
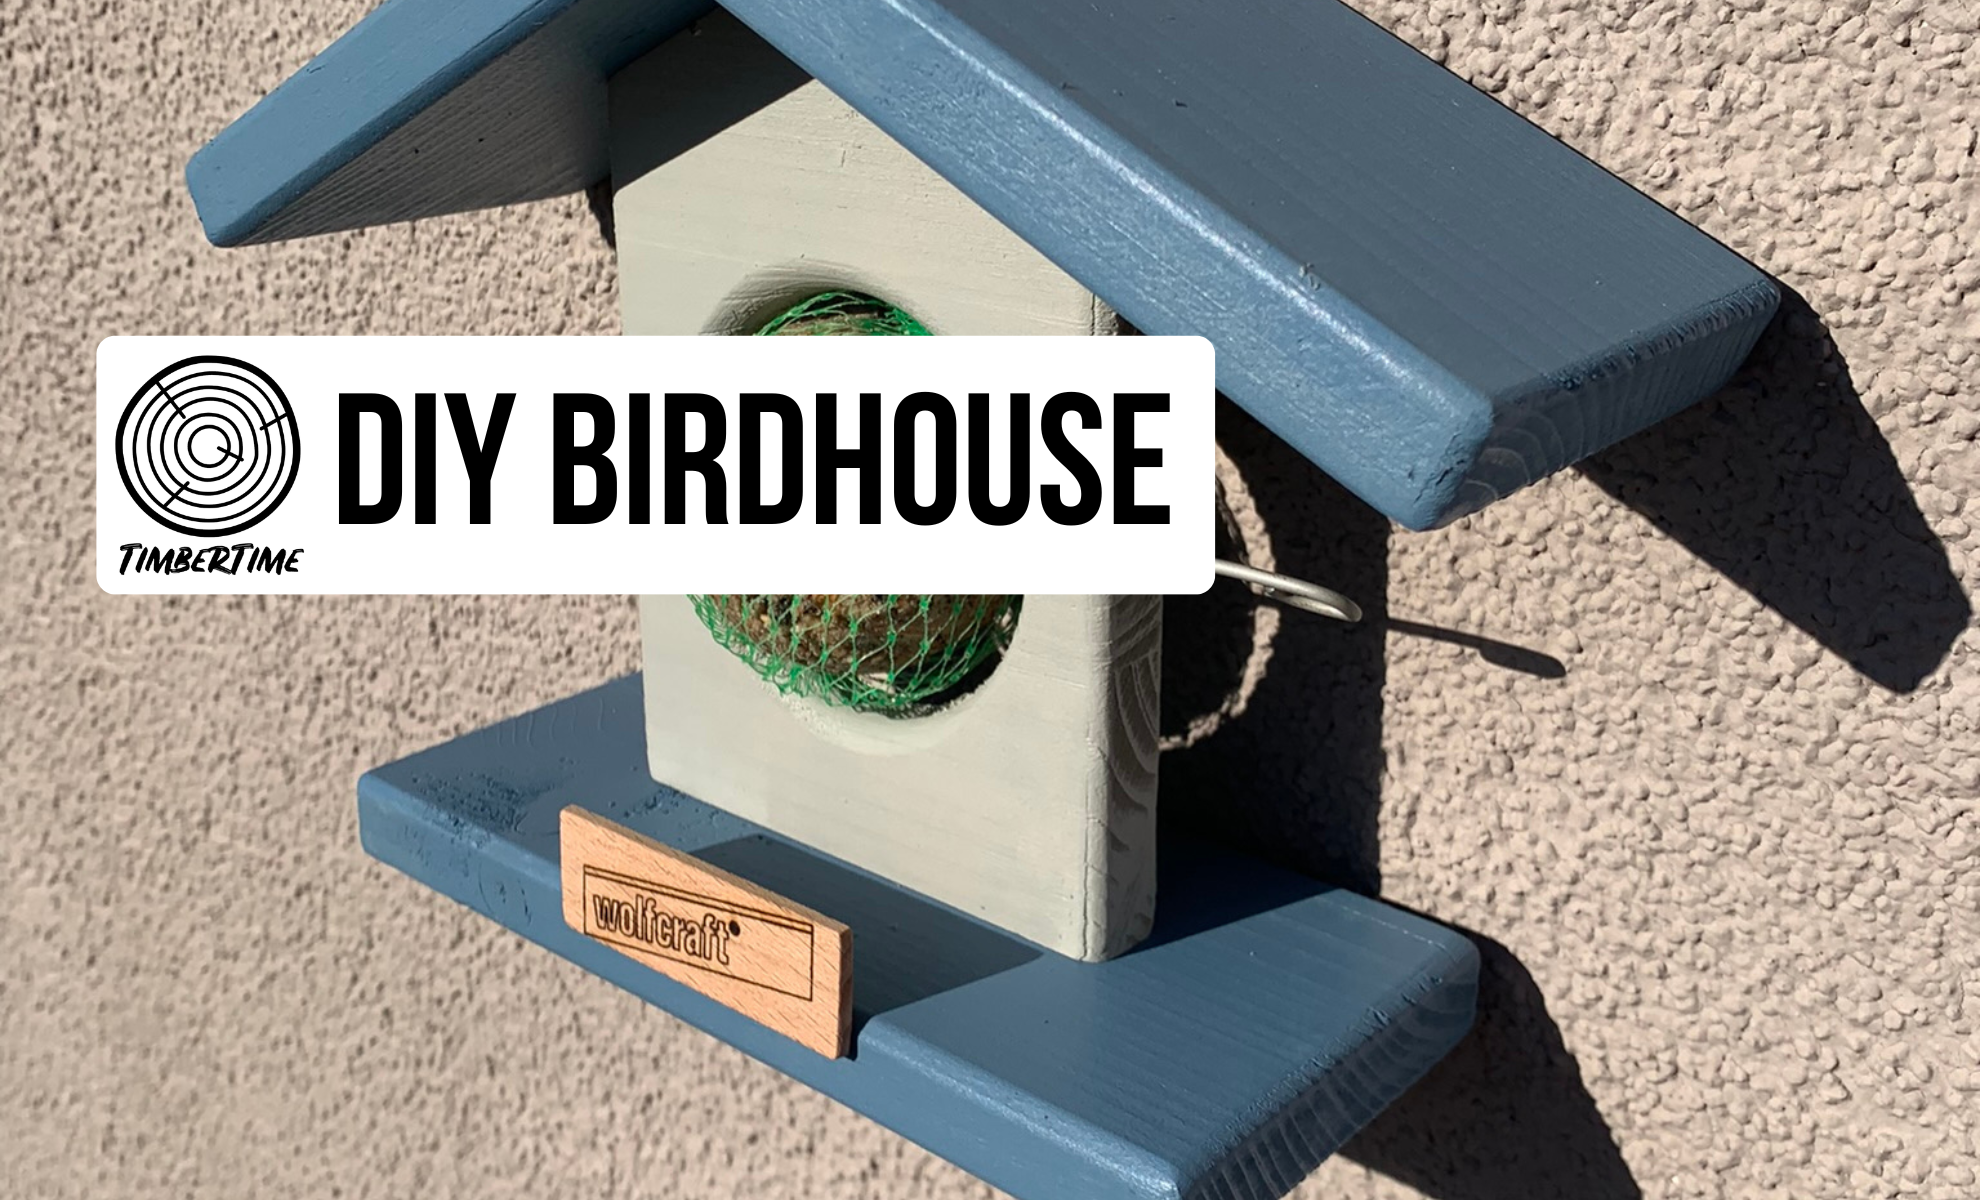
Looking for simple DIY Birdhouse Plans? Building a birdhouse yourself doesn’t have to be complicated. This simple DIY birdhouse looks beautiful and is built easily and quickly with the free instructions. The tit dumpling birdhouse is also a great DIY wood project for kids together with their parents. The birdhouse building instructions in the form of this post is free!
* = Affiliate Links /Advertising
As an amazon associate i earn from qualifying purchases.
Advertising

Necessary Tools
- Drill*
- Mitre Saw* or Jigsaw*
- Router* (hand sander is fine, too)
- Hole Saw 68mm drill bit*
- Countersinker*
- Sander*
- Clamps*
- Wood Drill Bit Set*
- Hole Marker* und Lead Refills*
- Paint roller and tray*
Necessary Material
- Wood glue – water proof*
- Knitting Needle or similar*
- Screw-In-Hook* (for hanging the birdhouse)
- Power glue*
- Wood Screws 4x30mm*
- Wine cork
Material Costs: ca. 10£
3D CAD Drawings – Free DIY Birdhouse Plans


Build A Birdhouse Yourself – DIY Tit Dumpling Holder
The complete DIY birdhouse can be built from a single 1m long board measuring 1000x100x18mm. This super quick DIY woodworking project is therefore super suitable as a DIY gift for friends and acquaintances. Apart from the surface treatment (paint or oil) and its drying time, it takes at most half an hour until the birdhouse is built – even if you take your time. The DIY birdhouse is certainly also a great project that you can implement together with children under supervision if you do the cutting yourself beforehand and saw out the hole yourself.
With the screw-in hook you can hang the birdhouse. Or you can attach the birdhouse to the base plate with a screw clamp.
You don’t need many tools either. Only the 68mm hole saw is something more special. But this hole saw cordless screwdriver attachment from wolfcraft is cheap and you can always use it well!
No products found.
Building A Birdhouse Yourself – Cutting The Individual Parts
The four individual parts can be cut according to the design drawing. Two parts are needed for the roof, each with a 25° angle, a base plate and the “house” with the 68mm diameter hole for the tit dumpling.
The easiest way to cut the material is to use a crosscut saw. In a pinch, it can also be done with a jigsaw, hand-held circular saw or, of course, with a table saw.


Drill Hole For The Tit Dumpling
The most important thing when building your own birdhouse is to make a hole of the right size for the titmouse dumpling. The wolfcraft hole saw with 68mm diameter is best suited for this. Carefully drill the large hole in the house of the DIY birdhouse. Make sure that the hole saw does not get jammed. A little caution is required in this step.


Next, you need to drill two small holes on the side of the house with a 3mm wood drill. This is important for the later suspension of the tit dumpling. A knitting needle or similar is passed through the two holes, from which the tit dumpling can then be hung. At the end of the knitting needle, a piece of a wine cork can be attached so that the knitting needle is secured.


No products found.
DIY Birdhouse Plan – Round Off Edges
The edges of the individual parts can be rounded off on a router table with a rounding cutter. But you can also do the whole thing with a simple surface sander and sandpaper*. This is no problem with the small project and easy to do.


Building A Birdhouse Yourself – Assemble Individual Parts
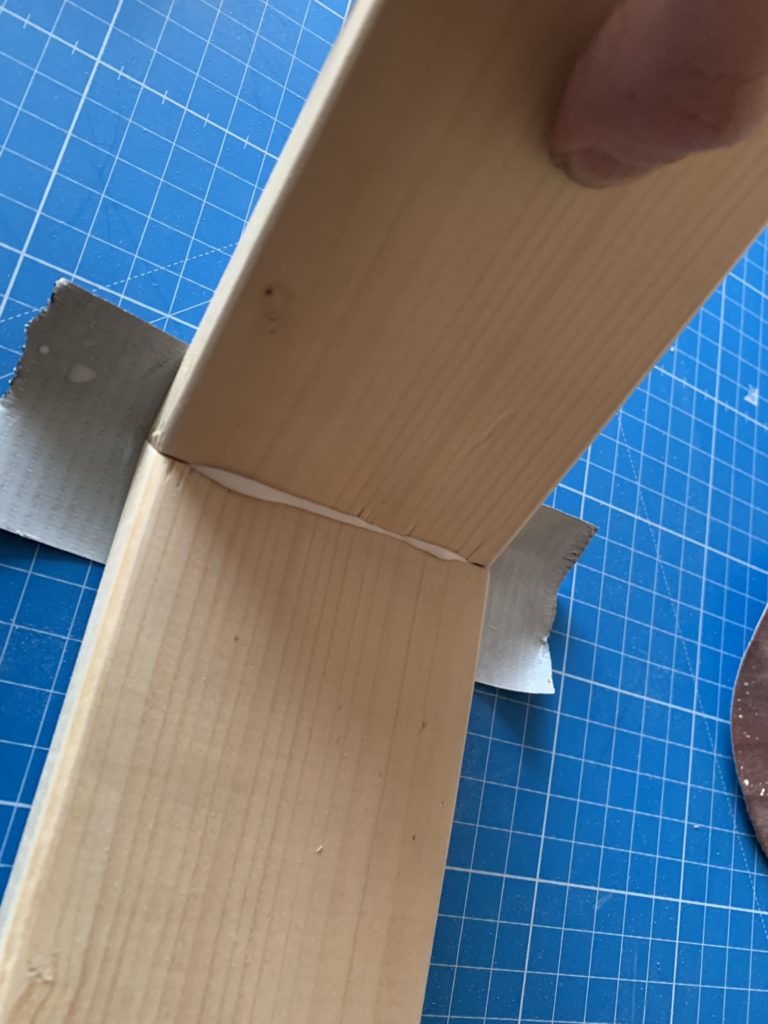
The prepared individual parts now only need to be assembled. First, the two roof parts can be glued together. To do this, simply fix the parts together with adhesive tape and apply waterproof wood glue*.


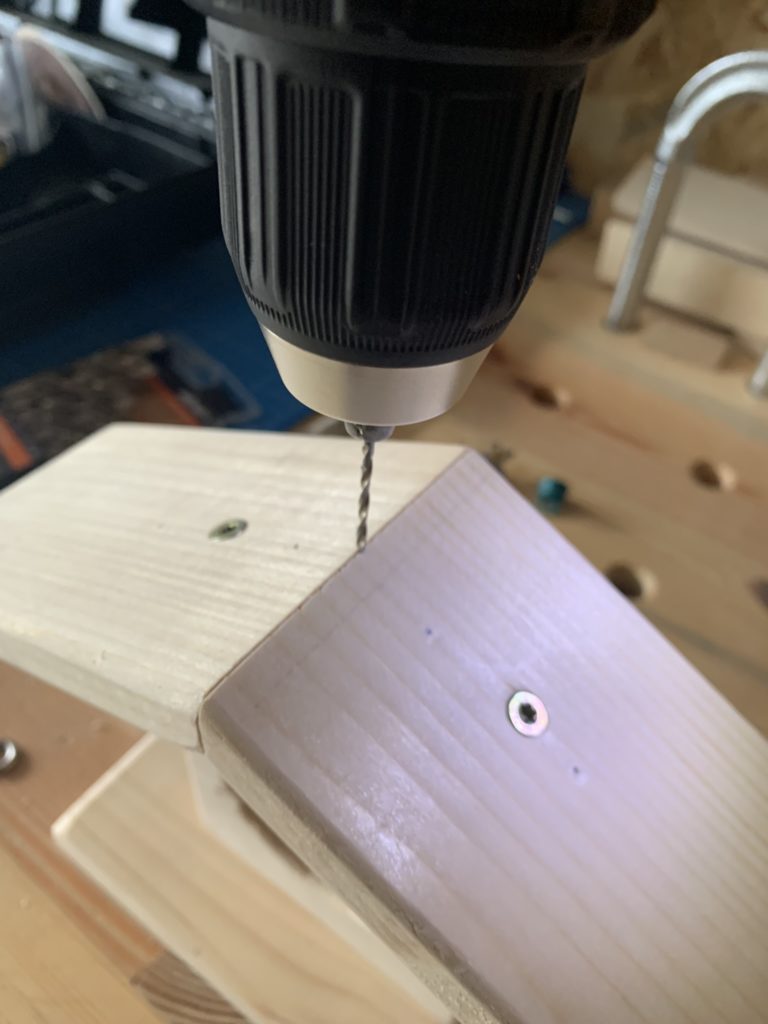
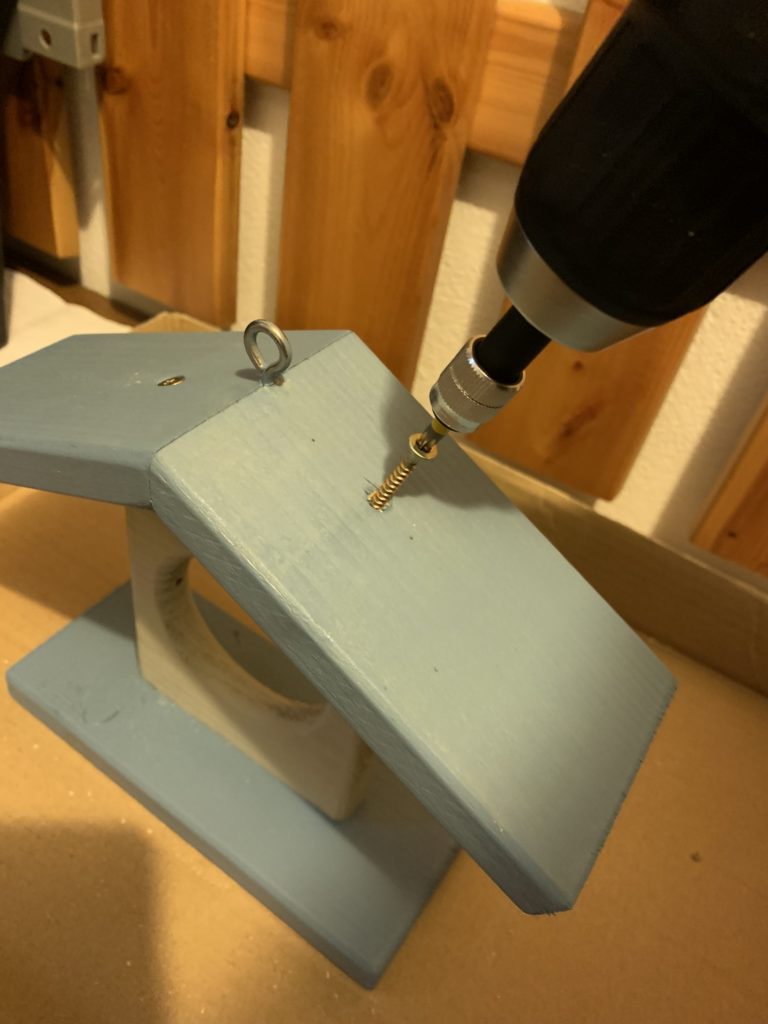
Next, the floor can be attached to the plate with the hole with two screws. The two roof parts can be screwed to the house as soon as the glue has dried. I used 4x30mm* wood screws. A 3mm wood drill* can be used to pre-drill so that the wood doesn’t crack. I also used the countersink with depth stop from wolfcraft* to countersink the holes for the screws. So later the screw heads do not stand out.


So that you can later not only put the DIY birdhouse but also hang in the tree, a screw-in hook must be attached to the edge of the roof. For this I pre-drilled a little with a 2mm wood drill* and then screwed the screw-in hook* with power glue* by hand. If you really want to hang up the birdhouse, the hook has to be really tight – be sure to pay attention to that. If you have a gap between the two roof parts, the hook could be too loose.


No products found.
Surface Treatment – Painting A DIY Birdhouse
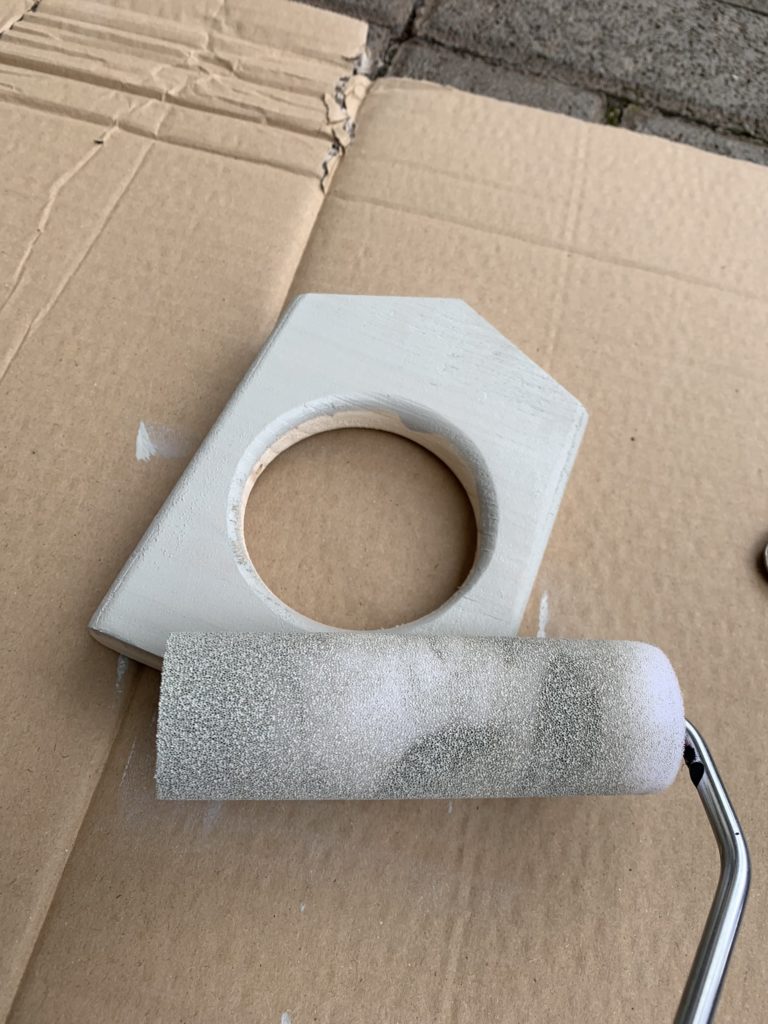
If you like, you can add a little color to the birdhouse or paint the individual parts with wood preservative oil*. The easiest way to do this is before the final assembly. But you can also unscrew the individual parts and then paint everything.
I painted the body in gray. I added some color to the floor and roof with a shade of blue. Make sure that you use paint or oil that is suitable for outdoor use. So you have longer something from the DIY birdhouse or DIY tit dumpling holder!


Finally, just attach a titmouse dumpling with a knitting needle or something similar and that’s it!
Laser Engraving A Personal Birdhouse Sign
If you want to give your DIY birdhouse a personal touch, you can laser engrave a personalized sign with a laser engraver* and attach it to the birdhouse (e.g. with strong glue).


Conclusion – Build Your Own Birdhouse – Free DIY Birdhouse Plans
I think the small and simple birdhouse with the tit dumpling looks great. The project is simple and fun. The whole thing is also great as a DIY gift idea!
If you liked the post “Simple DIY Birdhouse Plans: Easy-to-Build Project” or if you have any questions, just let me know in the comments! What do you think of the free woodworking plans?