
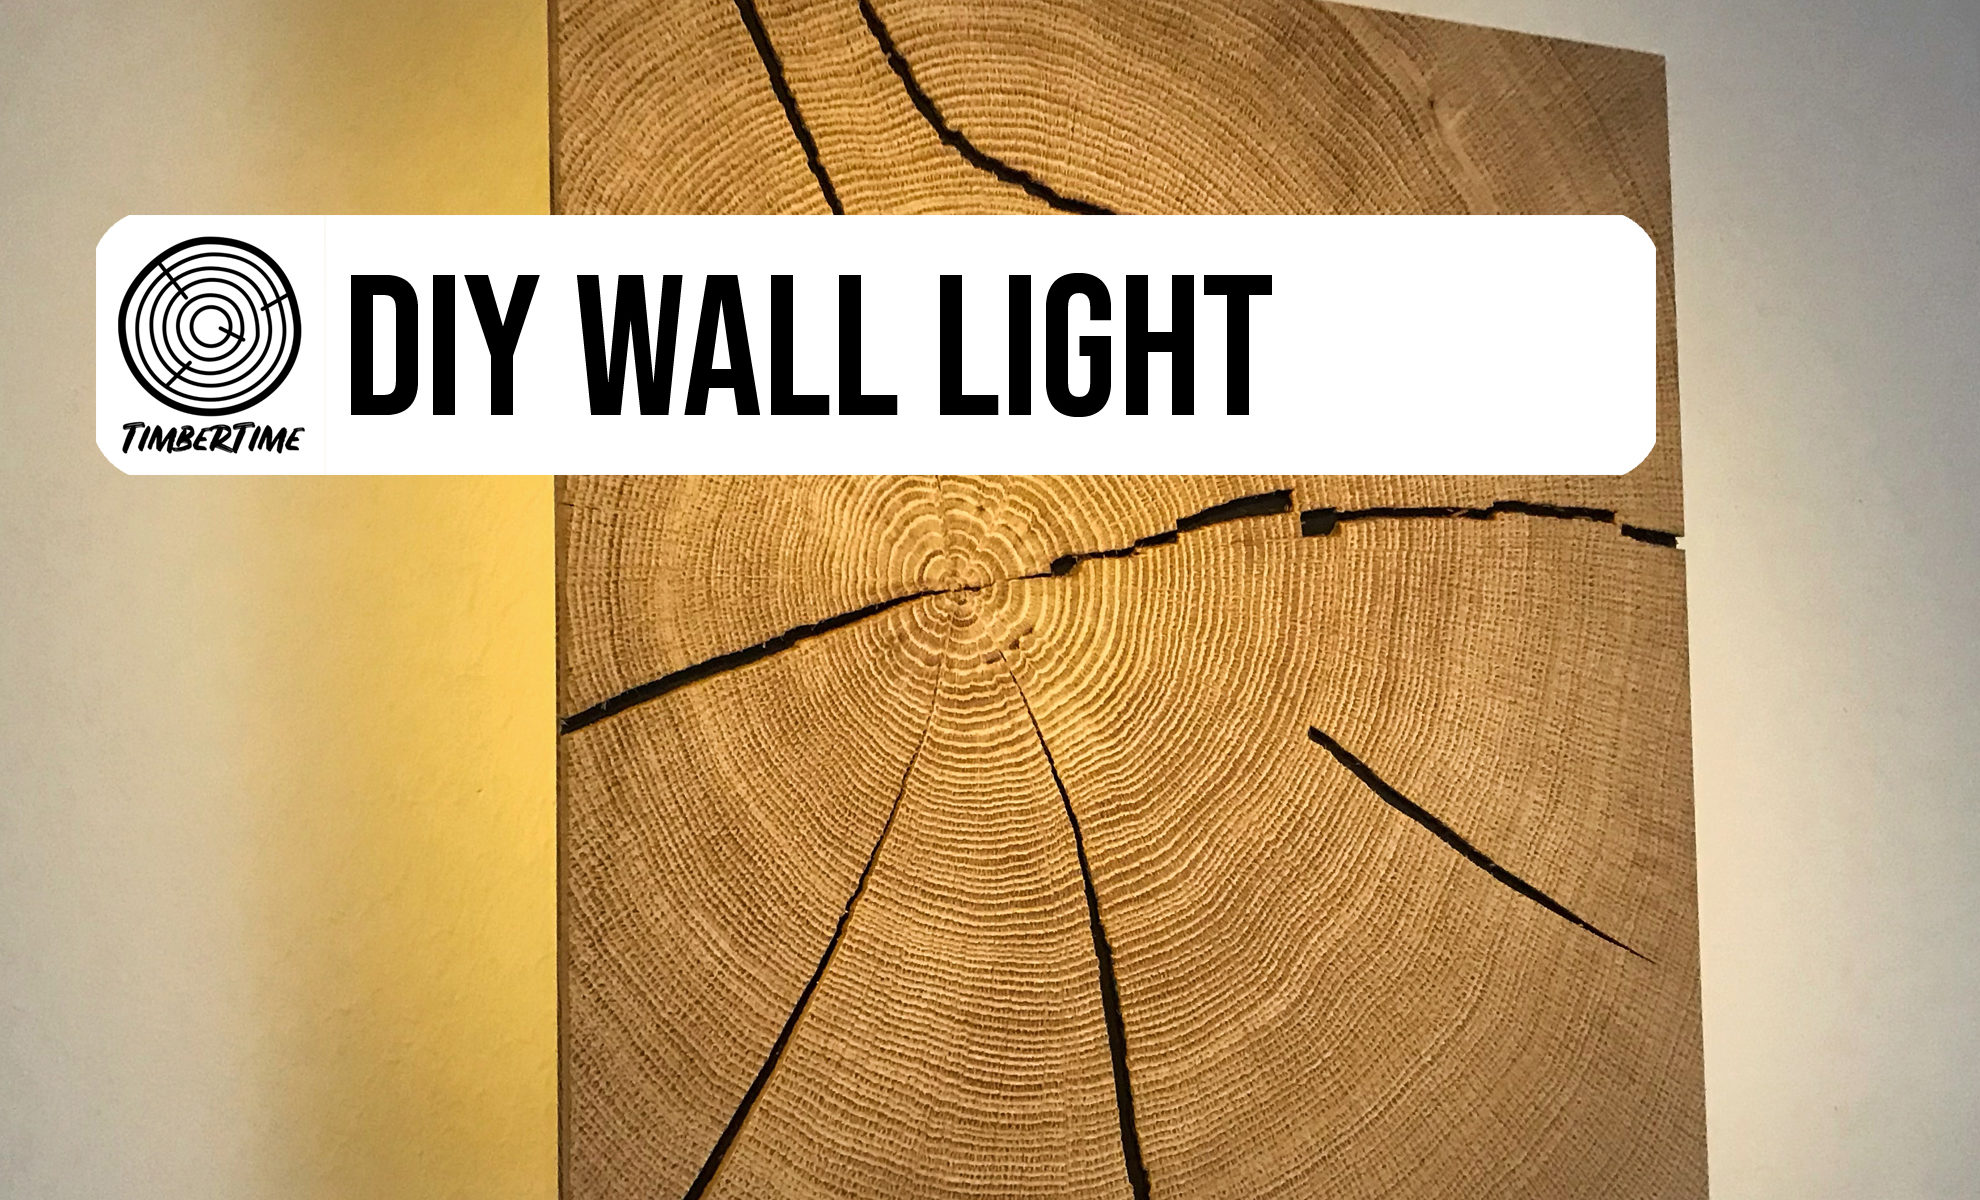
Do you want to know how to build a wall lamp yourself? Anyone can build this wooden DIY wall lamp easily and inexpensively. I’ll tell you where you can get the wooden end grain element in this post! Whether as a DIY wall light in the staircase or simply in the living room – this stylish diy wall light made of oak end grain creates a pleasant, warm atmosphere in every room! Instead of spending $200 in a furniture store for such a wall lamp, you can also build one yourself for a third of the price.
* = Affiliate Links /Advertising
As an amazon associate i earn from qualifying purchases.
Advertising
Necessary Tools
Necessary Material
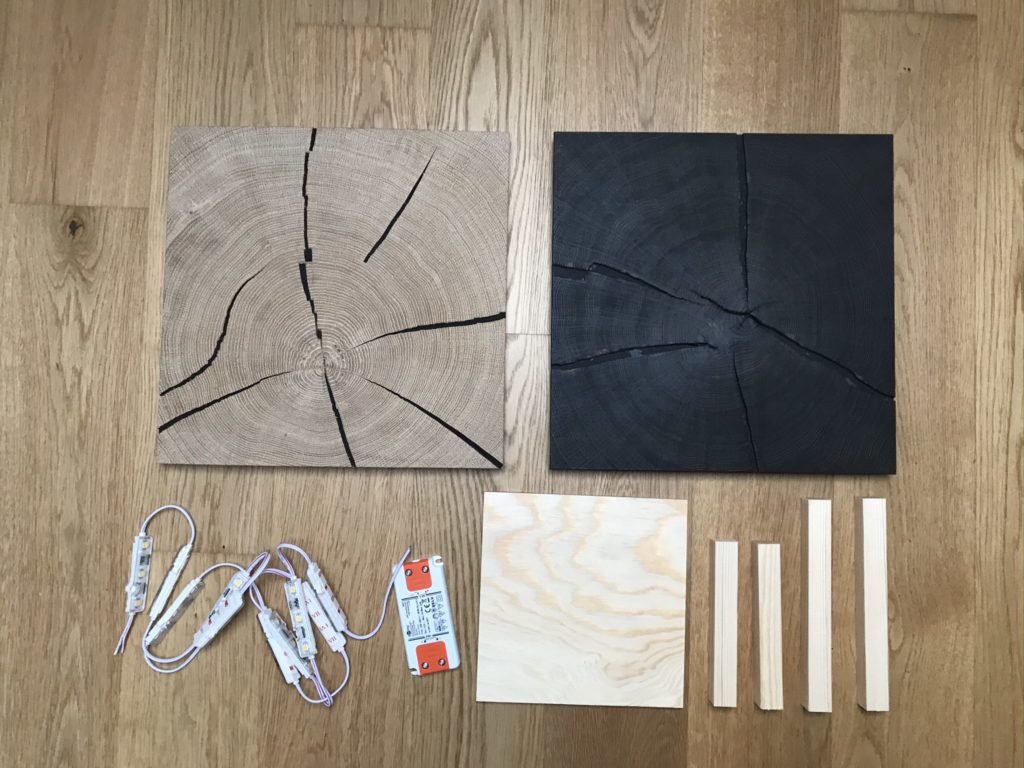
- 300x300x20mm Oak End Grain Element*
- 180x180x8mm wood board
- [2 pcs.] 20x20x180mm wooden strip
- [2 pcs.] 20x20x140mm wooden strip
- Wago Connectors*
- LED Transformer*
- LED Module warm white*
- Power Cable with Switch* (optional, in case the lamp should be powered by a power socket instead of direct wiring)
- [2 pcs.] Keyhole hanger*
- Wood Glue*
- 10cm wiring cable 1,5 mm²*
- Wood Screws 3x10mm*
- Wood Screws 4x25mm*
Material Costs: ca. 70£
3D CAD Drawings
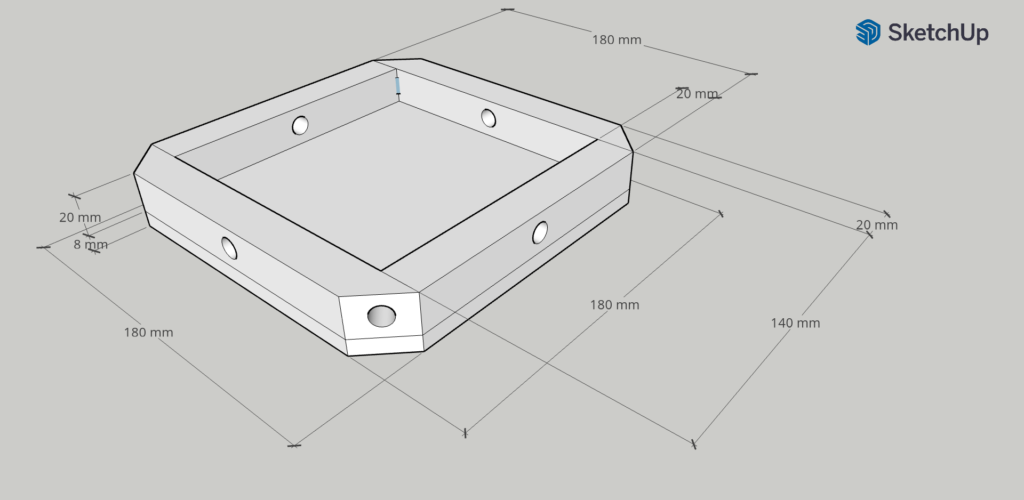
Cut the wood and mark the holes
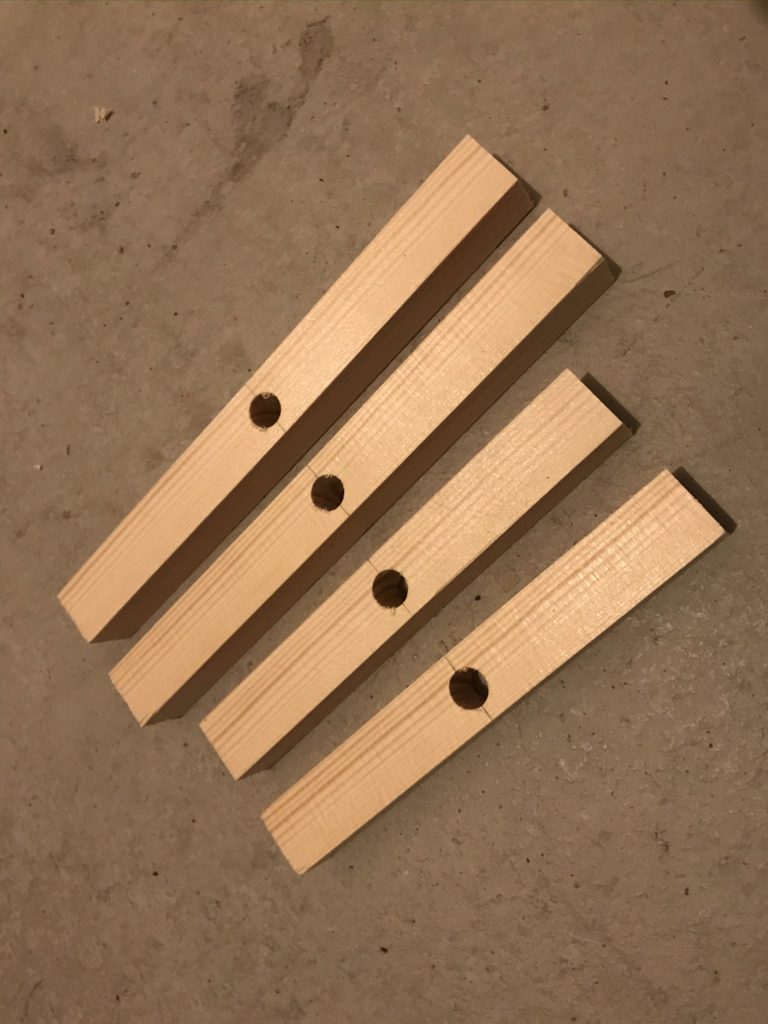
In addition to the end-grain element*, a 180x180x8mm wooden plate and a 1m square bar with a 20mm cross-section are needed. This will later be used to build a small frame where the lighting and electrics will be attached. The wooden plate and the 14cm and 18cm square rods can usually be cut to size at the DIY store. Then you don’t need a cross-cut saw, table saw or hand saw. You can see these parts at the bottom right of the following picture.
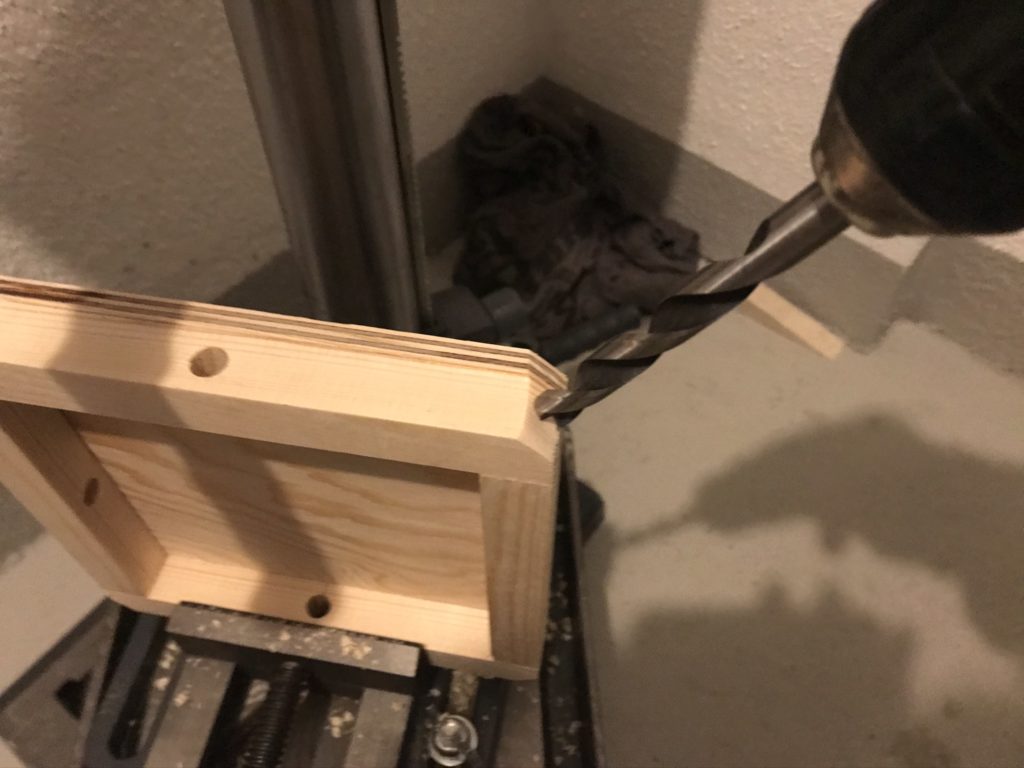
The four square strips each need a 10mm hole in the middle. This is necessary to hide the long cable between the individual LED modules*. So first mark the position of the holes in the middle of each square bar. I like to use hole markers* for this.
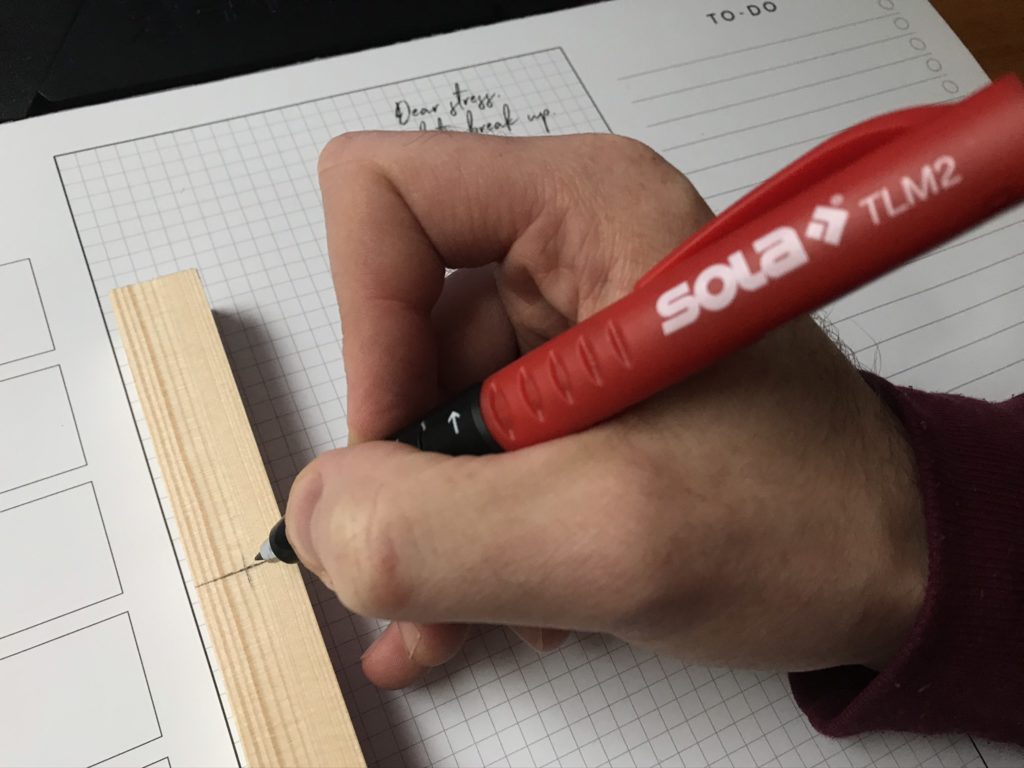
After you have marked the position, you can drill the holes with a cordless drill* and a 10 mm wood drill bit*.
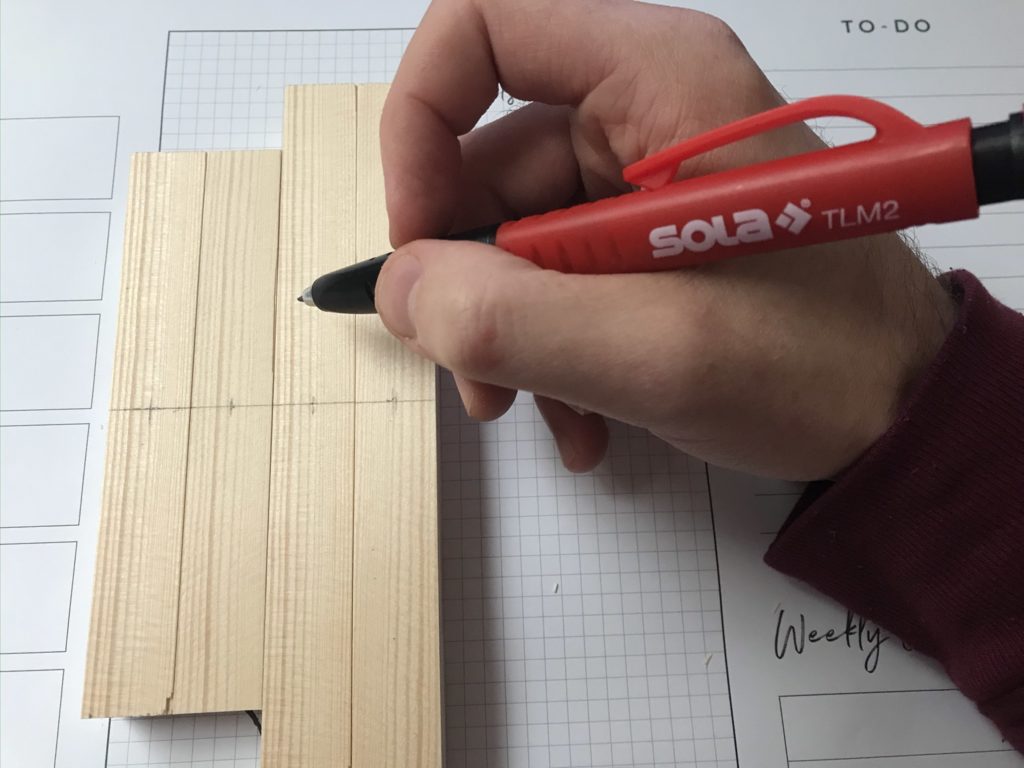
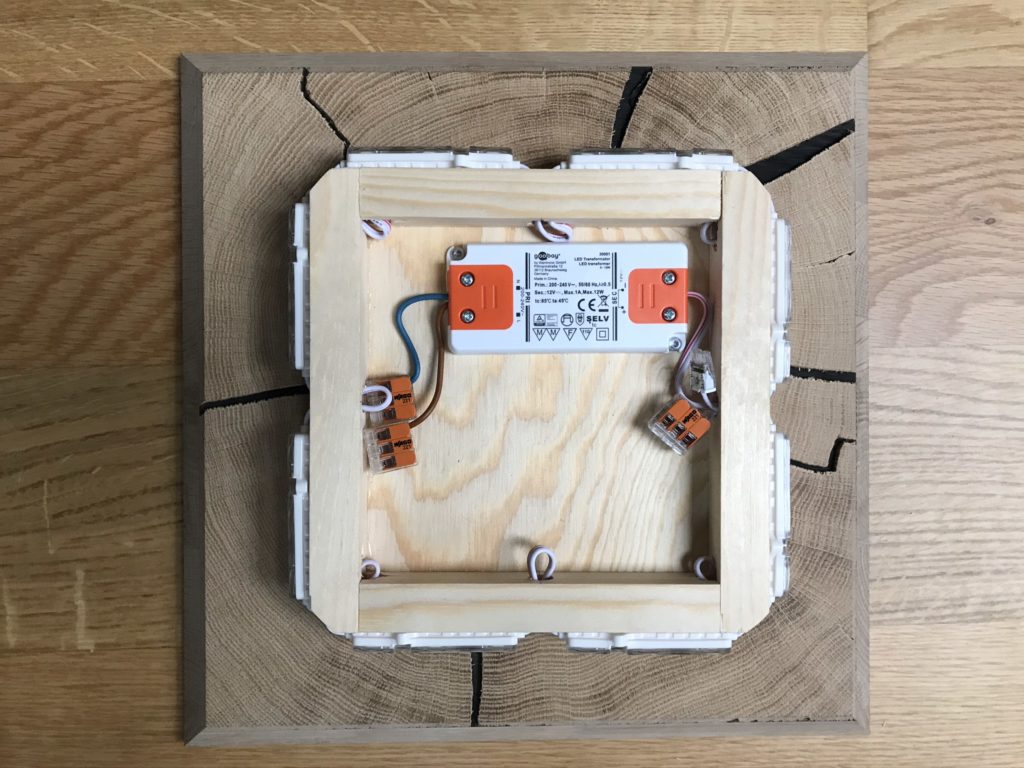
The next step is to build the backplate for the electrics out of these four parts.
Assembly of the backplate for the lighting and electrics
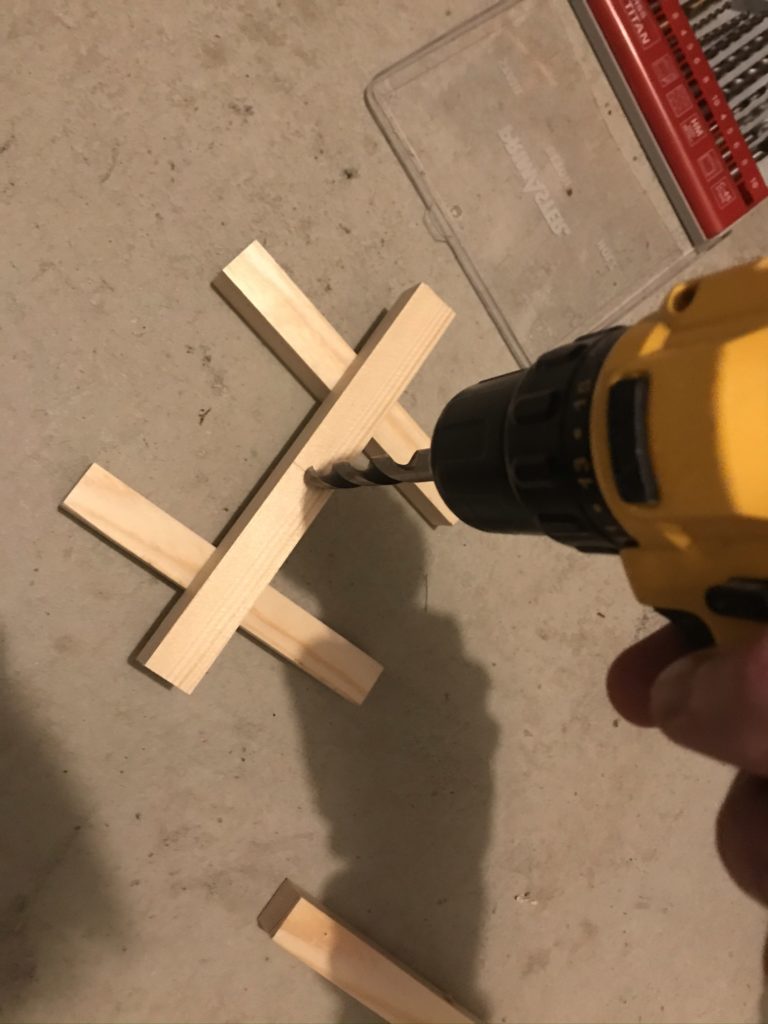
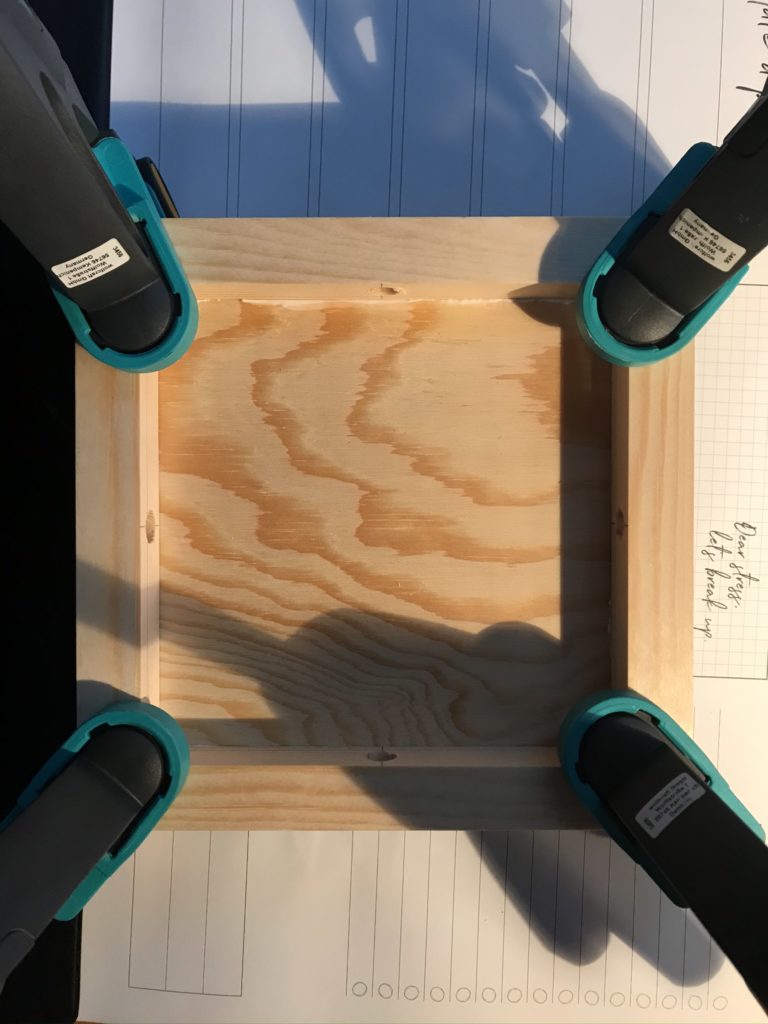
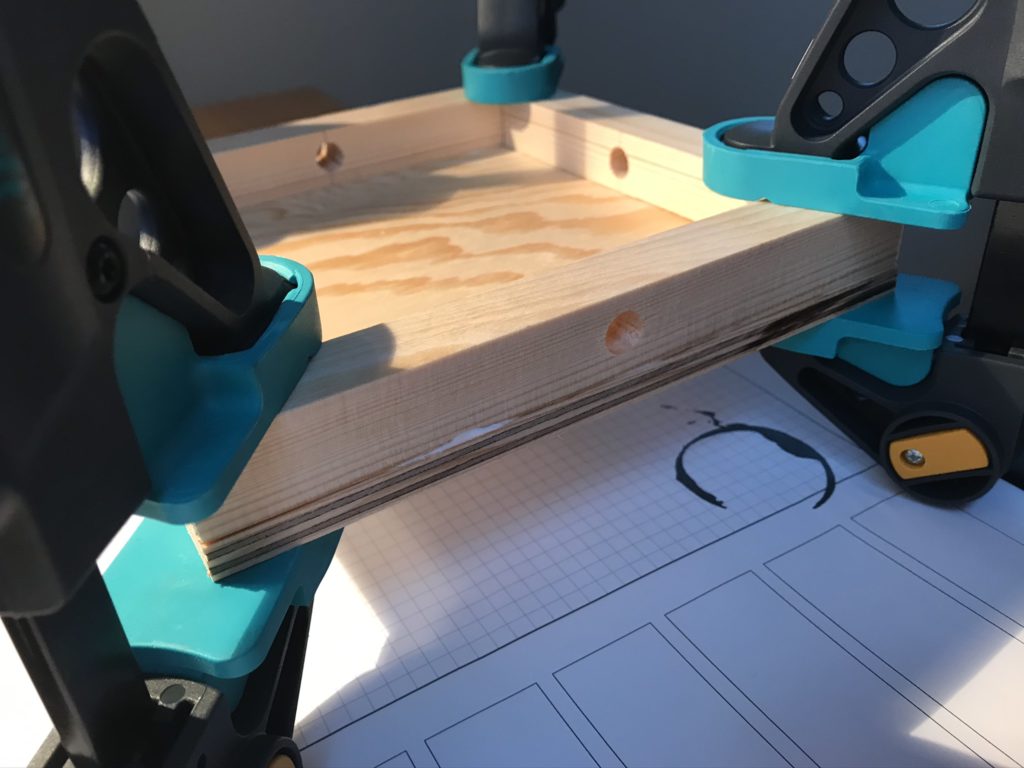
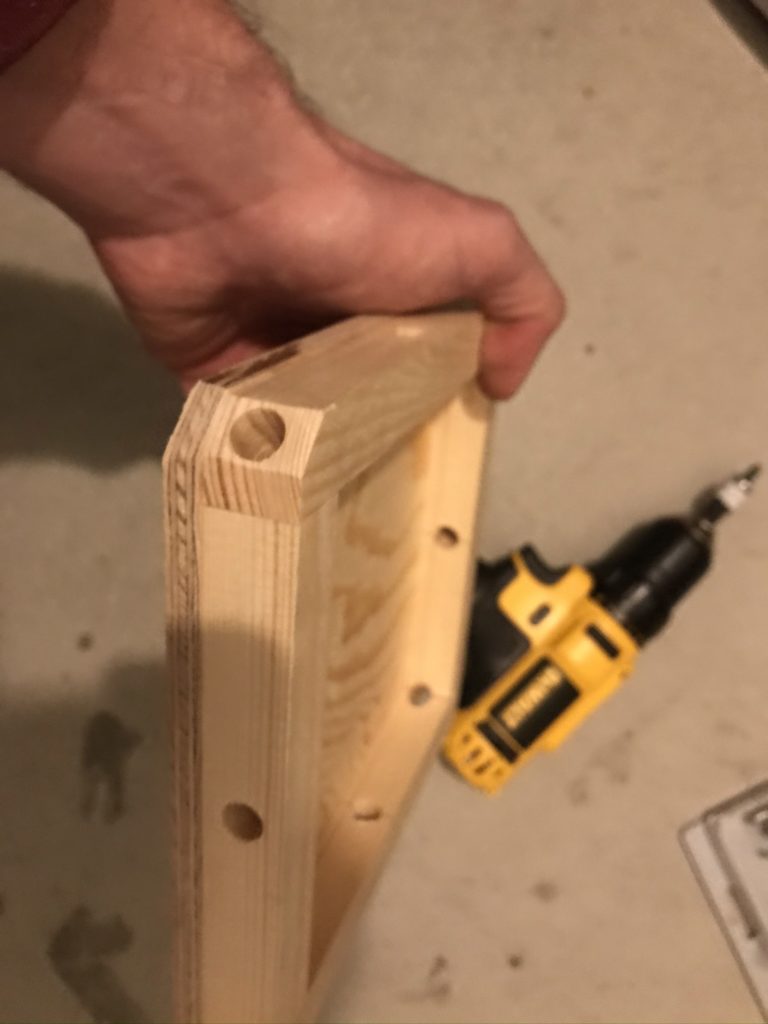
The four square strips are now glued to the outside of the wooden board. Make sure to do this in such a way that the holes in the wooden strips face each other.
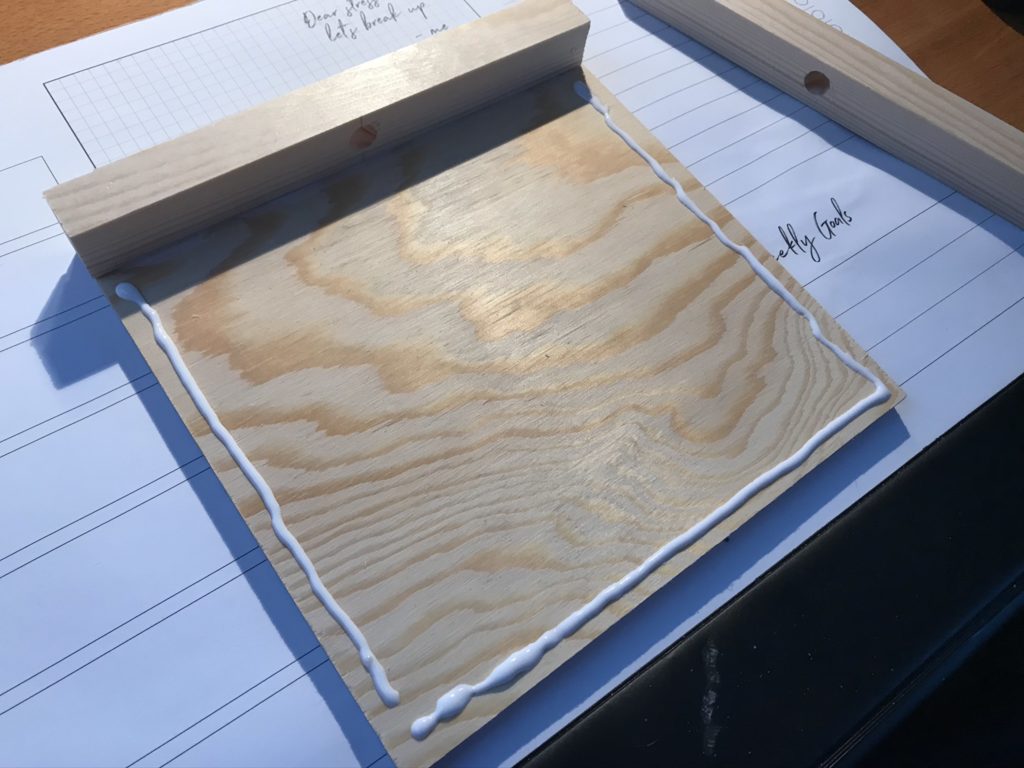
To fix the wooden strips, place a clamp* on each of the 4 corners and let the glue dry. You can wipe off excess glue while it is still liquid.
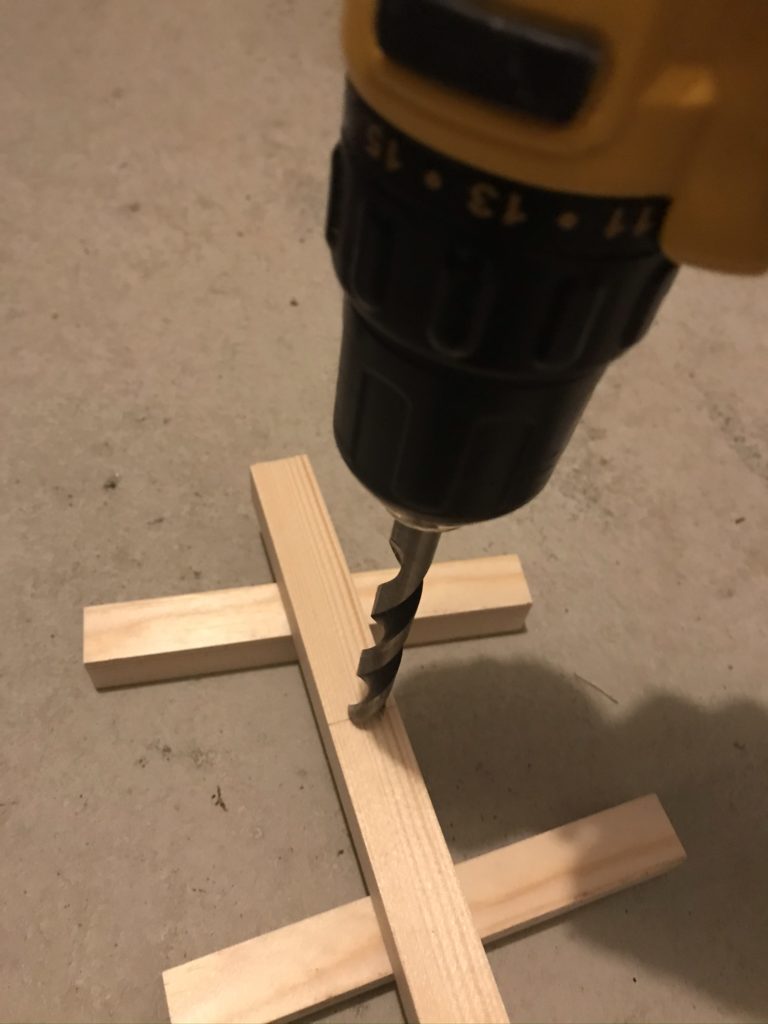
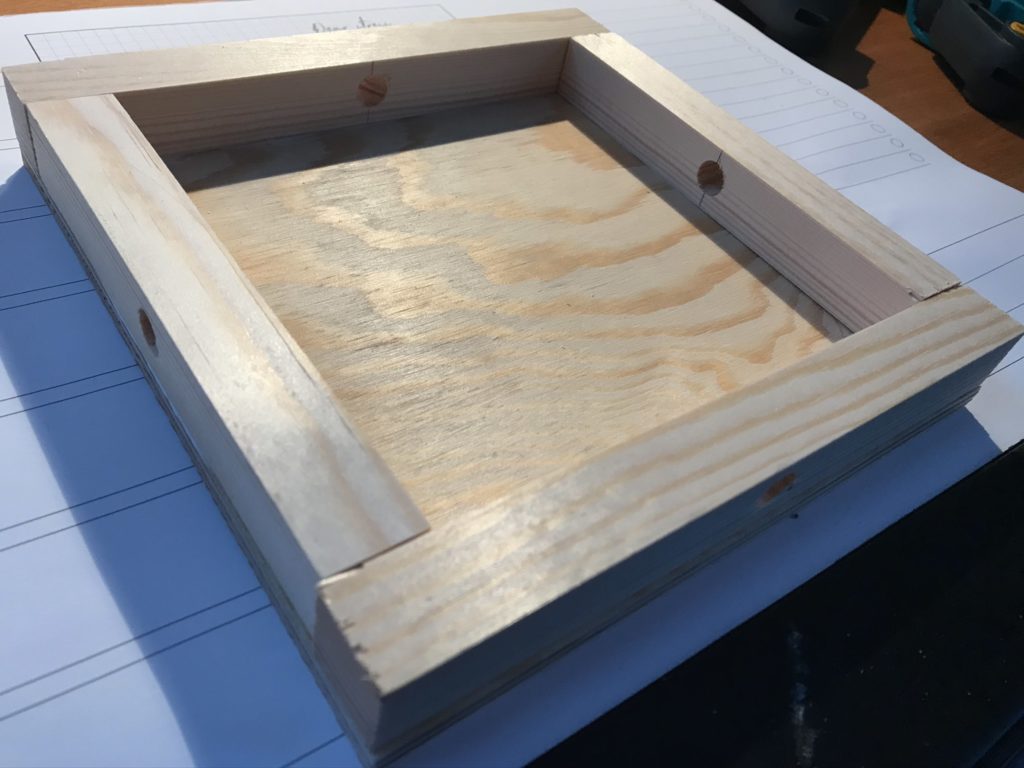
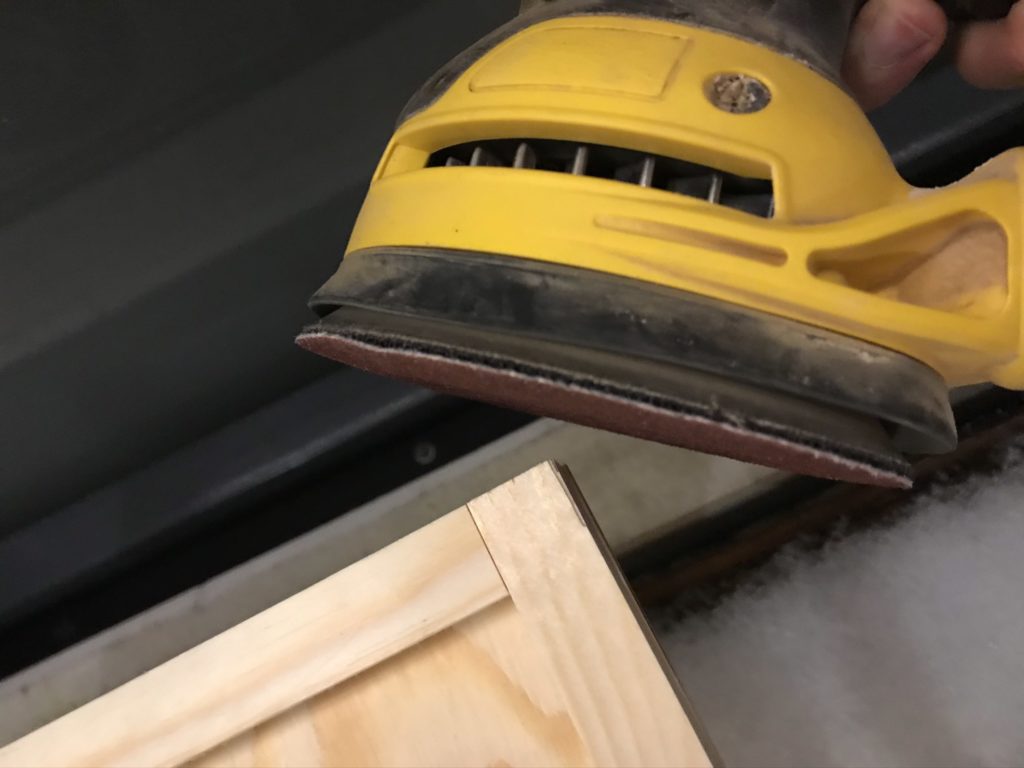
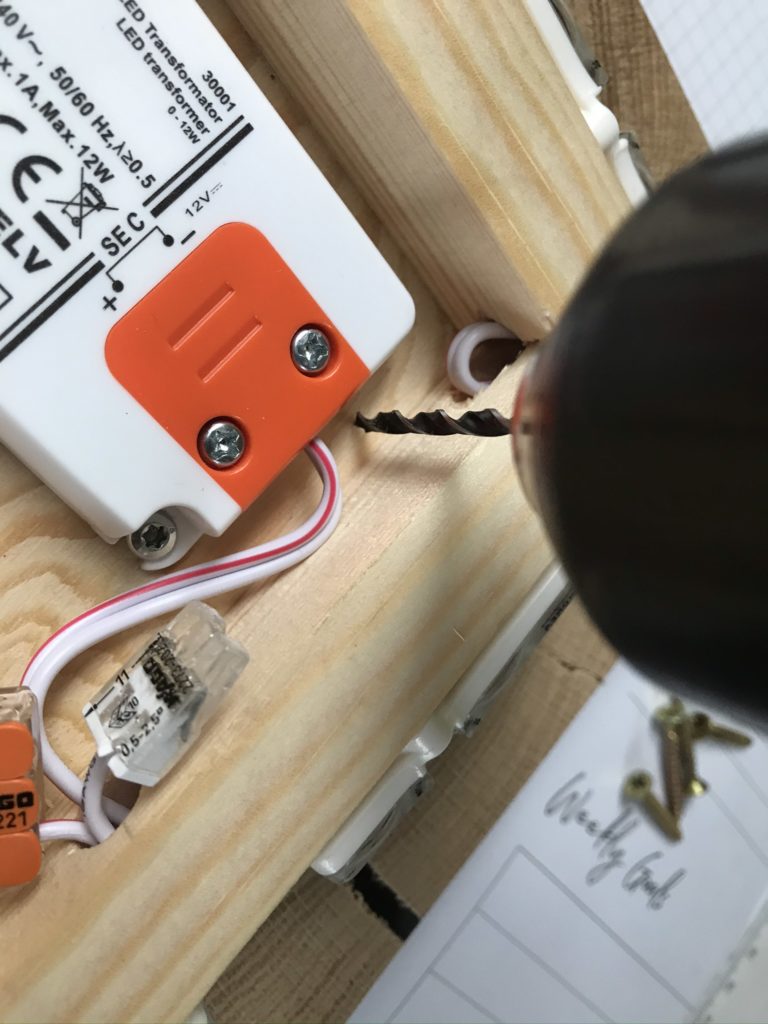
Next, use a sander* to sand the 4 corners of the frame briefly (with coarse grit) so that a kind of octagon is created. Moreover this is necessary to be able to drill a hole through the frame in each corner where additional cables for the LED modules* can be hidden.
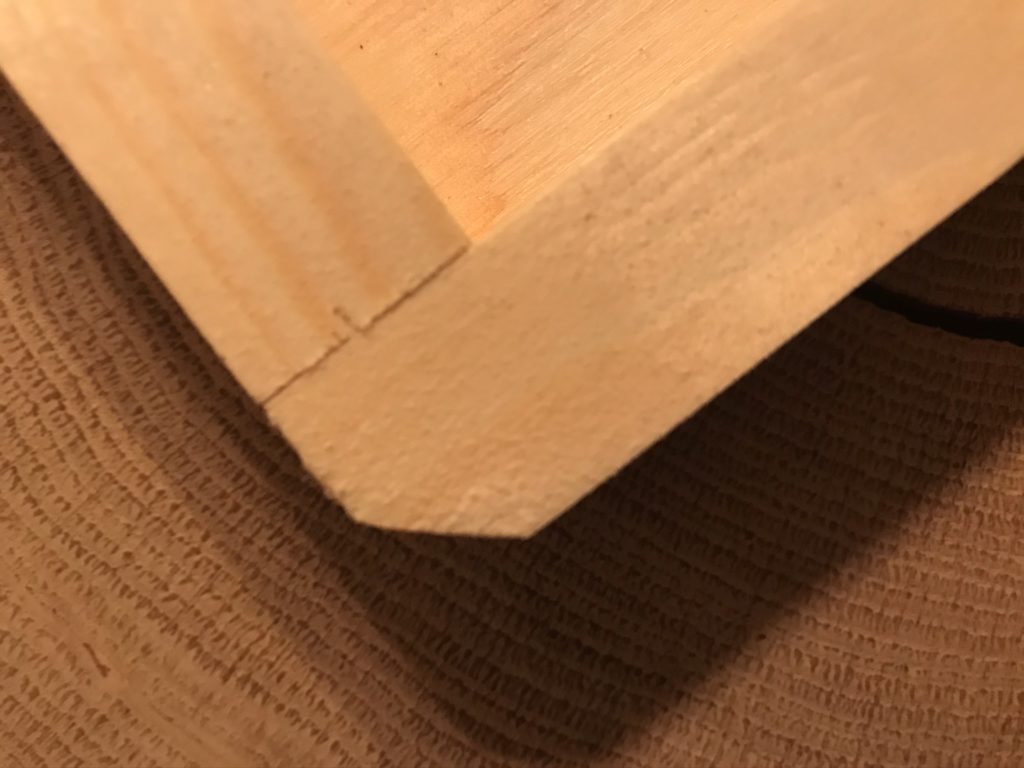
On the straight and sanded corner, you can now easily drill a hole through the frame with a 10 mm wood drill bit*.
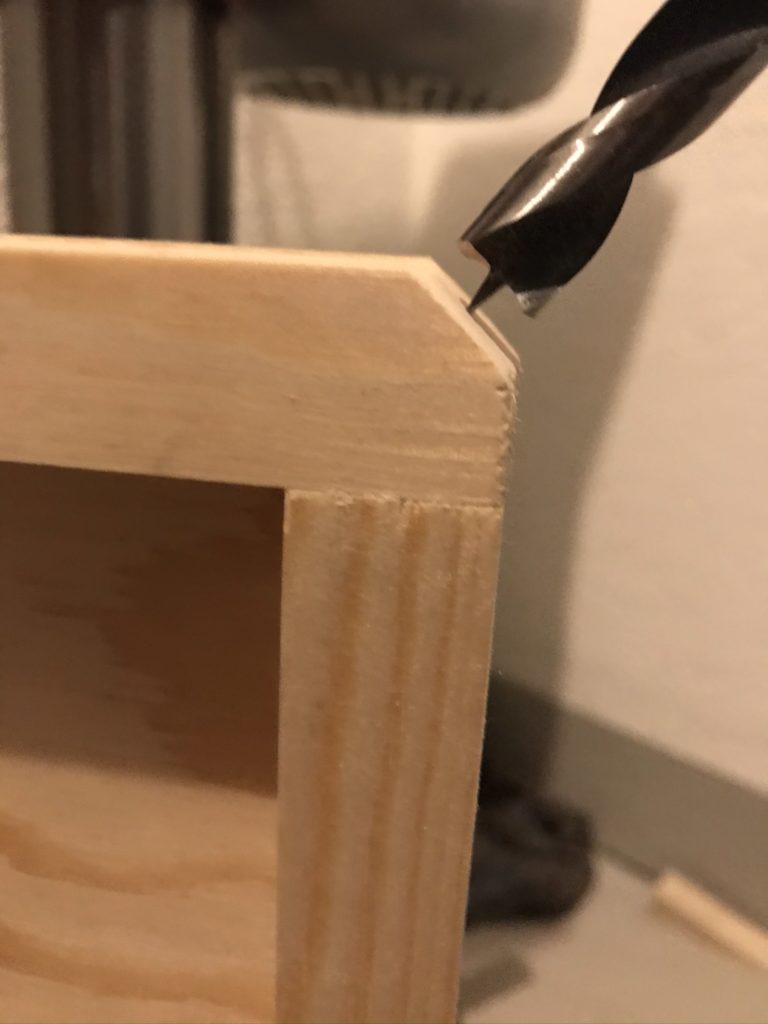
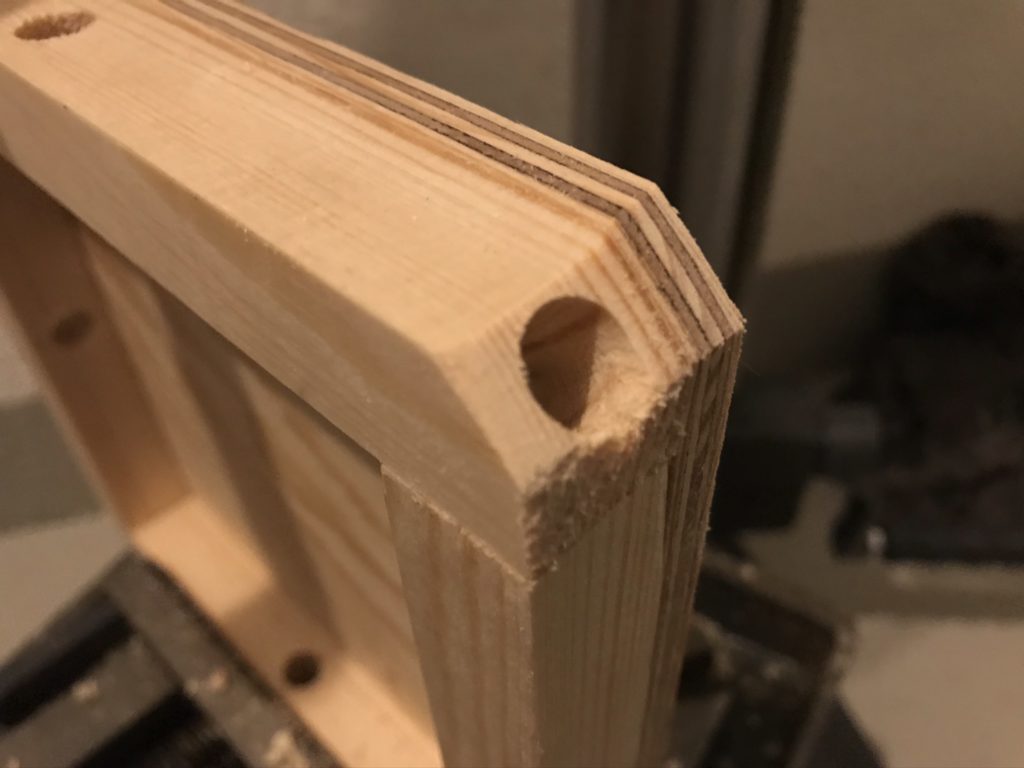
After the 4 holes at the corners have been drilled, the frame is ready.
DIY Wall Light – mounting the LED modules
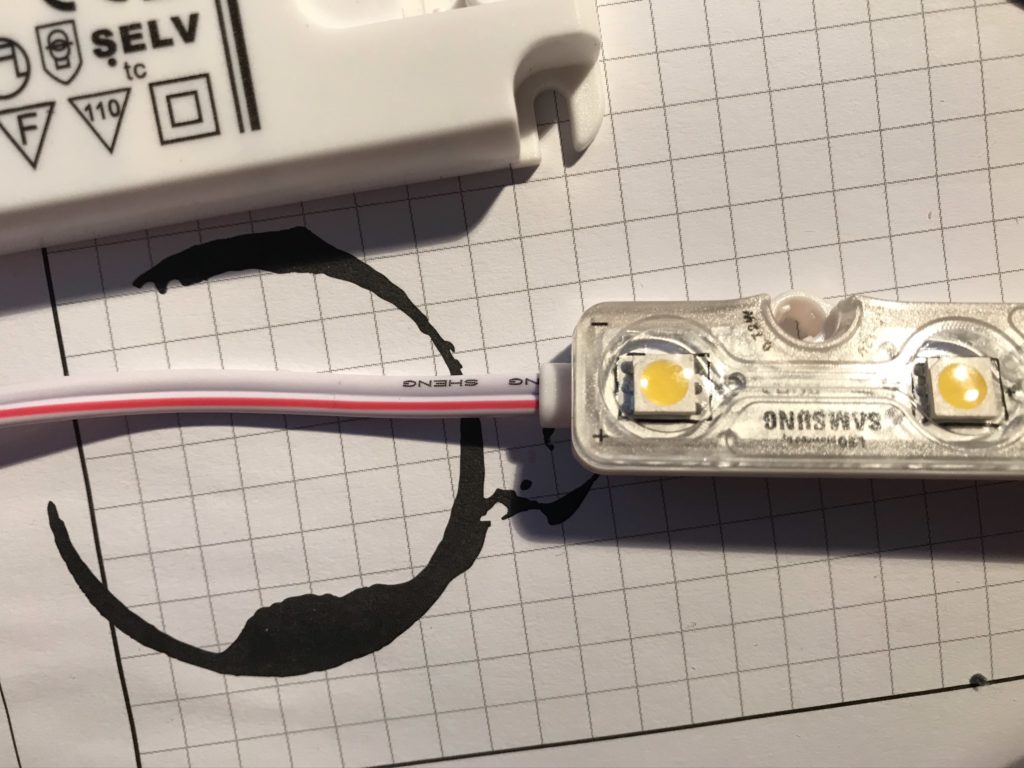
Next, the individual LED modules* can be attached to the 4 outer edges of the frame. To do this, stick the individual modules to the wooden strips with the adhesive pad already included, as shown in the pictures. Moreover the excess cable between the individual modules can be stowed in the 10mm holes drilled.
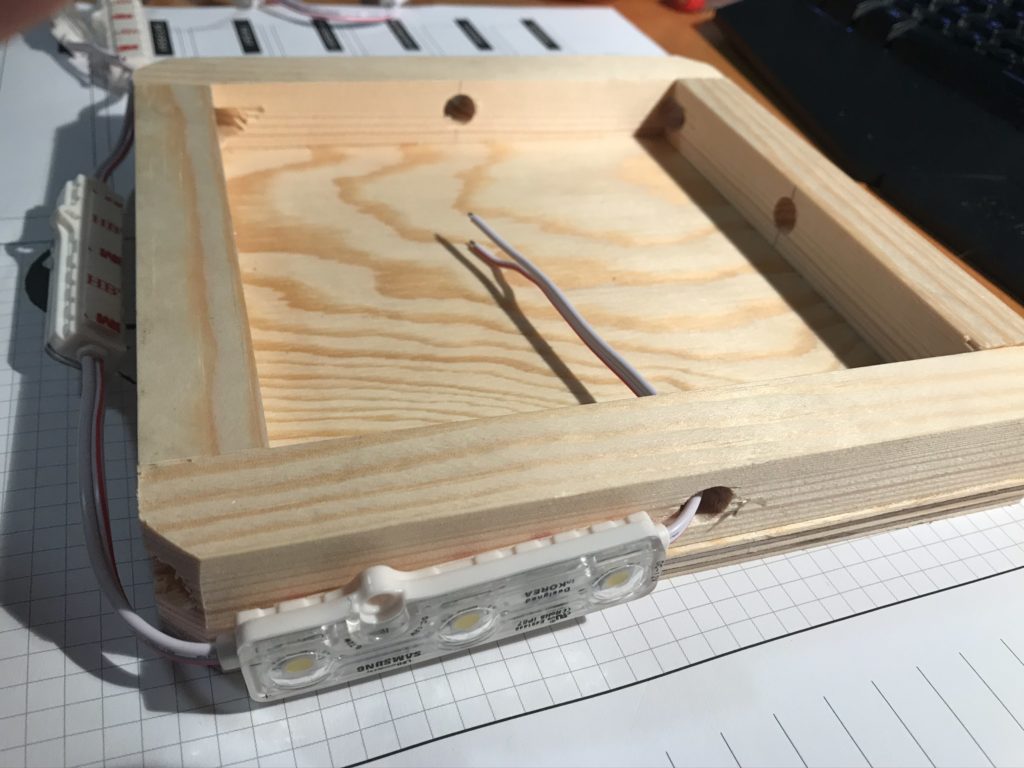
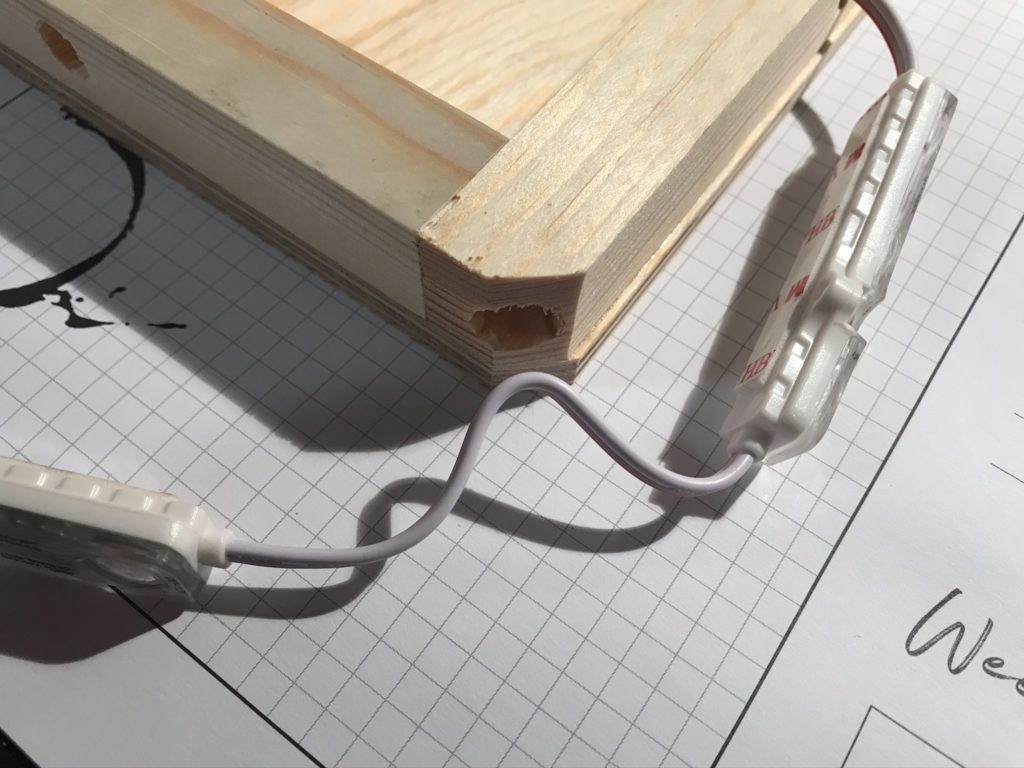
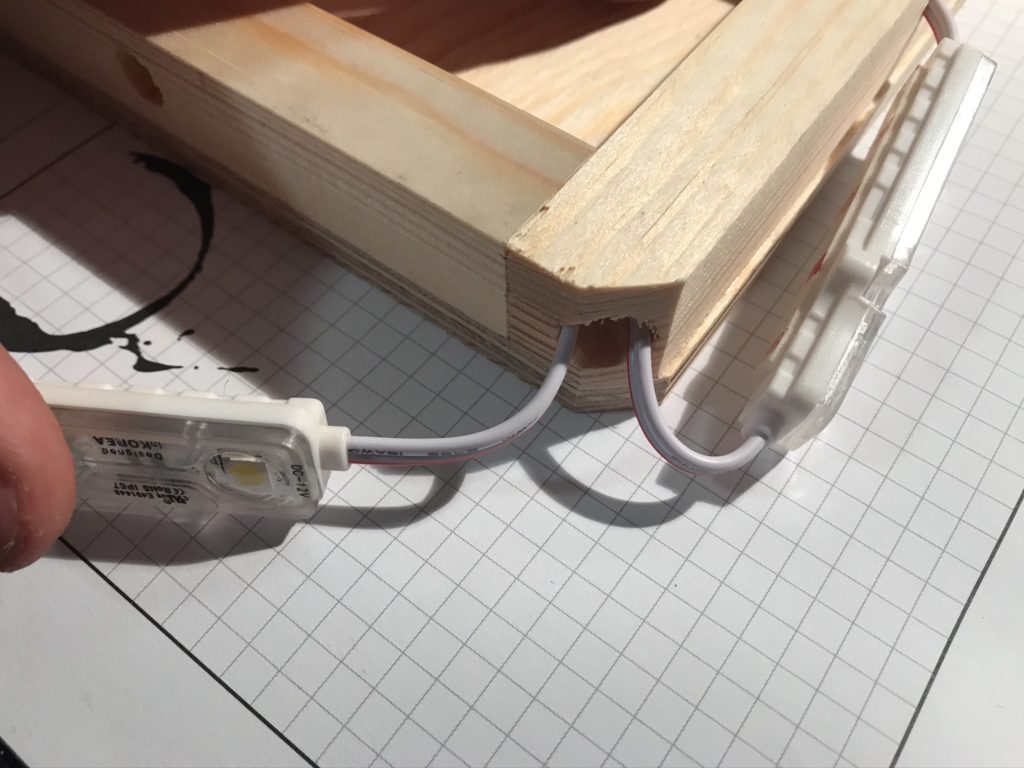
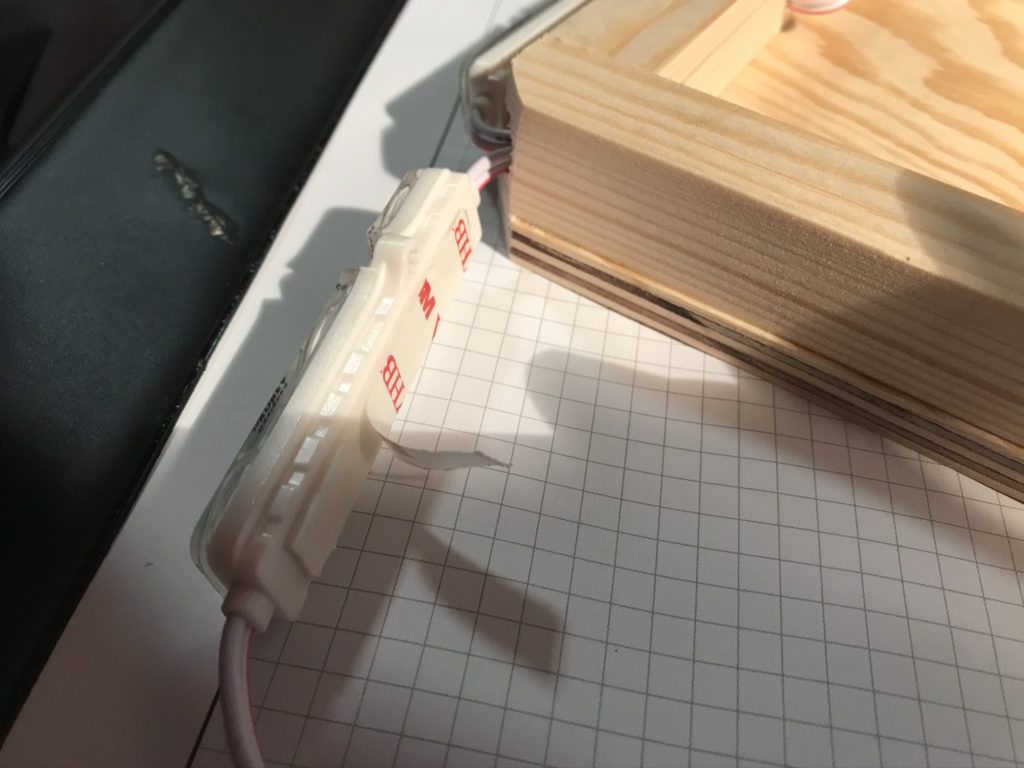
Only 8 of the 10 LED modules can be used to build the lamp. The 2 remaining LED modules can simply be cut off from the other 8 with a side cutter*. Cut the cable in the middle. This leaves enough cable to lay inside the frame.
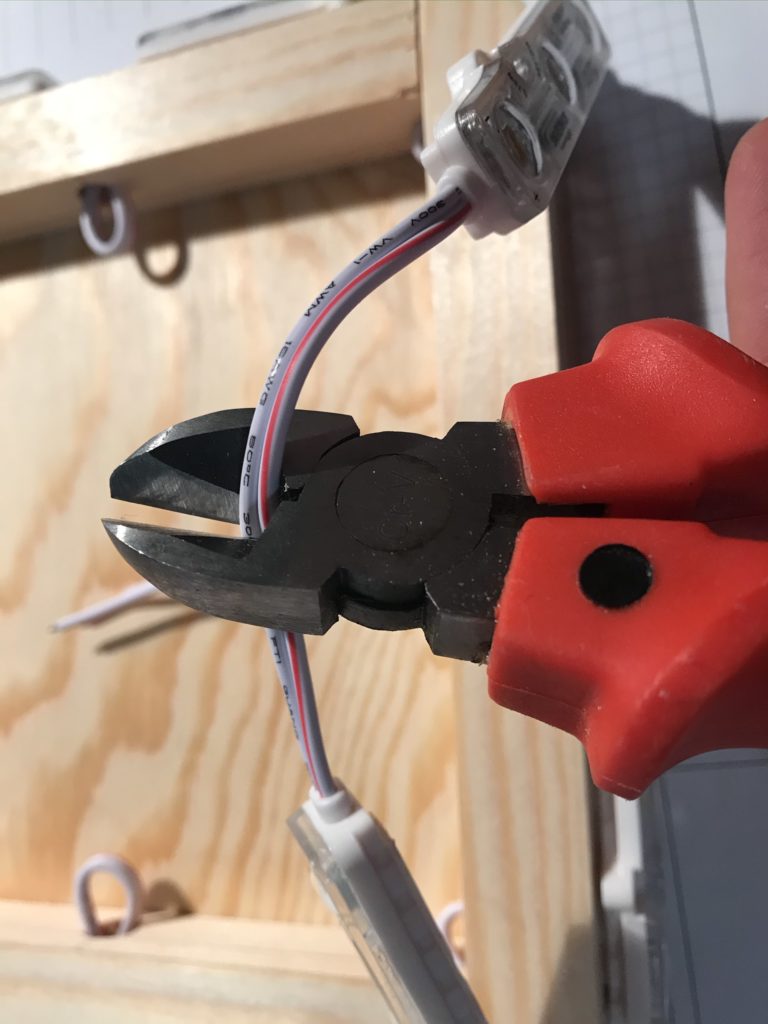
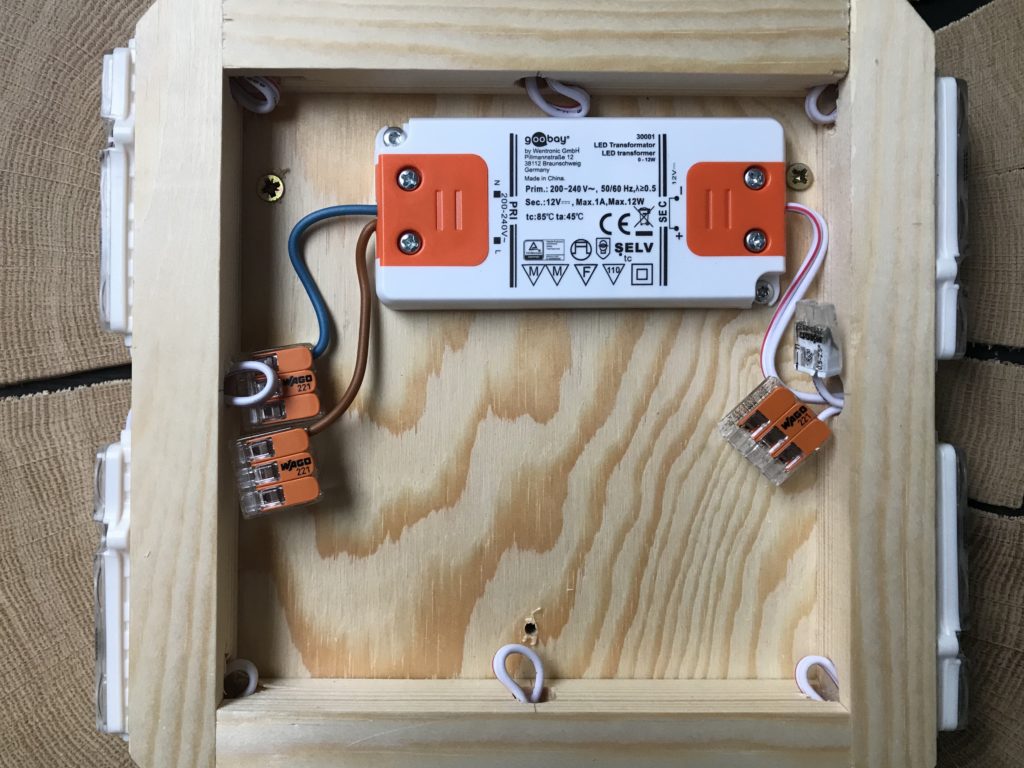
After the cable was laid inside the frame, I pulled the positive and negative wires apart in order to isolate each wire individually with a Wago connector* or an end sleeve. Under no circumstances should both wires be placed in the same terminal! It is best to use wire end caps*.
The pictures and descriptions of the electrics are not intended for reproduction. Please have any work on the electrics carried out by a qualified electrician or specialist!
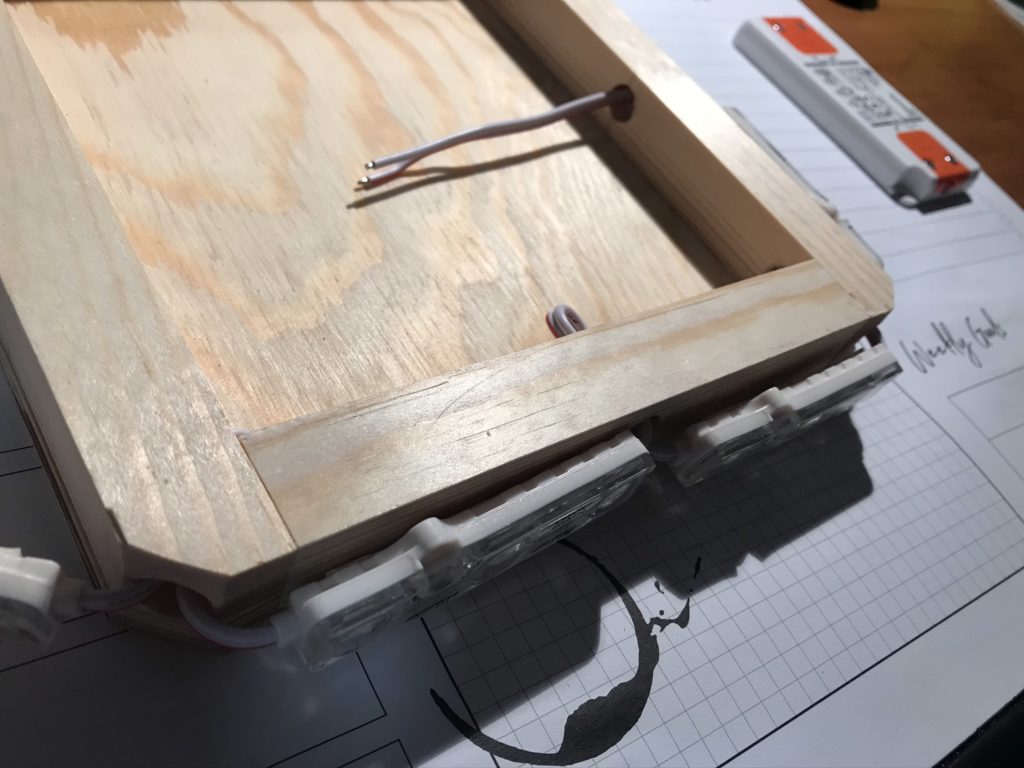
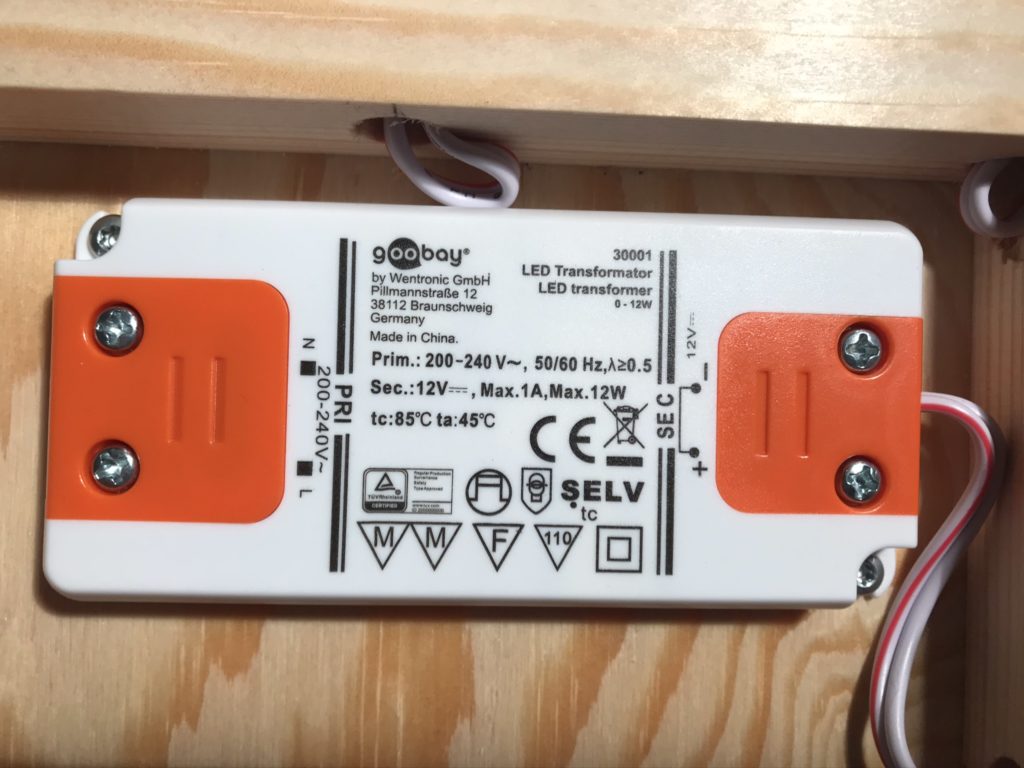
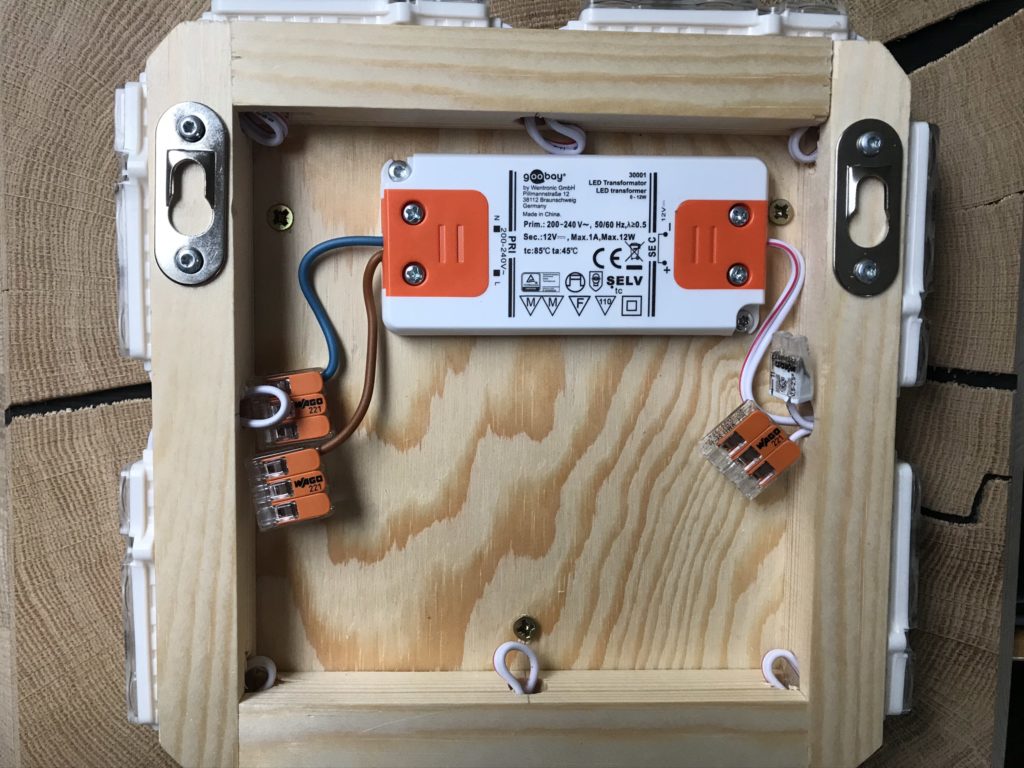
Connect and install LED transformer
The other two ends of the LED module string must be connected to the LED transformer*. Make sure to connect to the correct side (12 volt side of the transformer). In case of the linked LED modules*, the wire marked red is the positive pole (visible on the housing of the LED modules) and must therefore also be connected to the positive pole on the 12-volt side of the transformer.
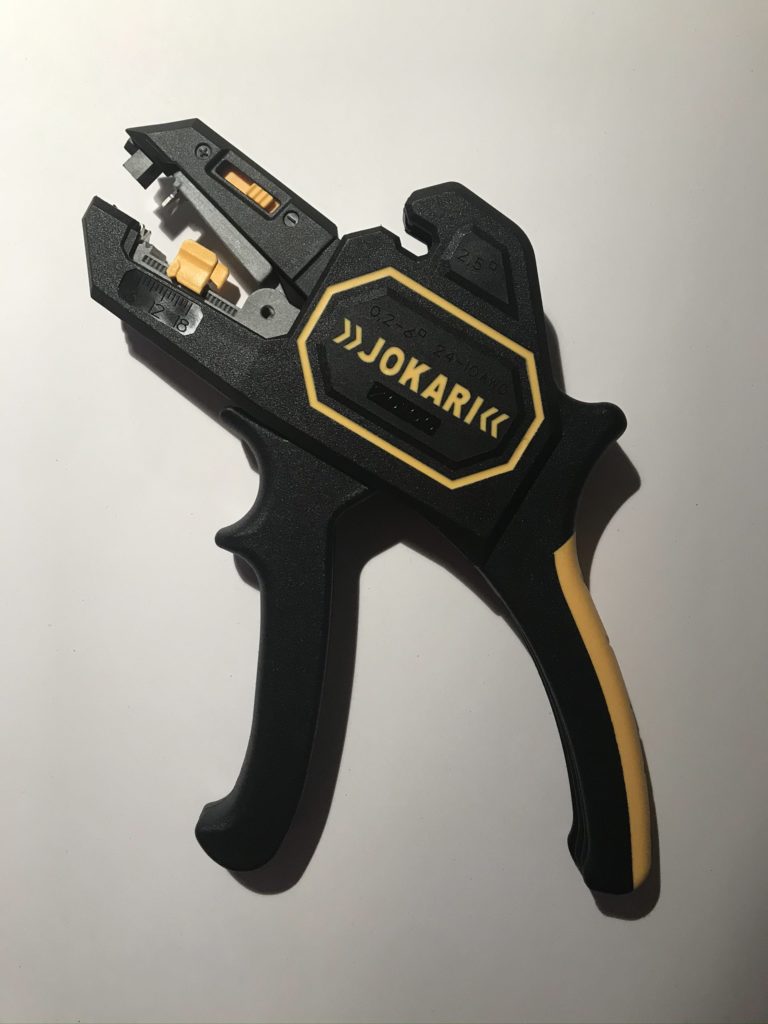
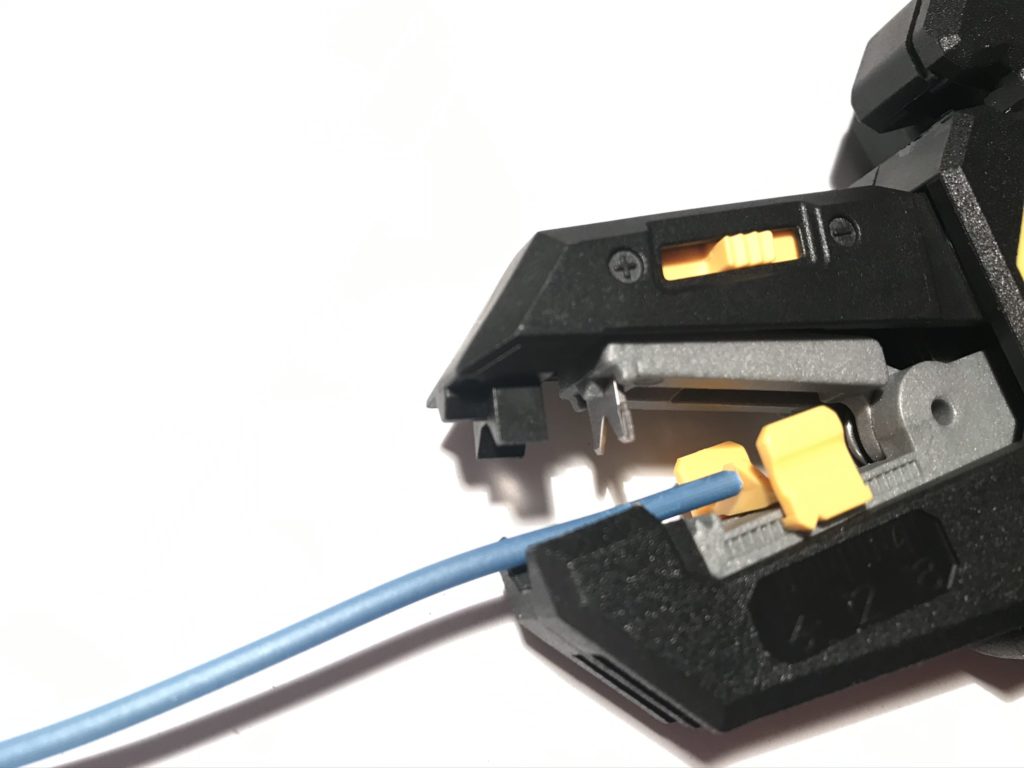
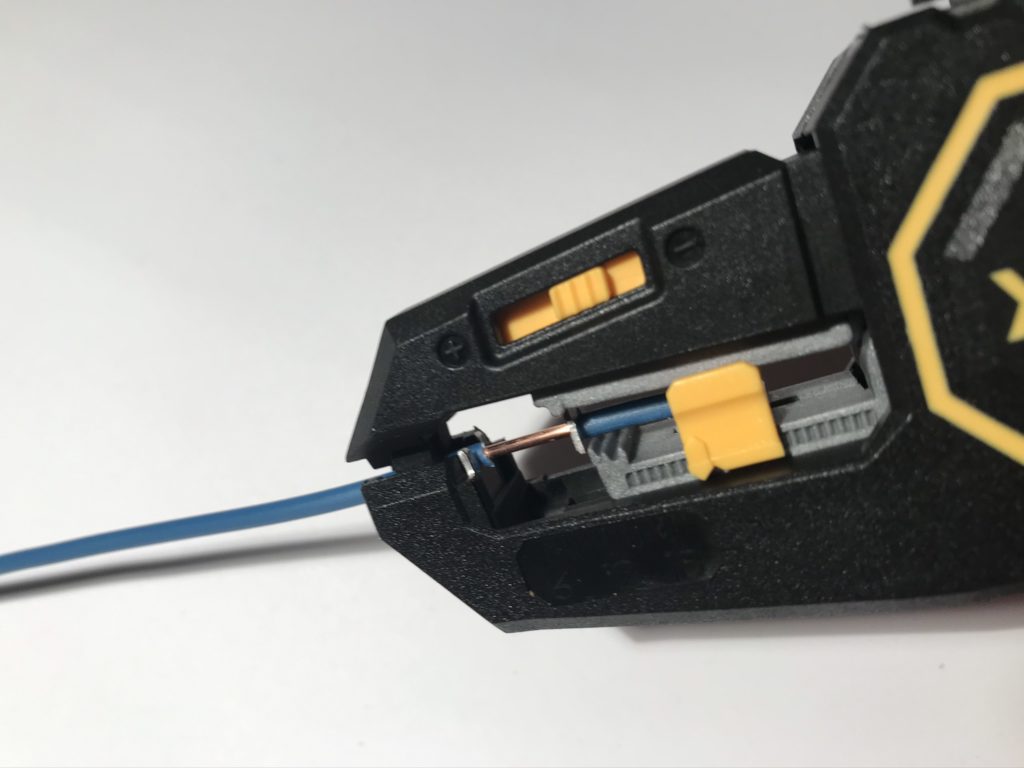
You can strip the wire ends quickly and reliably beforehand with a wire stripper*, such as the JOKARI Super 4 Pro*, without damaging the underlying copper strands. I used to do this kind of work without these tools. After I bought the wire stripper, I was shocked that I didn’t buy this tool earlier!

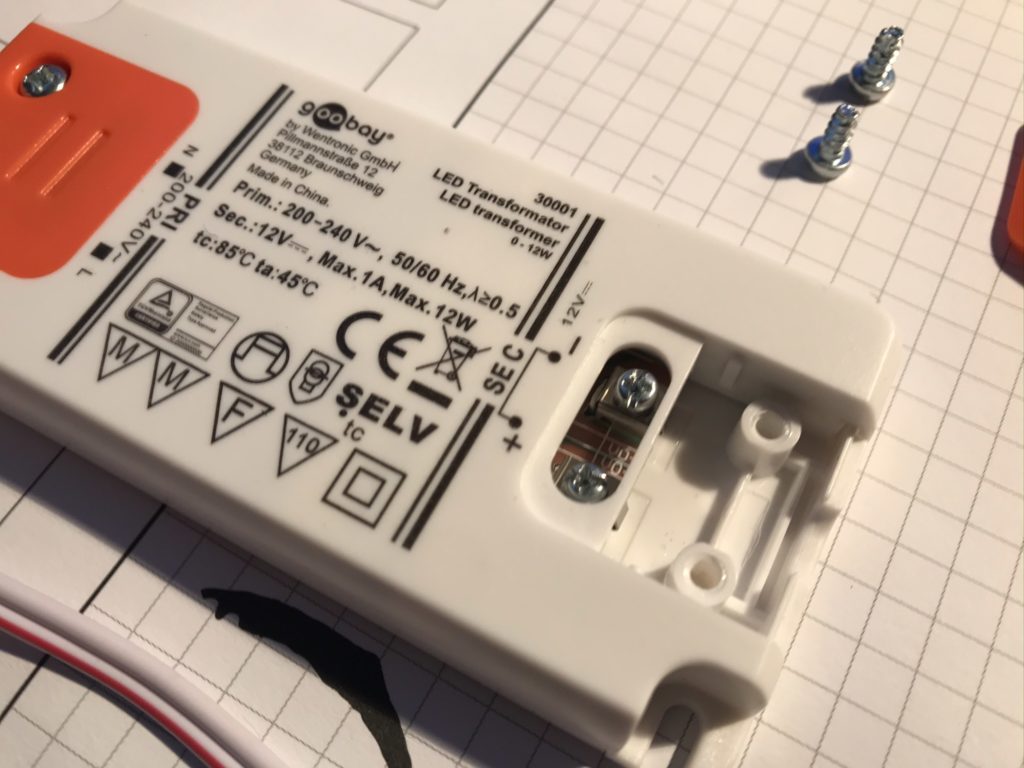
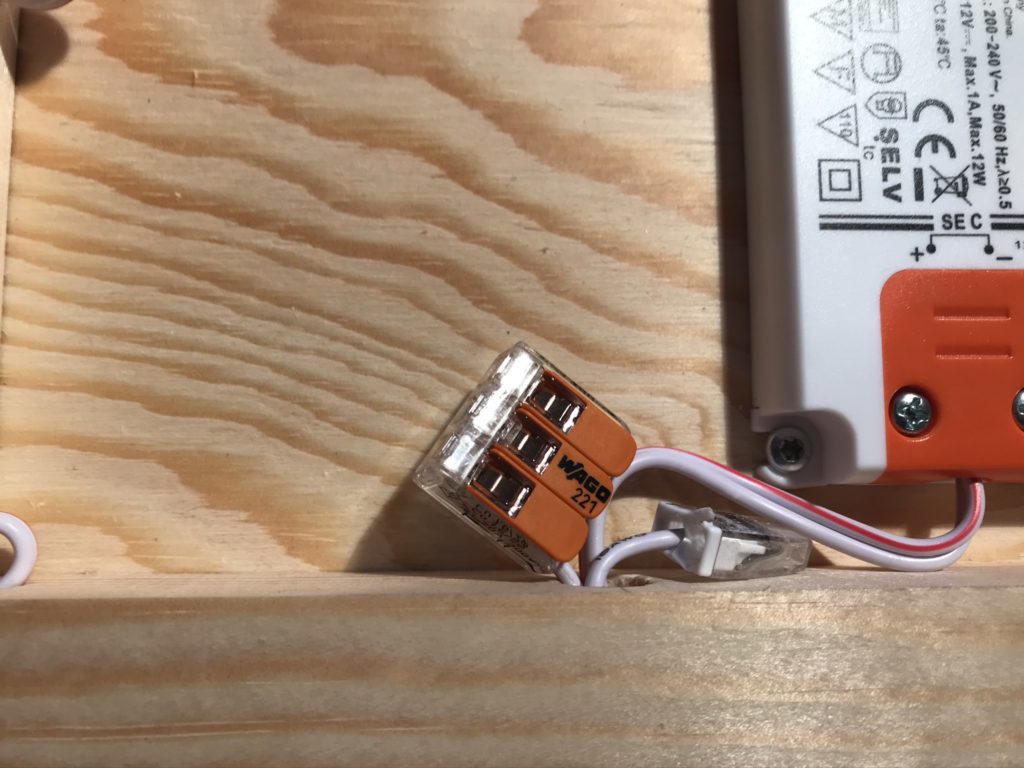
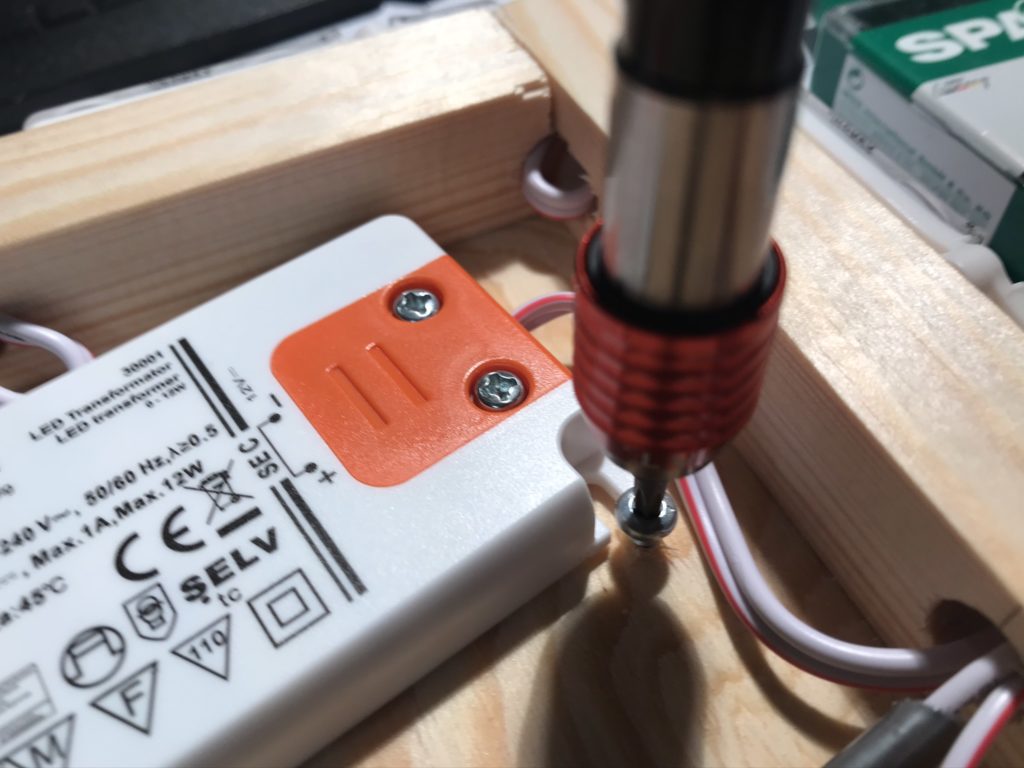
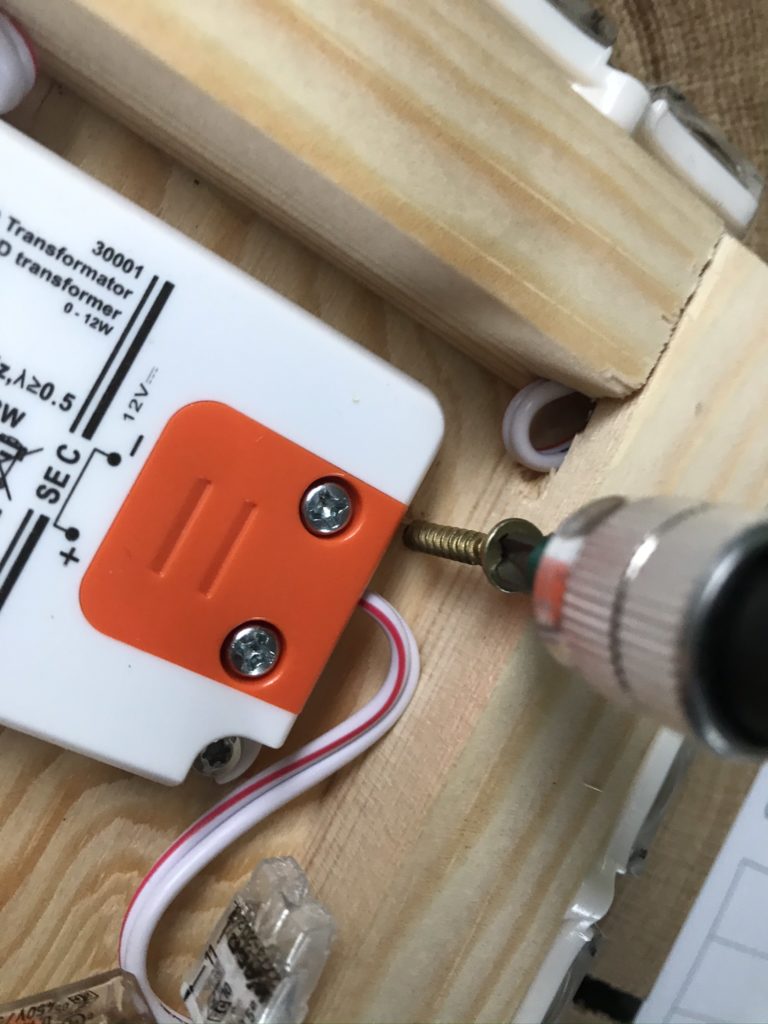
Next, I fixed the transformer to the wooden plate in the frame with two 3x10mm screws*. I did not pre-drill in this case.
DIY Wall Lamp – Preparing the connection to the mains supply
Either the DIY wall lamp is connected directly to a power line in the wall, or a power cable with switch* is installed, with which the lamp can be operated via a socket. I decided to go with the first solution and simplified the connection between the transformer and the cable in the wall using Wago connectors*.
Before connecting the lamp to the mains, please ask a qualified electrician to explain under which conditions the earth cable can be omitted. The pictures and descriptions of the electrical system are not intended for reproduction. Please have any work on the electrical system carried out by a qualified electrician or specialist!
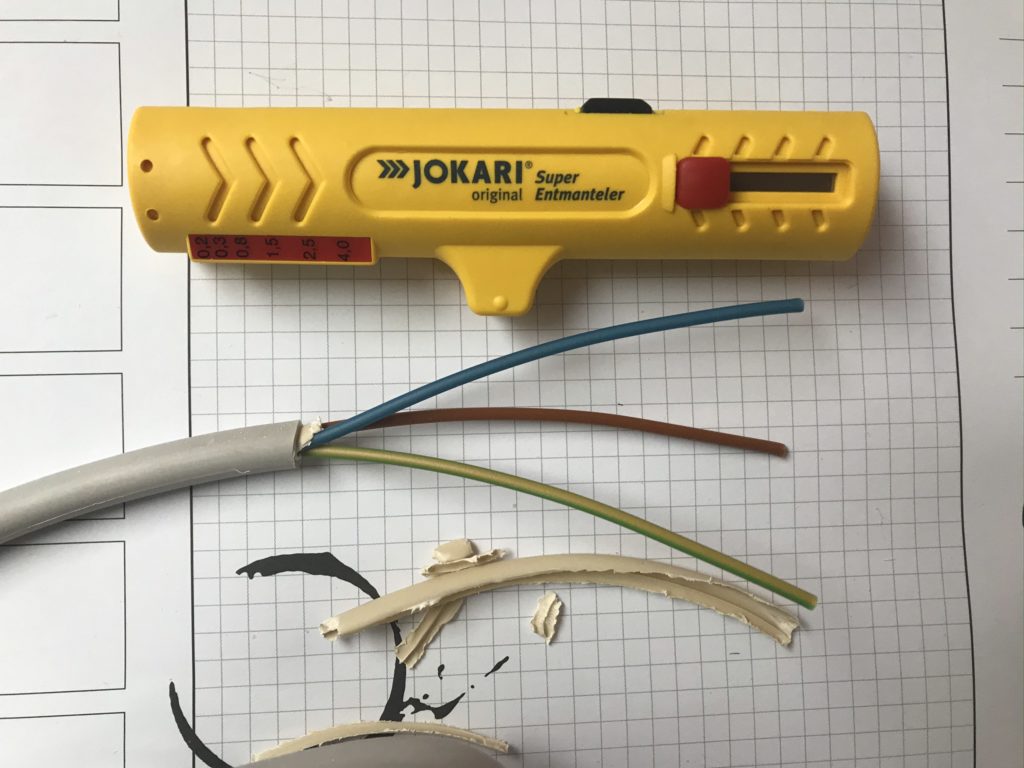
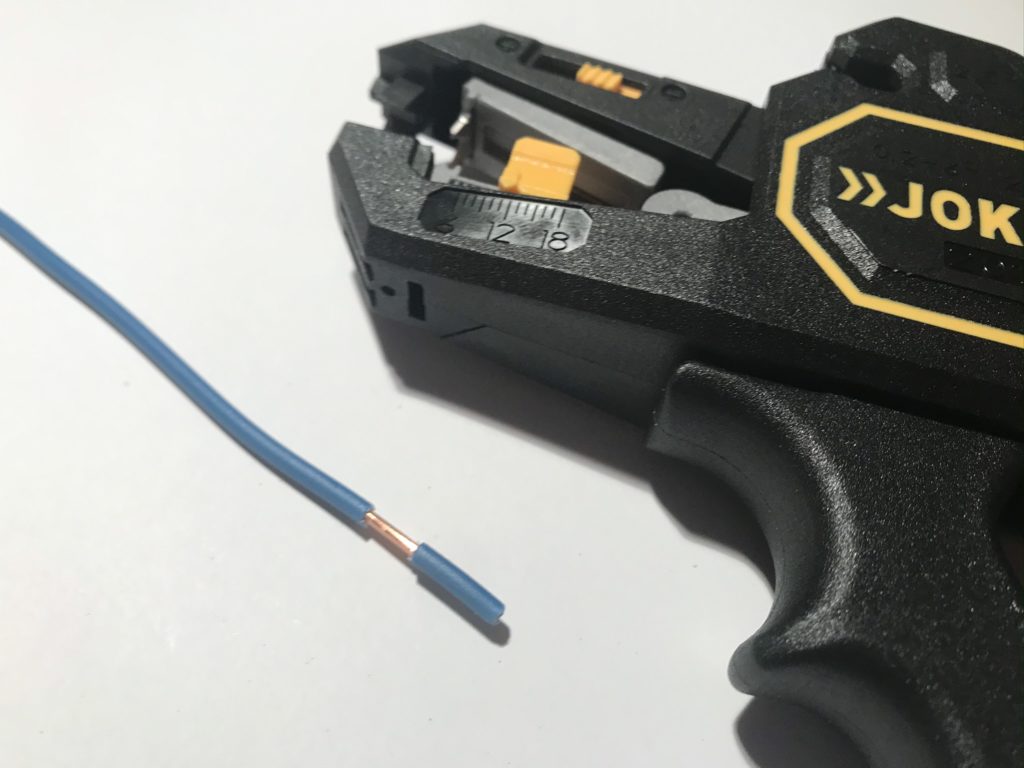
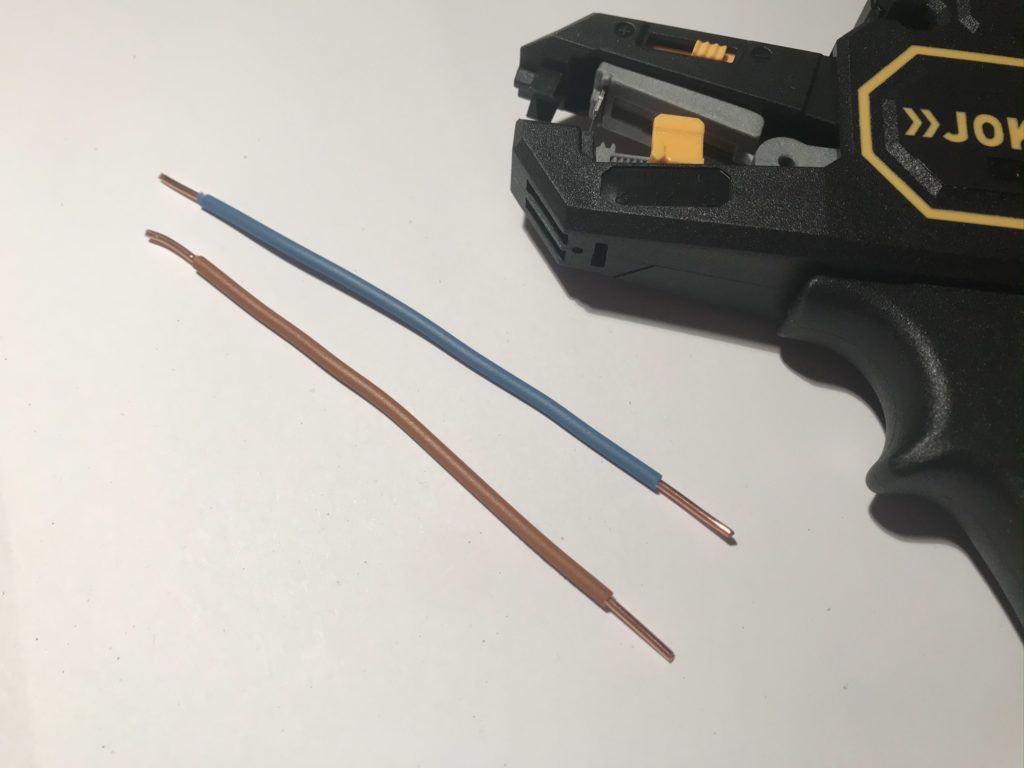
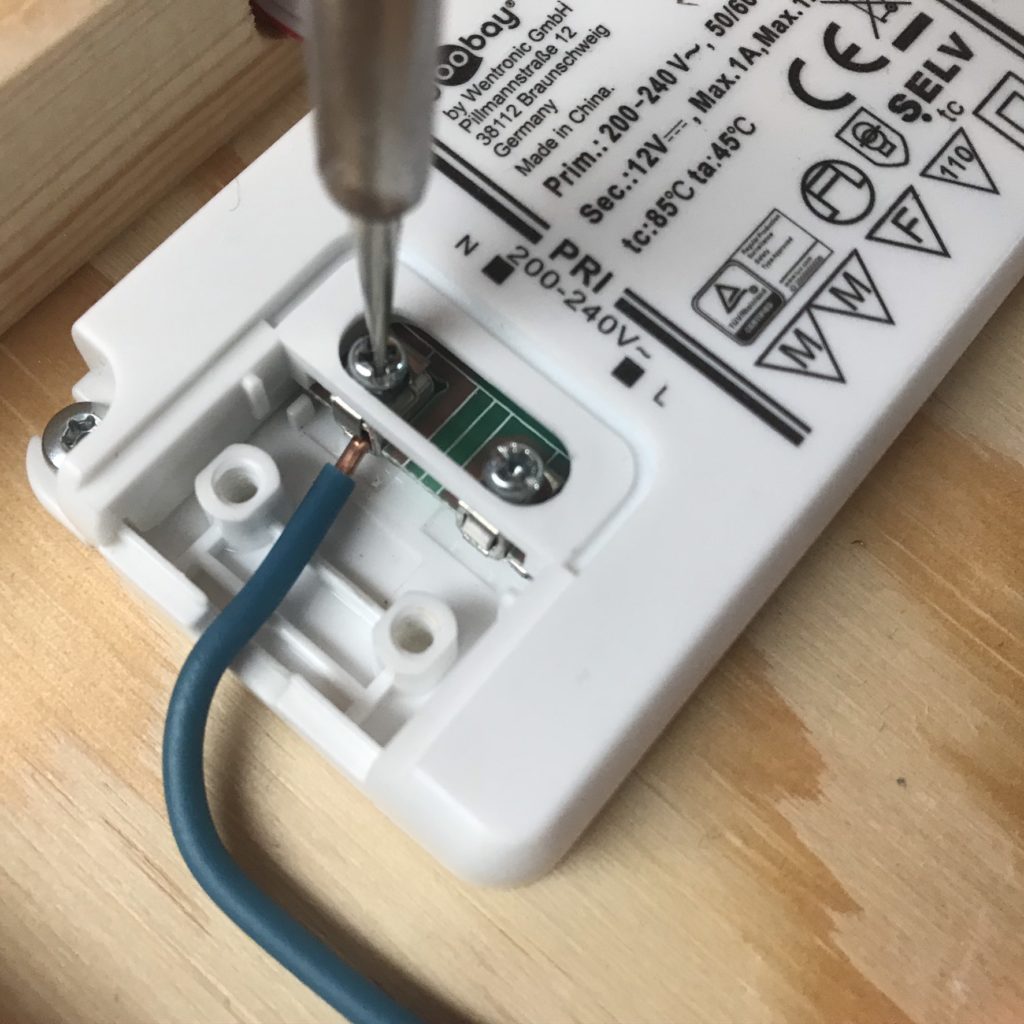
To do this, I stripped the sheath from a leftover piece of power cable (1.5 mm²)*, about 10 cm long, using a stripping tool* such as the JOKARI Wire Stripper No 15* and then cut off the blue and brown wires. In the picture you can see the rigid copper wires.
Please use the more flexible cables* with the individual strands for this! I didn’t have any other cable at hand at the time of the photo.


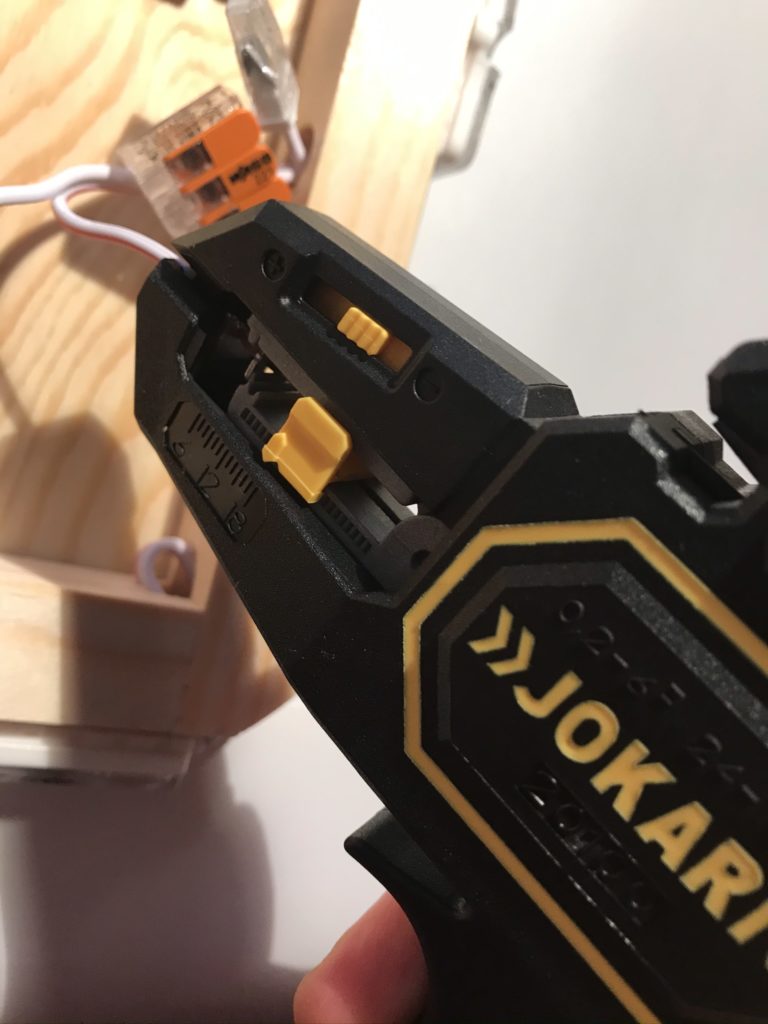
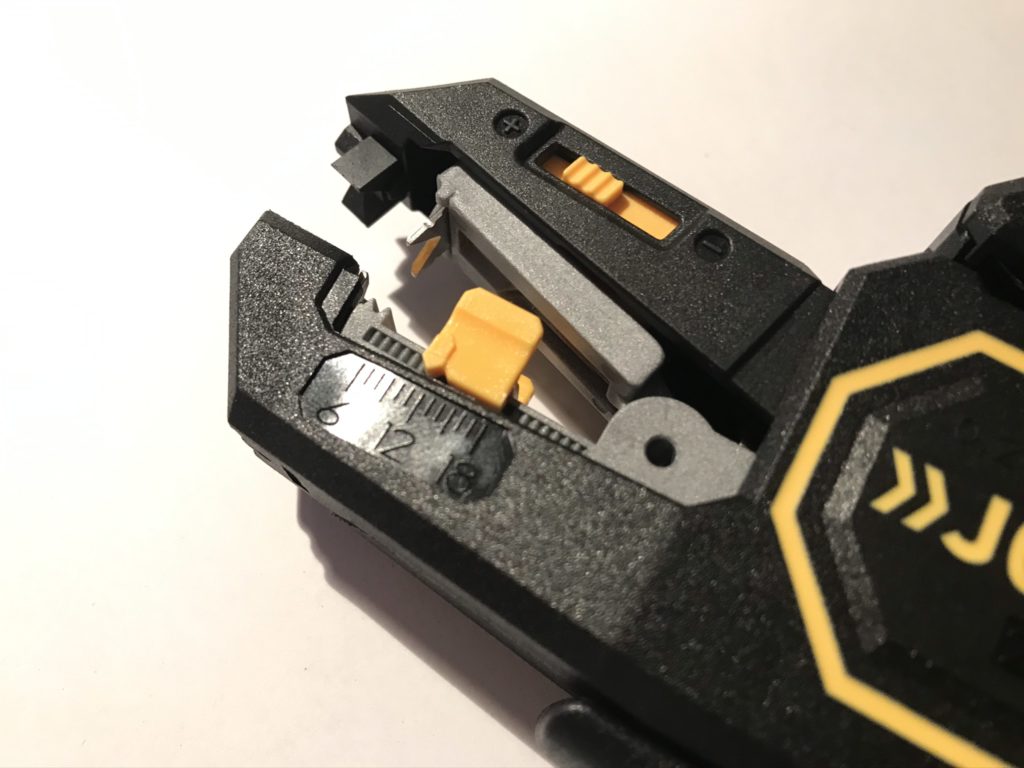
In principle, the same tool can also be used to strip the wire ends of the blue and brown copper cable. However, it is very important to observe the specifications of the WAGO terminals. How many mm of wire need to be stripped is stamped on the Wago connectors. Therefore, I prefer to use the Secura 2K from Jokari because you can adjust the length of the stripping there. In case of the Wago terminal 221, 11mm of the wire must be stripped so that it sits properly in the connector. Moreover you can easily set the 11mm using the lower yellow slider on the Secura 2K – there is also a scale stamped on it.
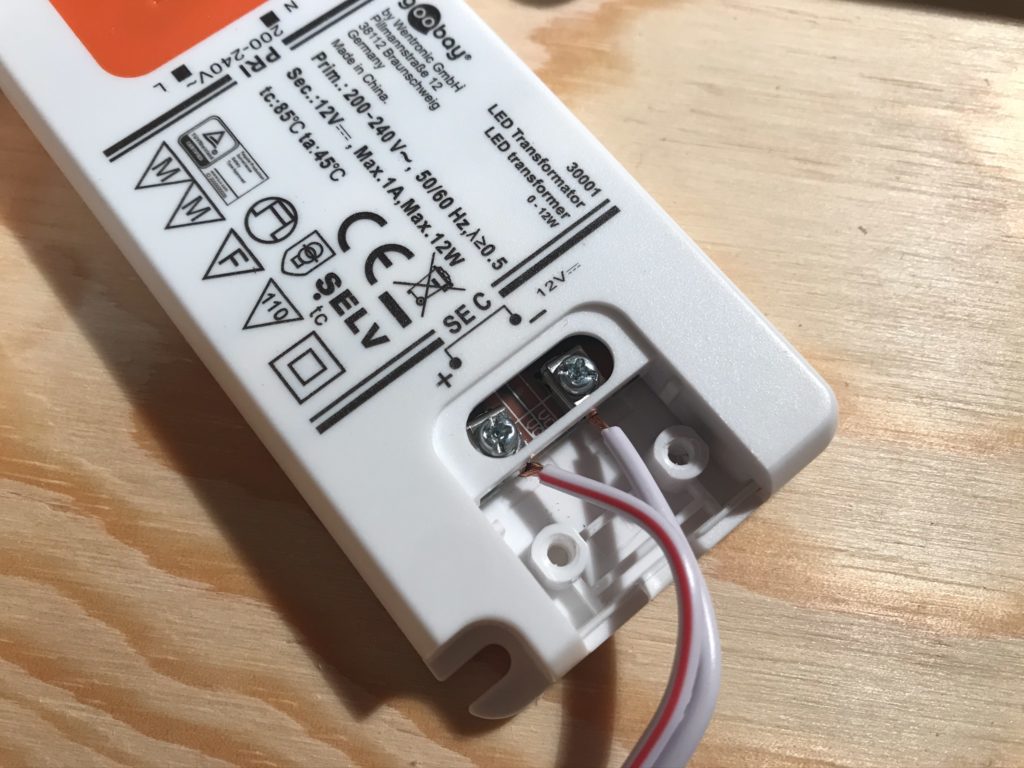
Next I connected the two cables to the 240V side of the transformer. The neutral conductor is blue (marked “N” on the transformer) and the outer conductor is usually brown (marked “L” on the transformer).
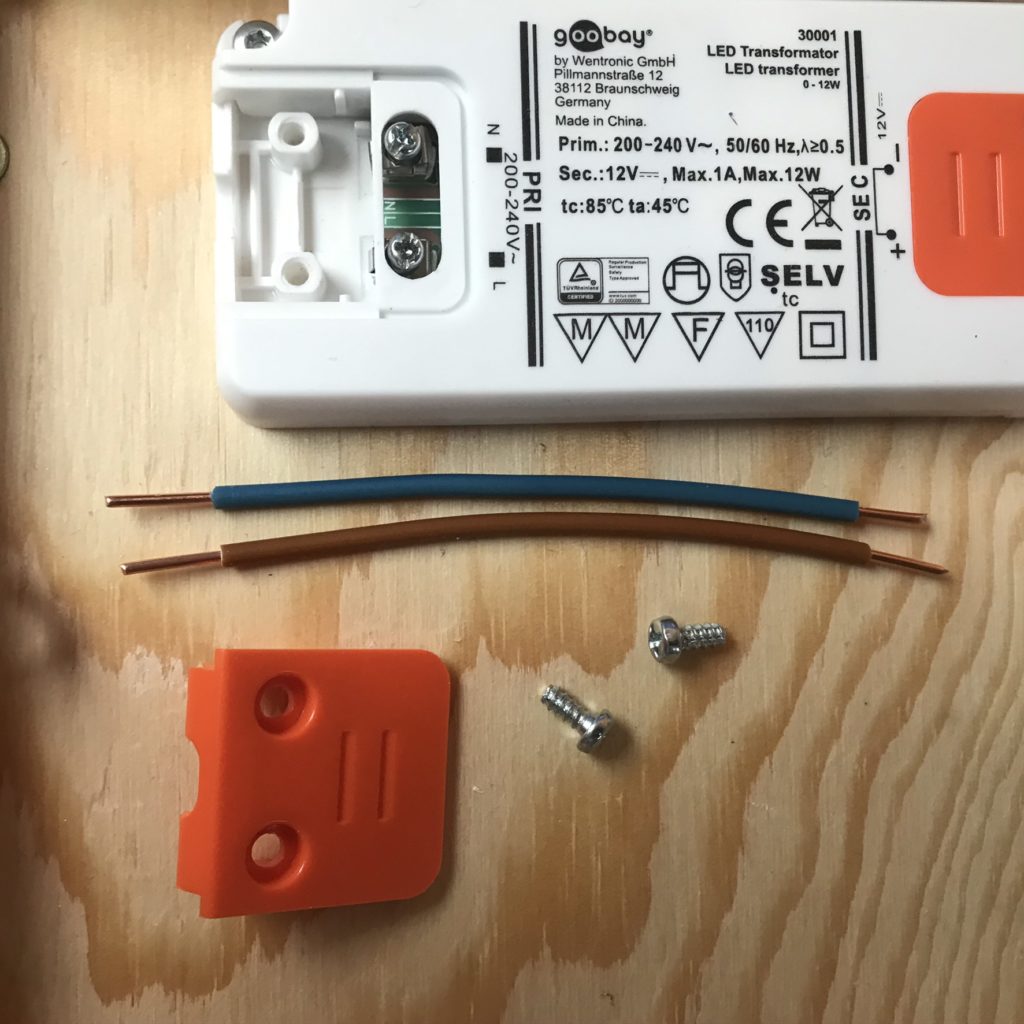
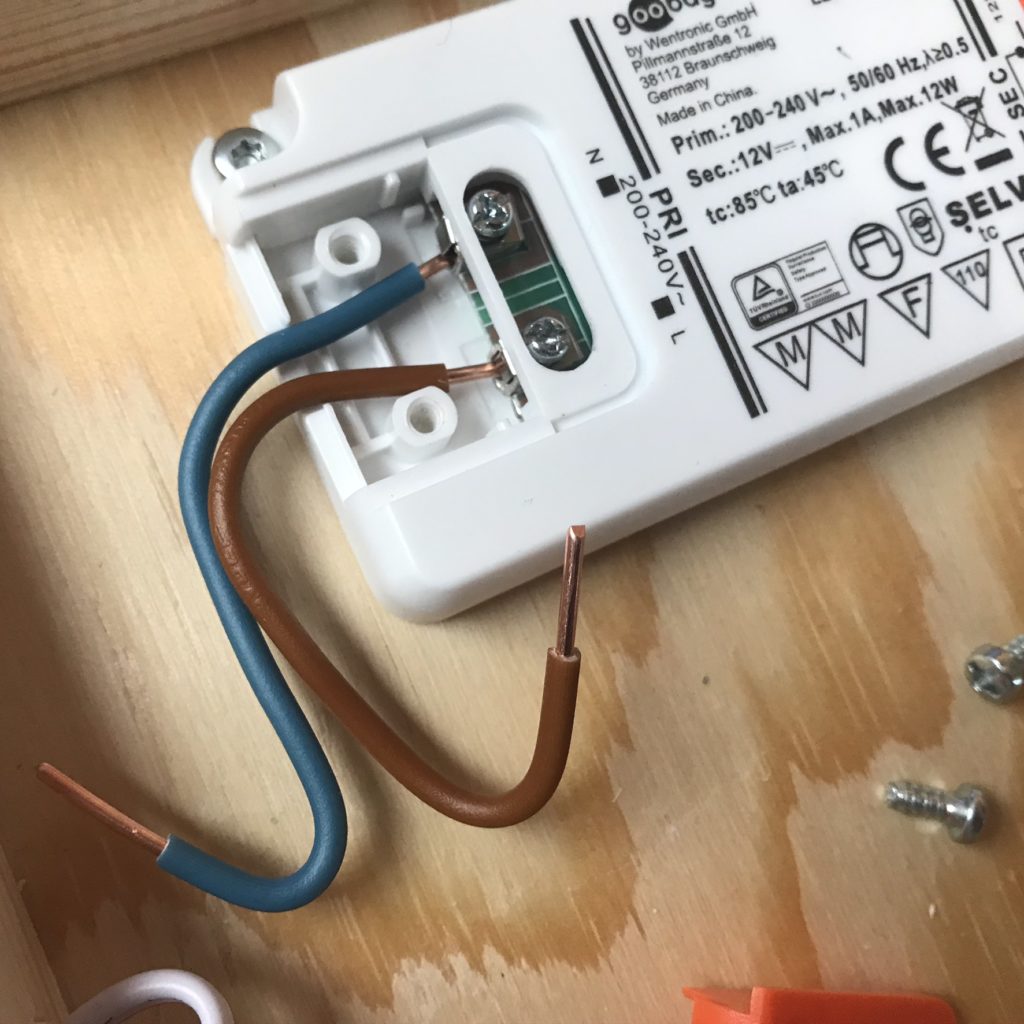
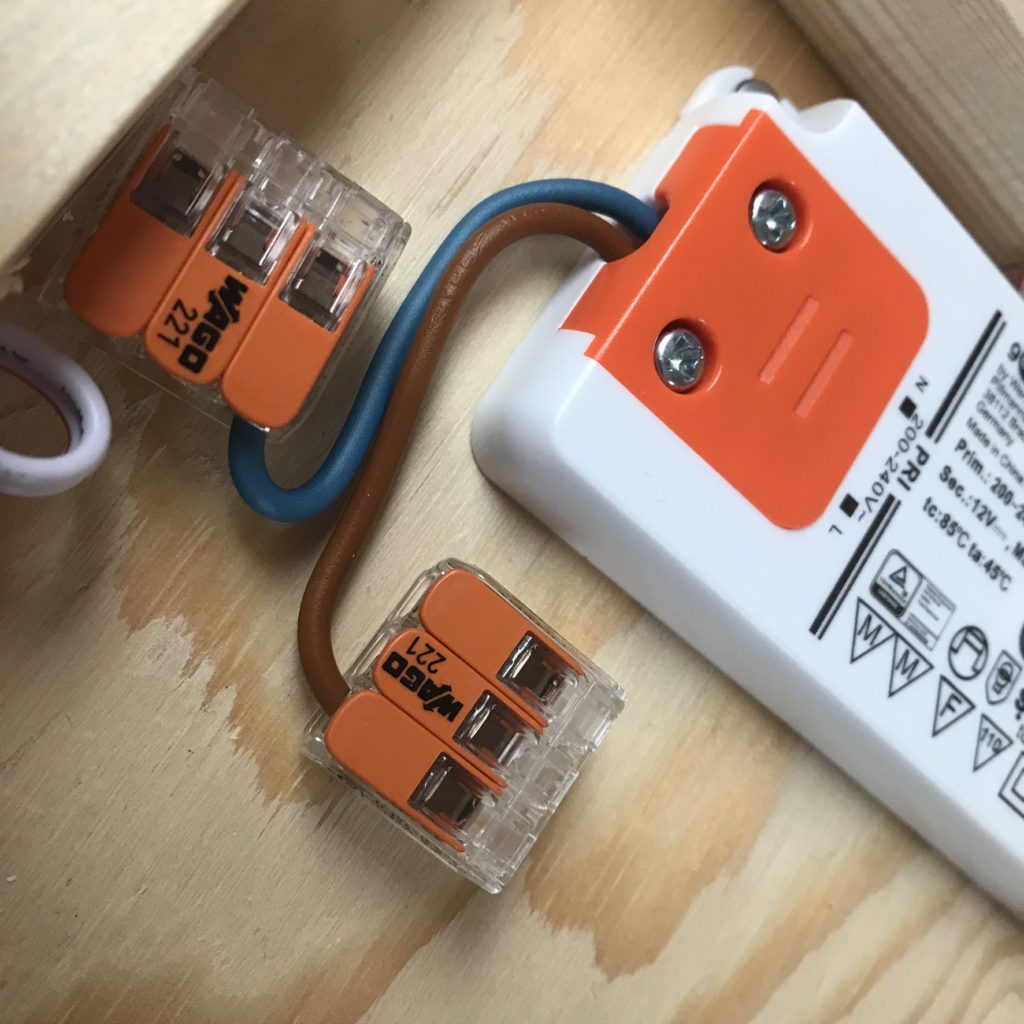
Finally, I attached Wago connectors* to the ends of the cables to make it as easy as possible to connect the lamp to the mains later on.
If you prefer the solution with a power cable with switch*, make sure to pull the cable of the connecting cable through one of the holes in the wooden strips. With the help of such a power cable with a switch, you can also operate the lamp at a socket.
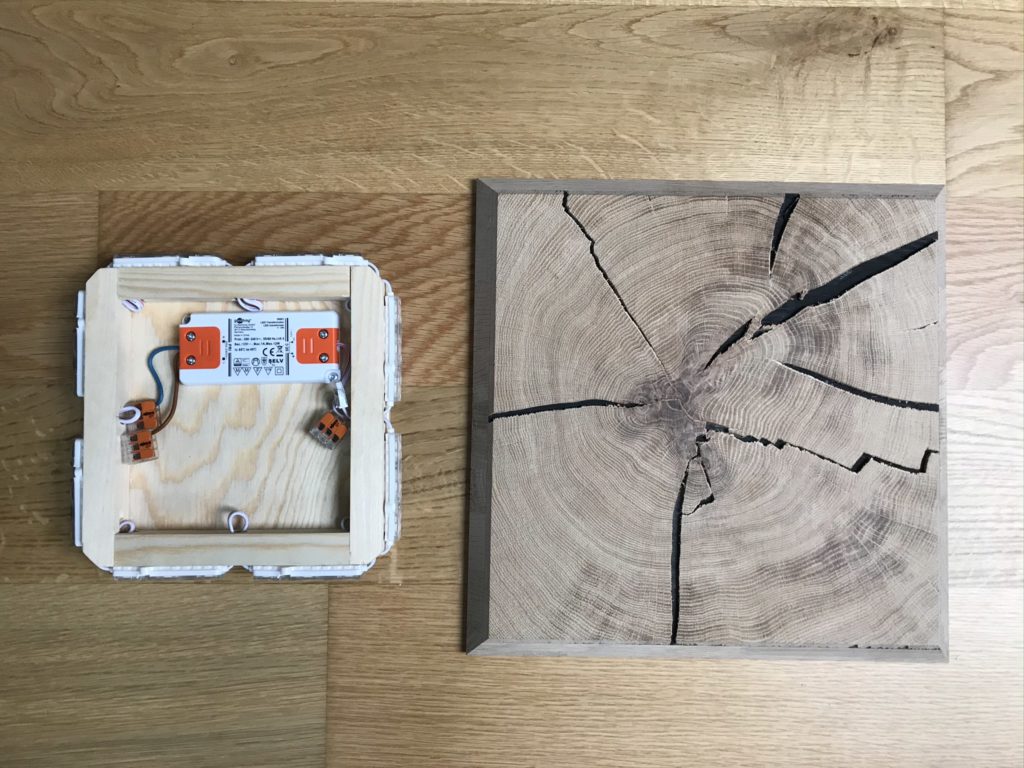
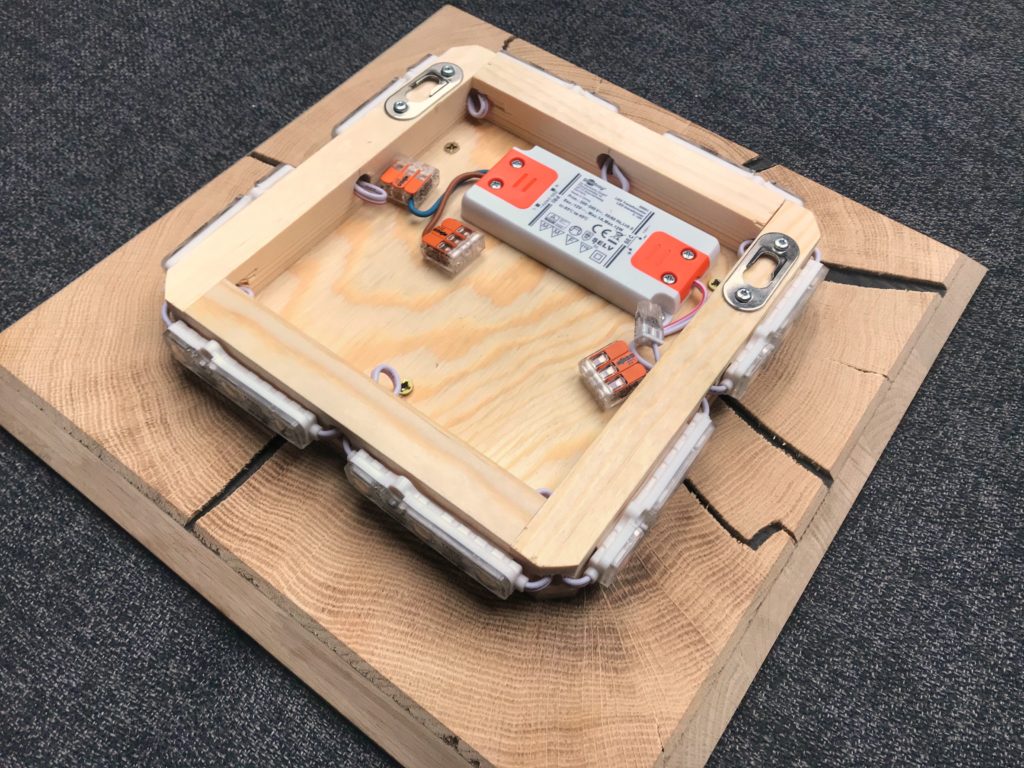
Attaching the backplate to the wood end grain element
Next, the electronics backplate can be screwed to the end grain element. Pre-drill with a 2mm or 3mm wood drill and screw with 4x25mm screws*. Make sure that the frame is exactly centred on the end grain element. And don’t drill too deep – the front of the end grain element should remain intact.
Mount wall brackets for the DIY wall light
To ensure that the wall lamp hangs securely on the wall, you only need to screw the appropriate wall brackets onto the frame. Actually Keyhole hangers* will do the job.
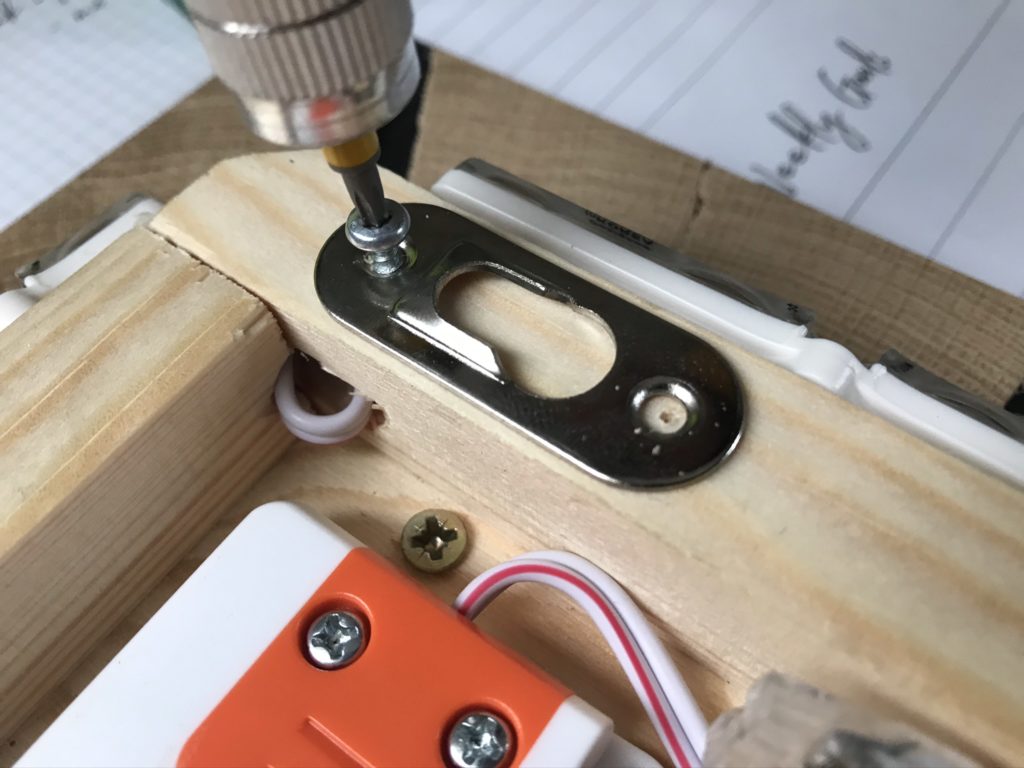
Again, I used the 3x10mm screws*. Pre-drilling is not necessary.
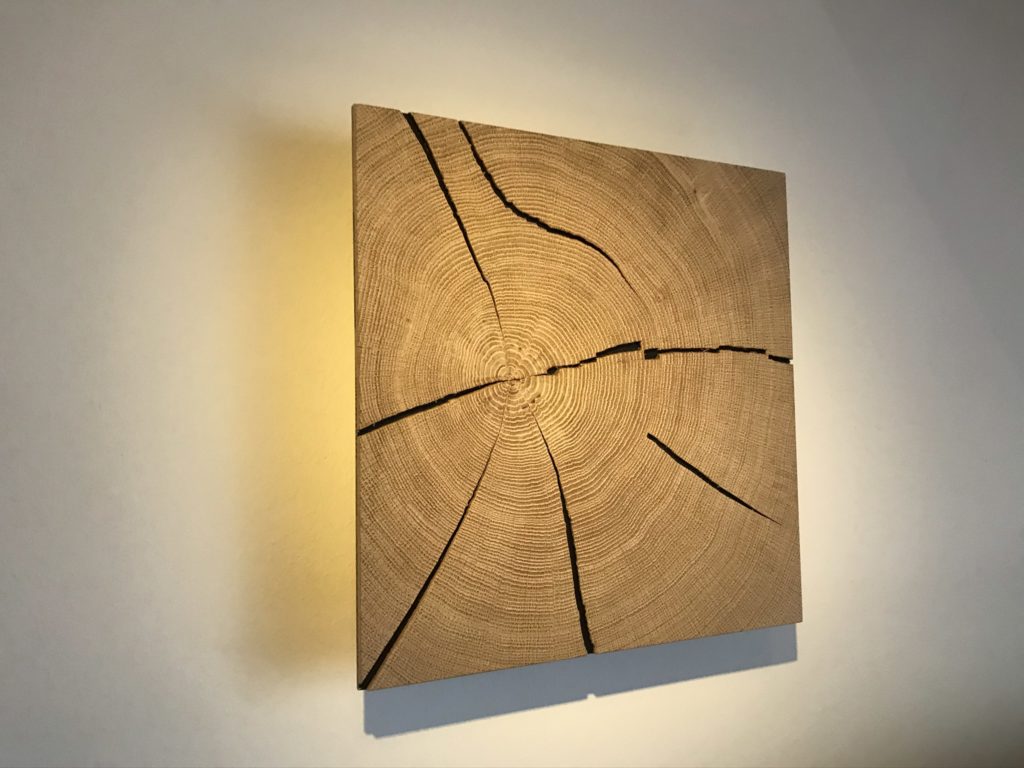
DIY Wall Lamp – The Final Result
Finally, the lamp only needs to be mounted on the desired wall.

If you liked the project, or if you have any questions, just let me know in the comments! What do you think of the wooden end grain elements? I already have the next DIY project ideas with one of the black or smoked oak end grain elements!