
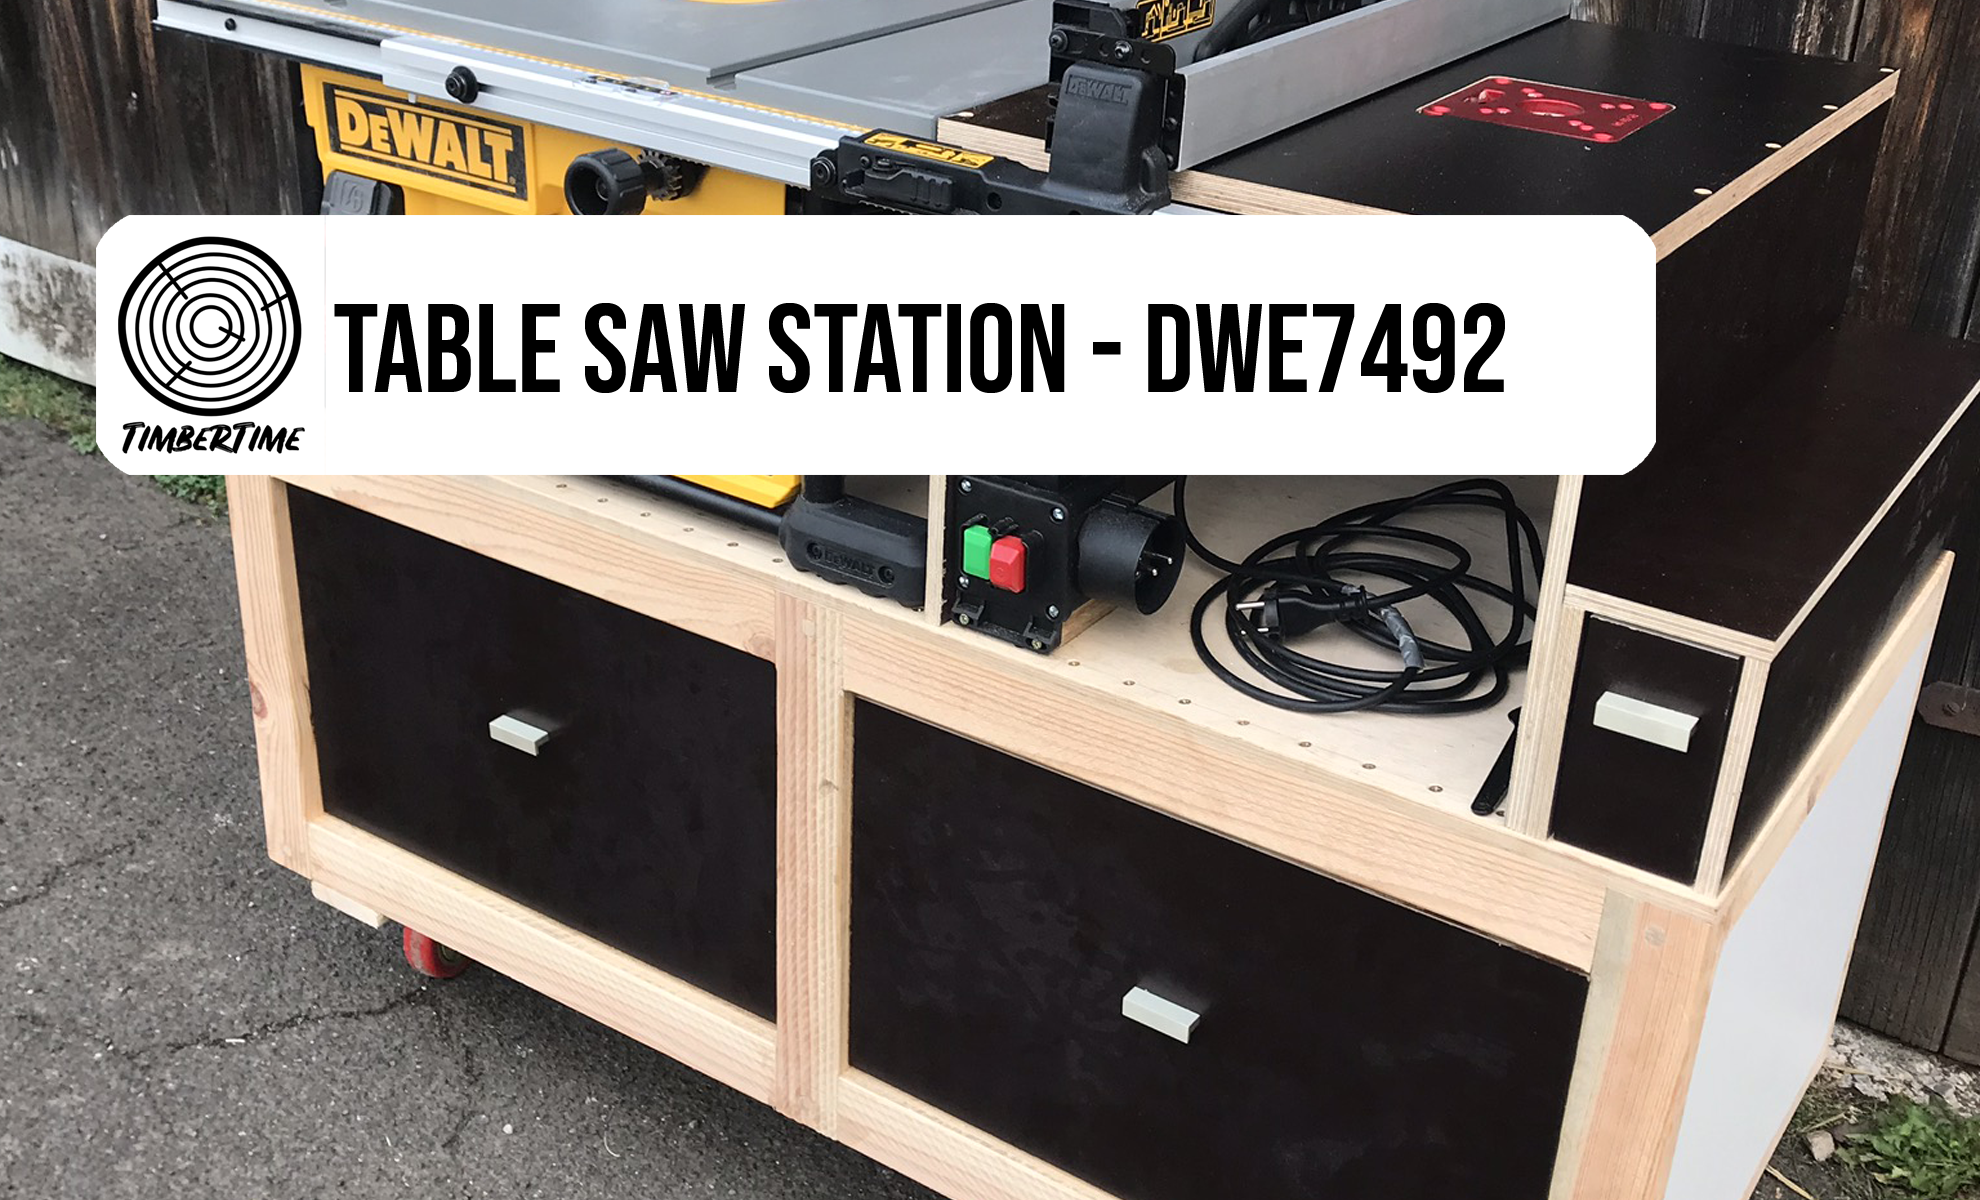
Build your own DeWALT DWE7492 base cabinet with an integrated router table! In these instructions I show you how I built a base cabinet with router table for the DWE 7492 myself. Step by step and with all the construction drawings, you can easily build the DeWALT DWE7492 Saw Station yourself. The mobile DIY DWE7492 saw stand has two drawers for accessories and tools, a separate drawer for routers and a safety switch* for the integrated router.
* = Affiliate Links /Advertising
As an amazon associate i earn from qualifying purchases.
Advertising
Necessary Tools
- Drill*
- Table Saw*
- Mitre Saw*
- Router*
- Jigsaw*
- Chisel*
- Sander*
- Clamps*
- Undercover Jig*
- Japanese Saw* (optional)
- Countersink Drill Bit*
- Wood Drill Bit Set*
- 12mm Auger Drill Bit*
- flush trim router bit*
- rebate cutter router bit*
- Woodworking Ruler*
- Construction Pencil* und Lead Refills*
Necessary Material – base unit (without drawers)
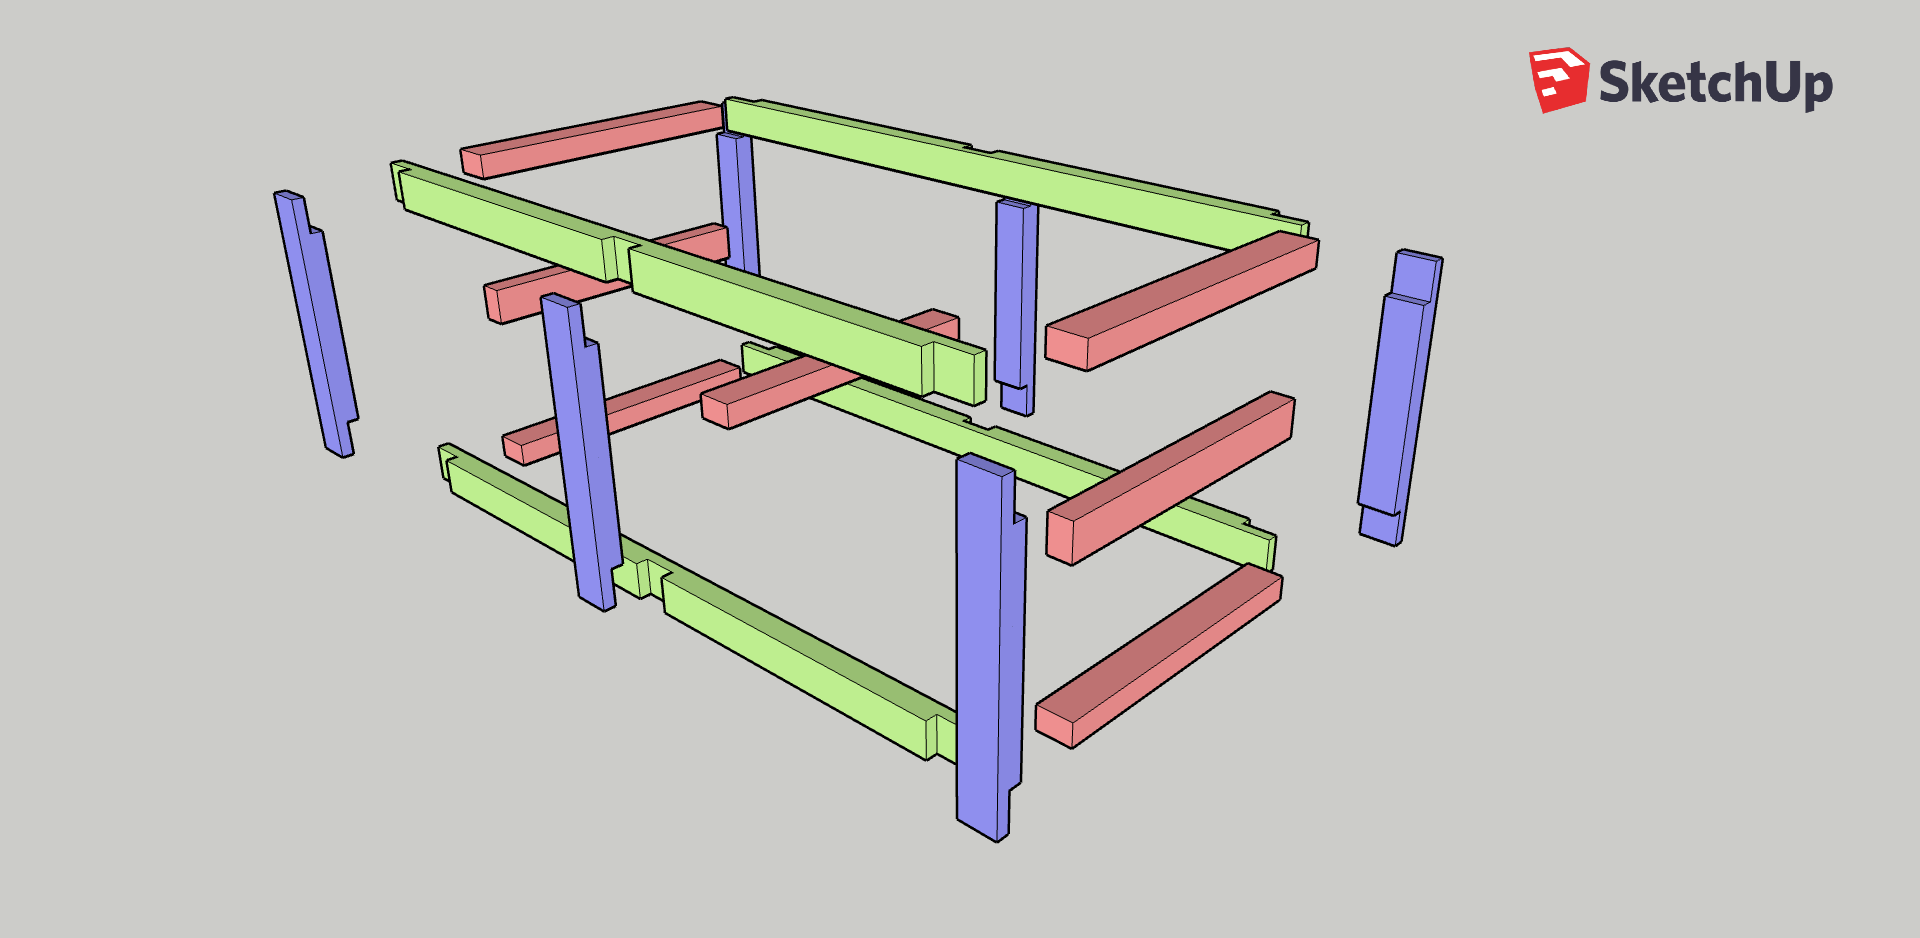
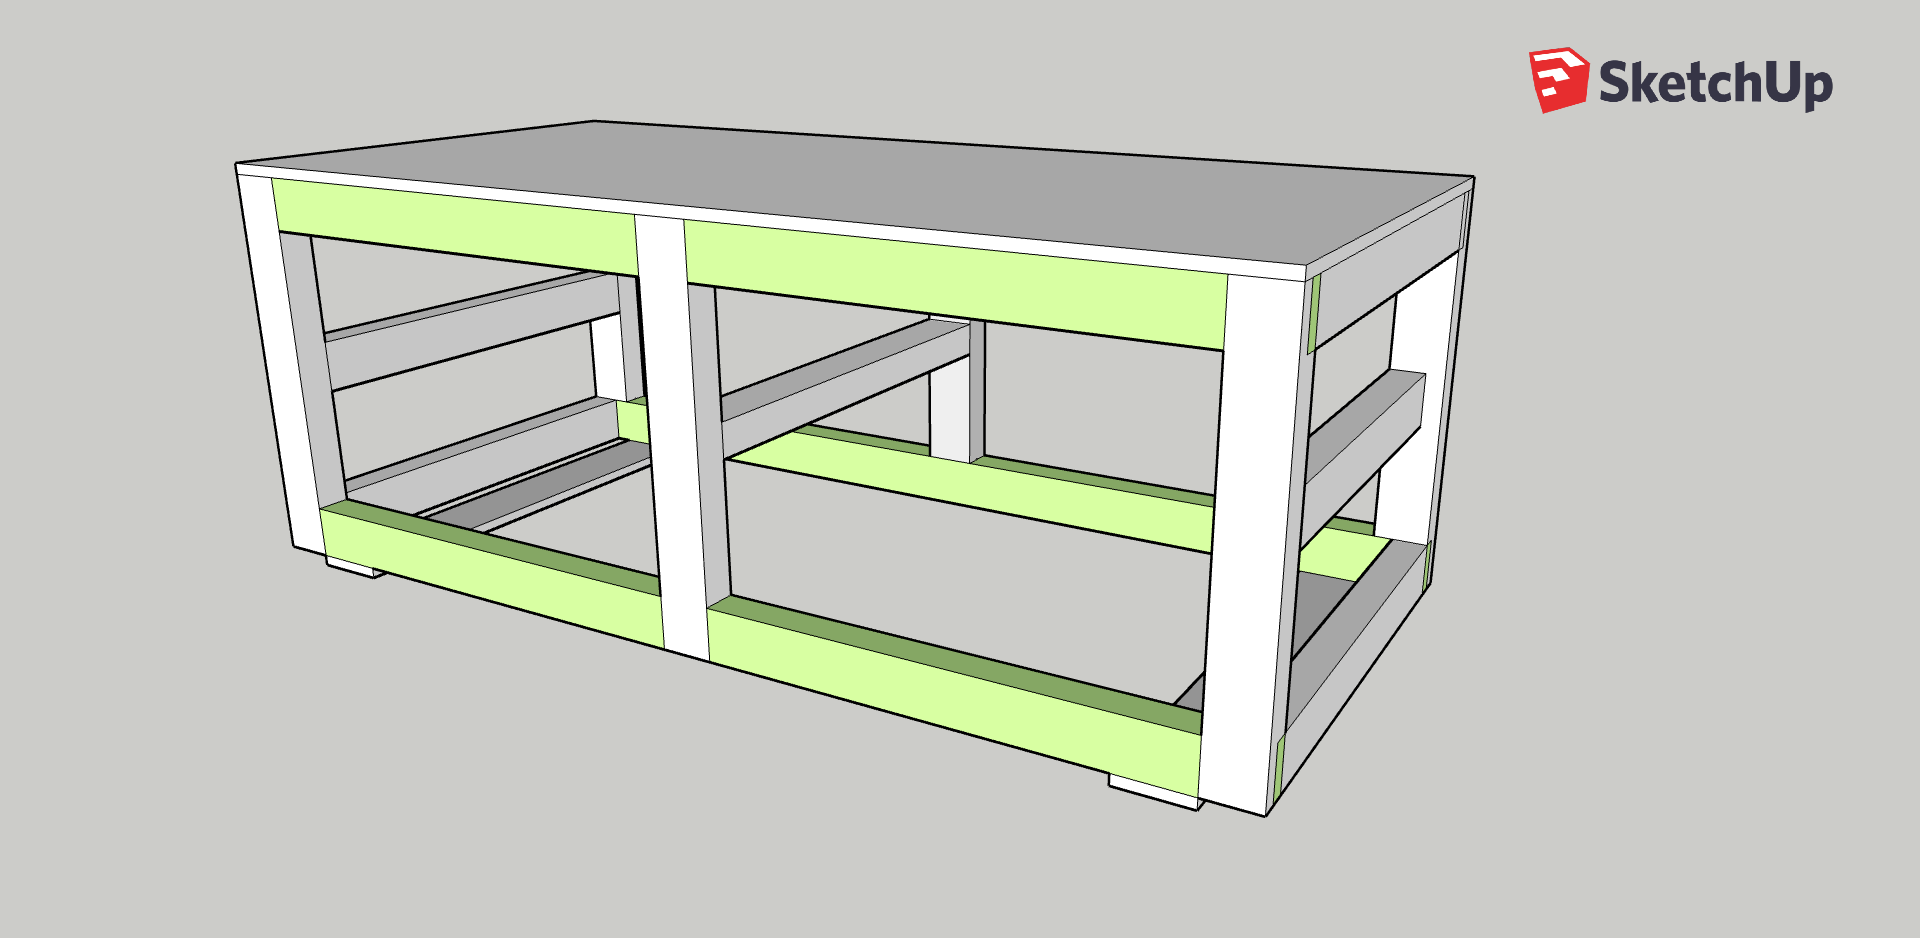
- [4 pcs.] [Long Struts – green] 58x38x1200 mm square timber (e.g. spruce/fir/pine)
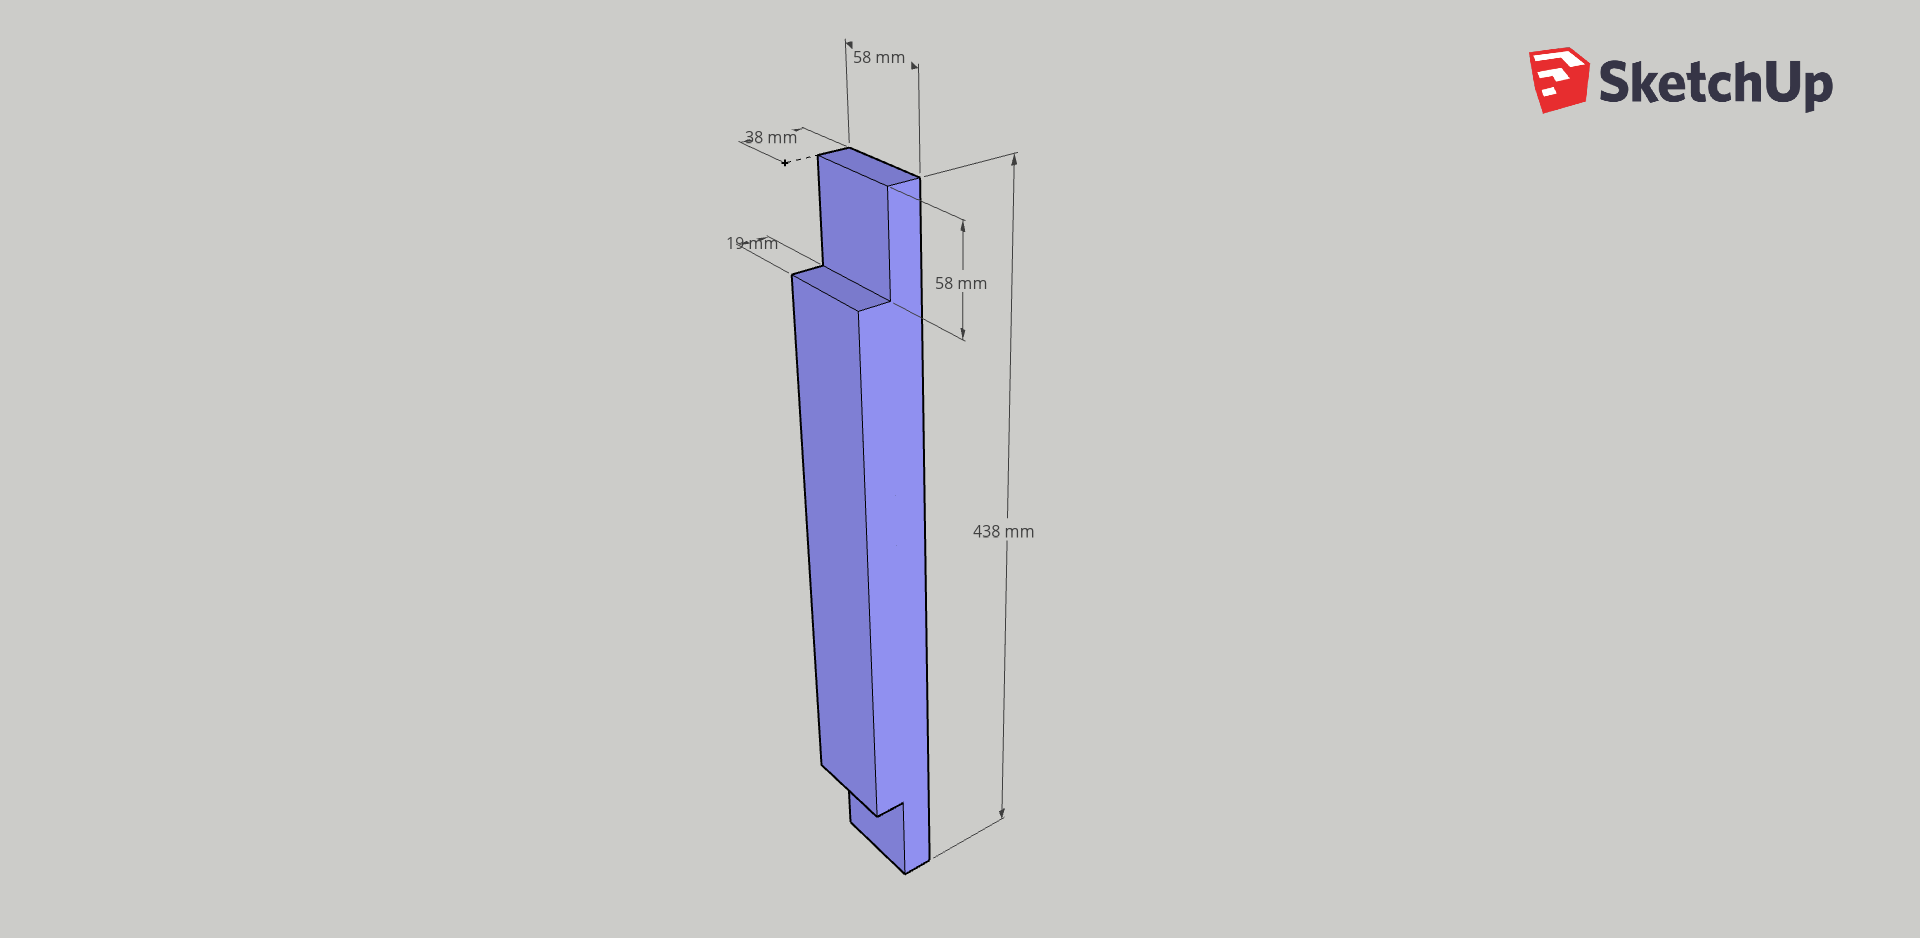
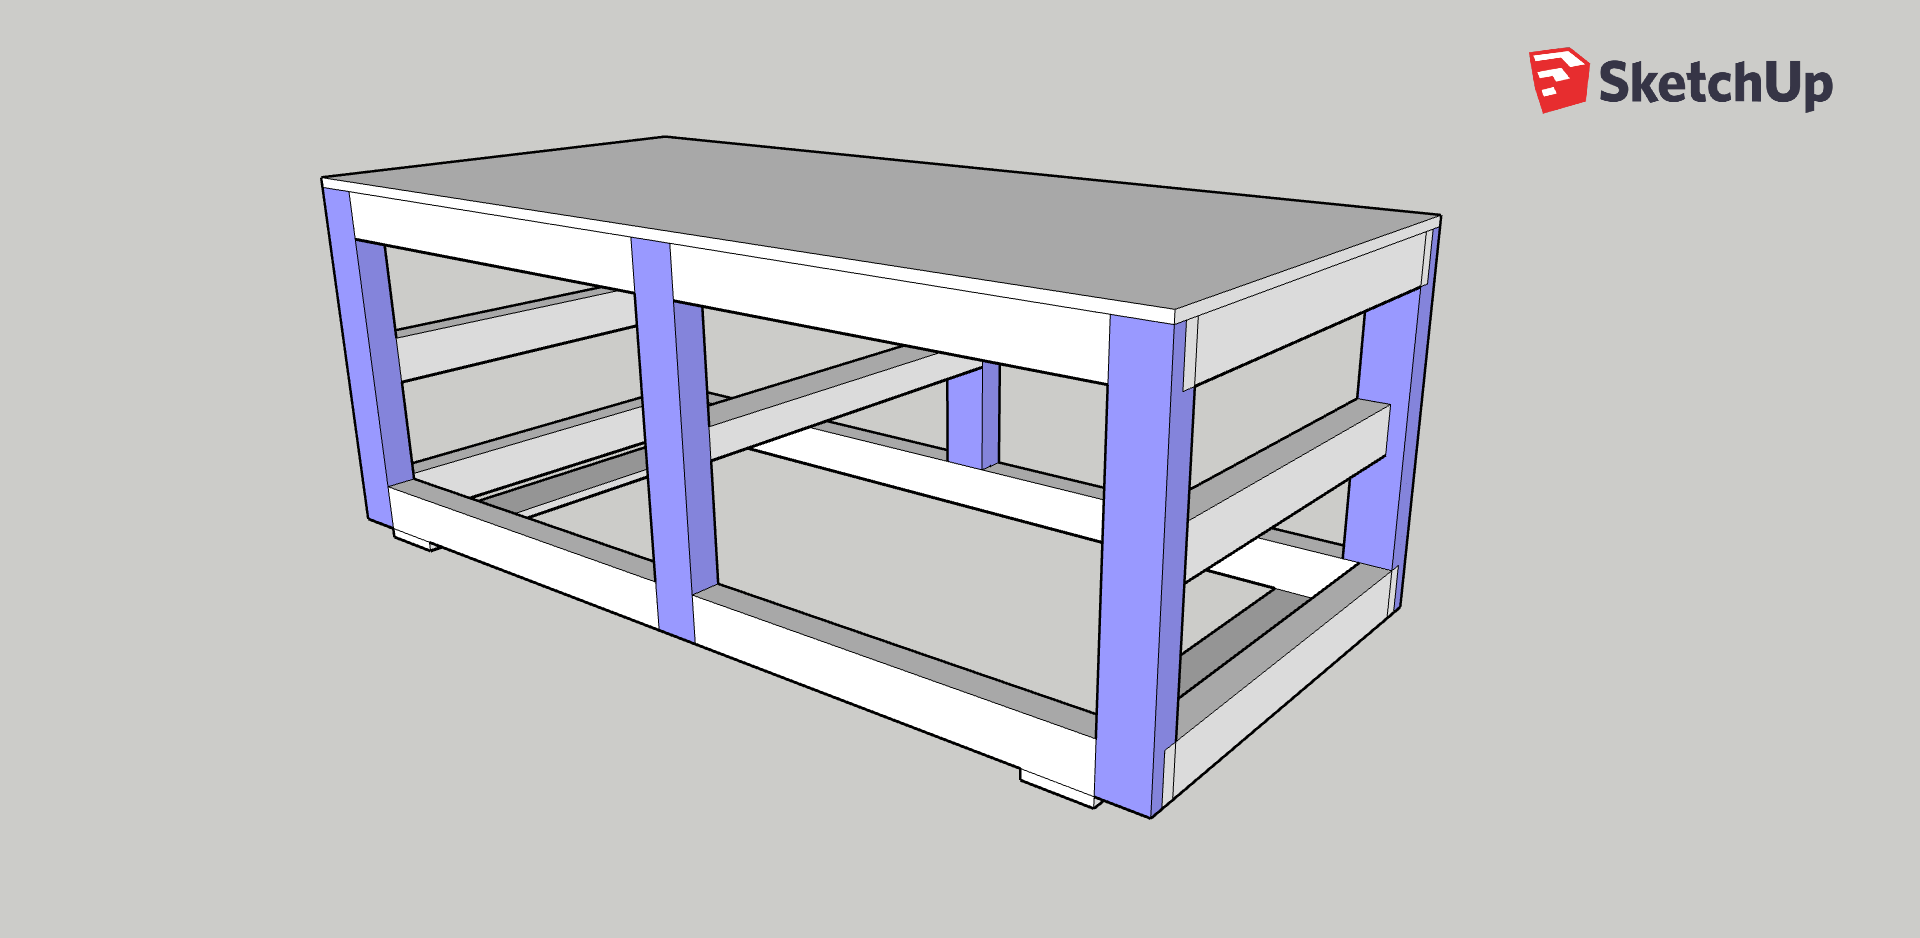
- [6 pcs.] [Short Struts vertically – blue] 58x38x438 mm square timber (e.g. spruce/fir/pine)
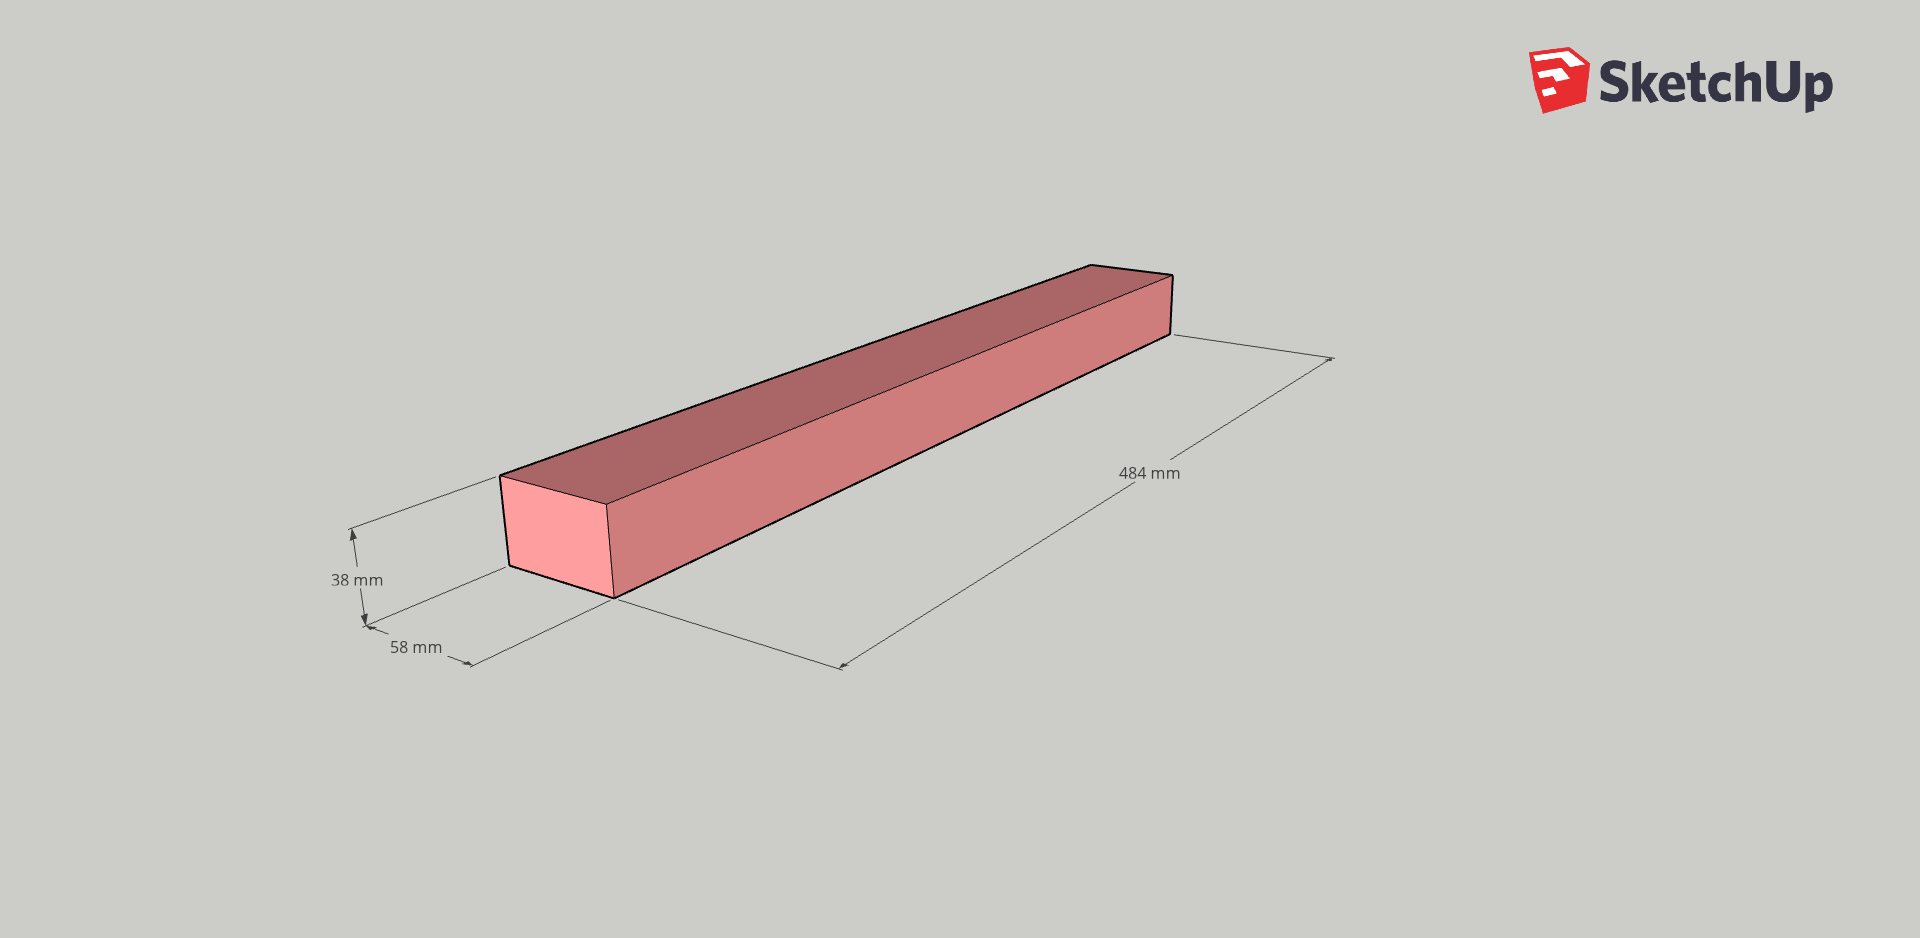
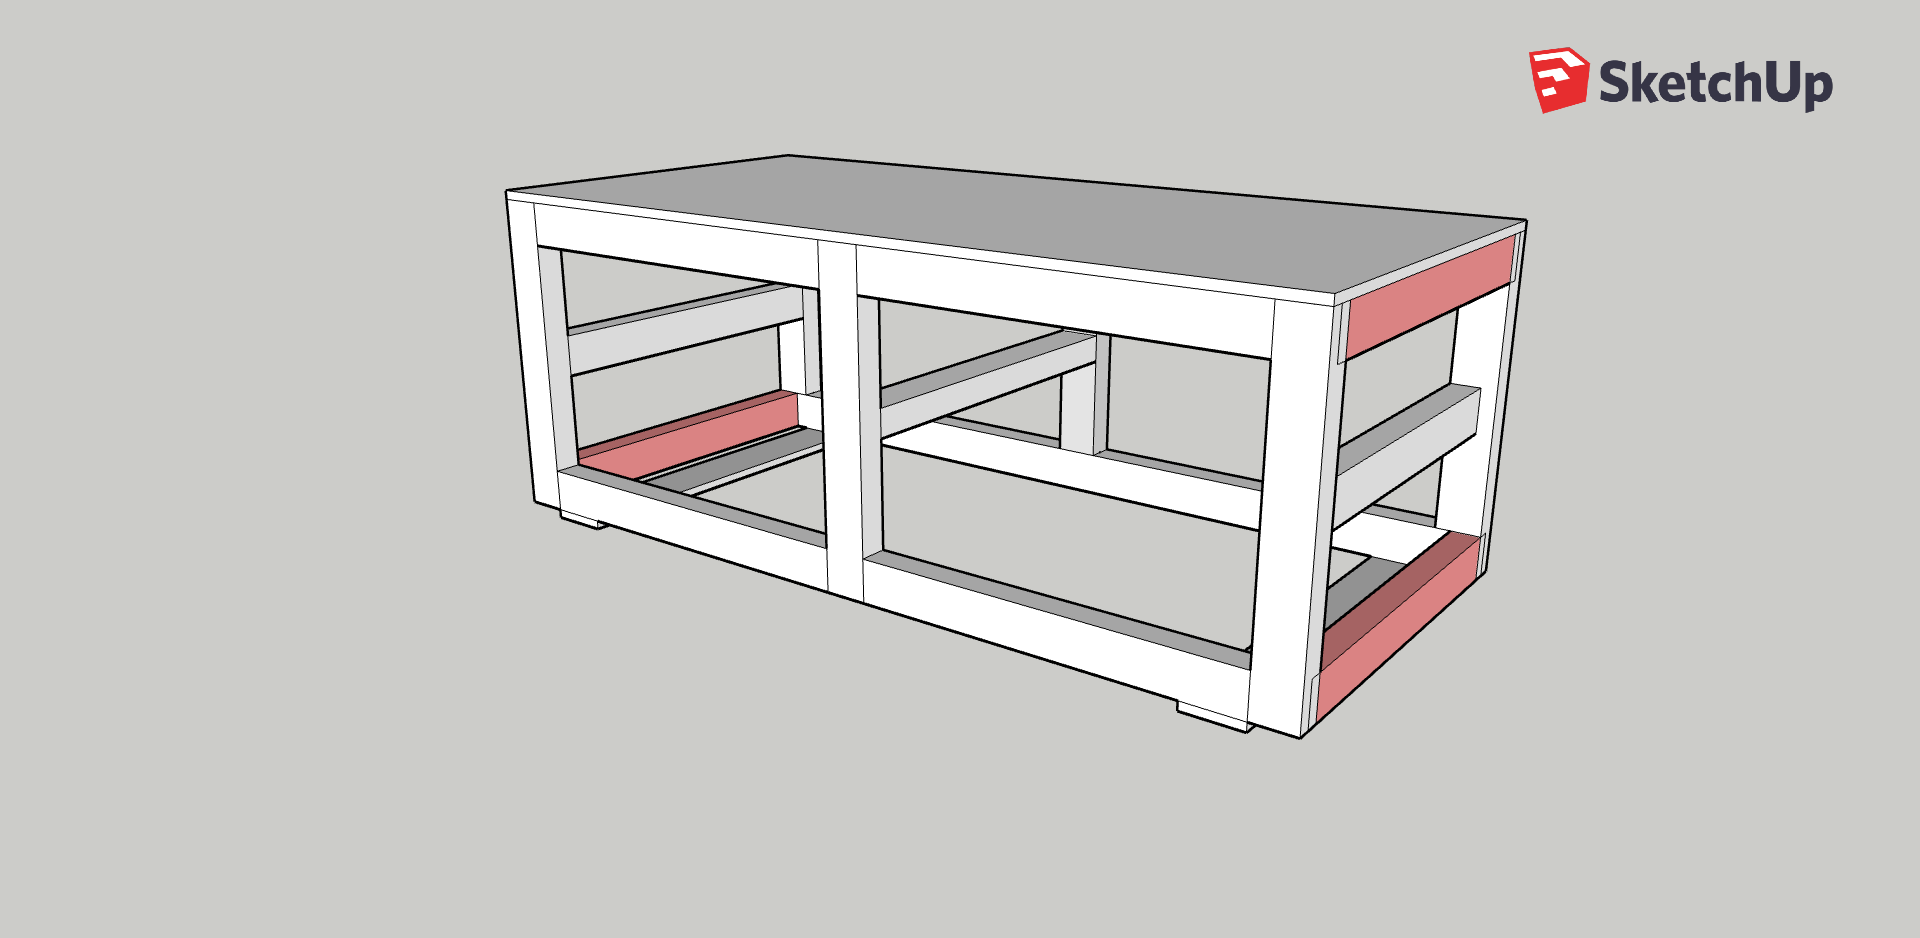
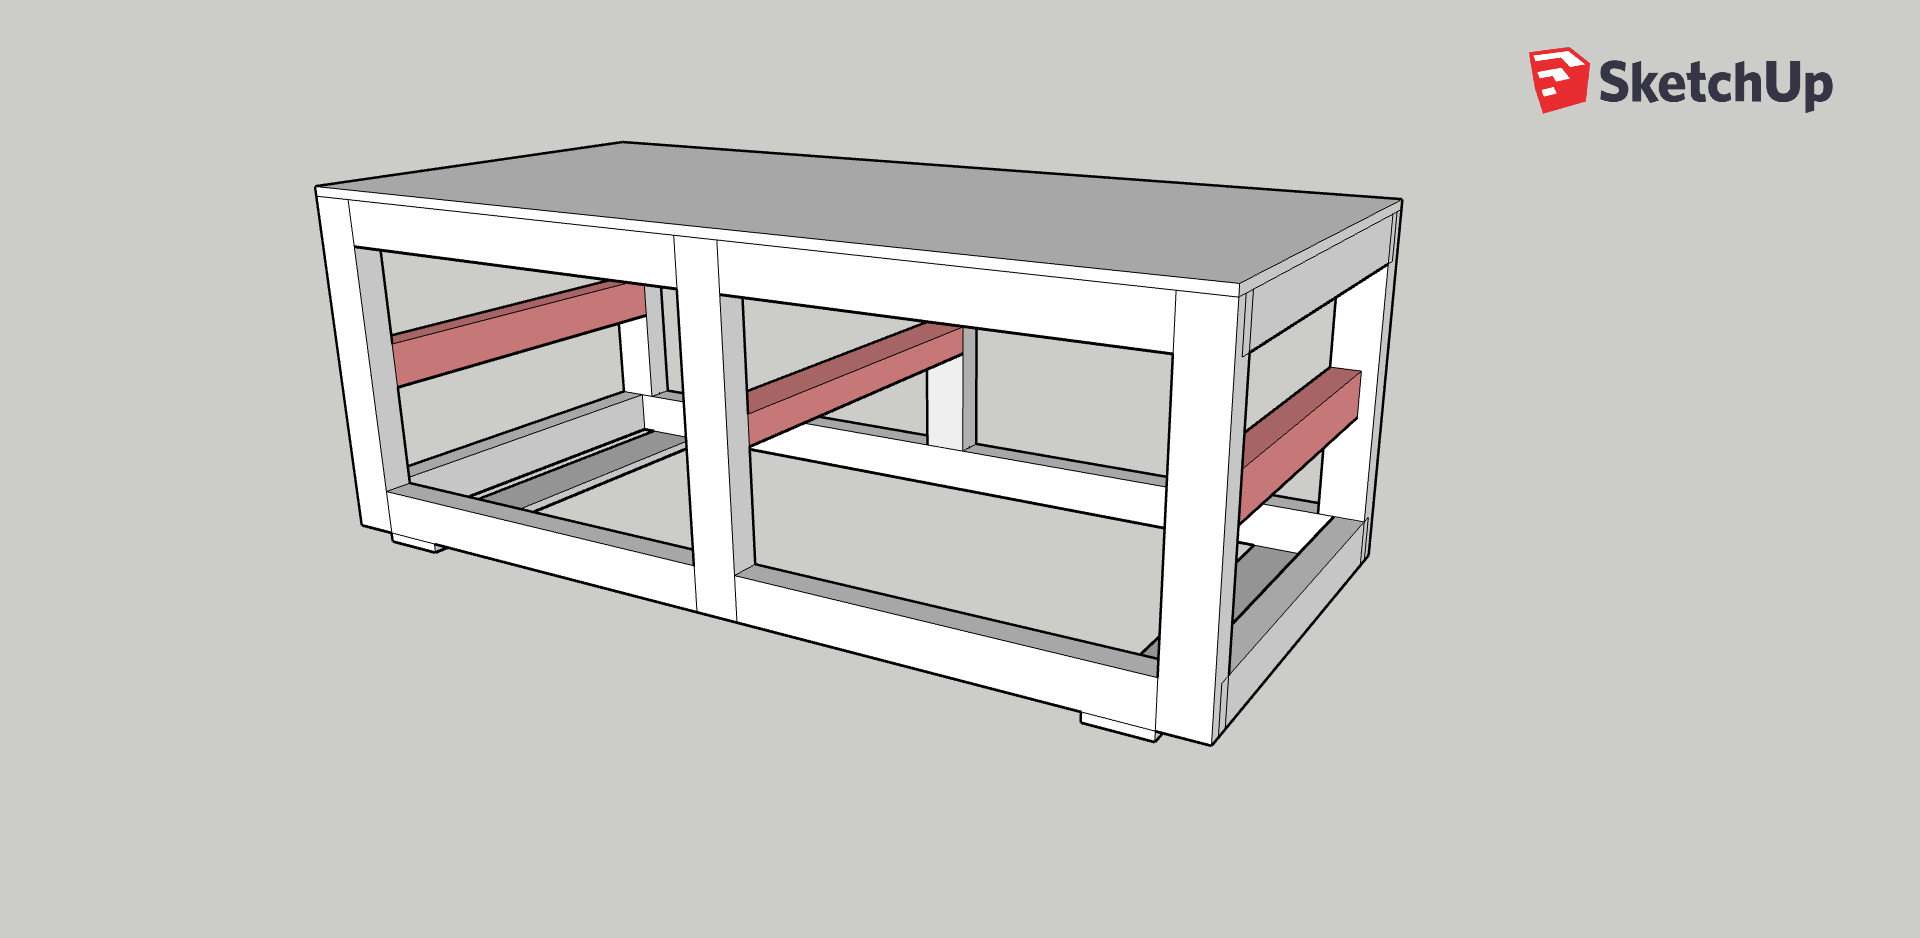
- [4 pcs.] [Short Struts horizontally – red] 58x38x484 mm square timber (e.g. spruce/fir/pine)
- [3 pcs.] [Short Struts horizontally – red (for mounting the drawer runners)] 58x38x484 mm square timber (e.g. spruce/fir/pine)
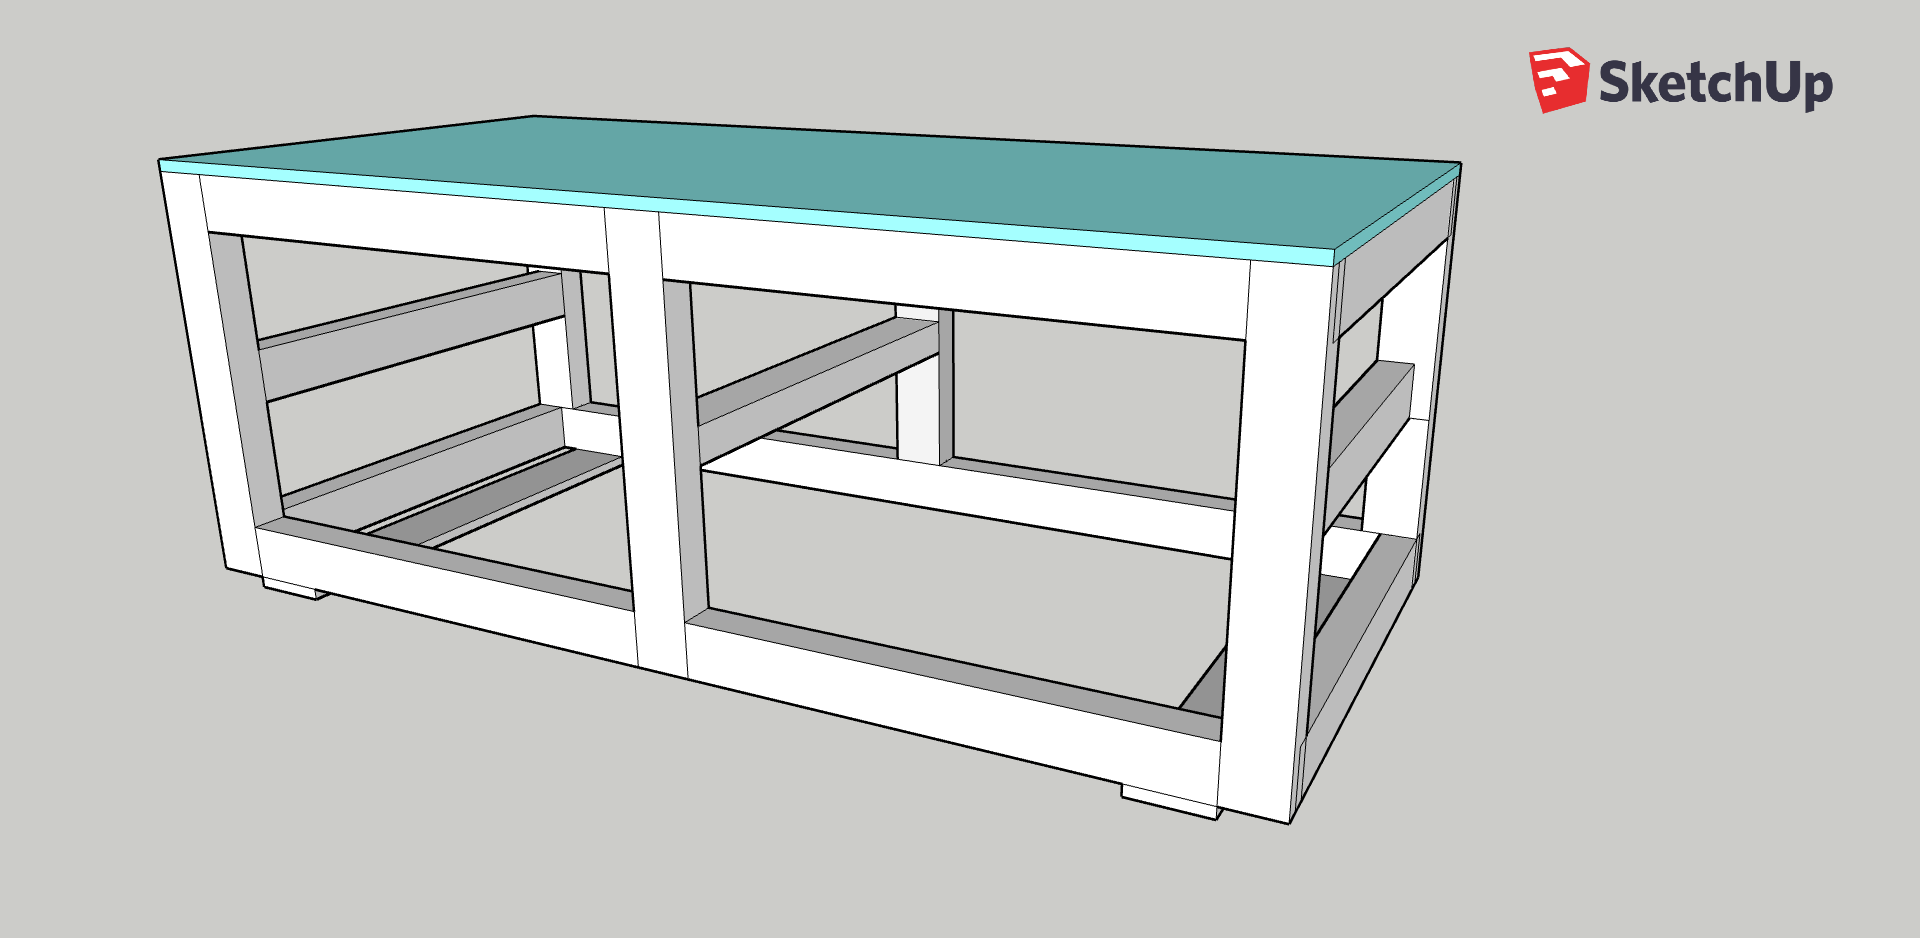
- [1 pc.] [tabletop] 12mm plywood 1200×560 mm
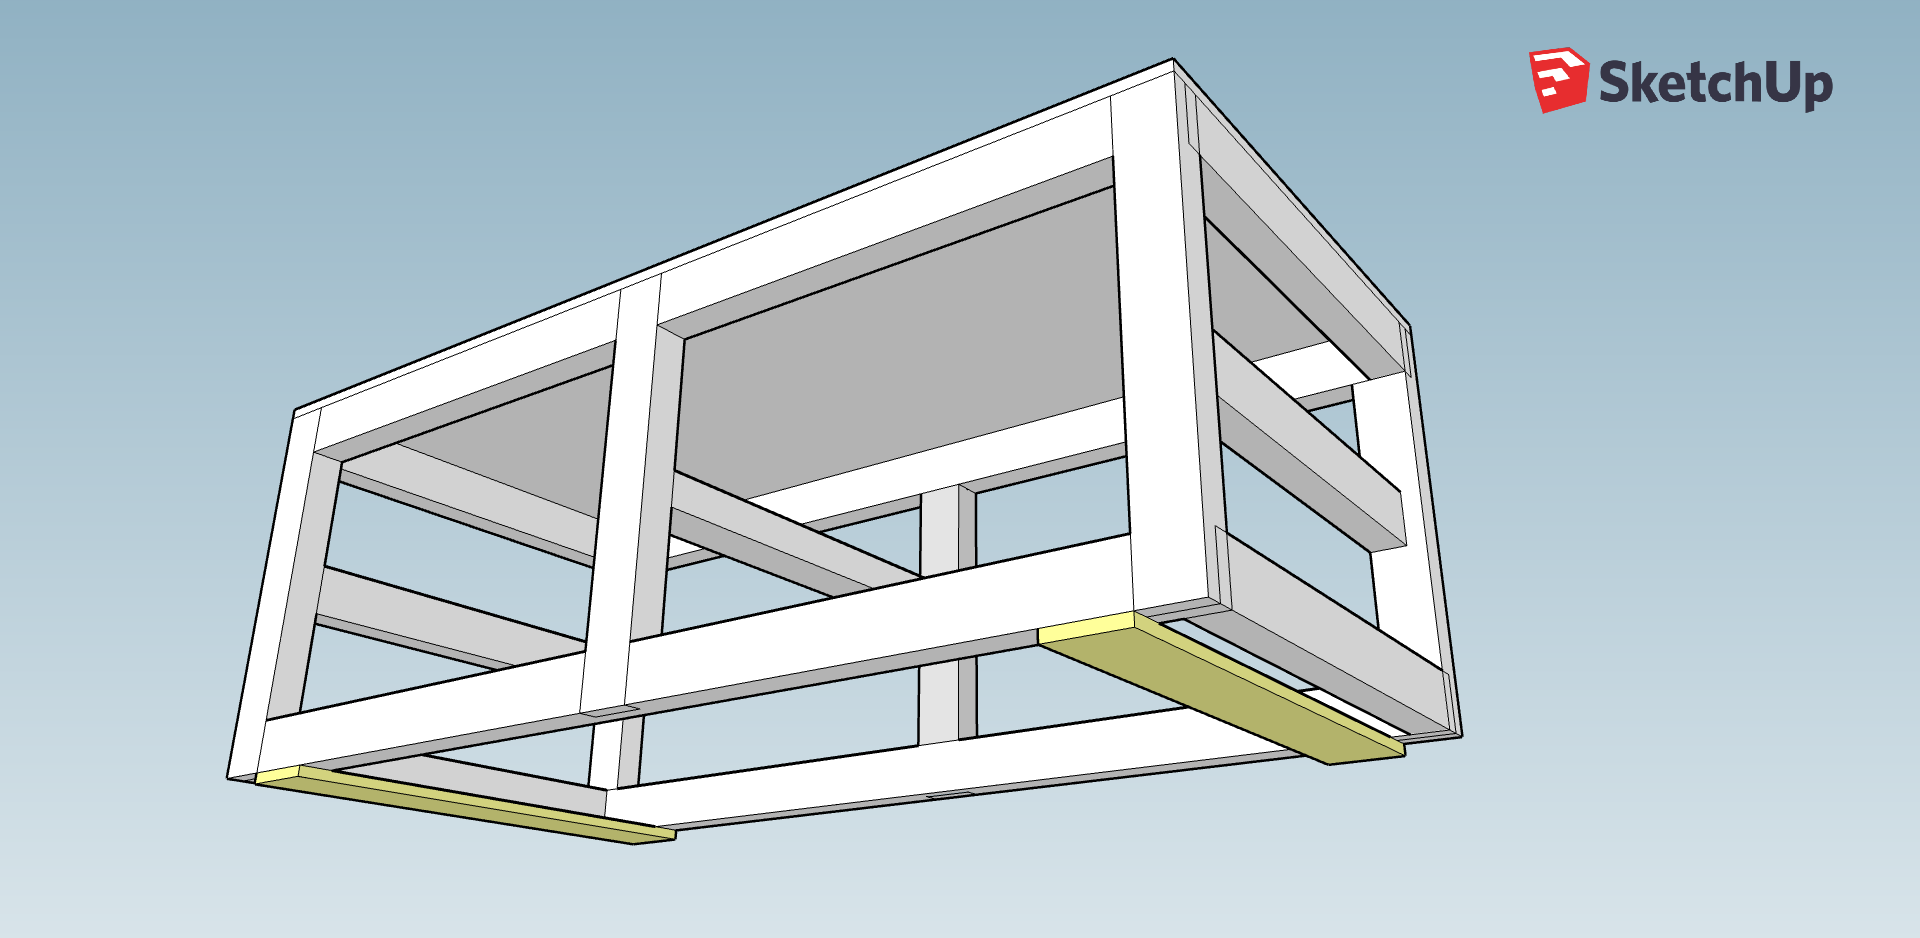
- [2 pcs.] [Mount for the castors] 12 mm wooden board 560×80 mm (e.g. spruce/fir/pine)
- [2 pcs.] [Saw Stand Back Panel] 3mm white hardboard sheet 530×340 mm
- [2 pcs.] [Saw Stand Side Panel] 3mm white hardboard sheet 500×340 mm
- 4 Heavy Duty Castors (with brakes)*
- Wood Screws 4x30mm*
- Wax polish*
- Woodglue*
- [2 pcs.] Hardwood Dowel 1000×12 mm (e.g. Birch or Oak) (optionally)
- Auger Drill Bit 12mm* (optional)
Material – router table
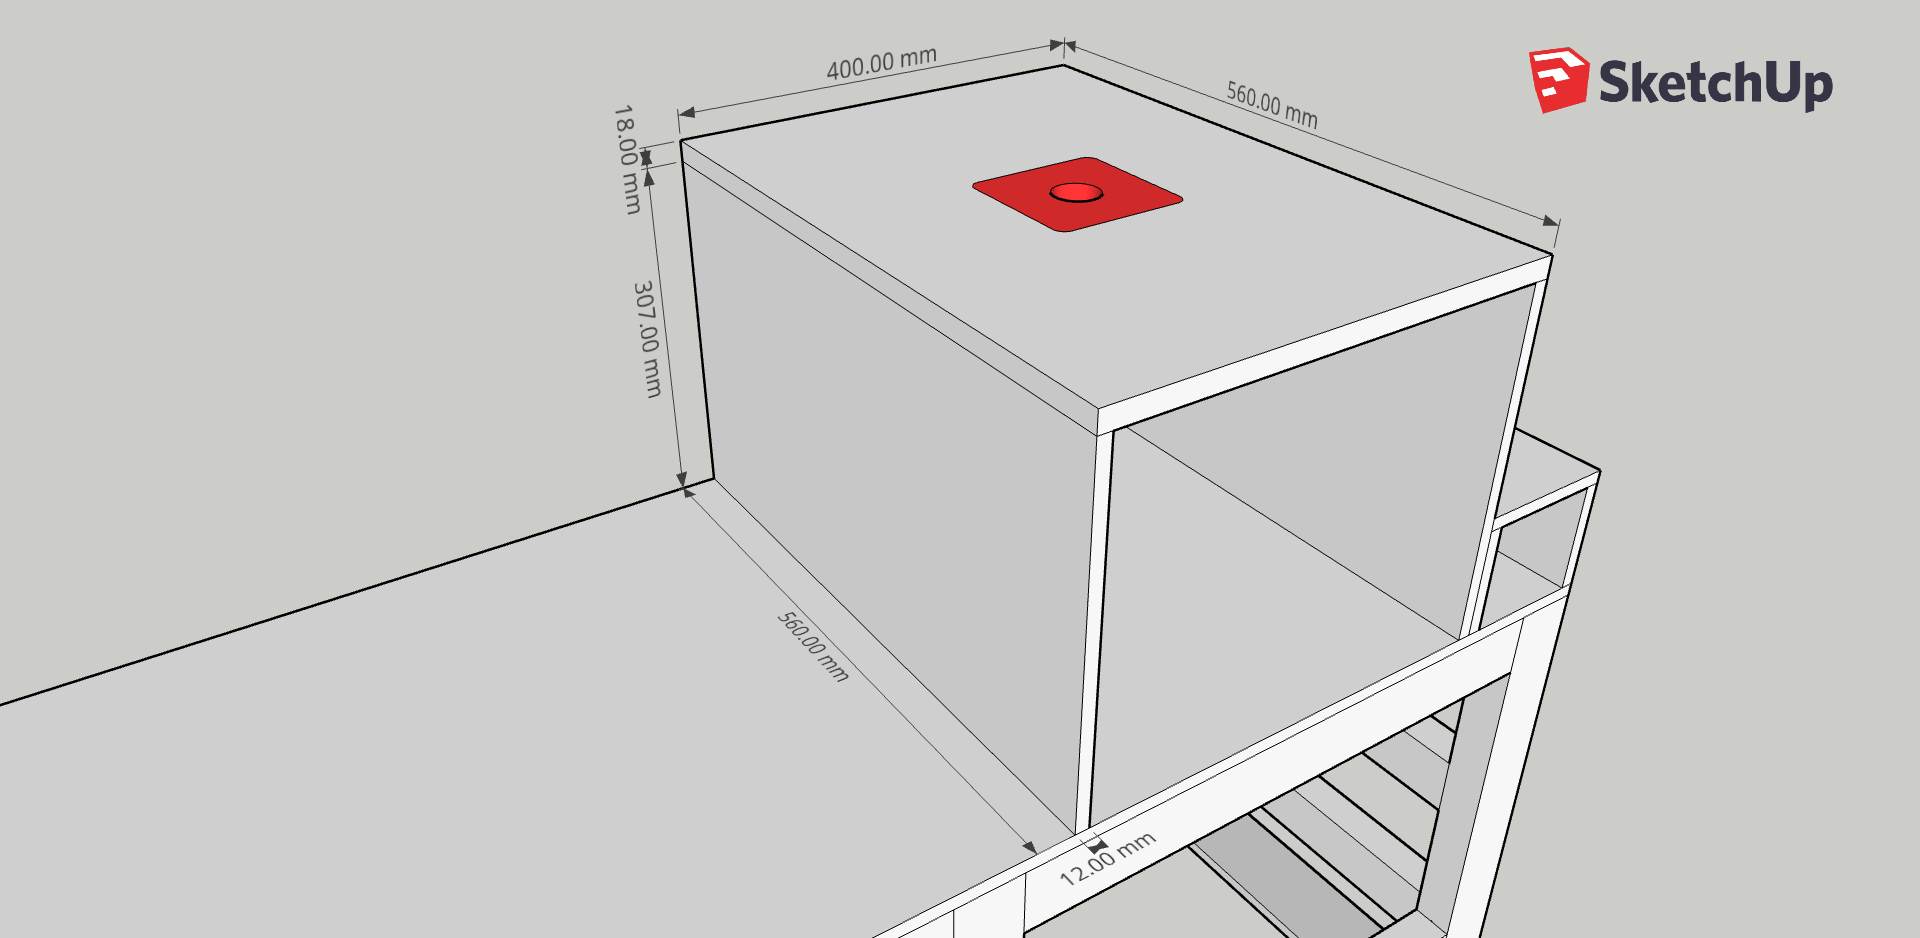
- [1 pc.] [tabletop] 18mm film faced plywood (phenolic plywood) 400×560 mm
- [2 pcs.] [side plates ] 12mm film faced plywood 560×307 mm
- [2 pcs.] [side plates router bit storage] 12mm film faced plywood 560×100 mm
- [1 pc.] [top router bit storage] 12mm film faced plywood 560×130 mm
- [1 pc.] [backplate router bit storage] 12mm film faced plywood 106×100 mm
- [1 pc.] [drawer front router bit storage] 12mm film faced plywood 102×96 mm
- router inser plate for Makita RT0700 router*
- safety switch
- [1 pc.] drawer handle*
- [1 pc.] drawer runner 500mm*
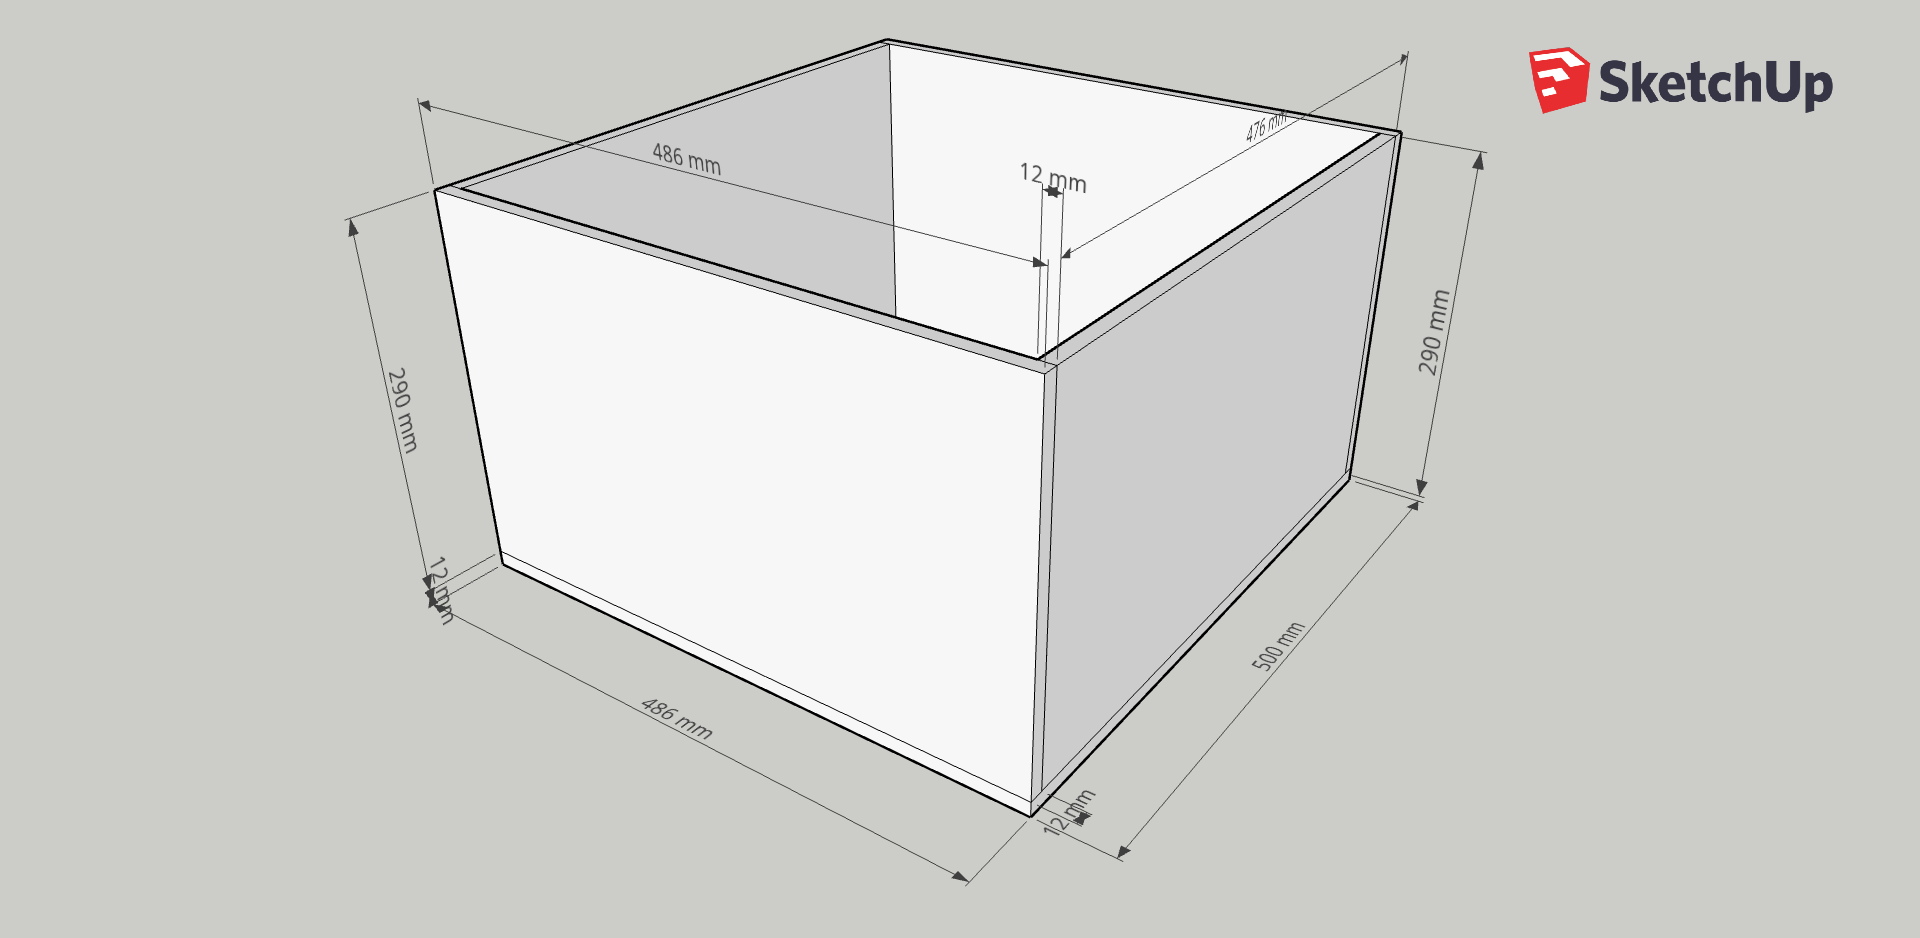
Necessary Material – drawers
- [2 pcs.] [bottom] 12mm plywood 486×500 mm
- [4 pcs.] [side plates] 12mm plywood 476×290 mm
- [4 pcs.] [front- and backplates] 12mm plywood 486×290 mm
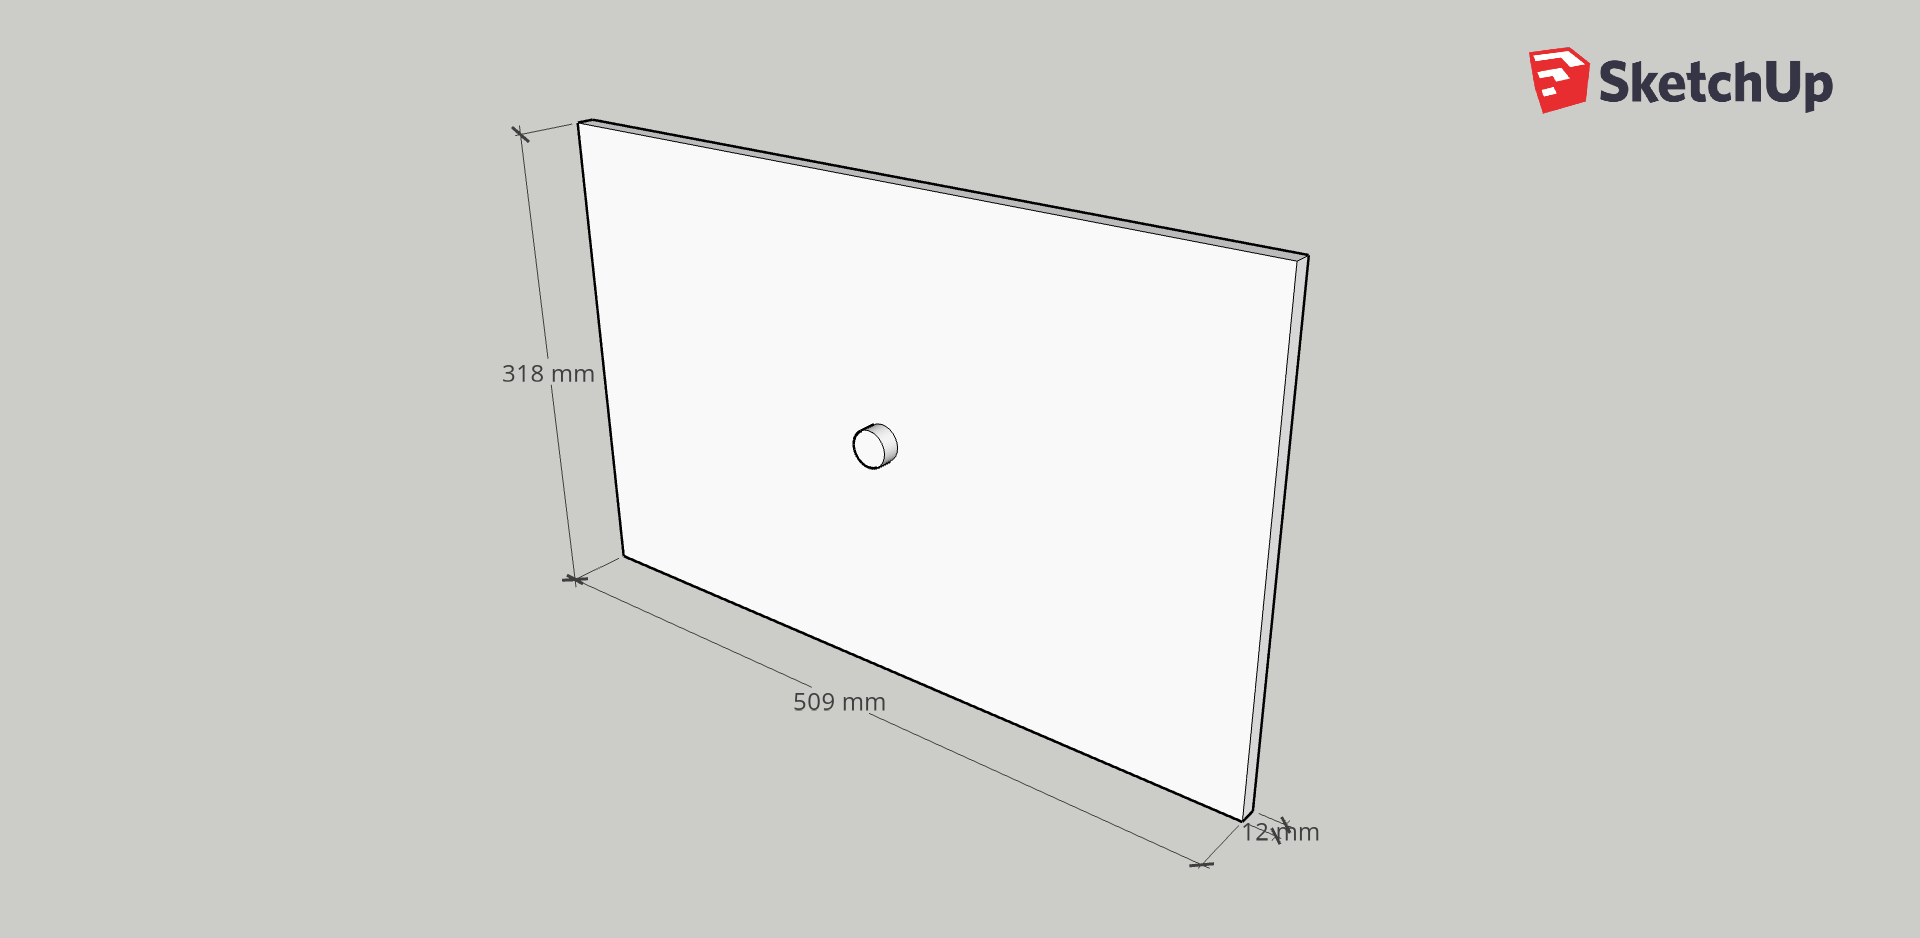
- [2 pcs.] [drawer front] 12mm film faced plywood509×318 mm
- [4 pcs.] drawer runner 500mm*
- Wood screws 3x10mm*
- Wood screws 4x20mm*
- [2 pcs.] drawer handles*
- wood glue* or wood screws 4x25mm*
Material Costs: ca. 200£
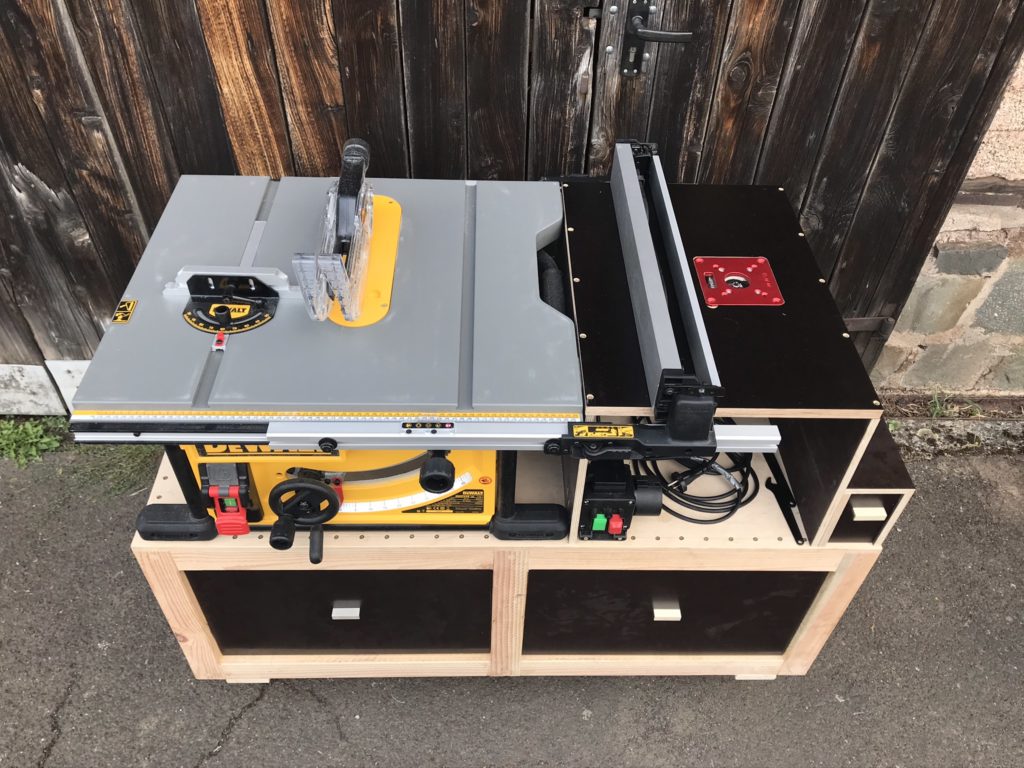
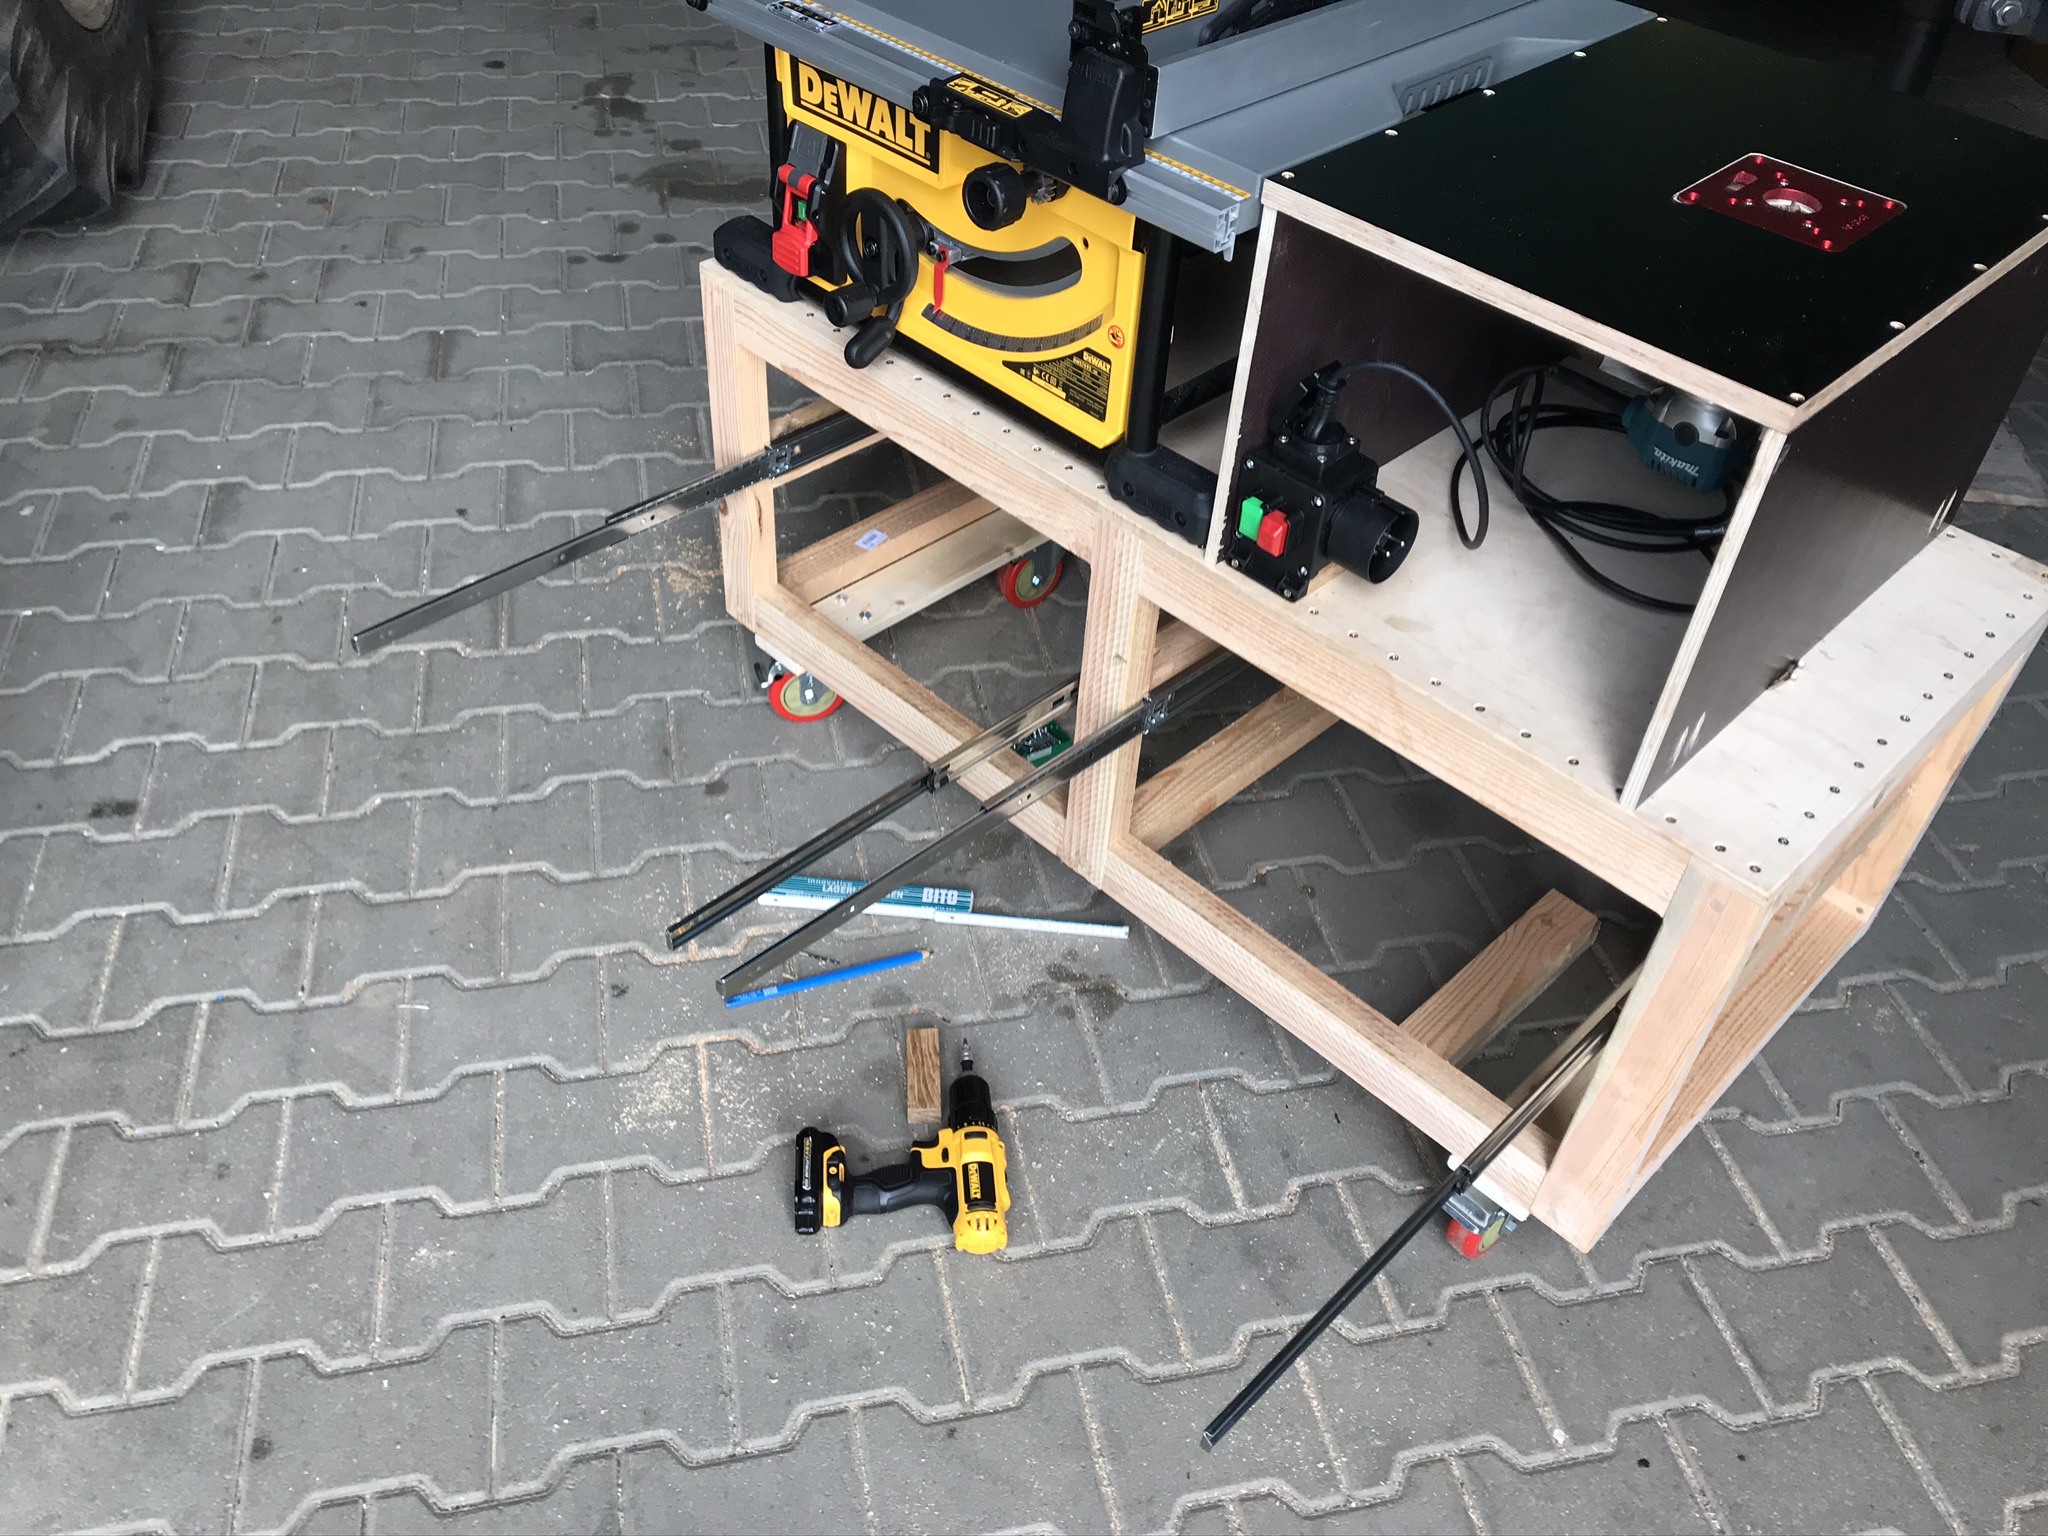
DWE 7492 Table Saw Stand – general considerations
The DIY base for the DeWALT DWE7492 should fulfil several criteria. It should be mobile and have drawers for storing accessories. Furthermore, a router table for a router is to be integrated into the saw stand so that the existing rip fence of the DWE 7492* can also be used for routing. In addition, a protected storage facility for routers will be integrated.
I would also like to adjust the height of the base unit to the height of my self-built workbench (approx. 90 cm). You can find the instructions for rebuilding the timbertime workbench here. The upper edge of the sawing table and the milling table can be up to 1 cm higher than the work surface of the workbench. By doing so large workpieces can be pushed over it without any problems. In this case, the workbench serves as a workpiece support. Alternatively you can always use a saw stand* as a workpiece support tool.
In my case, contrary to the technical data sheet, the tabletop of the DeWALT DWE7492 is 325mm high, not 330mm. Please measure this before cutting the parts for the router table.
I chose the base area of the frame to be roughly about 1200x560mm. So the feet of the DeWALT DWE7492* are exactly flush with the frame. If you wish, you can of course adapt the frame to the common DIY store sheet size of 1200×600mm.
When buying the wood, make sure that you buy squared timber that is as straight as possible – this will save you potential trouble later when building the diy table saw station.
Overlaps are used as joints in the construction of the underframe. The horizontal short struts (marked red in the construction drawing) can be screwed together quickly and easily using the Undercover Jig. Alternatively, the short struts can also be fixed with 12mm dowels made of hardwood dowels. I show you both ways in the instructions and you can decide which option is best for you. It’s quicker to use the undercover jig.
One more thing: building the DWE7492 saw stand yourself is easier than you might think! Just get started!

- HEAVY DUTY CASTORS FOR FURNITURE – Heavy Duty Casters Wheels Rotate 360 degrees. Smooth & Silent & Sturdy. When brakes are applied both fixing plate and wheels will be locked simultaneously.
- FLEXIBILITY AND SAFETY – Polyurethane (PU) castor wheels offer the elasticity of rubber wheels combined with the toughness and durability of metal wheels. Safe for all floor types – Heavy Duty Trolley…
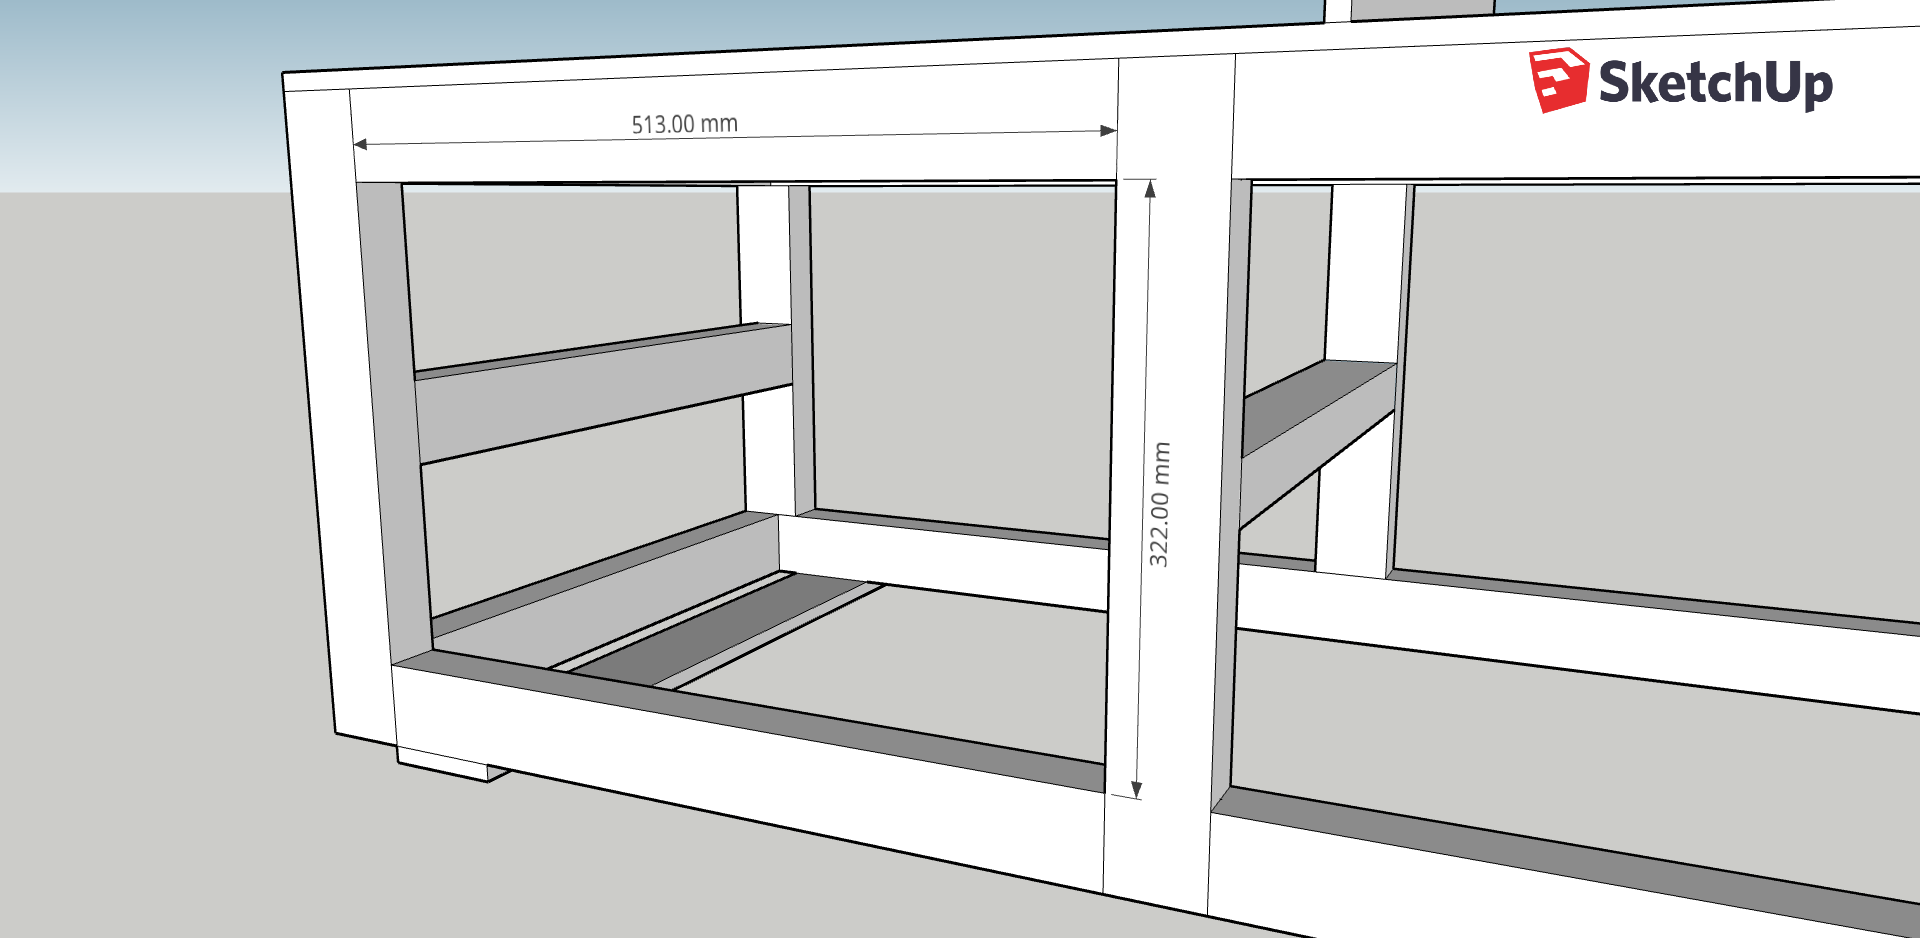
Construction drawings – DeWALT DWE7492 saw stand with router table integrated
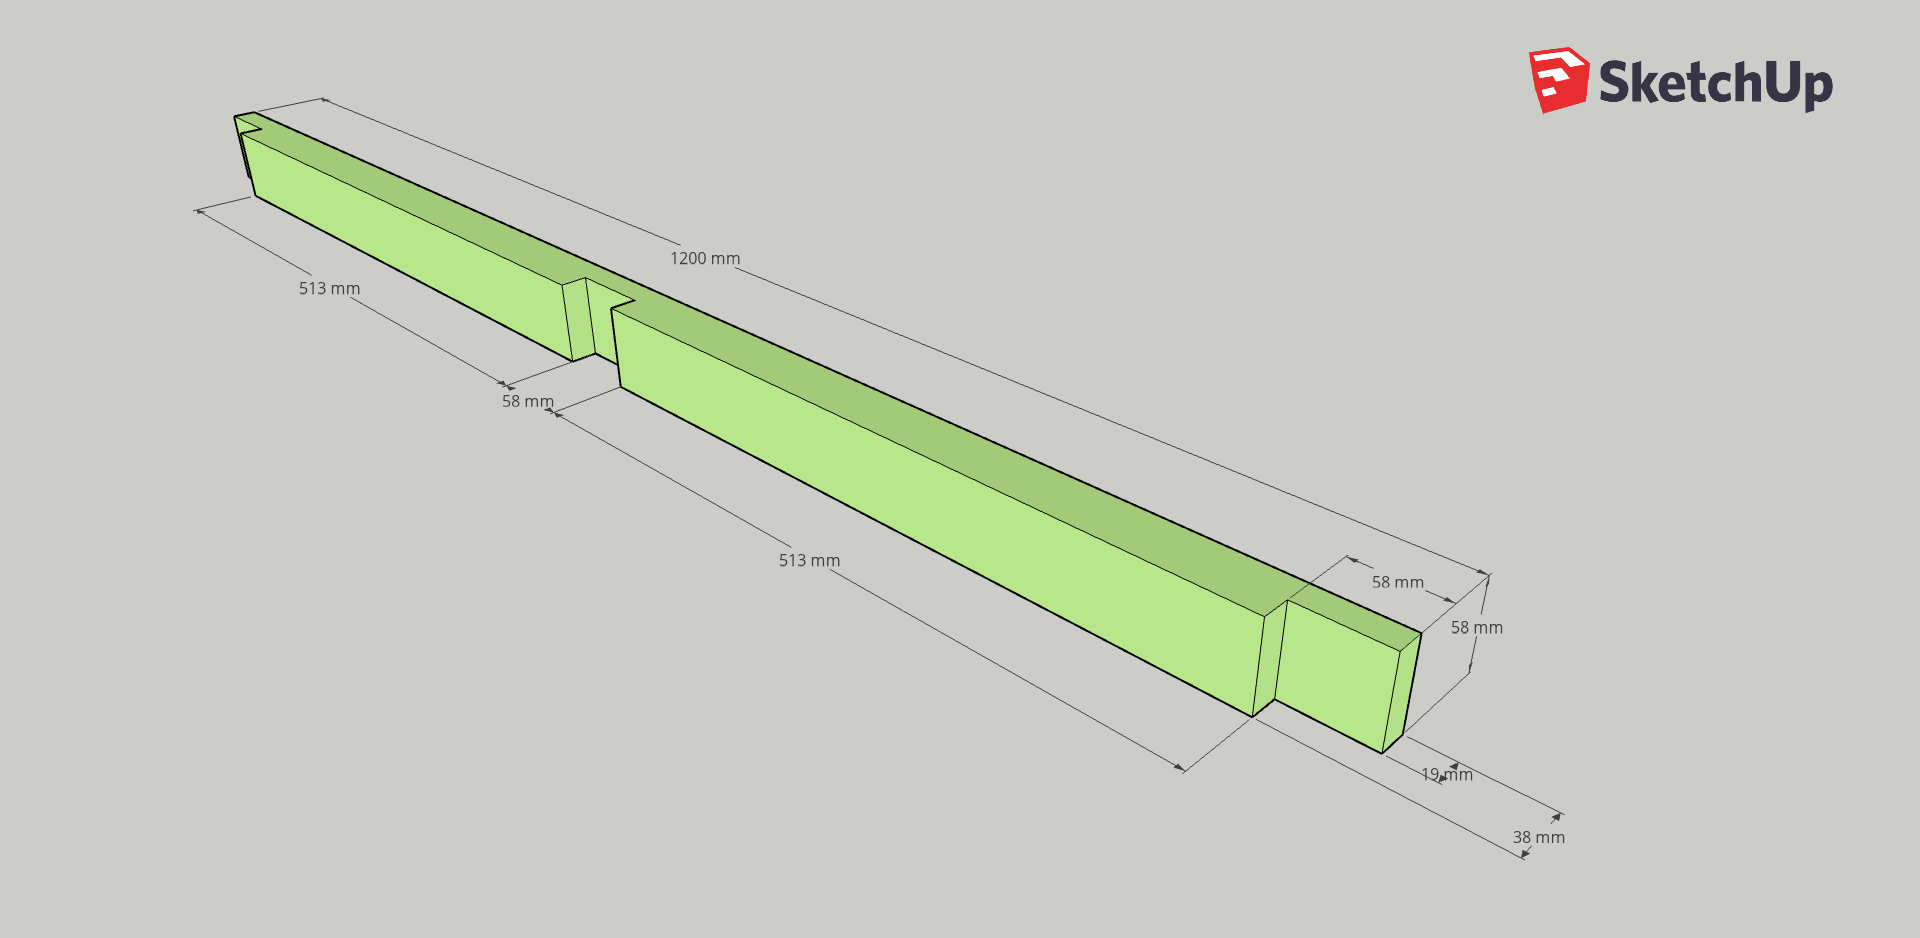
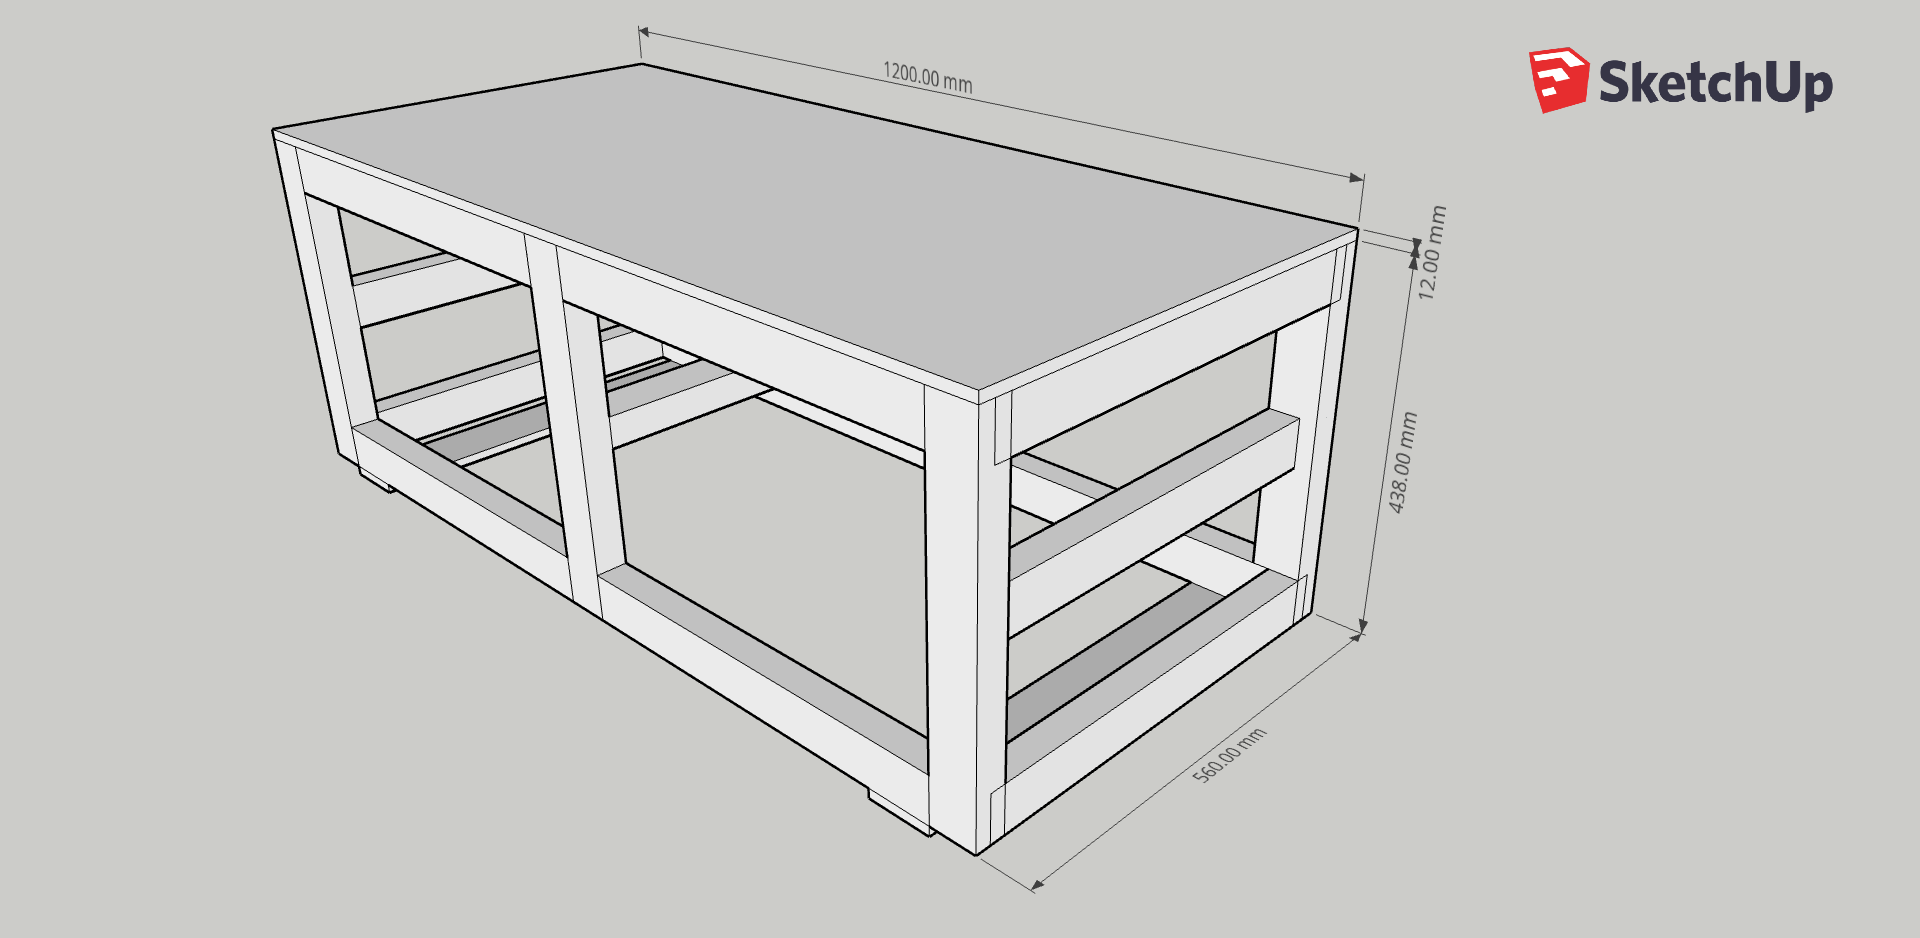
DWE7492 base cabinet – cutting struts and making overlaps
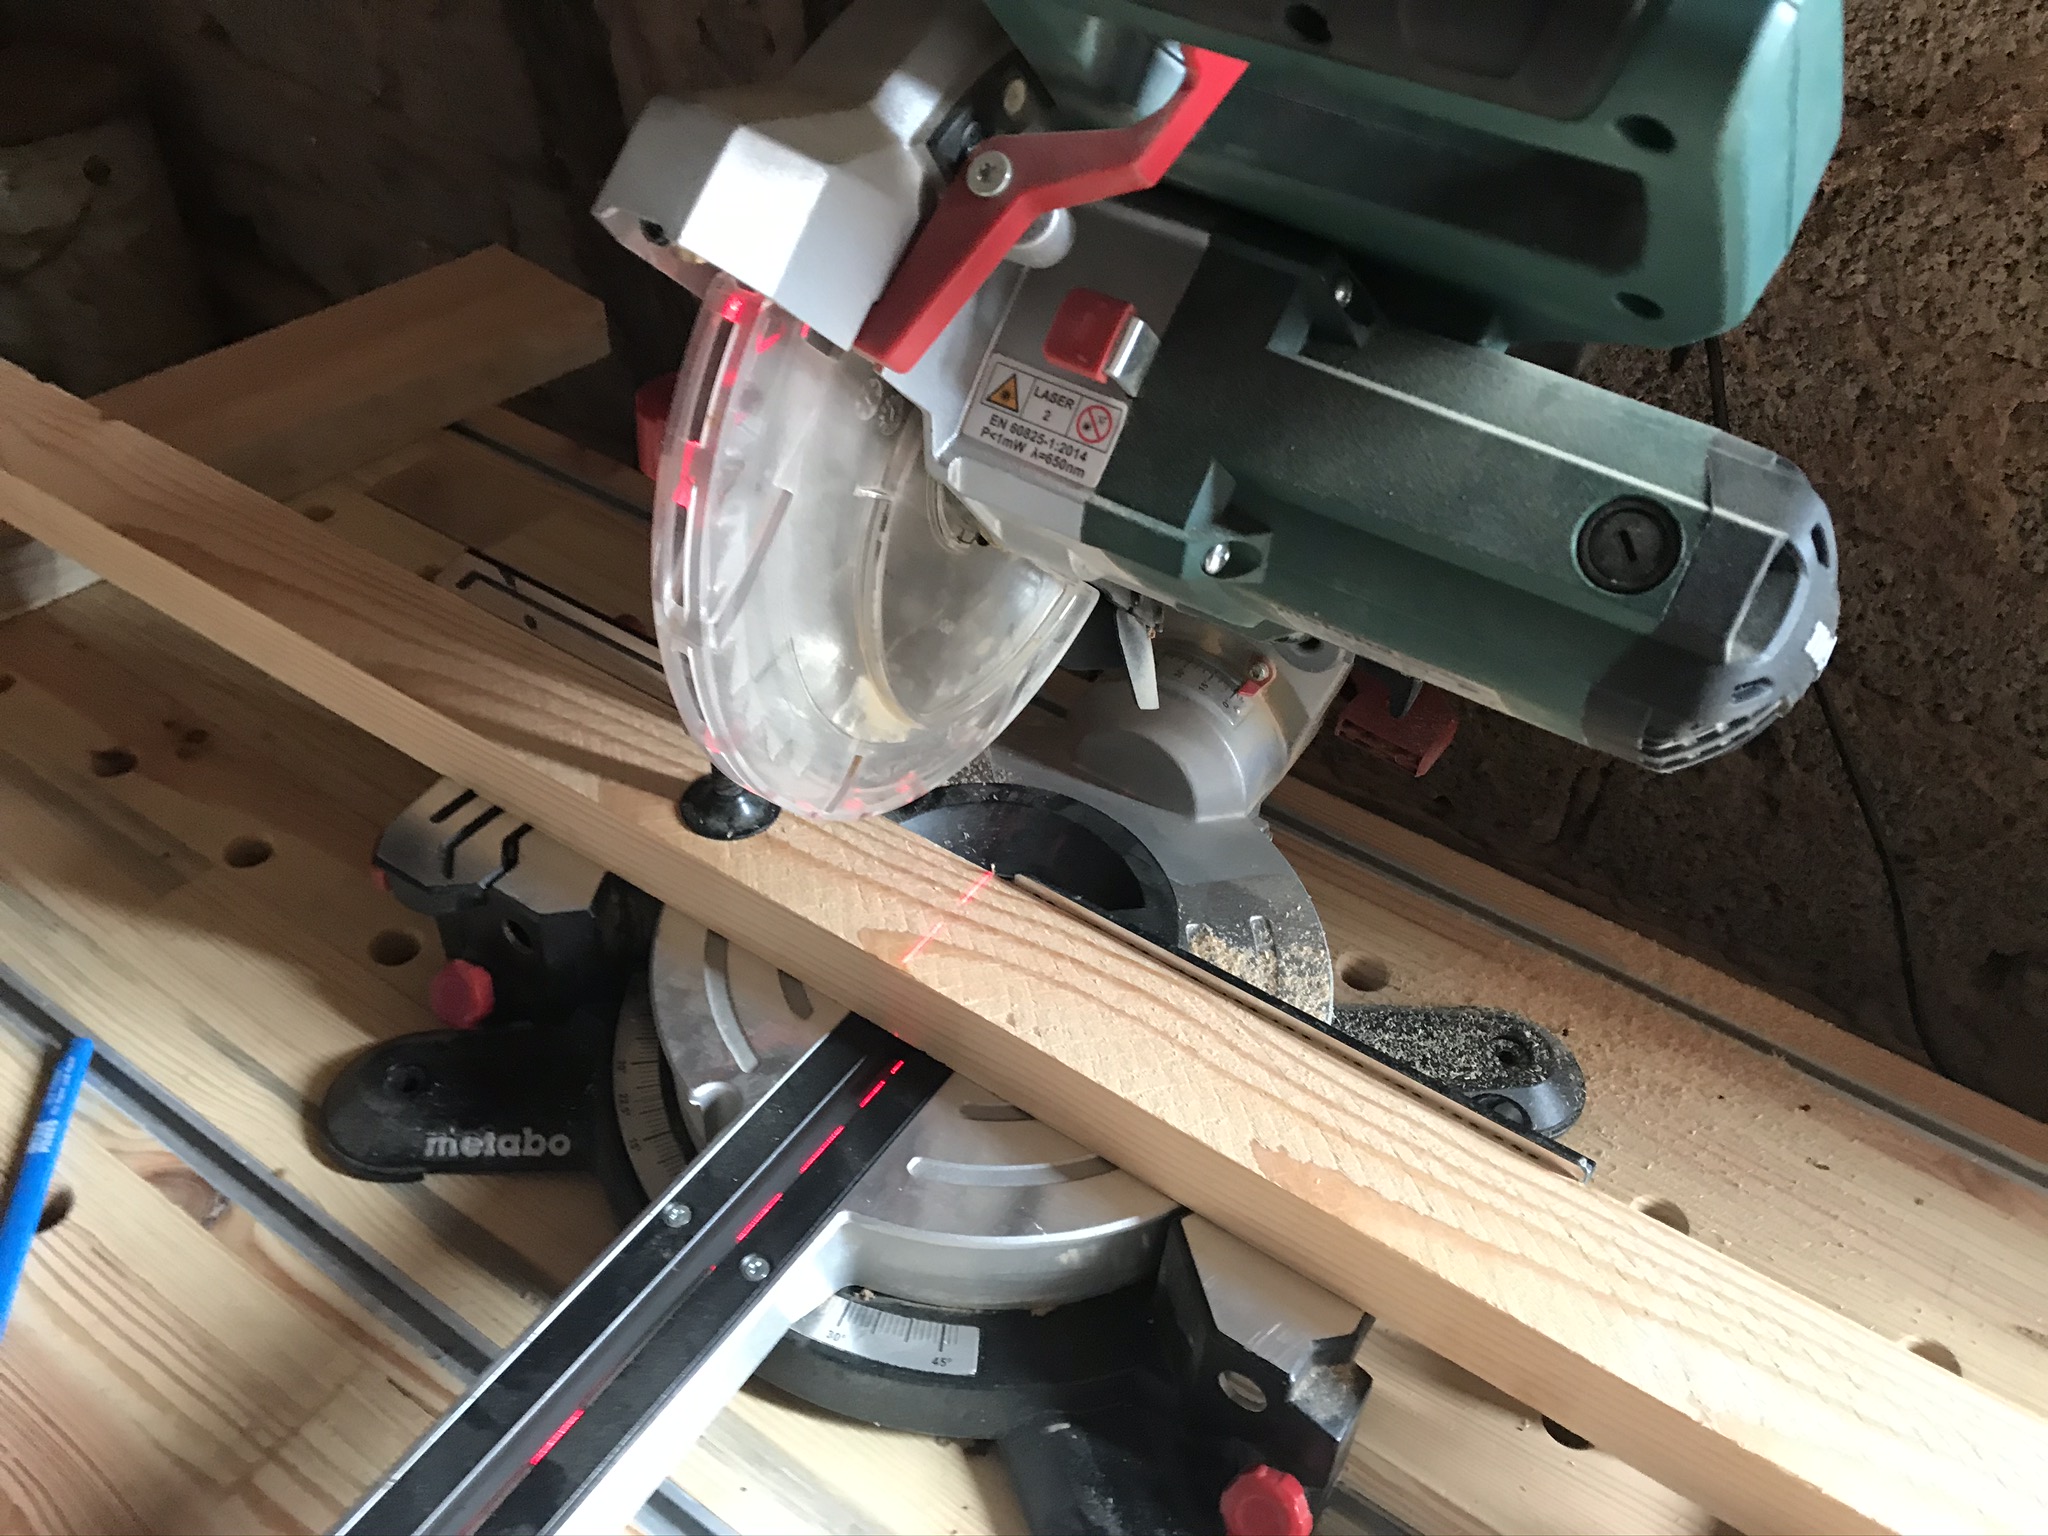
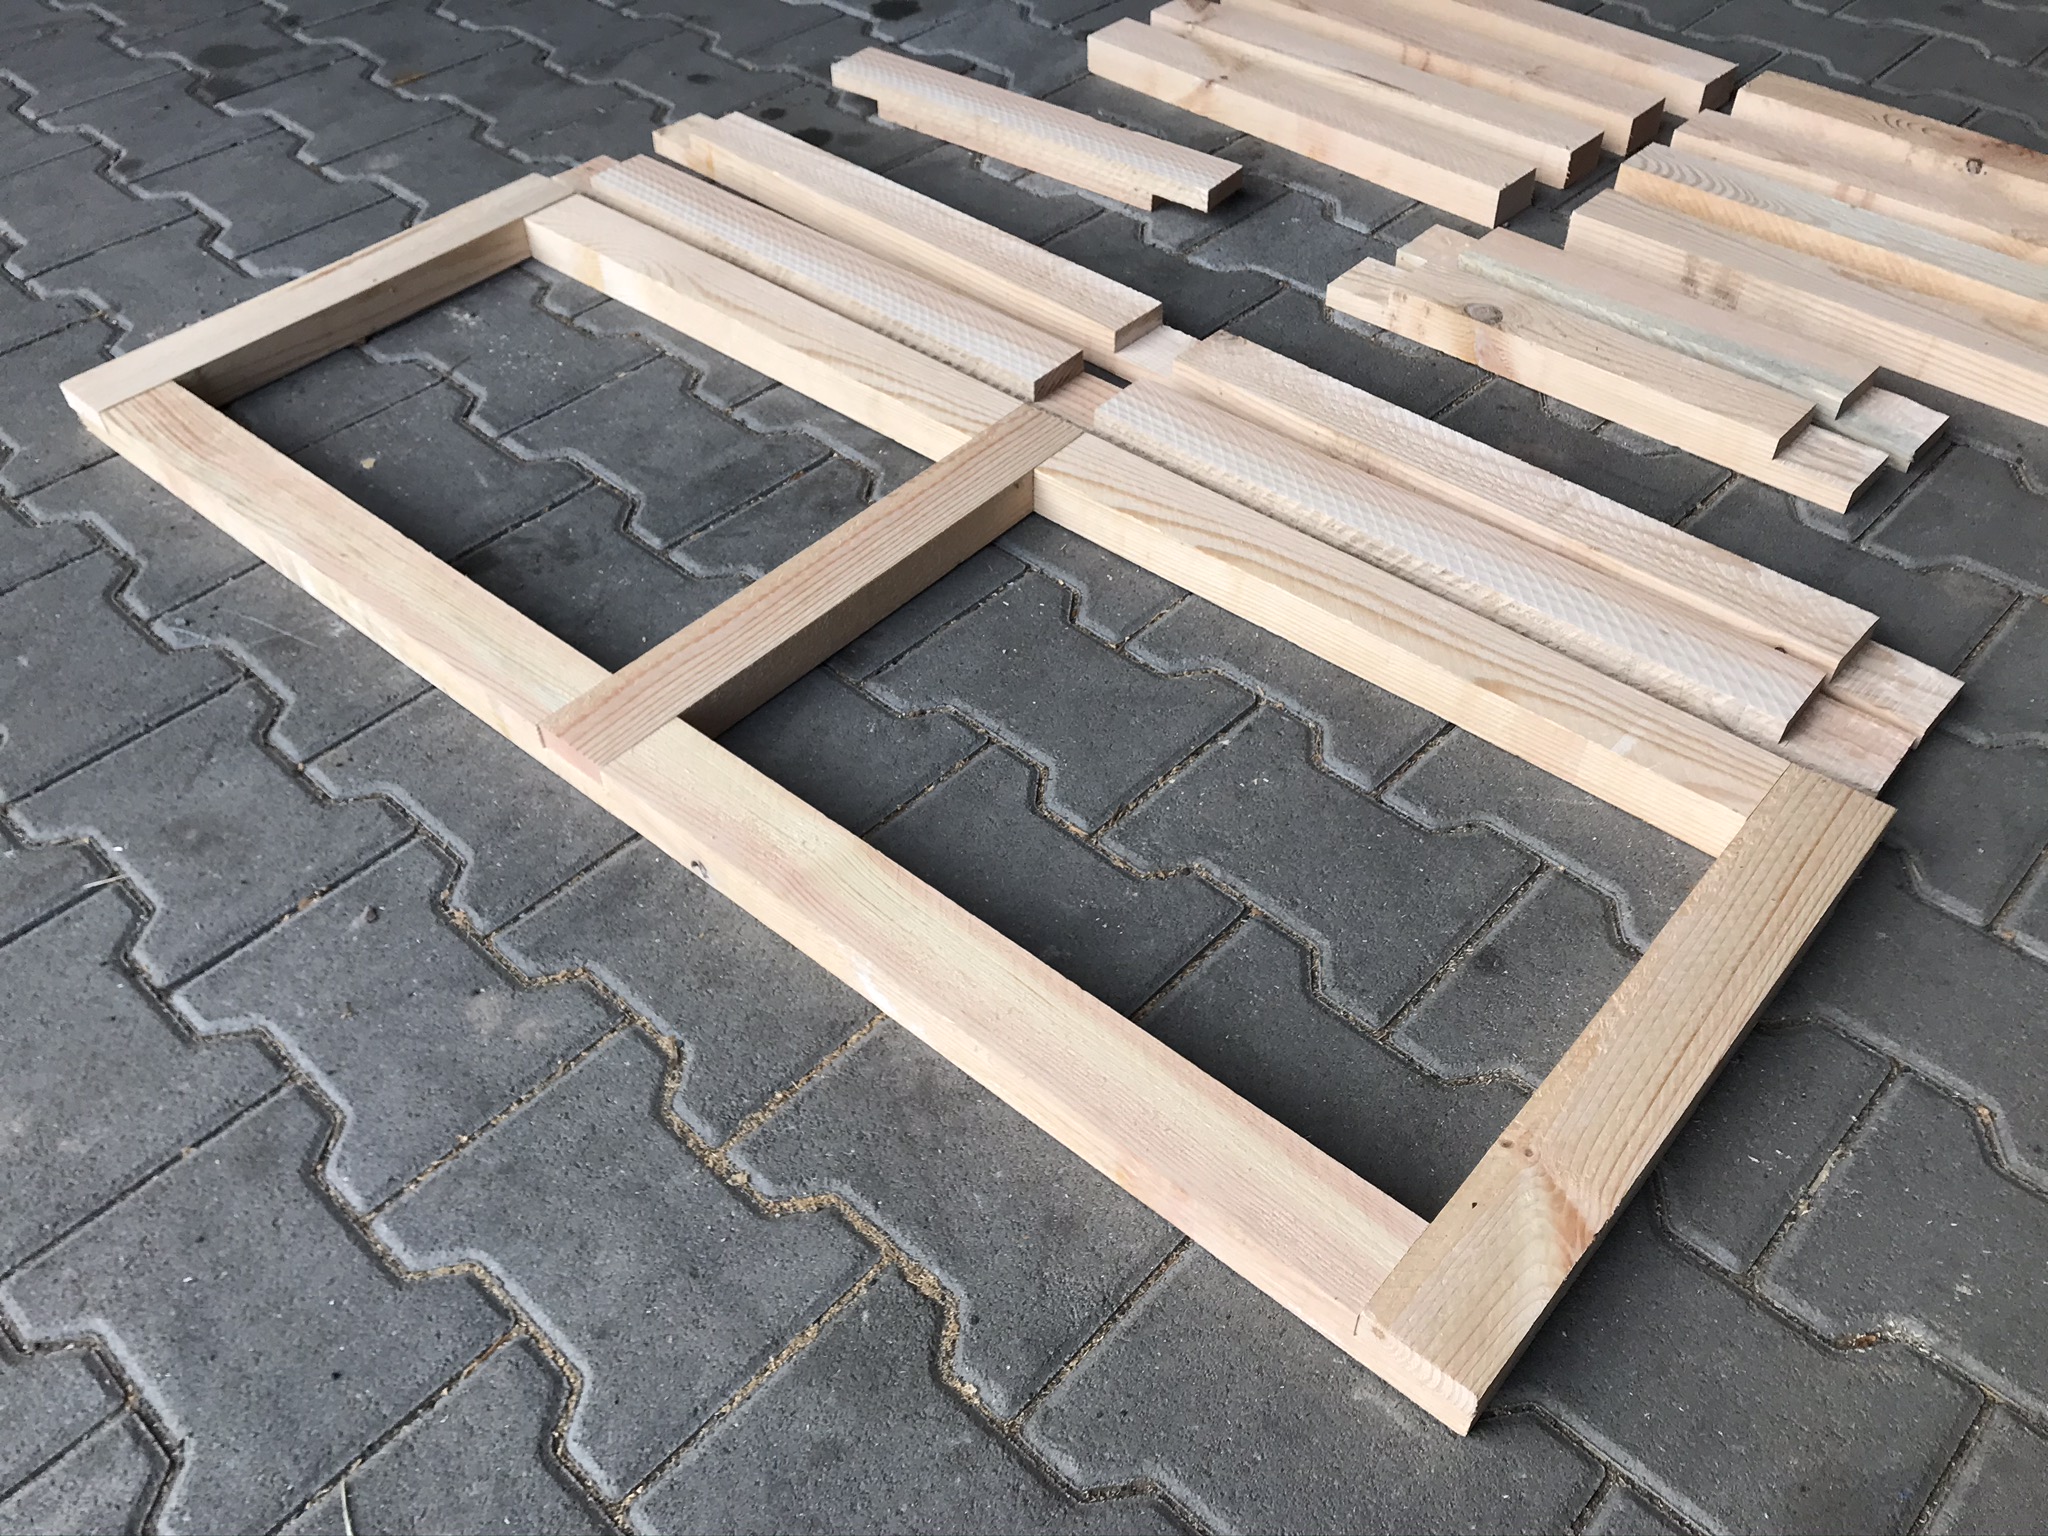
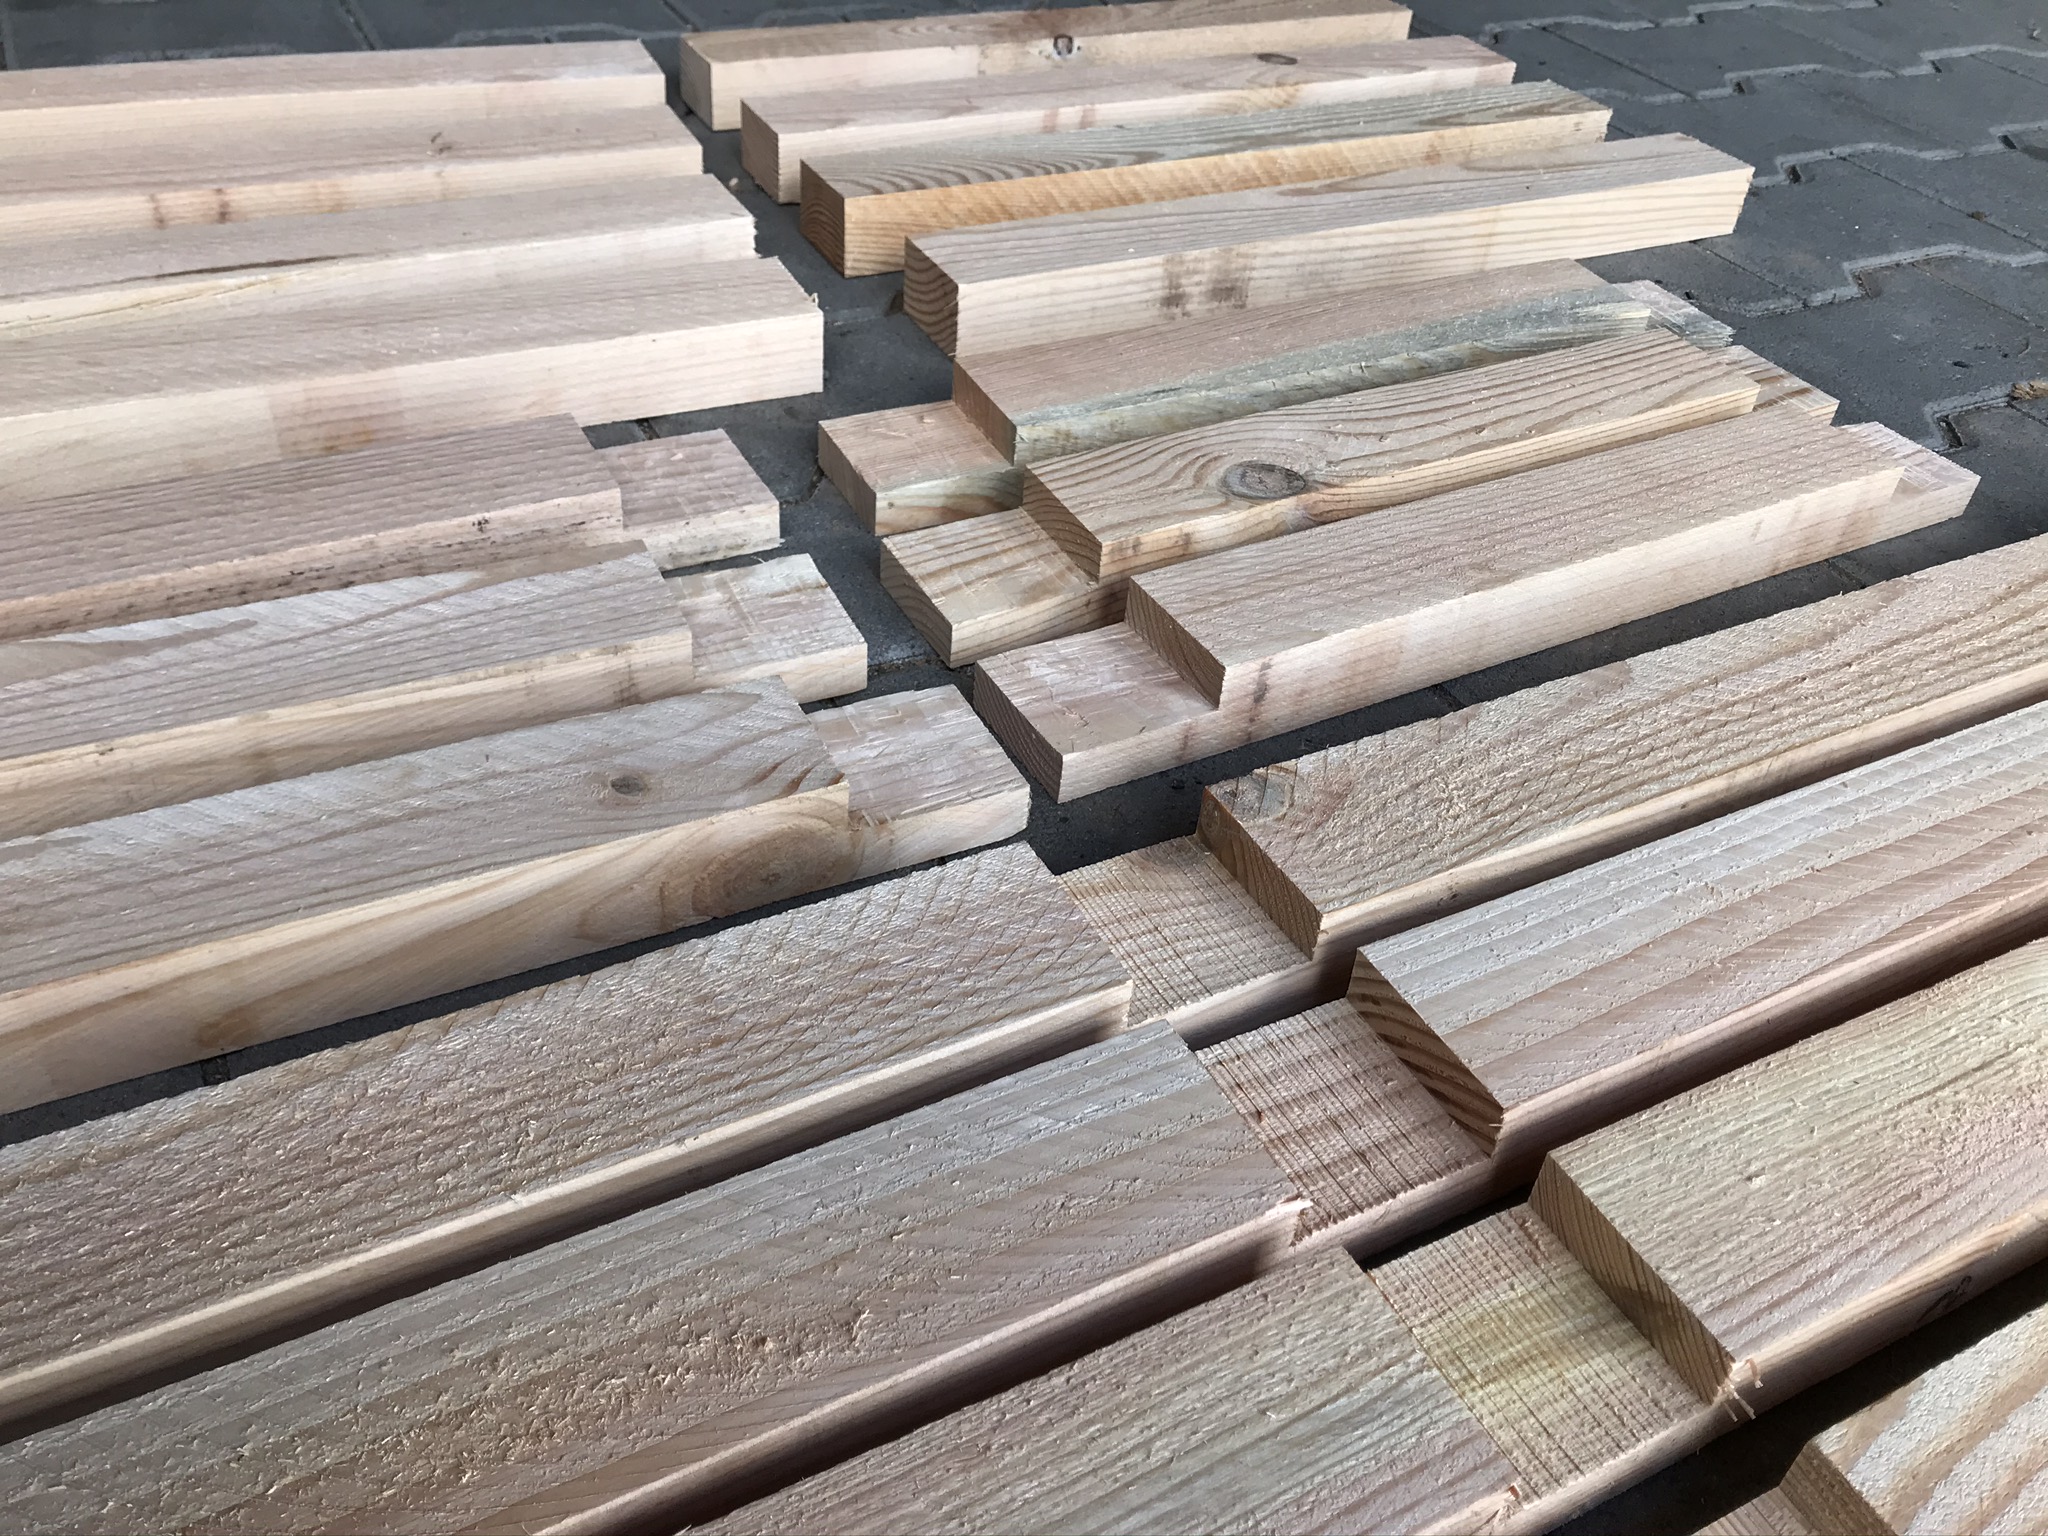
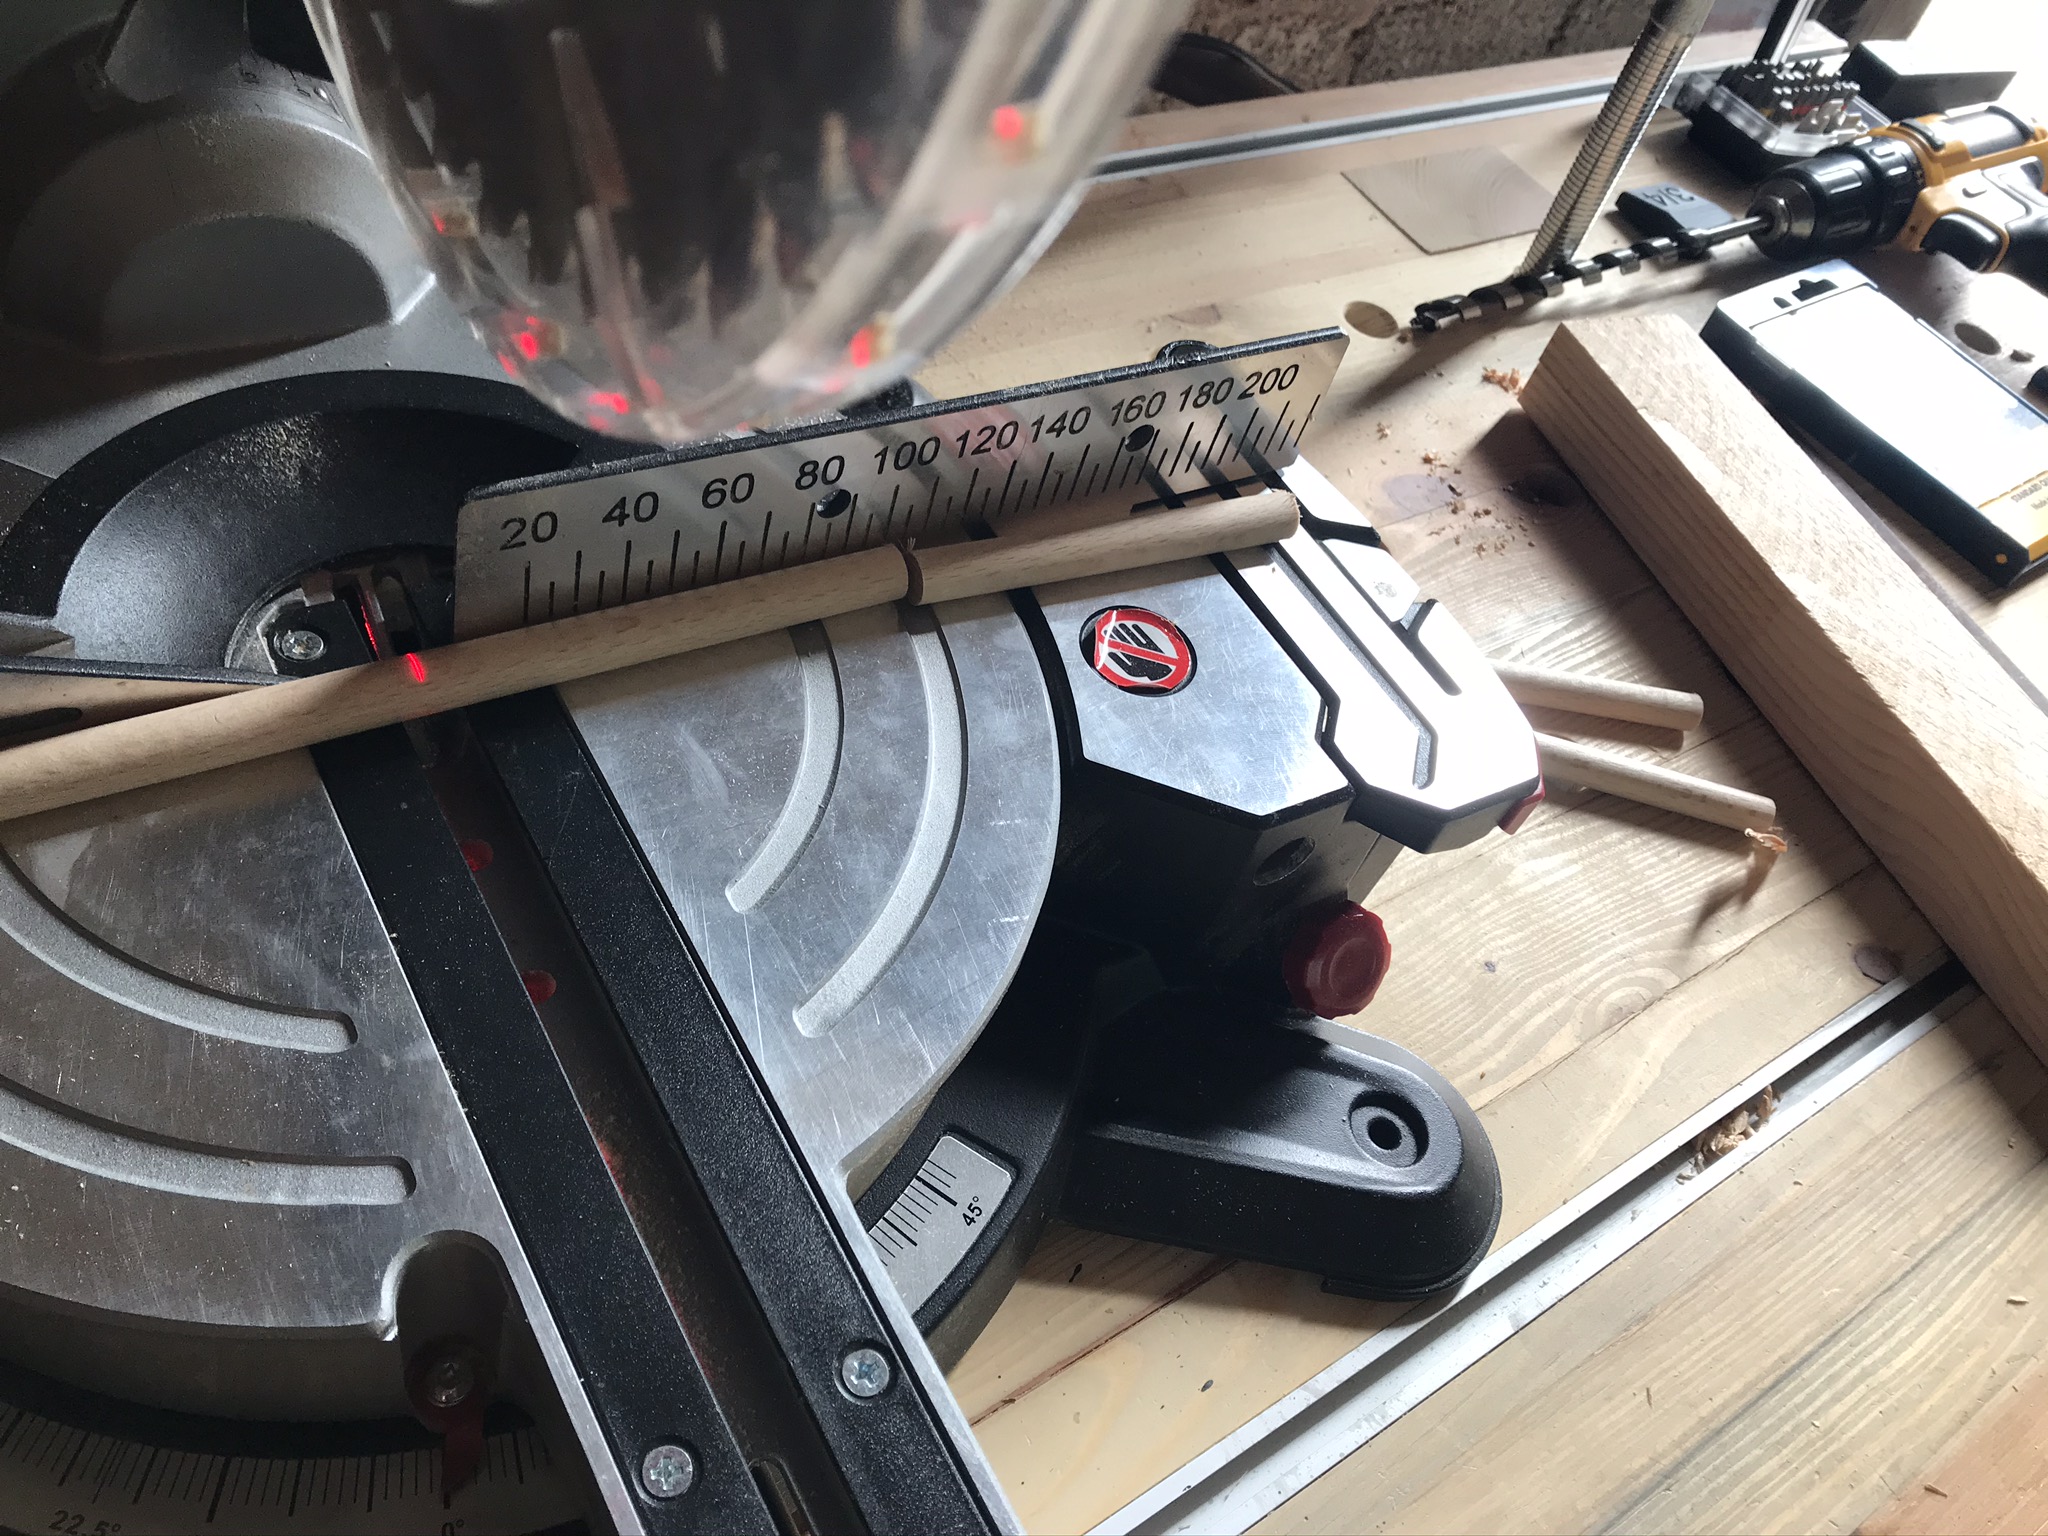
The first step in building the DWE7492 underframe yourself is to cut the frame wood. You cut this to the appropriate lengths with the mitre saw* according to the parts list. In total we need 4 long struts, 6 vertical short struts and 7 horizontal short struts.
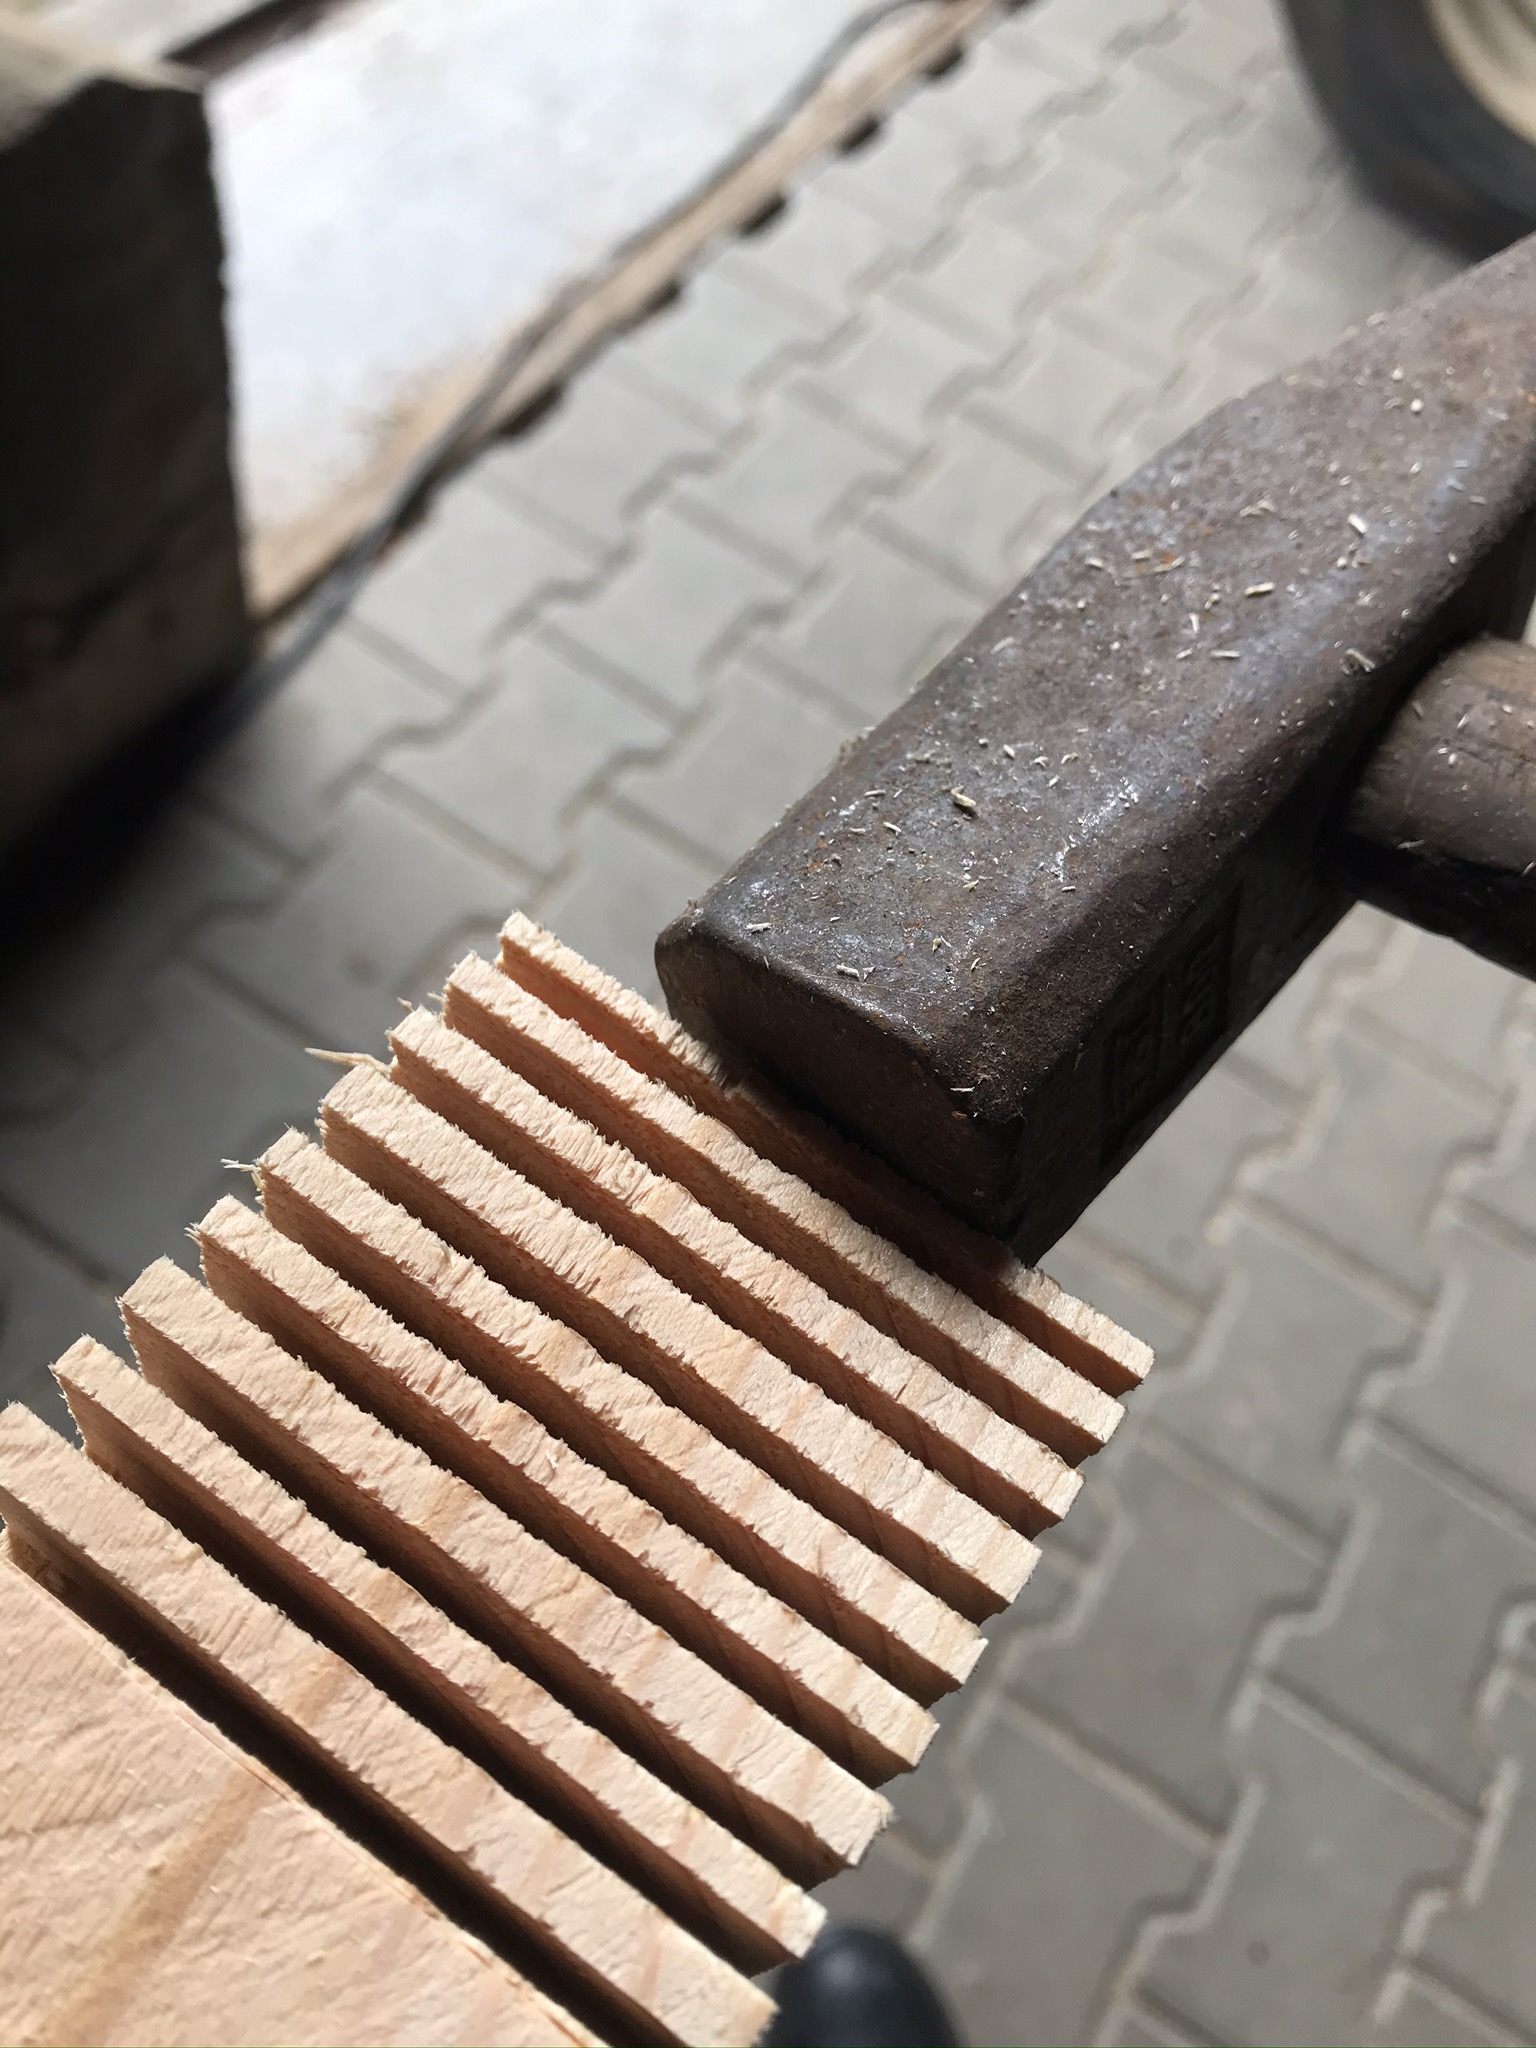
In the next step you draw the recesses for the overlays. Since we are using 58 mm wide frame wood, the recess must also be 58 mm wide. You can set the depth to 19mm on the depth stop of the crosscut saw*.
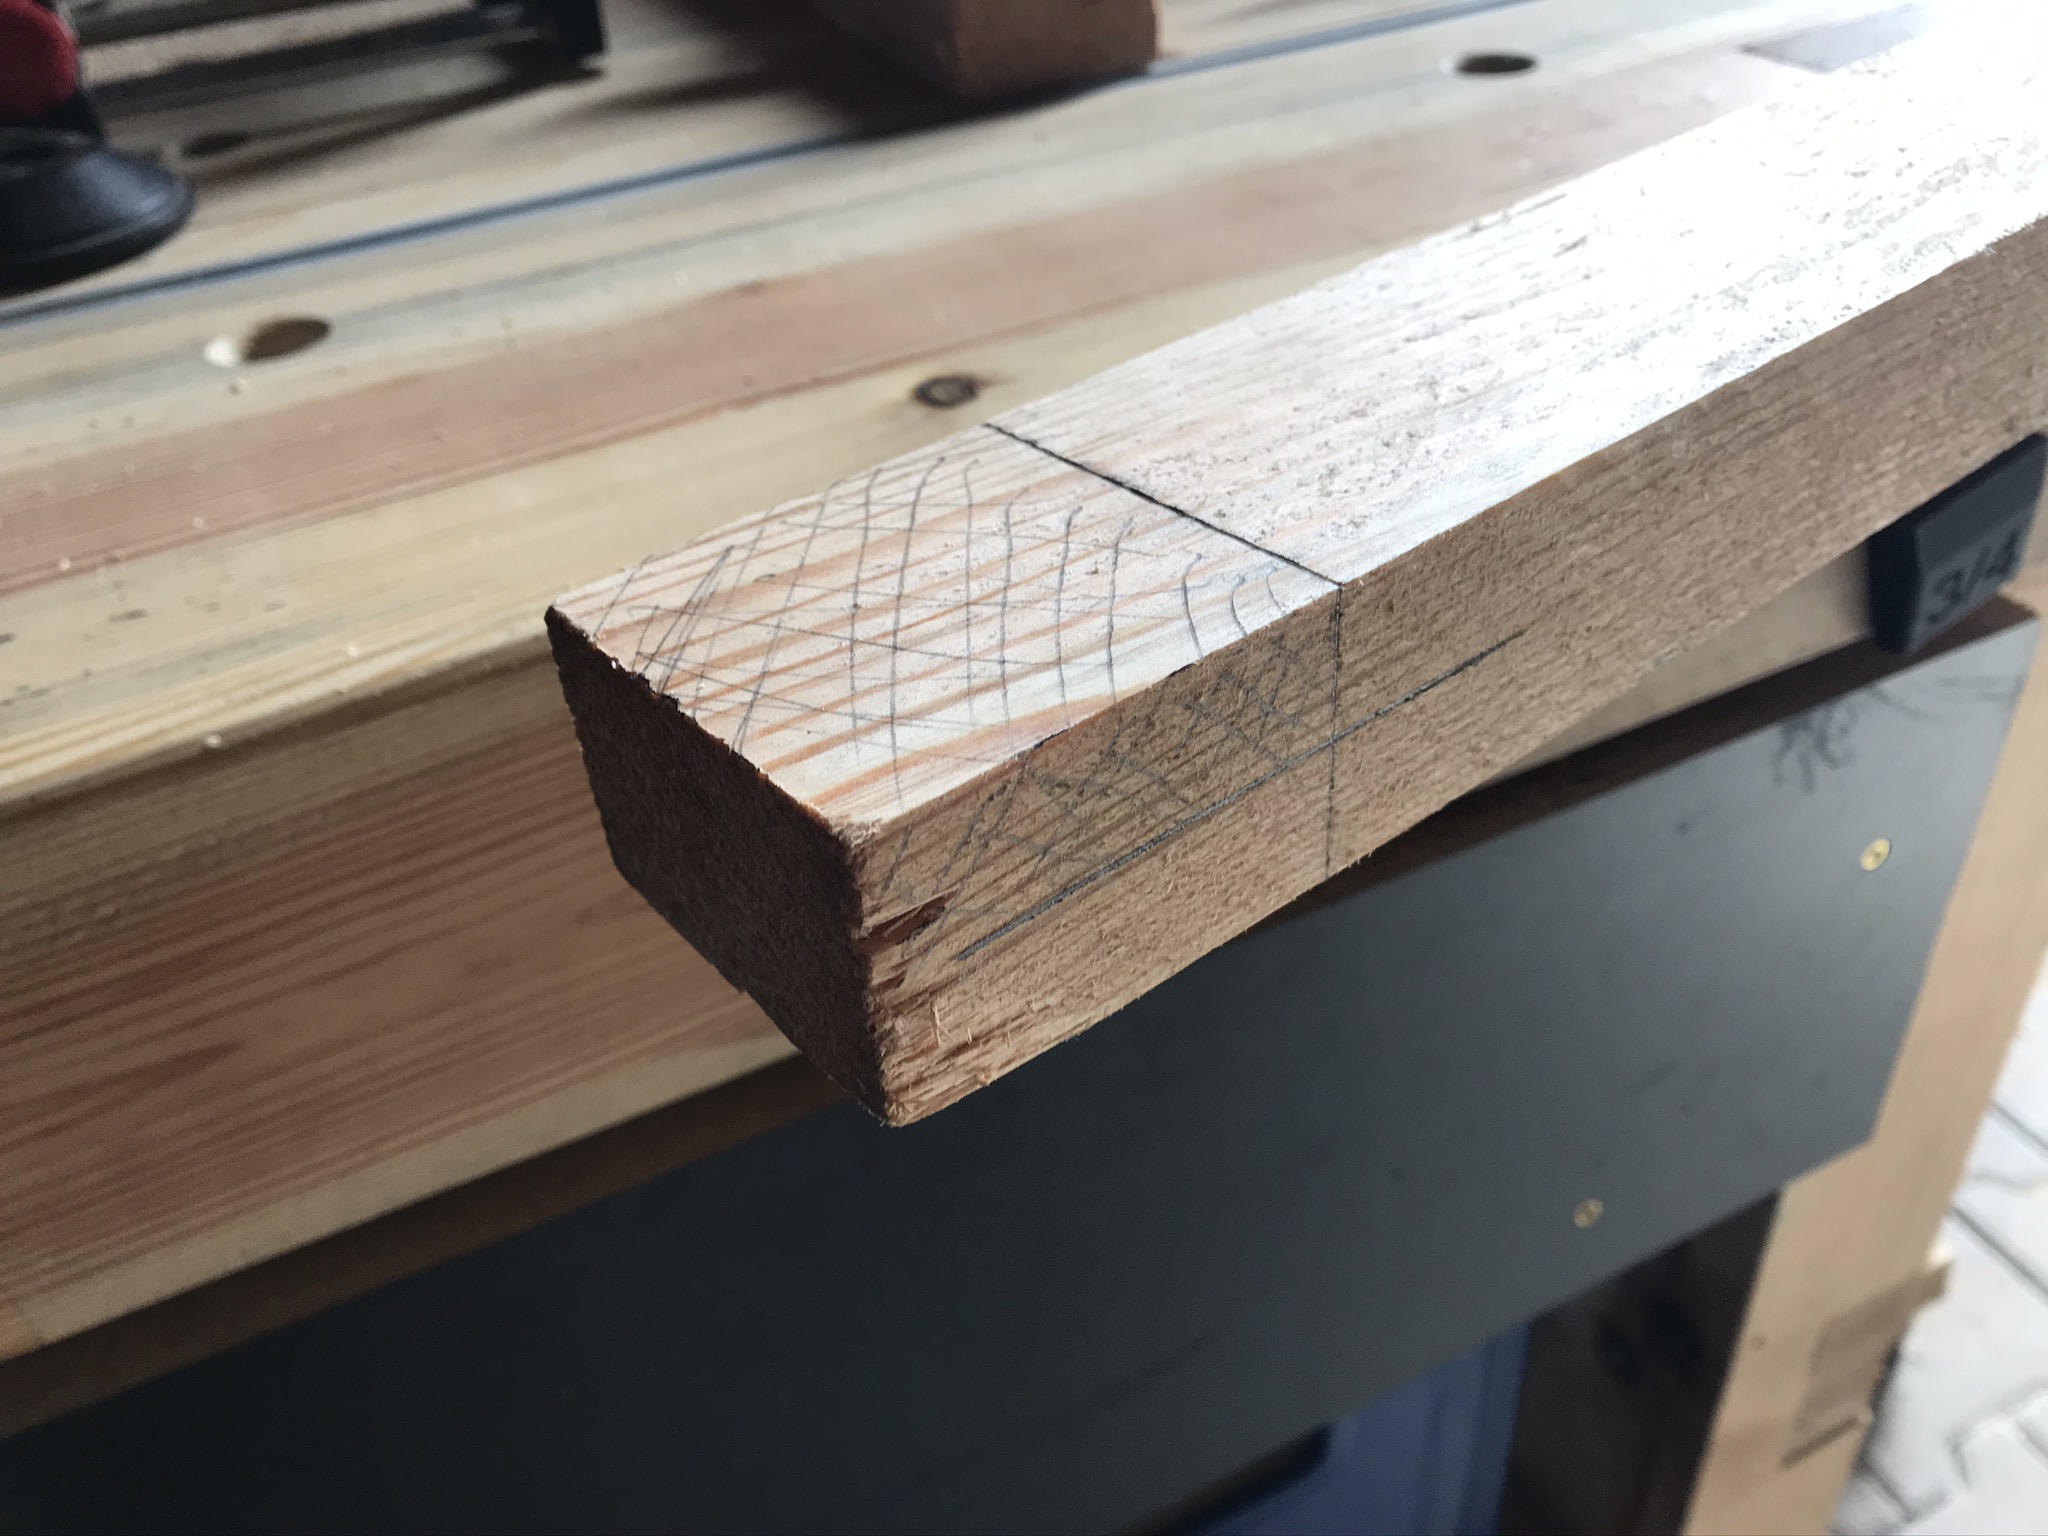
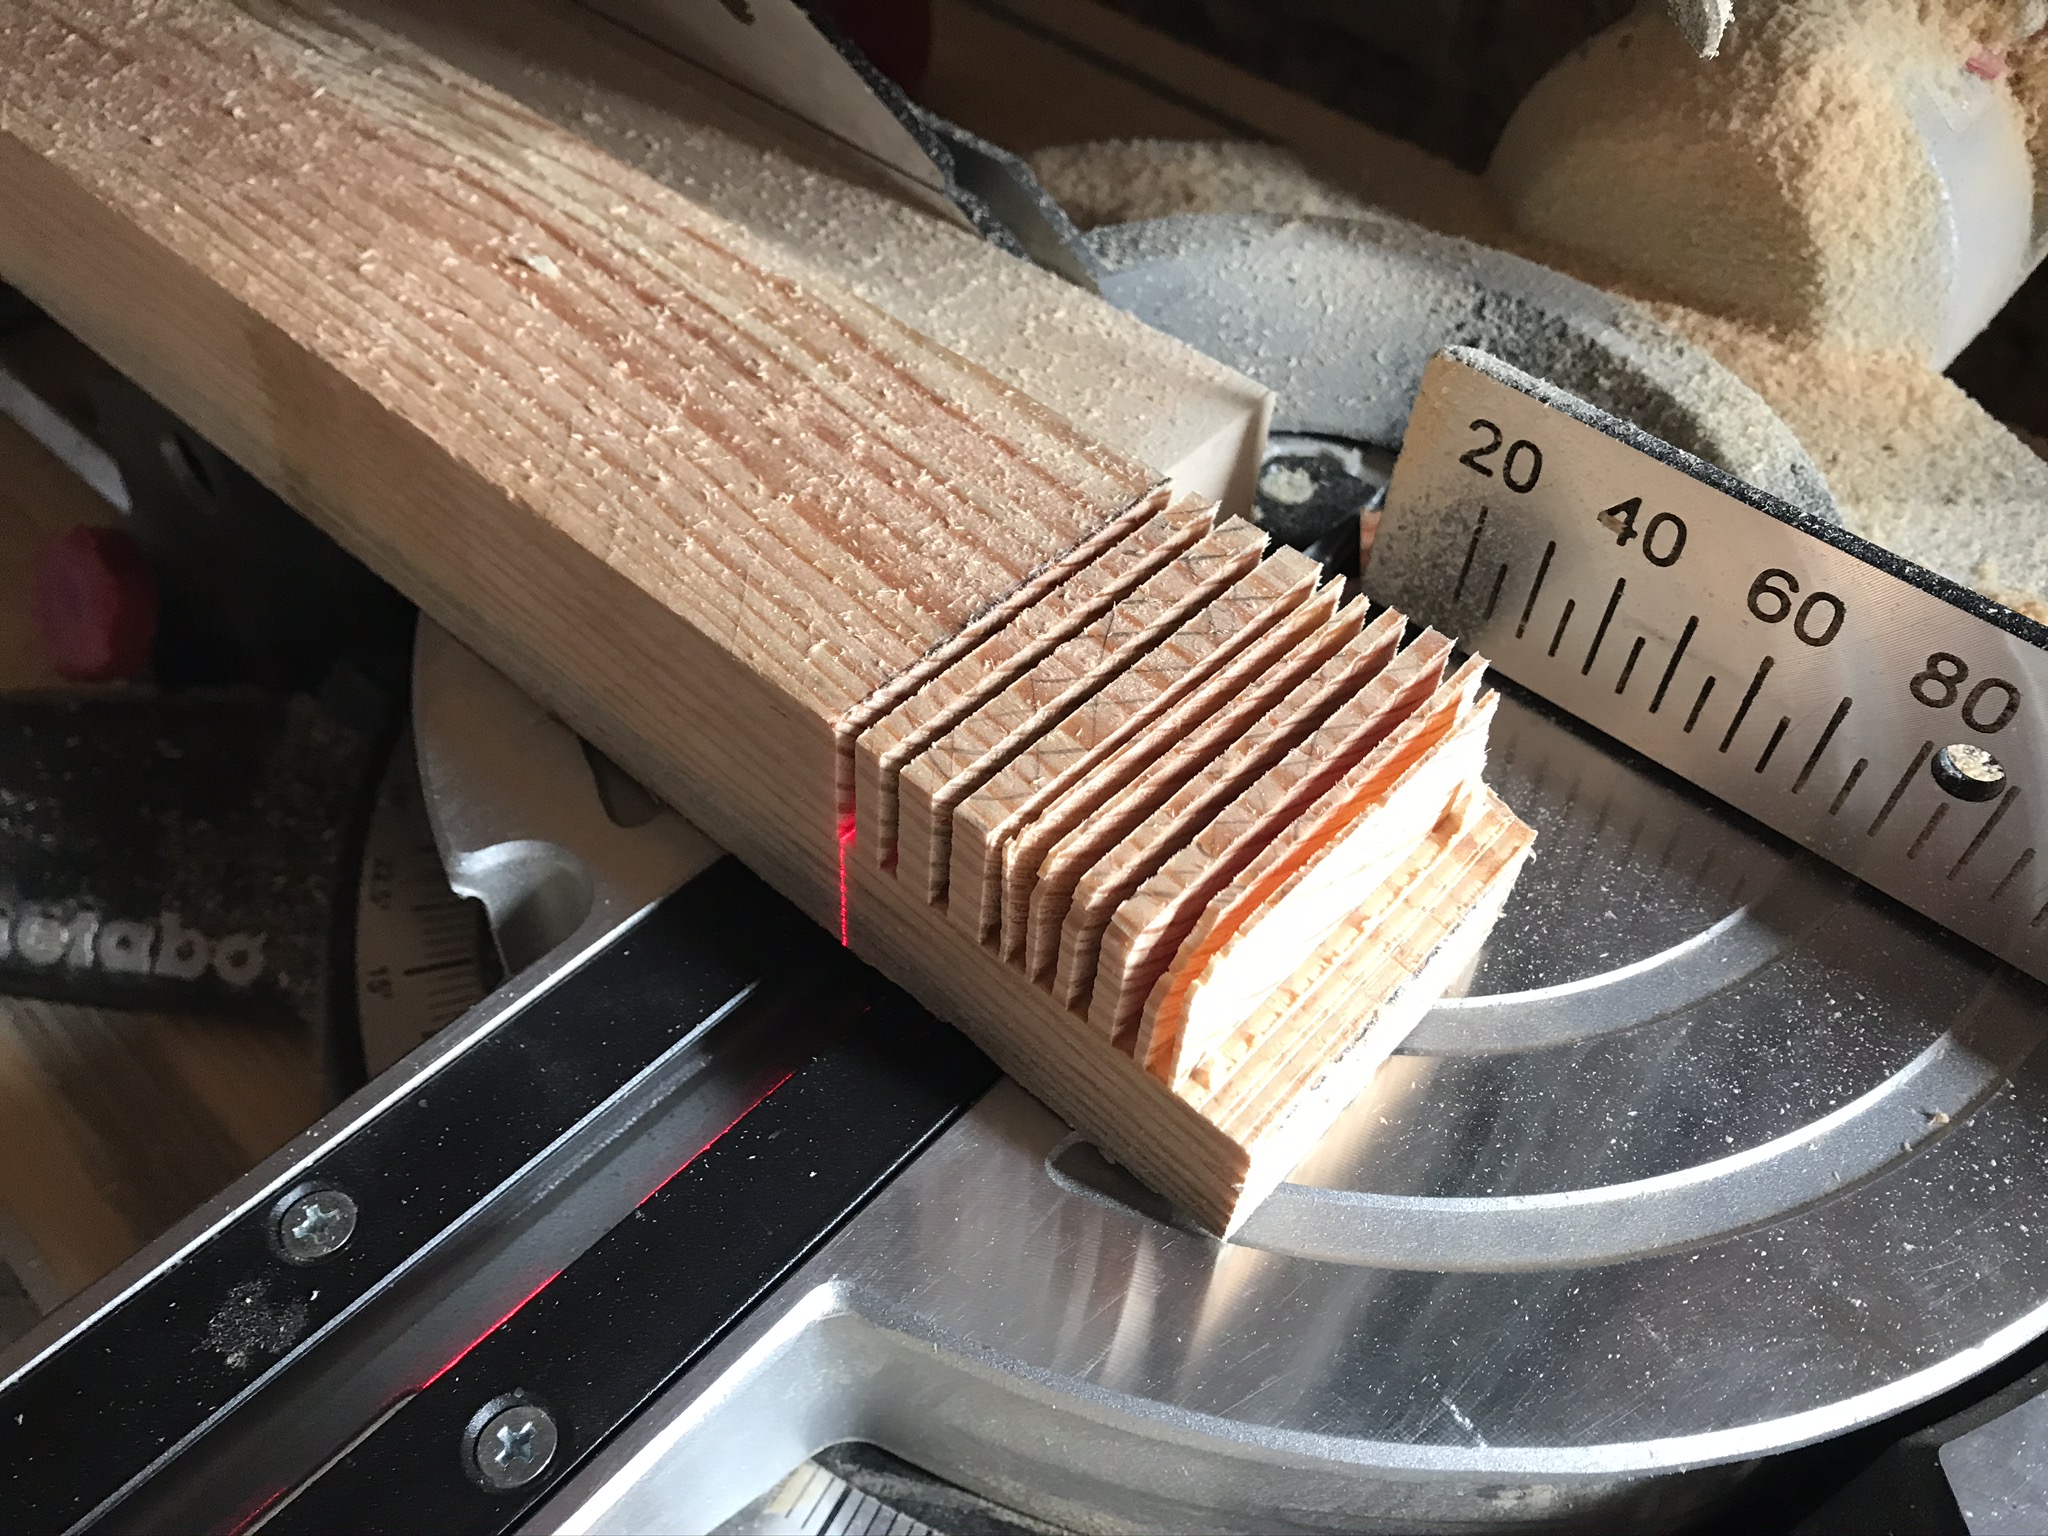
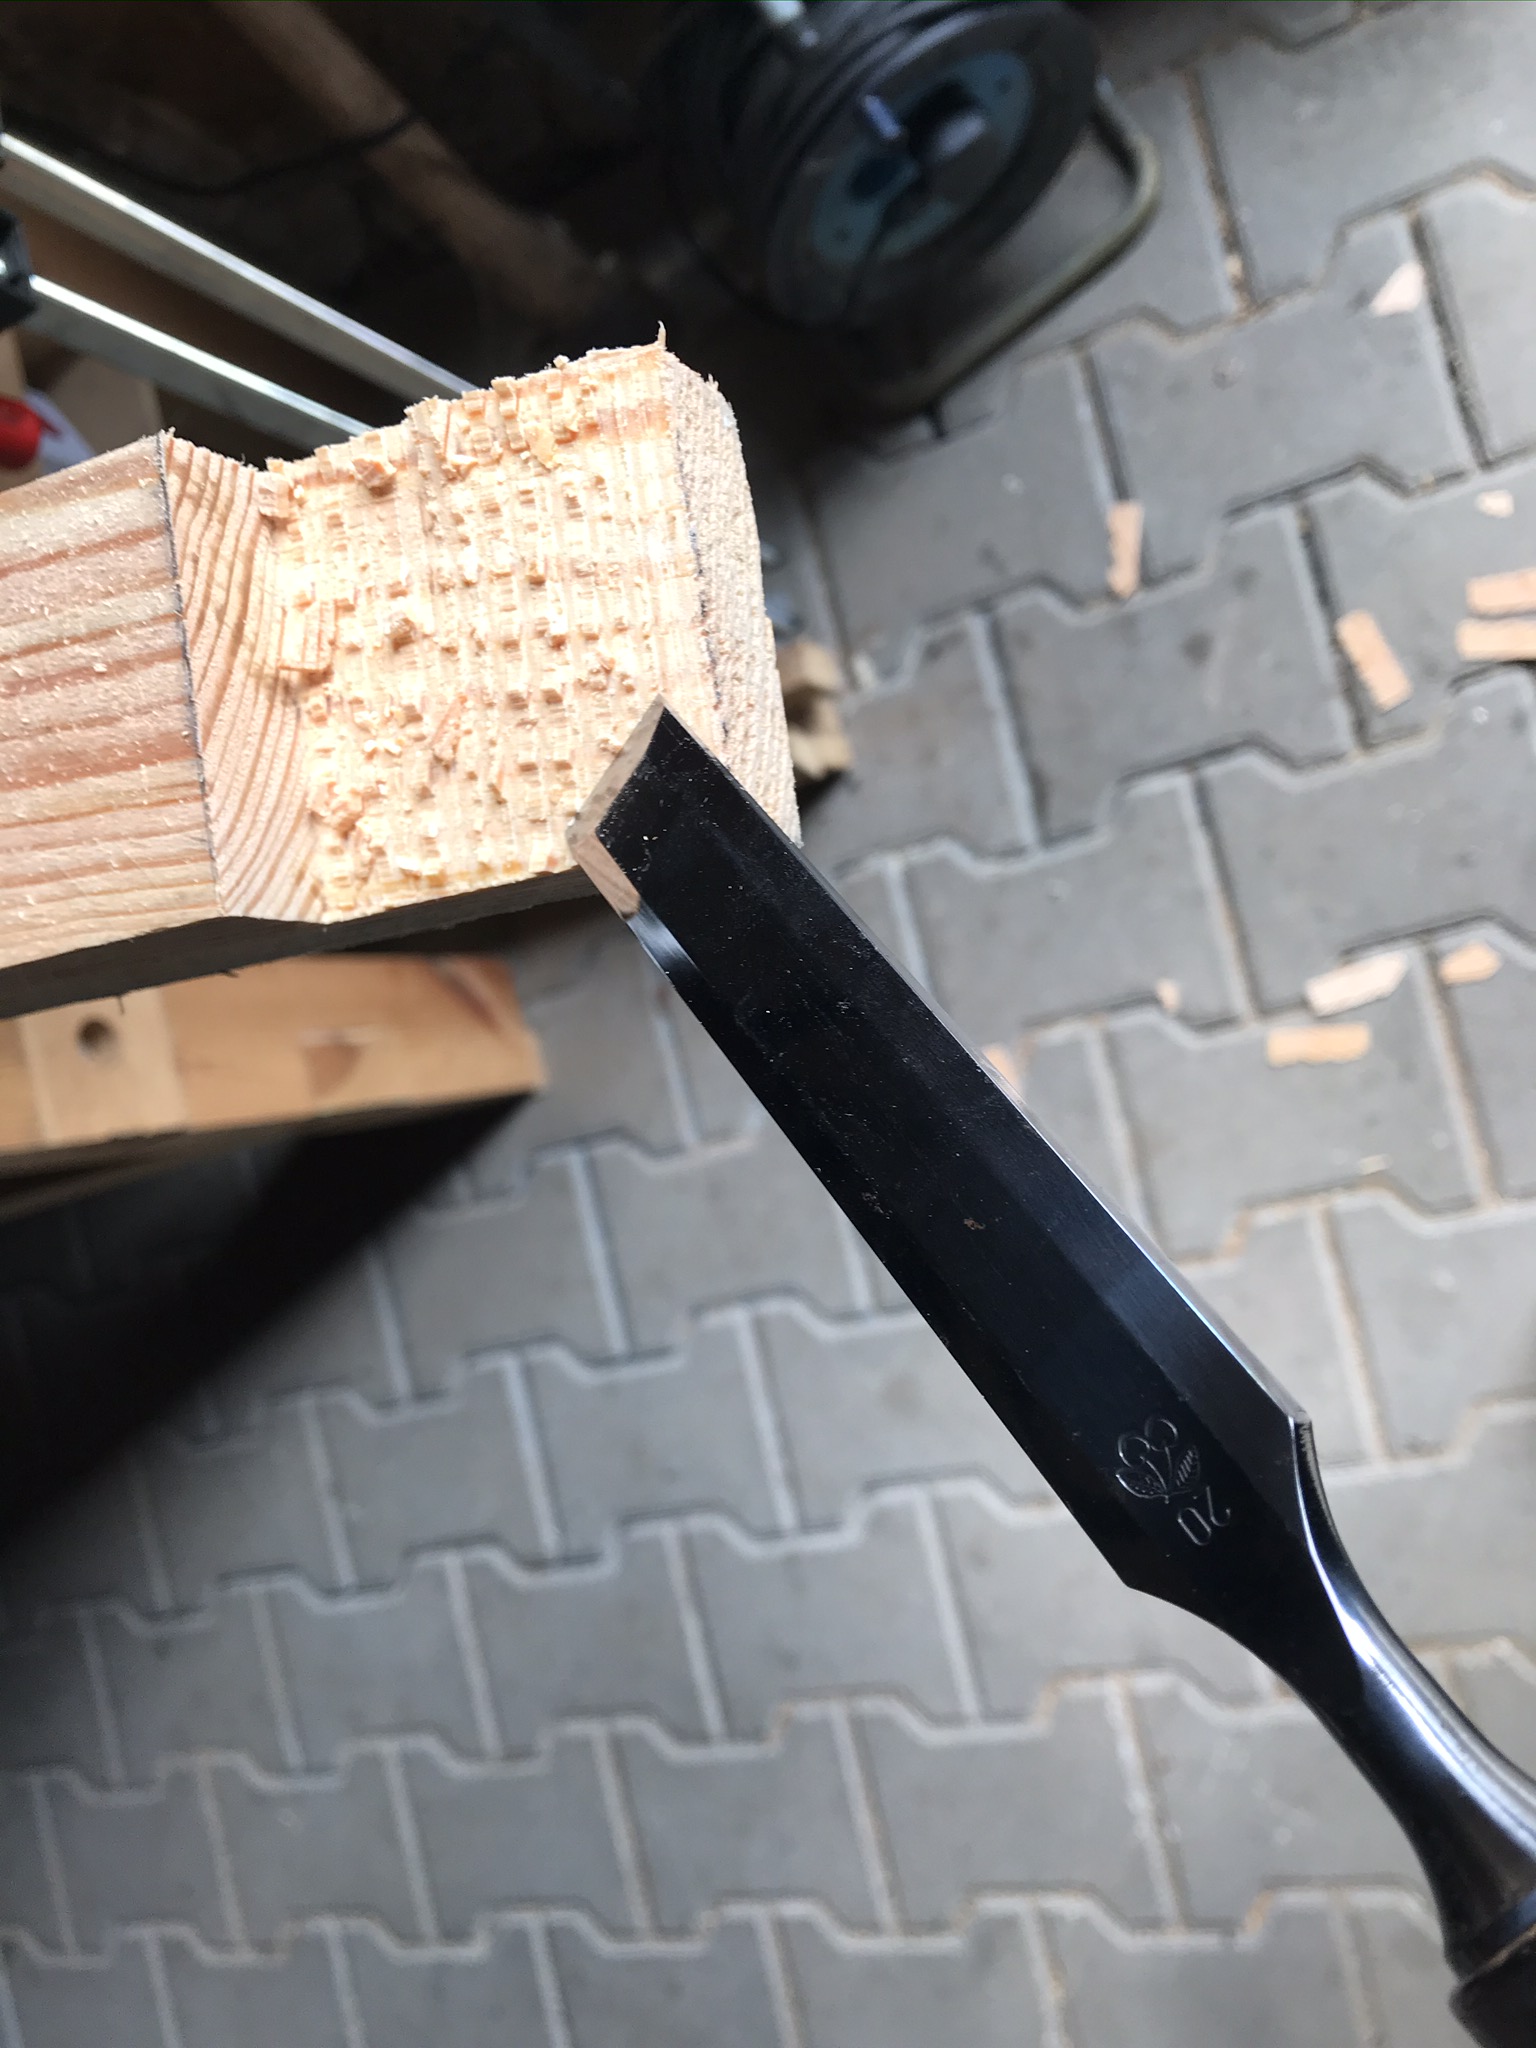
The remaining narrow strips can be broken off with a hammer blow. You can scrape off any remaining wood with a chisel* to smooth the surface of the recess.
In the construction drawings you will find all the required dimensions in detail!
Assembling the parts of the DWE 7492 saw stand base unit
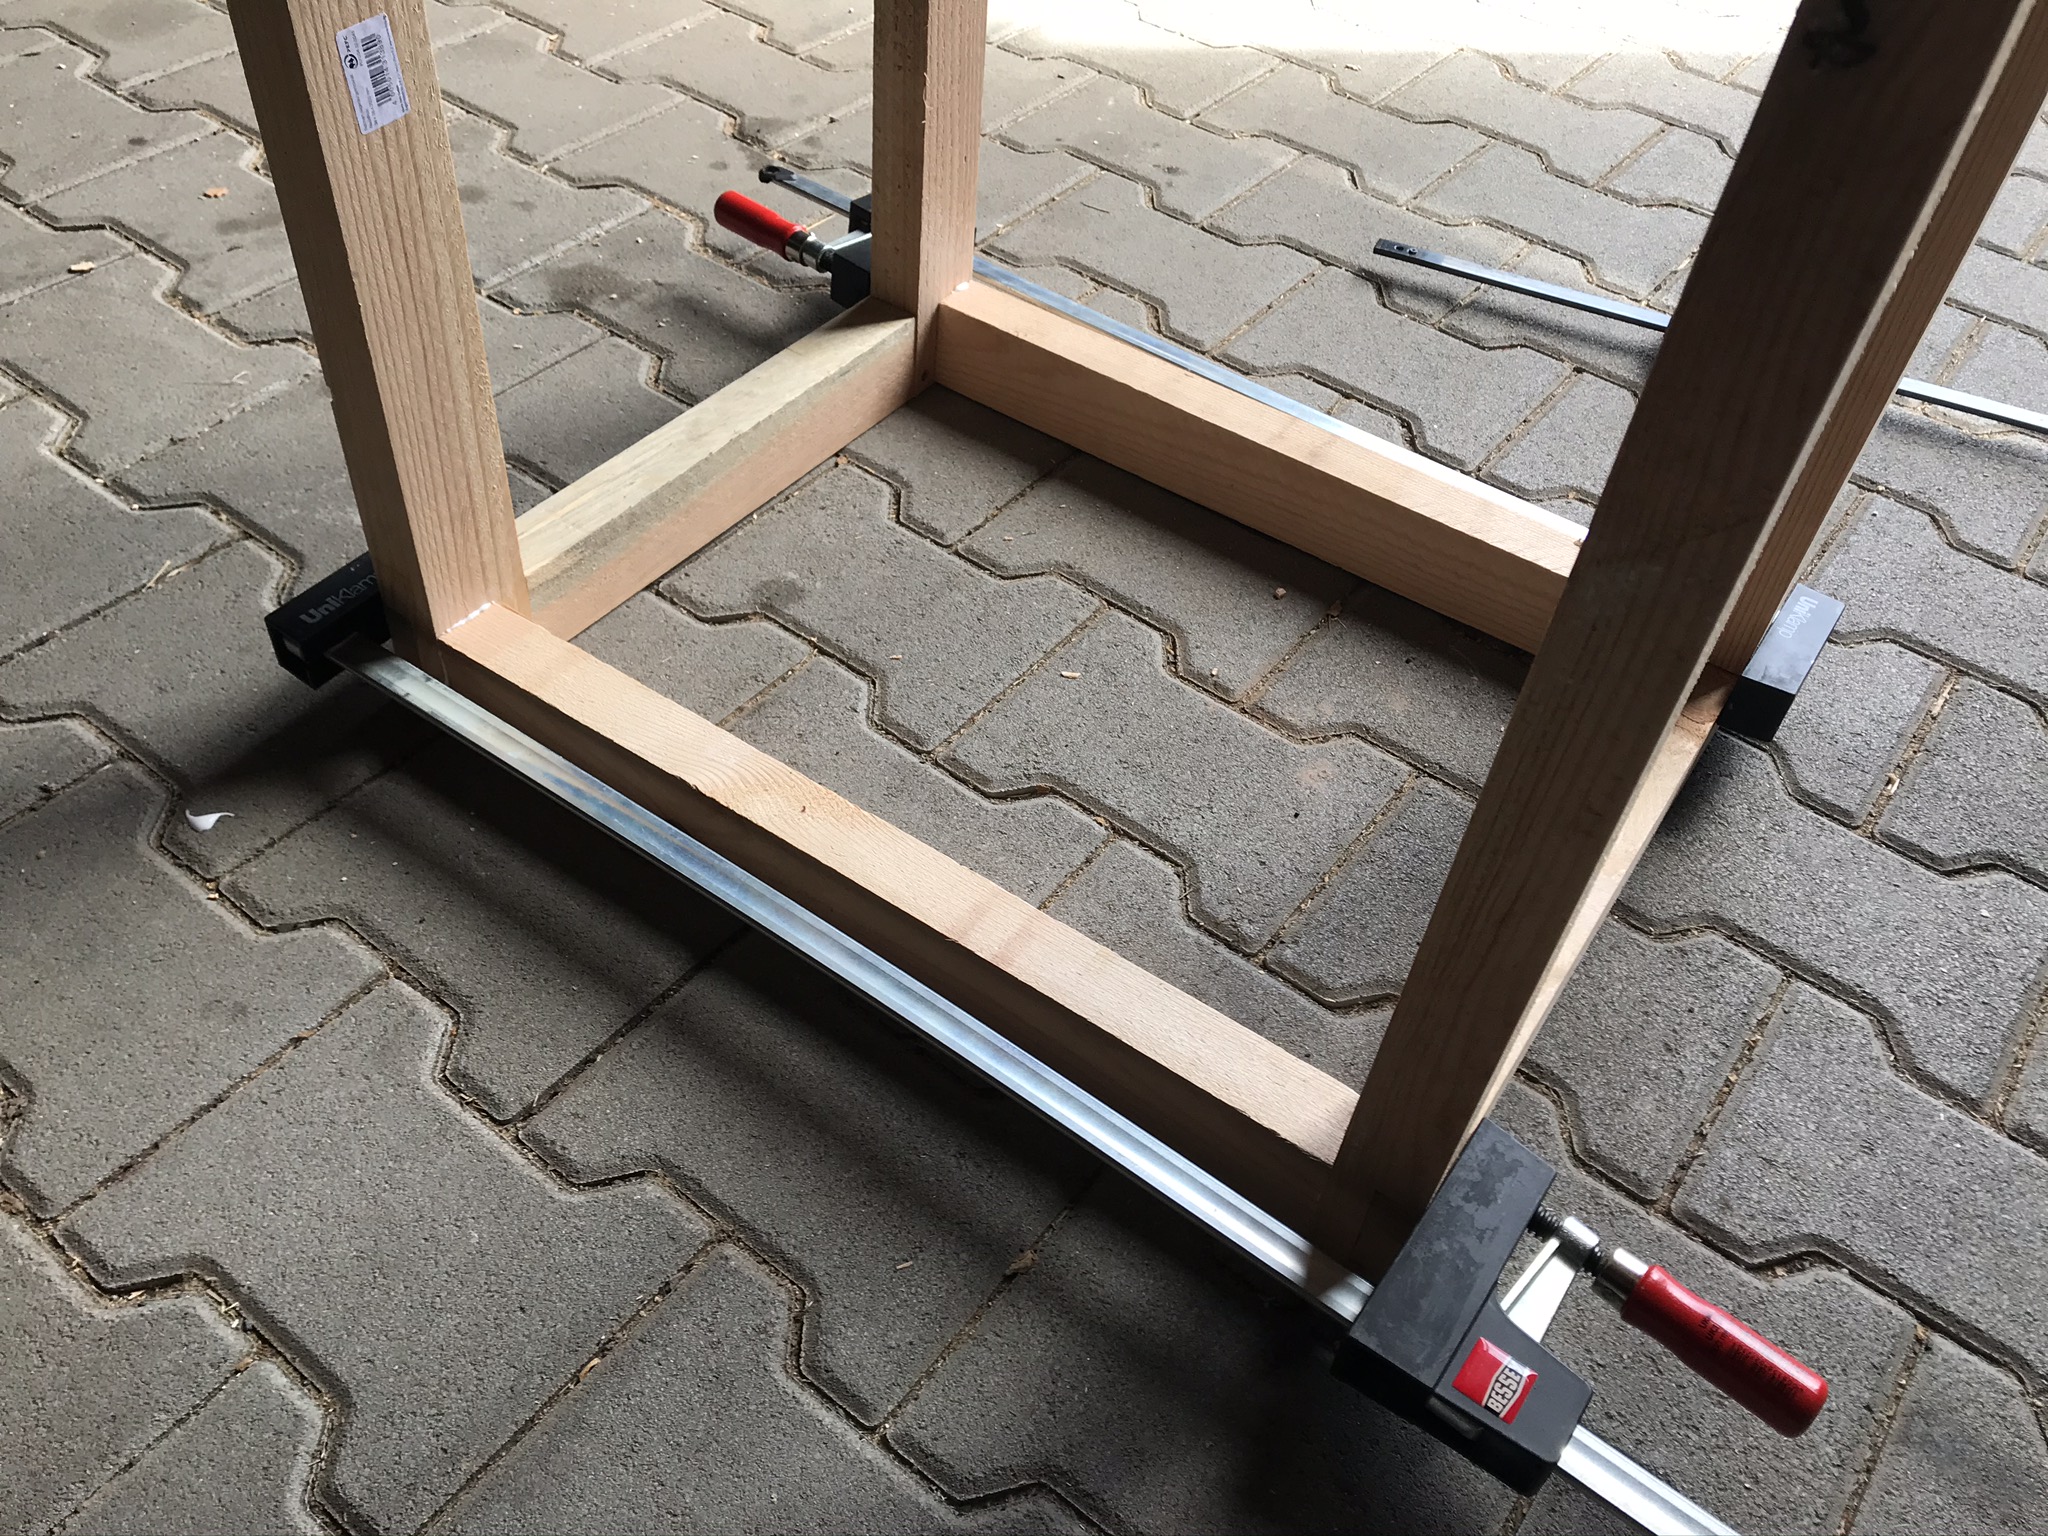
Once all the struts are made, you can connect the long struts (green) with the vertical short struts (blue). I screwed the parts together at the back with wood screws* (2 screws for each overlap). Don’t forget to pre-drill with a 3mm wood drill bit* – otherwise the wood can crack. Alternatively, you can glue the overlays together. When joining the parts, check with a joiner’s square* that everything is at the correct 90° angle – corrections can still be made.
You can either screw the horizontal short struts (red) with the Undercover Jig* or you can connect the short struts with self-made wooden dowels from a 12mm beech round bar.
Horizontal short struts – Variant 1 – Wooden dowels
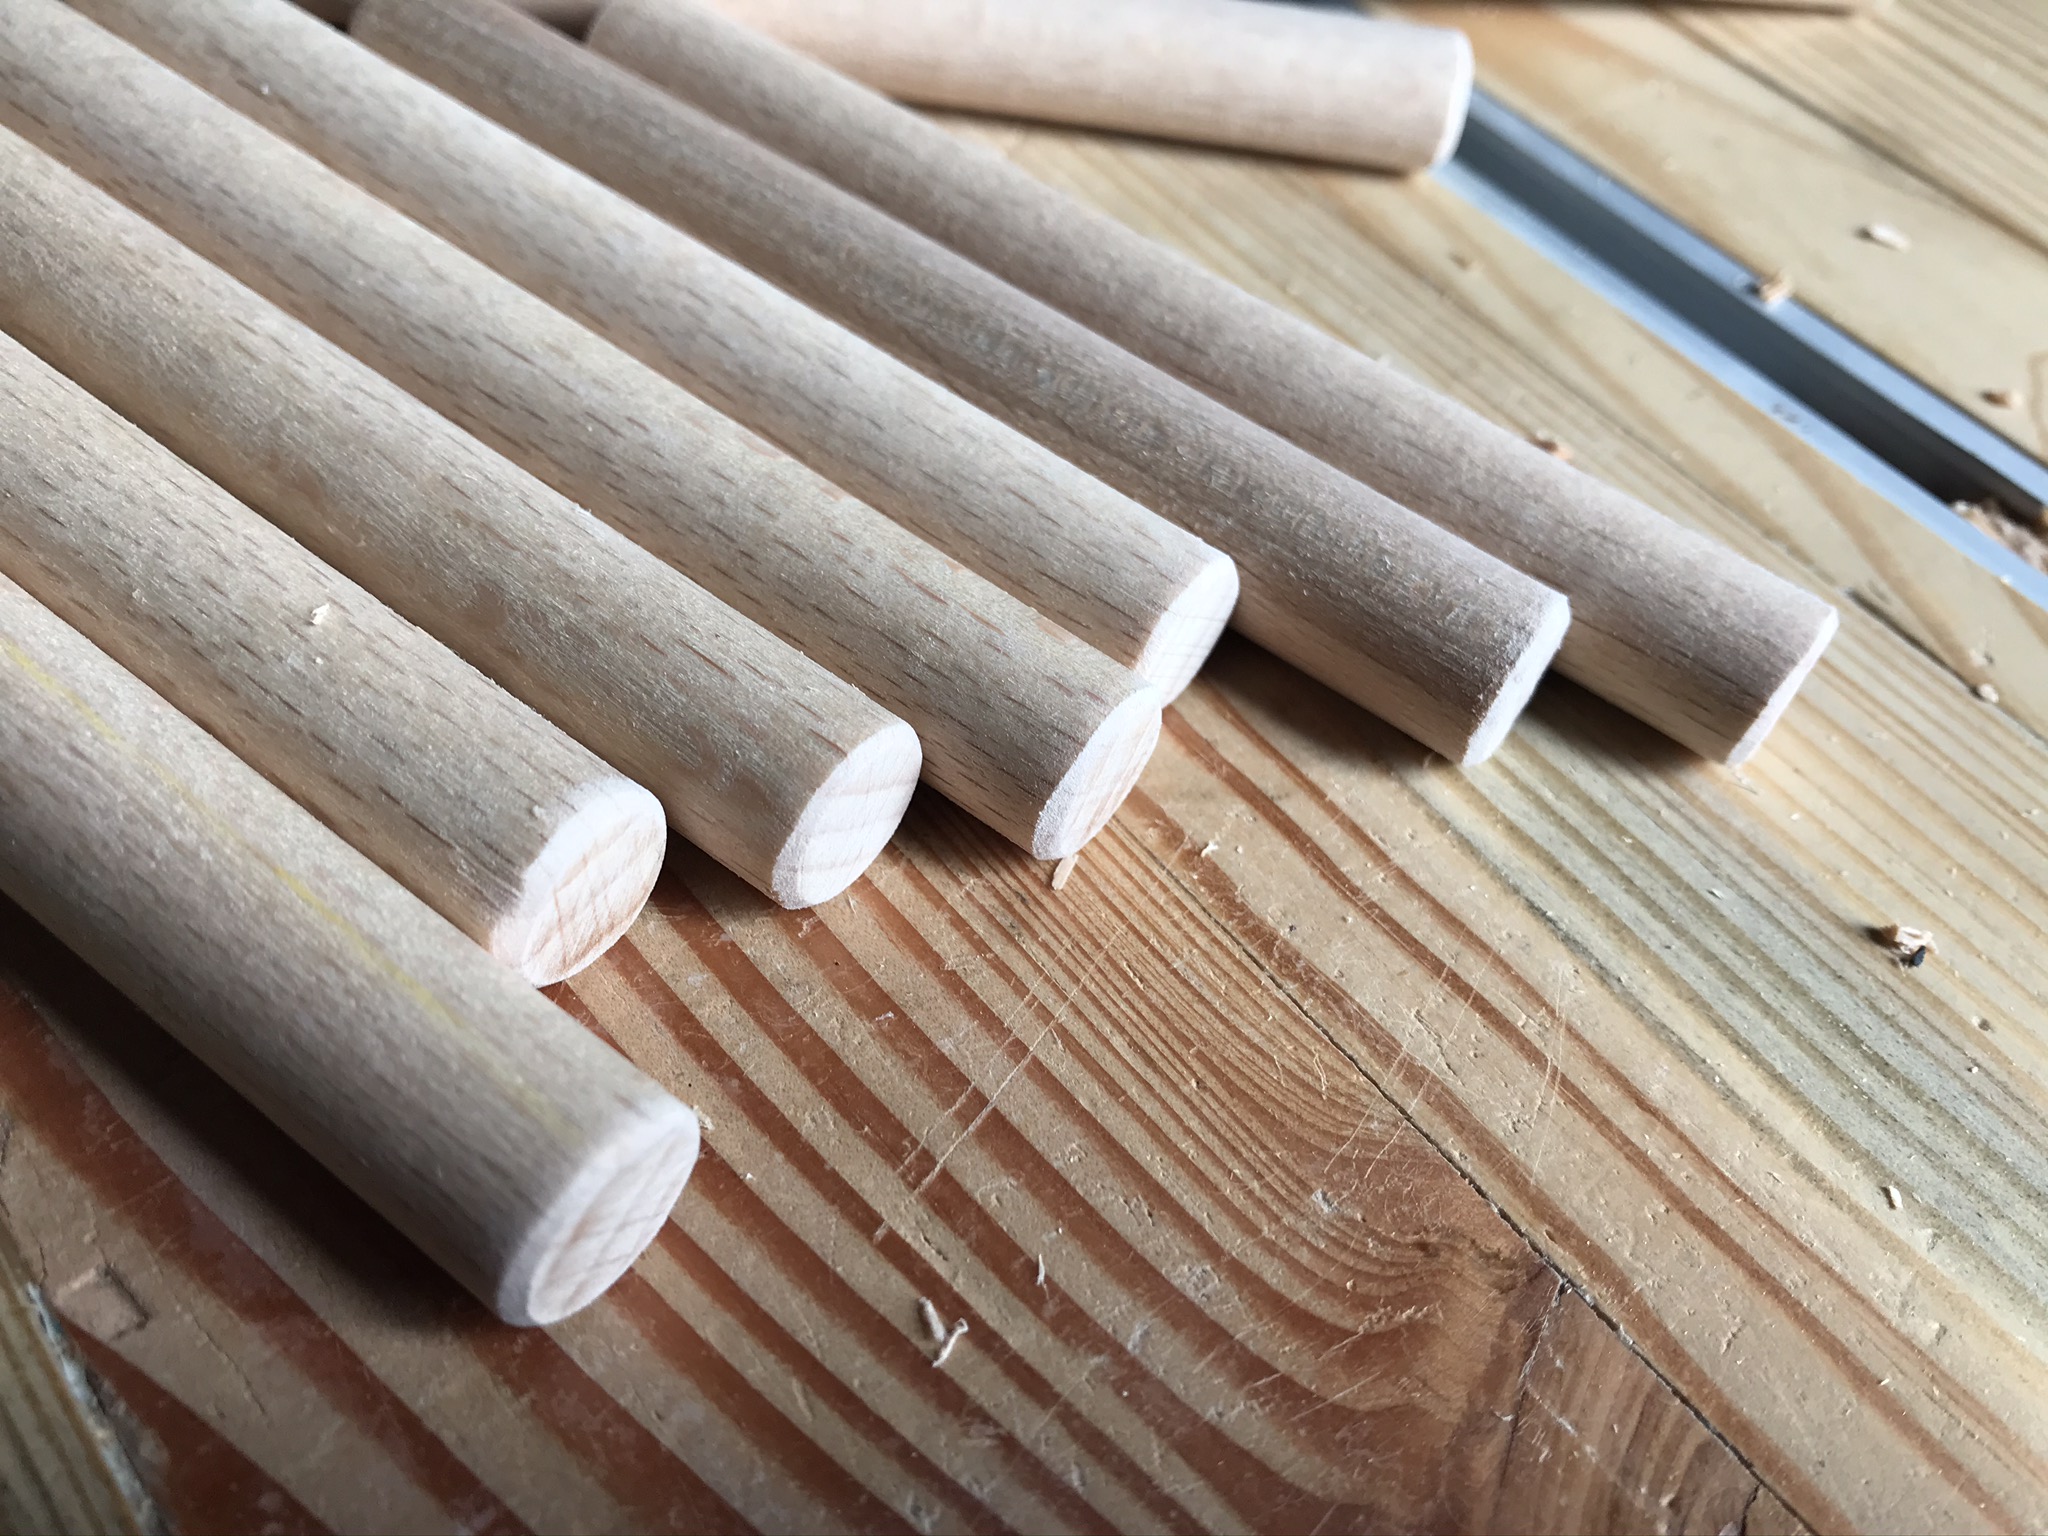
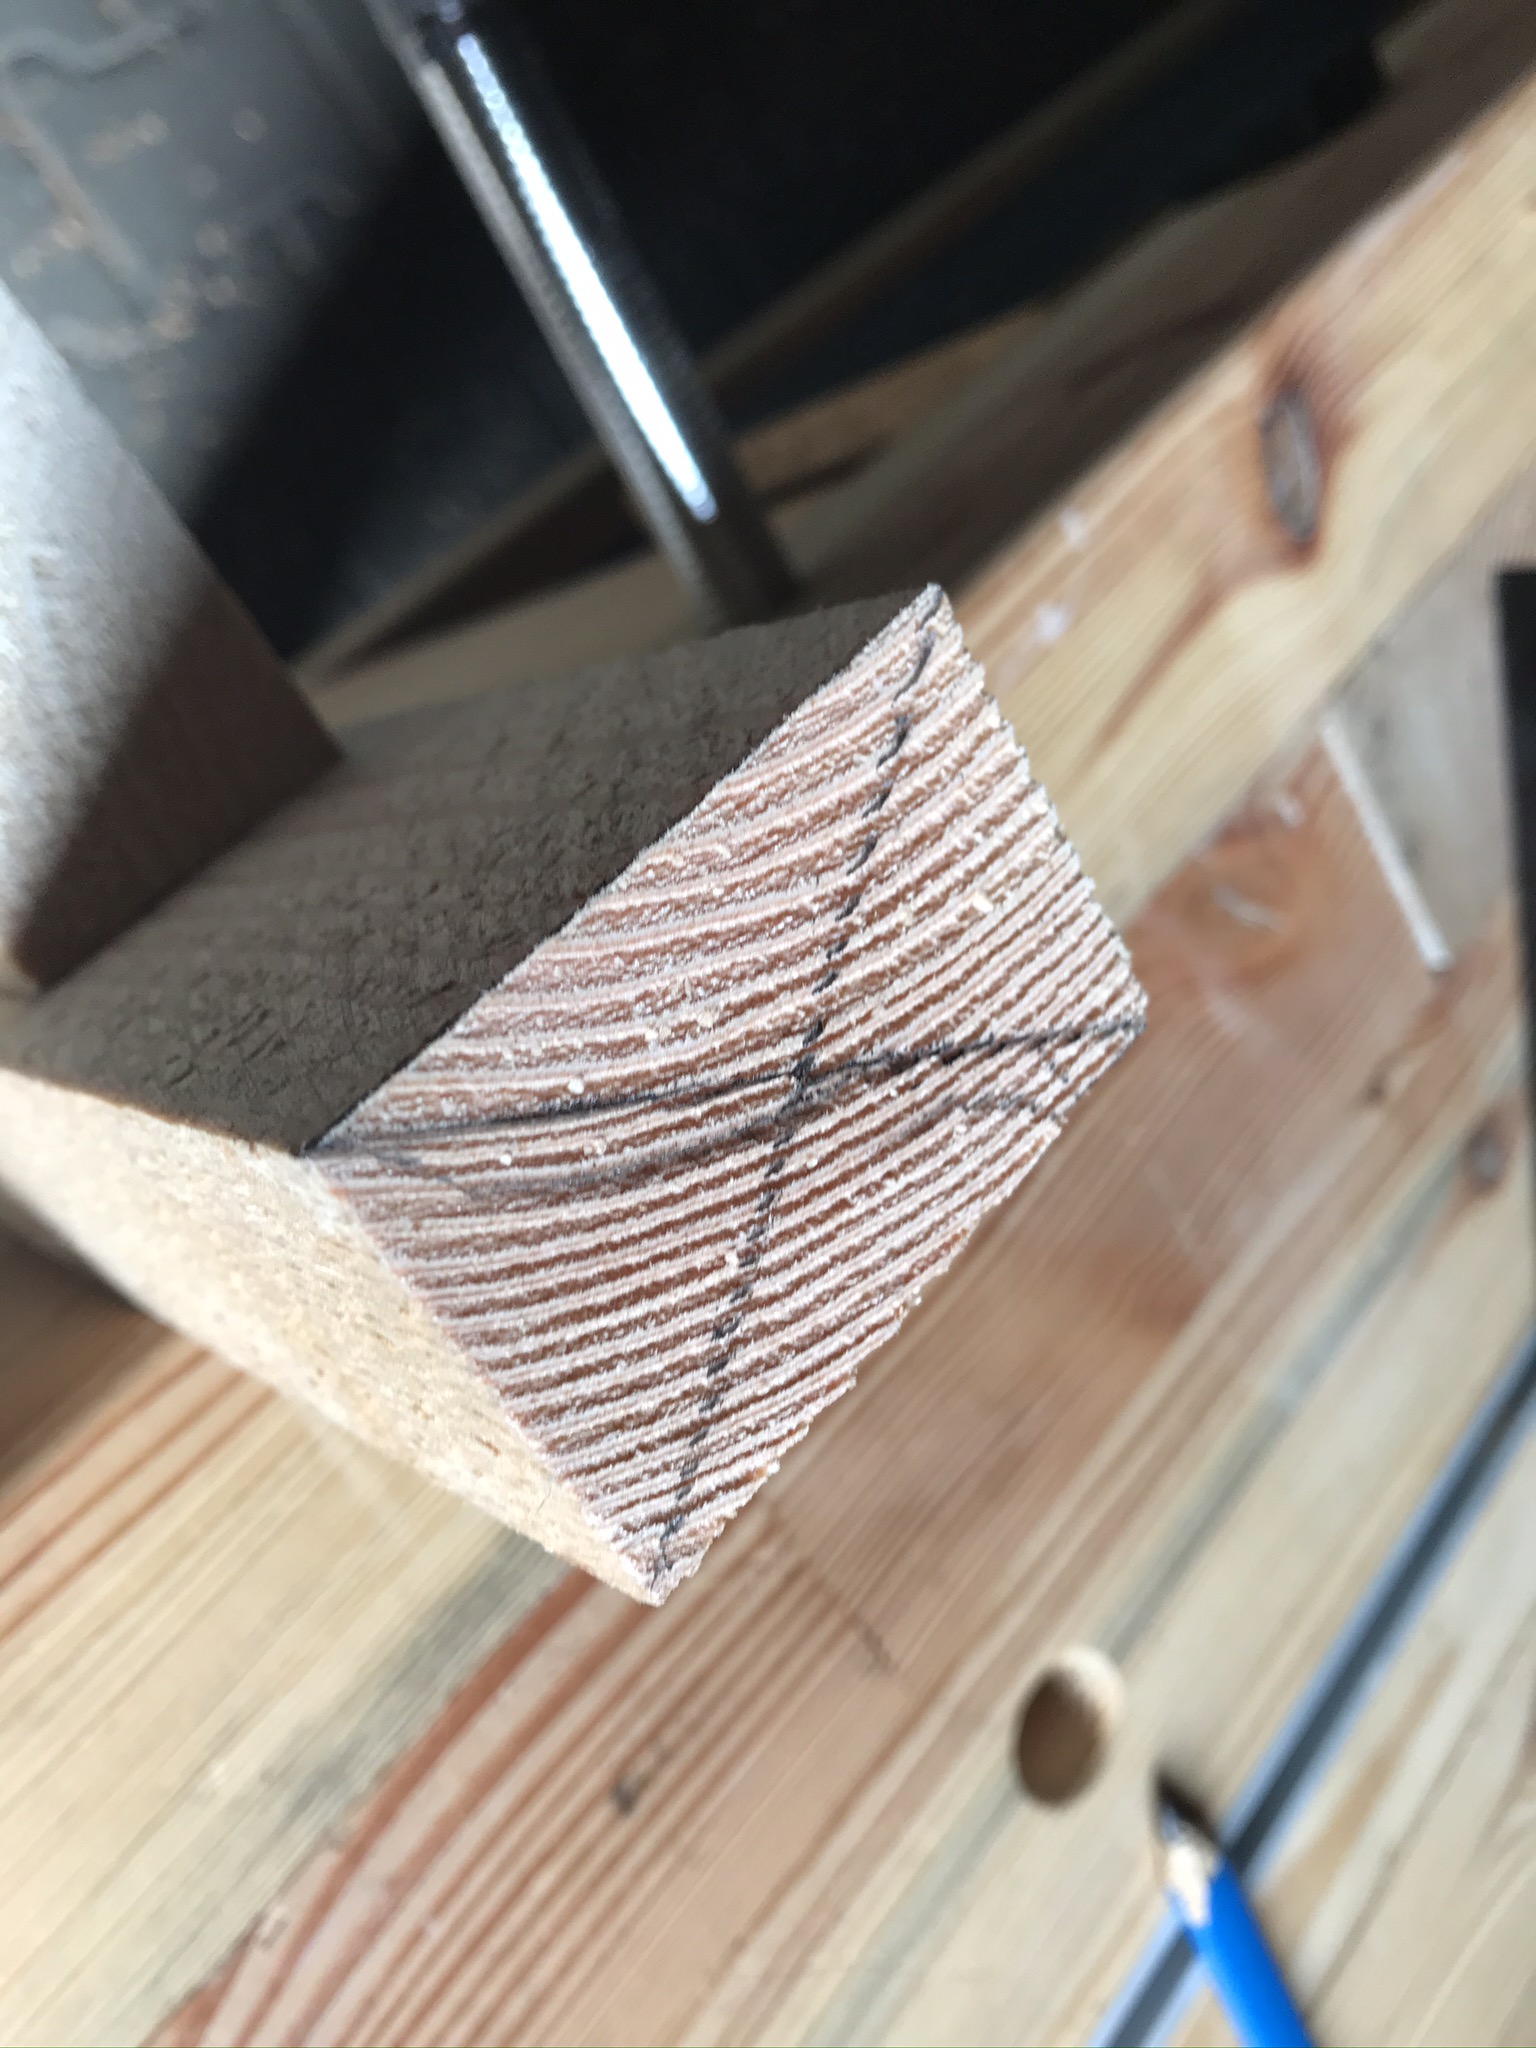
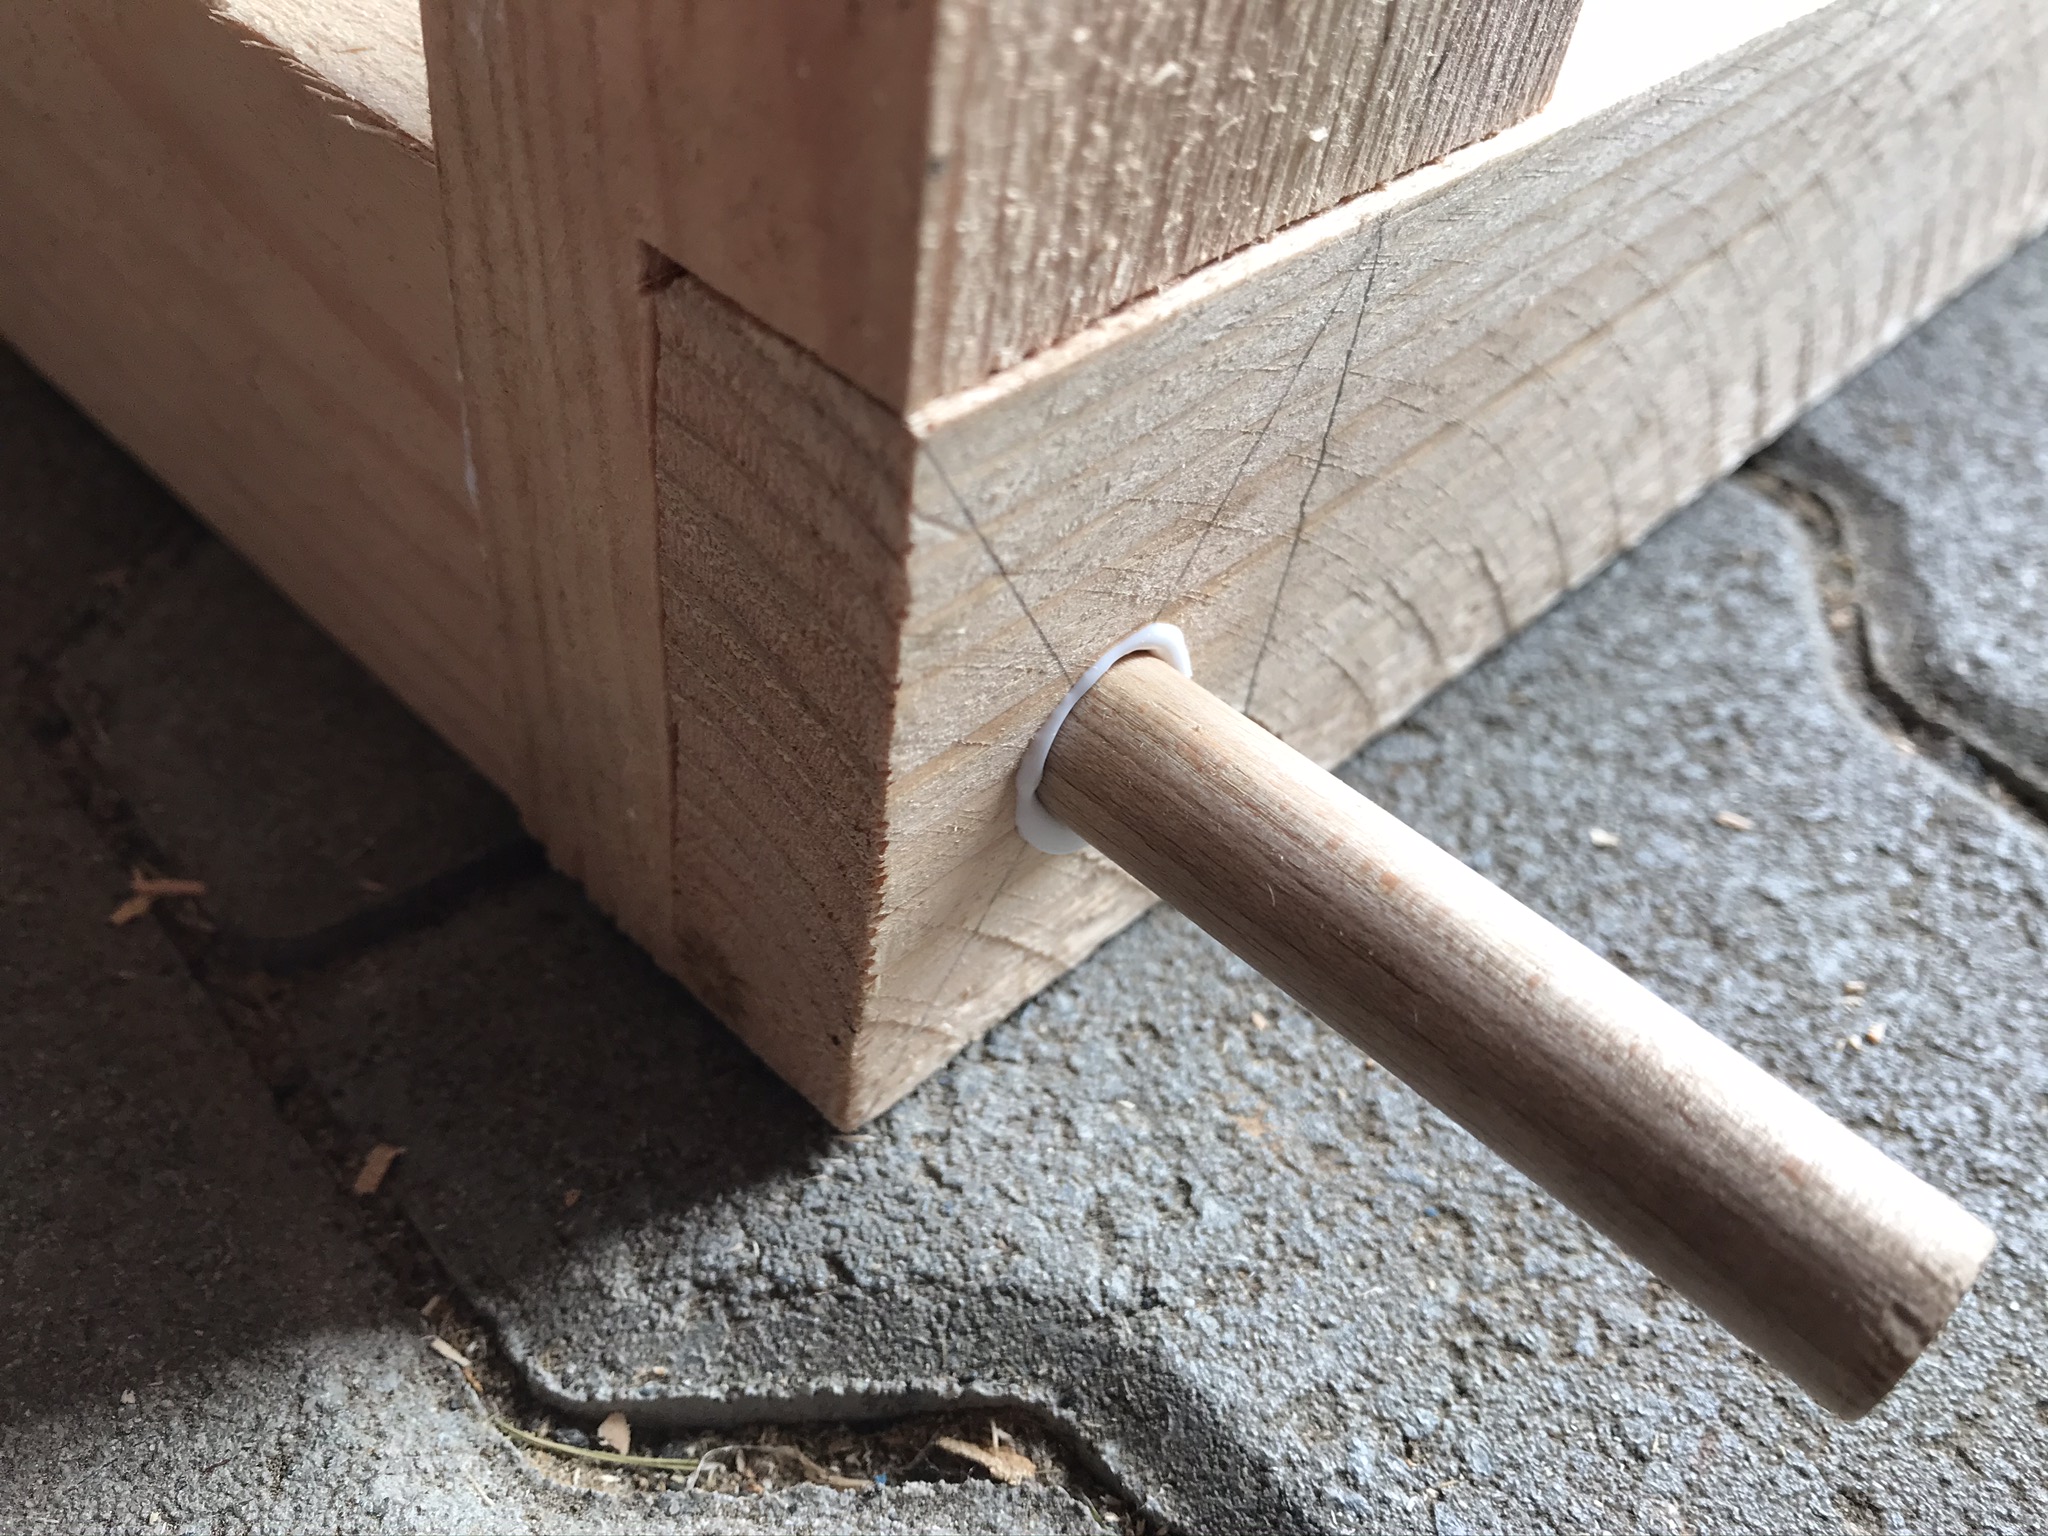
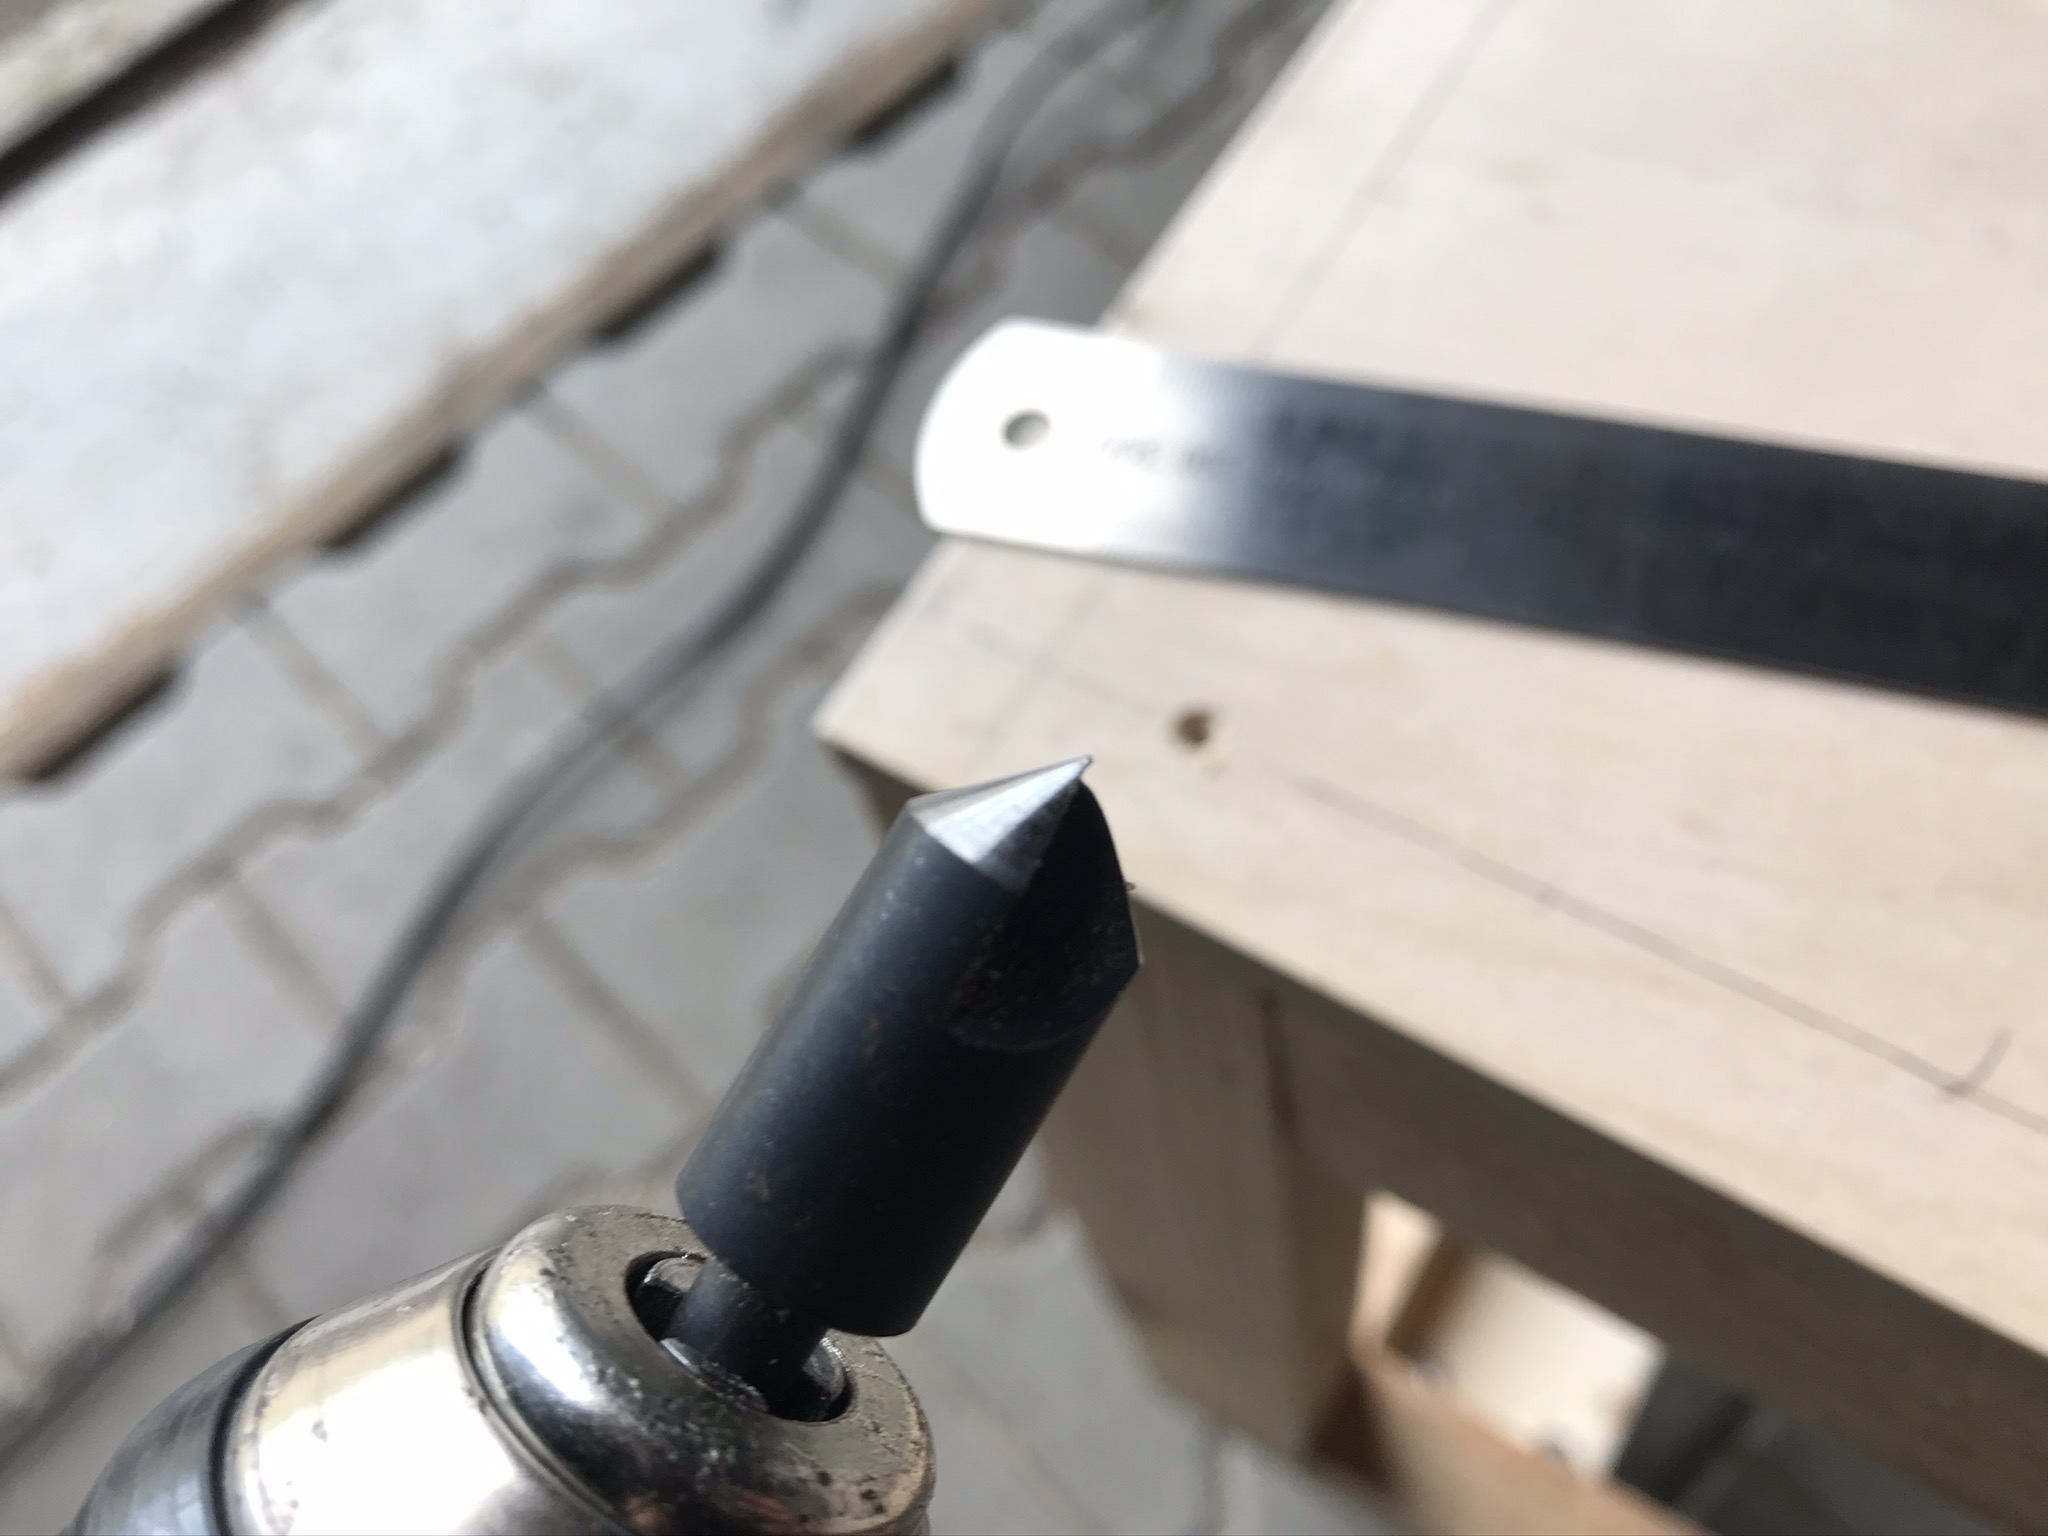
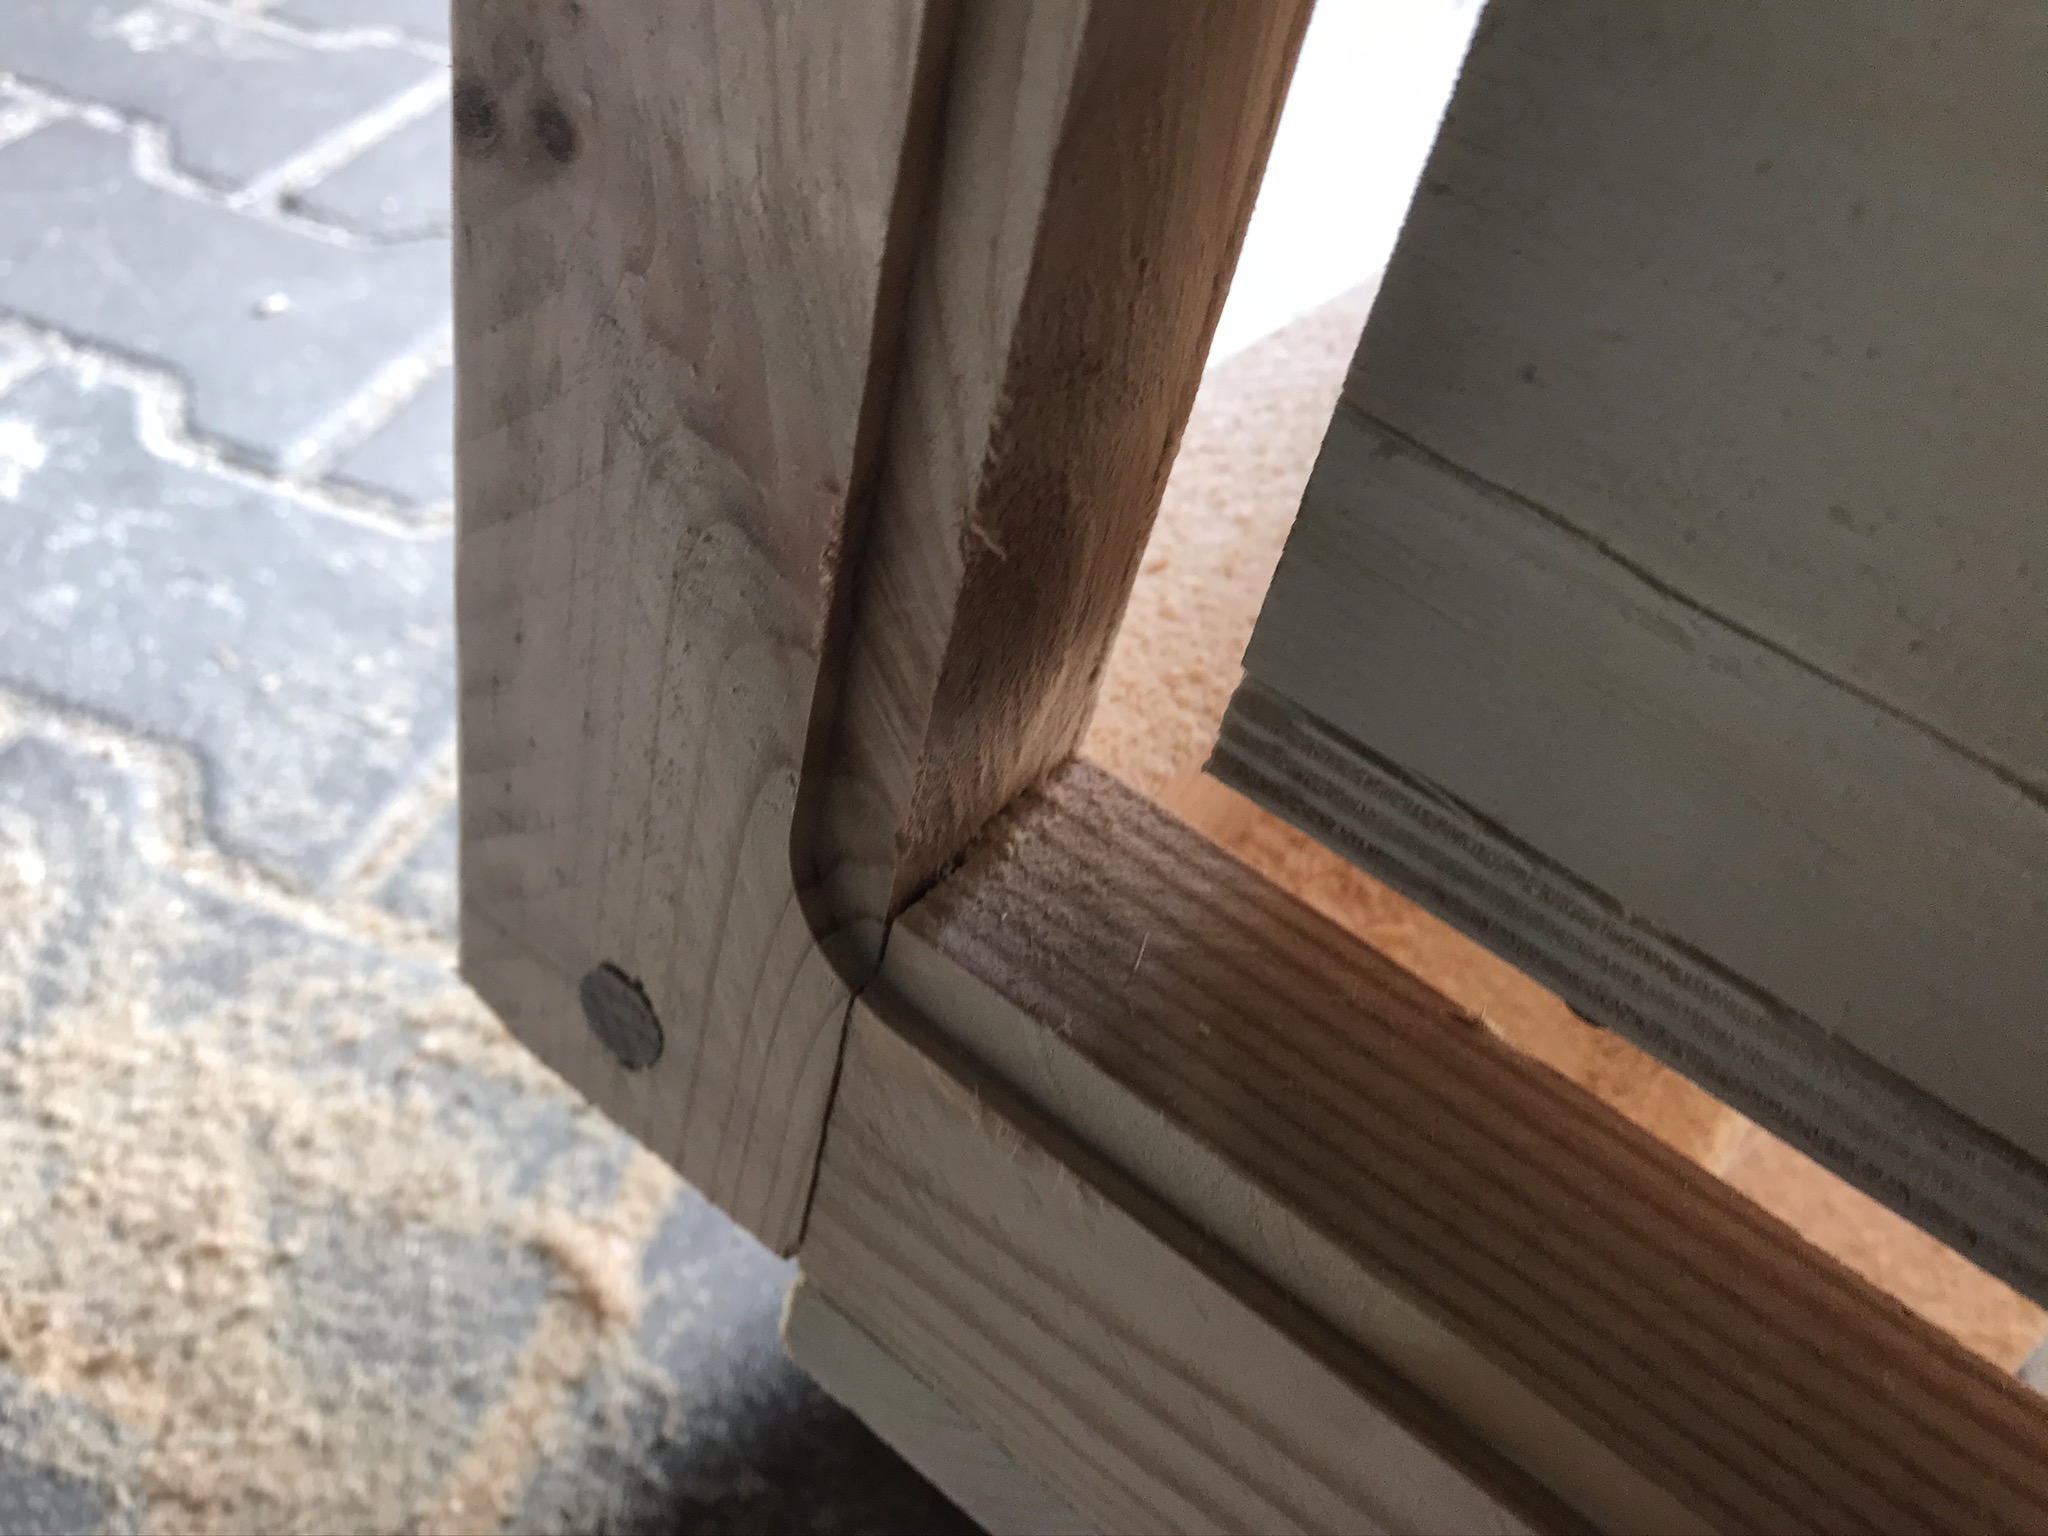
The connection with thick 12mm wooden dowels is complex but visually very good looking. I used these for the 4 corner joints. First, saw the wooden dowels to a length of about 10 cm. You can bevel the ends of the dowels with a little sandpaper.
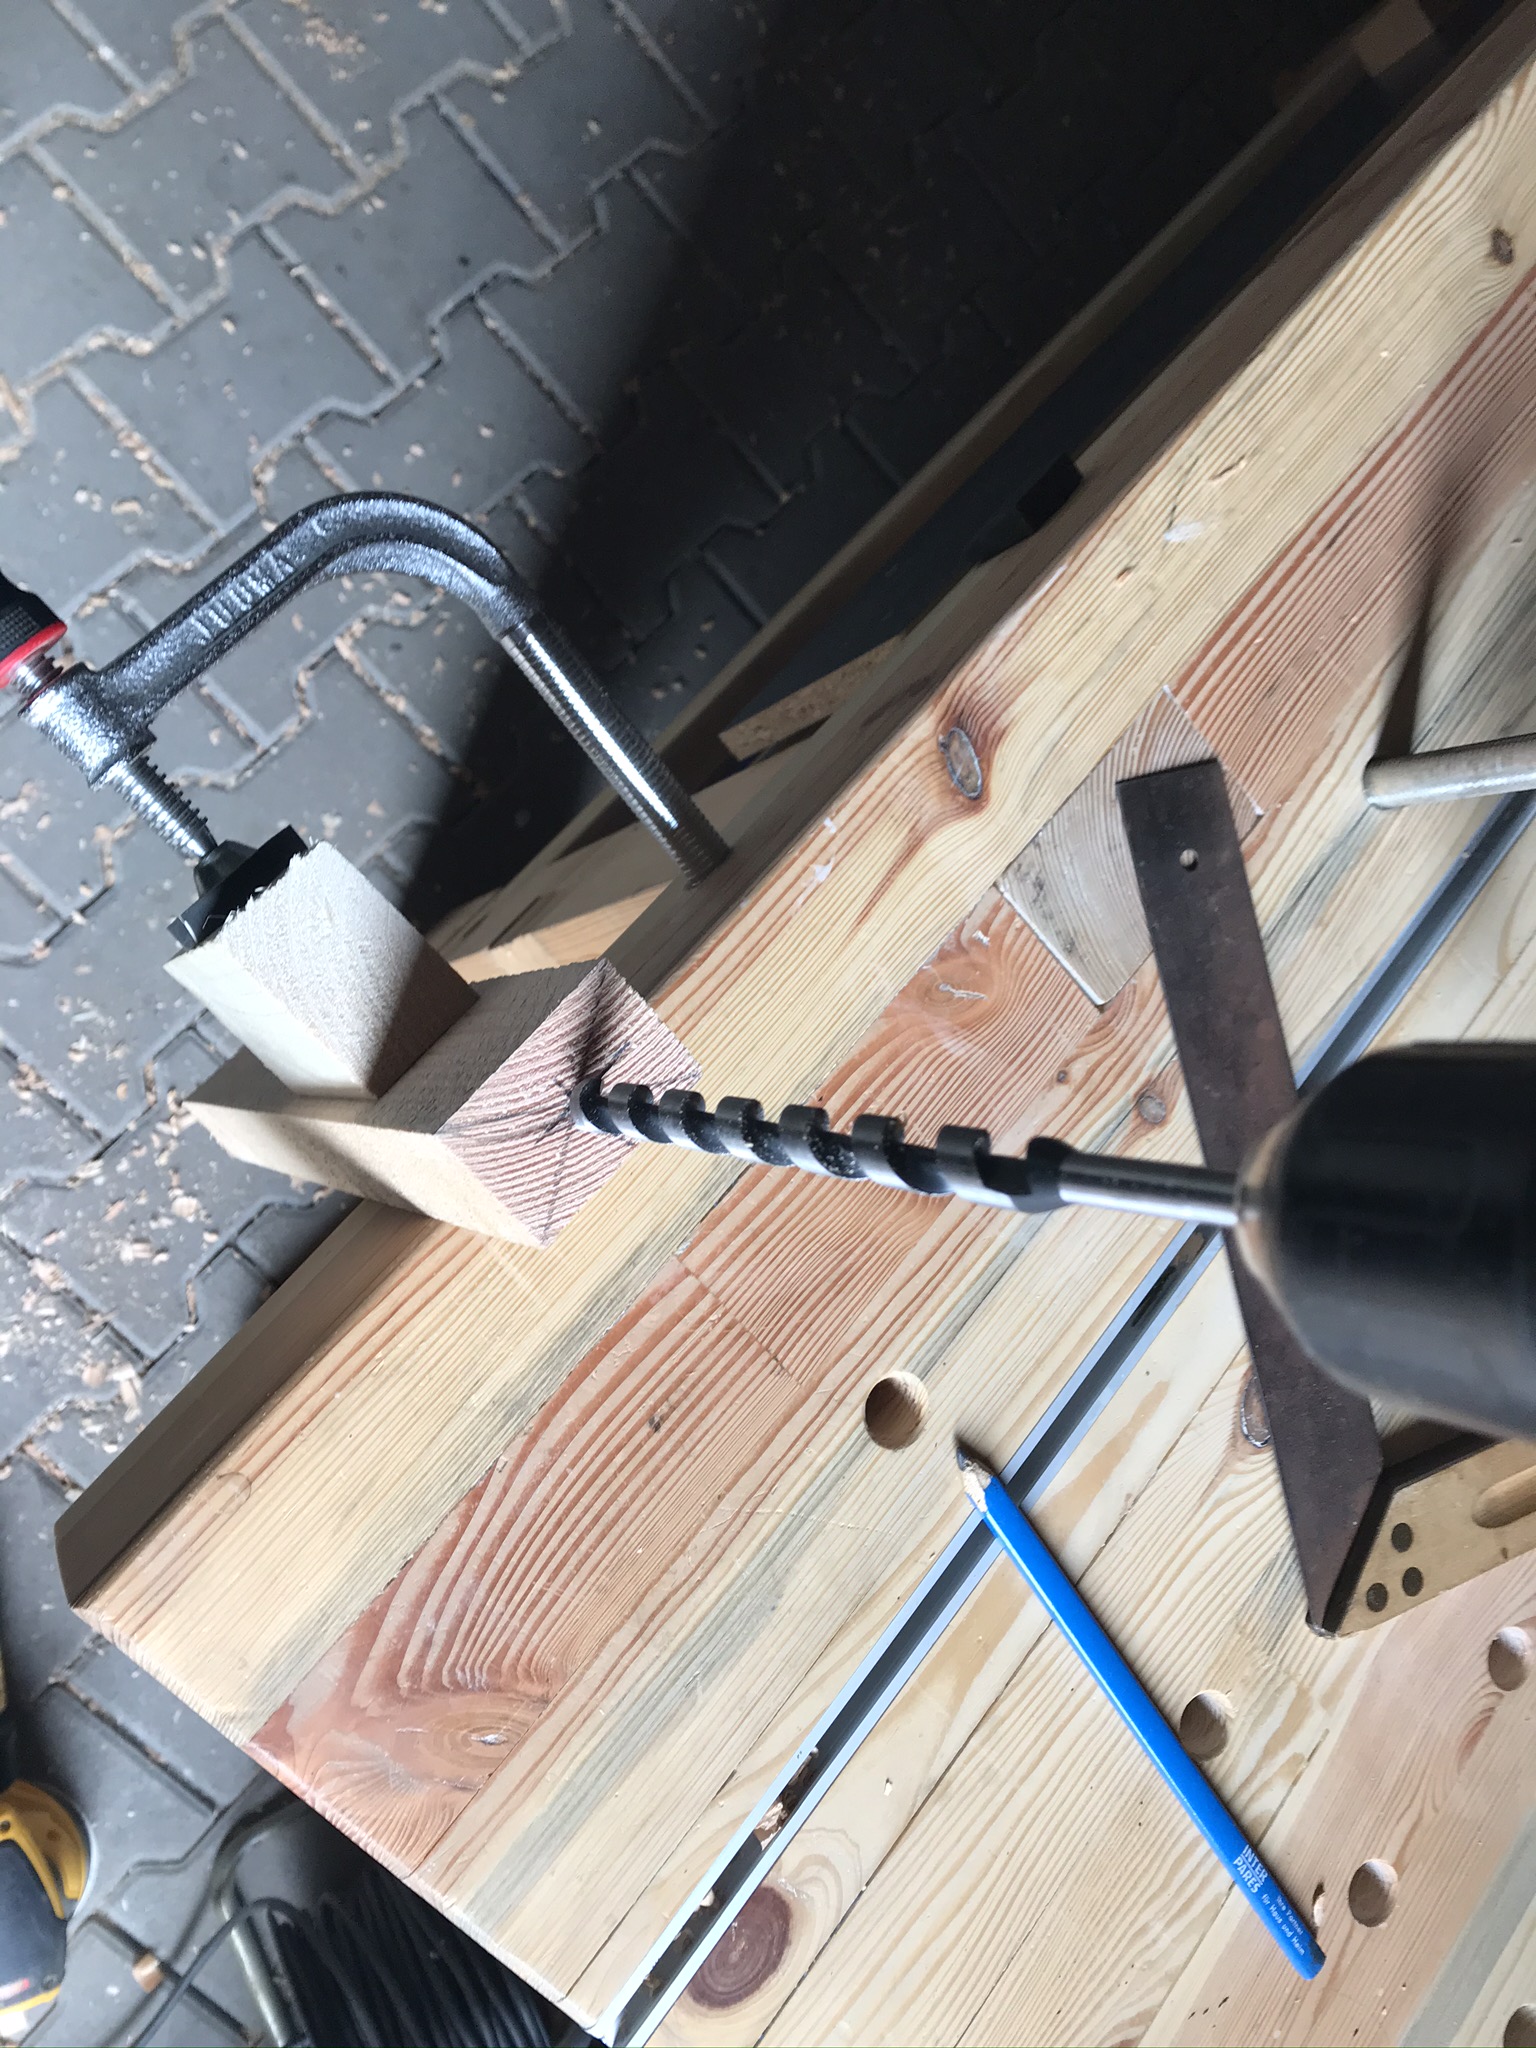
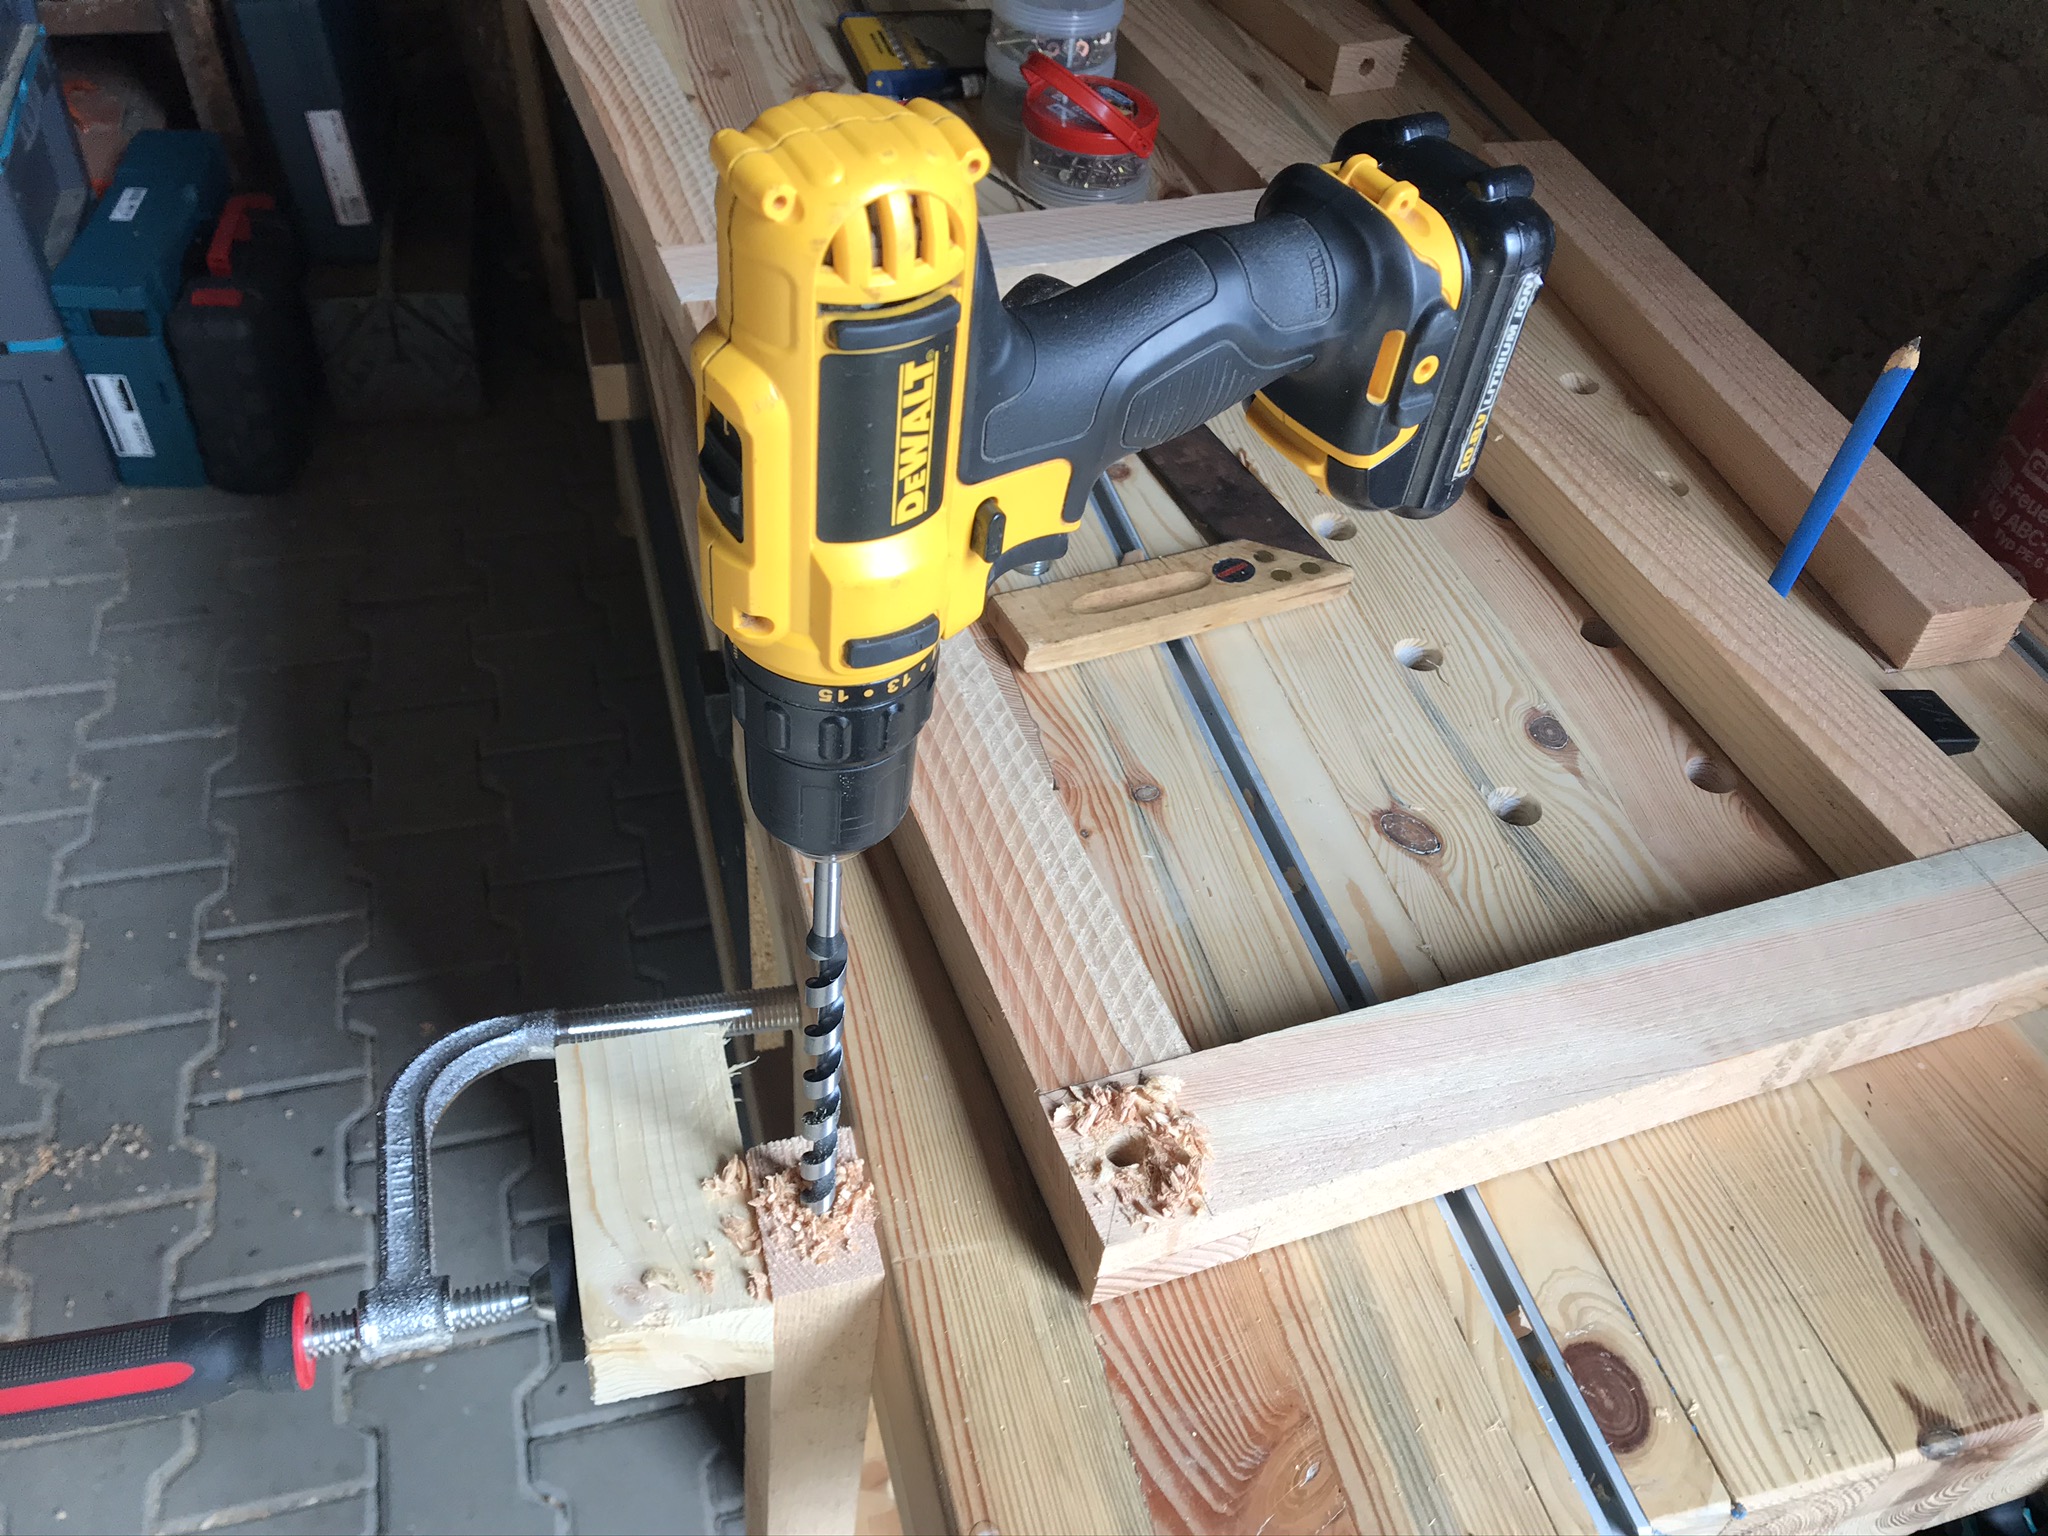
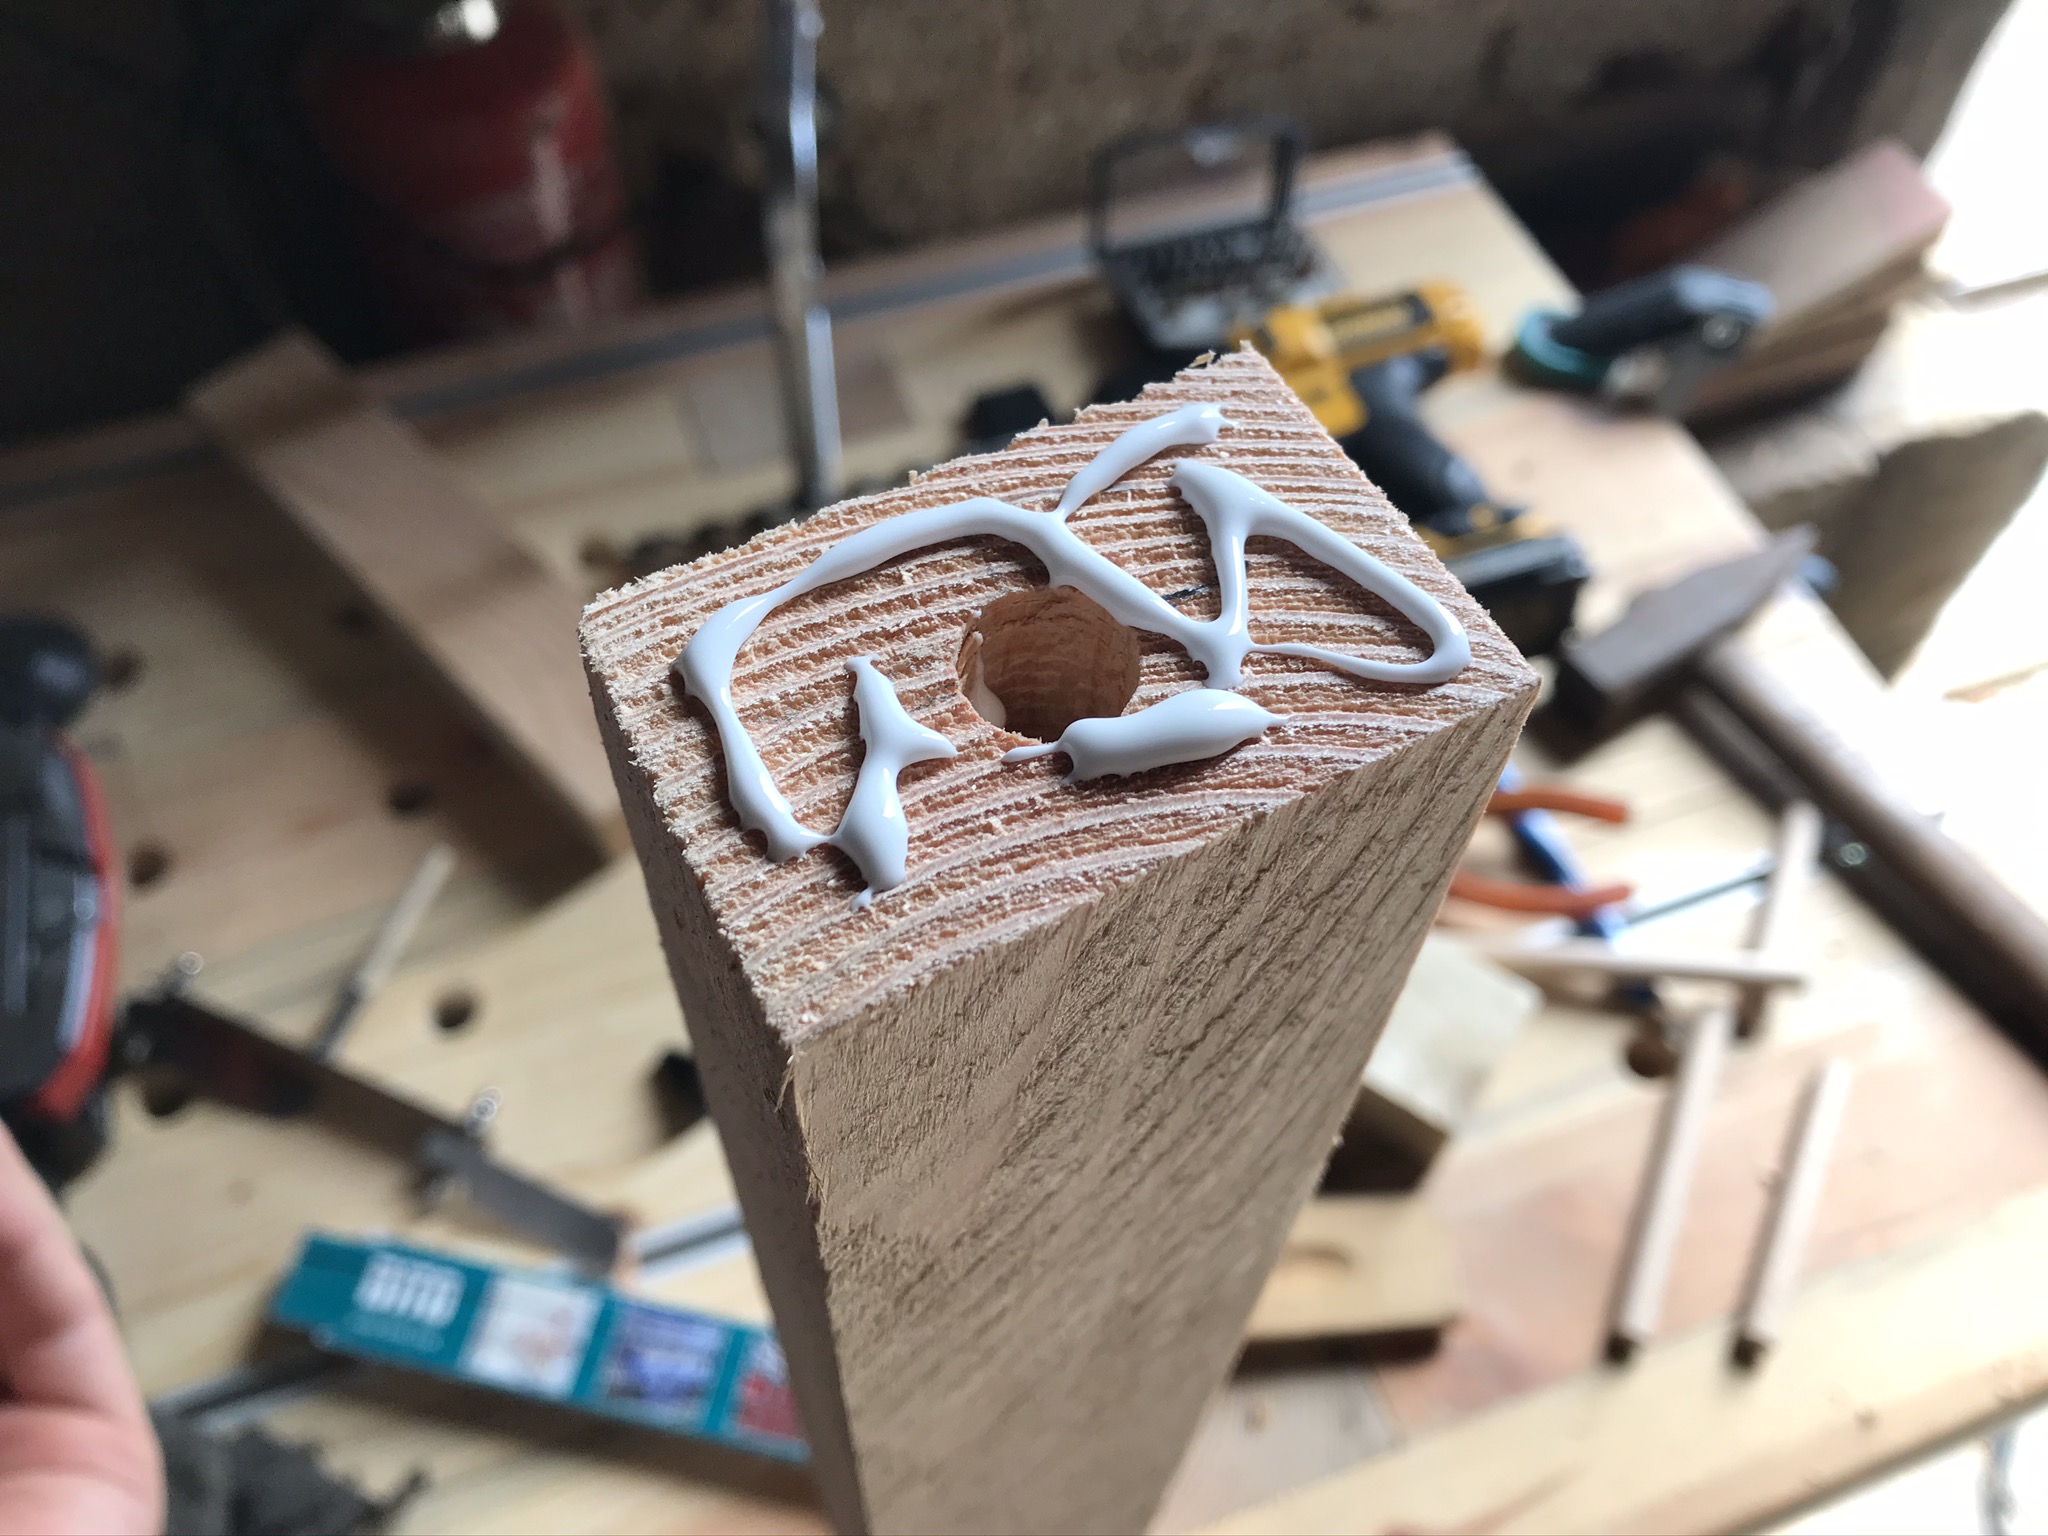
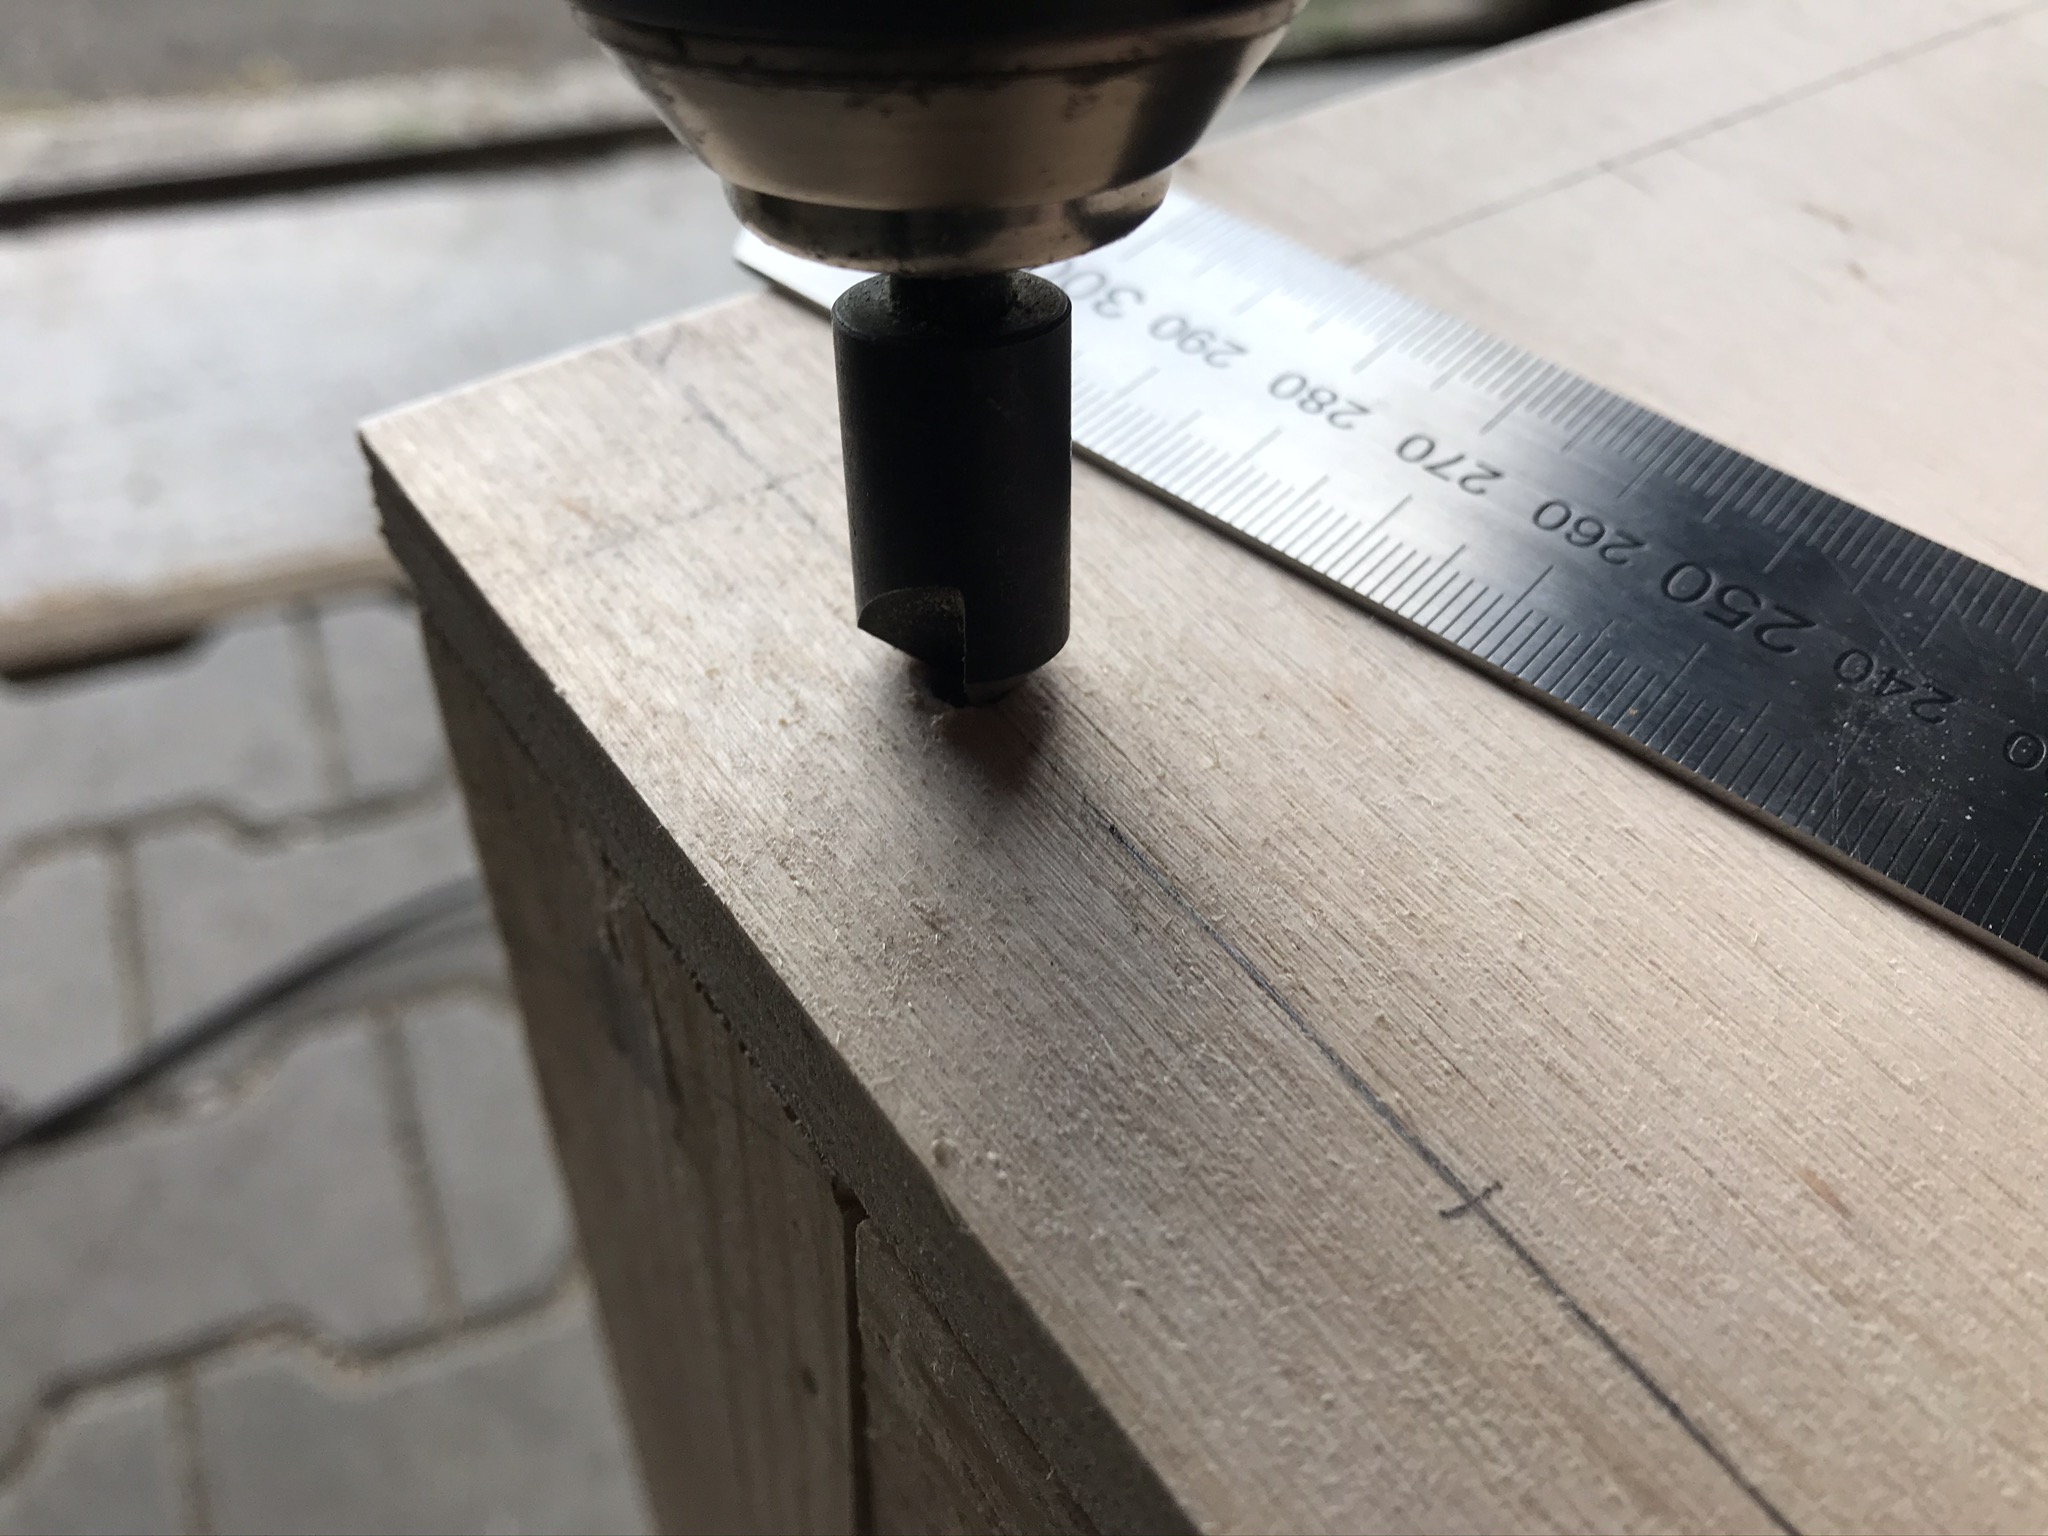
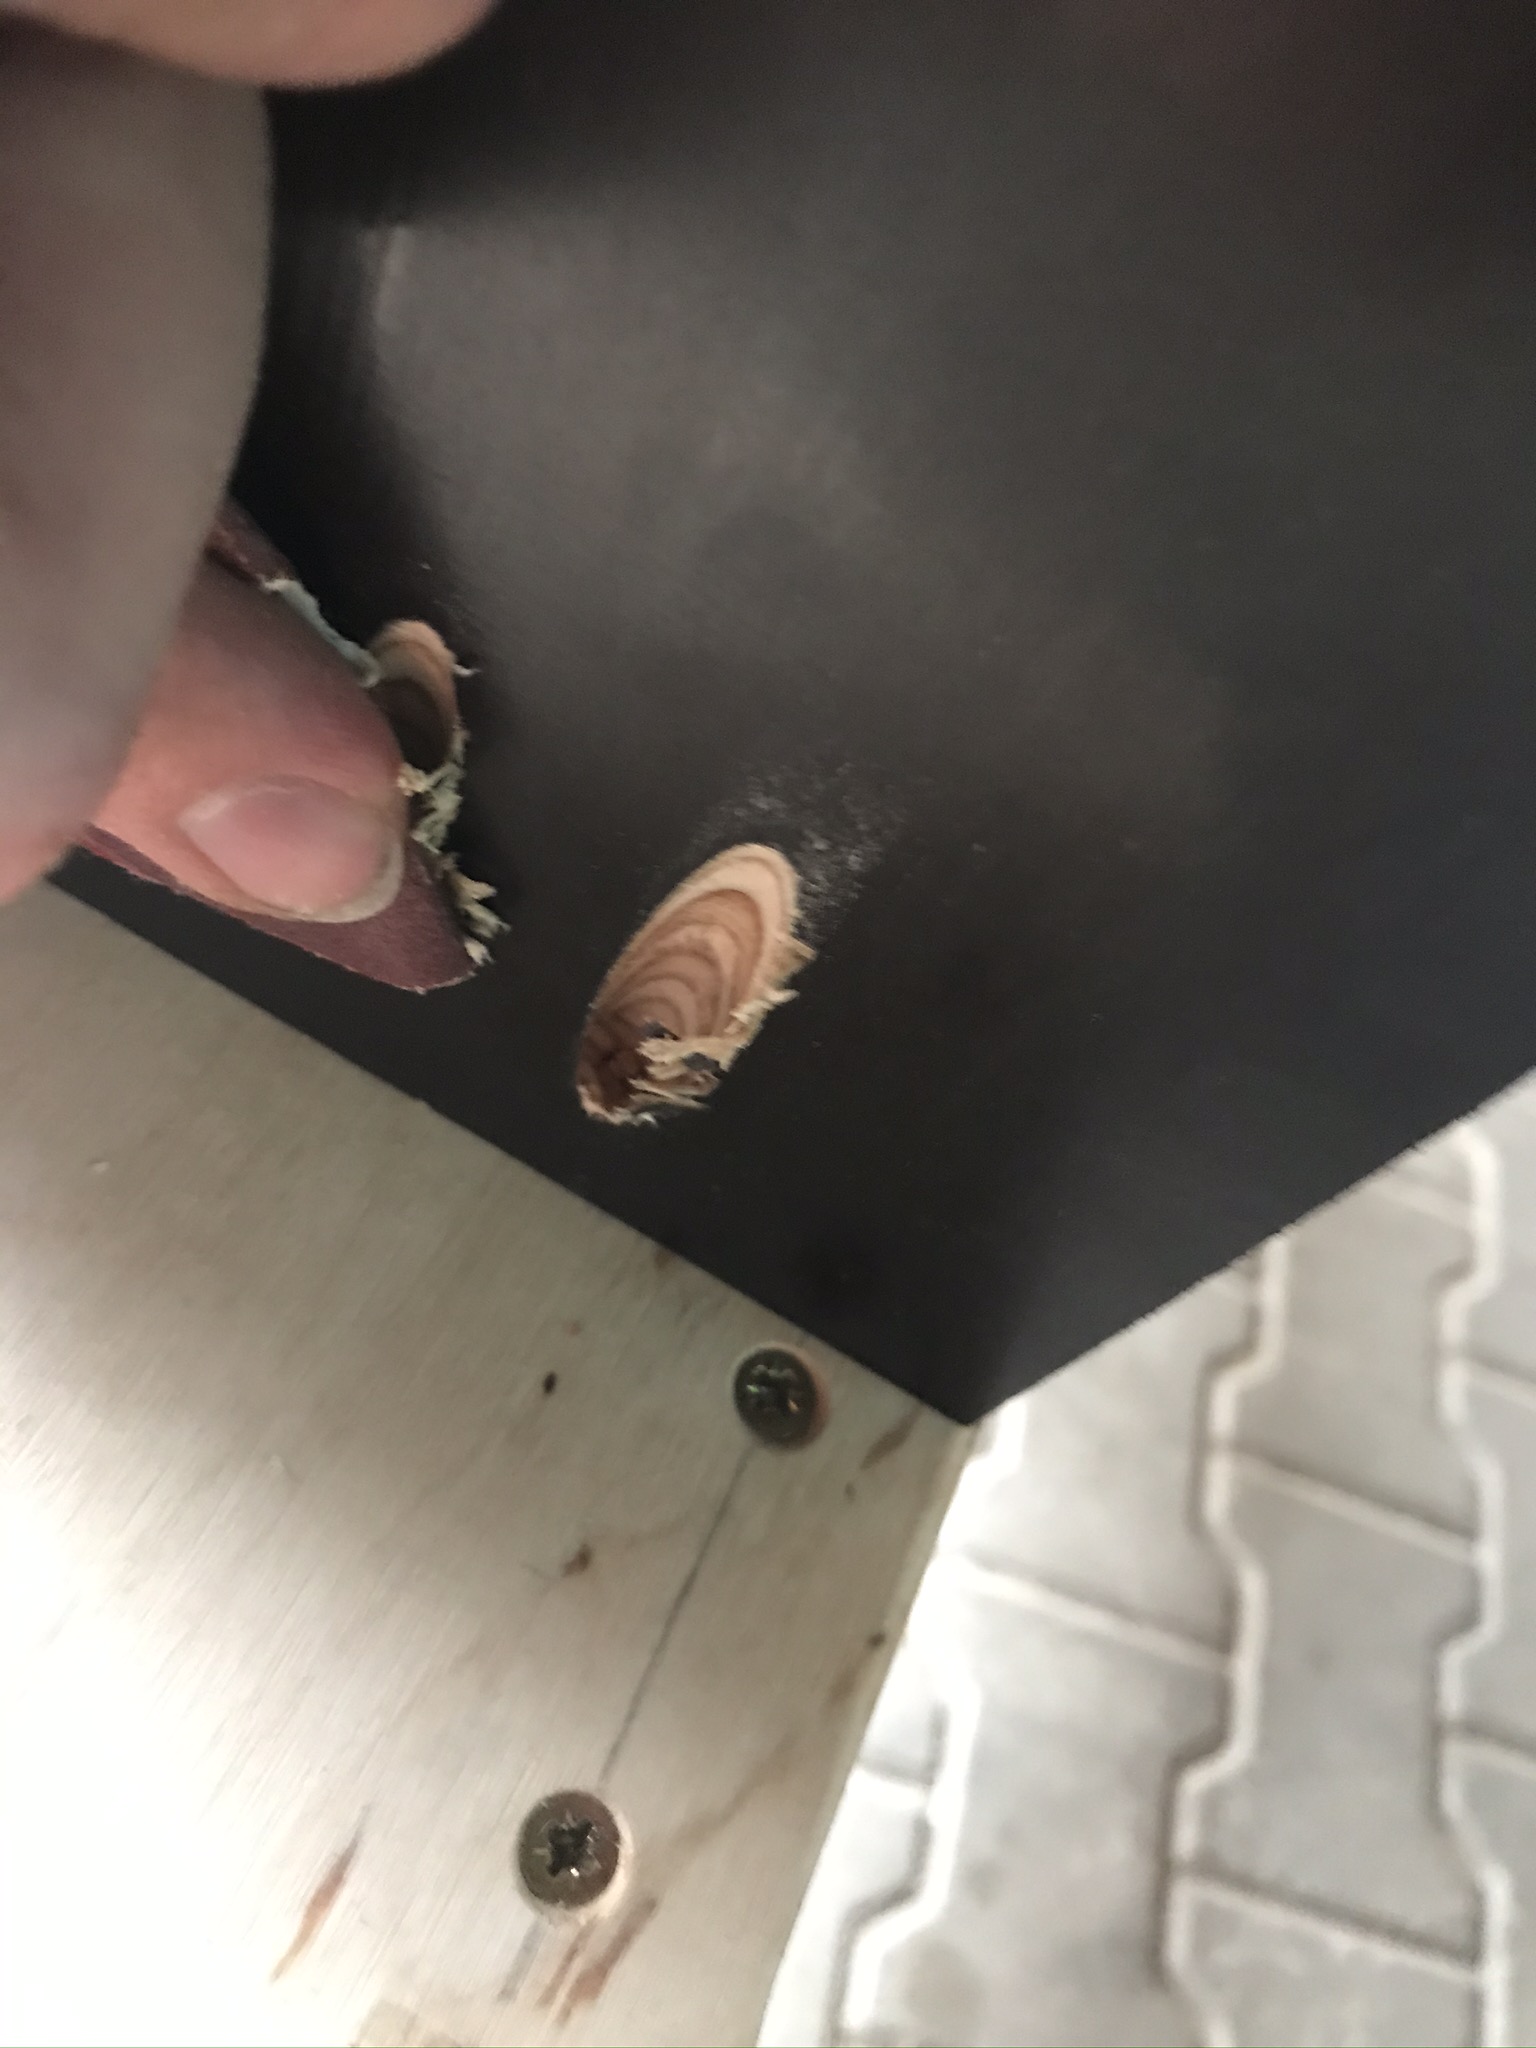
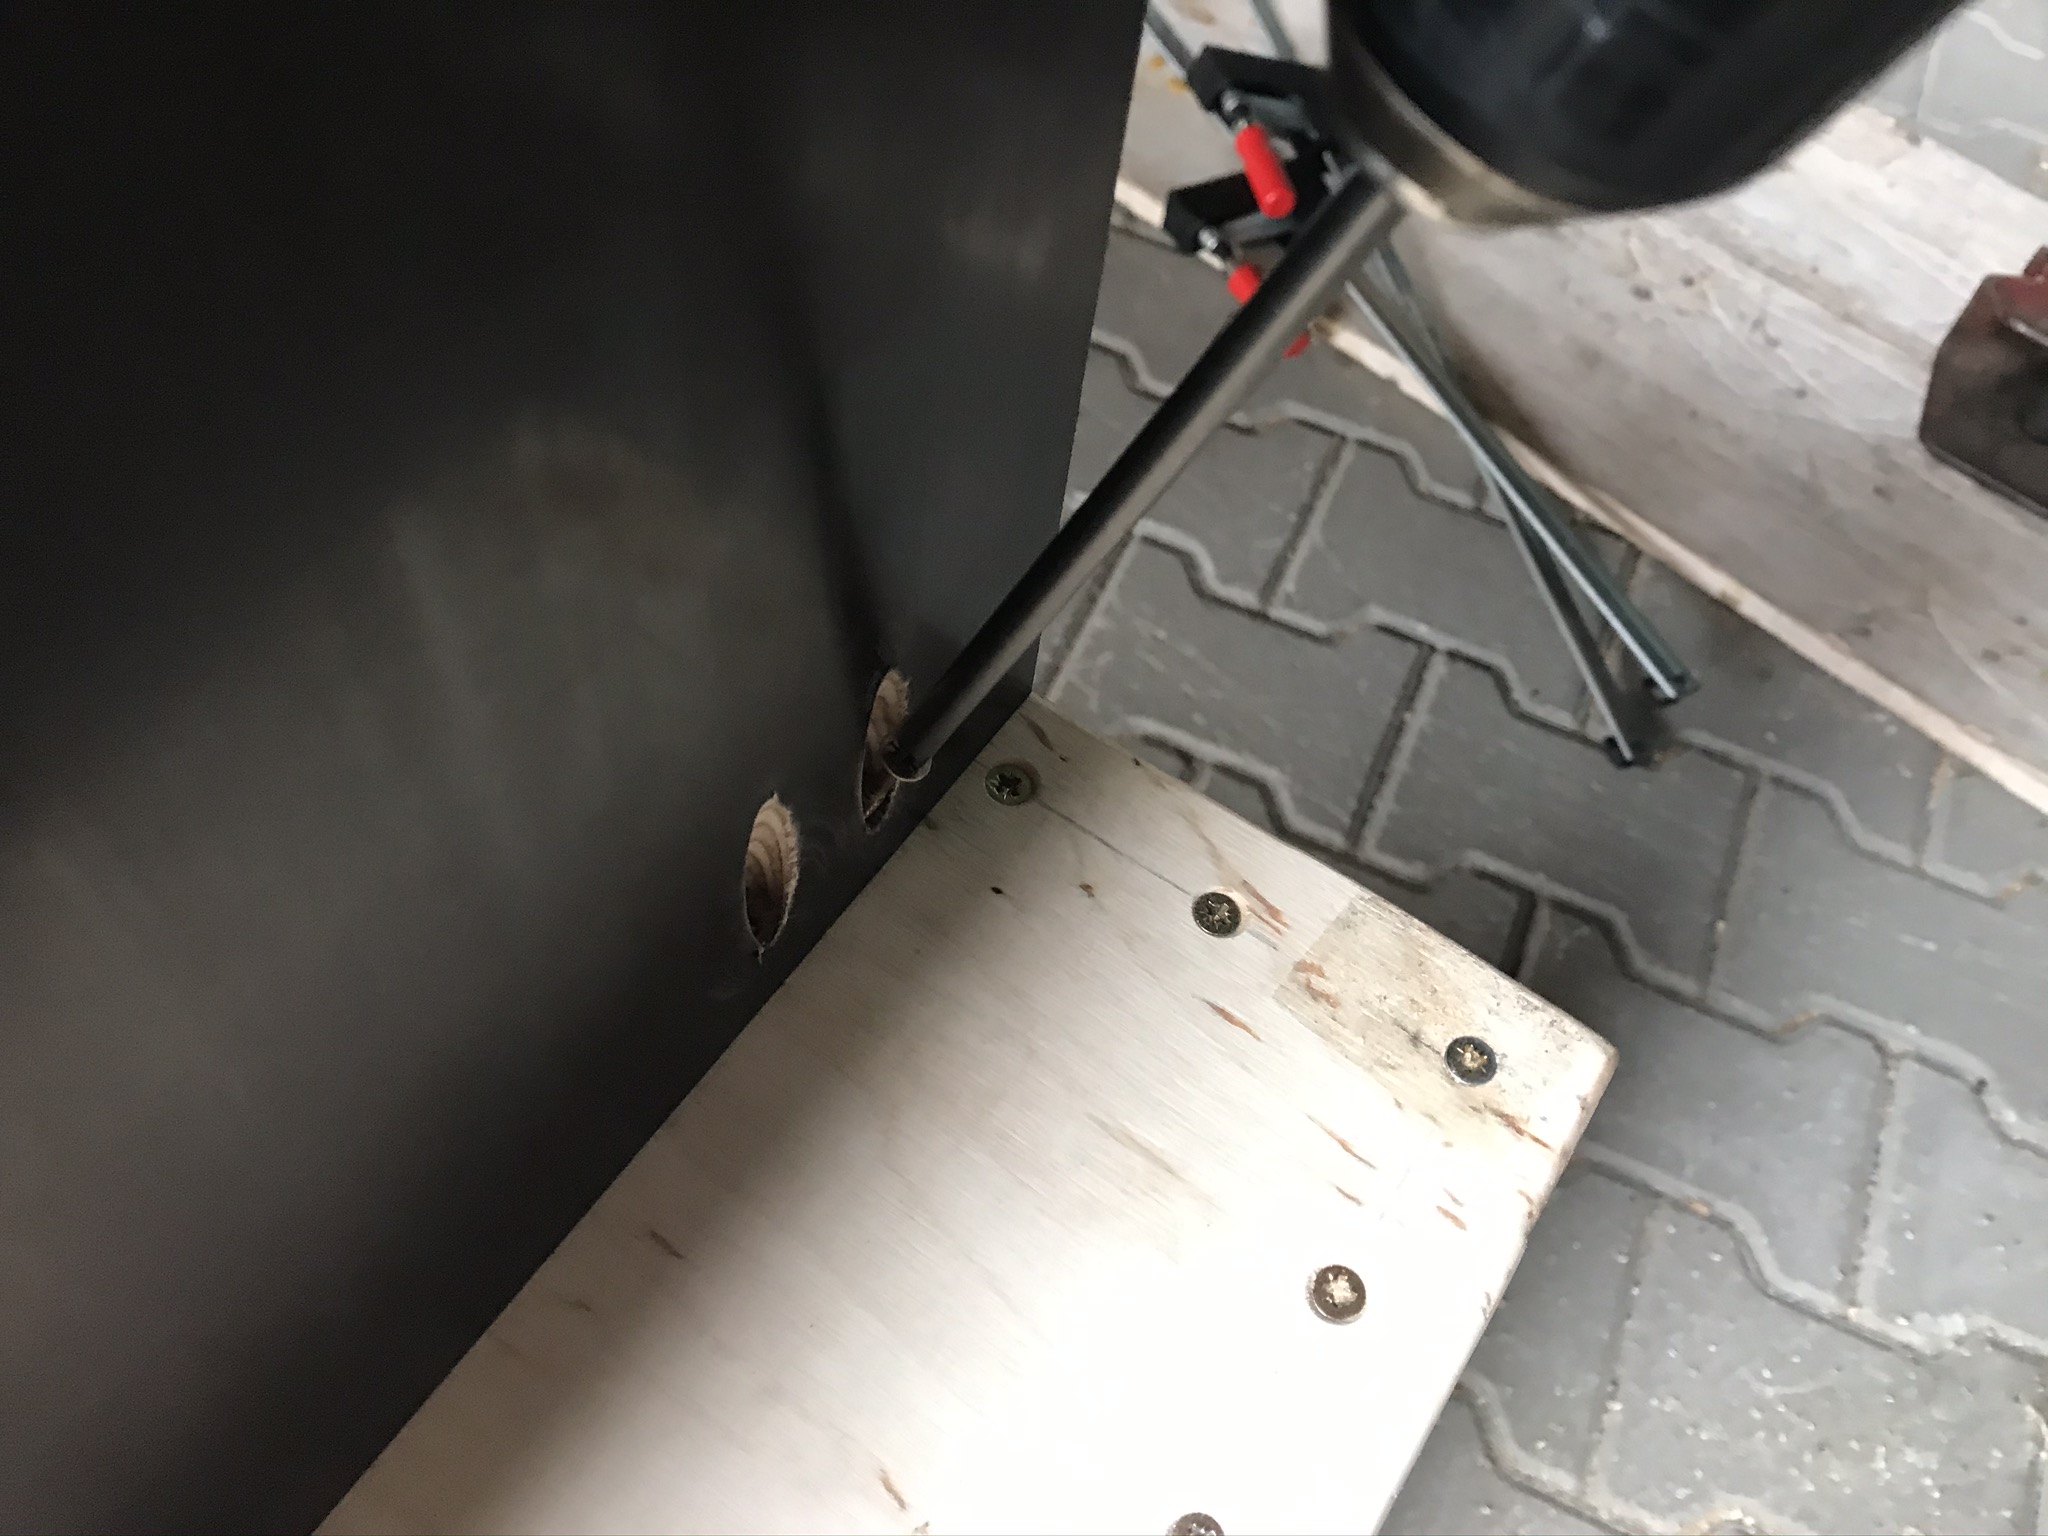
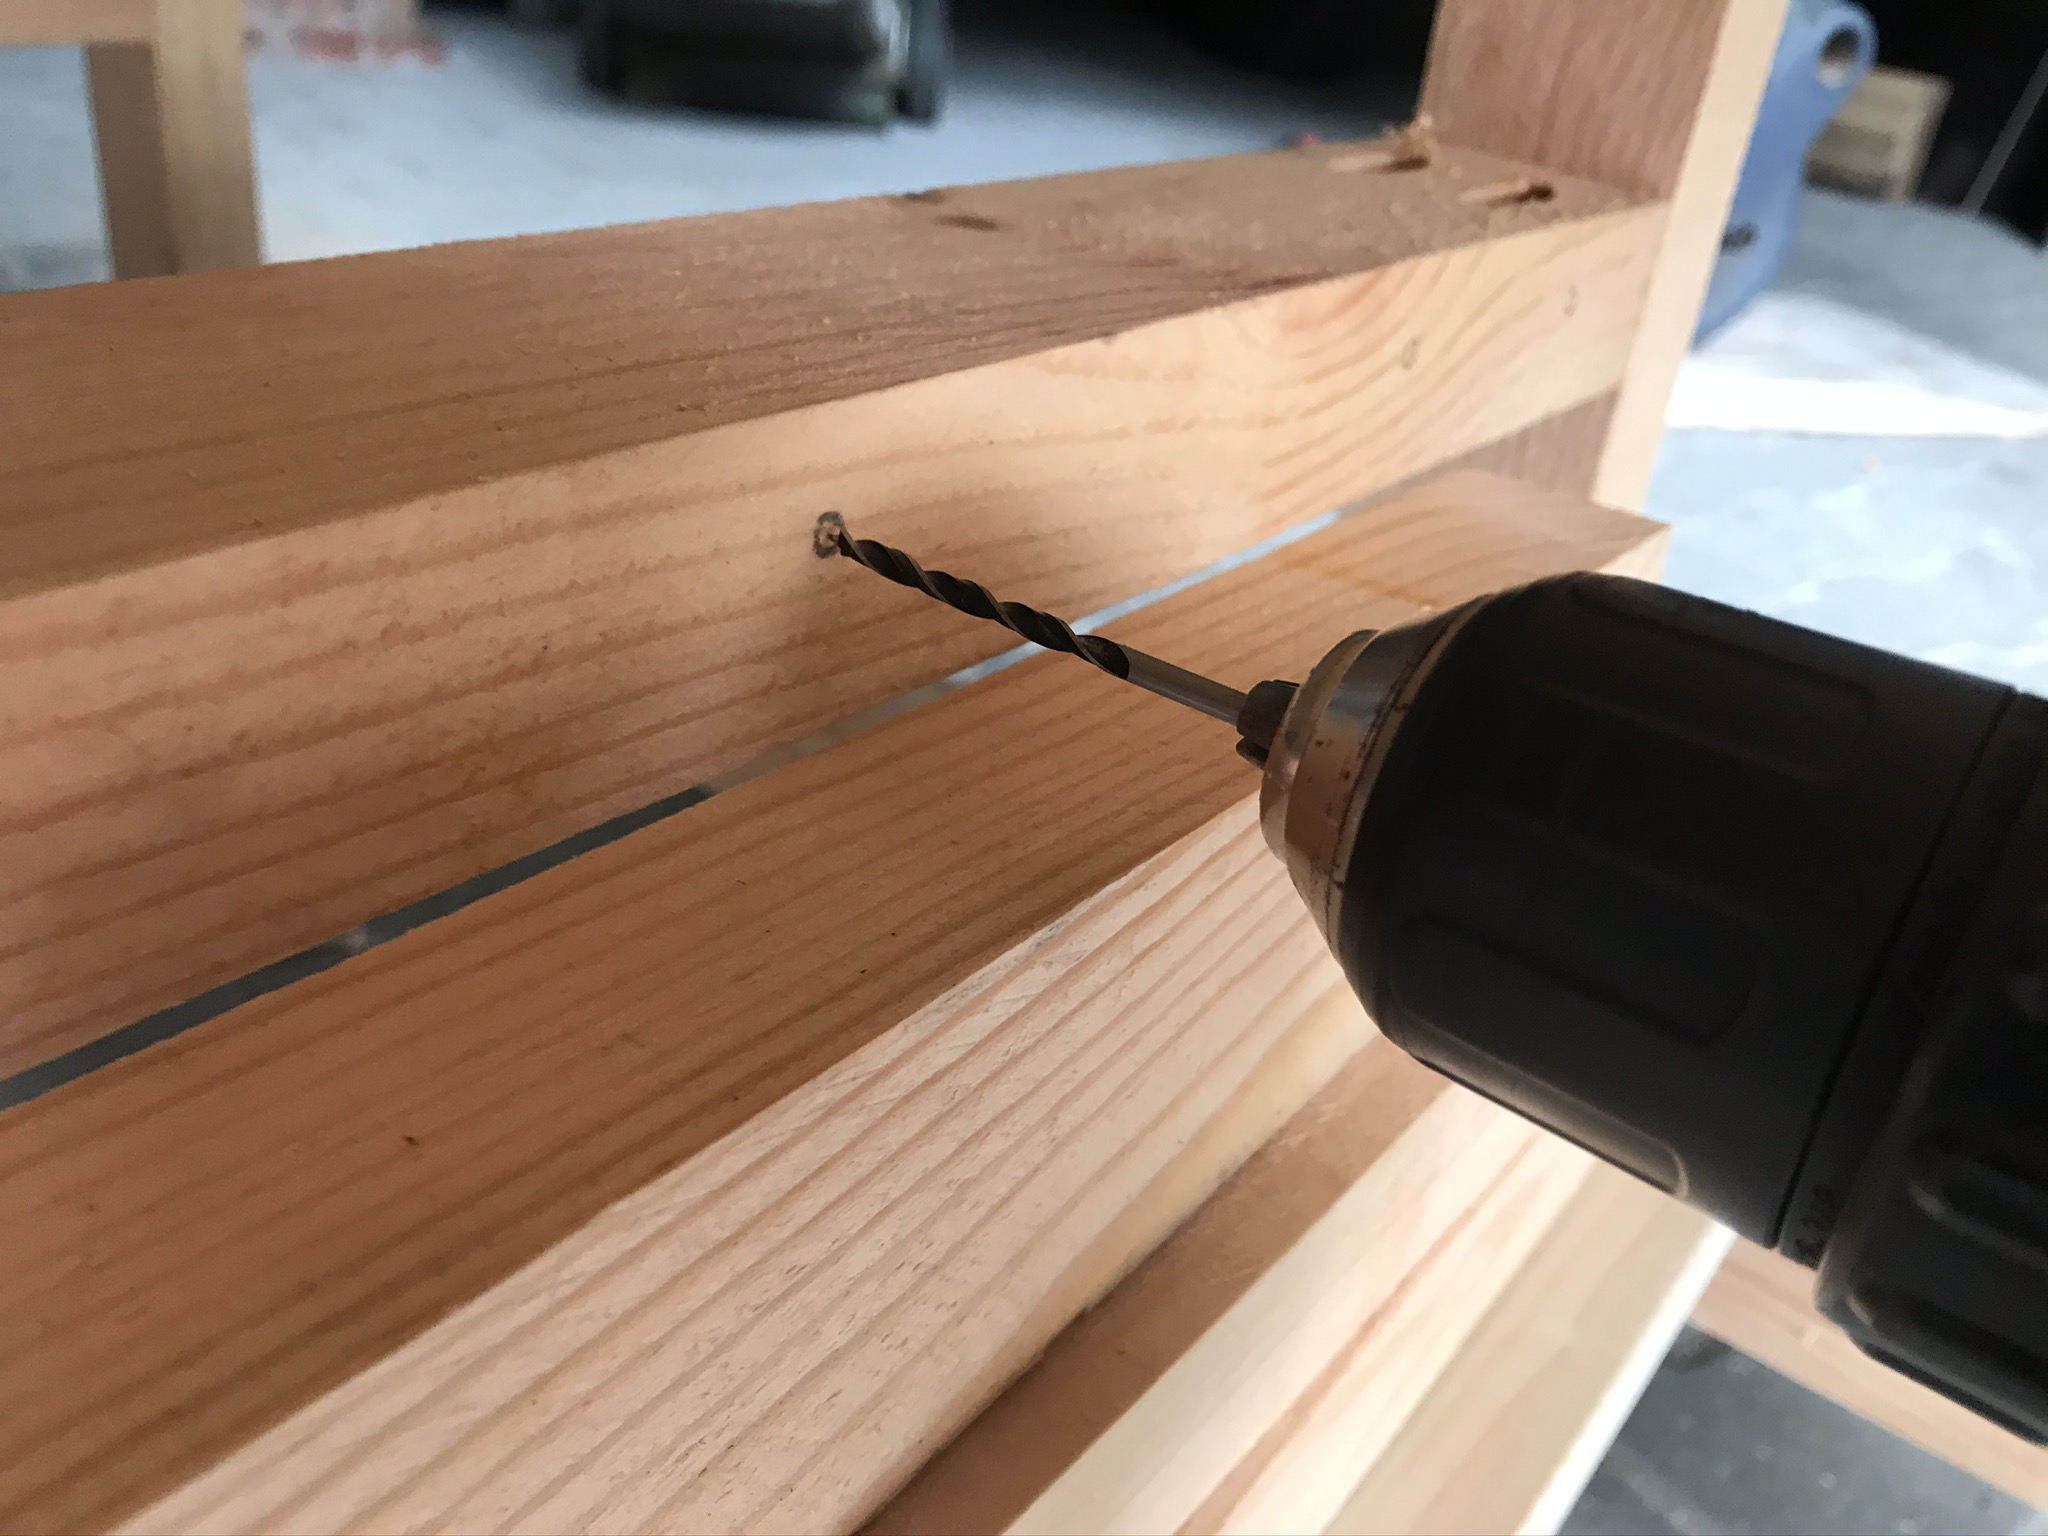
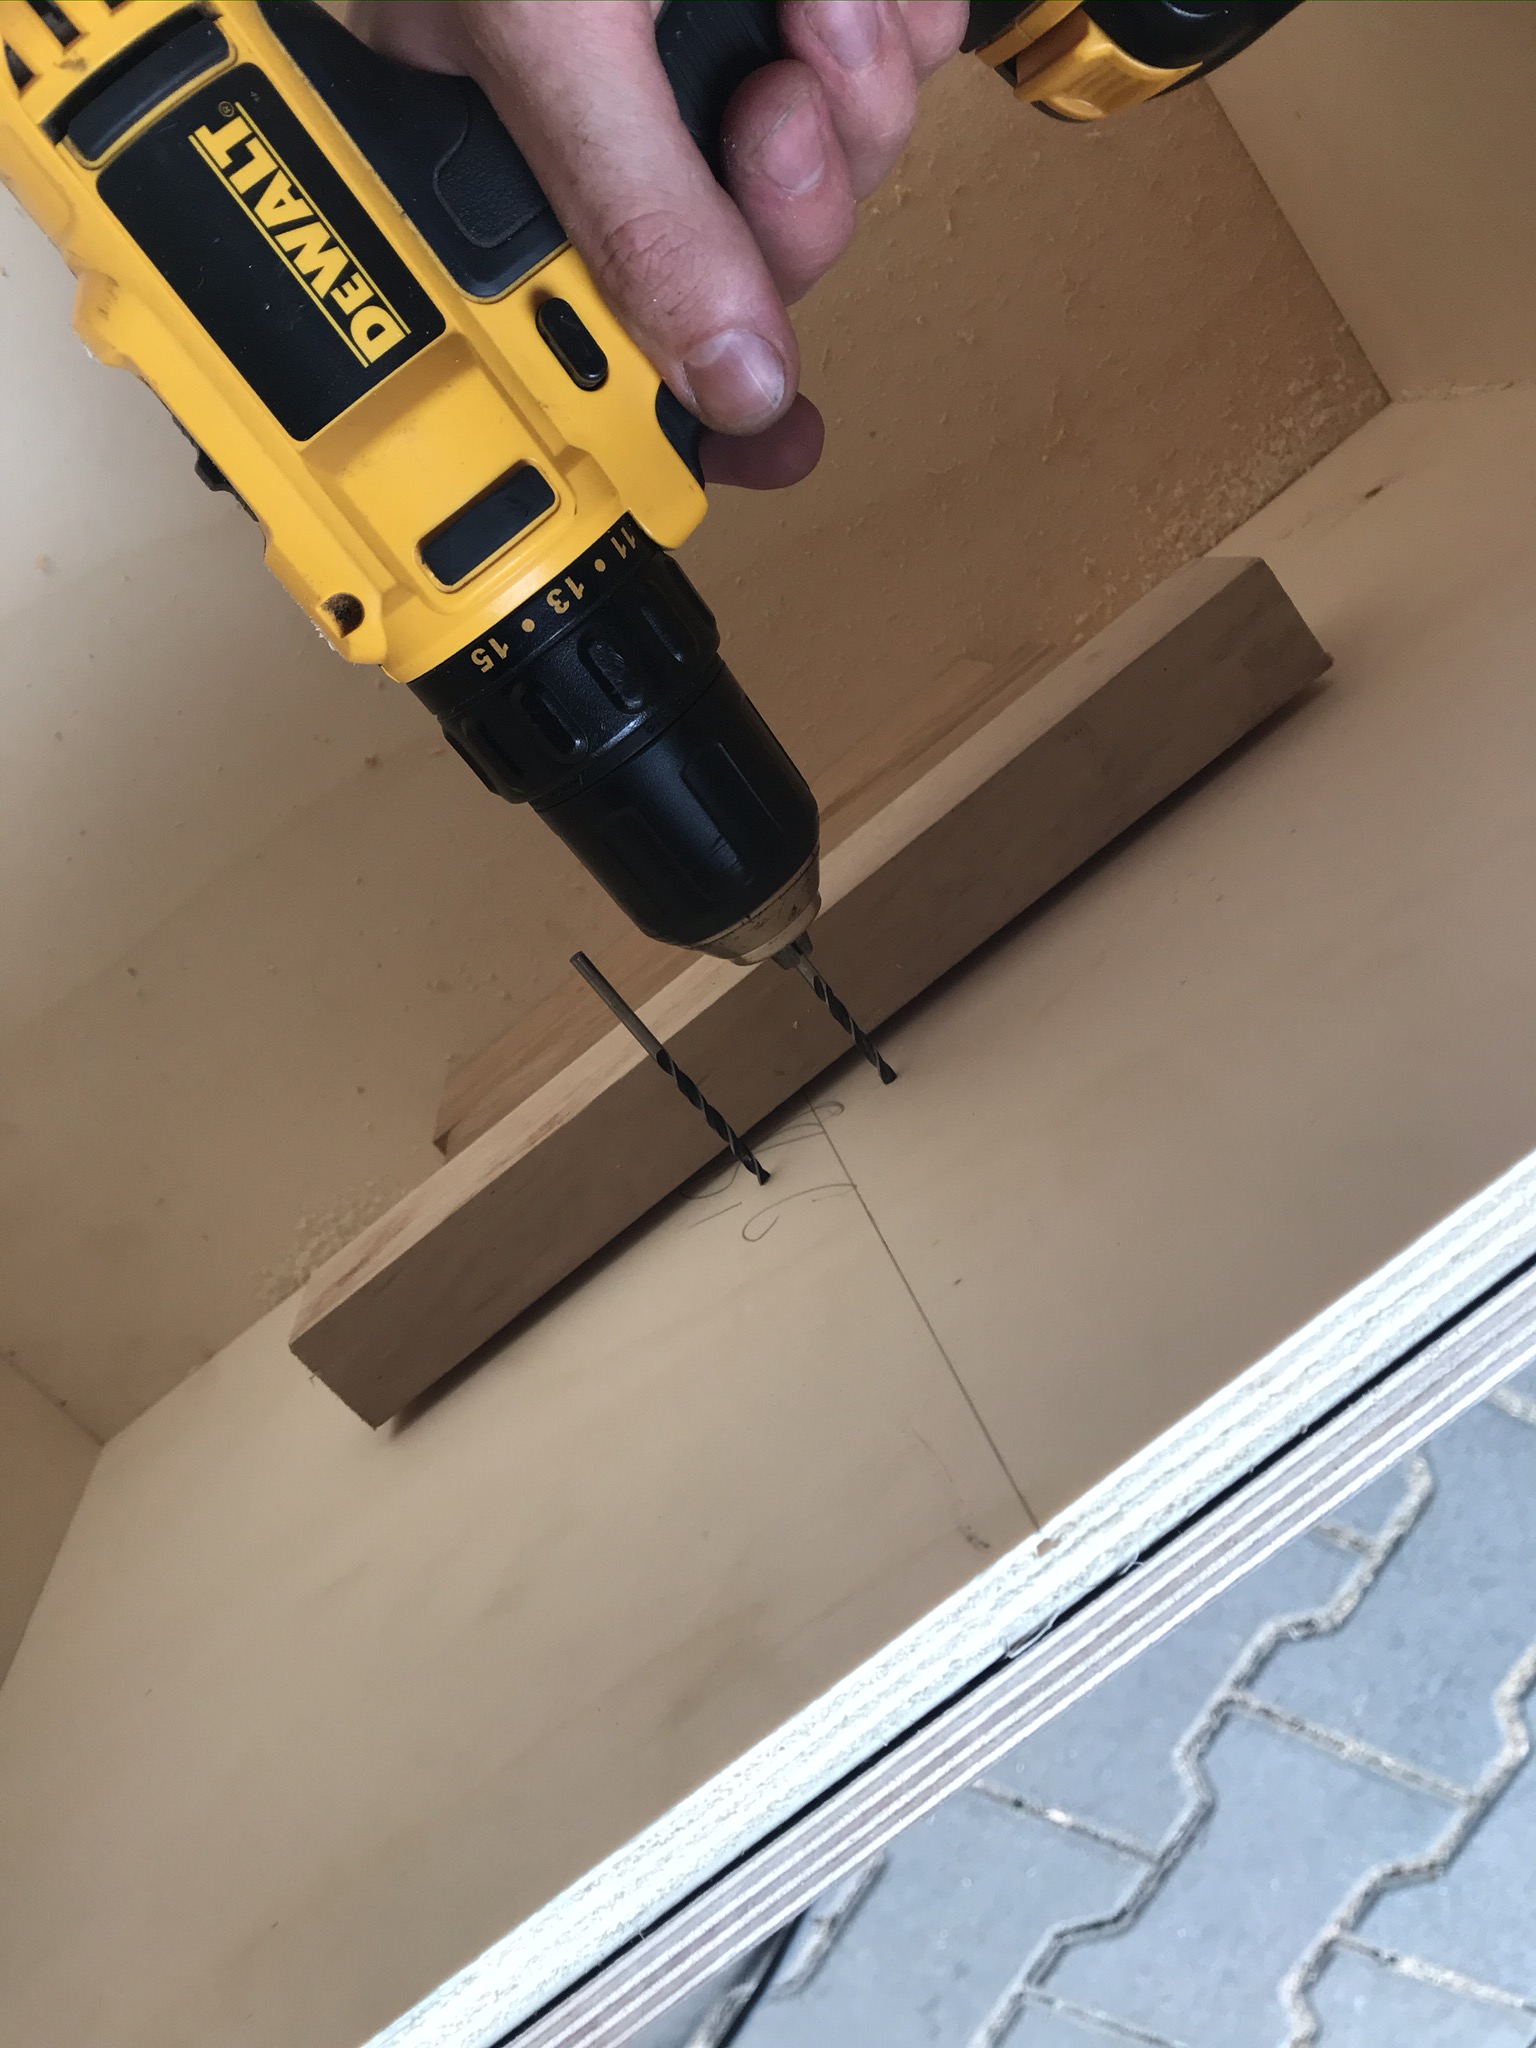
Now the matching holes have to be drilled in the existing frame parts of the frame and in the horizontal short struts. I used a 12mm Auger drill bit* for this. Beforehand, I marked the drilling position on the frame so that I hit the exact centre. Precise work is important here so that the edges are all flush later. With variant 2 (undercover jig), this is a little easier to do.
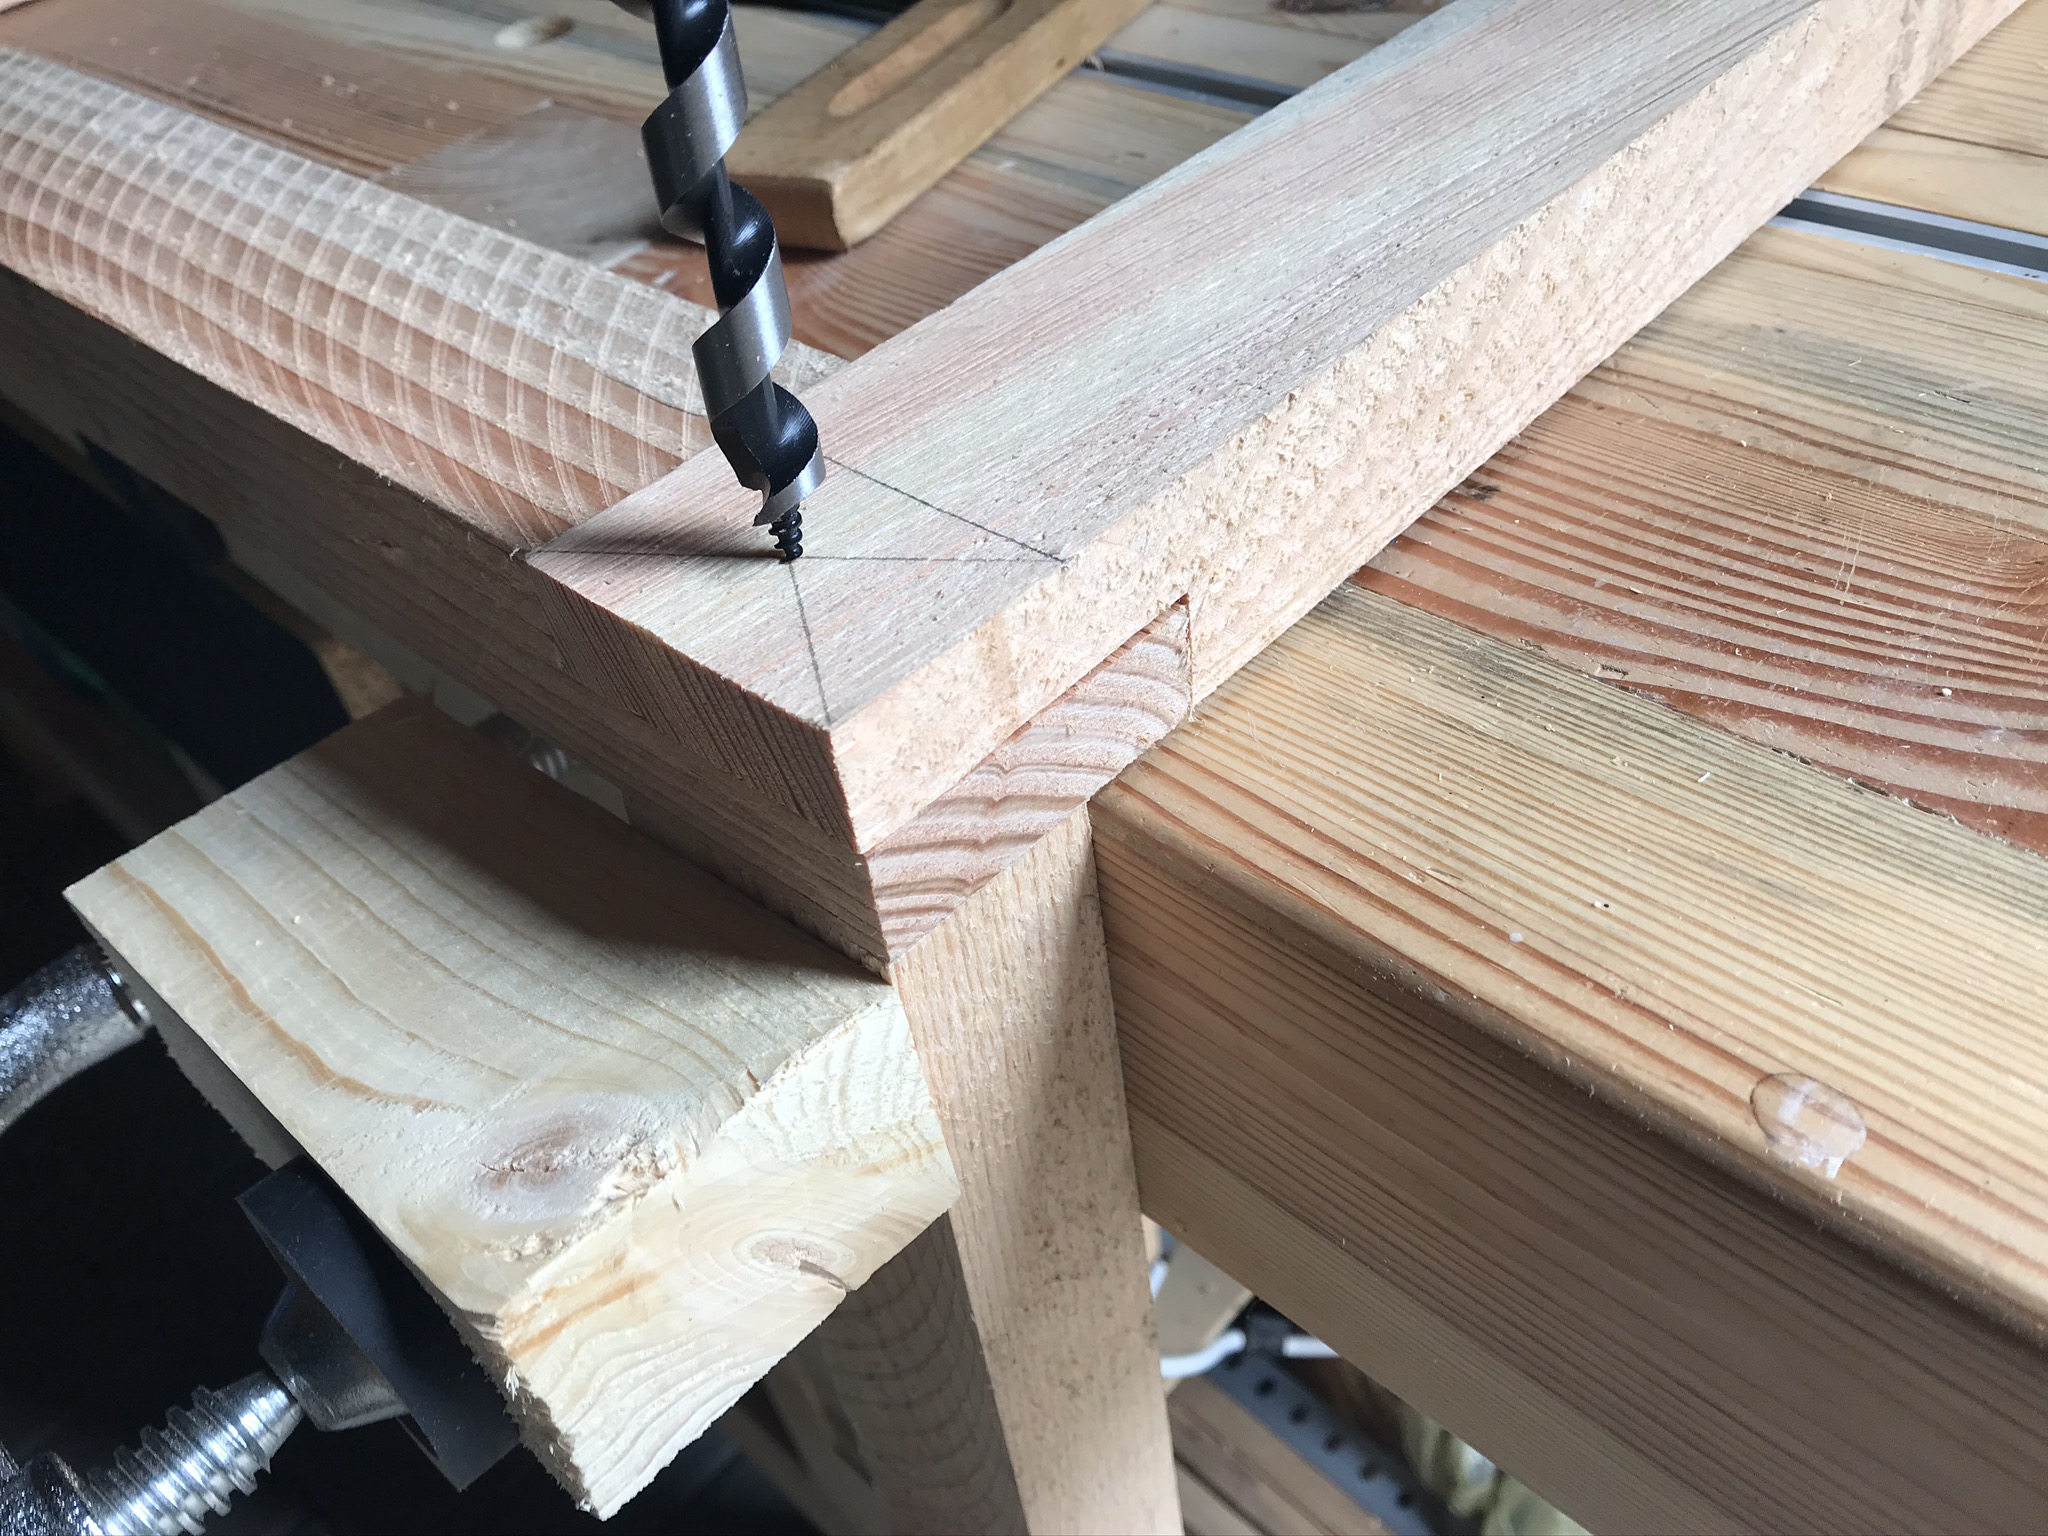
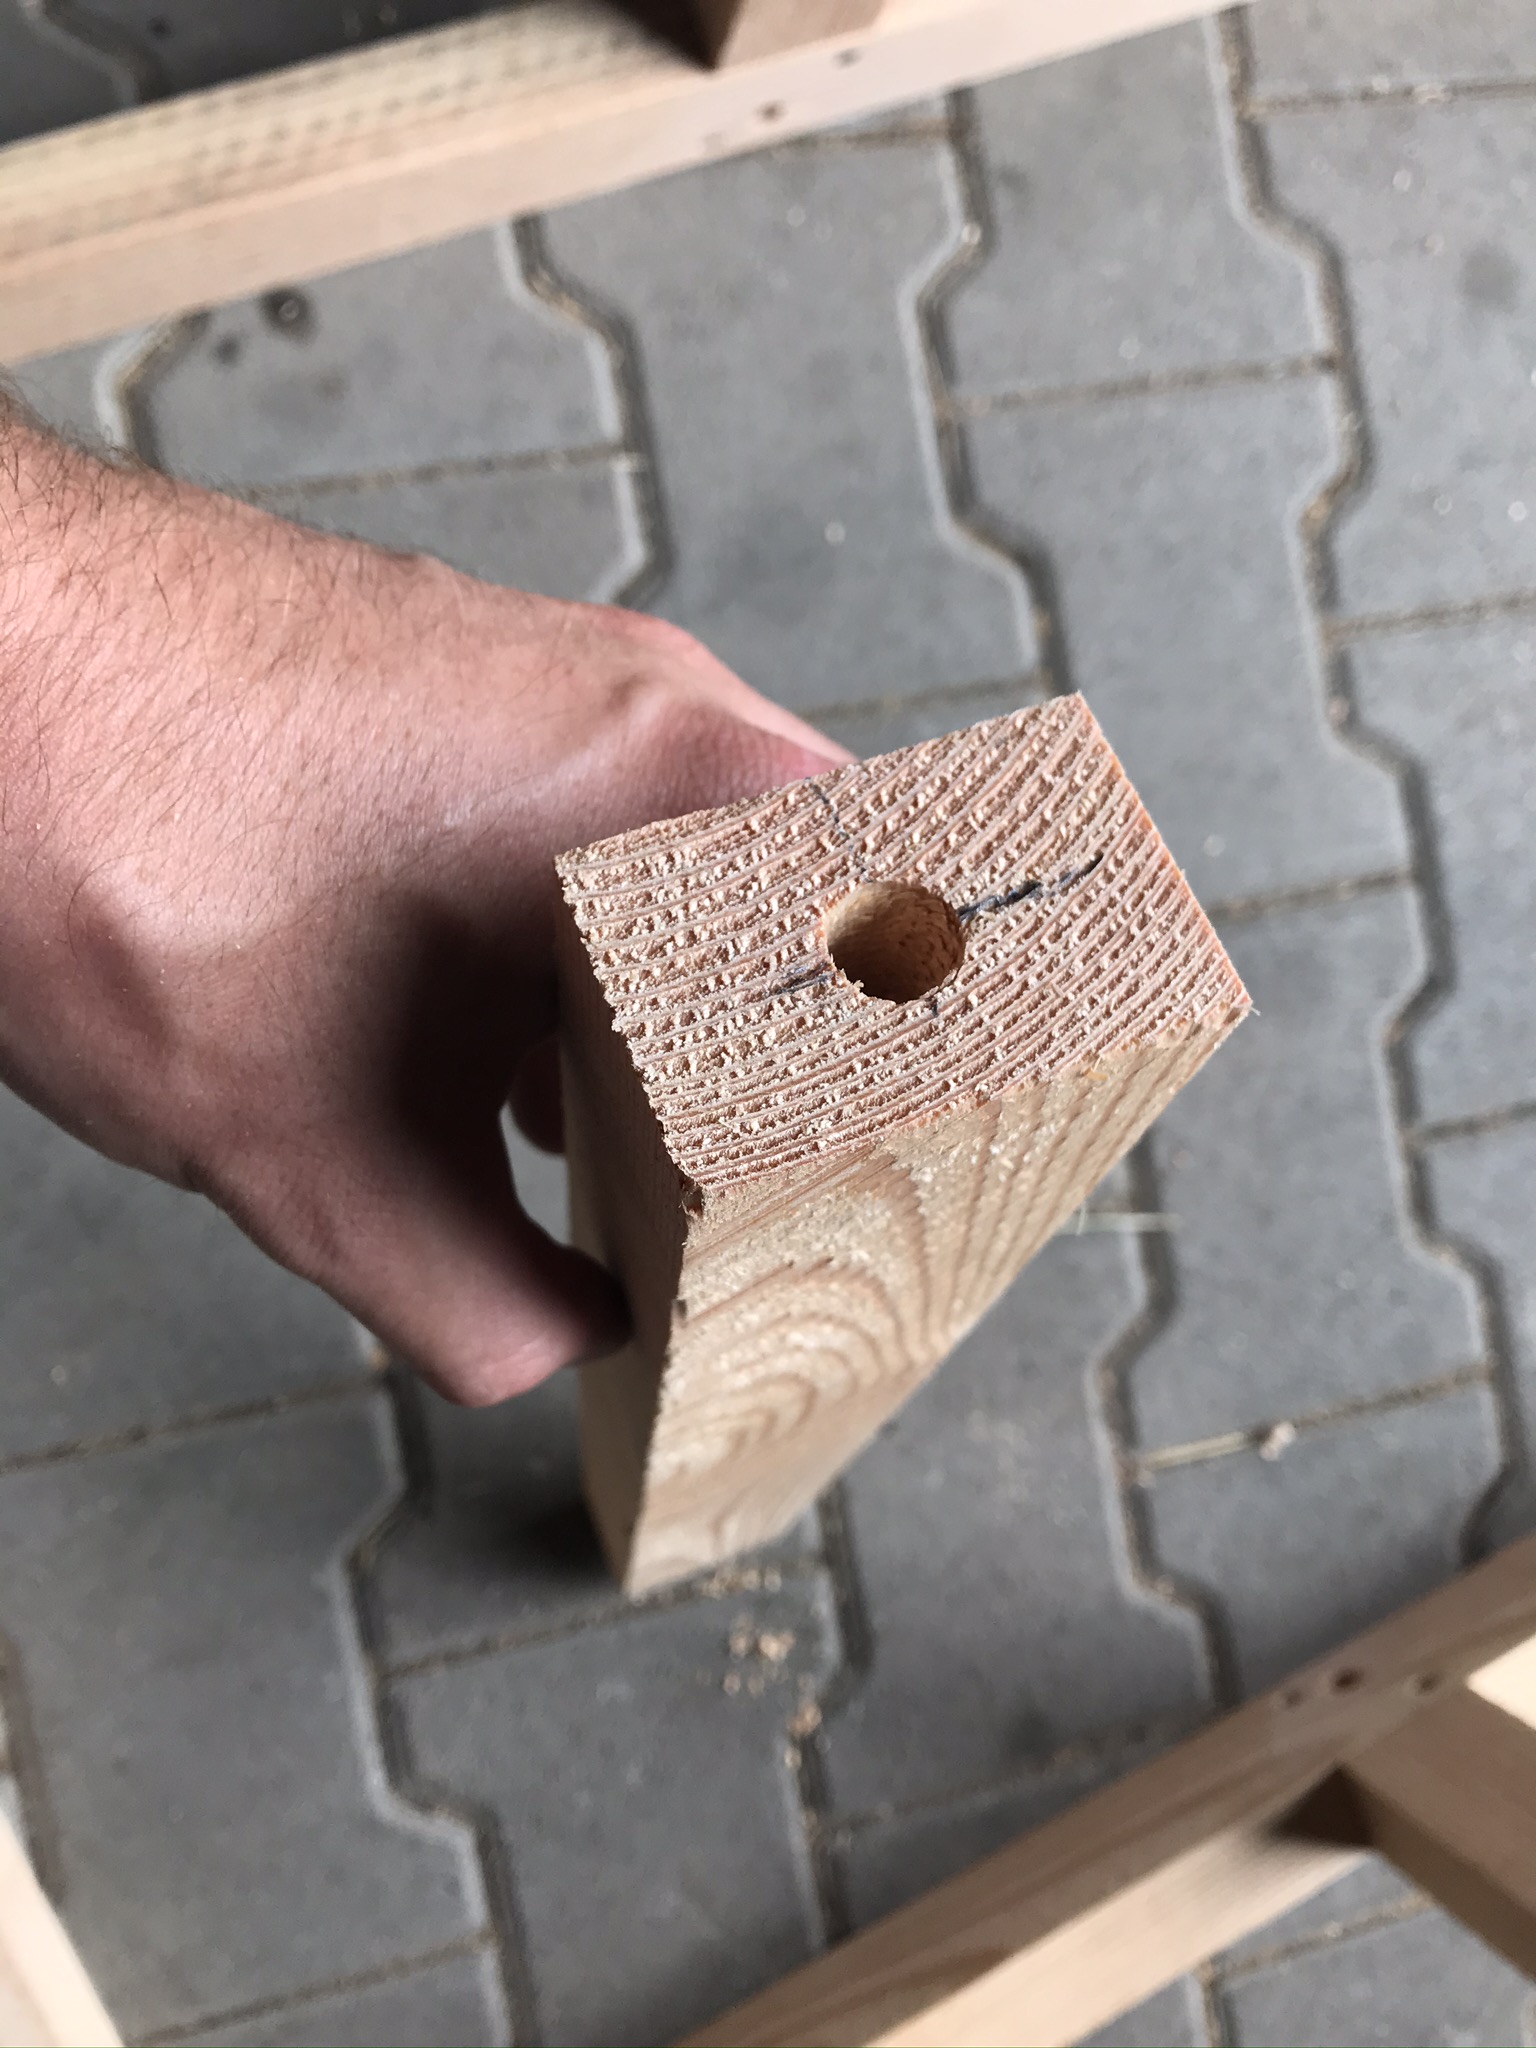
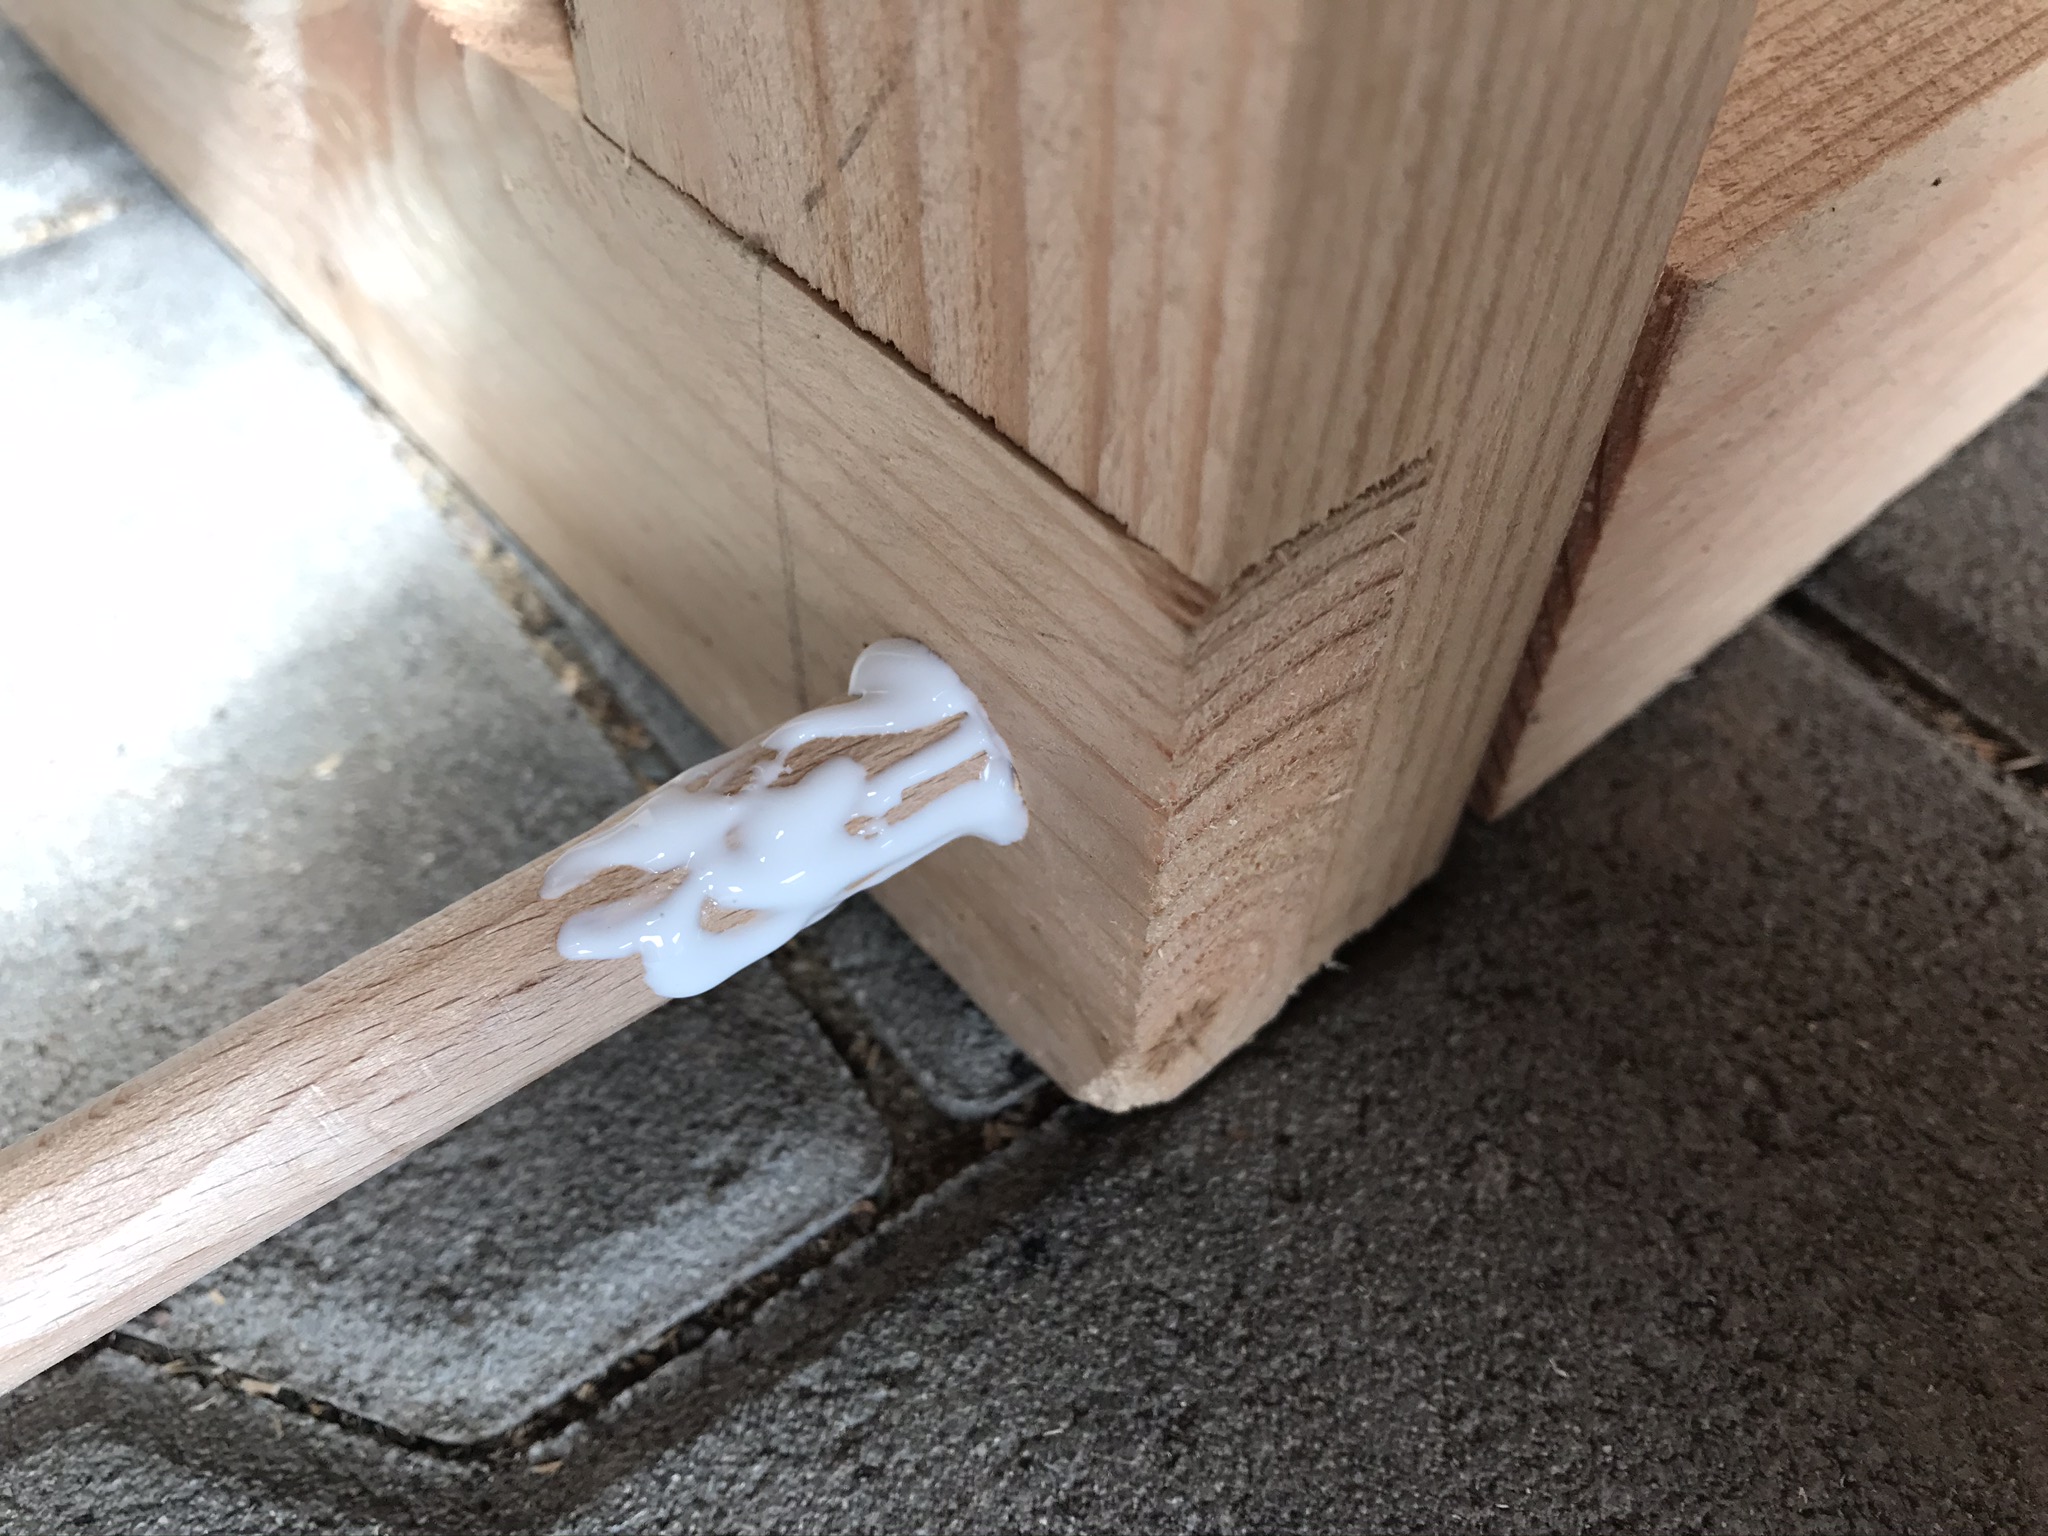
Finally, only the horizontal short struts have to be connected to the two pre-assembled frame parts. Before you drive in the dowels, spread glue not only on the dowel itself but also on the butt edges of the struts and frame parts. Enough screw clamps* with a sufficient span (600mm) are indispensable here. Since the square timbers do not have a square cross-section, make sure that you insert the horizontal short struts the right way round – you can see all the details in the construction drawings.
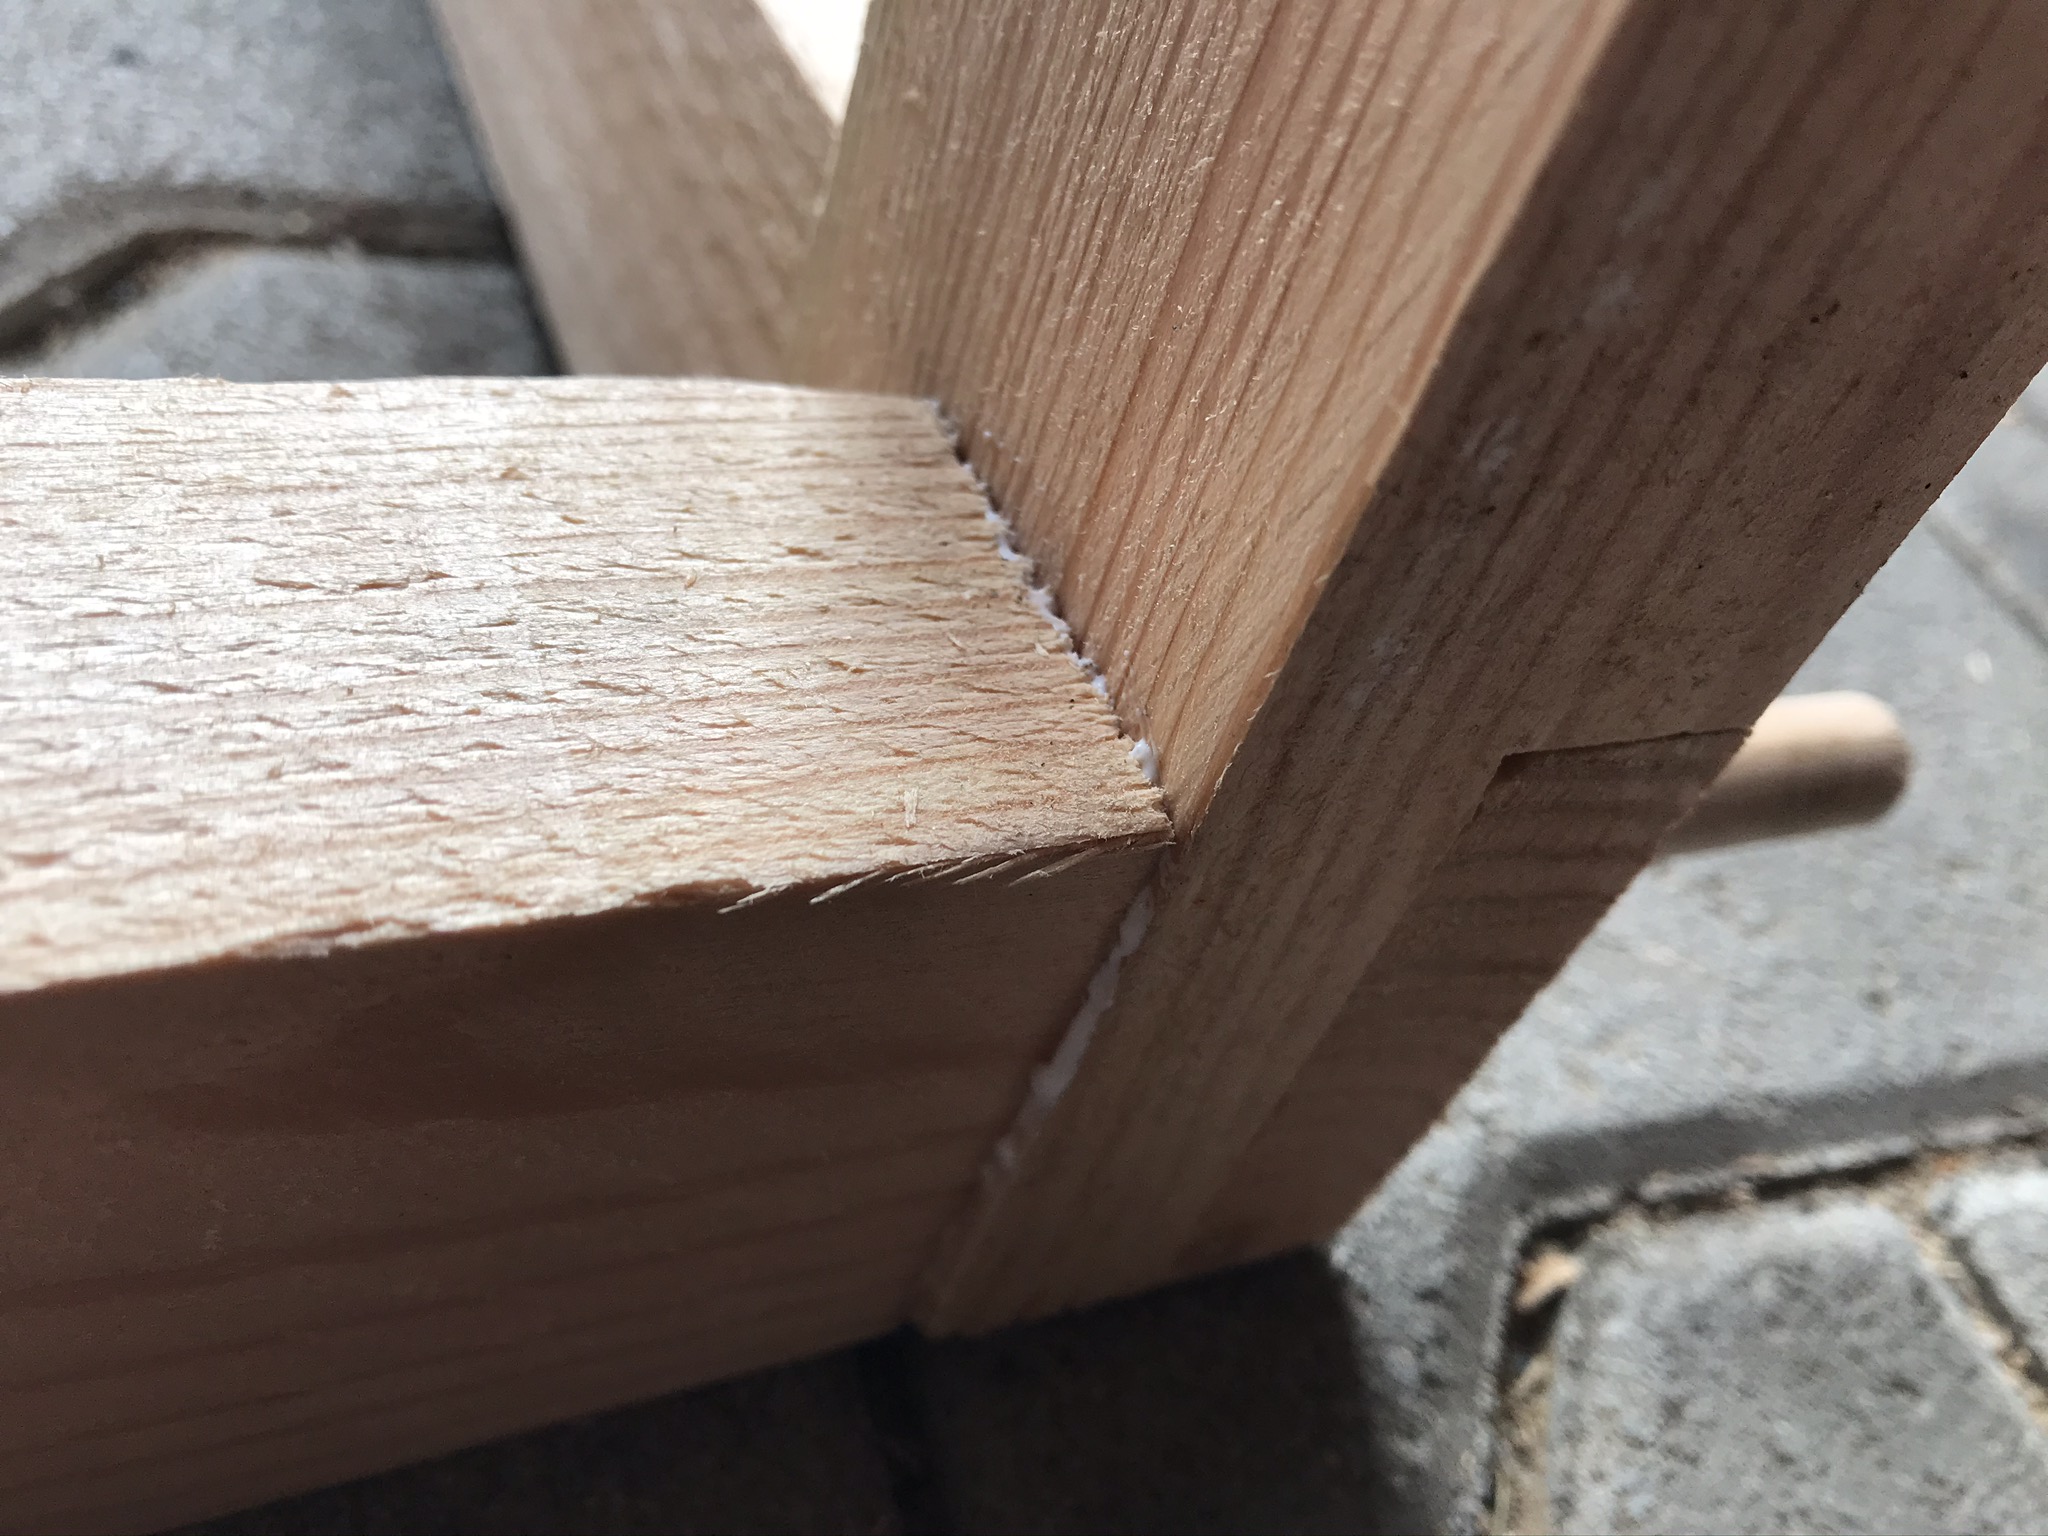
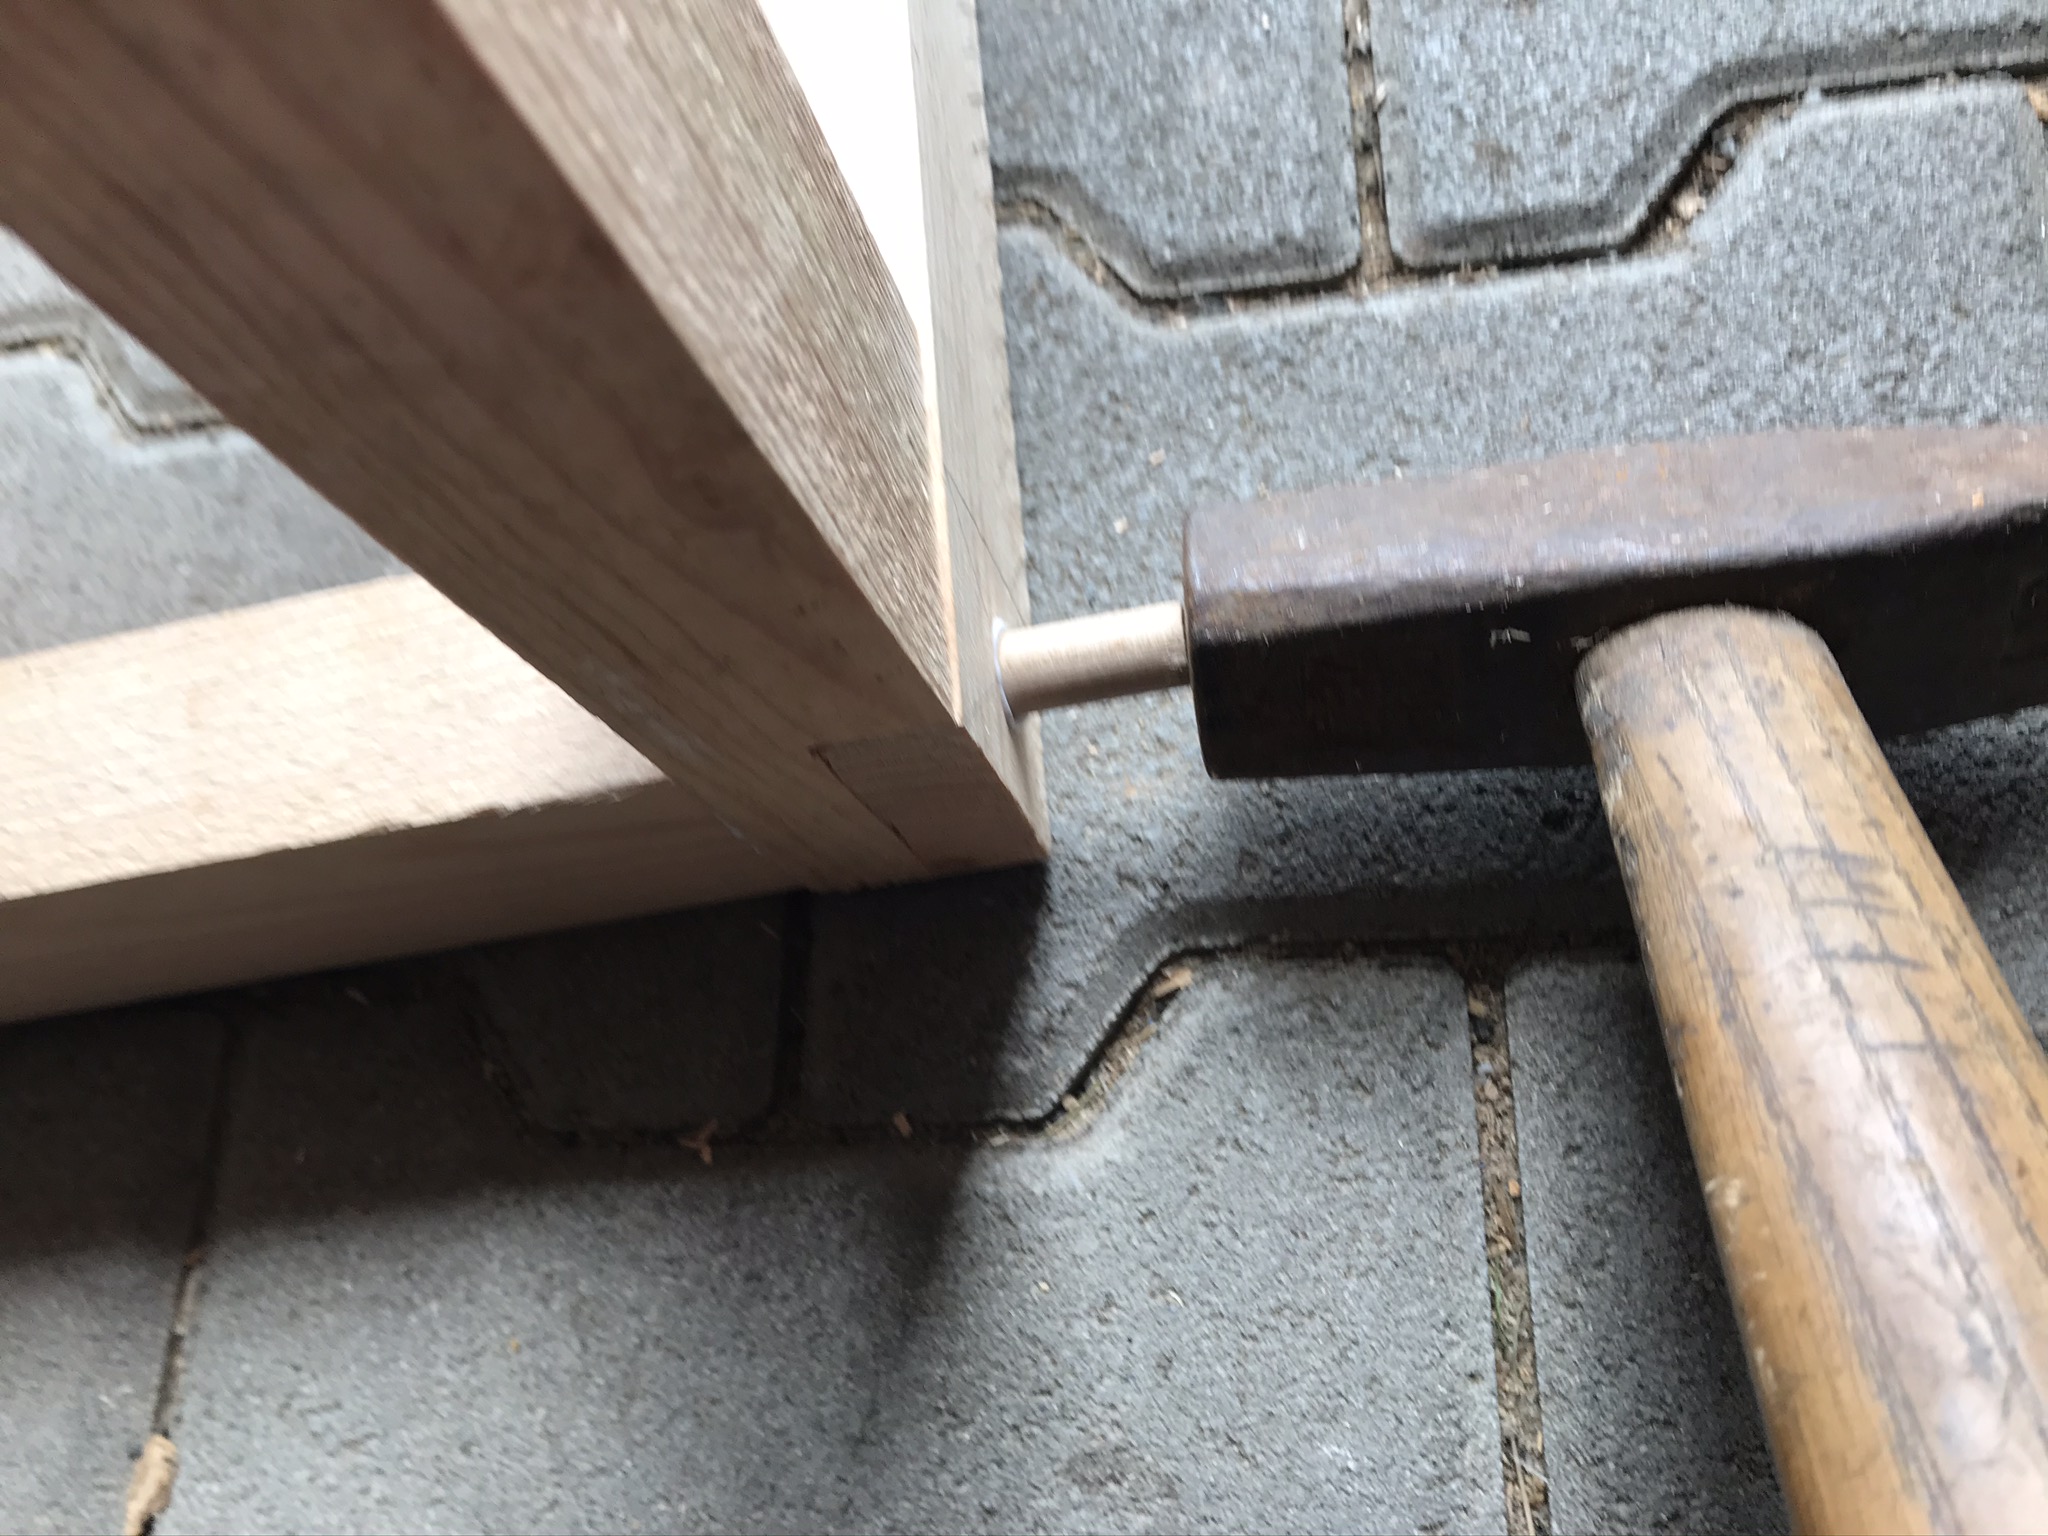
You can saw off the protruding remains of the wooden dowels with a Japanese saw*.

- JAPANESE STYLE PULL SAW: This product is a “Pull Saw.” Most people are used to European saws, called “push saws,” which cuts through a pushing motion. On the other hand, Japanese saws cut…
- JAPANESE STEEL: All SUIZAN Japanese saws consist of top quality Japanese steel. The high-quality steel makes razor sharp cuts.
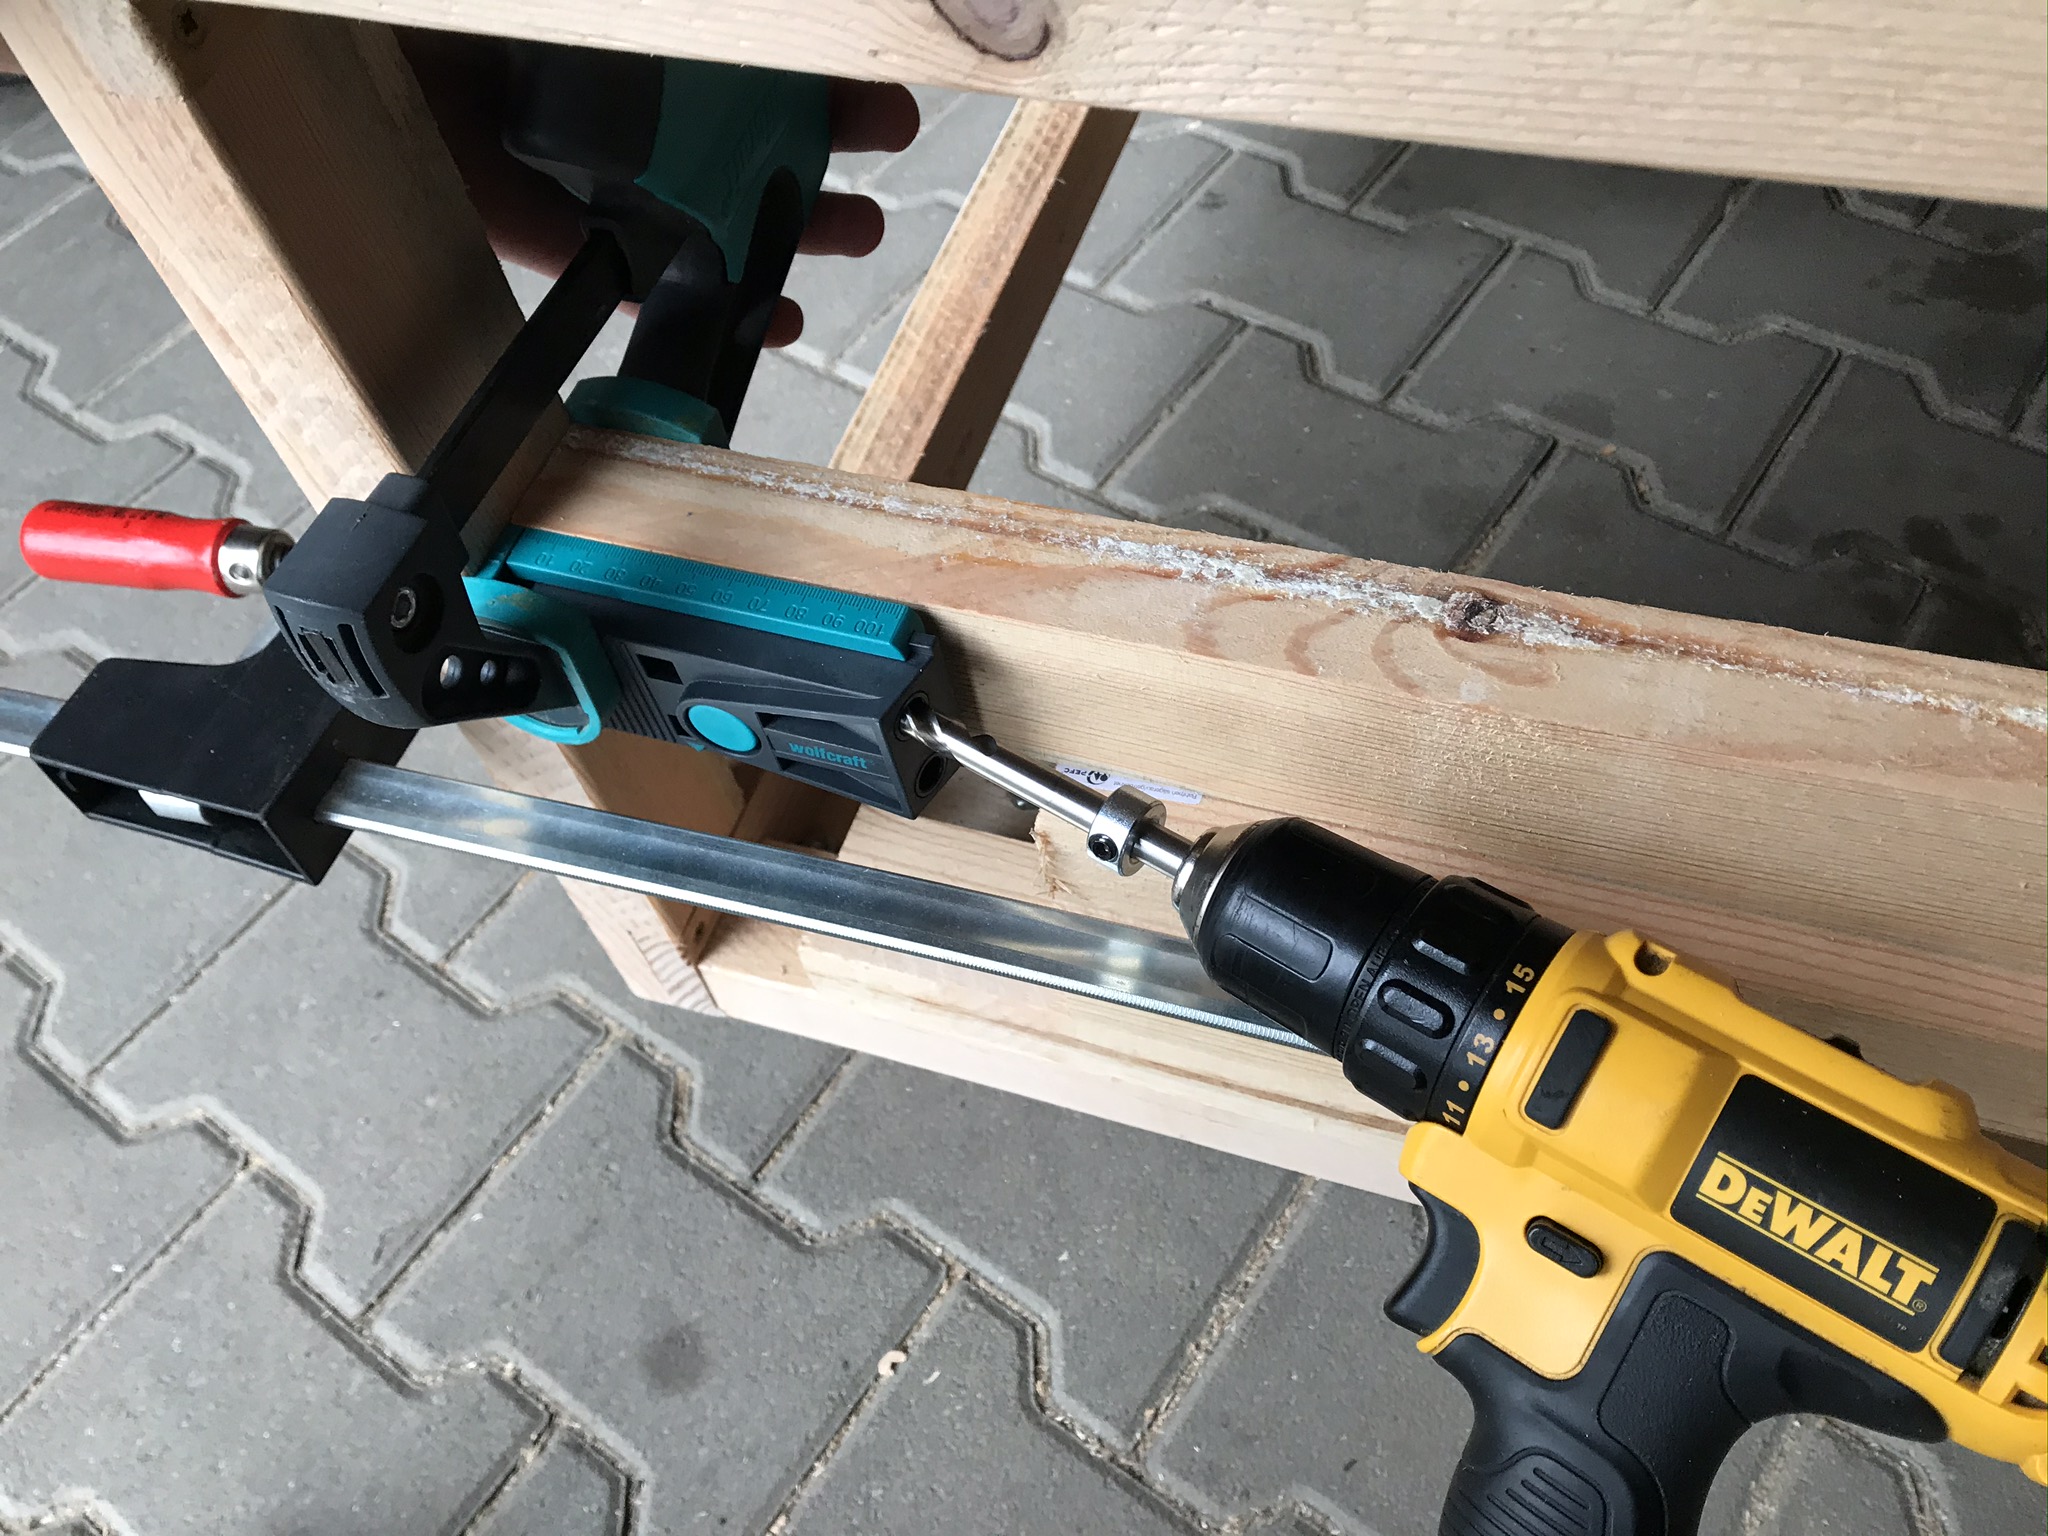
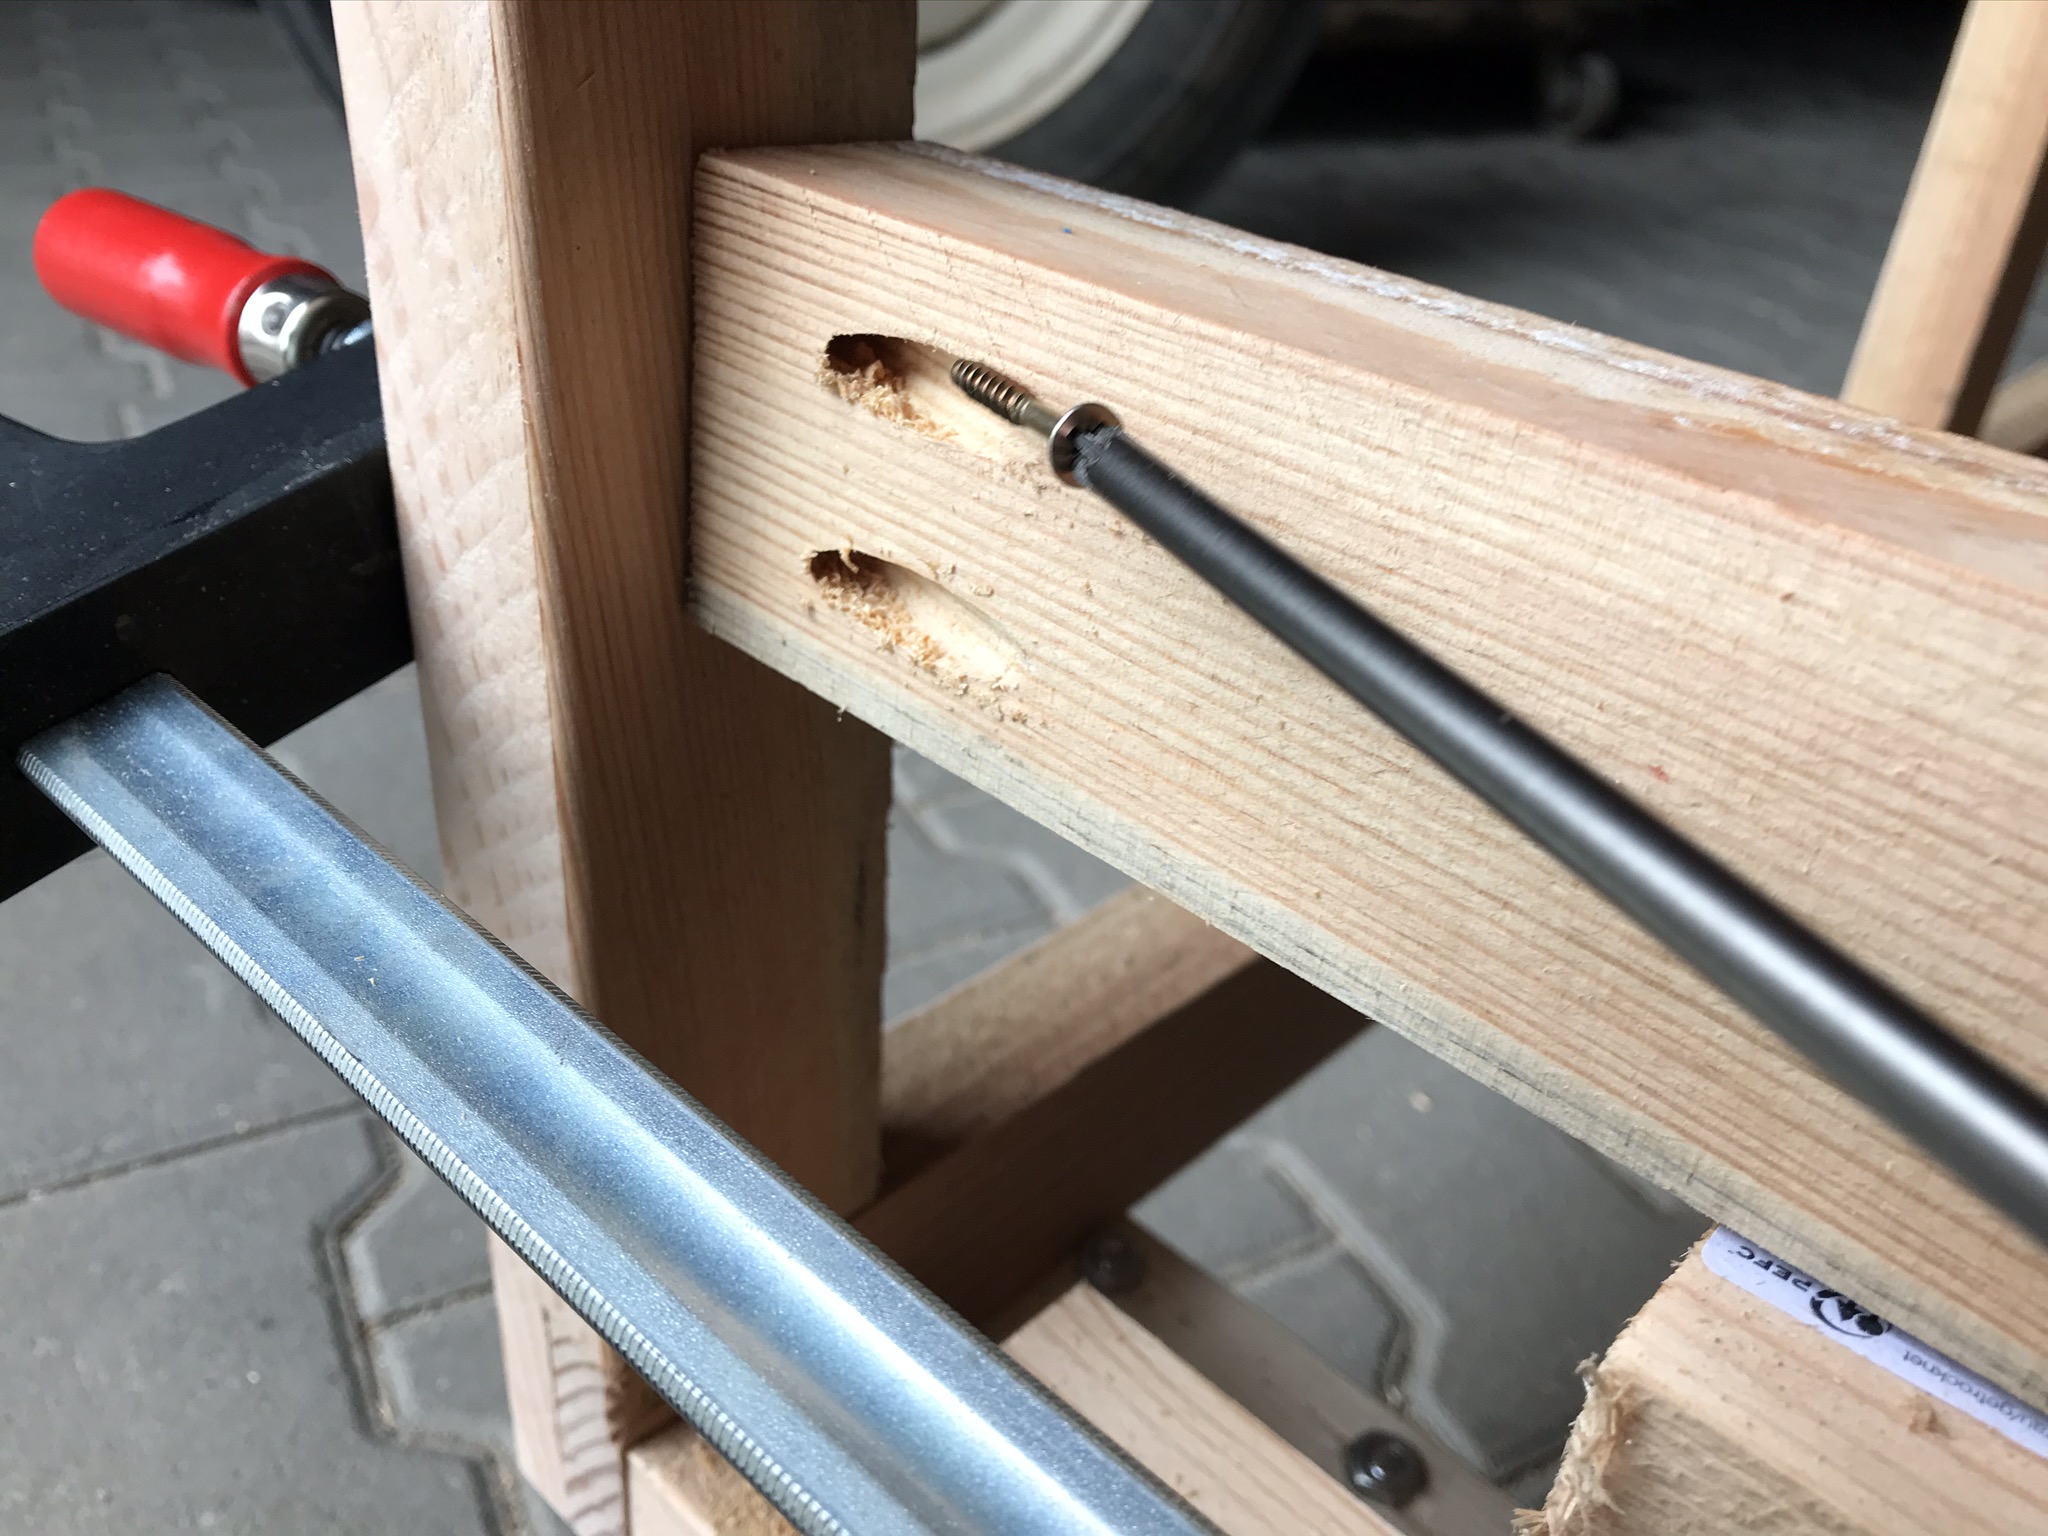
Horizontal short struts – Variant 2 – Undercover Jig
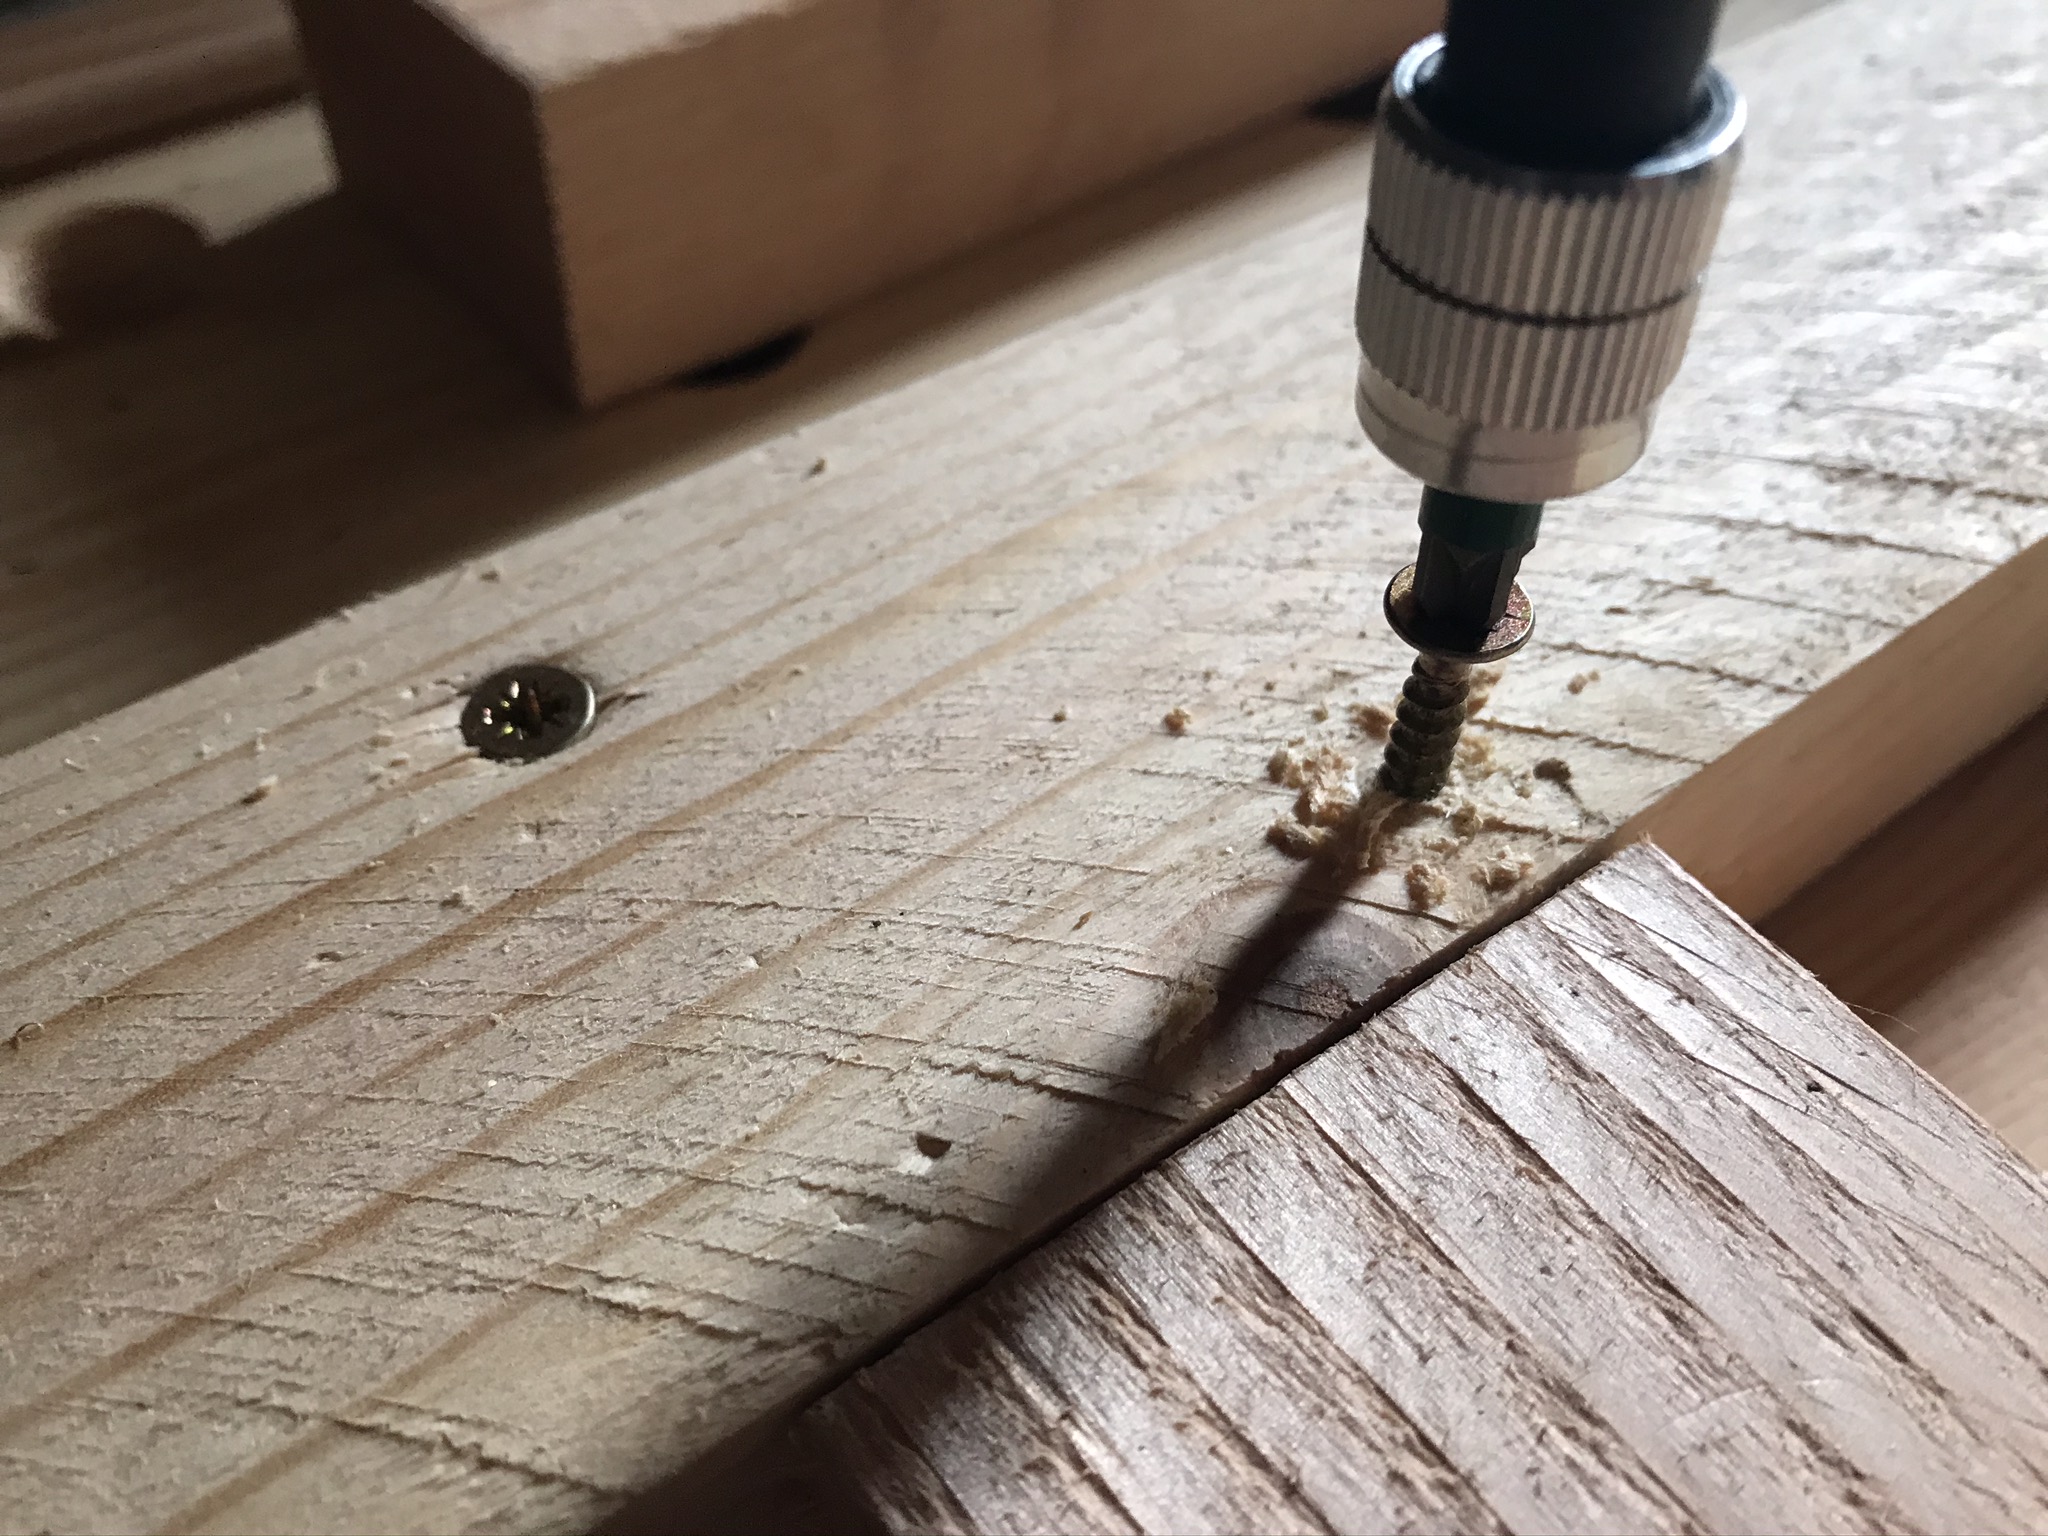
The quicker alternative for installing the horizontal short struts is to use the undercover jig or pocket holes. I used this type of connection for the 3 remaining horizontal short struts, which will later be used to hold the full-extension runners for the drawers. The set from Wolfcraft* contains everything you need. The application is very simple: clamp the jig with a screw clamp. Drill a hole. Countersink the screw. Again, make sure that the struts are correctly positioned in the table saw base.

- Complete Pocket Hole Kit: Includes a special drill bit, depth stop, hex key, wood screws with matching screwdriver blade, and screw-hole covers for clean, invisible joints
- Three-Step Invisible Fastening: The drilling template guides you through perfect T-butt, corner, and edge-to-edge joints with concealed fastening in just three simple steps
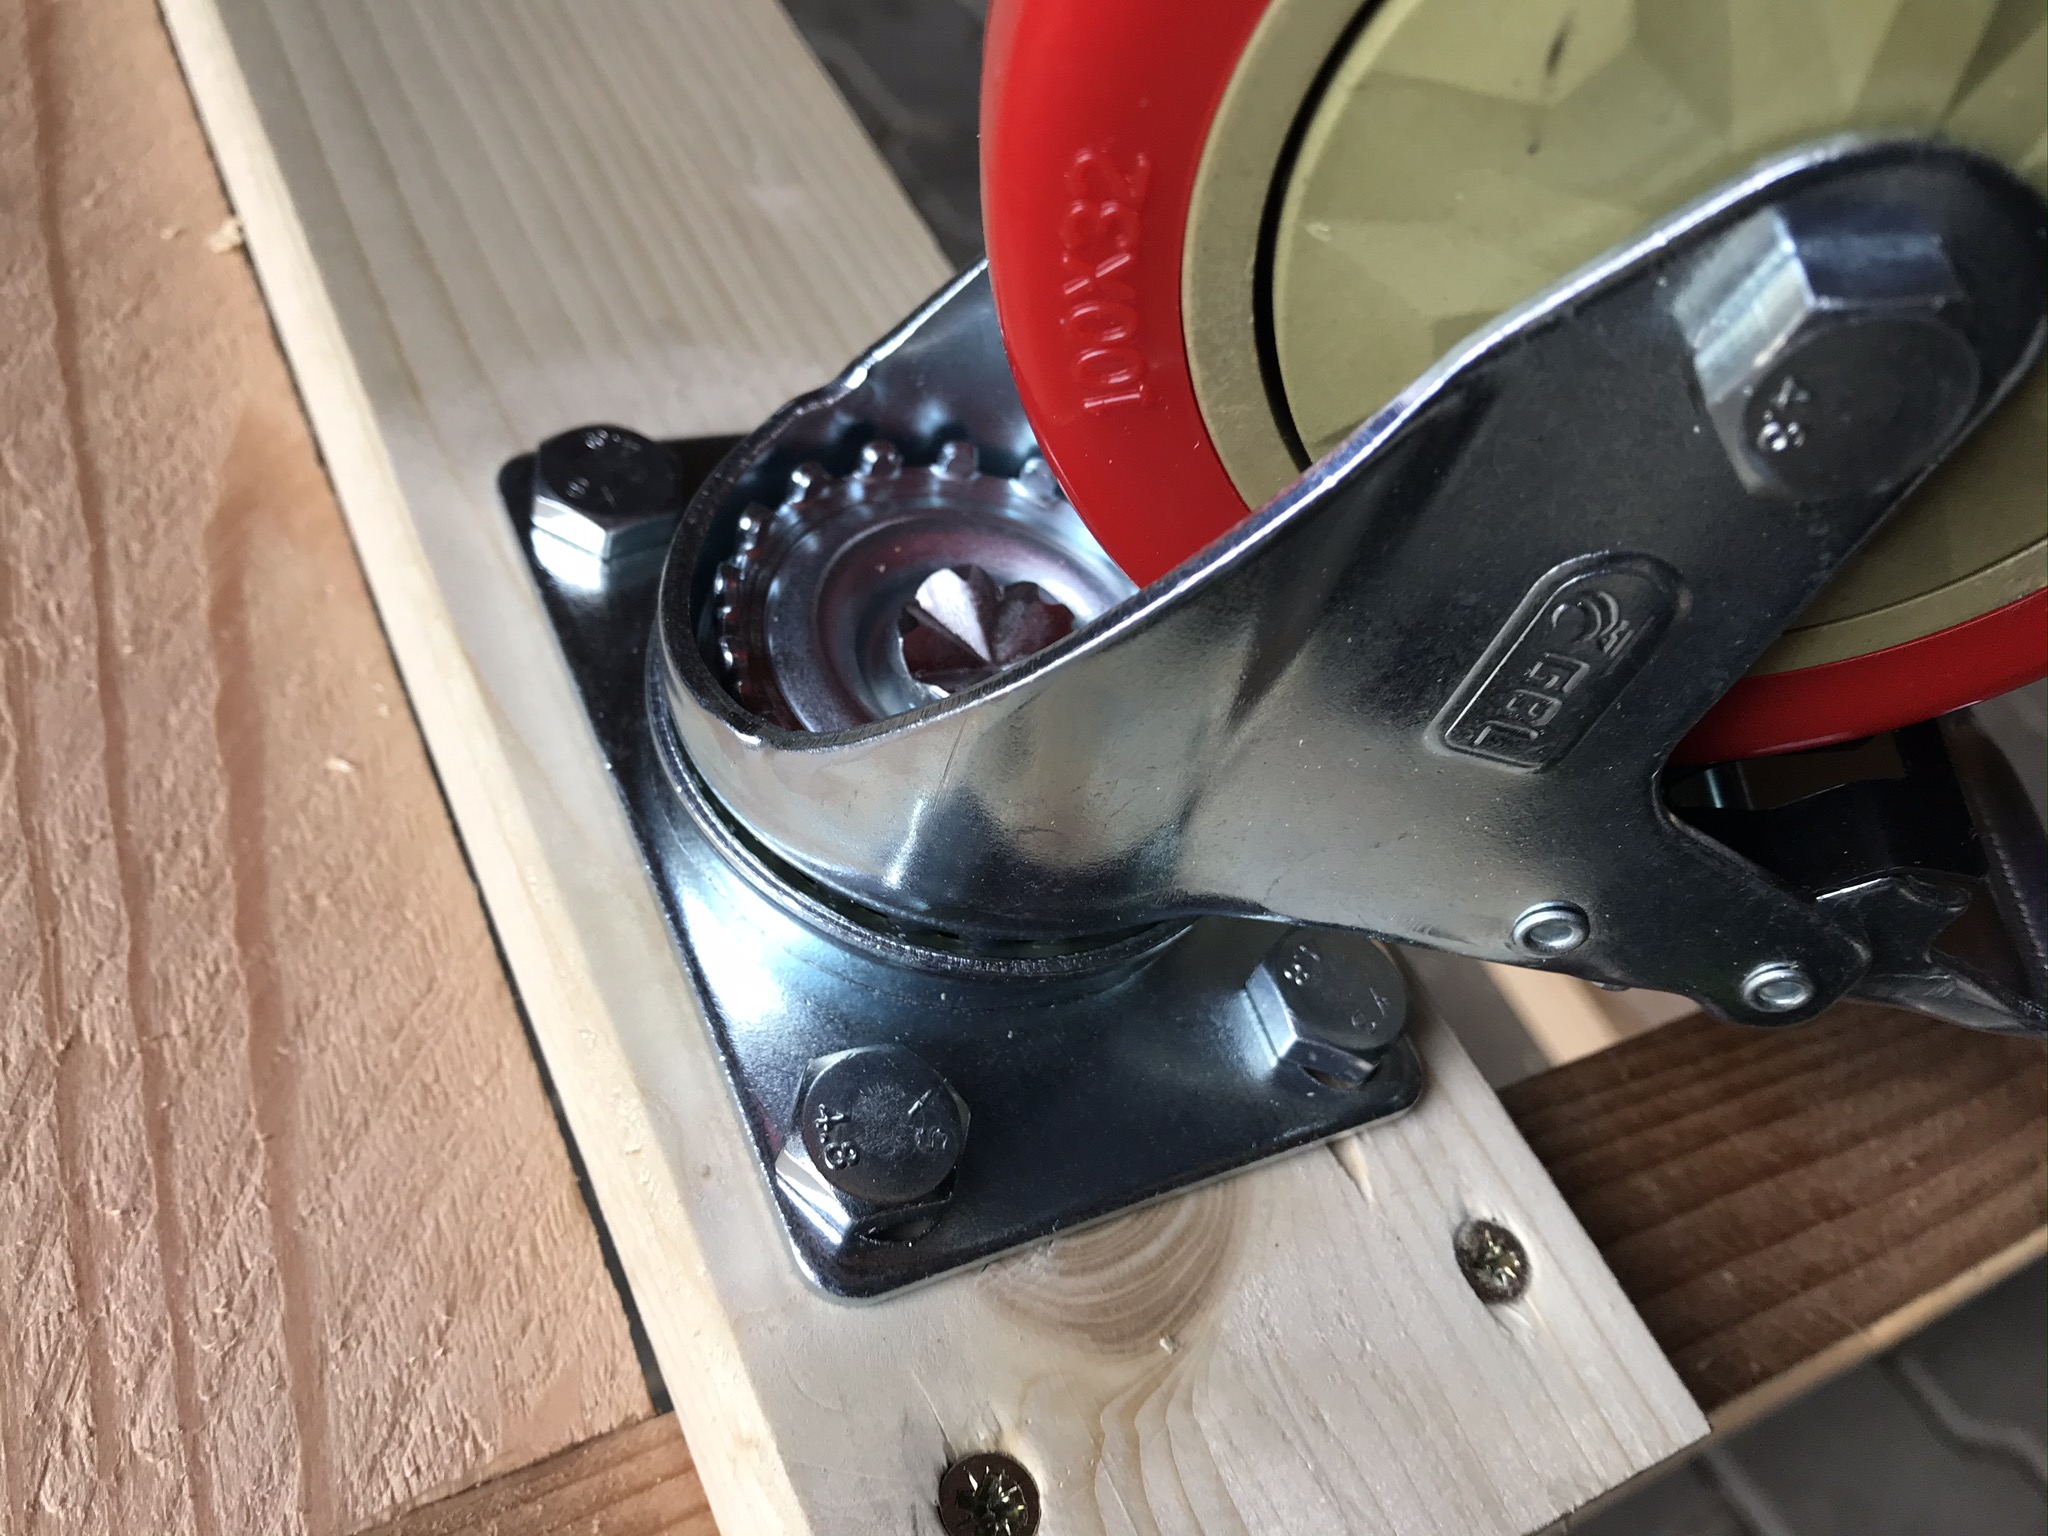
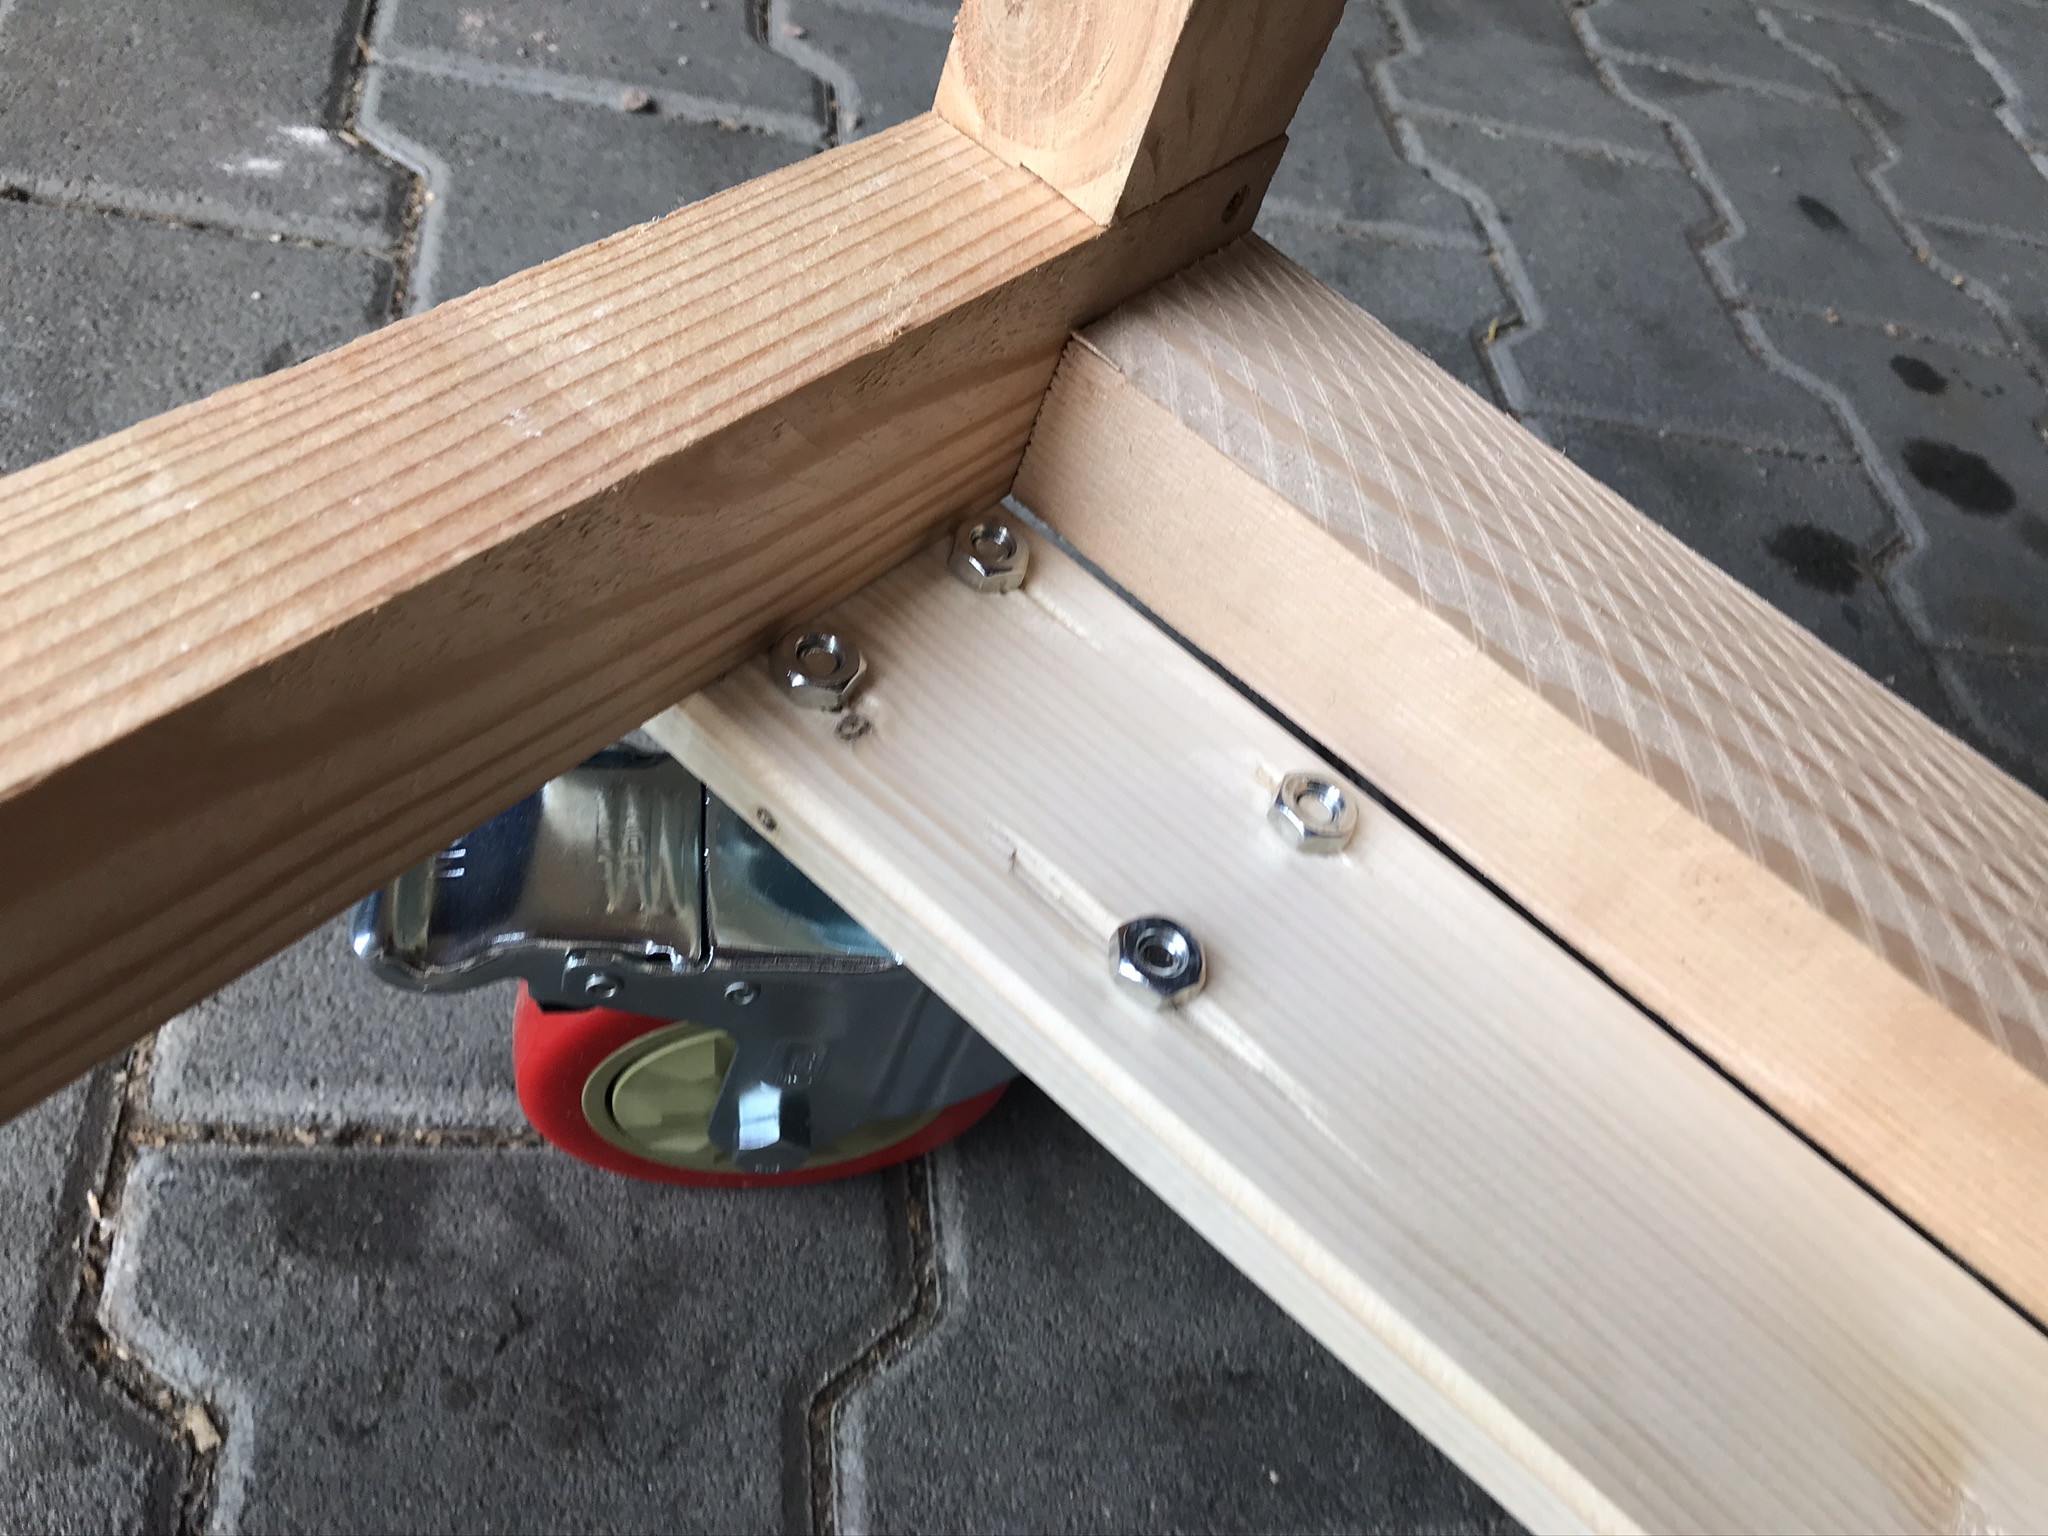
DWE7492 table saw stand – mounting the heavy duty castors
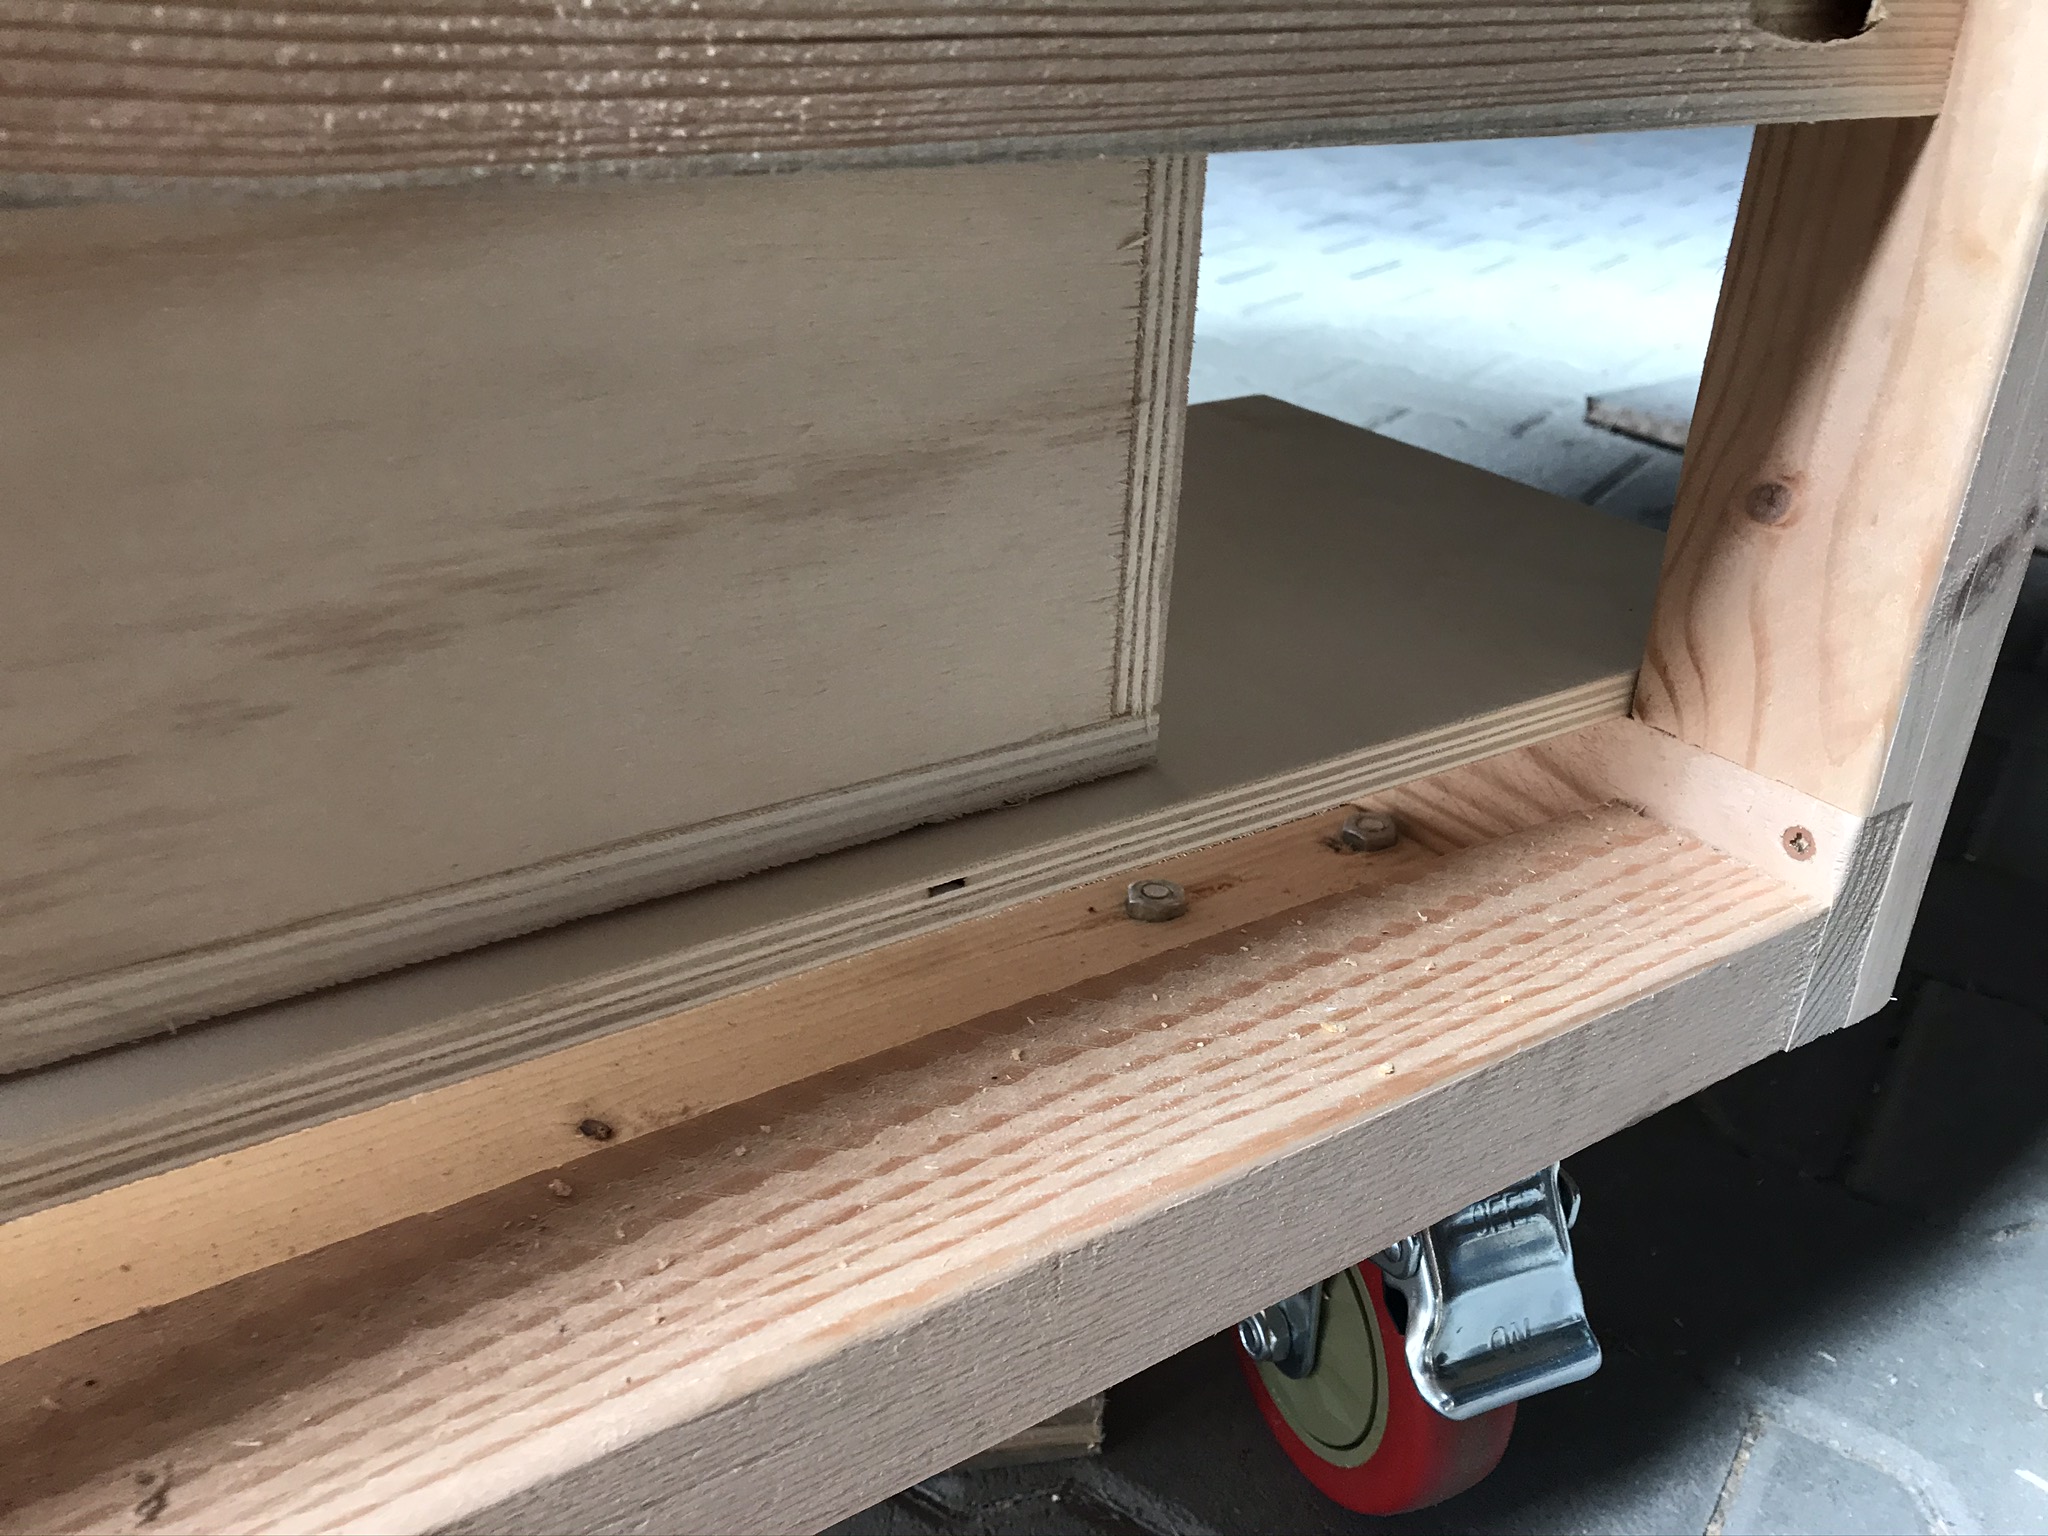
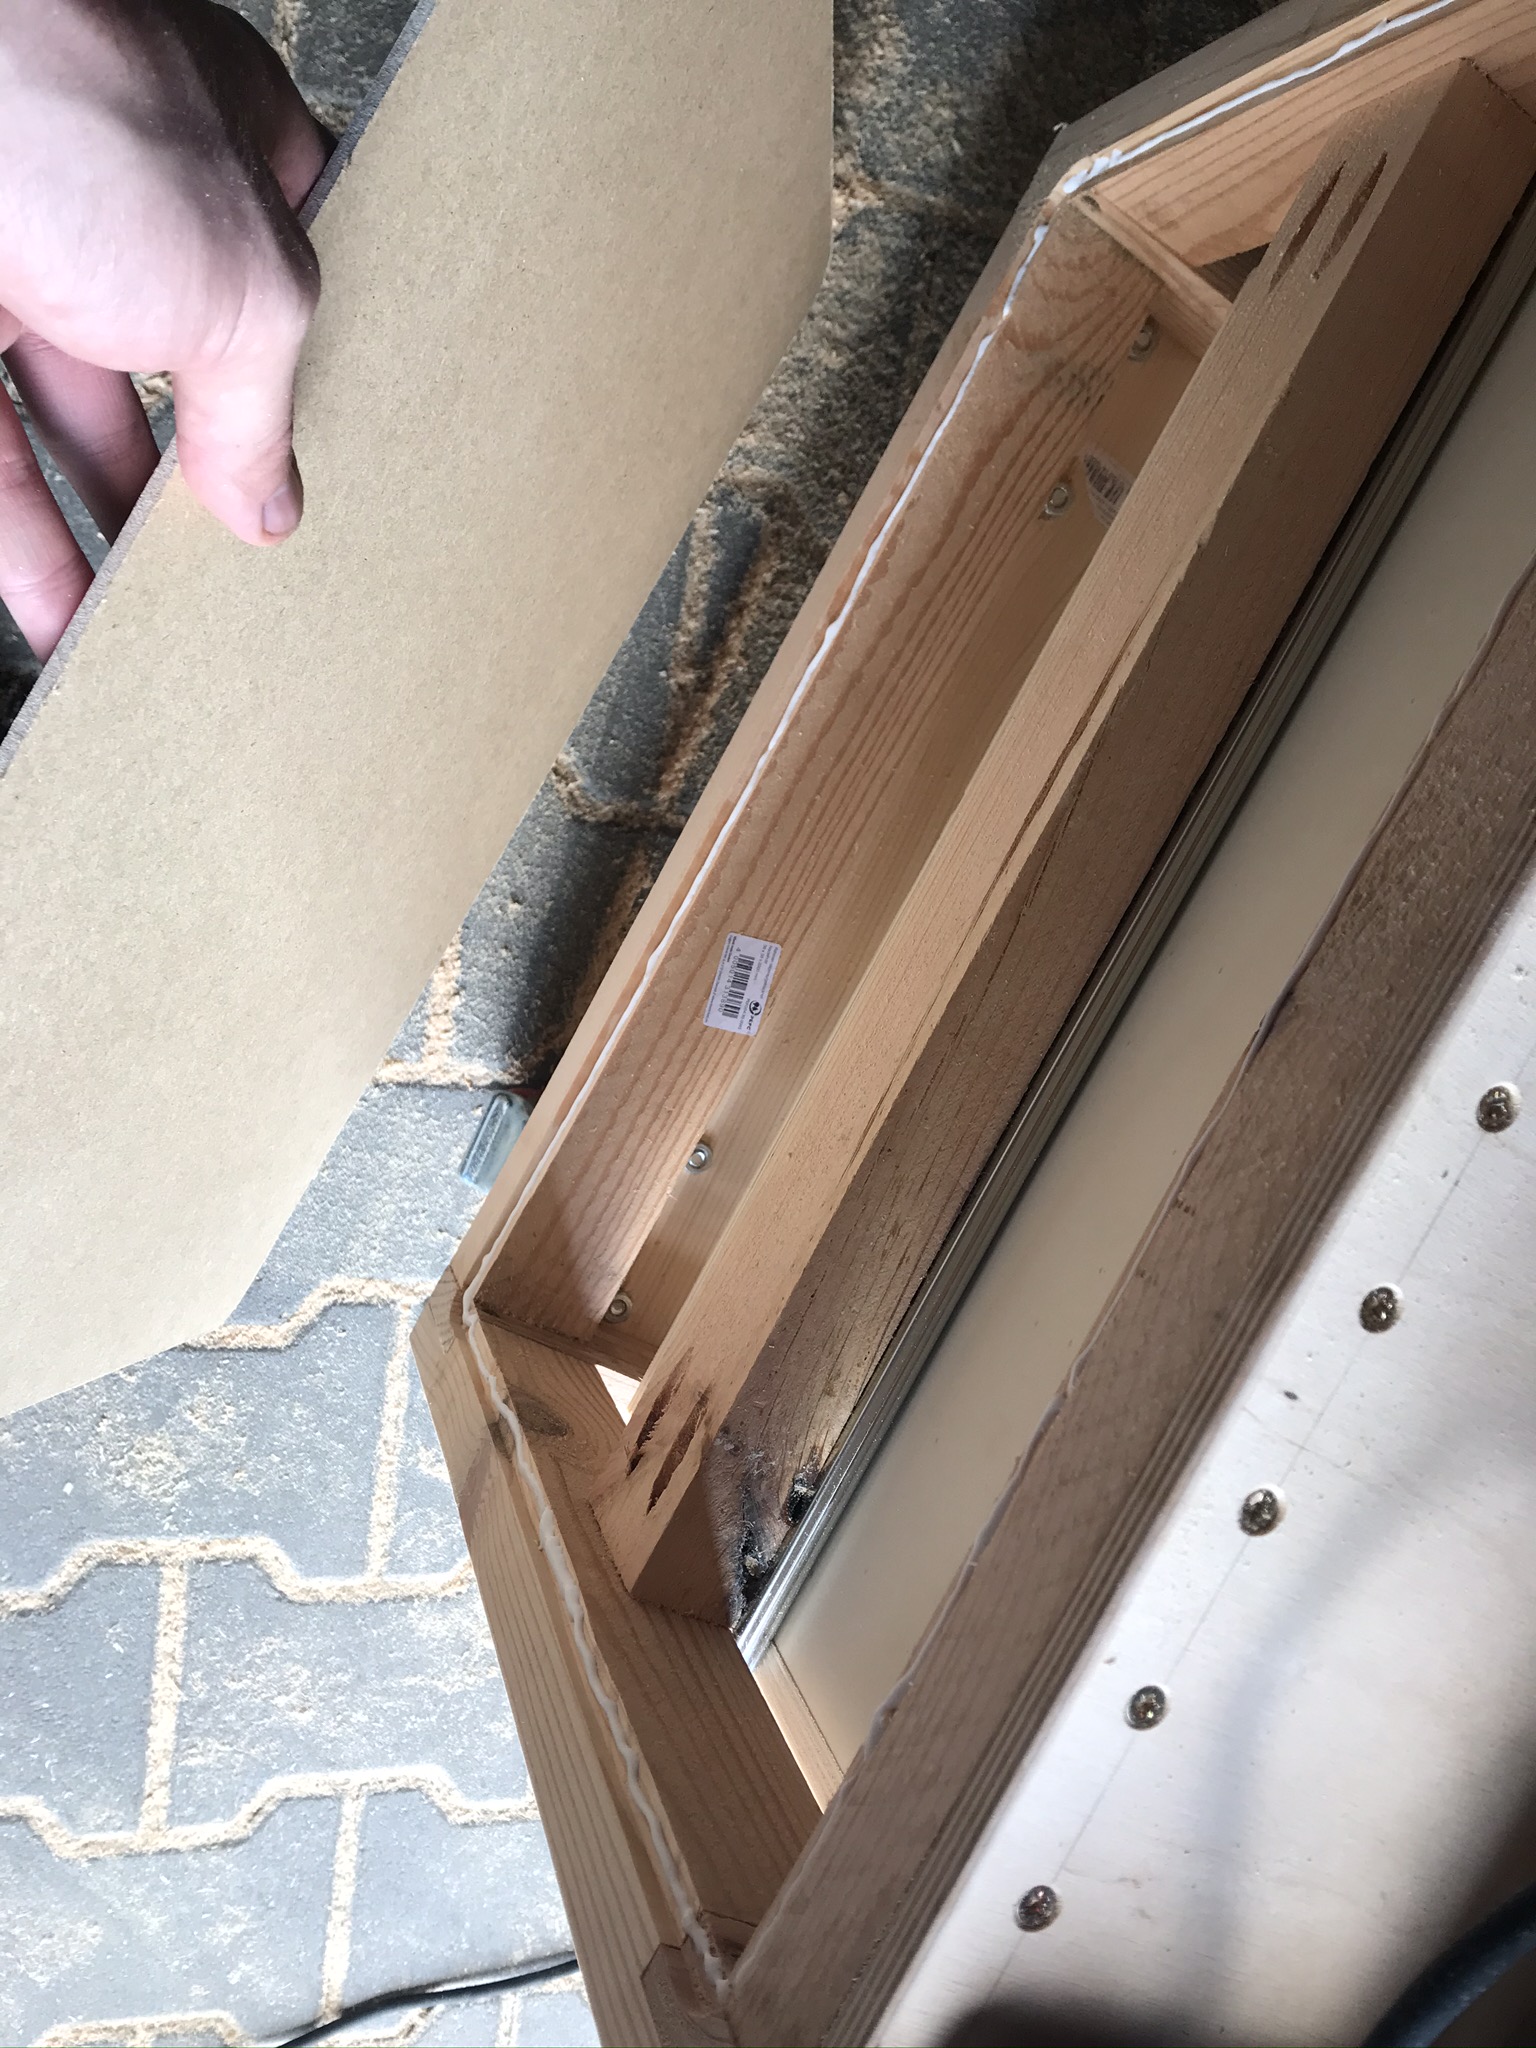
To make the frame mobile and easy to move, two boards must be screwed to the underside of the frame to hold the castors*. The material you need for this is 12 mm thick and 80 mm wide wooden boards. Saw two of these boards to a length of 560mm. Arrange the two boards on the underside of the frame as shown in the pictures. It is important that you do not screw the boards to the very outside of the short struts. To be able to attach the castors* later with the machine screws supplied, we need access from the back of the board.
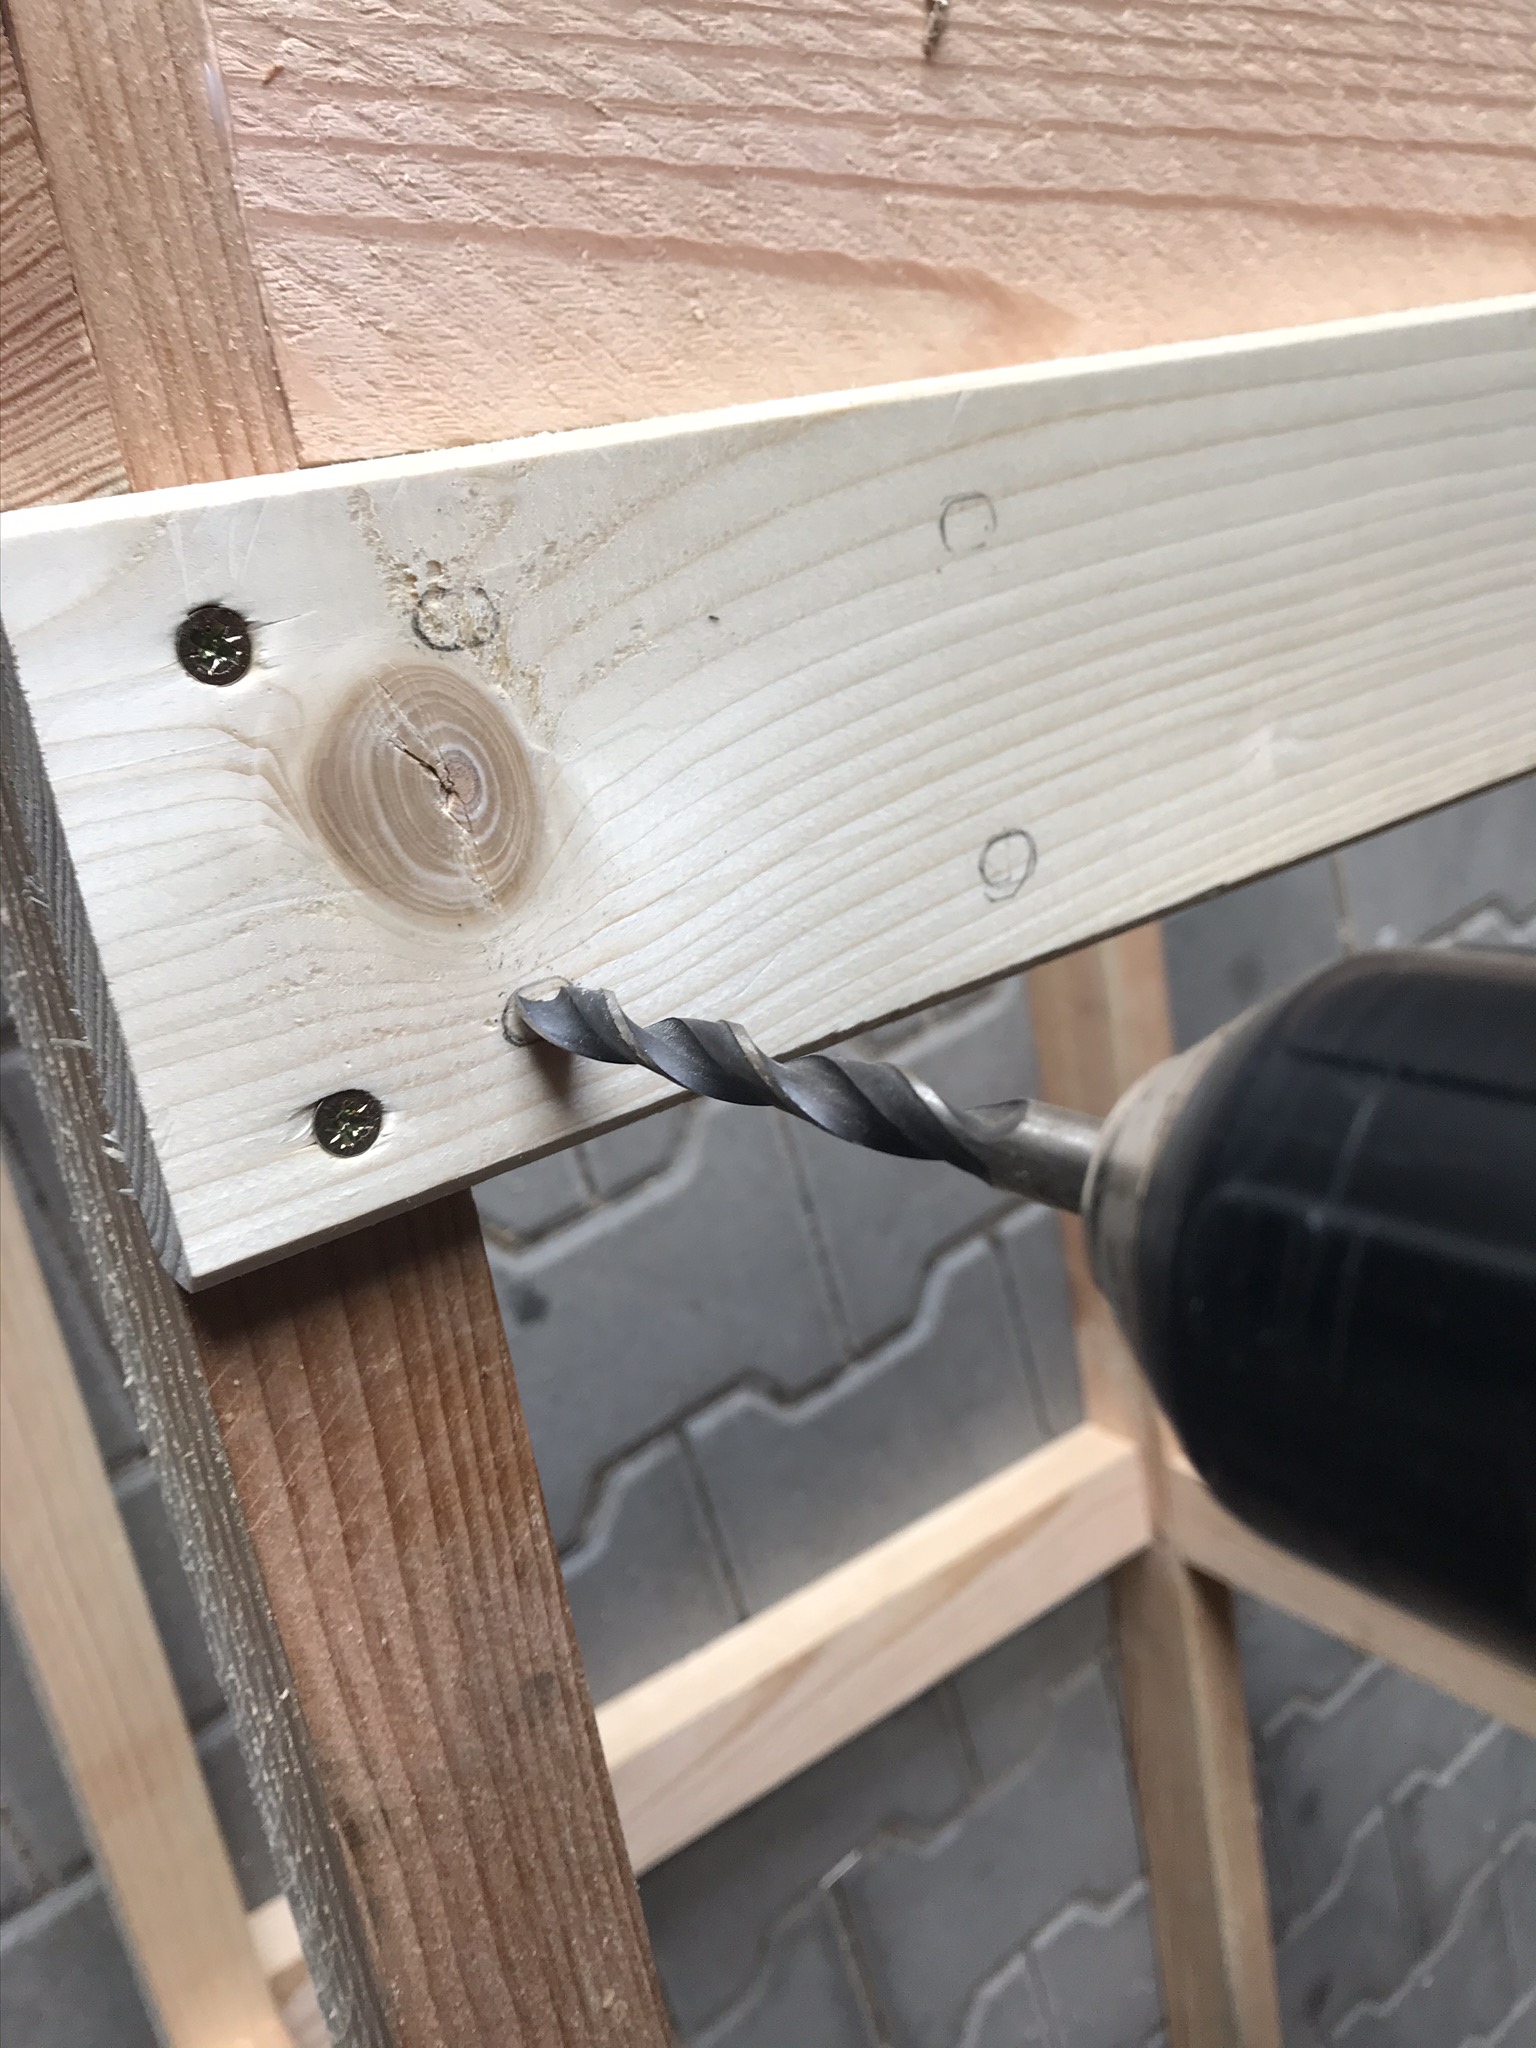
You can fix the wooden boards on each side with two 4x30mm or 4x40mm wood screws*. Pre-drill with a 3mm wood drill to prevent the wood from cracking!
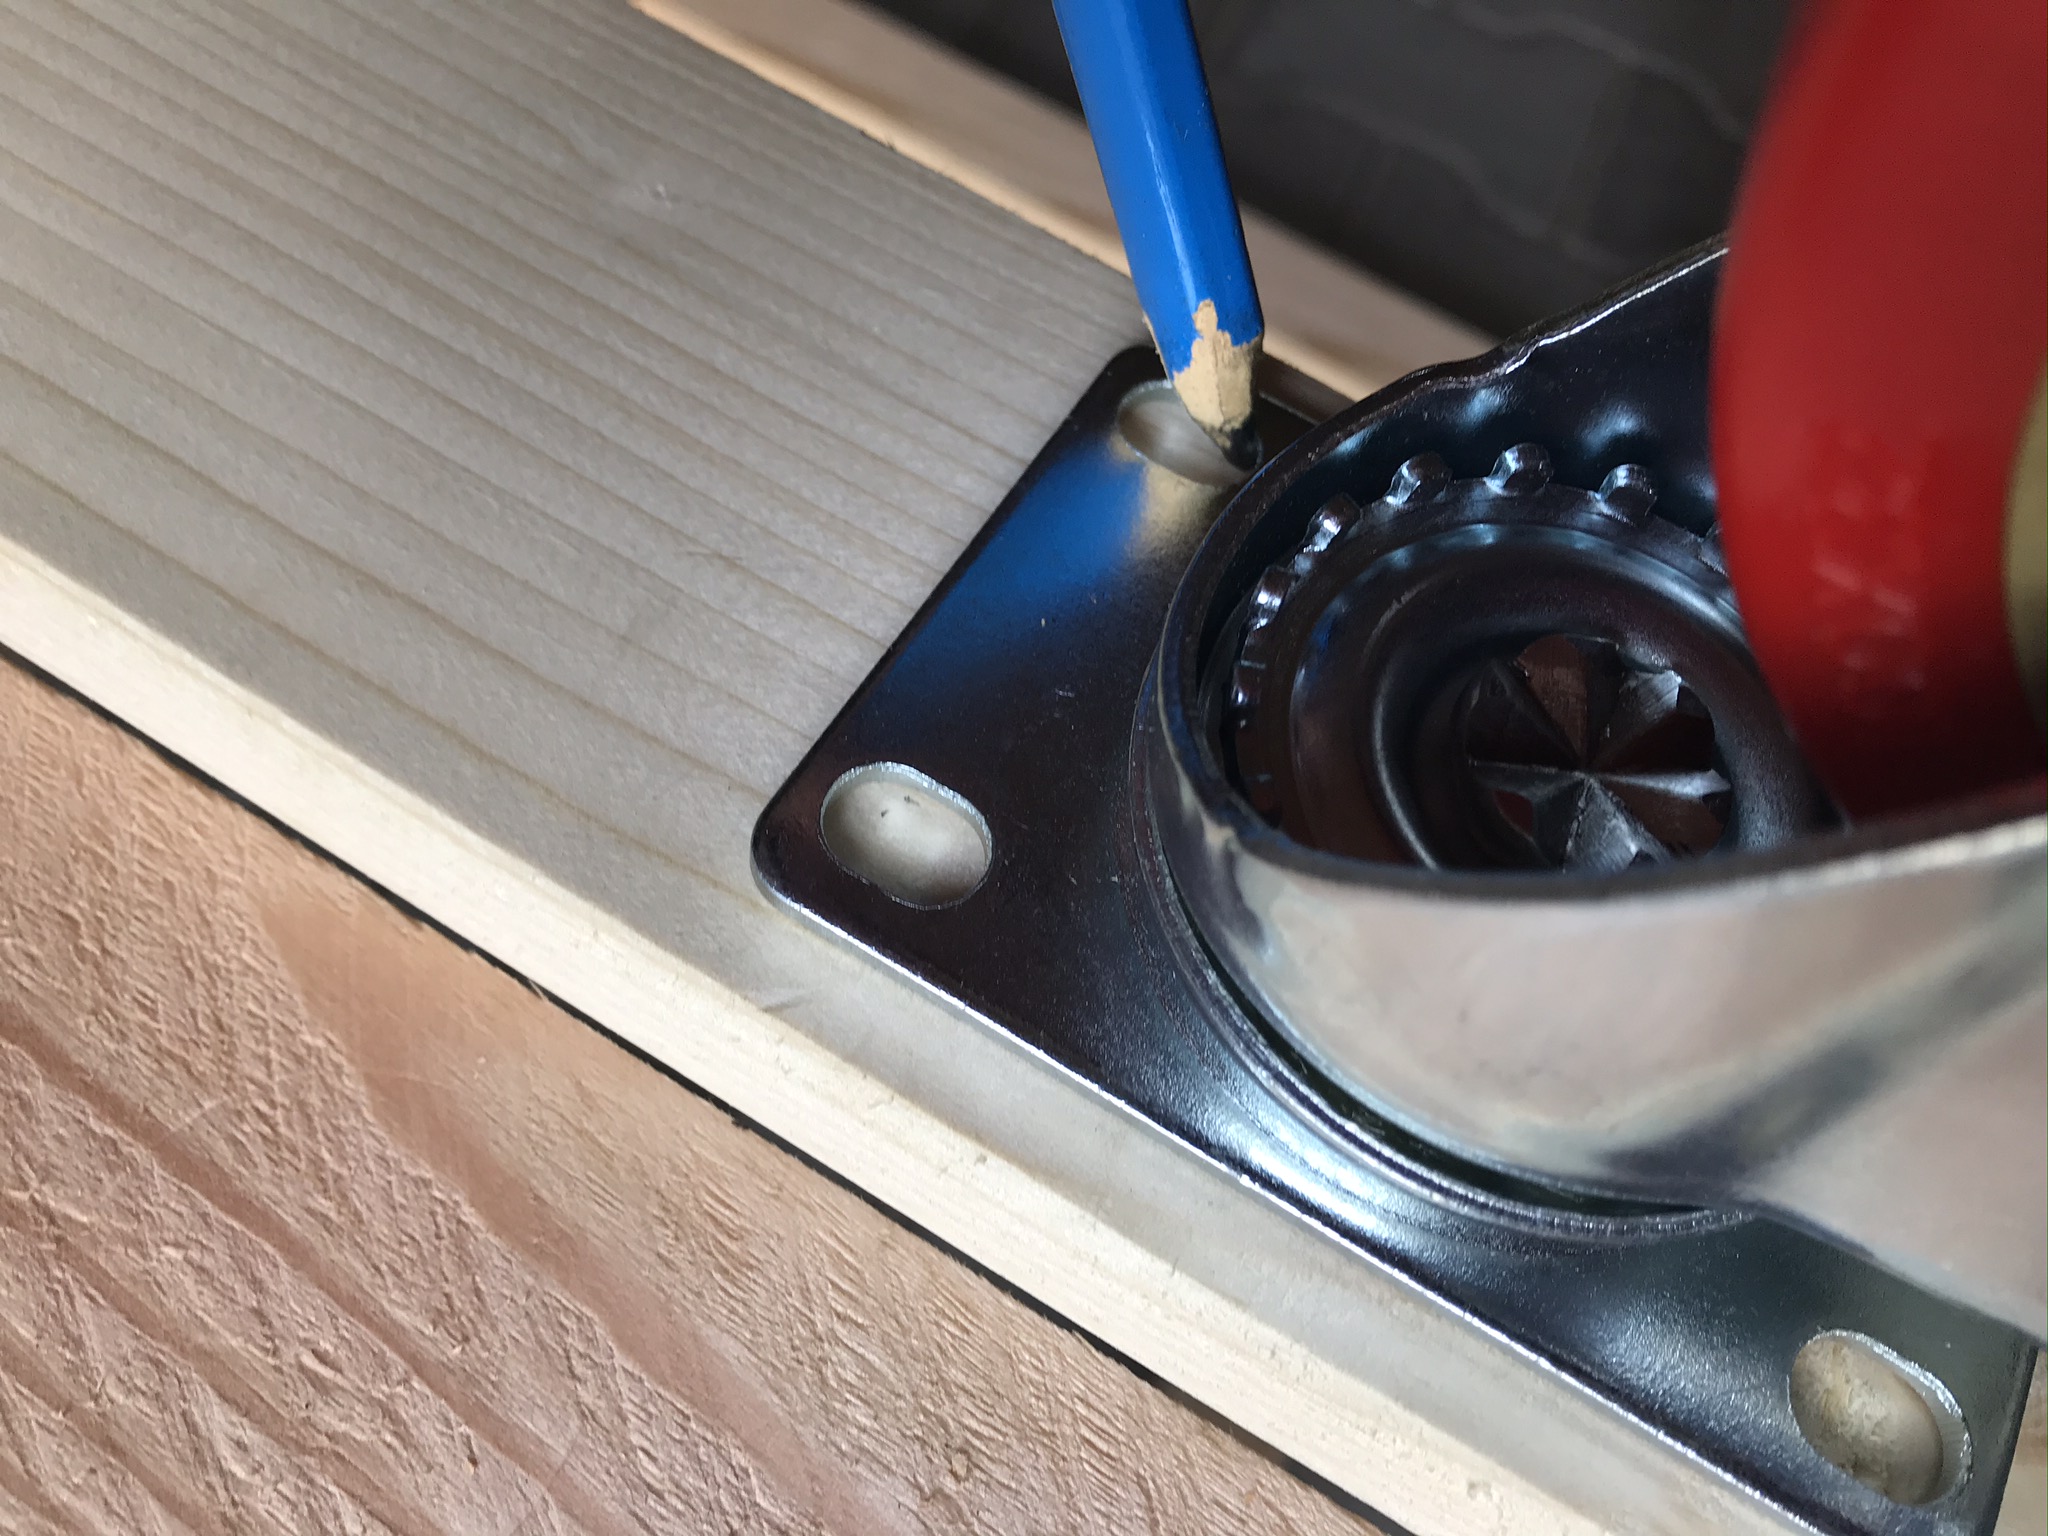
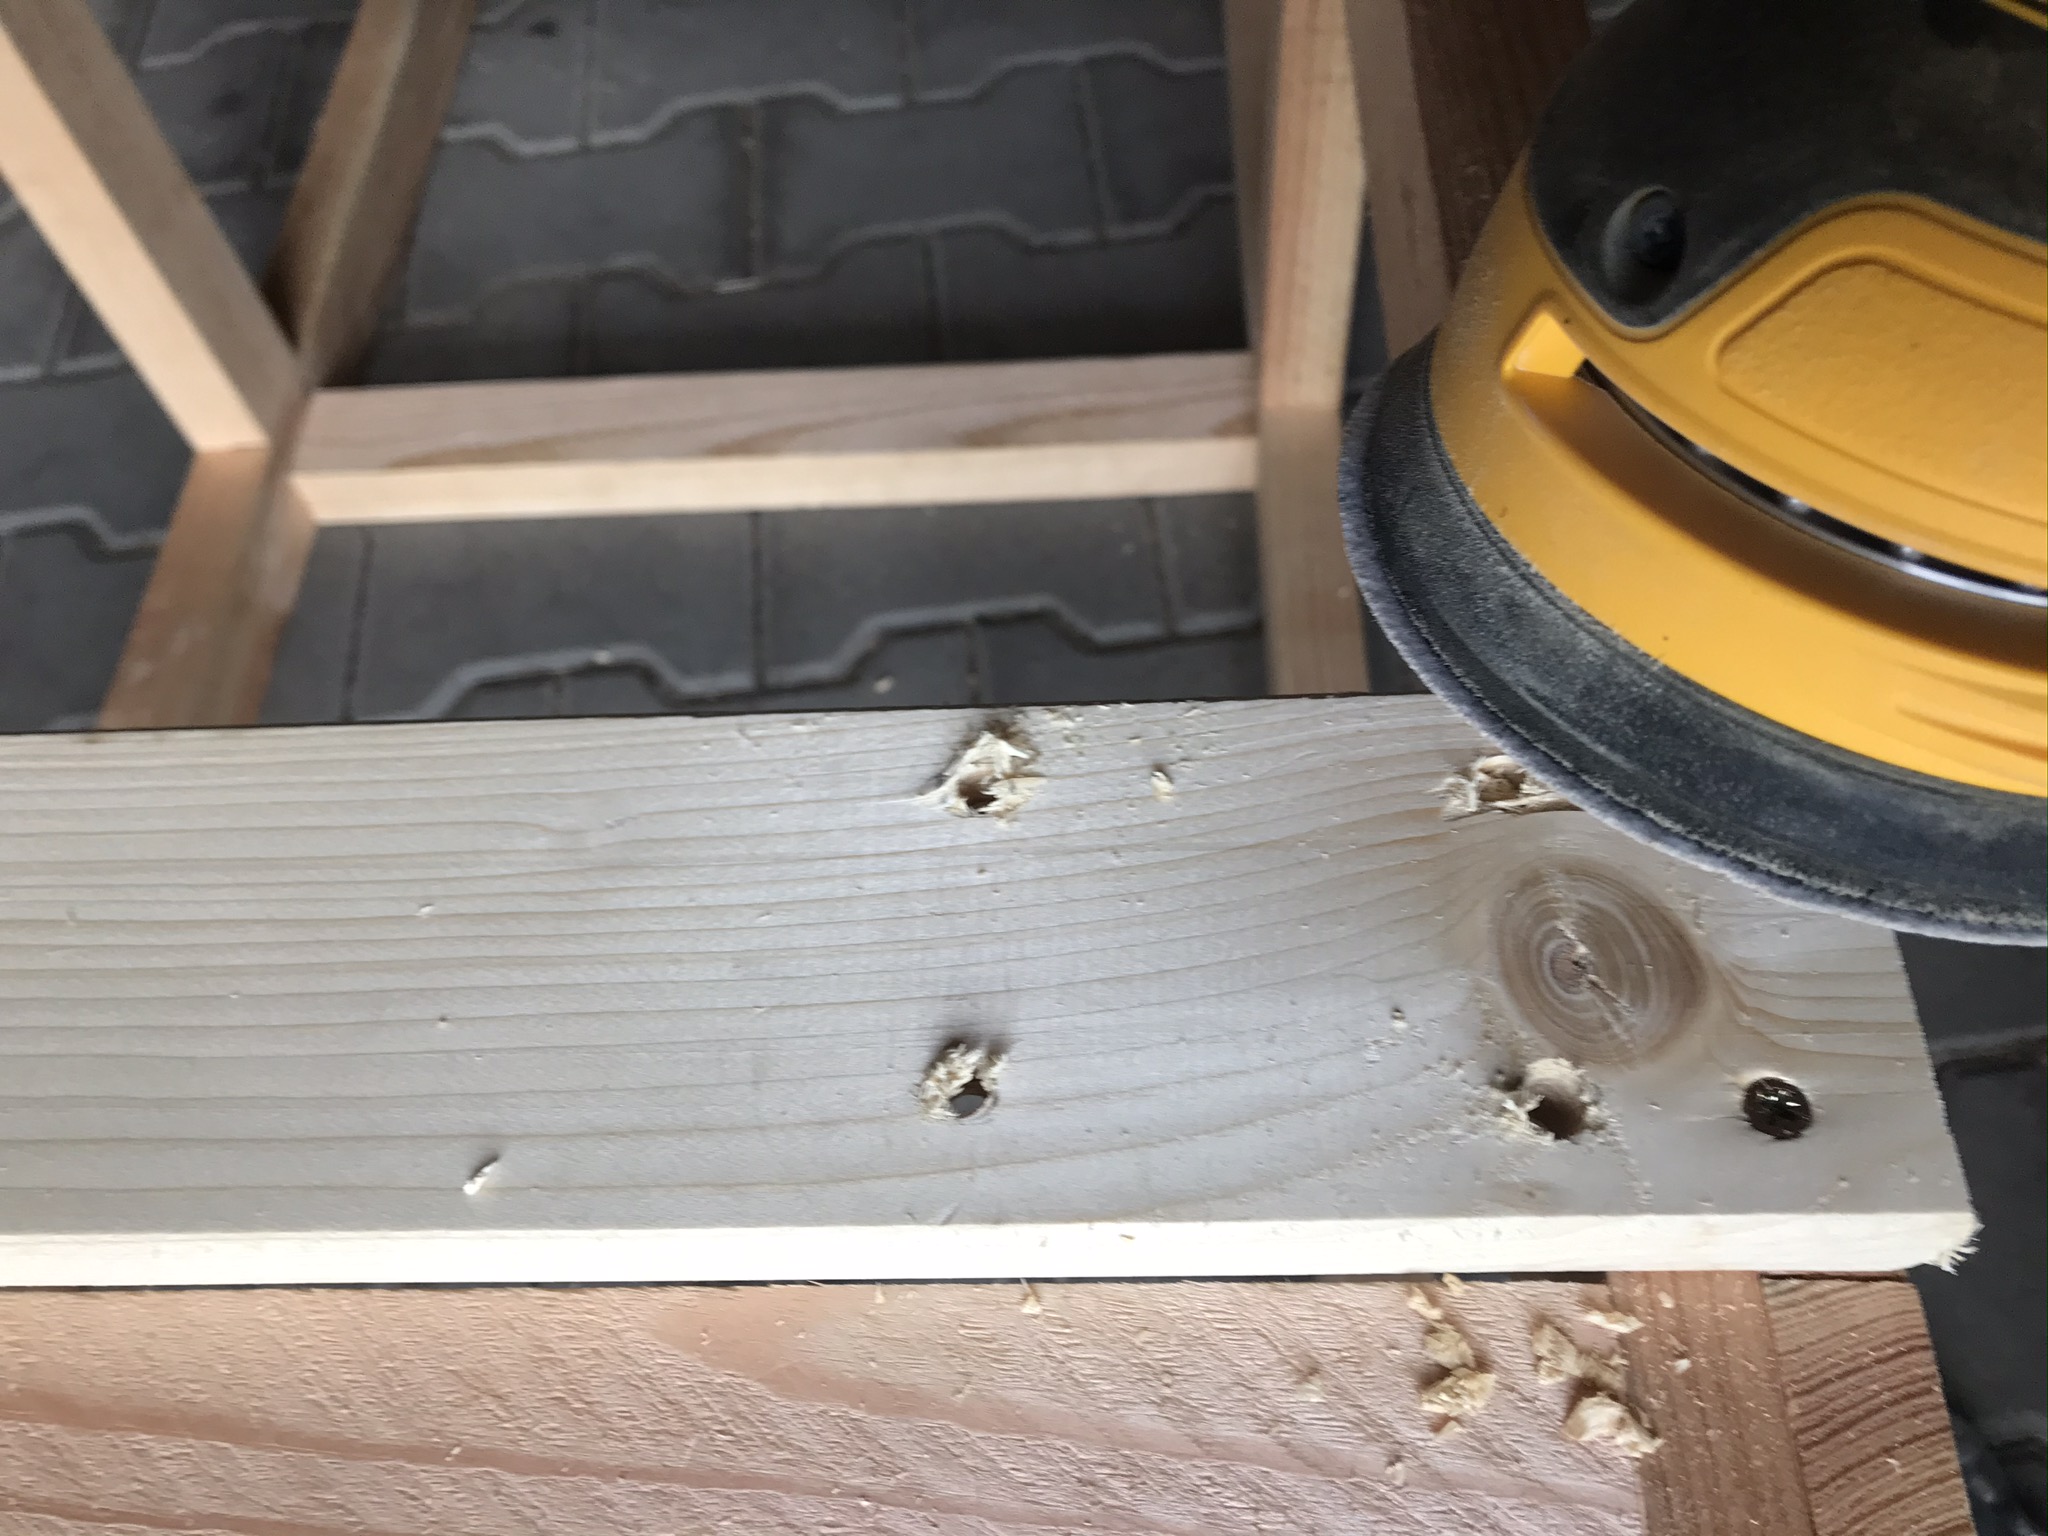
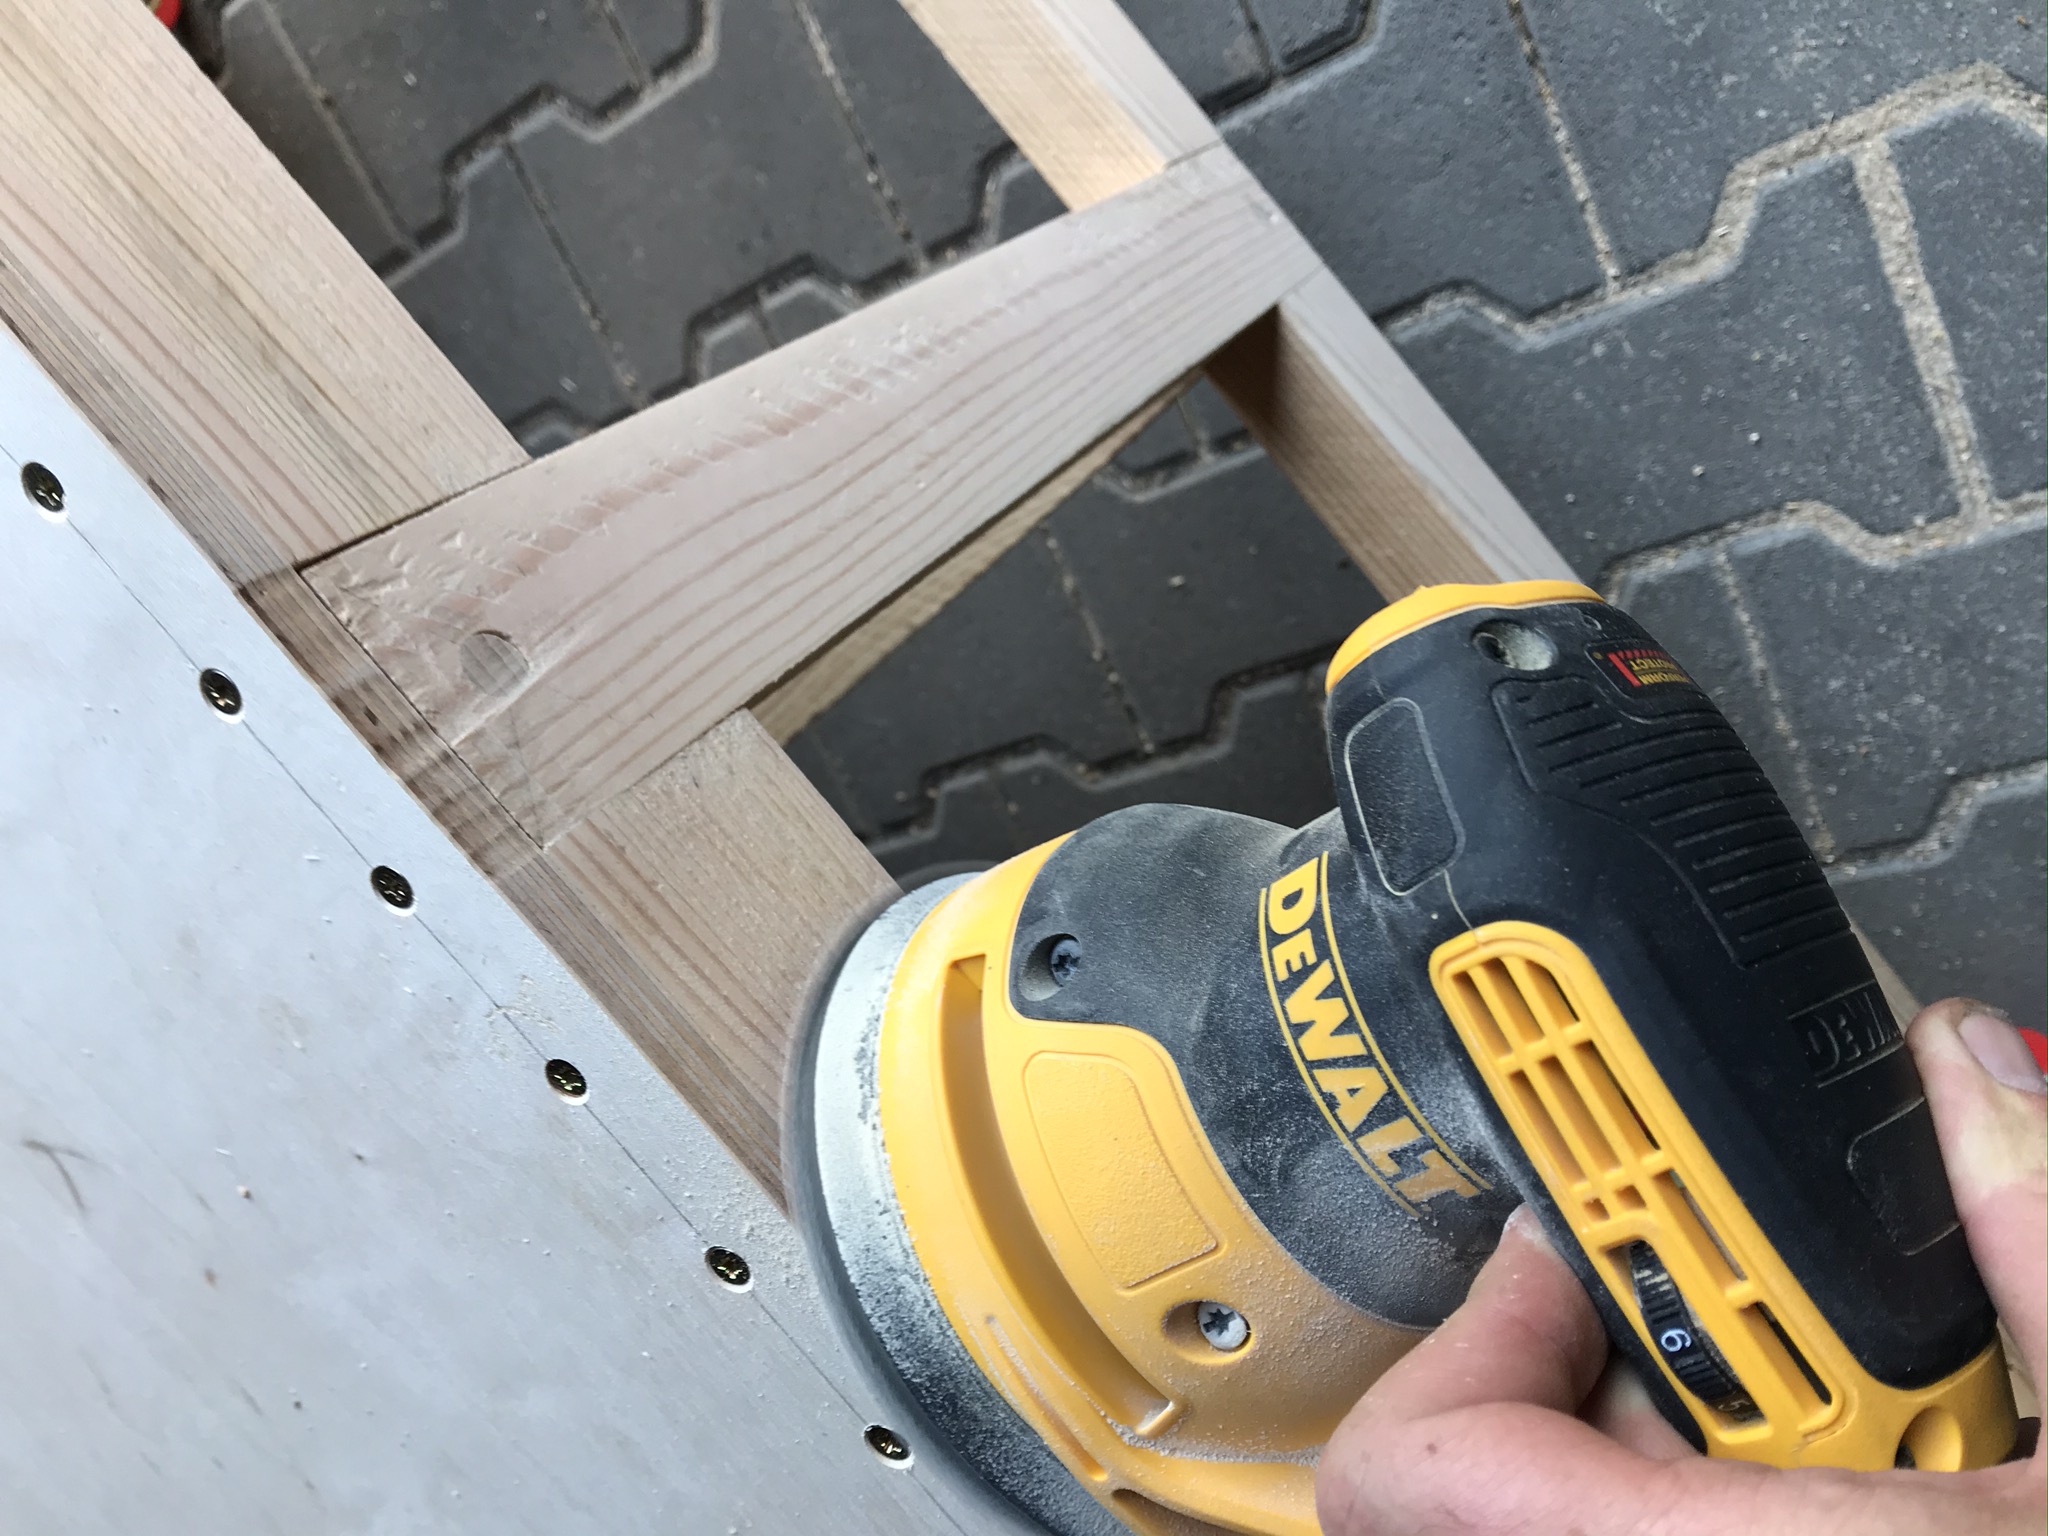
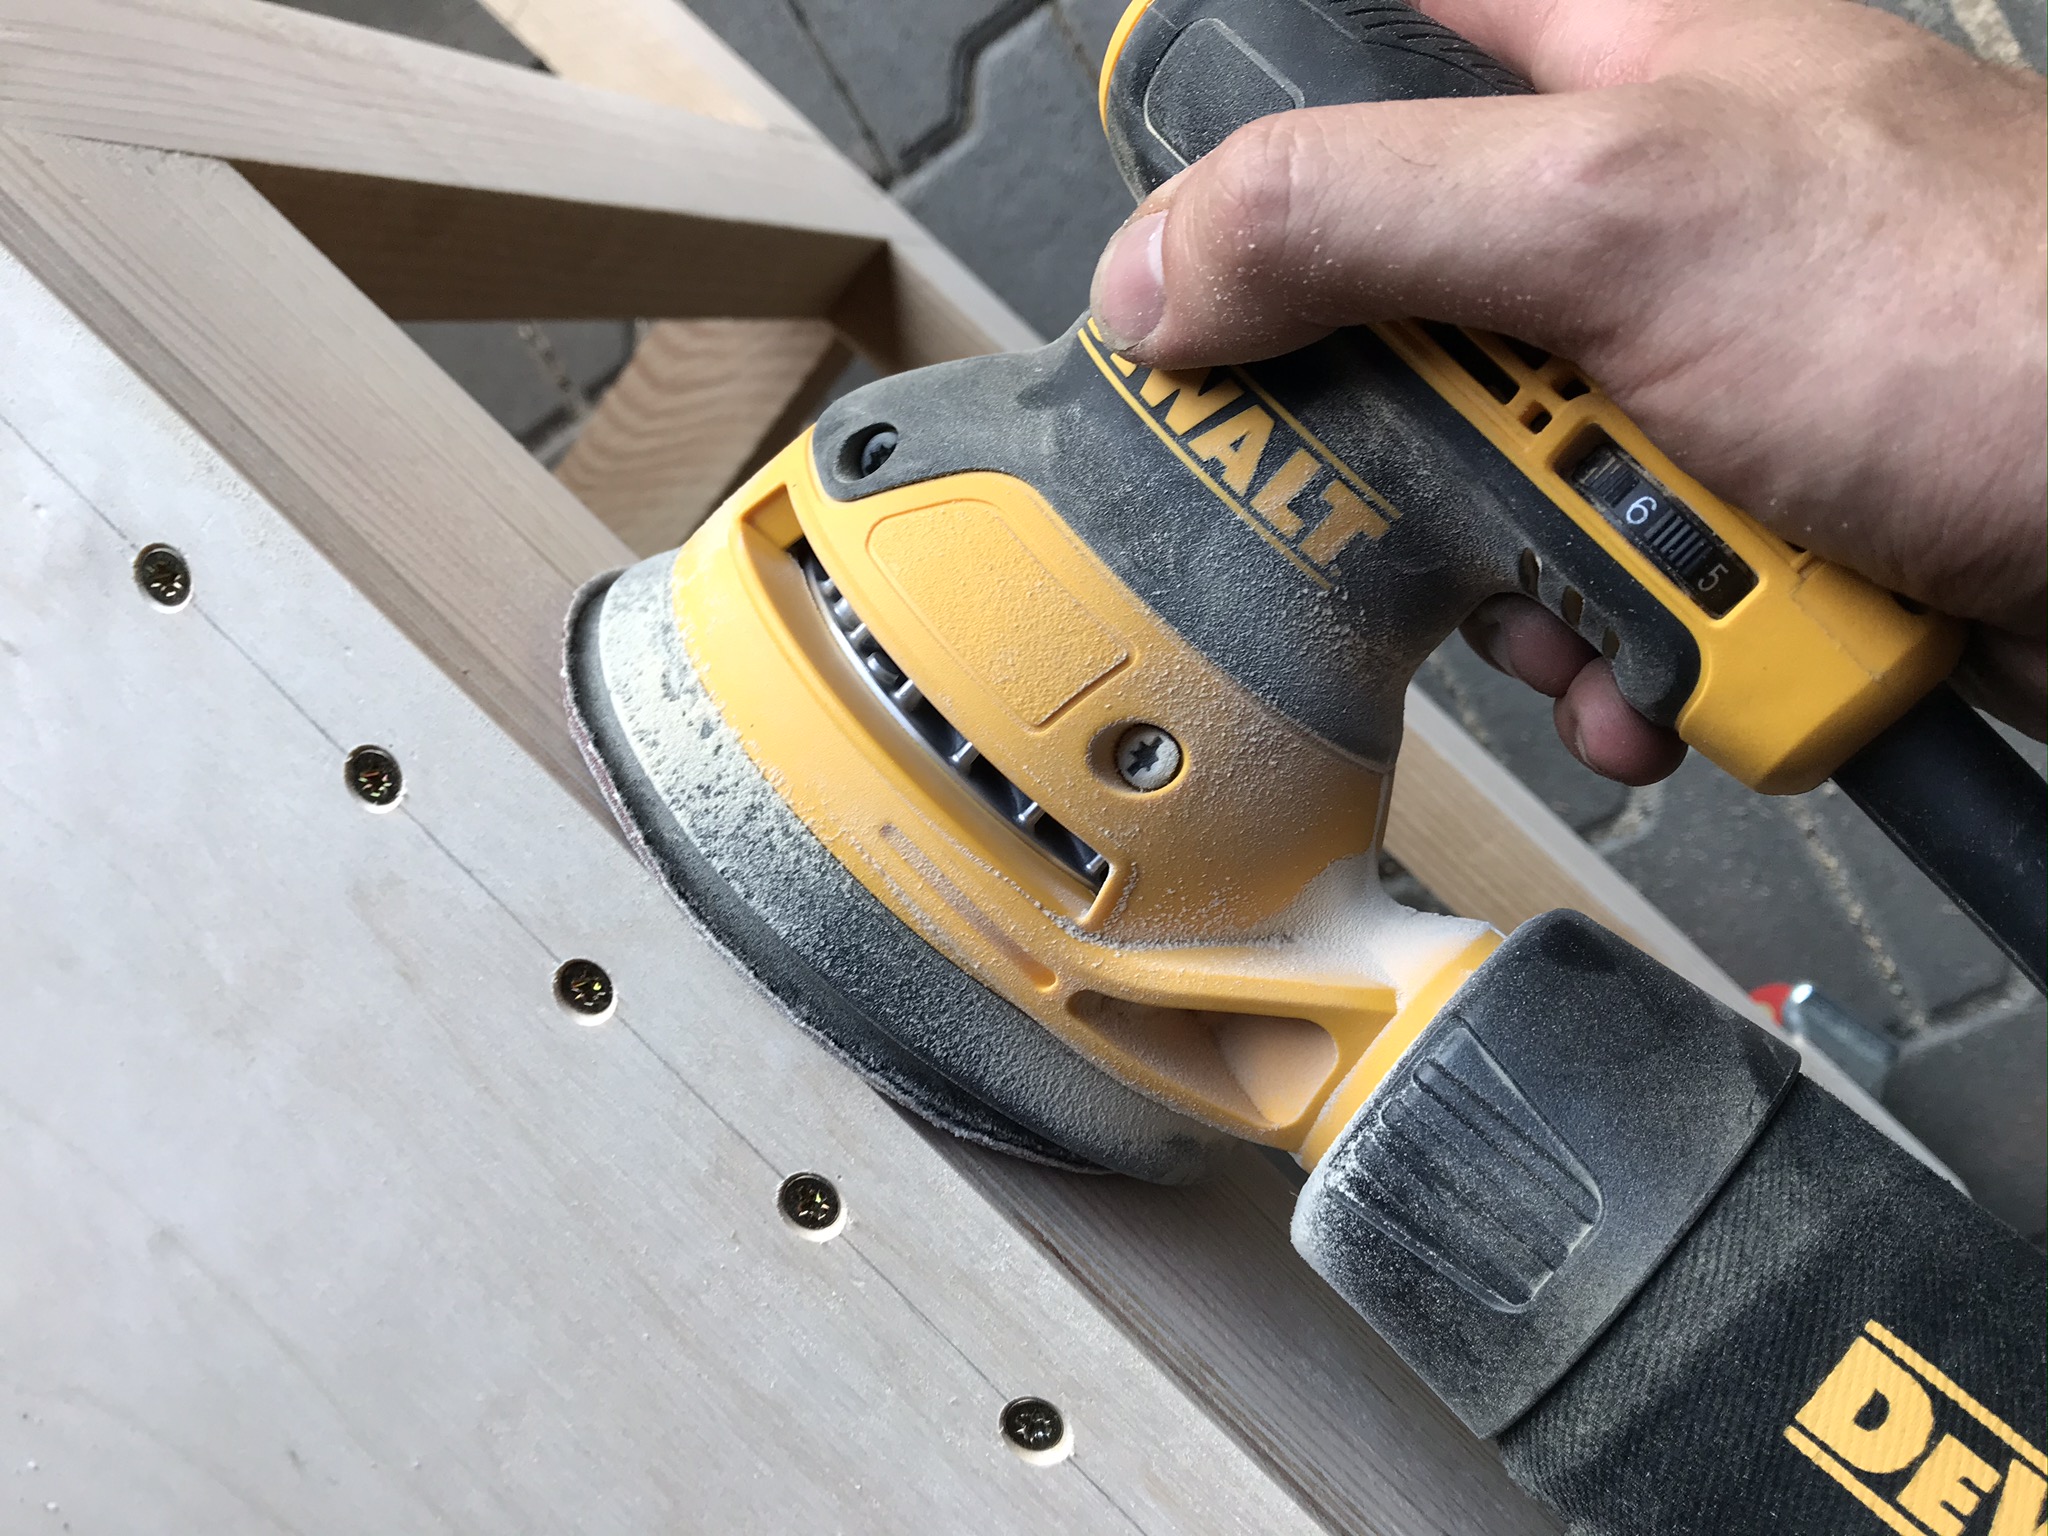
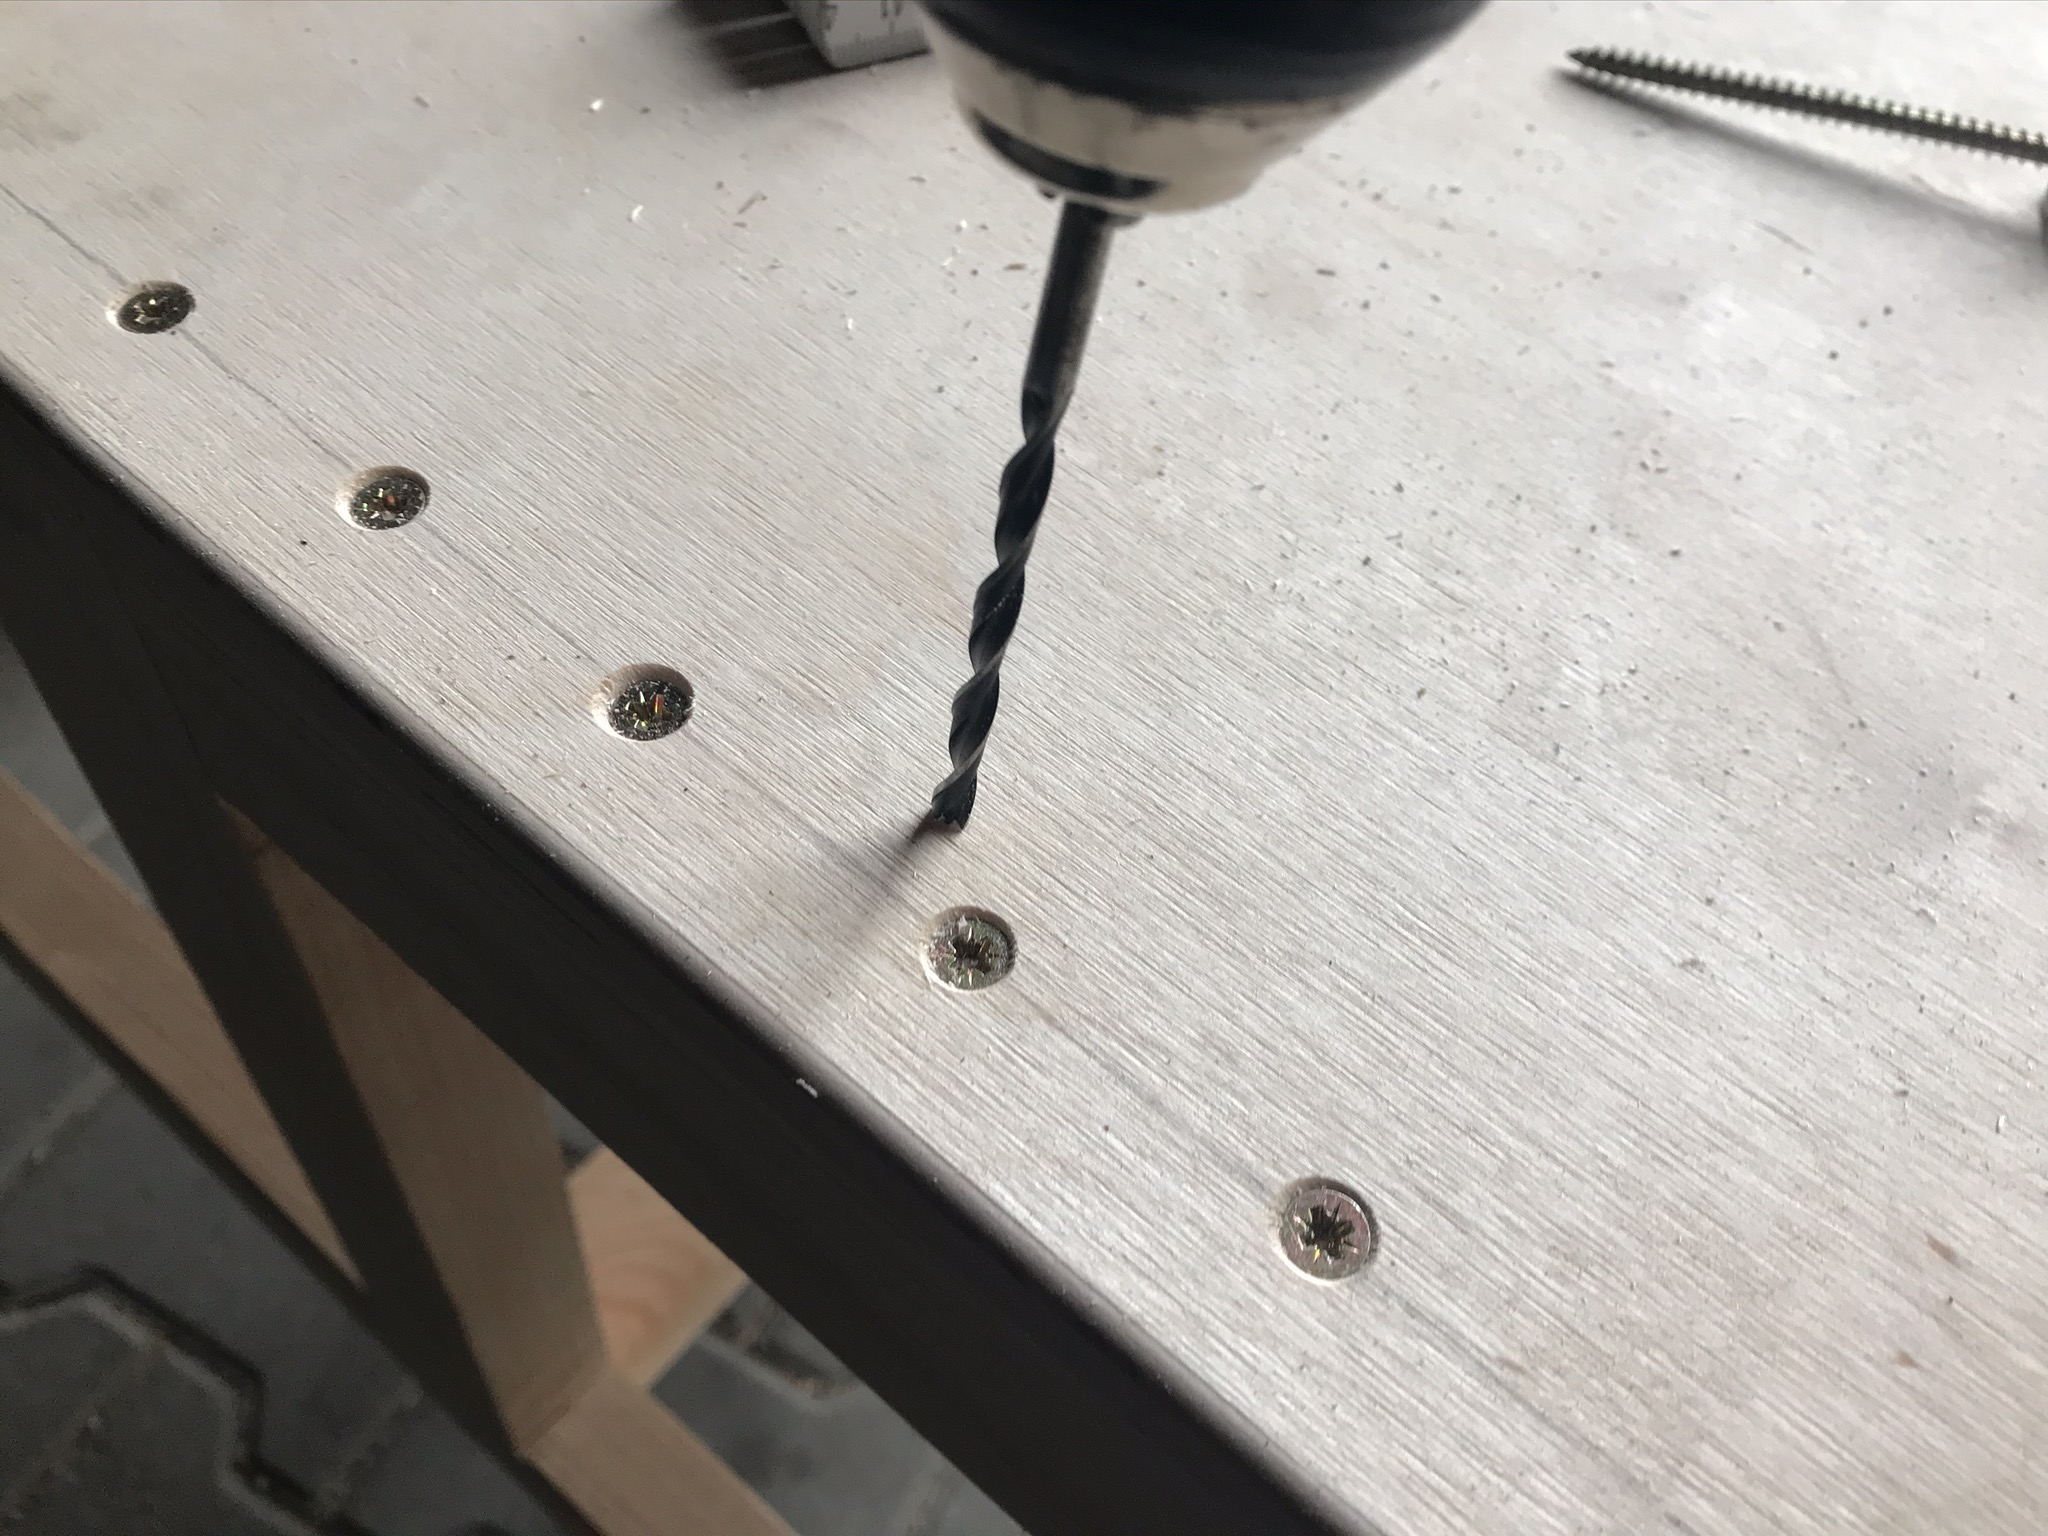
Then you can mark the holes for the heavy-duty rollers* and drill the holes for the machine screws with a 9mm drill bit. Experience has shown that the wood tends to tear when drilling. A short sanding with the random orbital sander* creates a flat surface where the rollers can be screwed in properly.
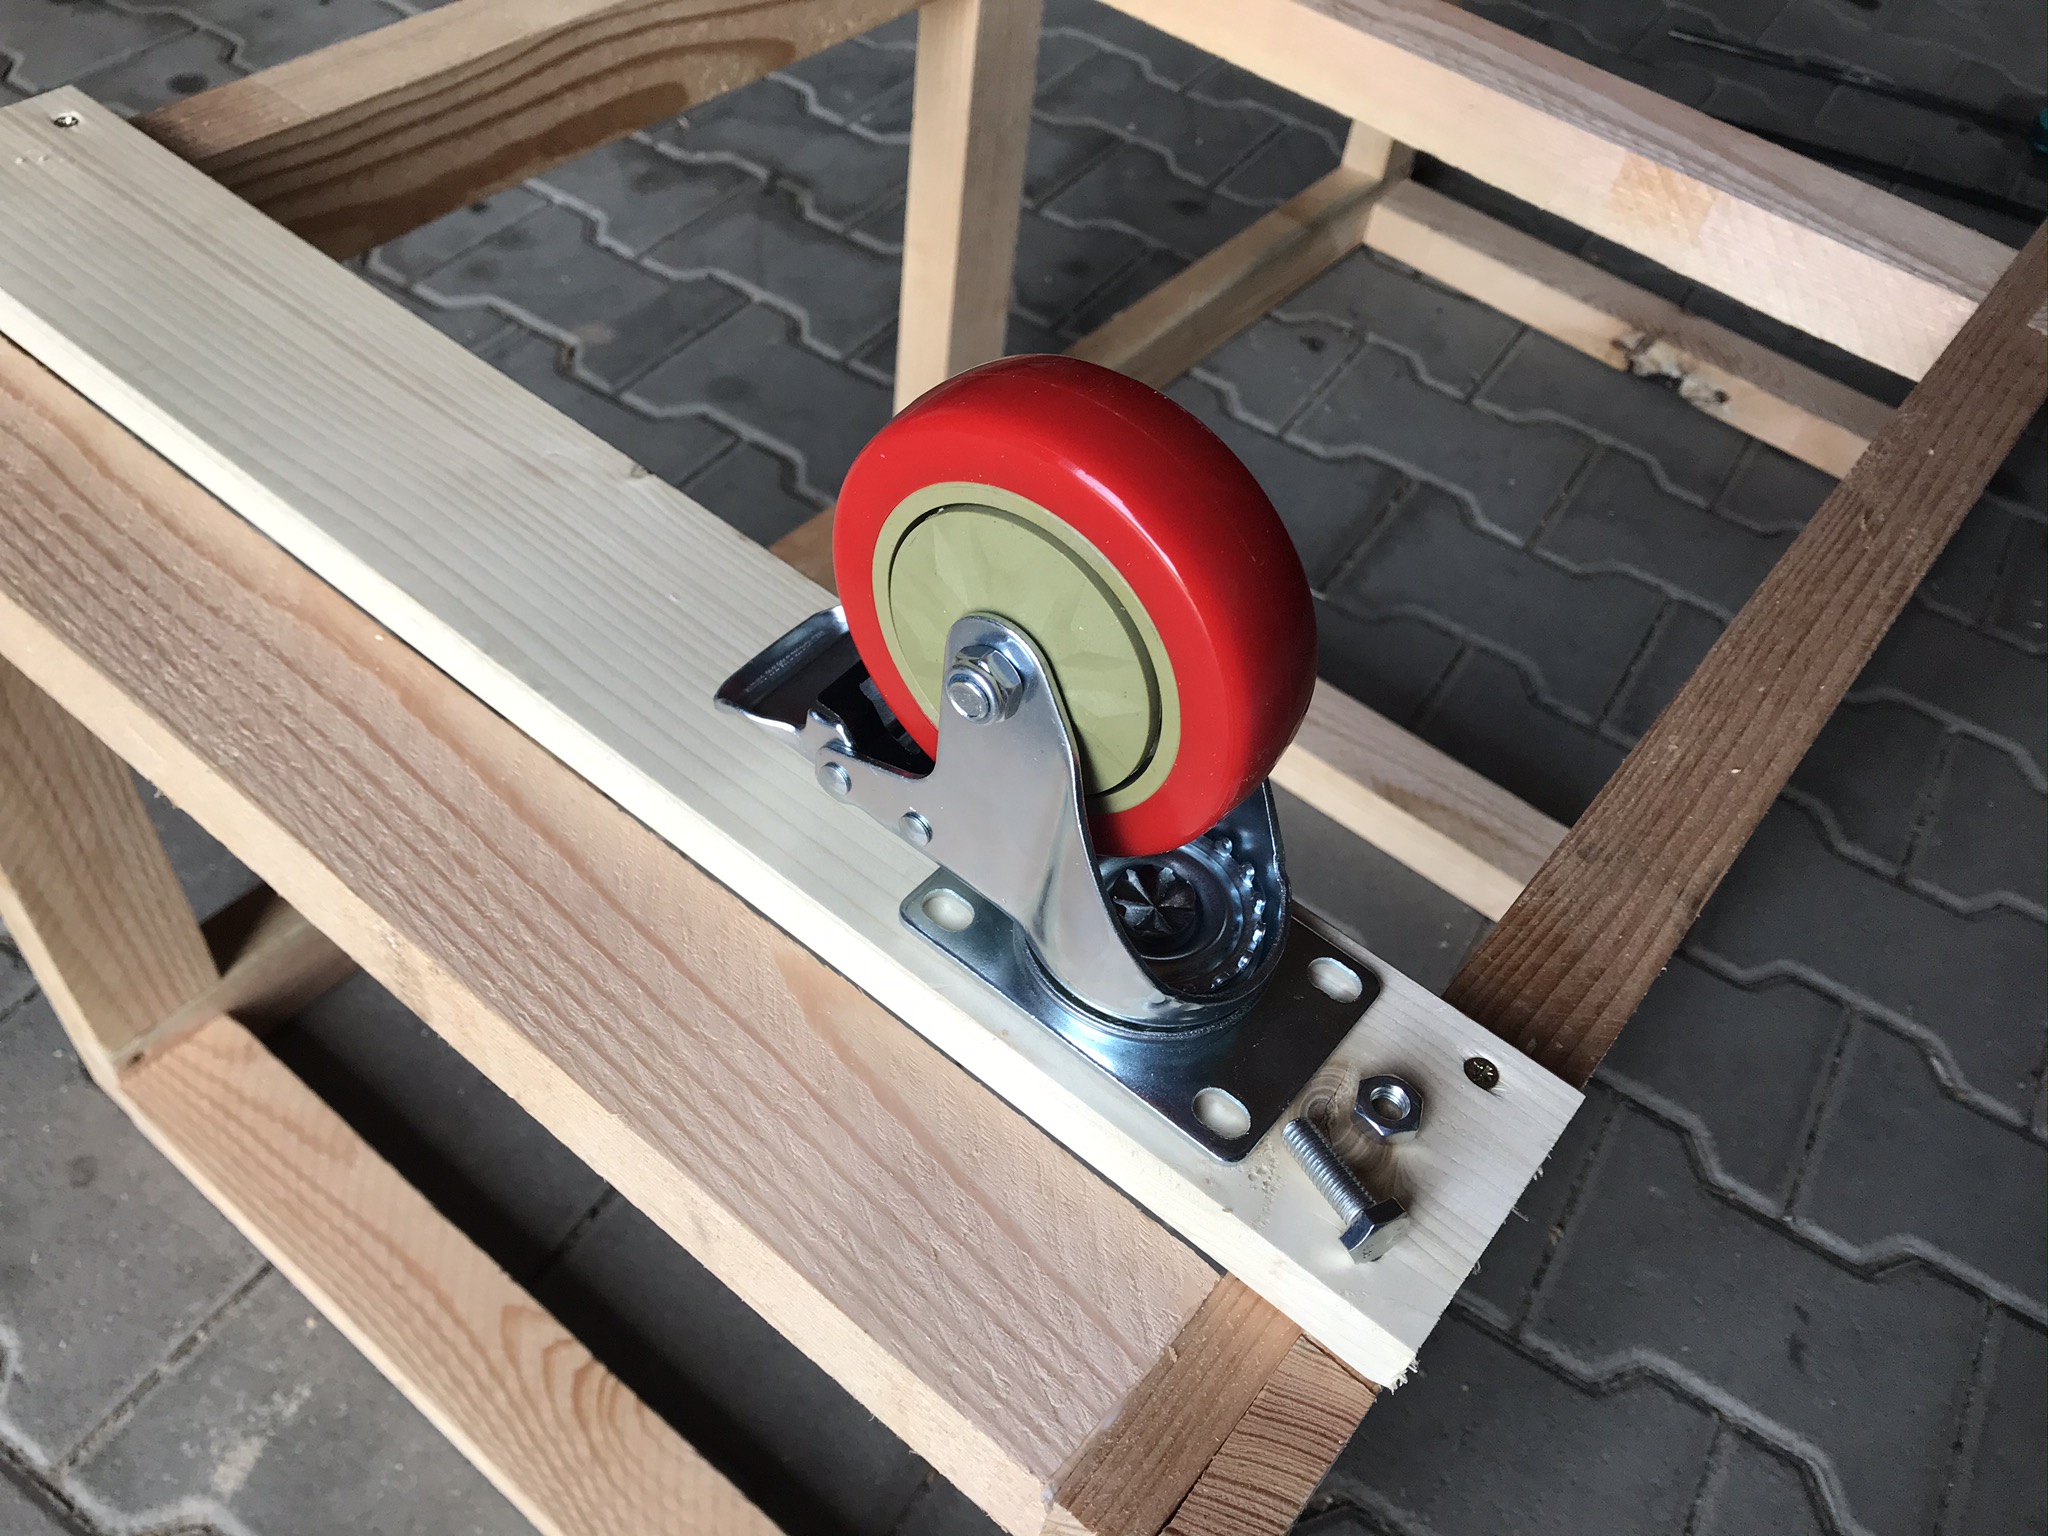
You can easily attach the 4 castors* with the machine screws and nuts supplied. Tighten the nuts well with a small ratchet. If you like, you can apply a drop of loctite to the nuts.

- 280 W MOTOR: 8,000 – 12,000 opm, providing a superior finish
- 125 mm HOOK & LOOP PLATEN: Quick change and secure hold of Sanding Disc
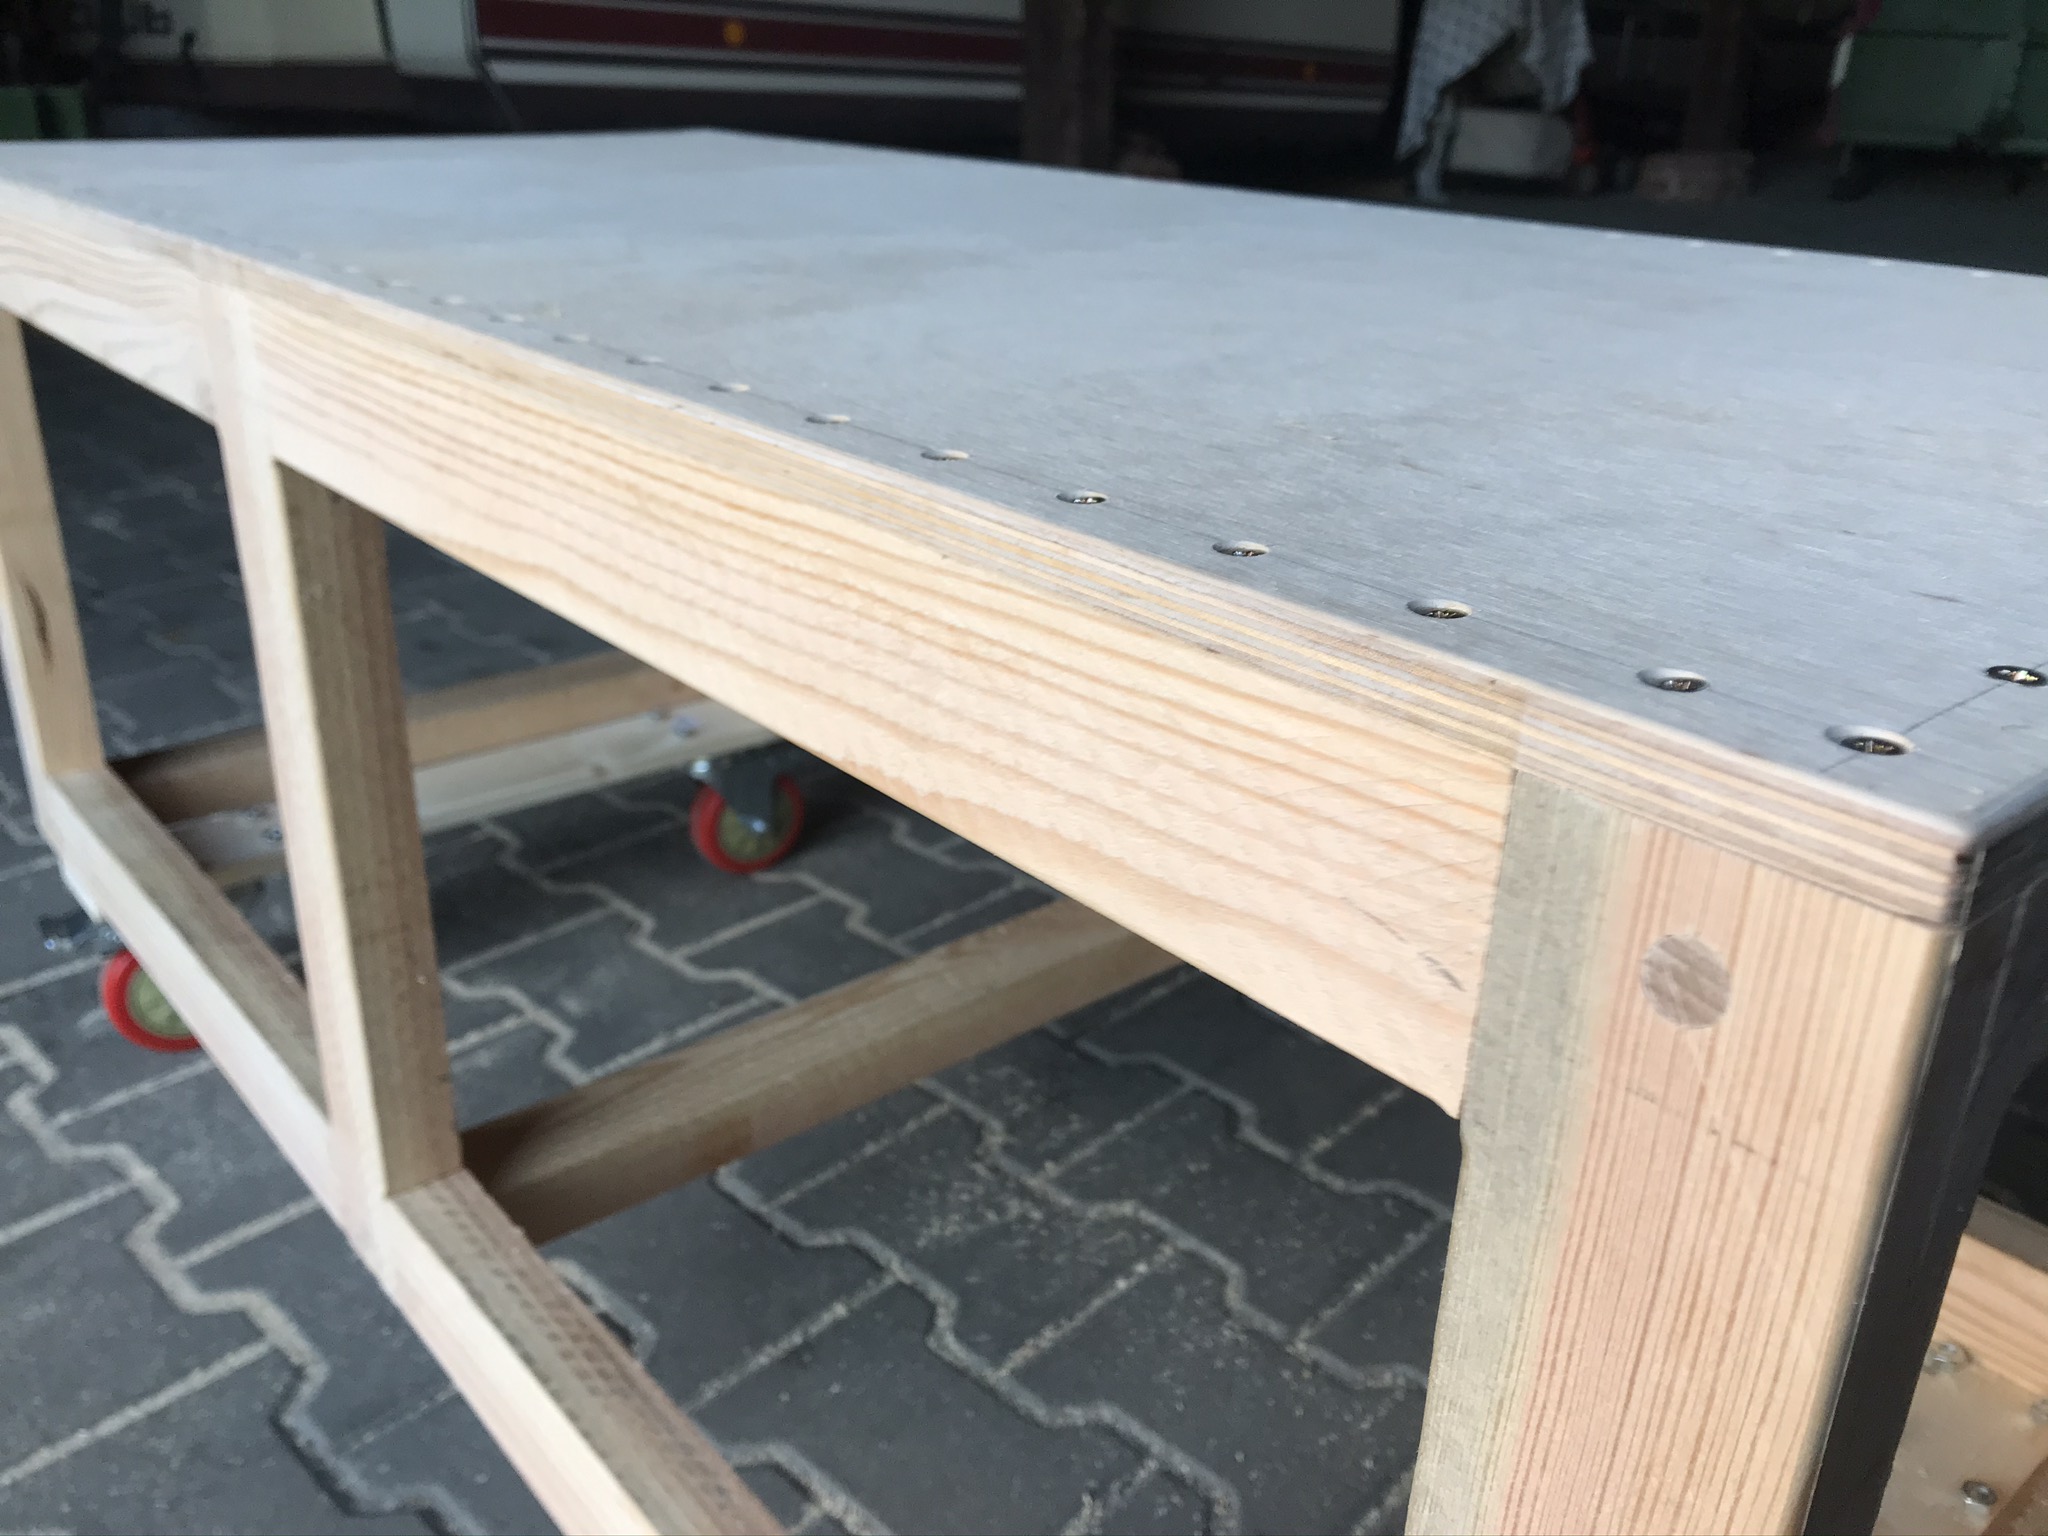
DWE7492 table saw station – table top assembly
I use a 12mm plywood board as the base plate for the table saw, which is placed on top of the mobile DeWALT DWE7492* base frame. The table top is 1200x560mm in total. The base here is standard 1200x600mm plywood from the hardware store. You do not necessarily have to shorten the tabletop to exactly 560mm. You can also simply adjust the overhang to the frame with a flush milling cutter after screwing the top together.
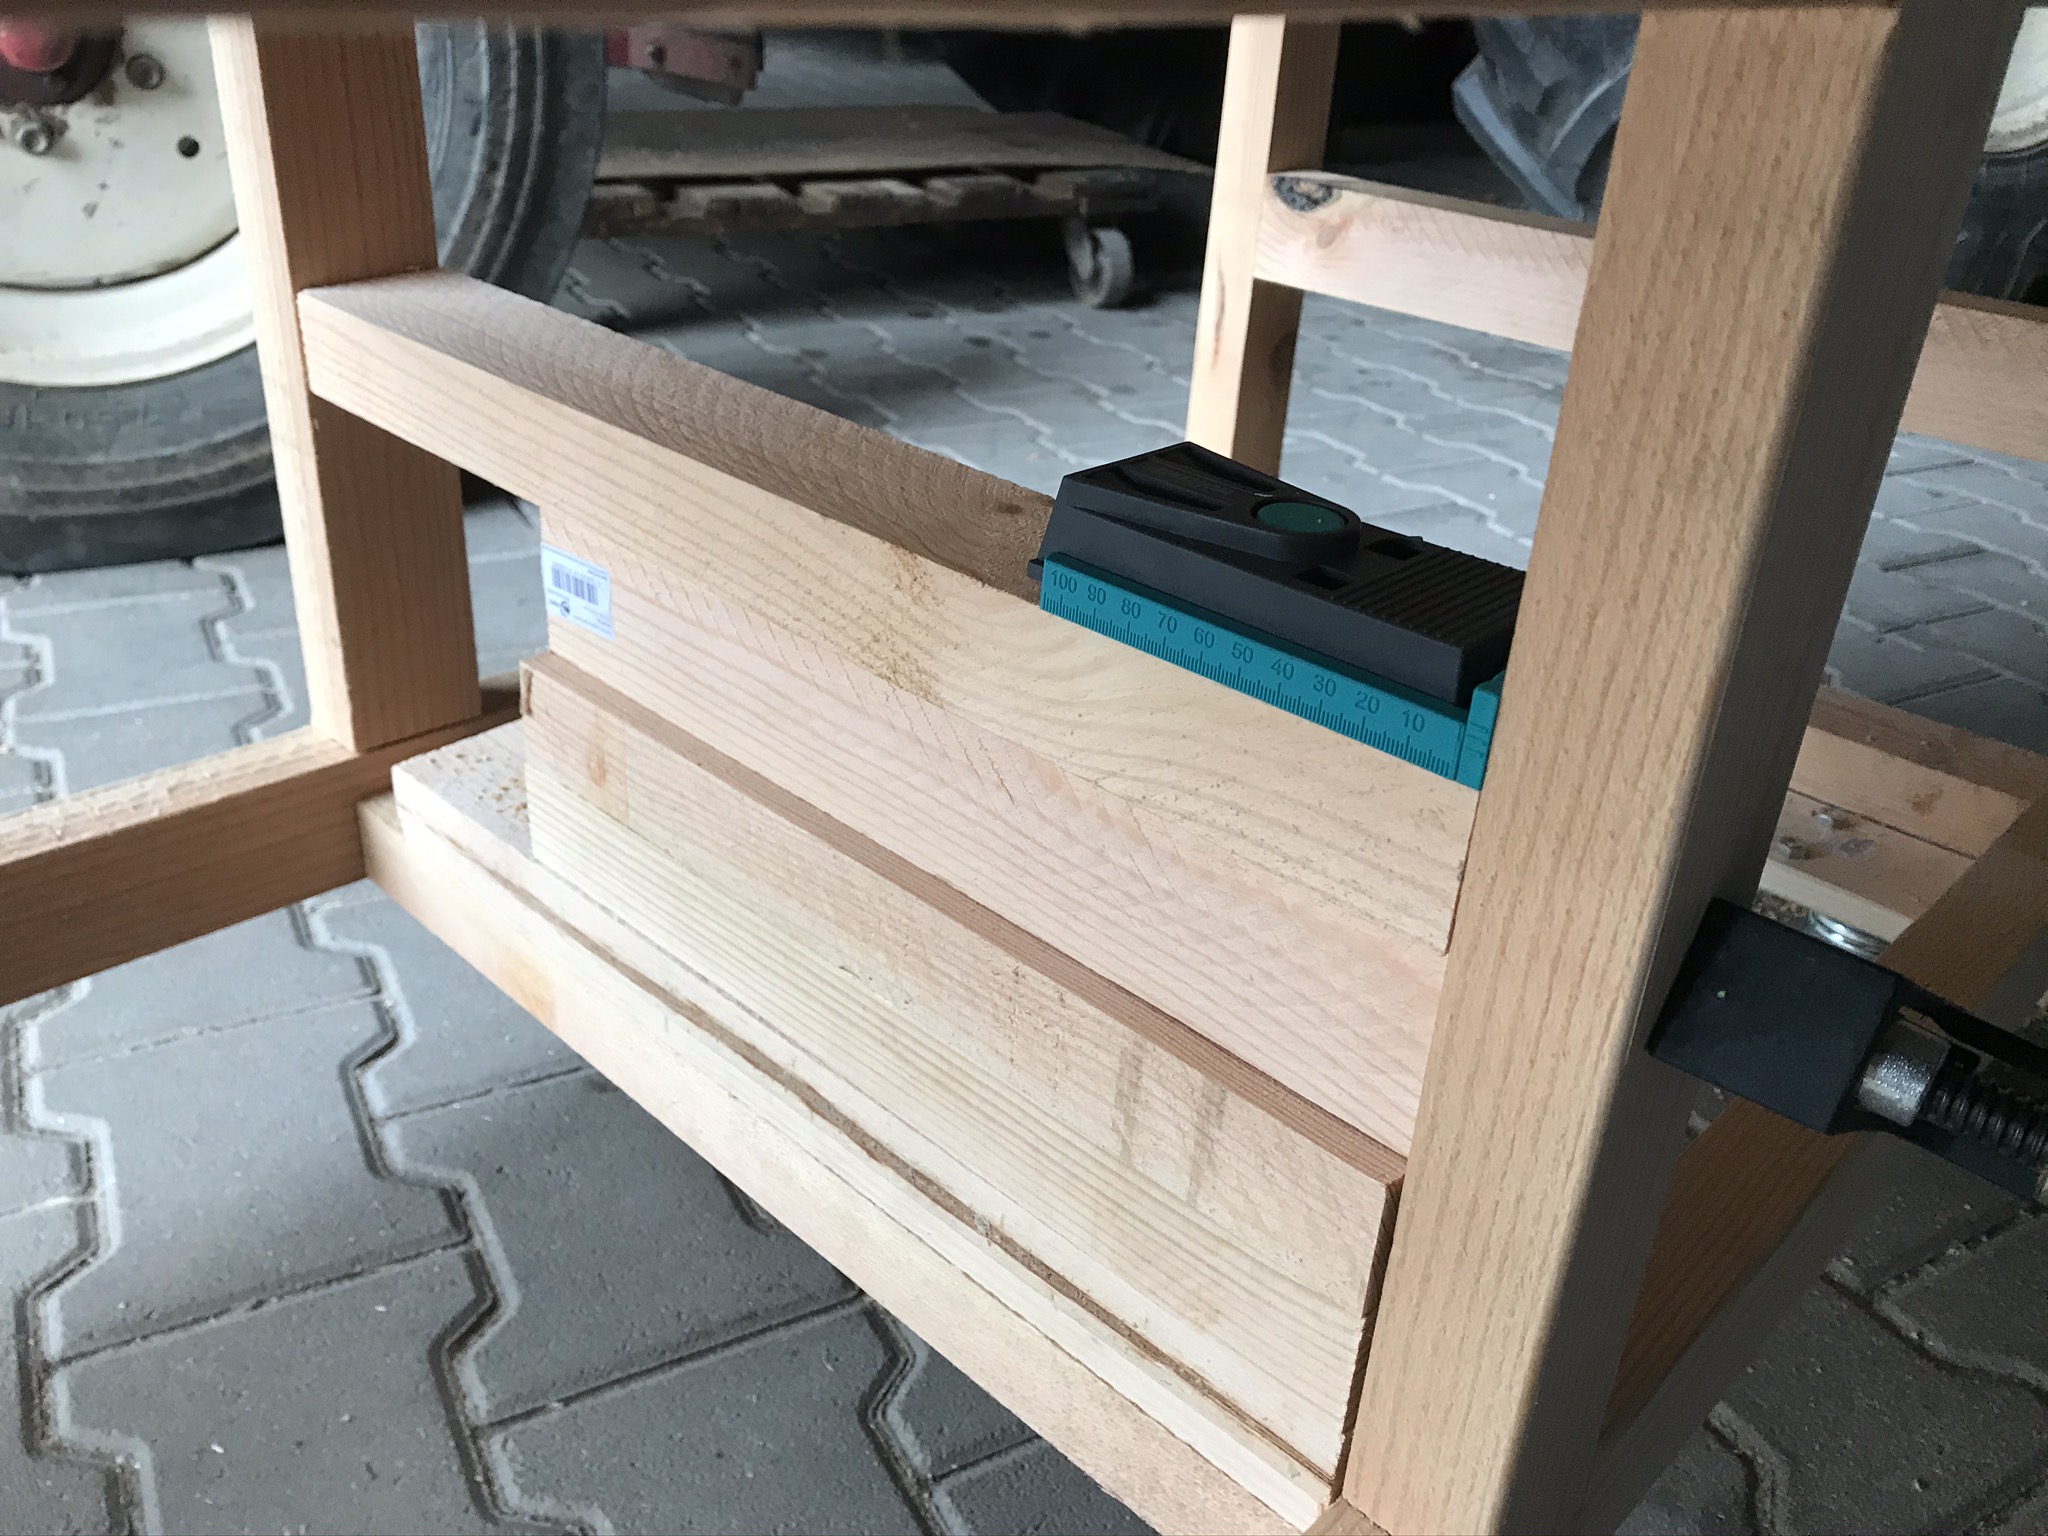
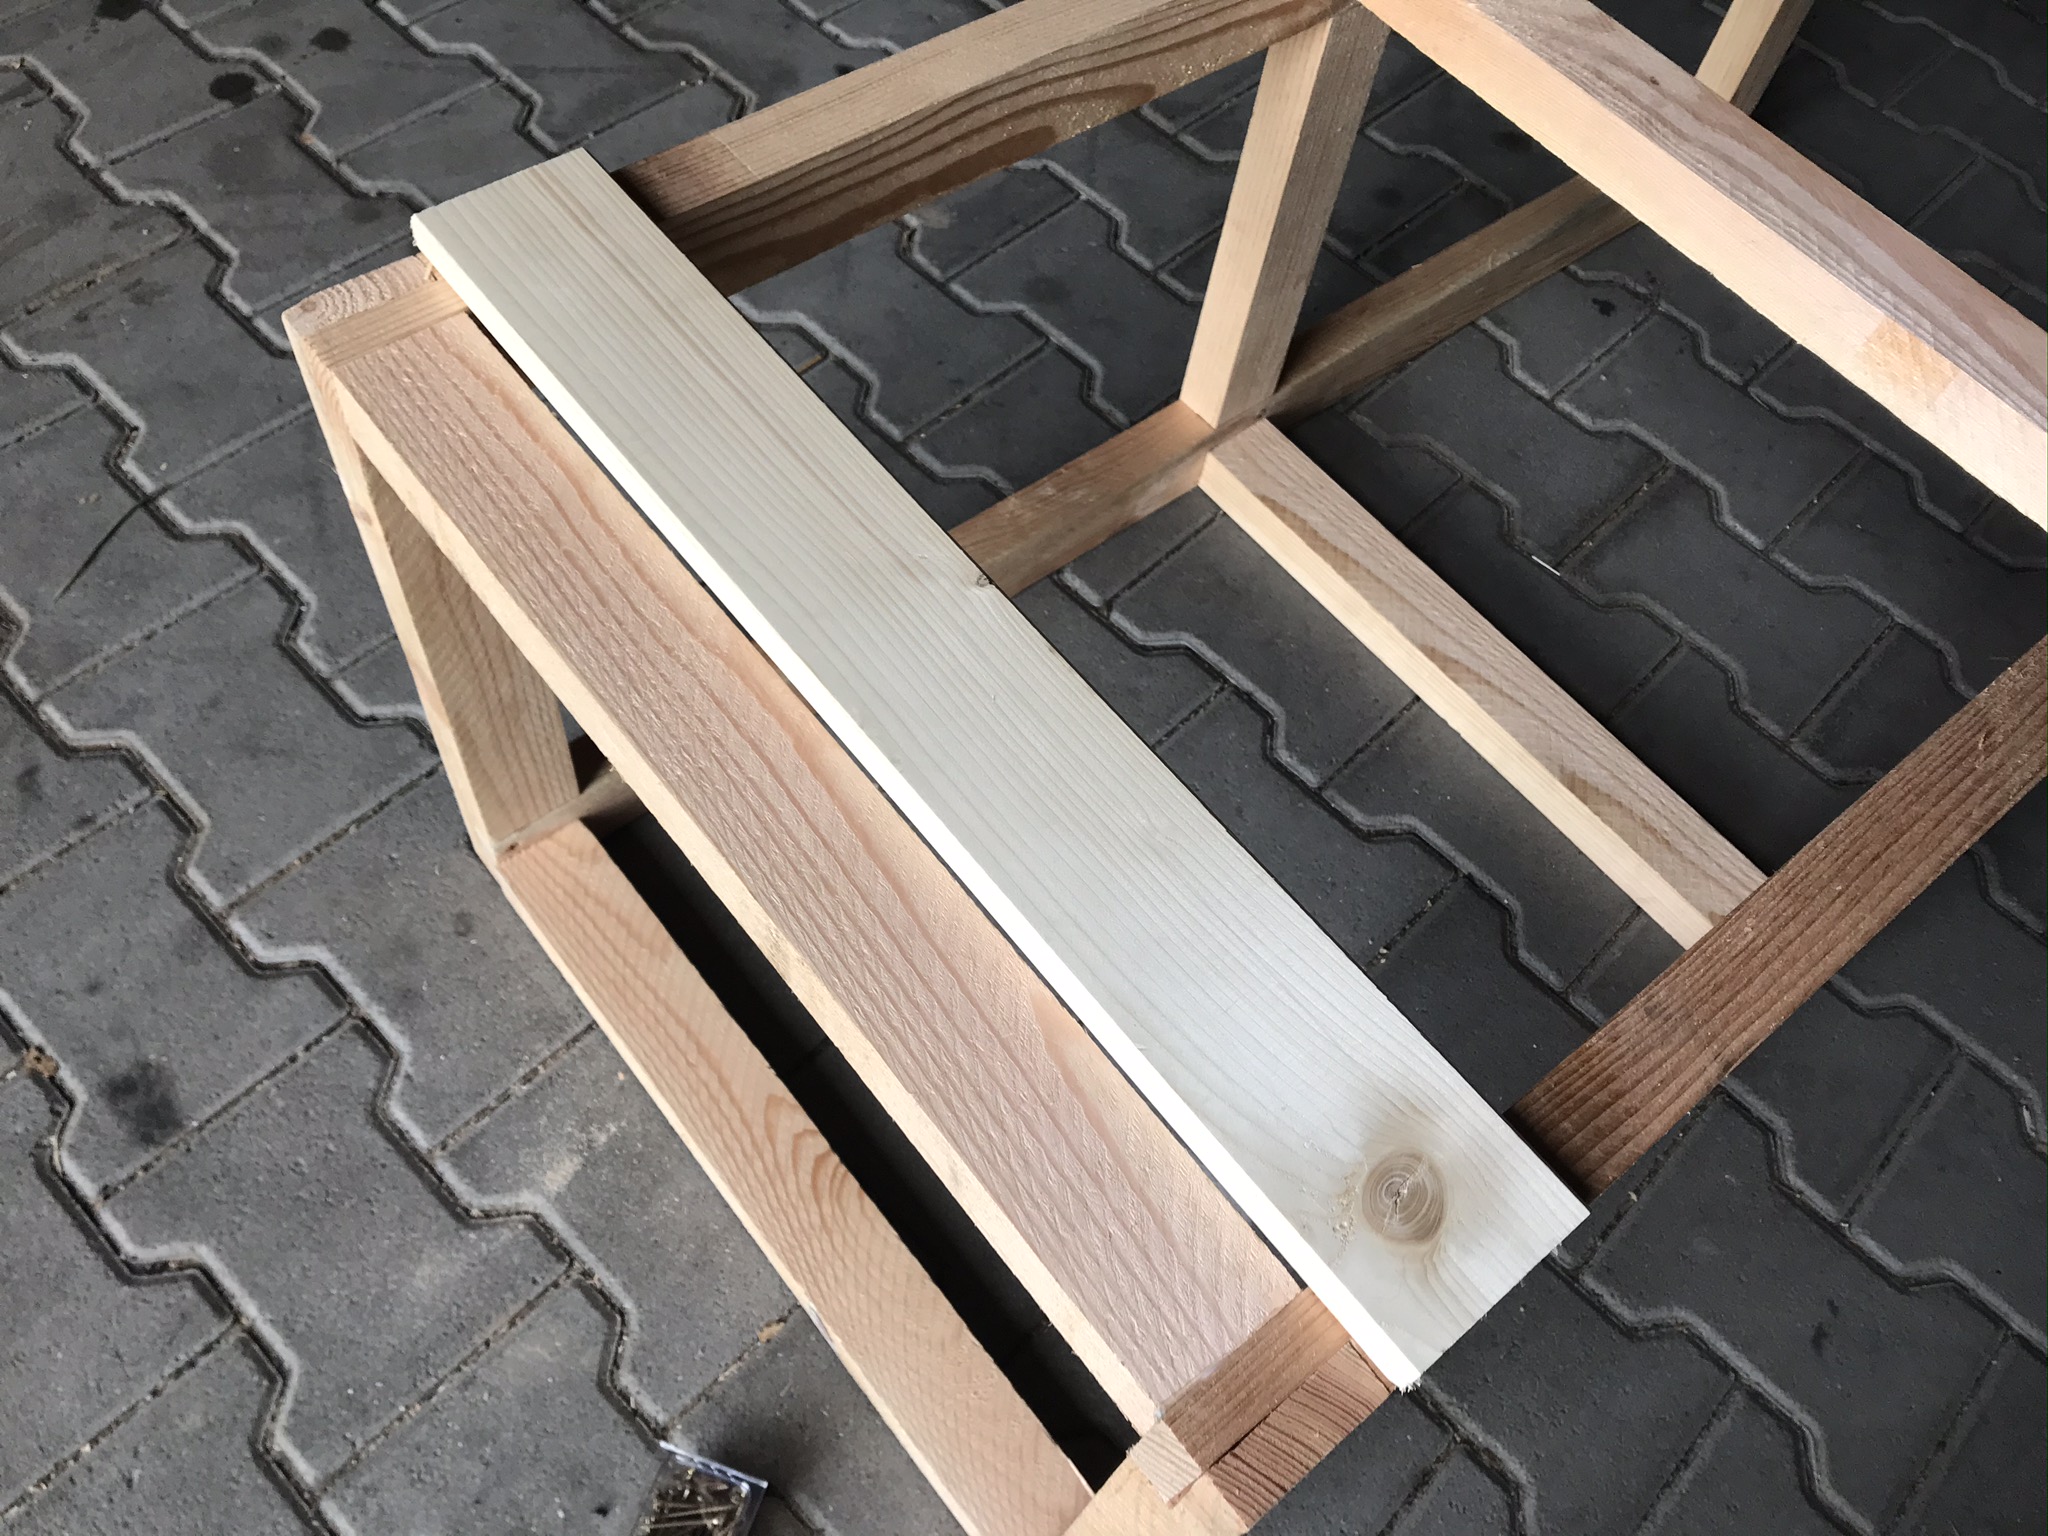
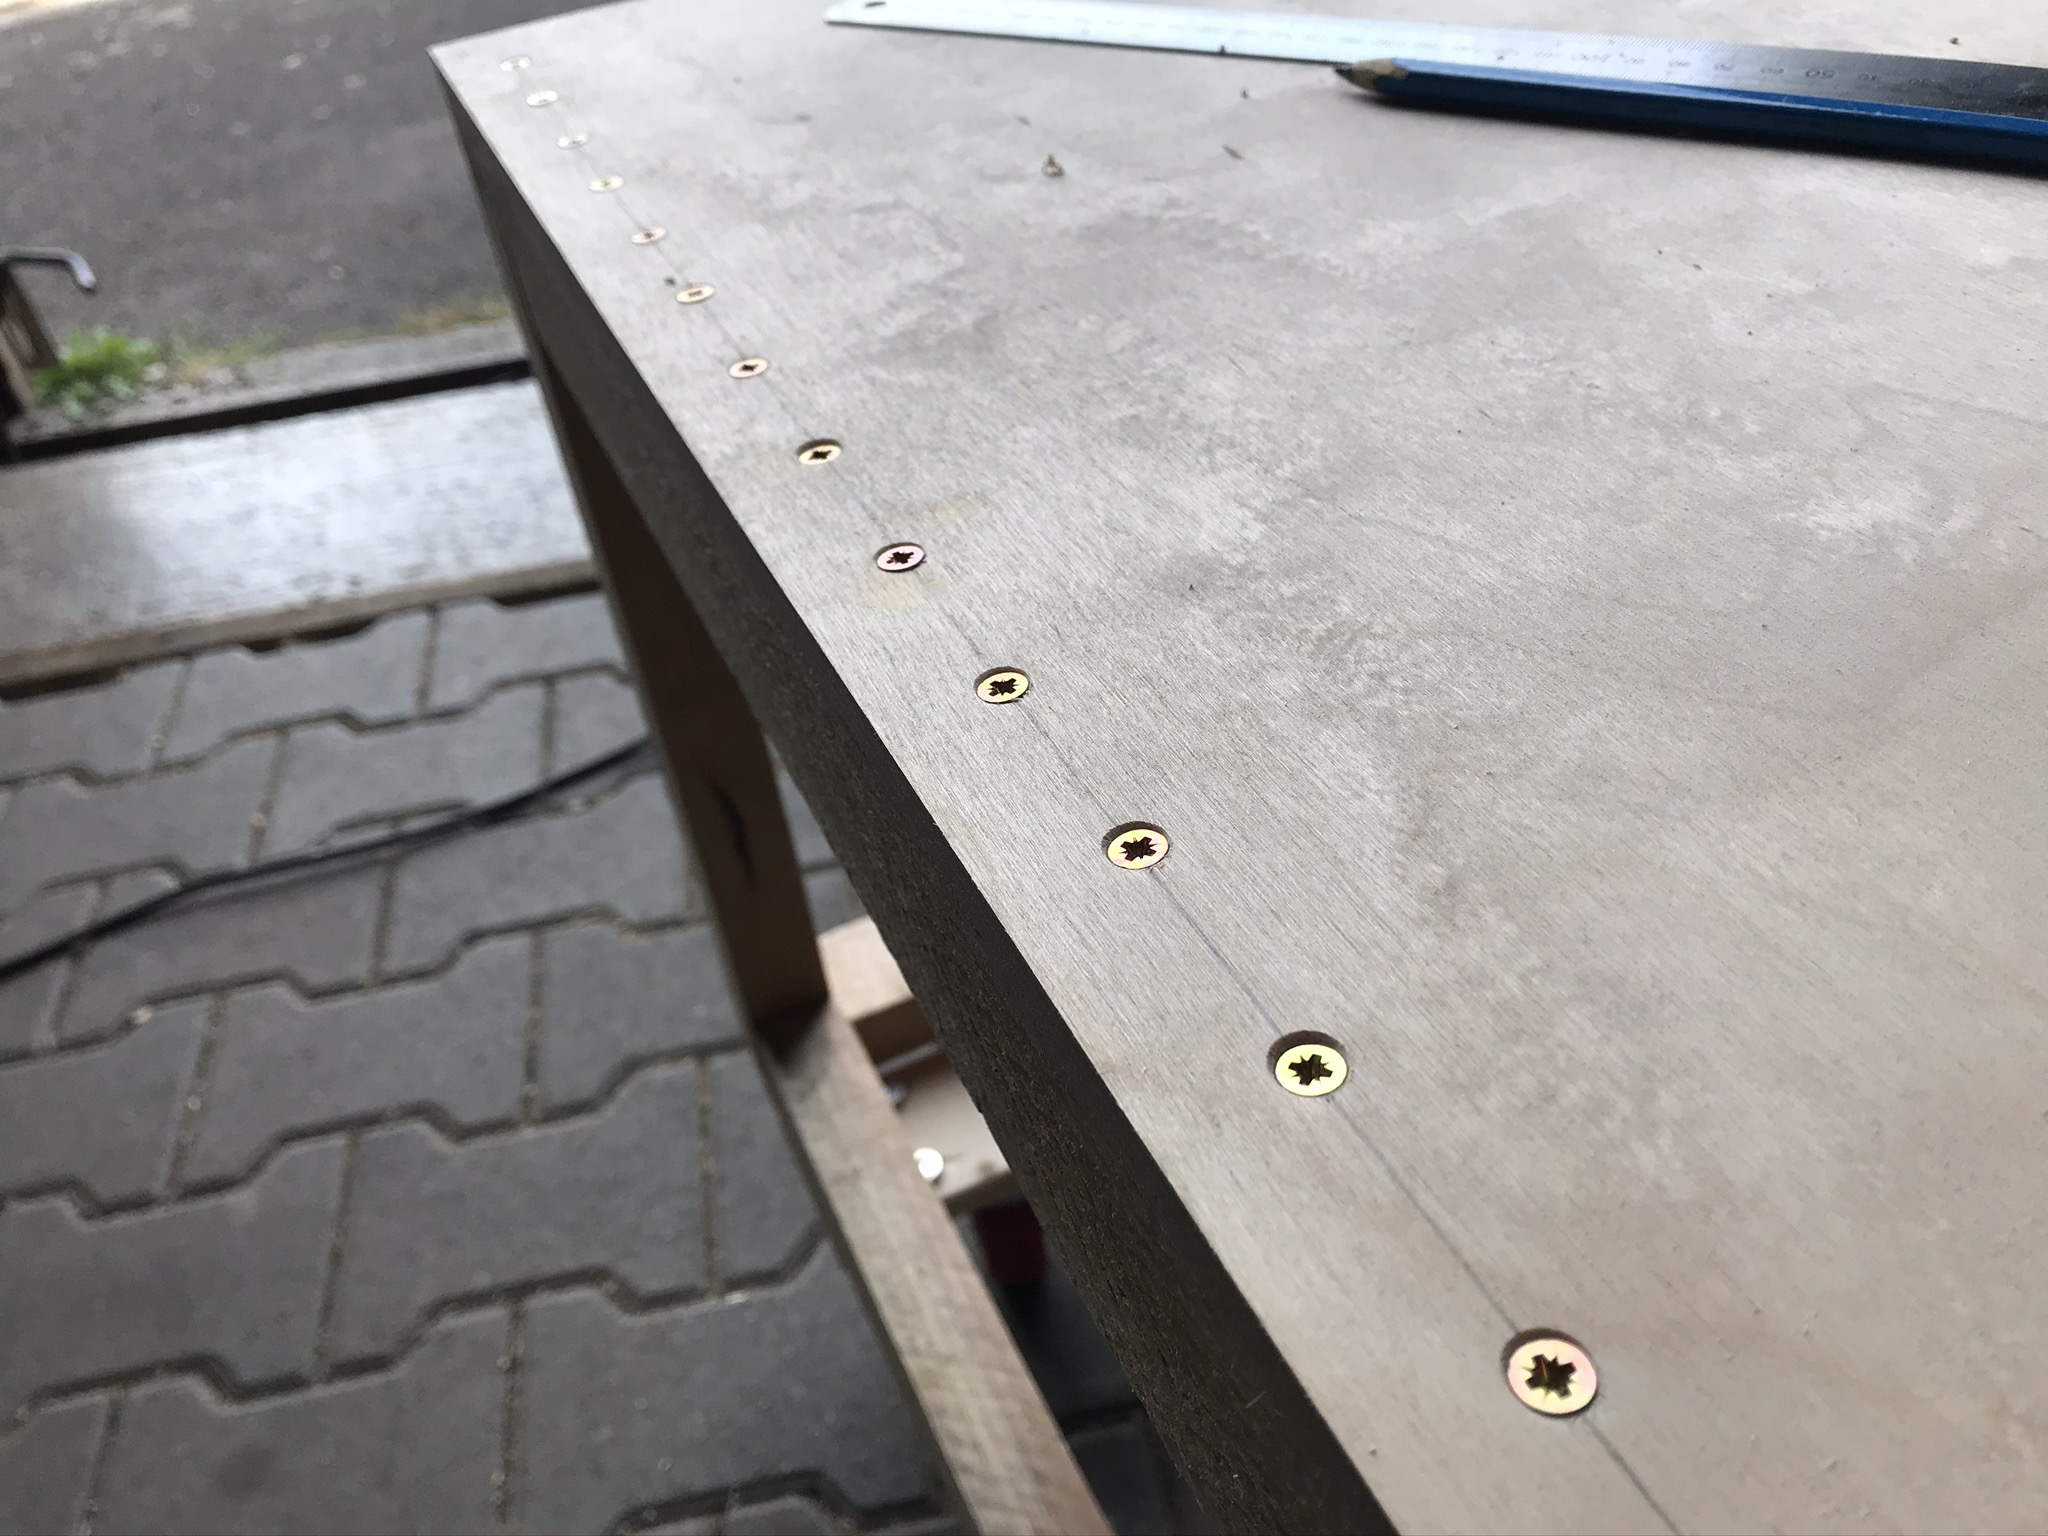
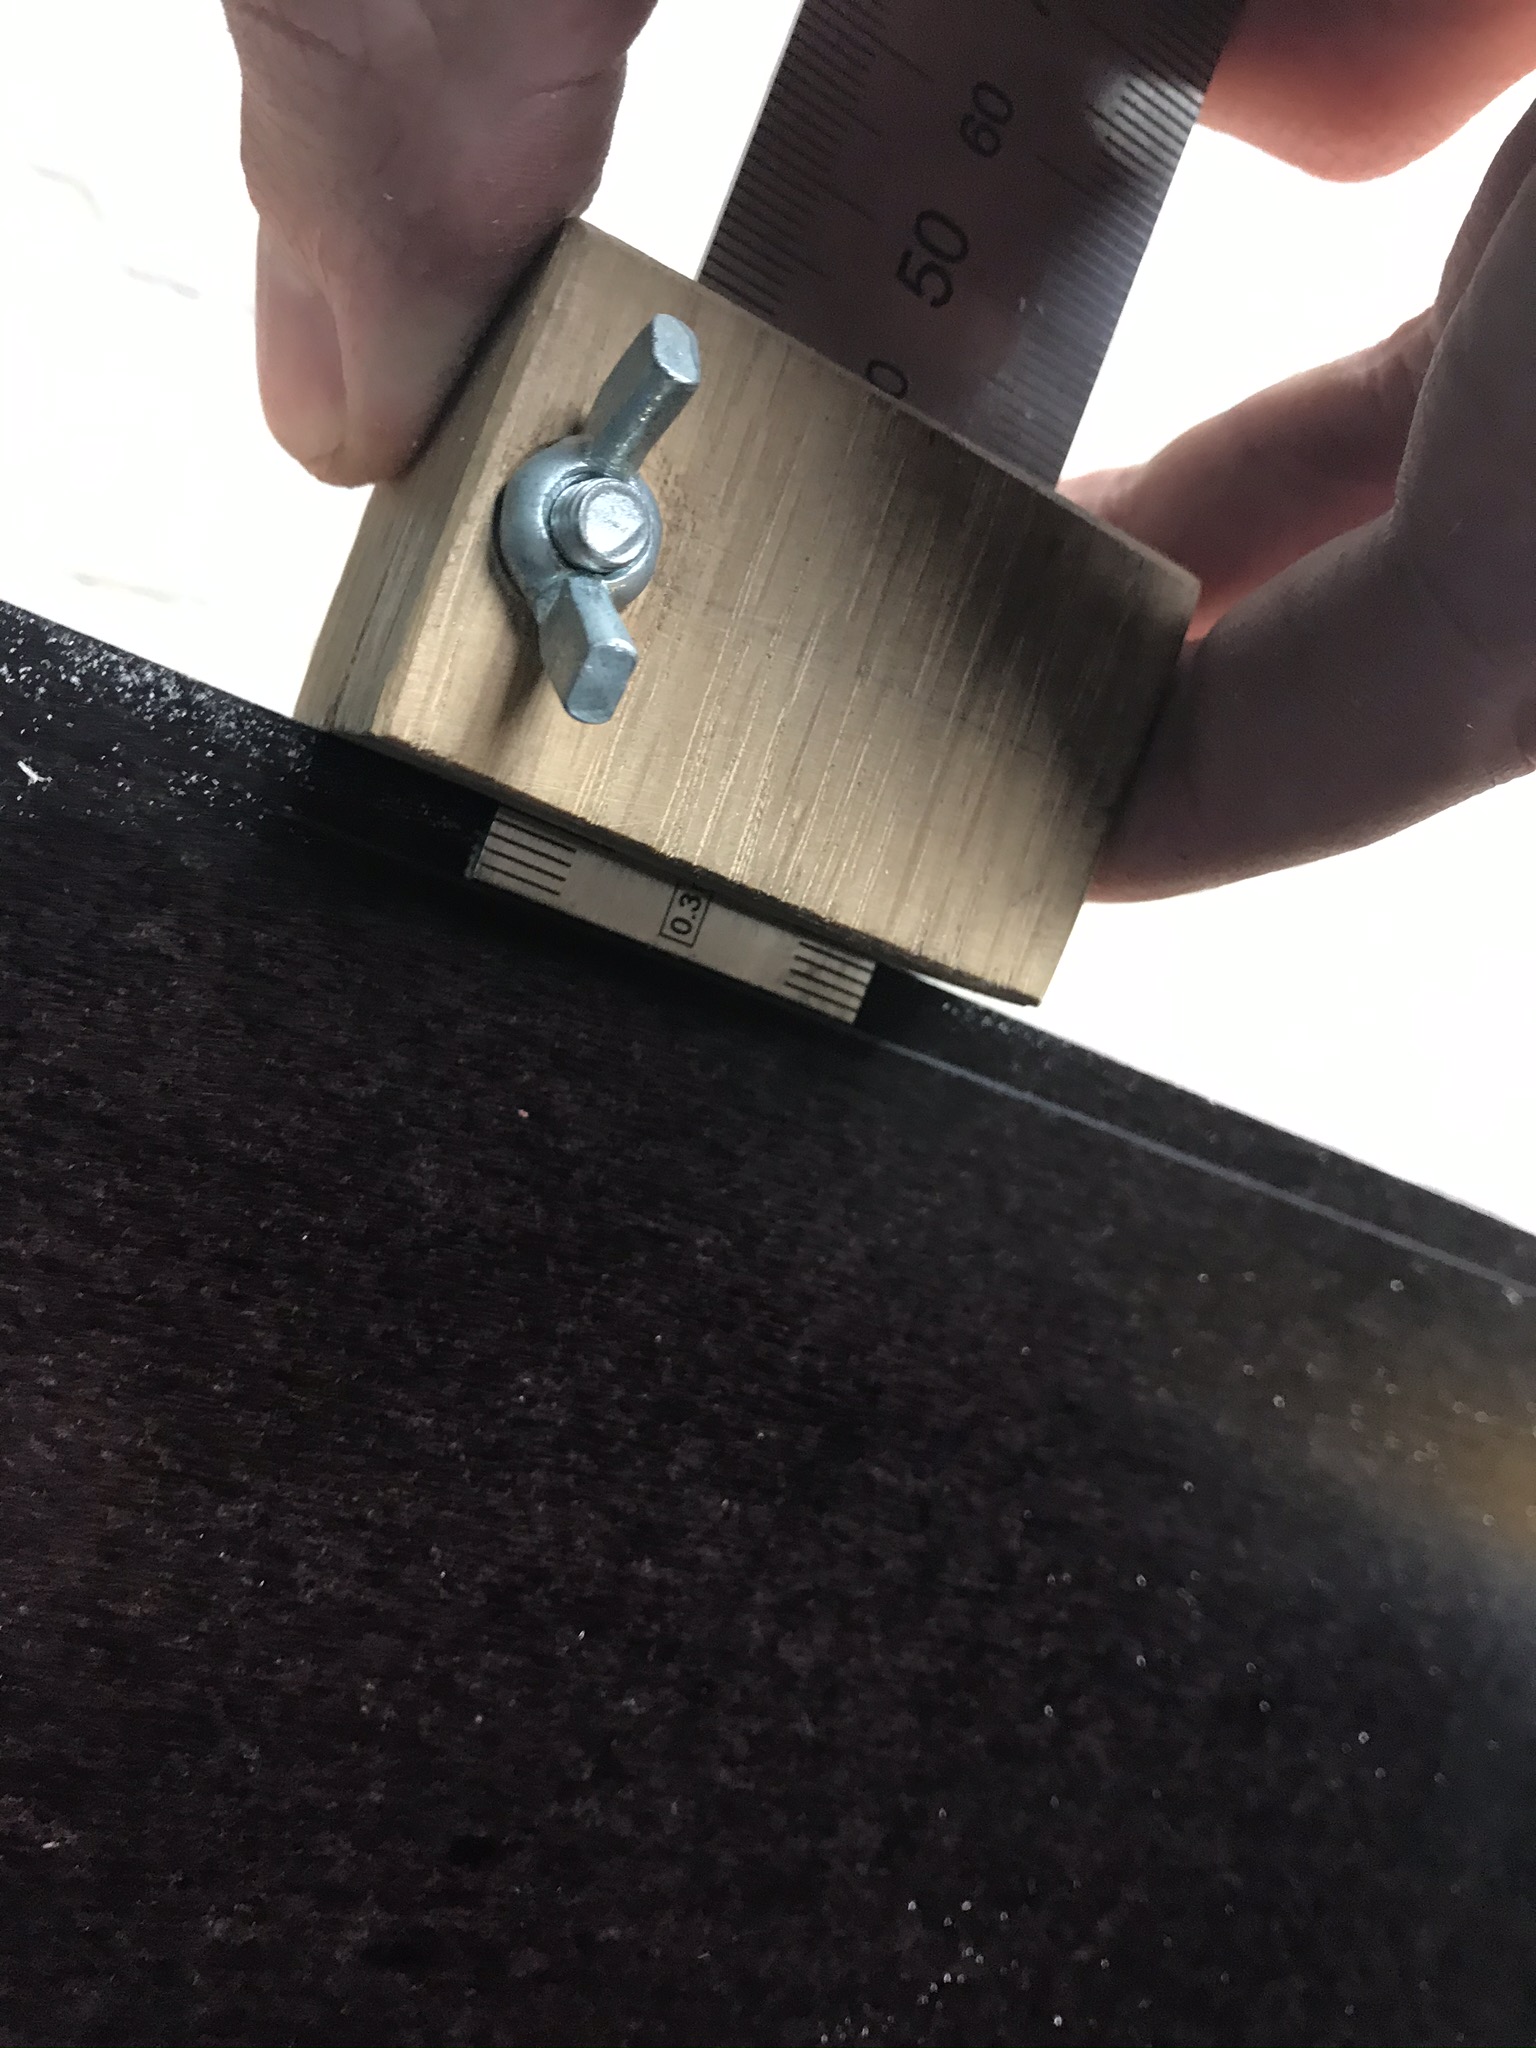
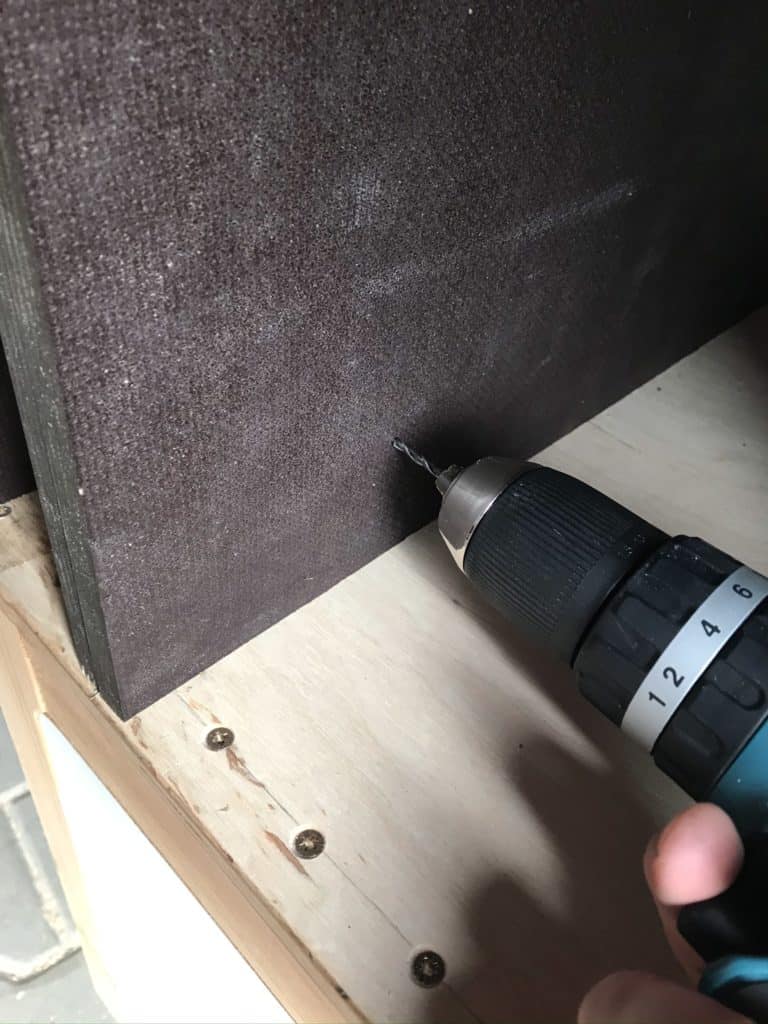
First place the board on top of the frame and mark the centre of the squared timber underneath with a rule – set the rule to 19 mm. The wood screws for fastening the board to the TKS subframe are placed on this line.
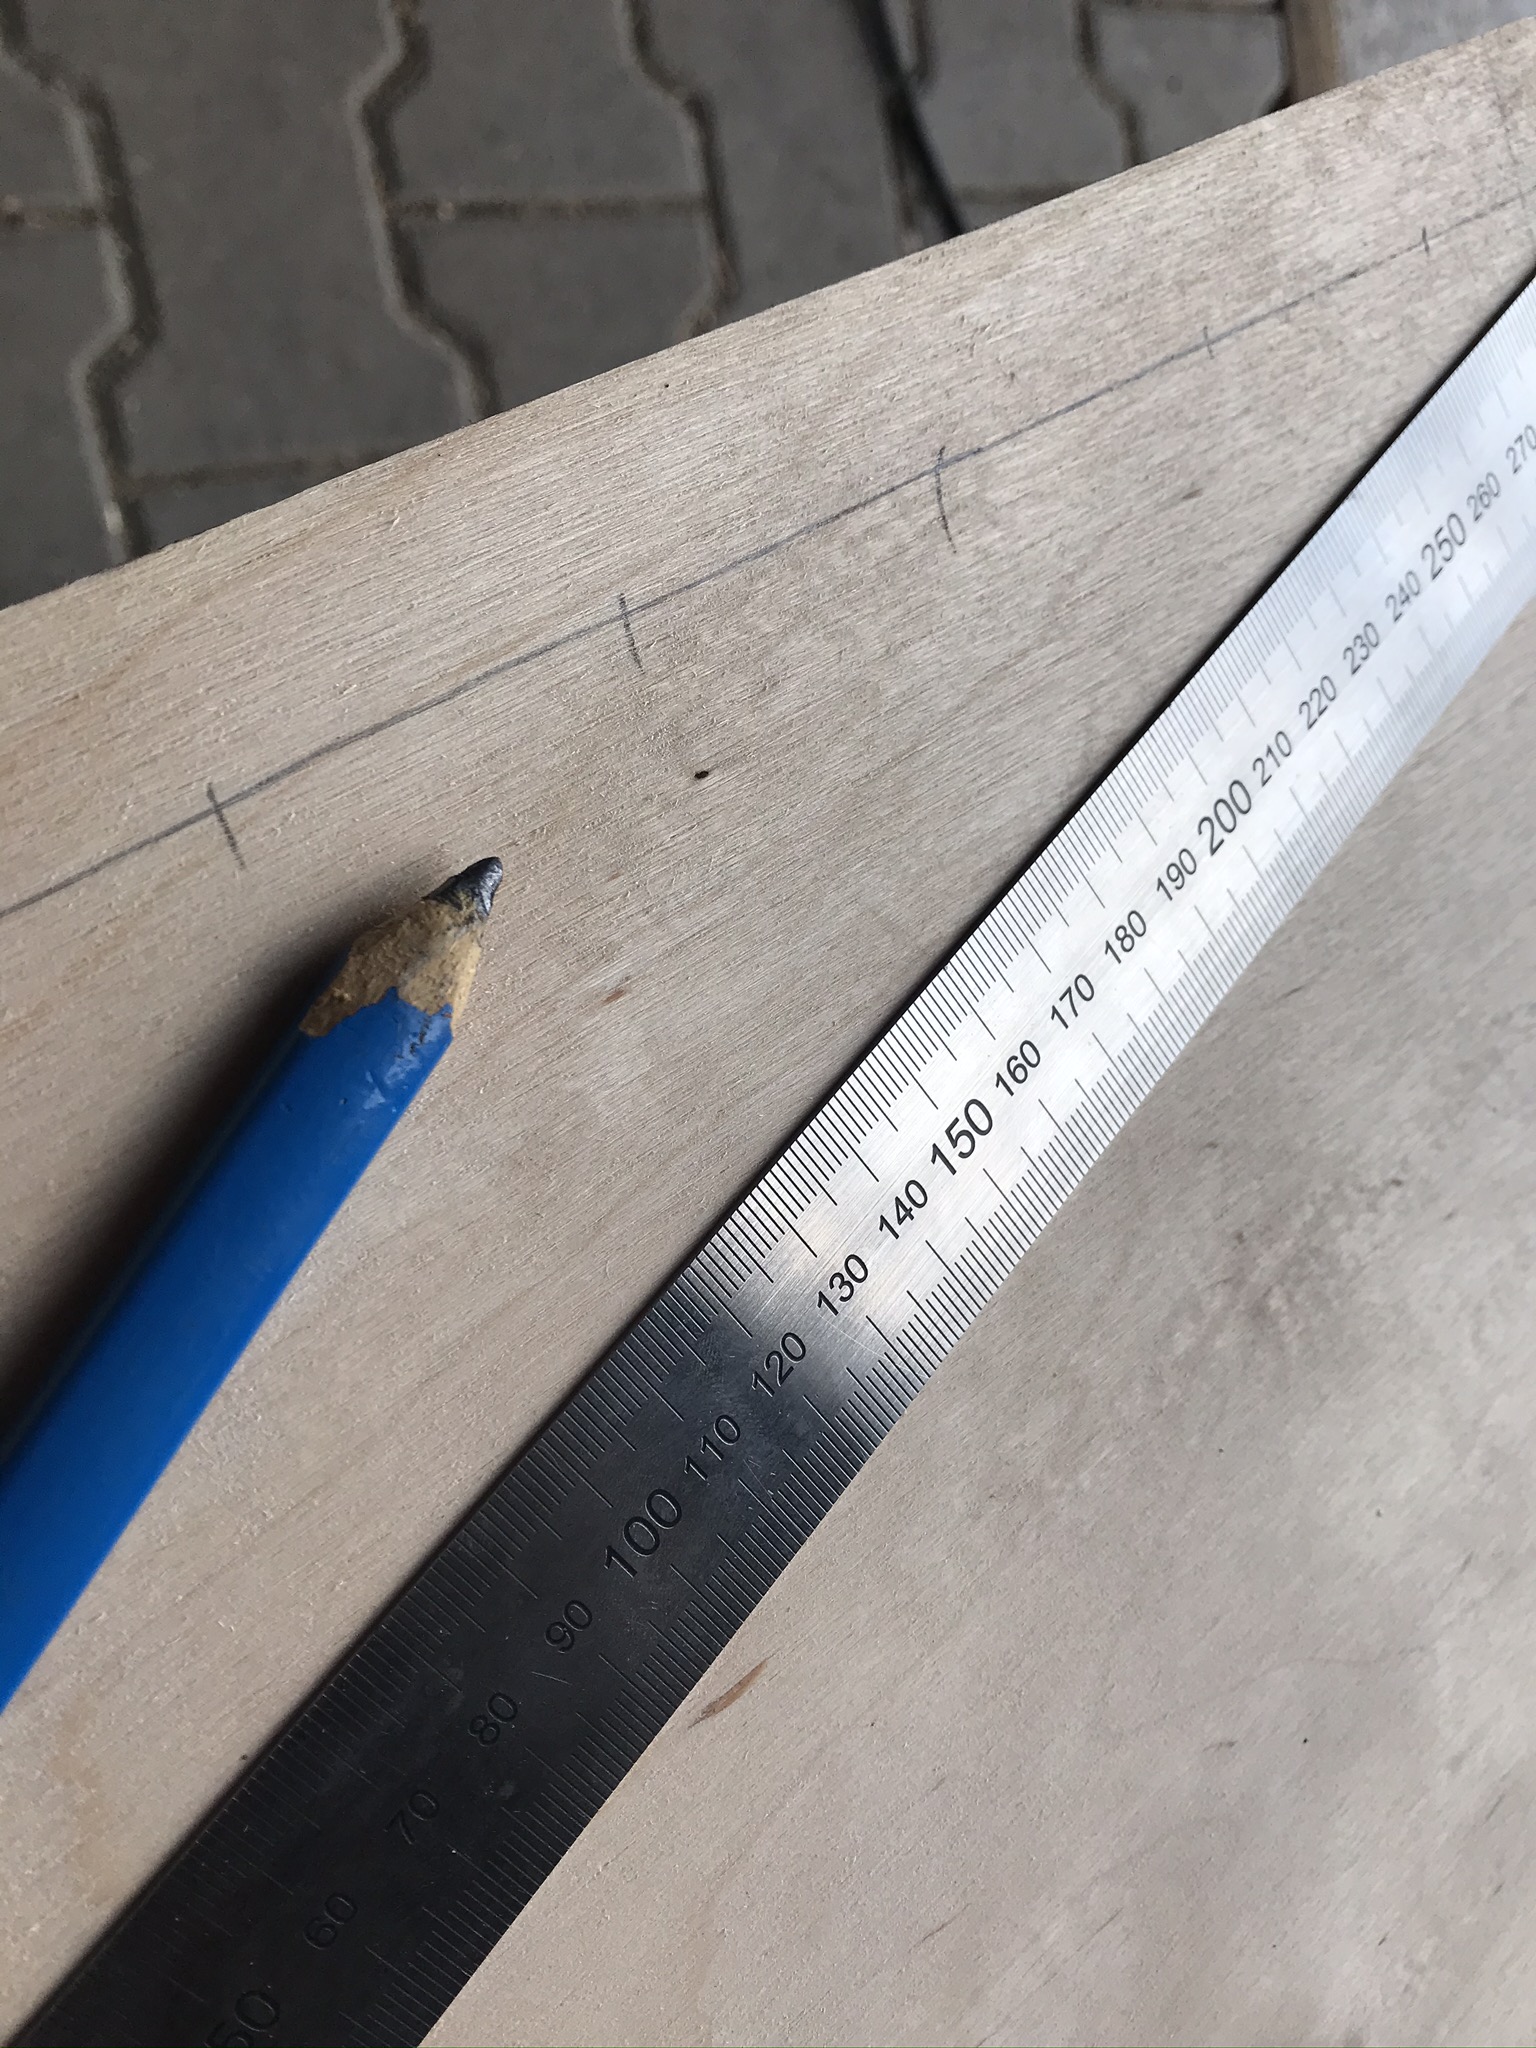
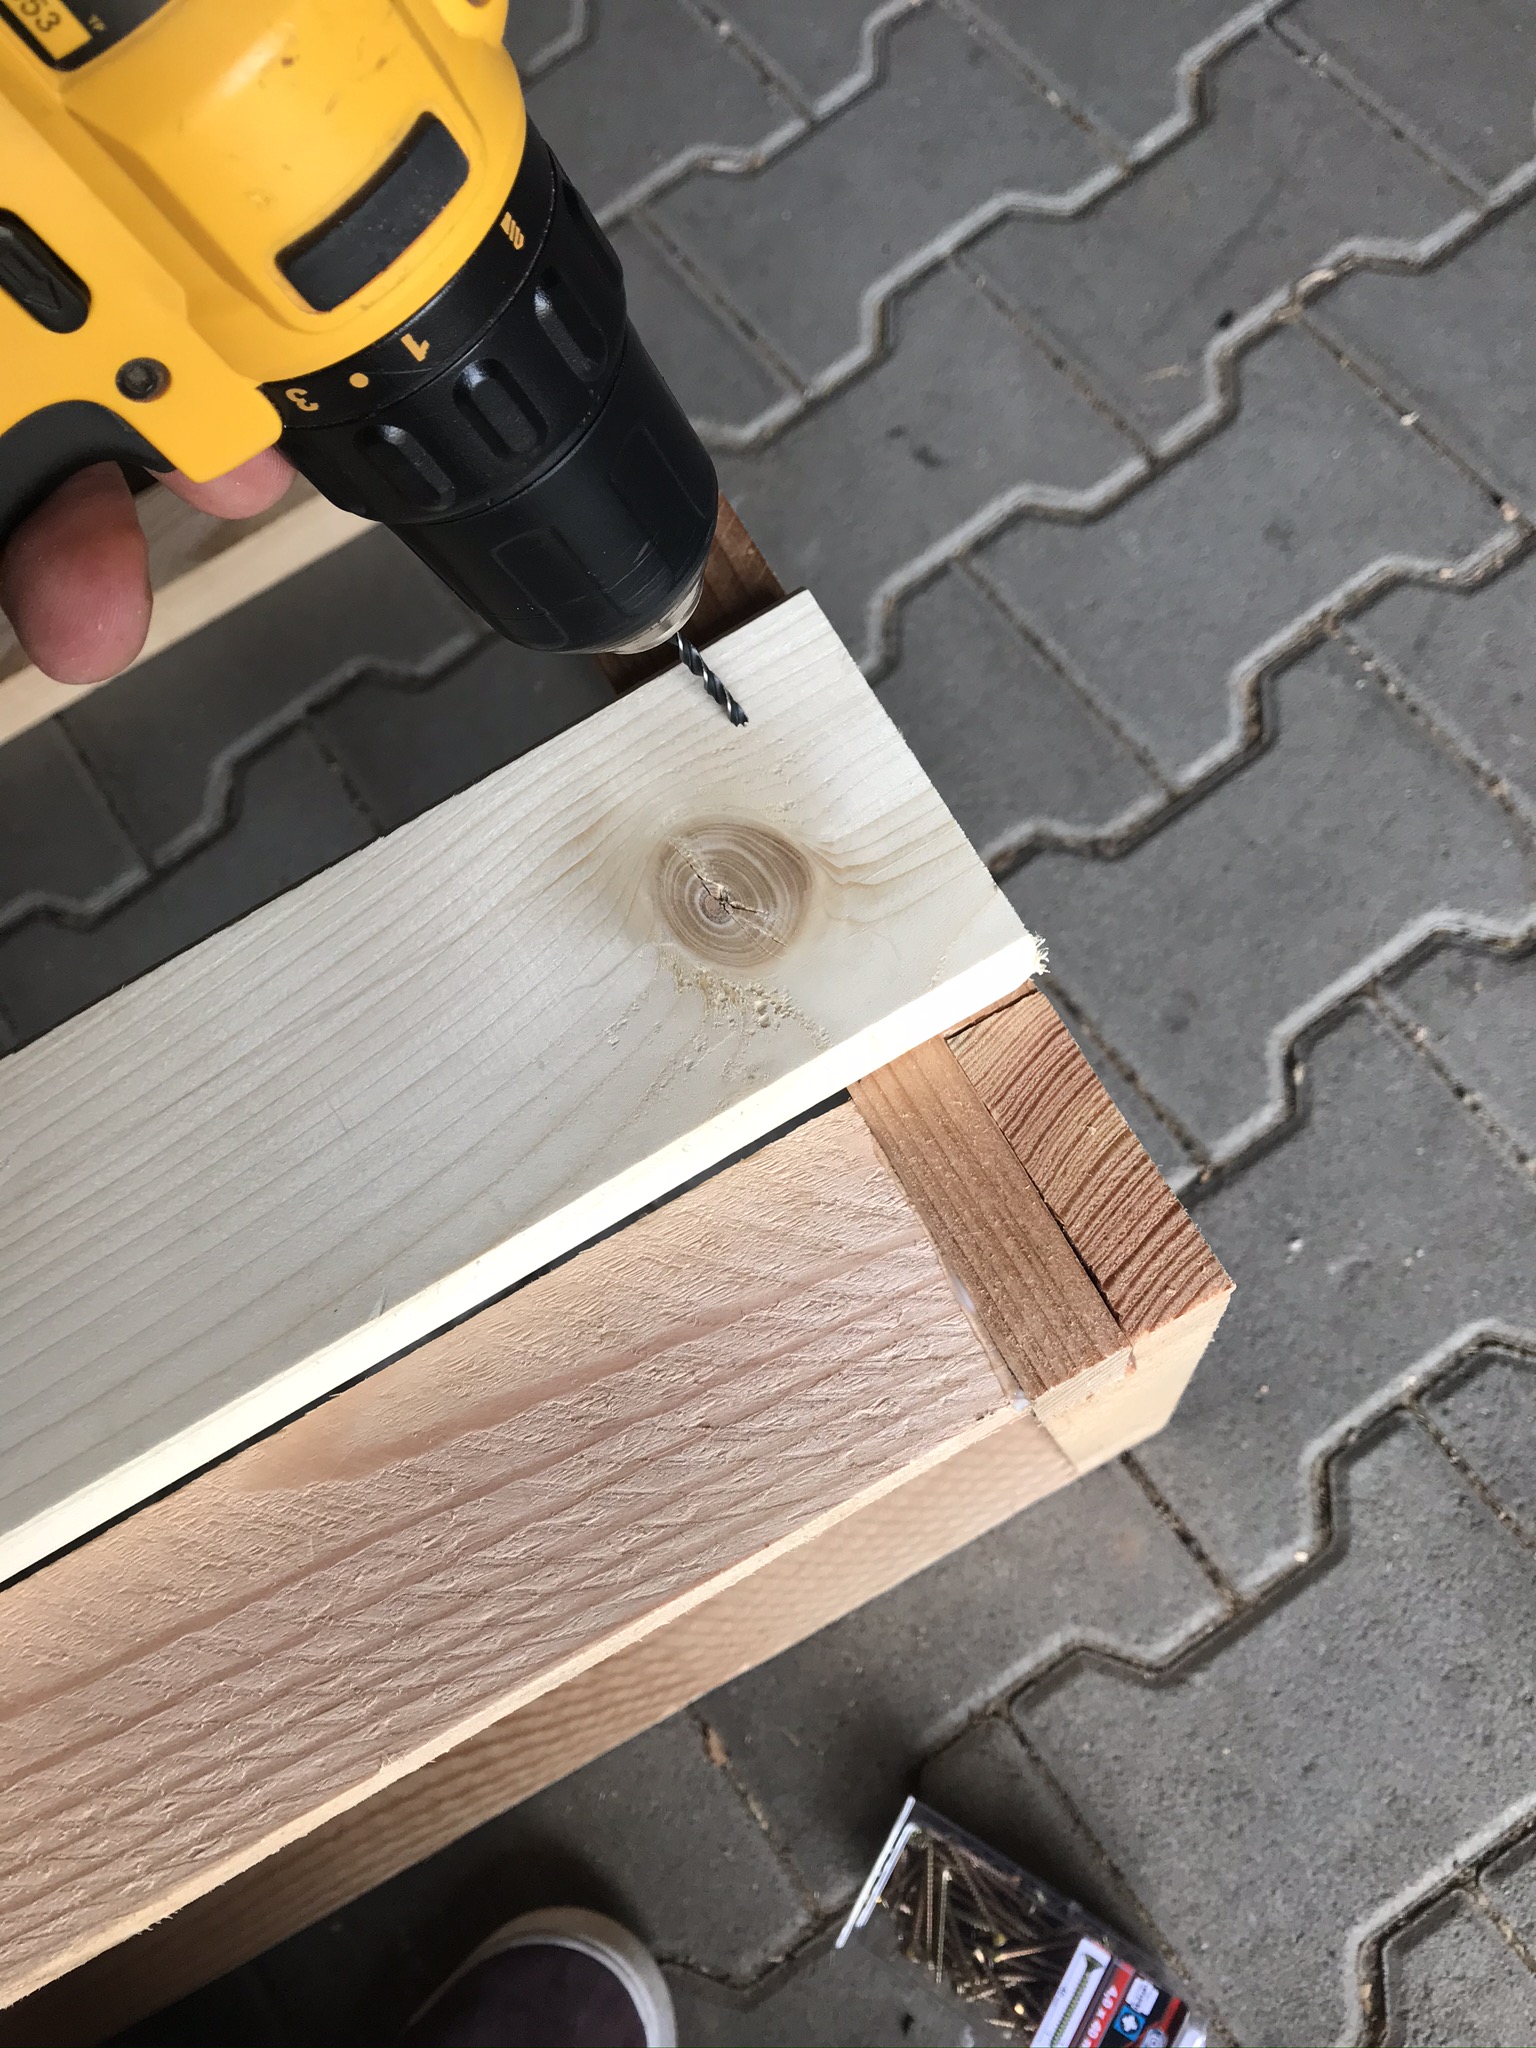
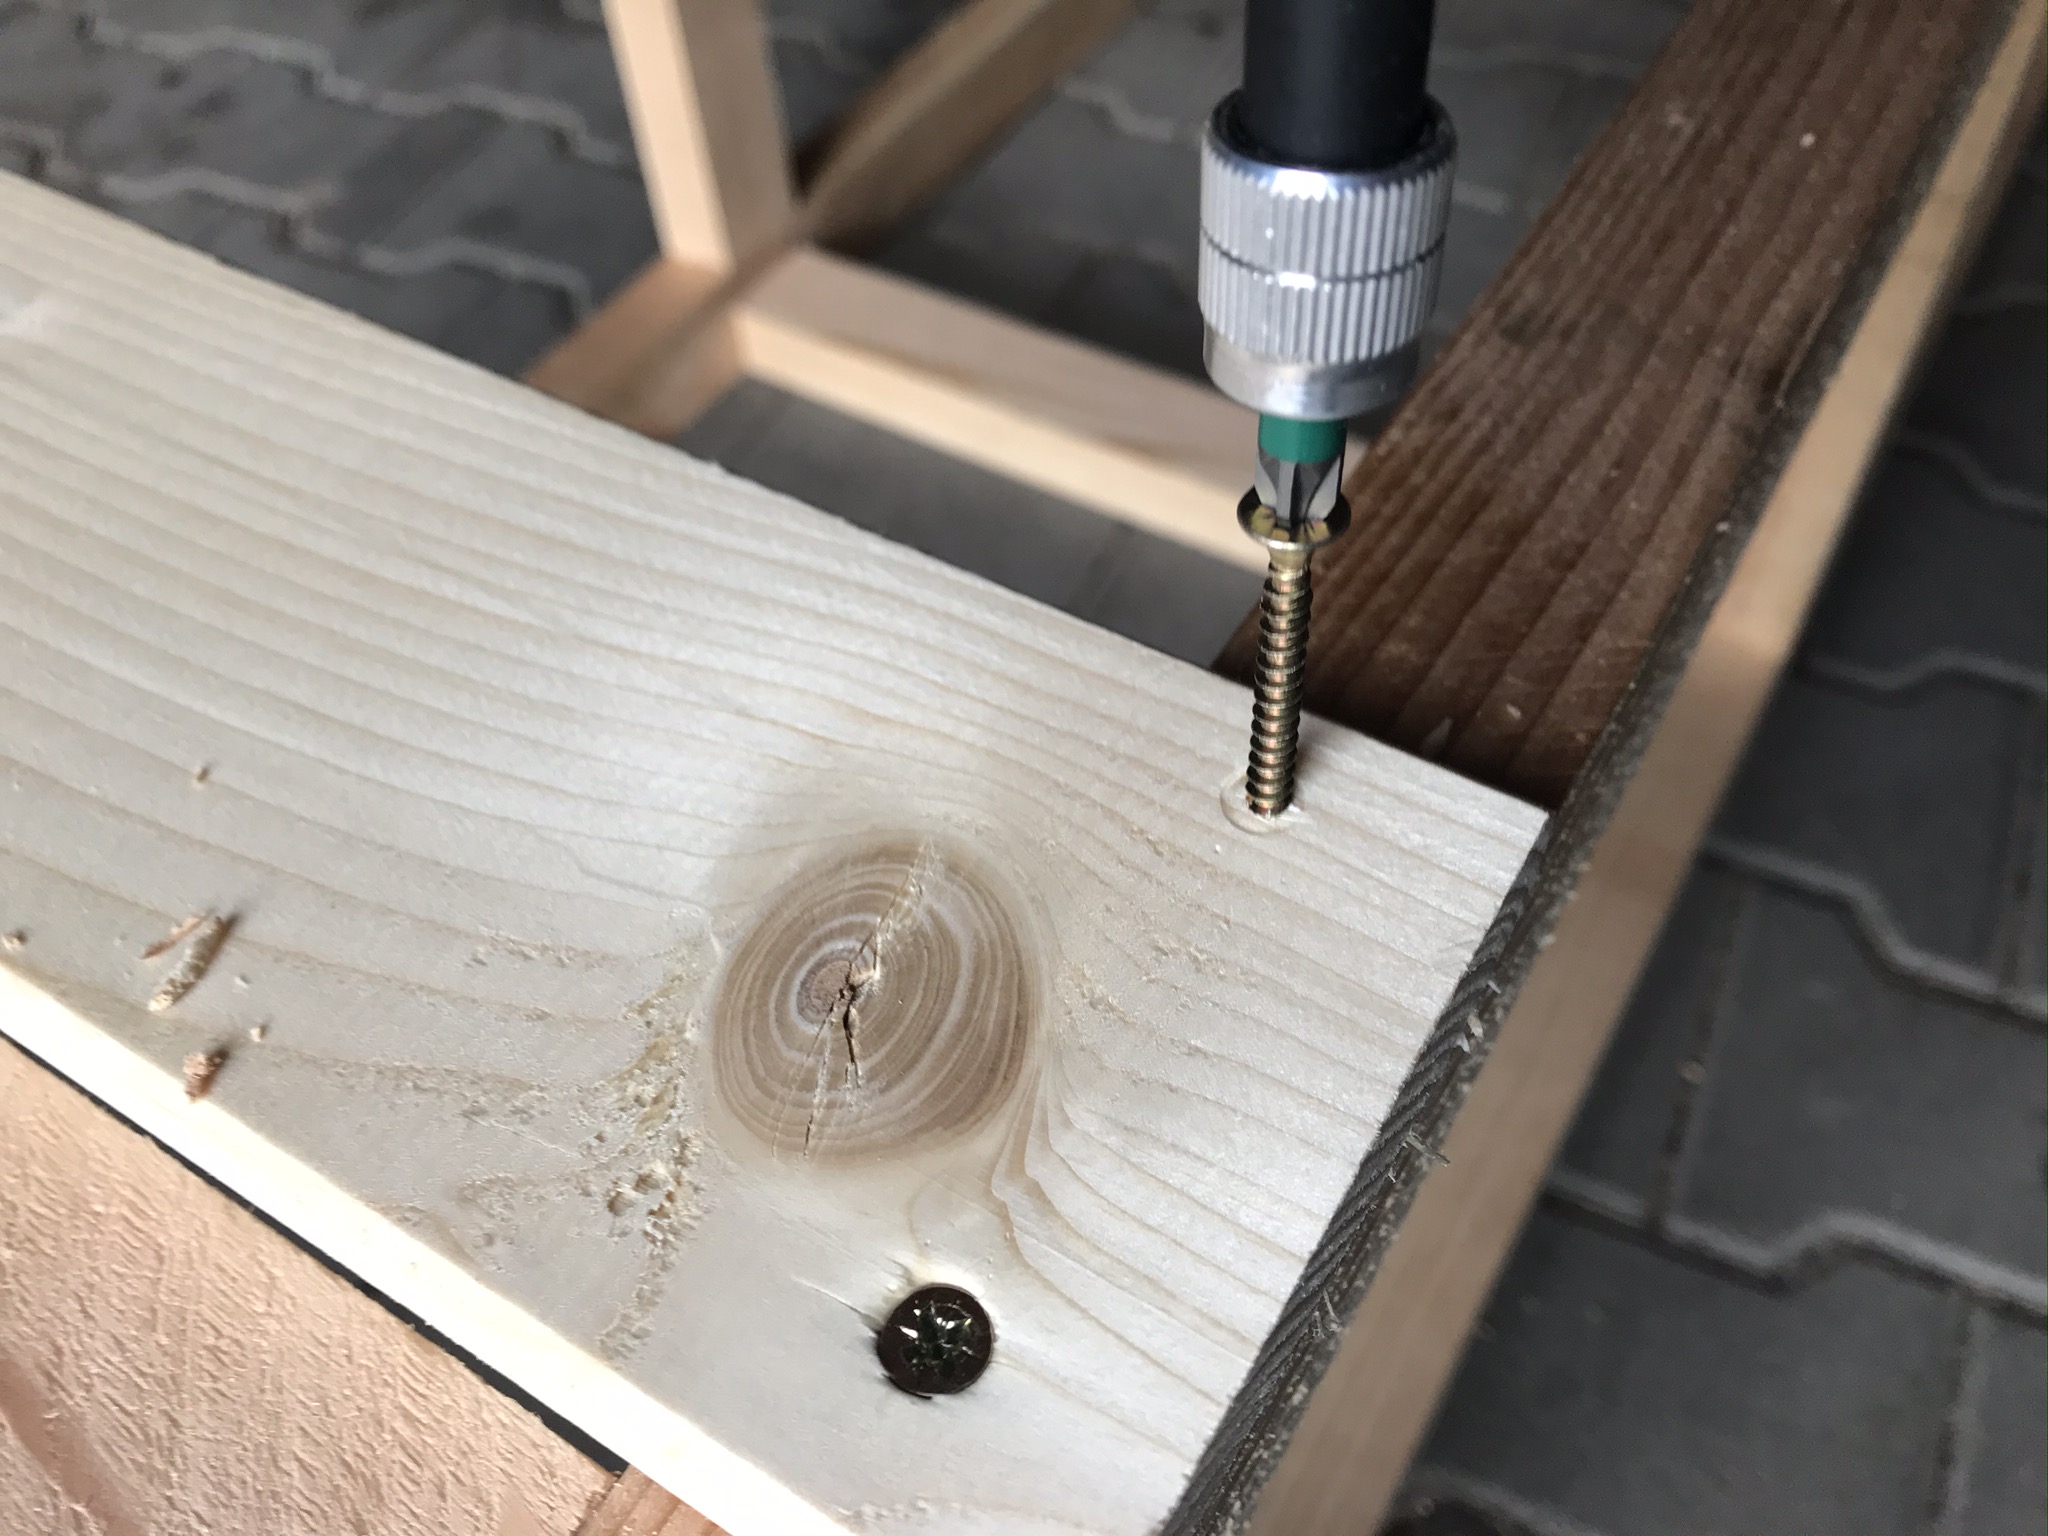
In steps of a few centimetres you can set a mark where a screw should be placed to fix the panel. I overshot it here – but it is enough to place a screw every 8 cm. For example, you can use 4x35mm wood screws* and pre-drill with a 3mm drill bit. I recommend countersinking the holes with a countersink drill bit* to make sure the screw heads are flush with the tabletop.
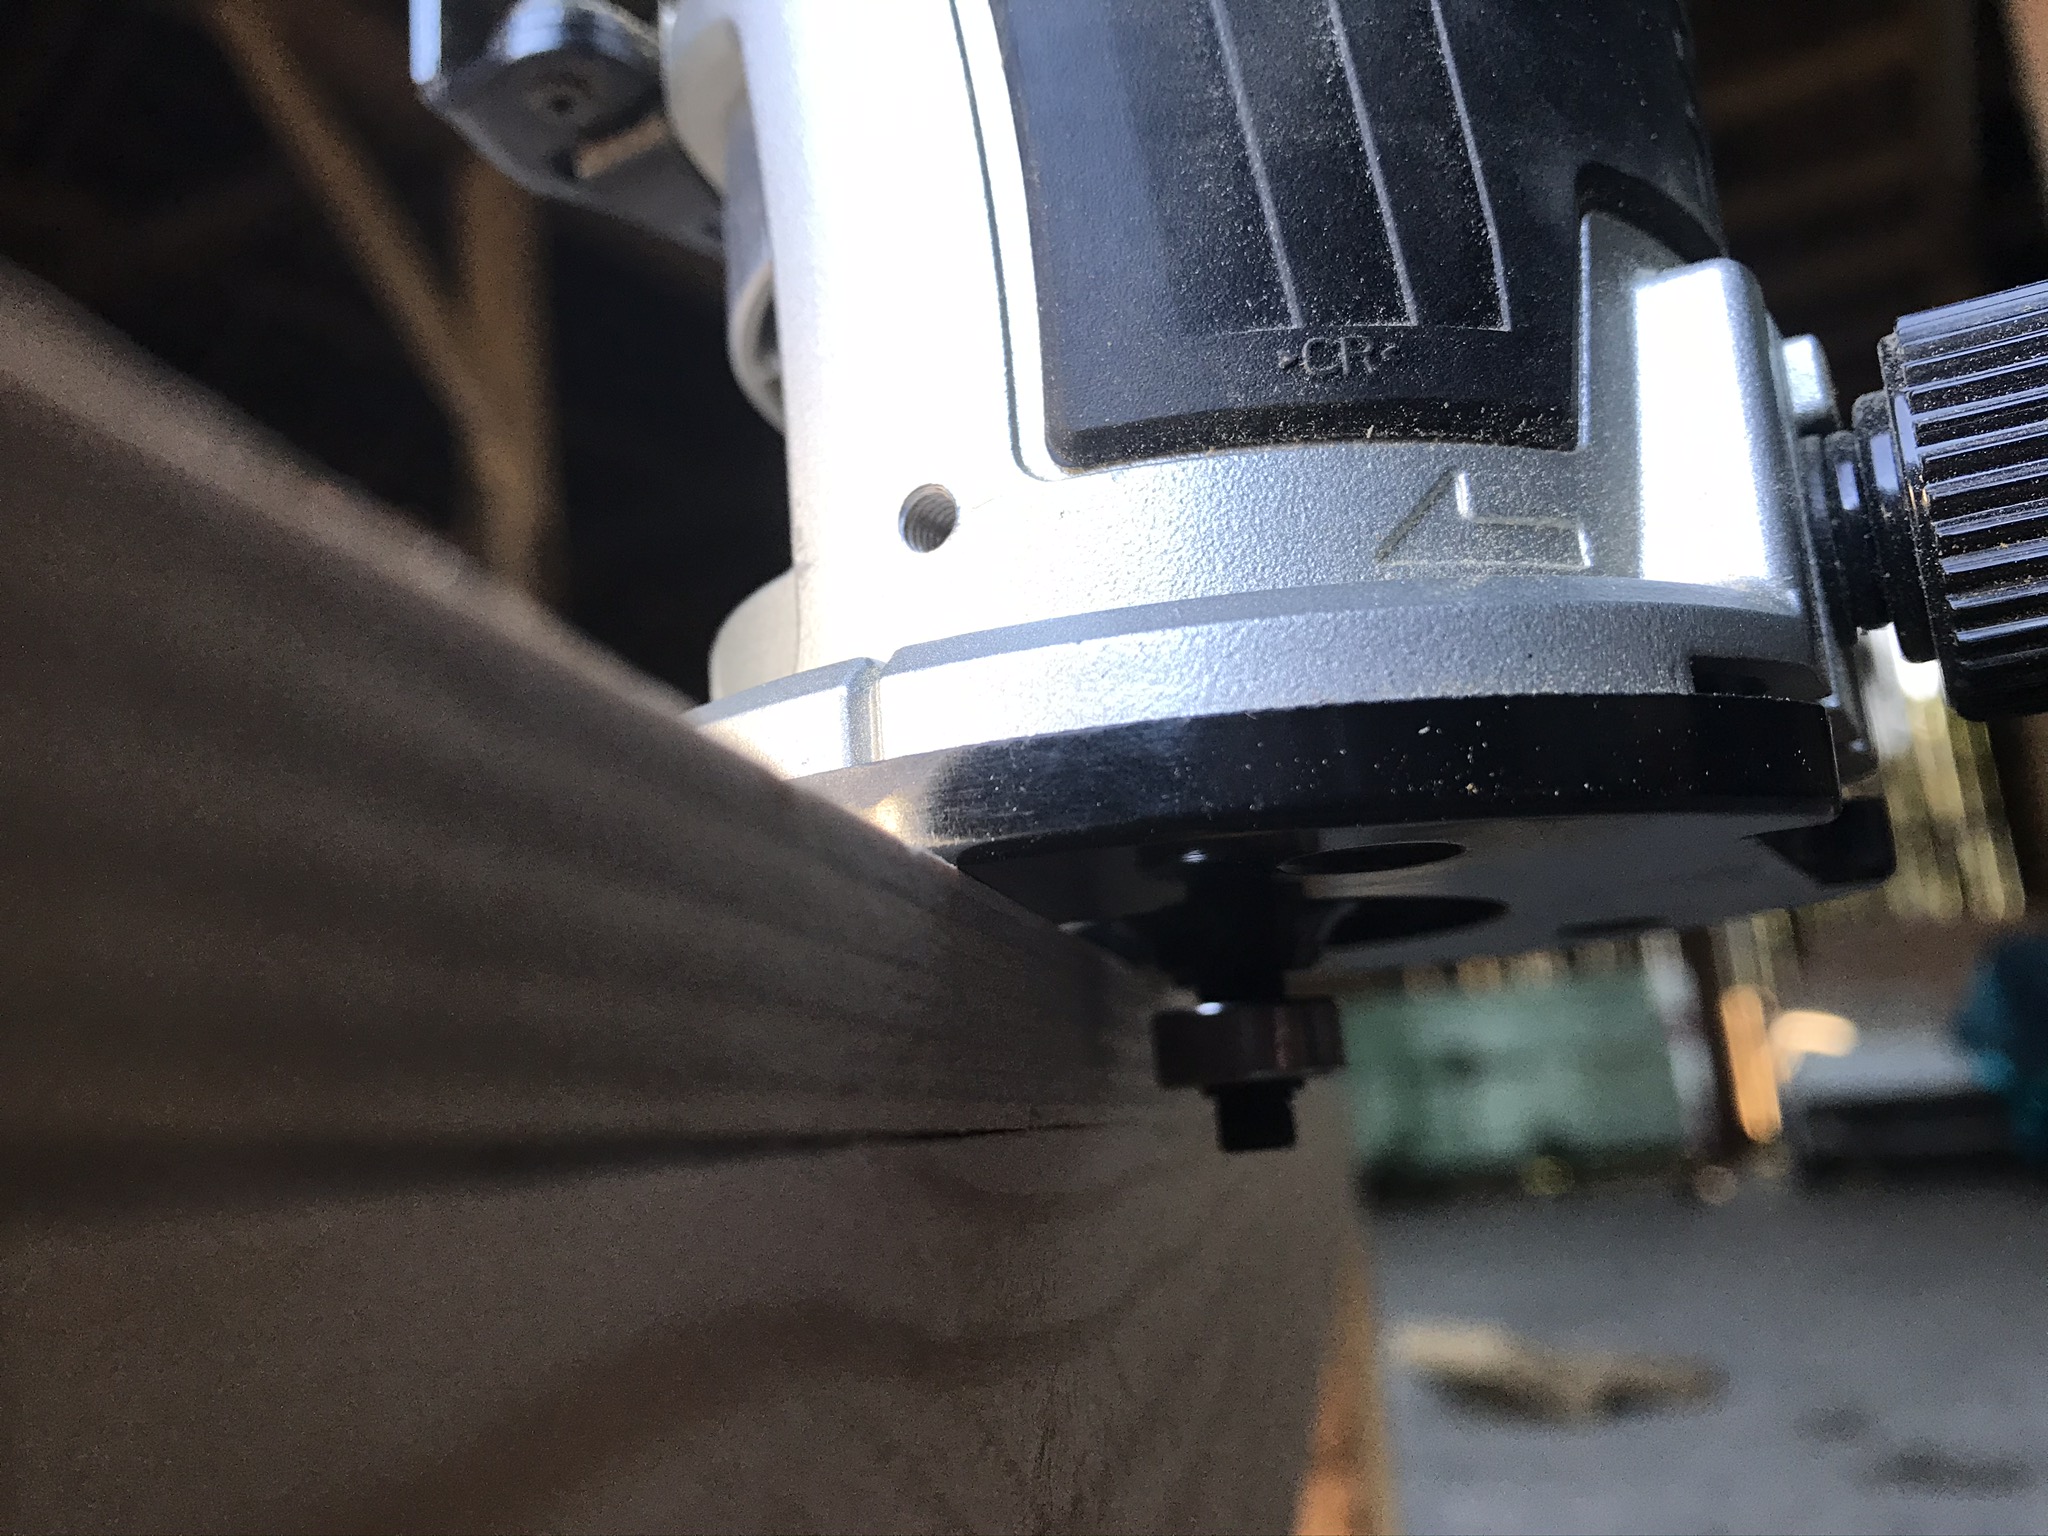
You can make sure the 12 mm plywood is perfectly flush with the base using your router* and a flush trim bit*.
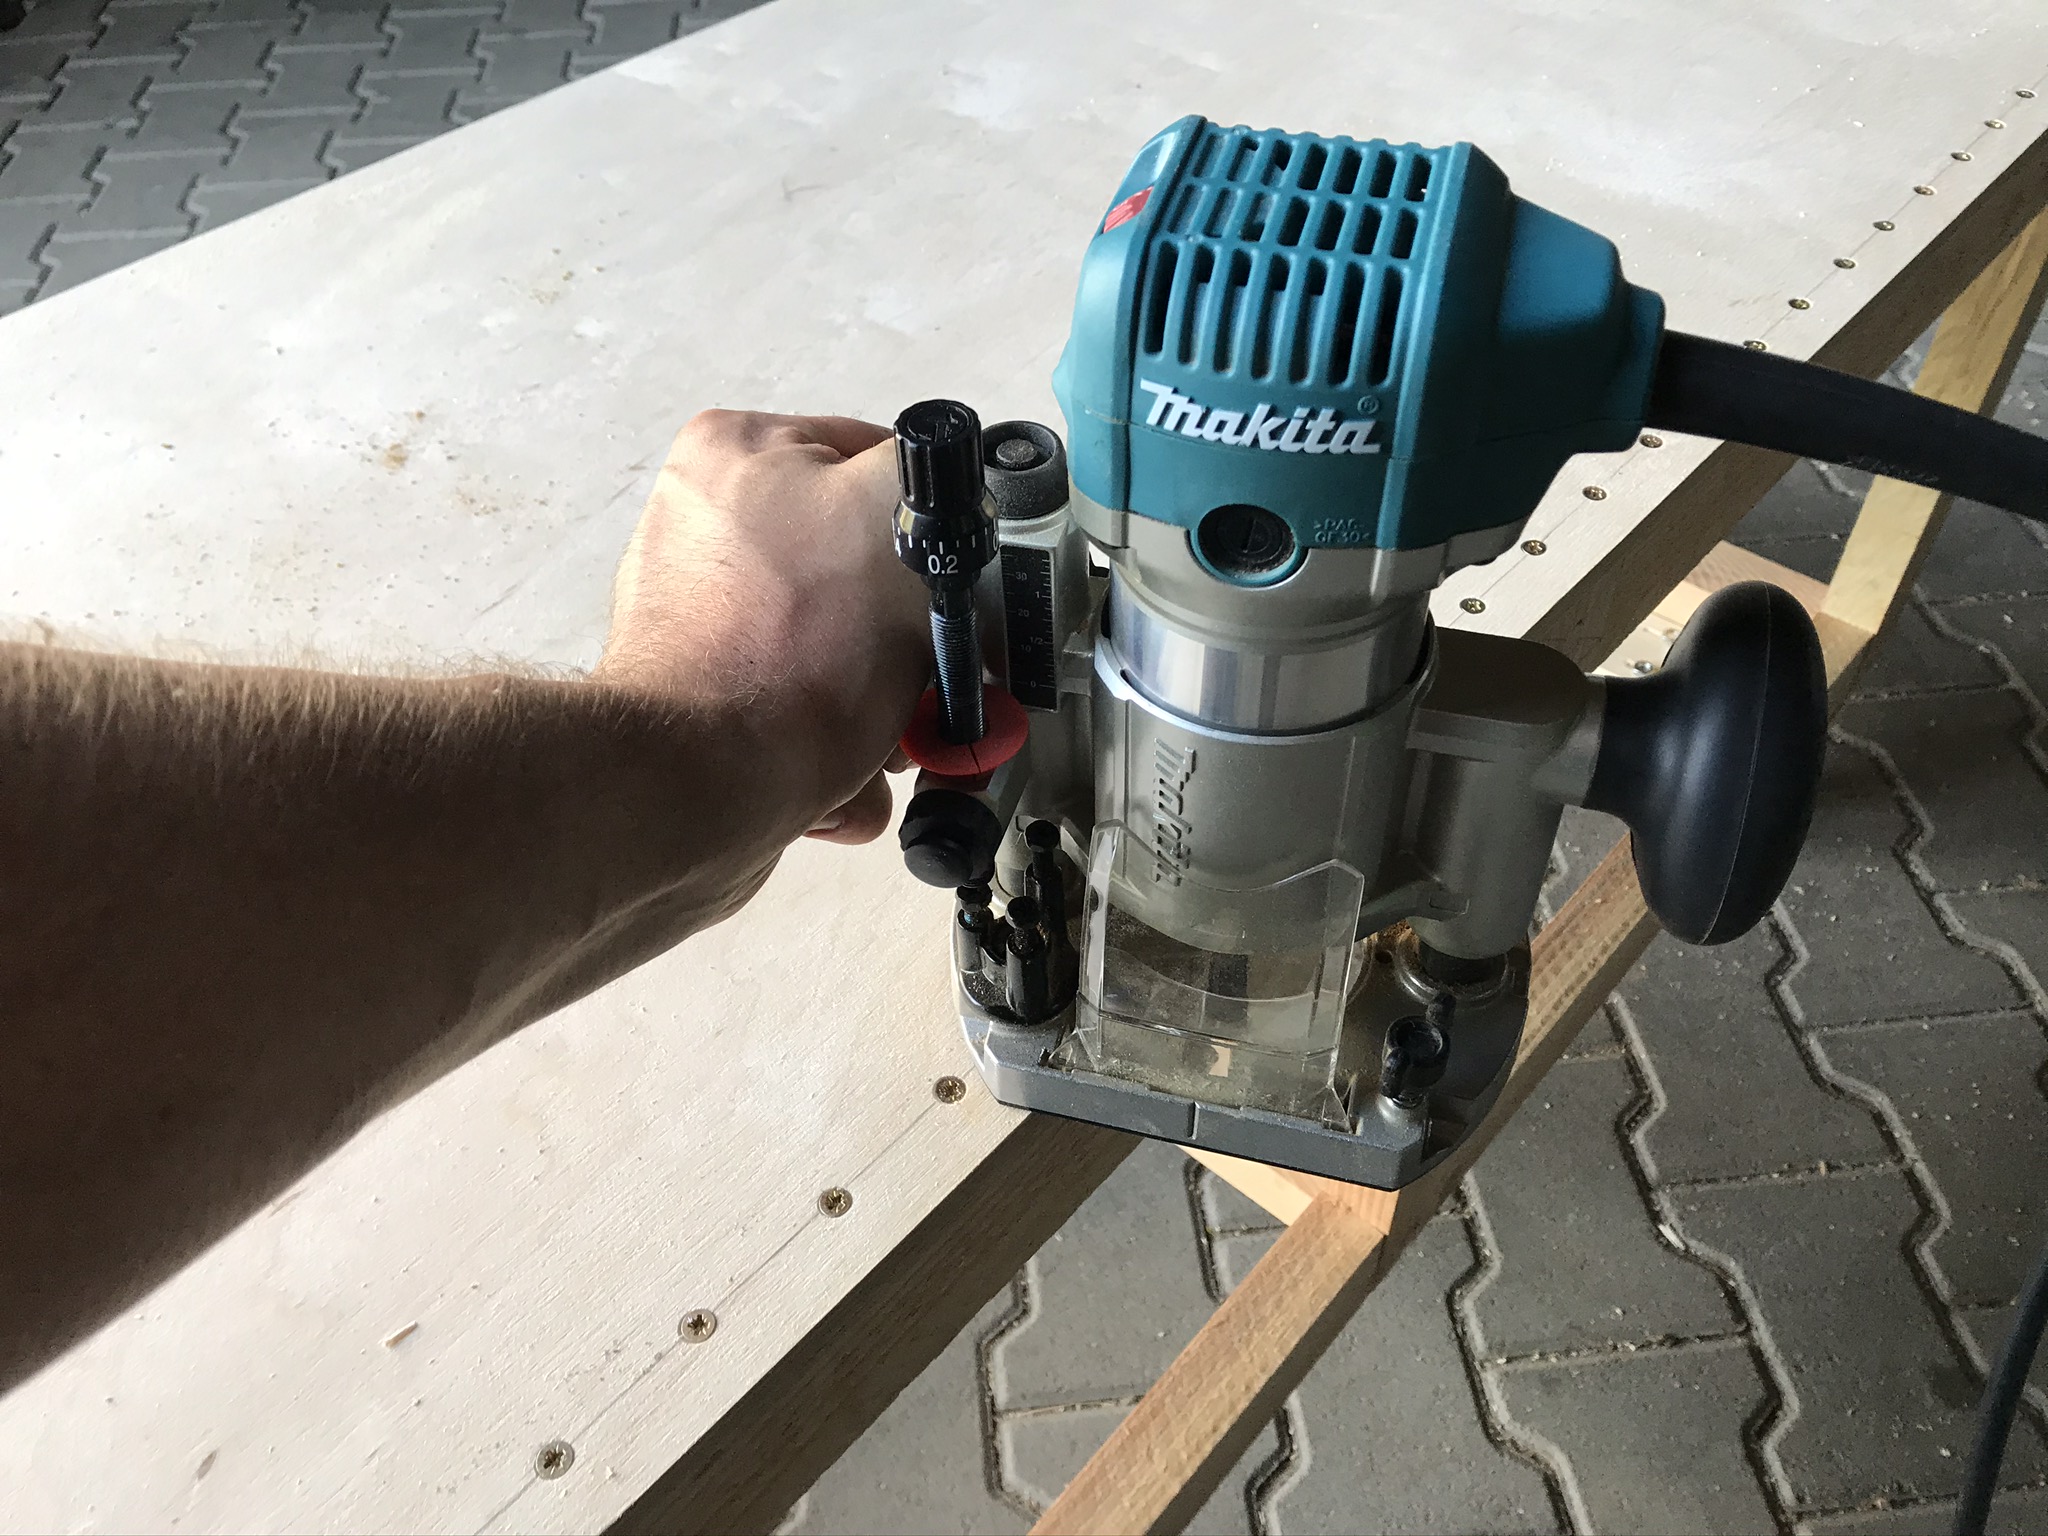
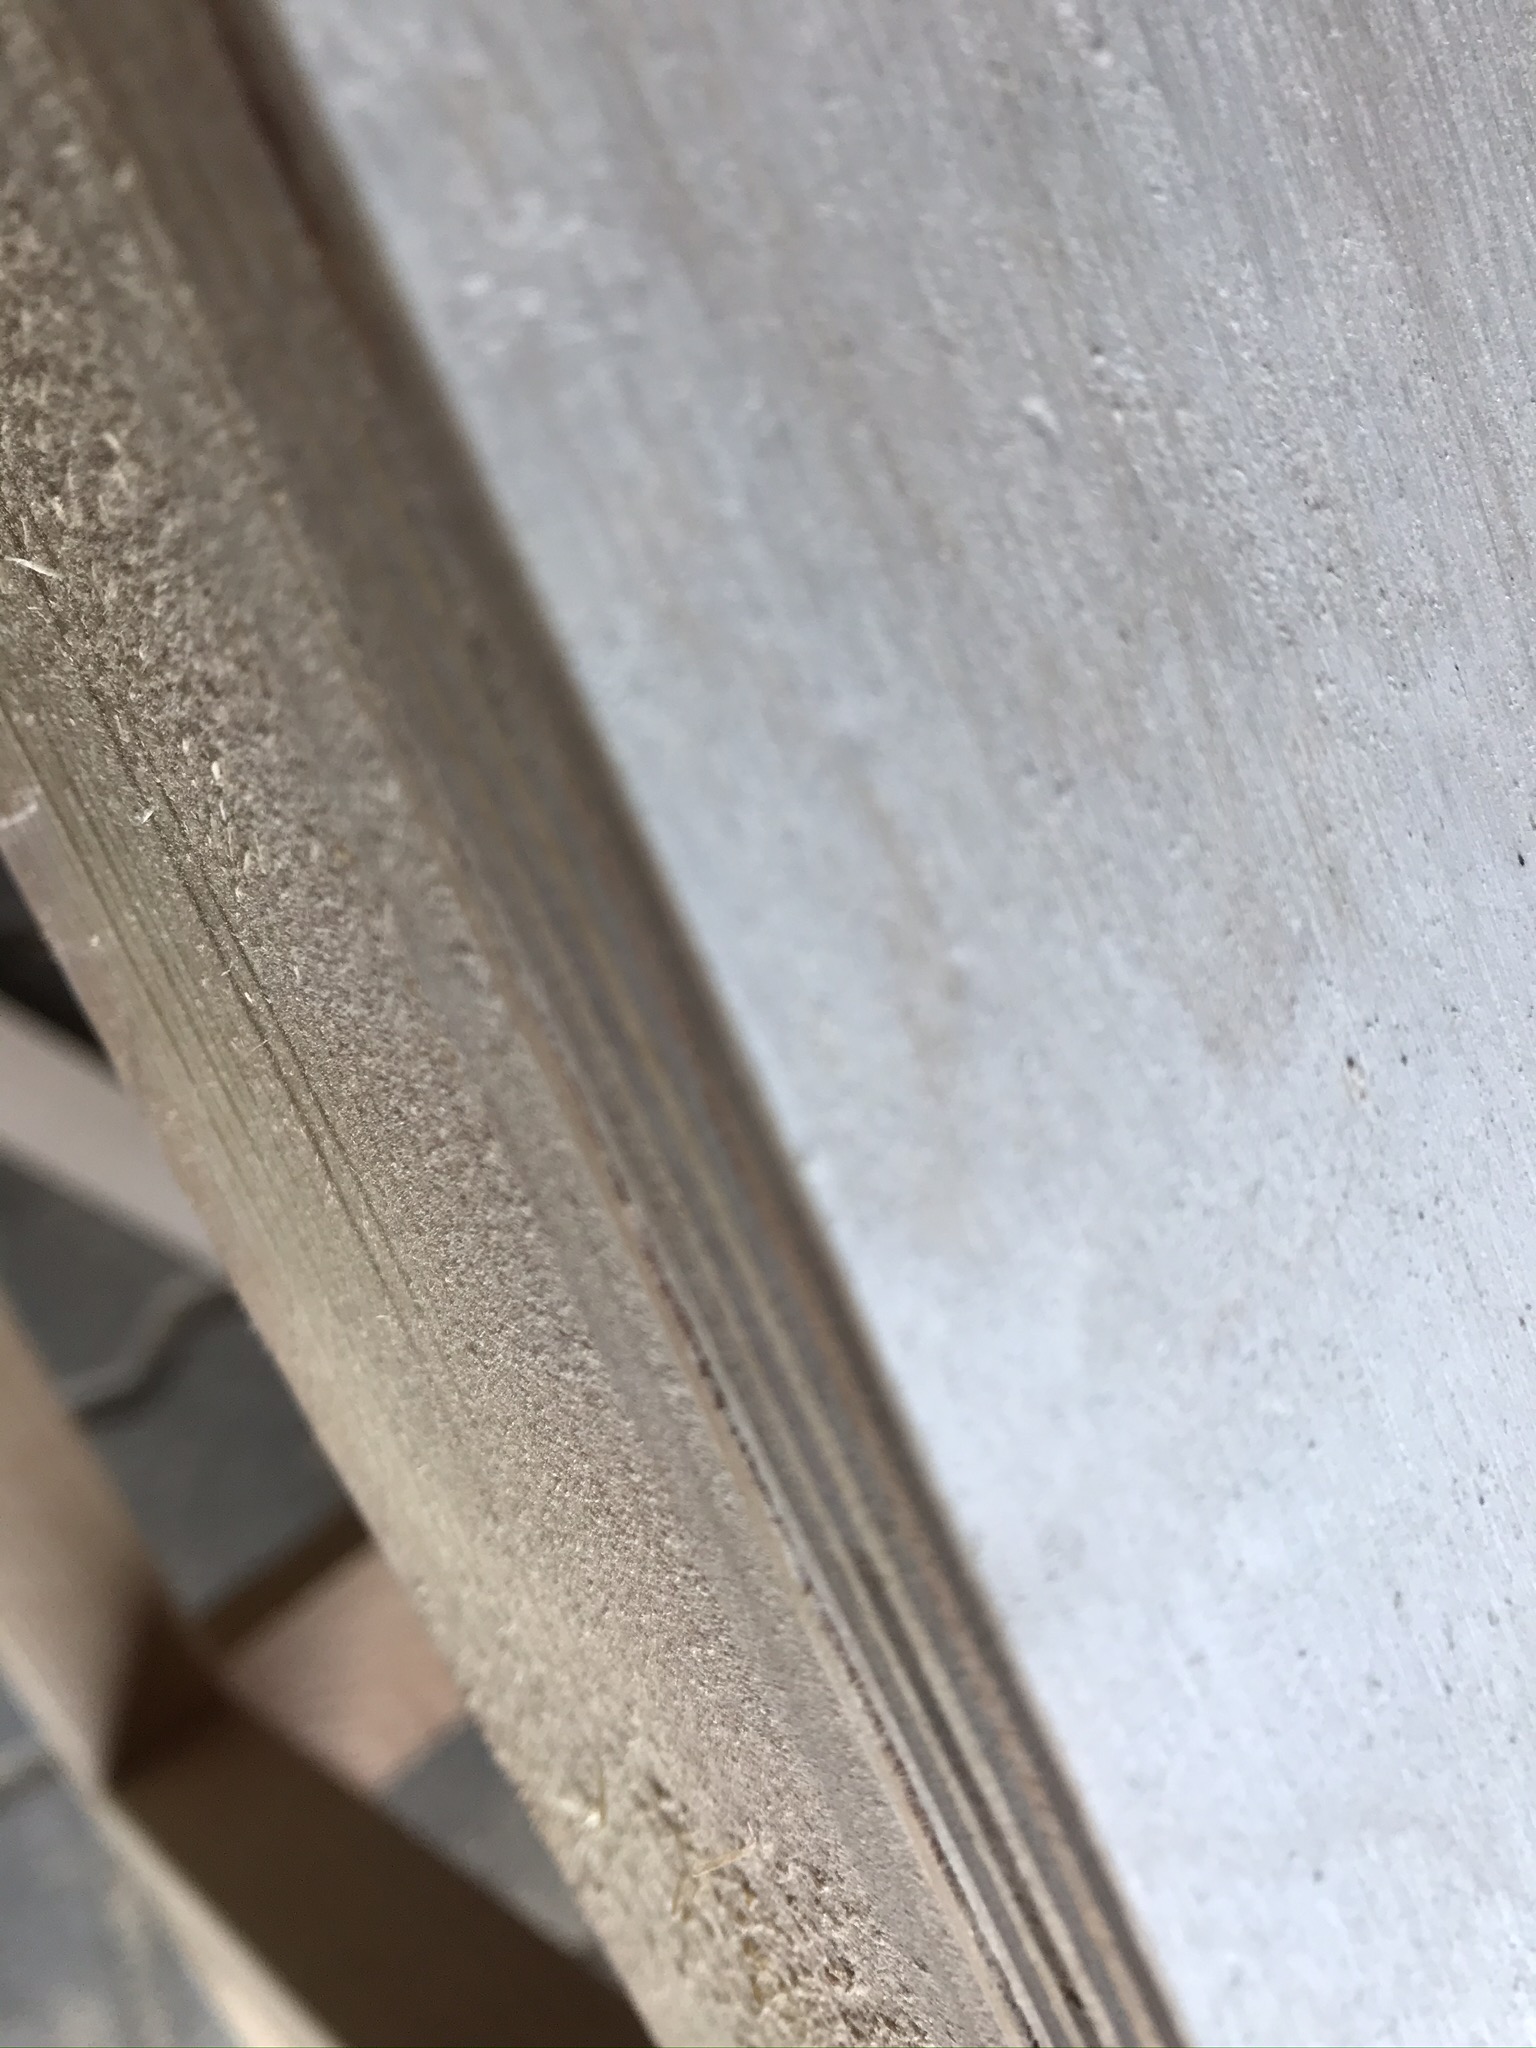
This creates a very clean and, above all, flush edge! With a rounding cutter (4 mm radius)* you can work on all sharp edges of the base frame. This gives the TKS underframe a pleasant feel. It also prevents the risk of injury (cuts on sharp edges). Finally, you can create a uniform, smooth surface by sanding all parts of the frame with the random orbital sander*.

- Warranty extendable up to 3 years
How to build a router table for the DWE7492 table saw stand
The next step in building the DWE 7492* base frame myself is to build a suitable router table. To get the maximum benefit from the DeWALT DWE7492, I would like to integrate a table router into the frame, where my Makita RT0700* will be used. The existing rip fence of the DWE 7492* should be able to be used for this. The milling table and the saw table must therefore be at the same height. Please note that in my case the height of the saw table is not 330mm as stated in the data sheet but 325mm. It is best to measure again and make sure that you adjust the side parts of the router table exactly to the height of your saw table.
Right next to the router table, I would like to create a protected storage option for routers where a full-extension drawer is used.
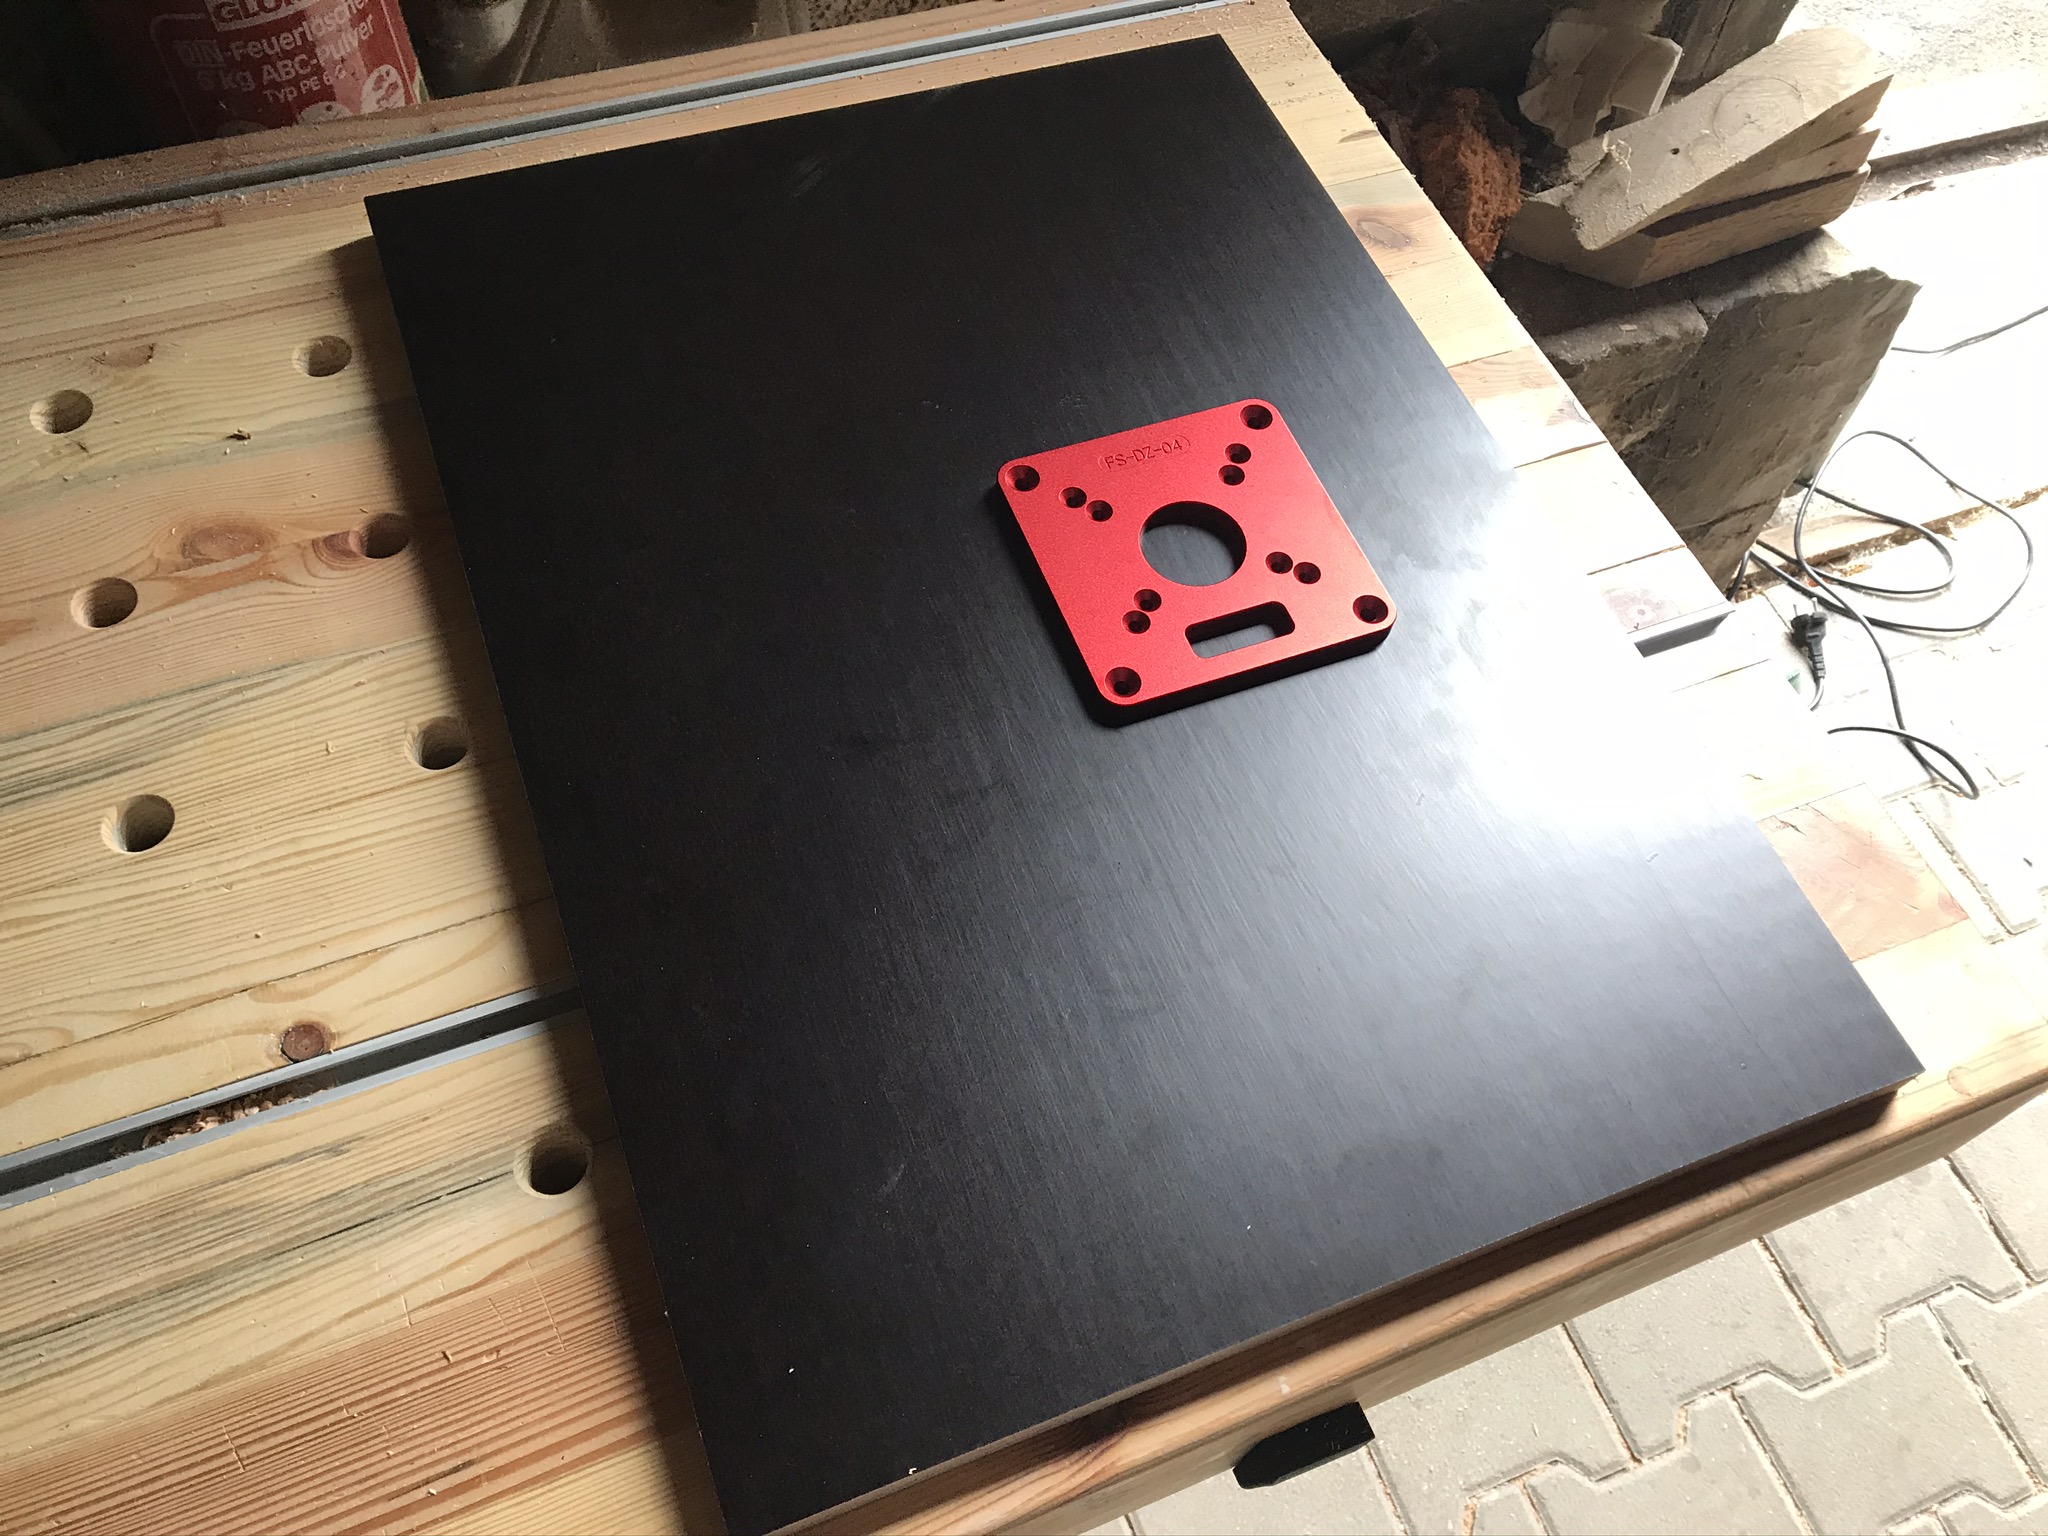
First, saw the individual parts for the router table according to the parts list. The upper film faced plywood piece should be at least 18 mm thick so the insert plate* for the router can be securely integrated into it. If you use a different insert plate* that is even thicker, it may make sense to choose a different material thickness for the upper plate. Otherwise the entire router table is made of 12 mm film faced plywood.
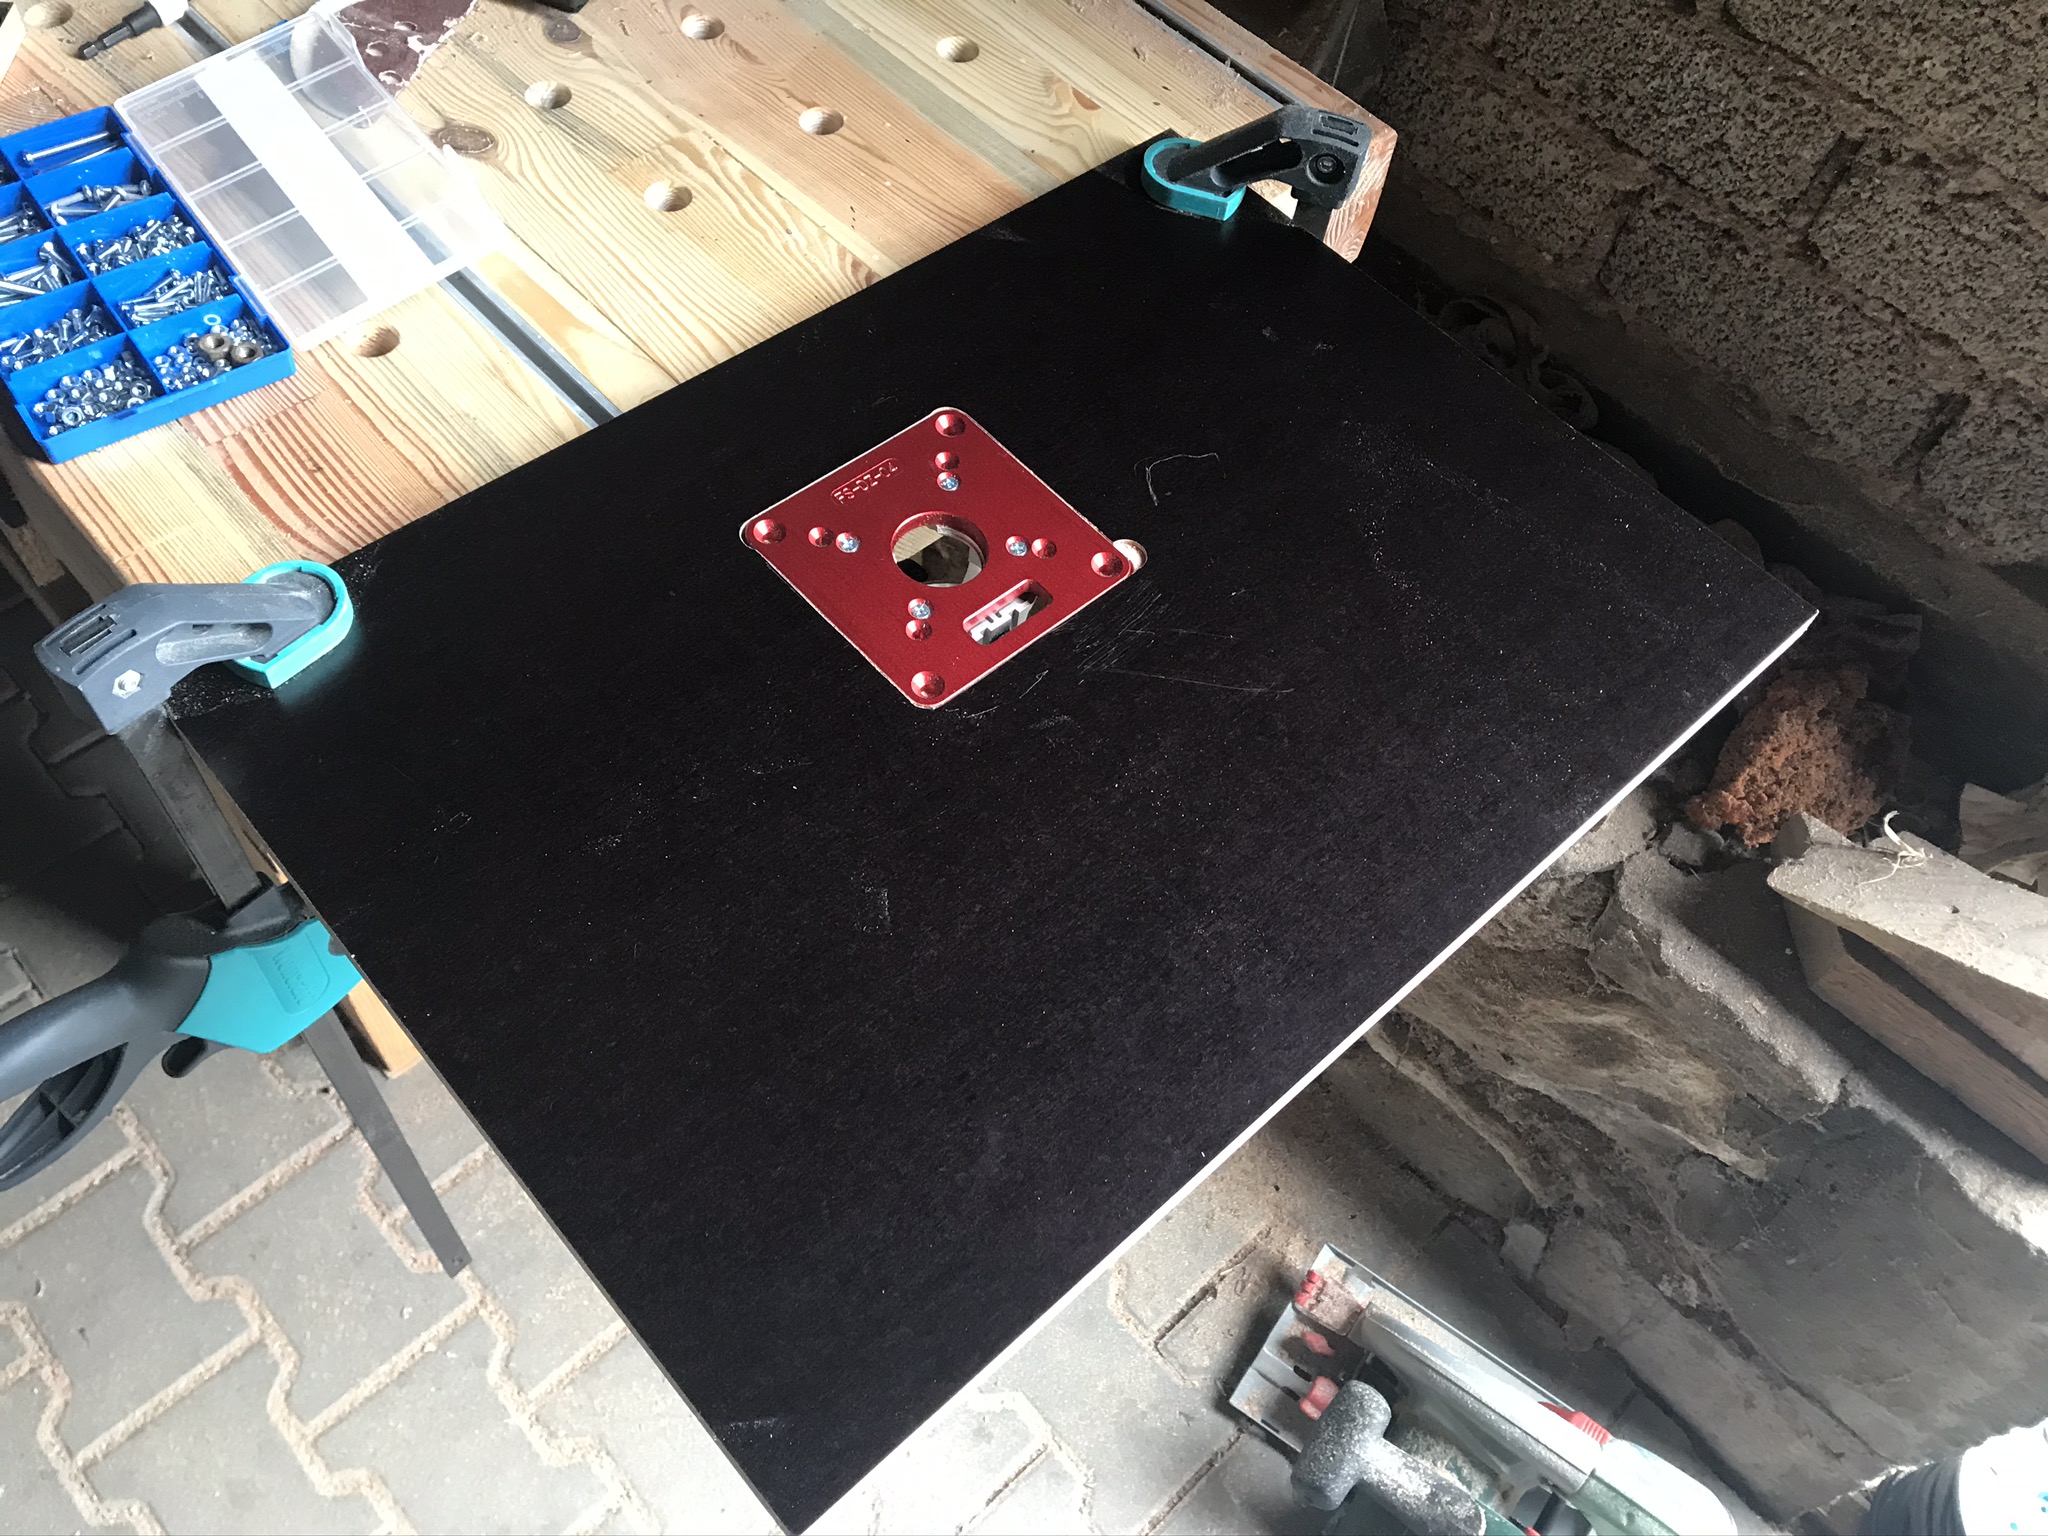
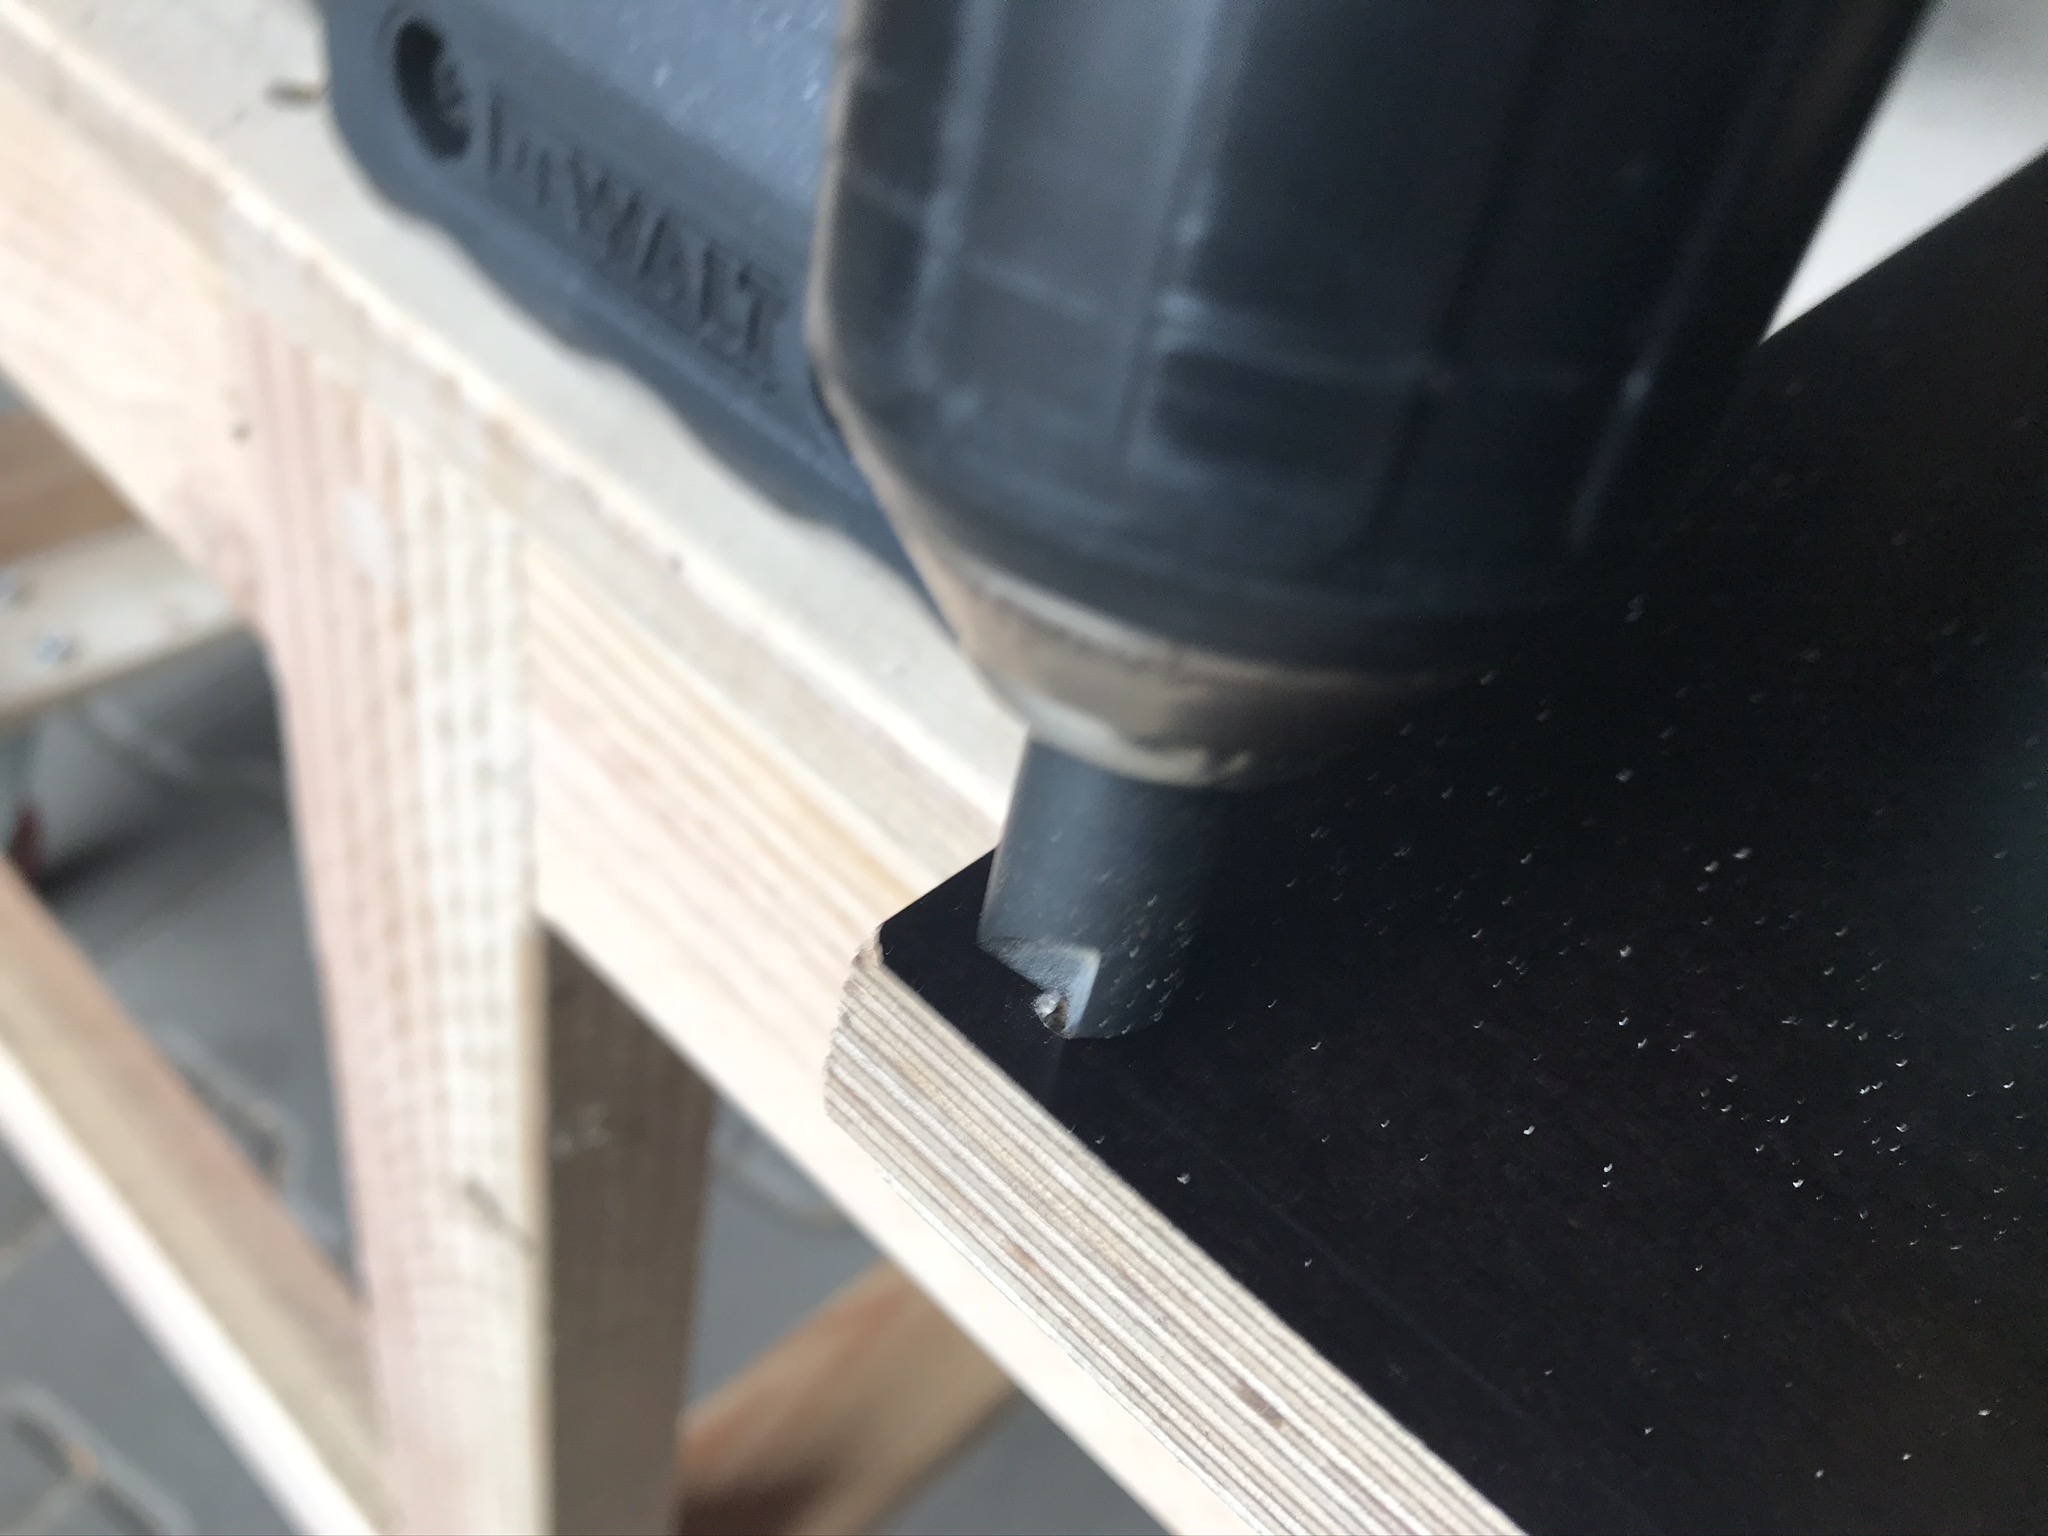
Mill cut-out for router insert plate
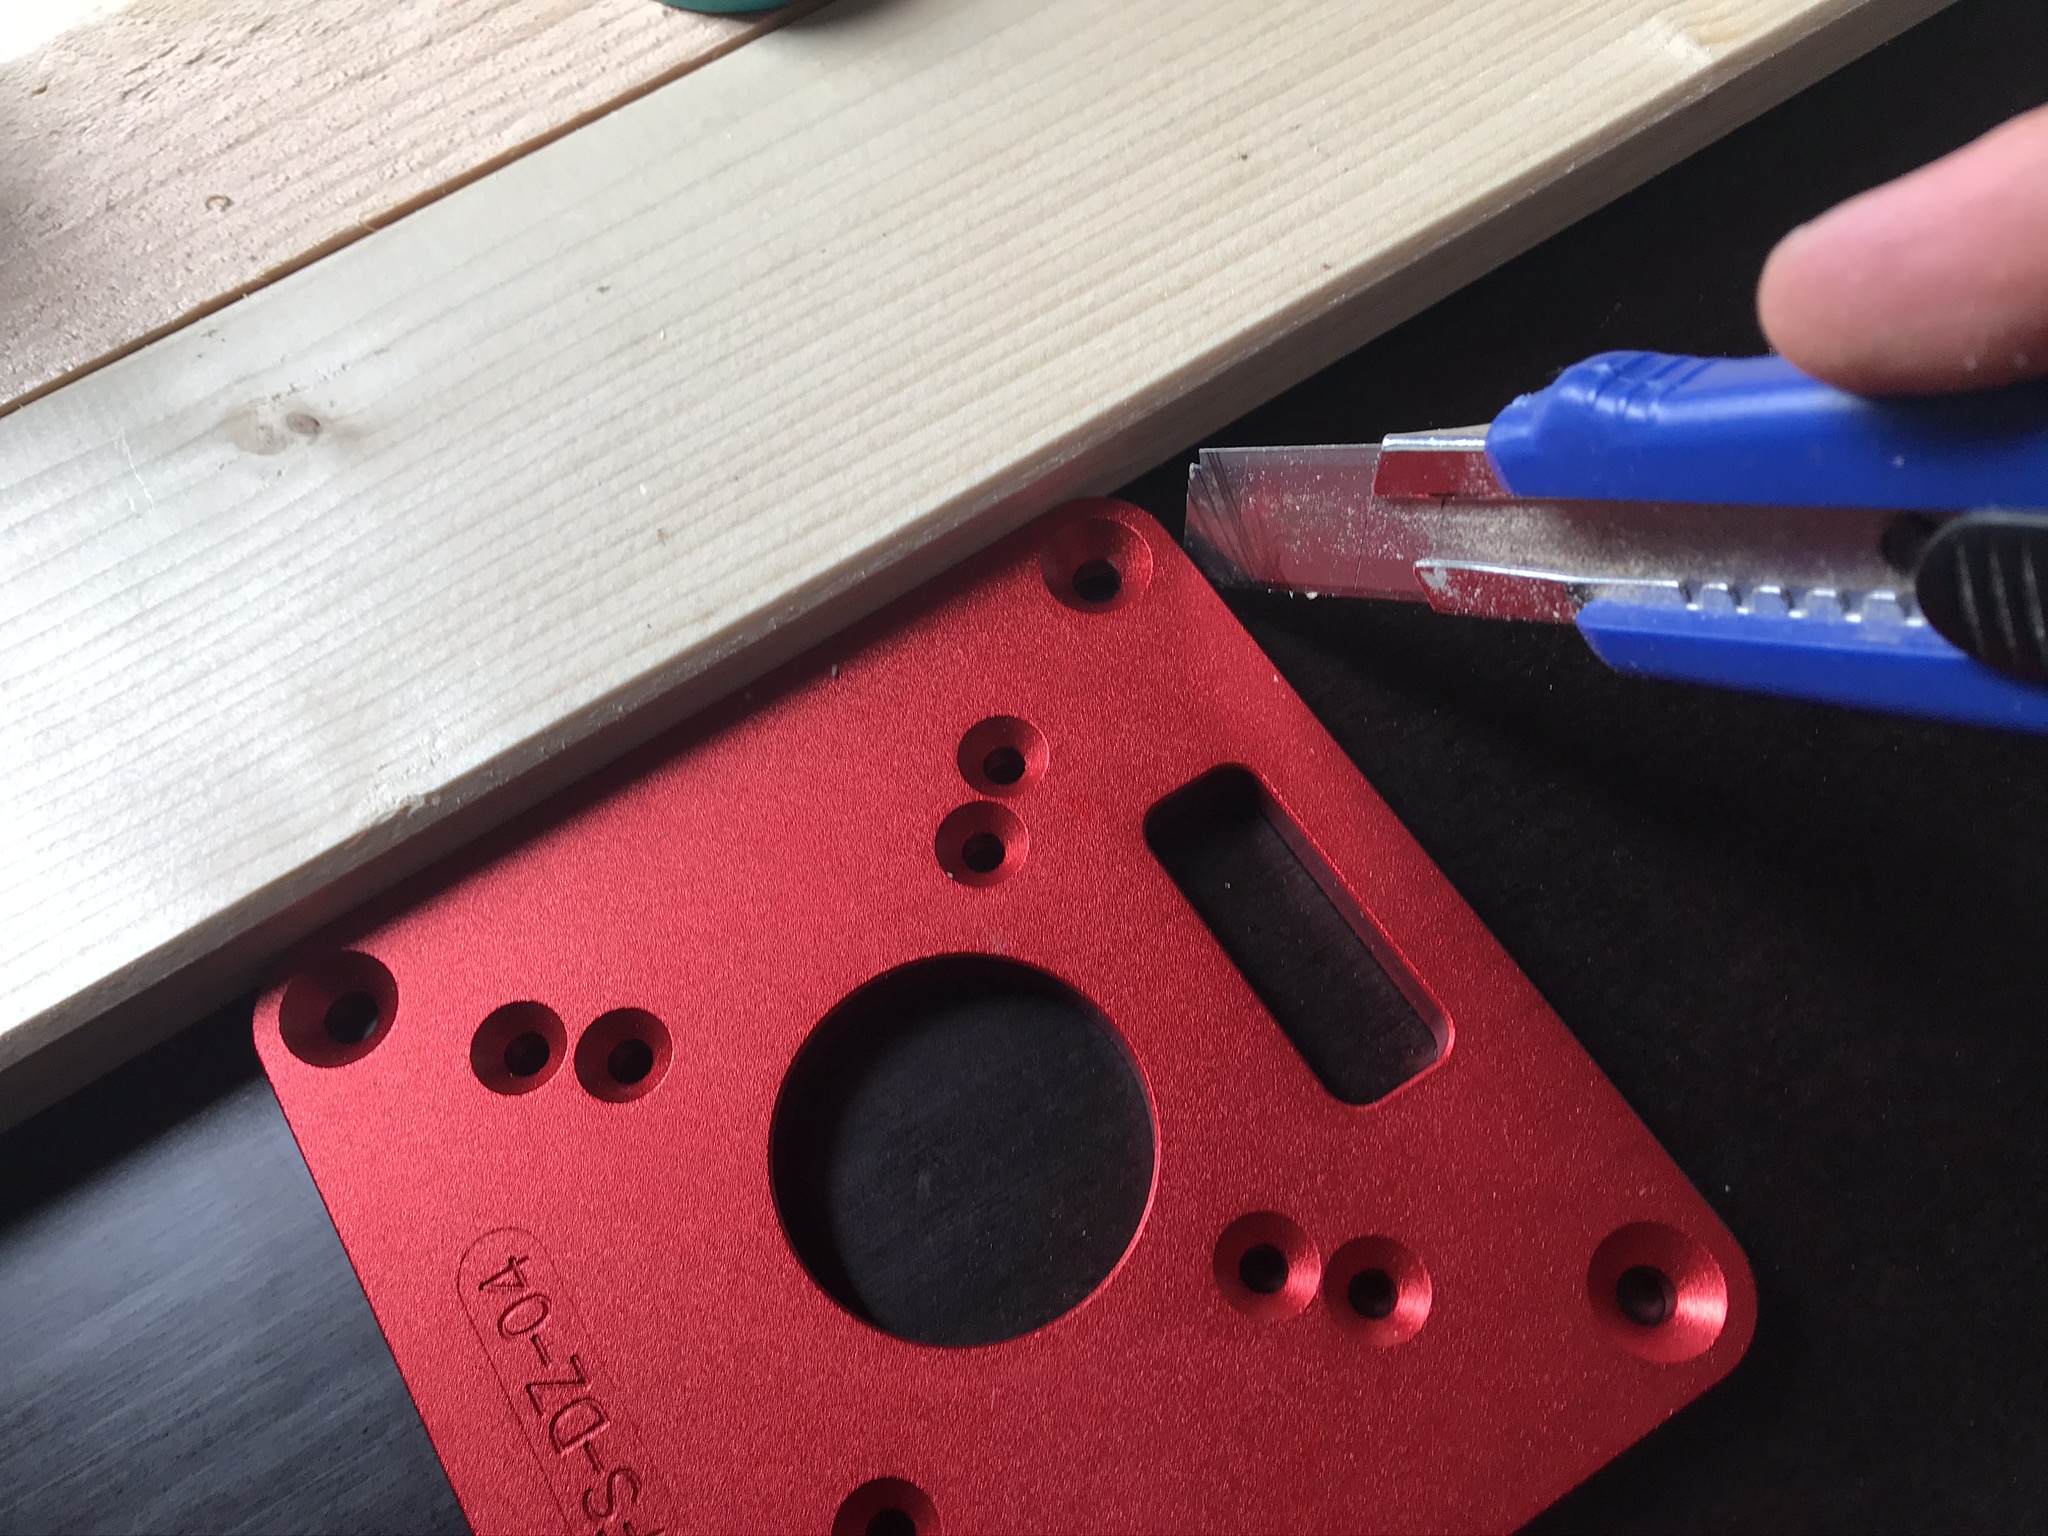
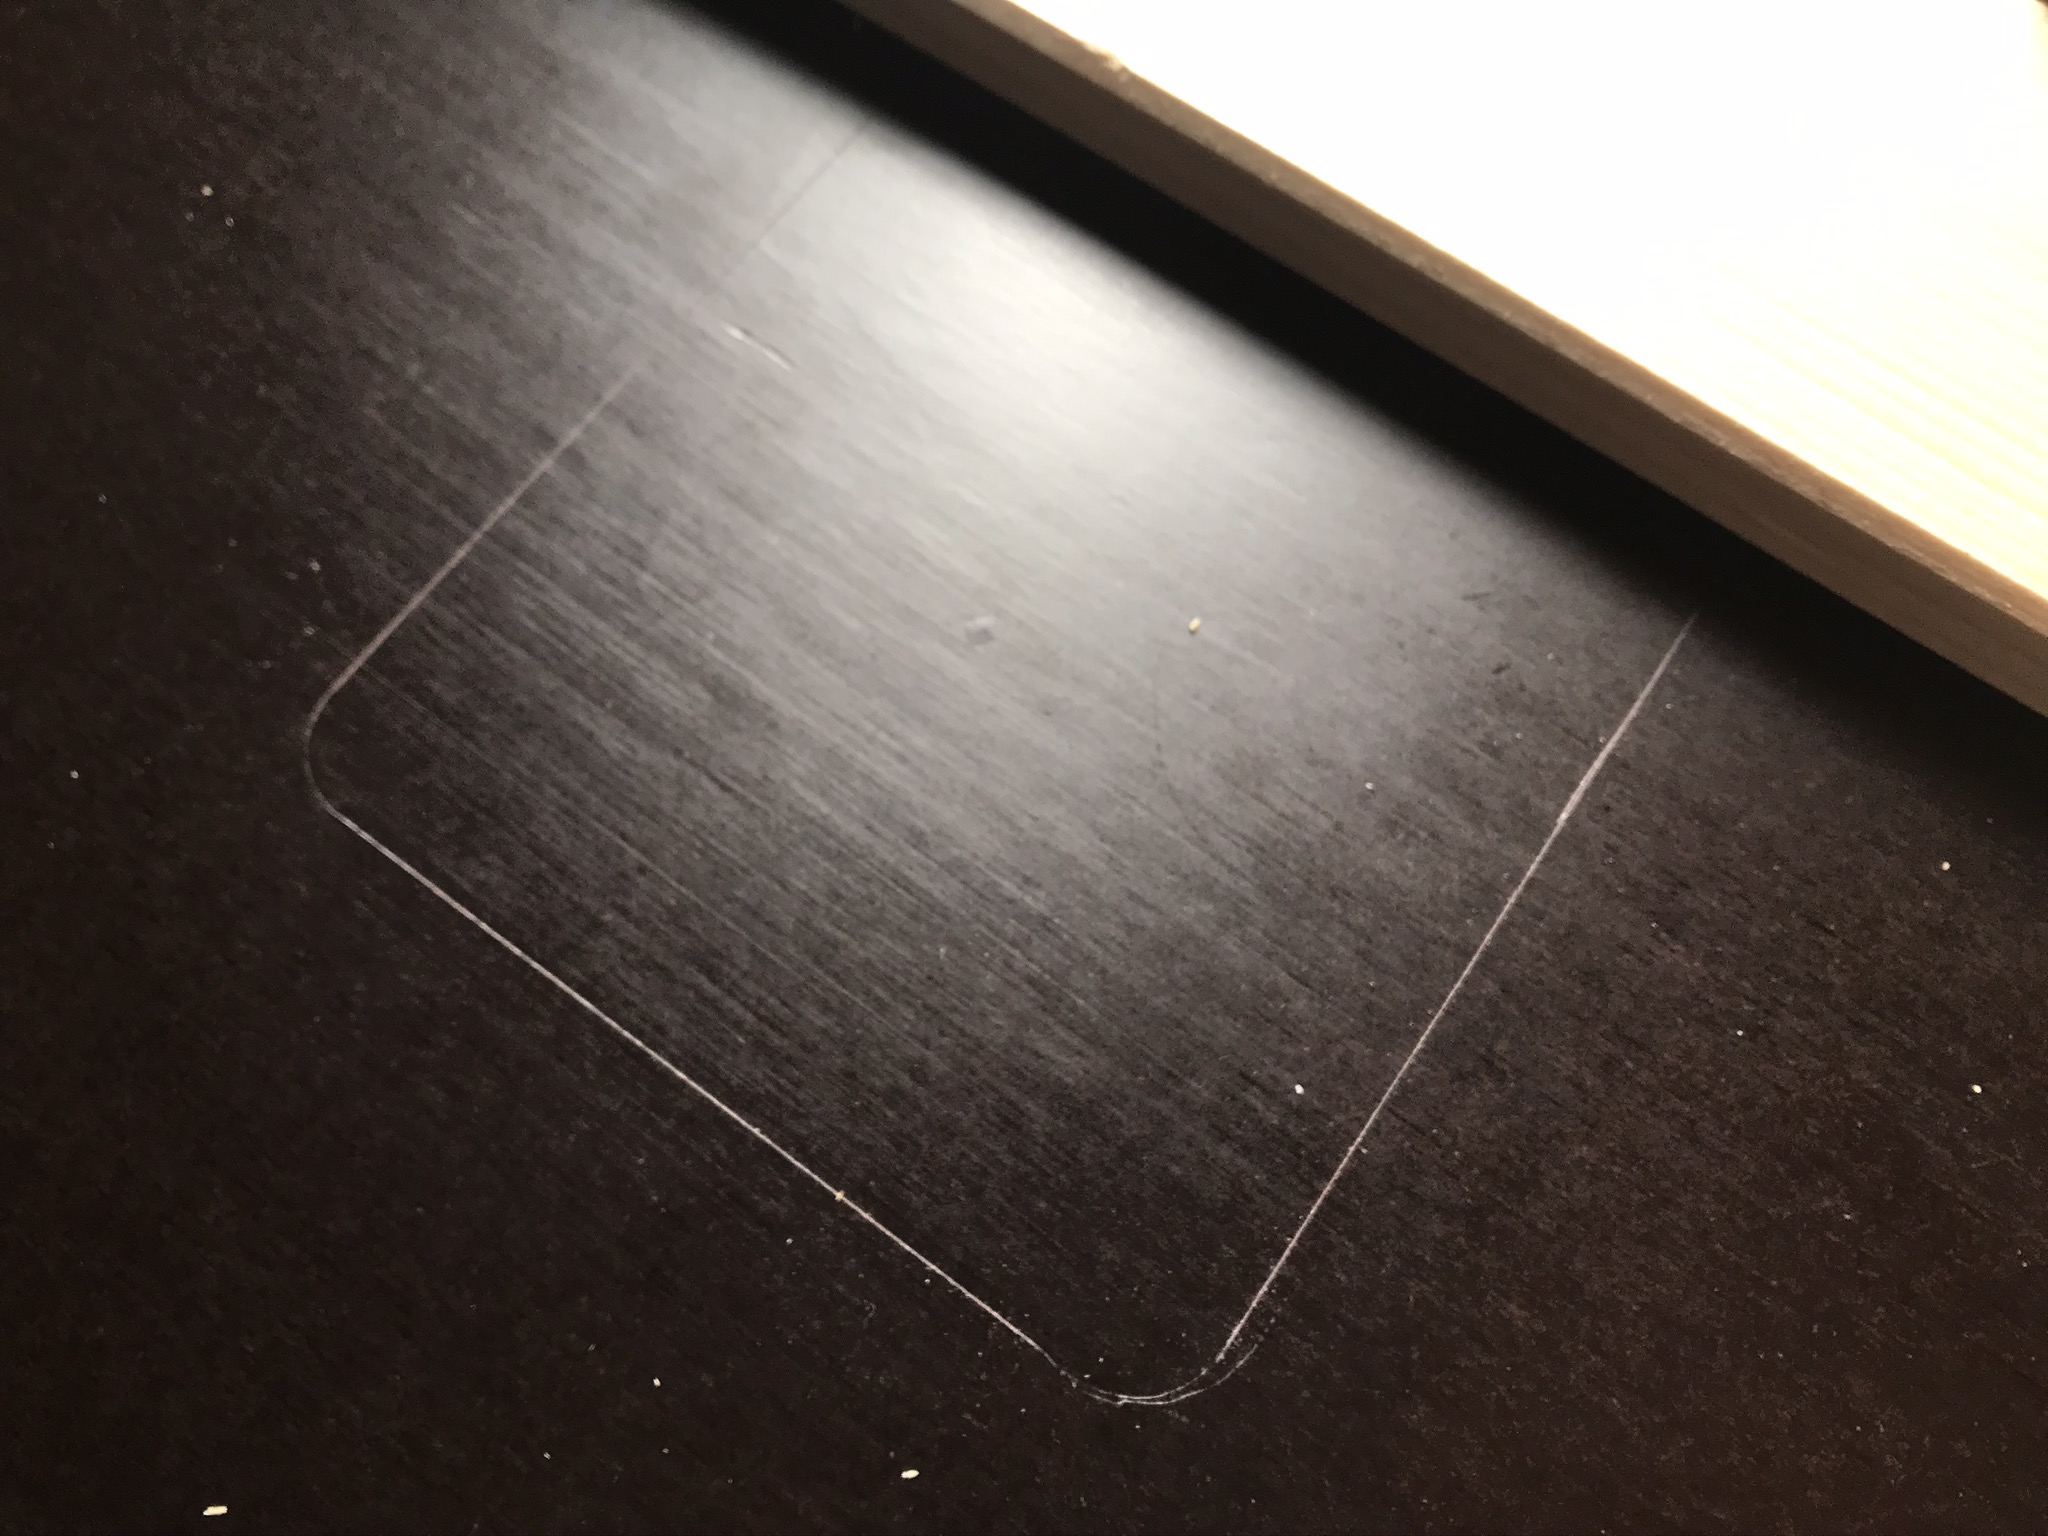
Next, mill a precise cut-out in the upper film faced plywood piece where the router insert plate* for the router fits exactly flush with the surface. With a routing template this should work relatively quickly and accurately – unfortunately I don’t have one. I therefore took a lot of time for this step – and still small mistakes happened. First place the insert as desired on the 18mm film faced plywood plate and mark the outline with a cutter knife or similar.
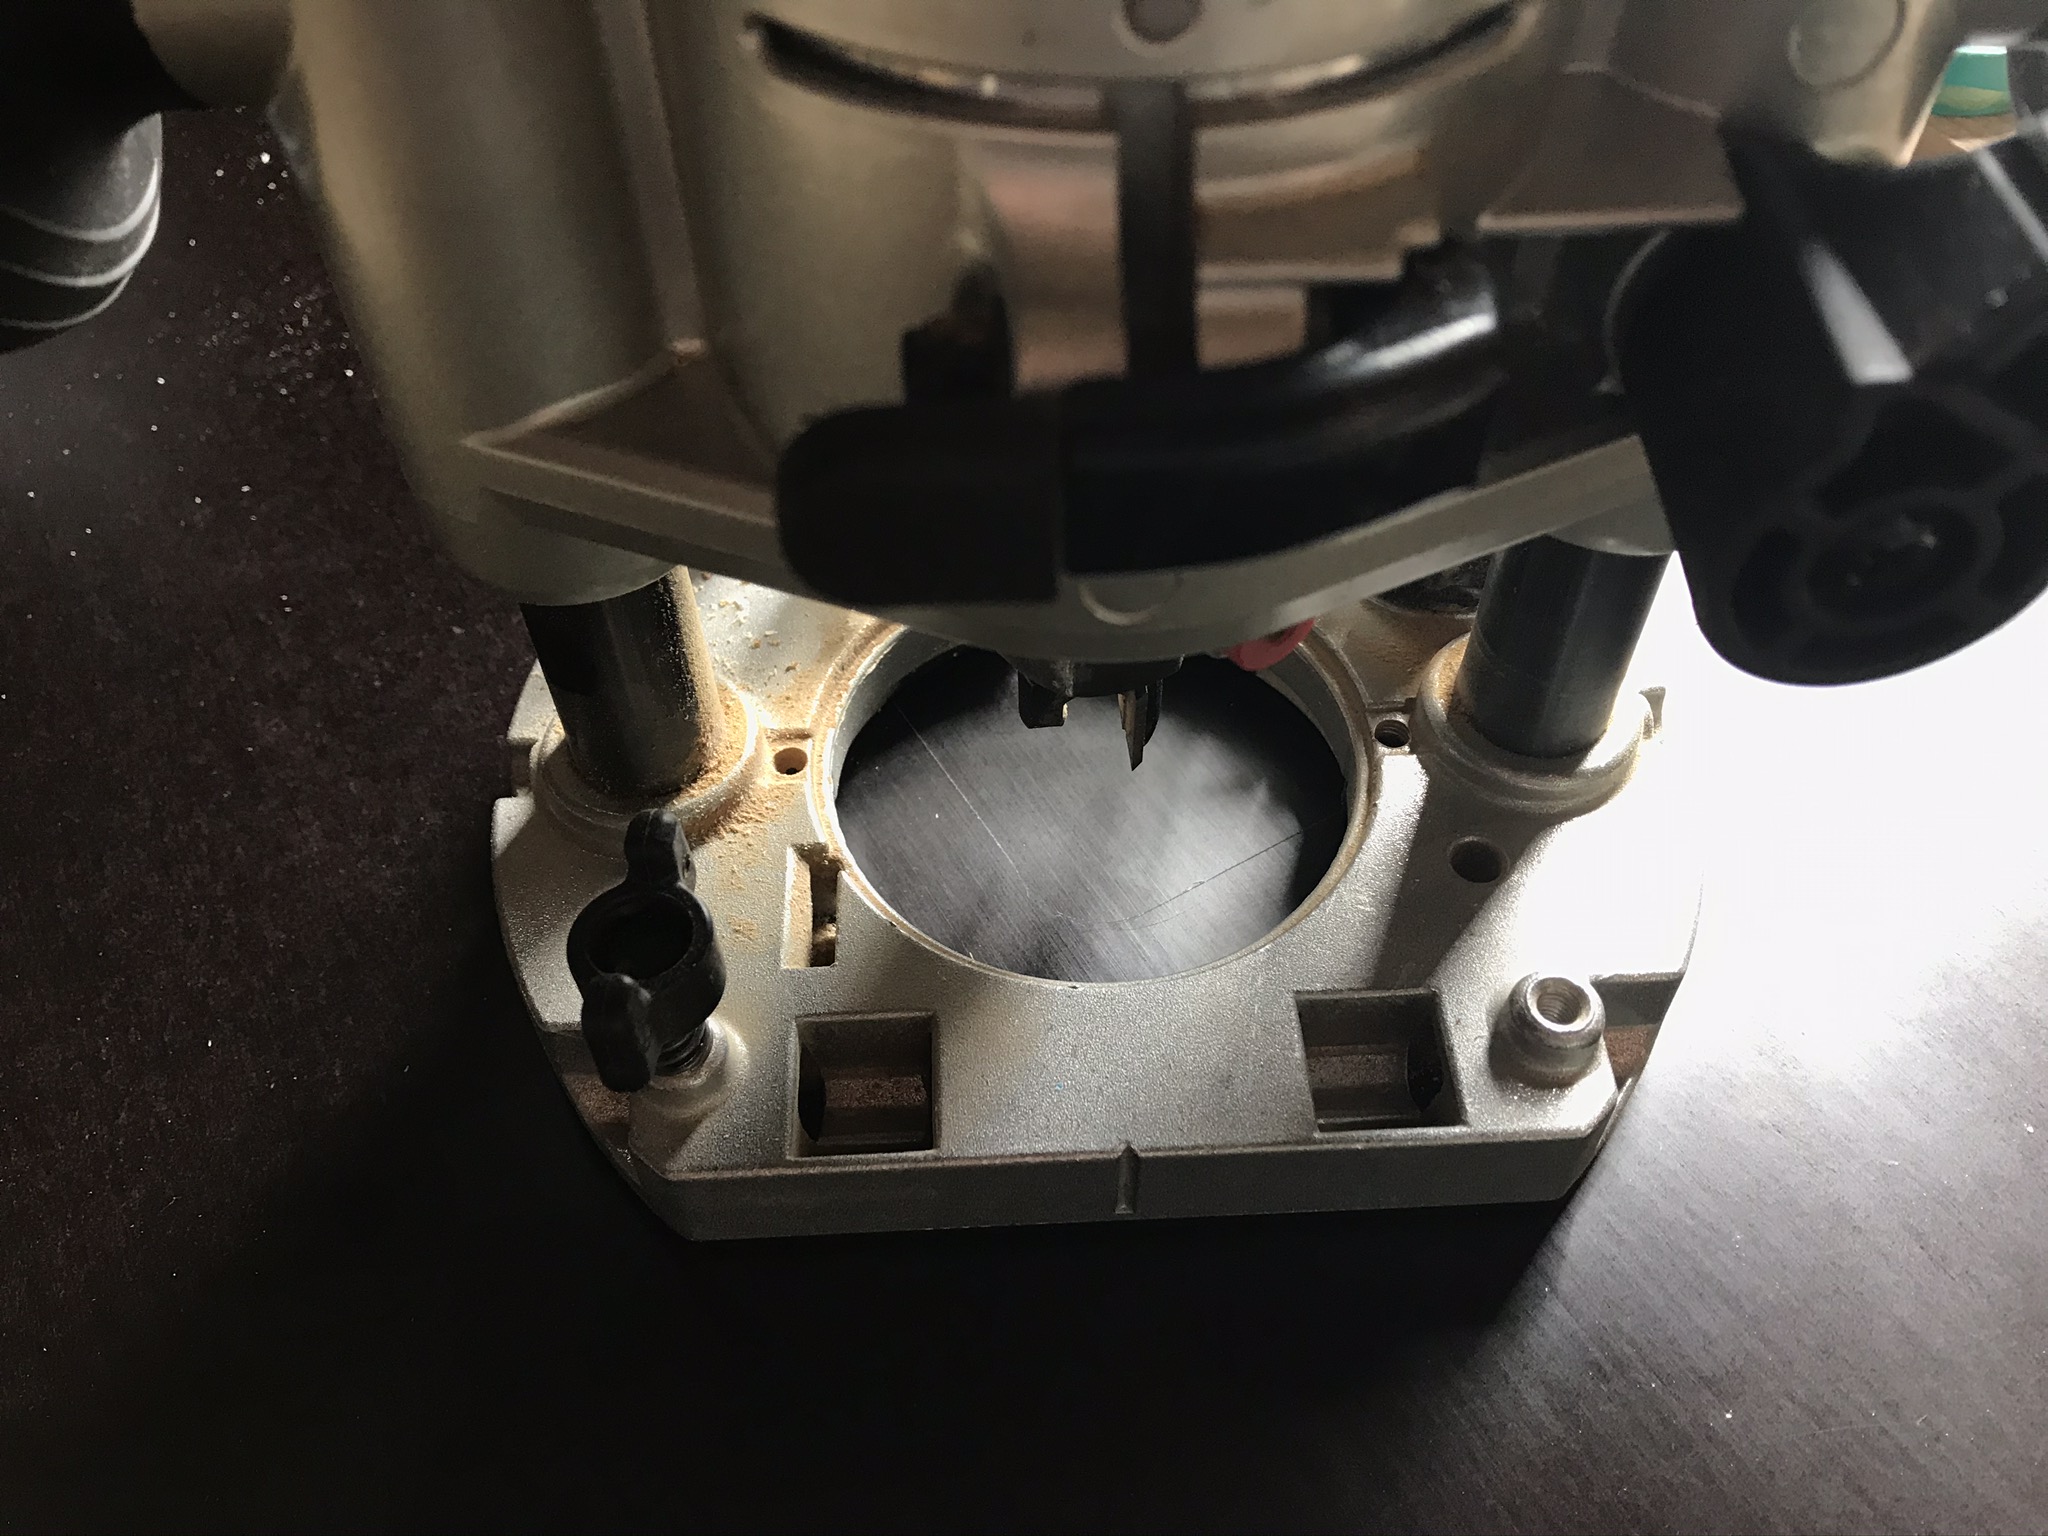
With the help of a stop, I place the router exactly on the marked recess so that the router bit is flush with the scribed edge. Set the depth stop of the router minimally deeper than 8mm so that the insert plate does not protrude above the film faced plywood plate. Now you can carefully cut out the first edge. Do not remove the entire 8mm of material immediately, but guide the router through the material in several passes.
Make absolutely sure that the wood chips do not ignite due to the frictional heat! Sharp cutters, the right feed rate and not too much material removal at once are very important here to avoid fires.
Repeat this step for all 4 edges. As you can see, I also made a mistake and at one point I moved the cutter too far along the cross stop. Functionally this is not a tragedy – but visually it is annoying!
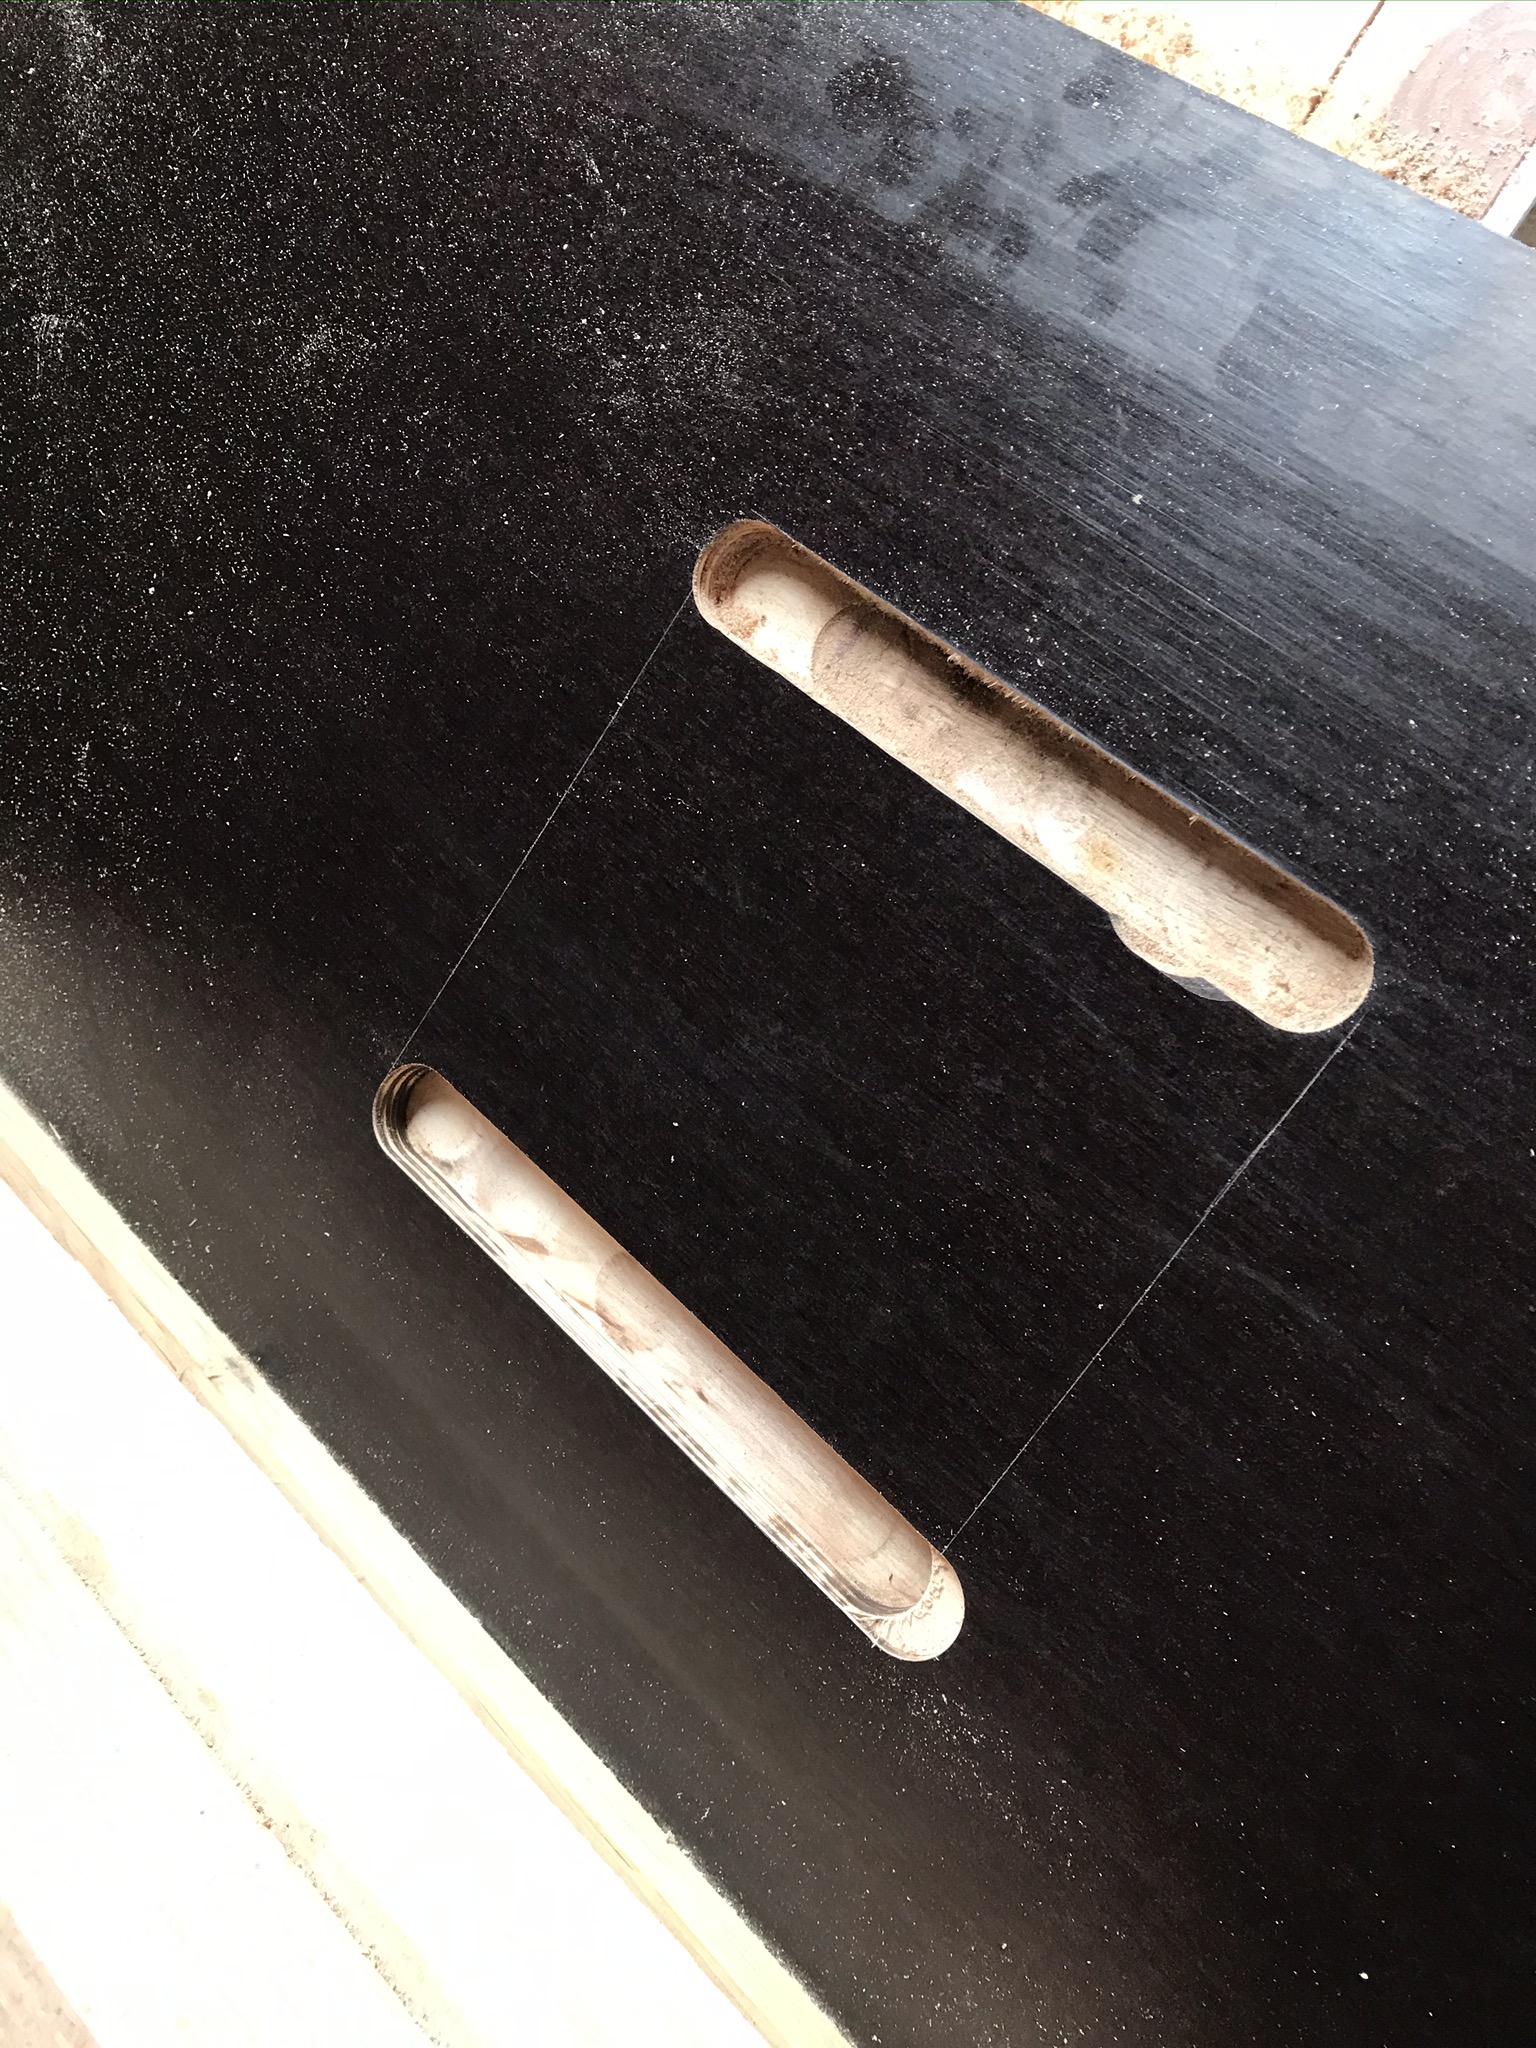

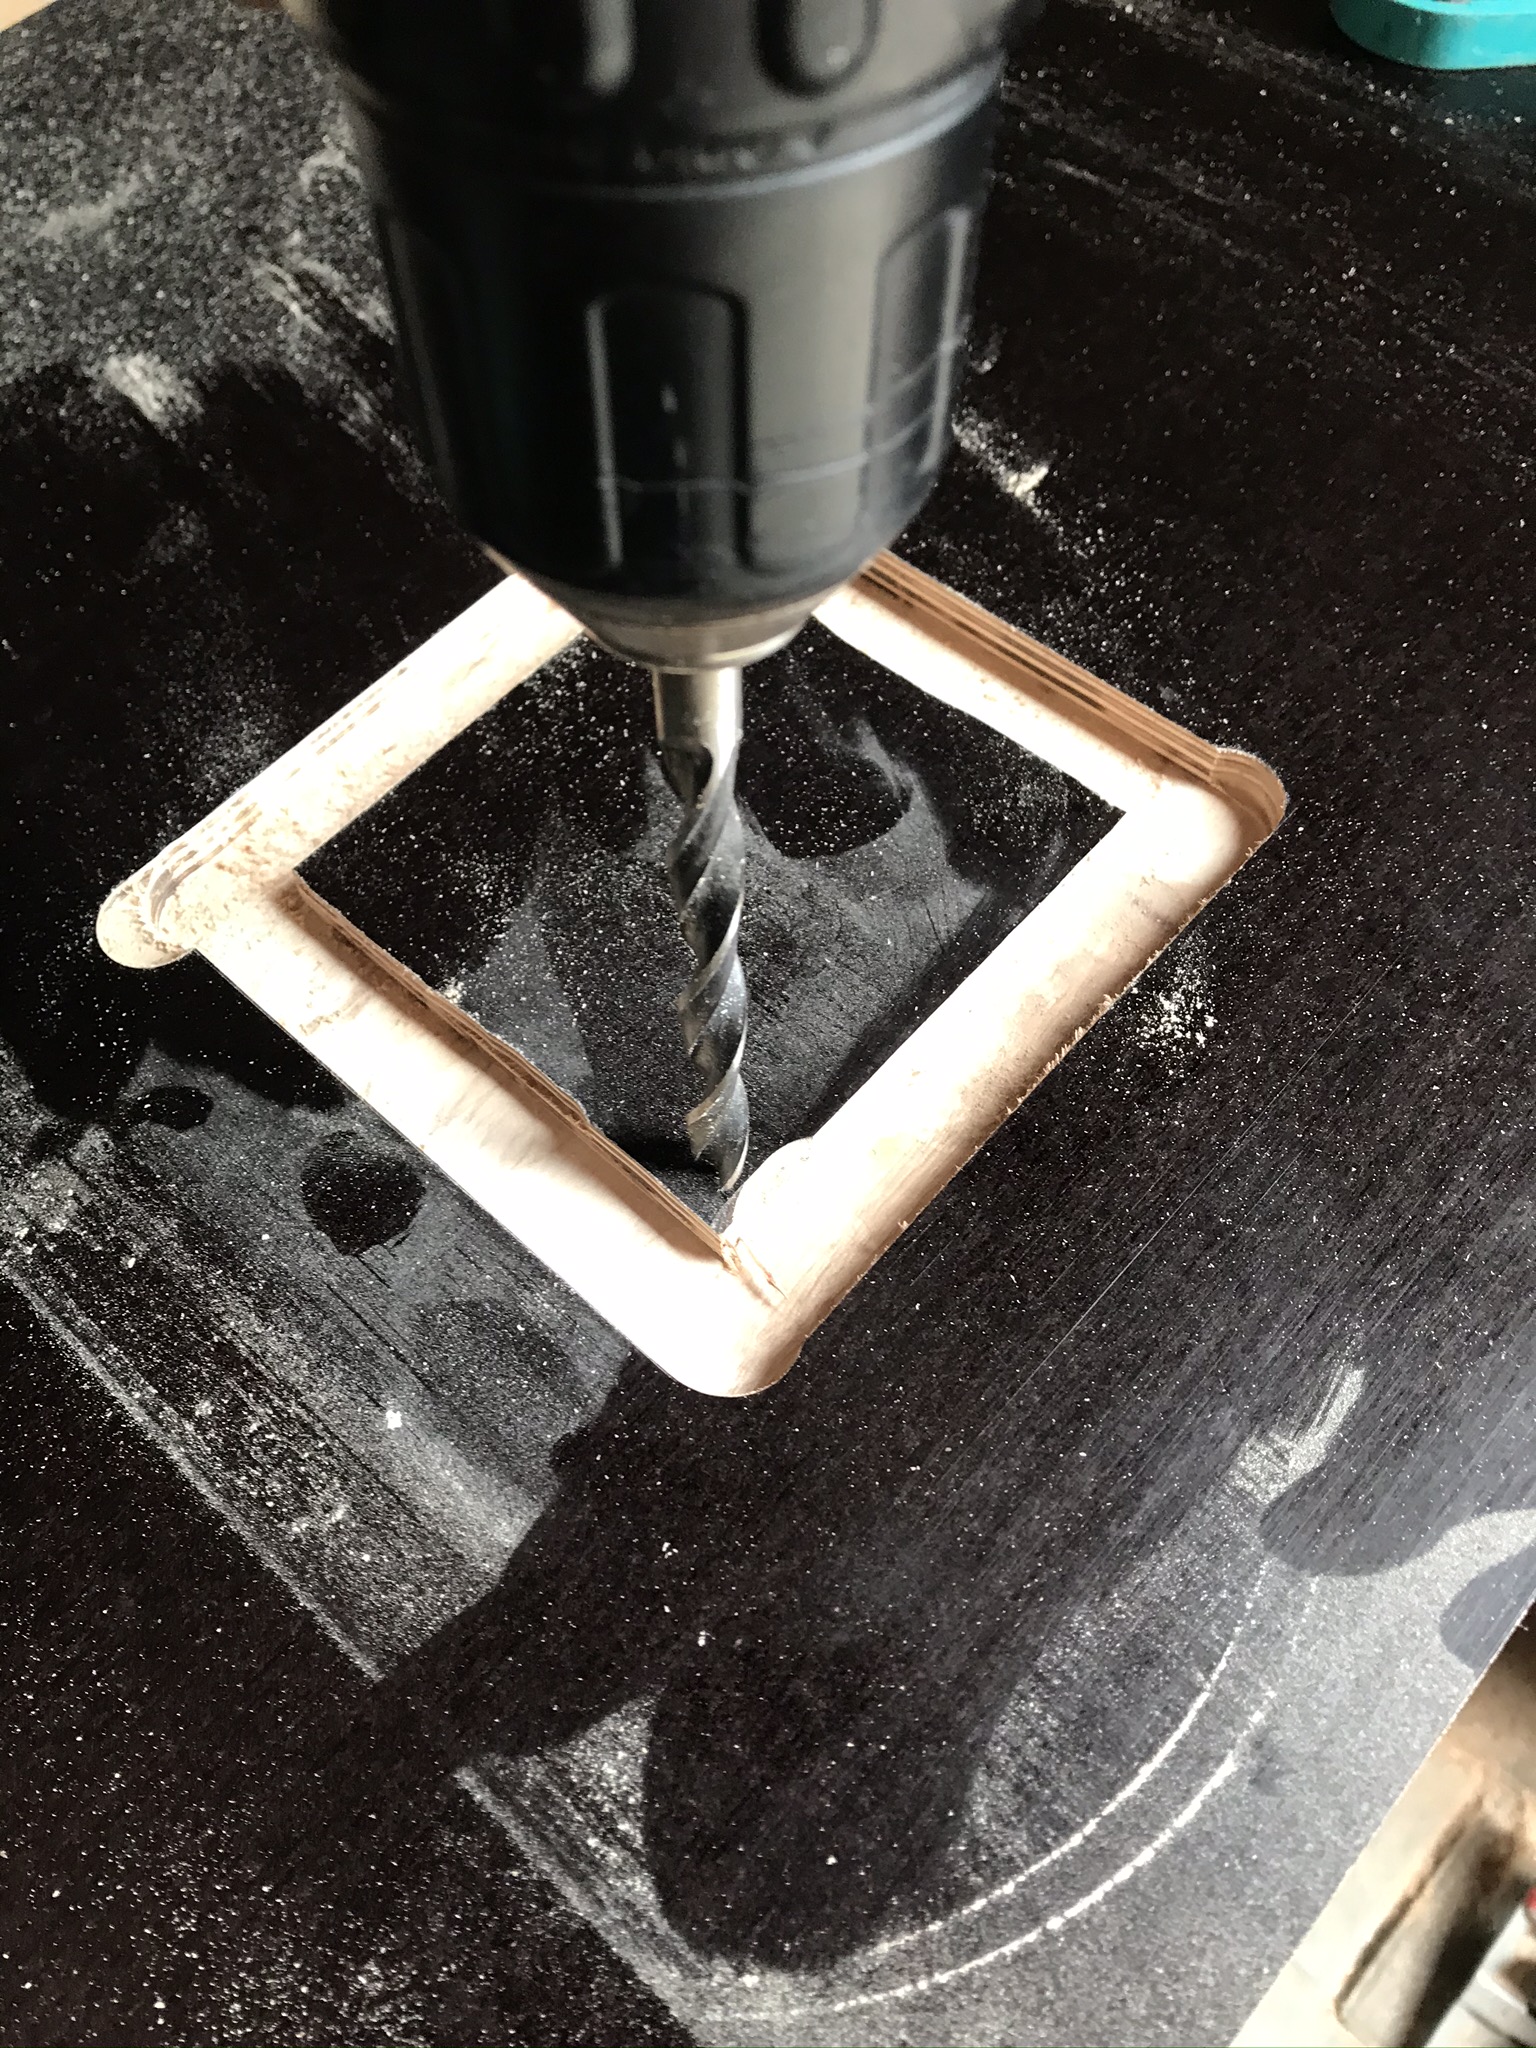
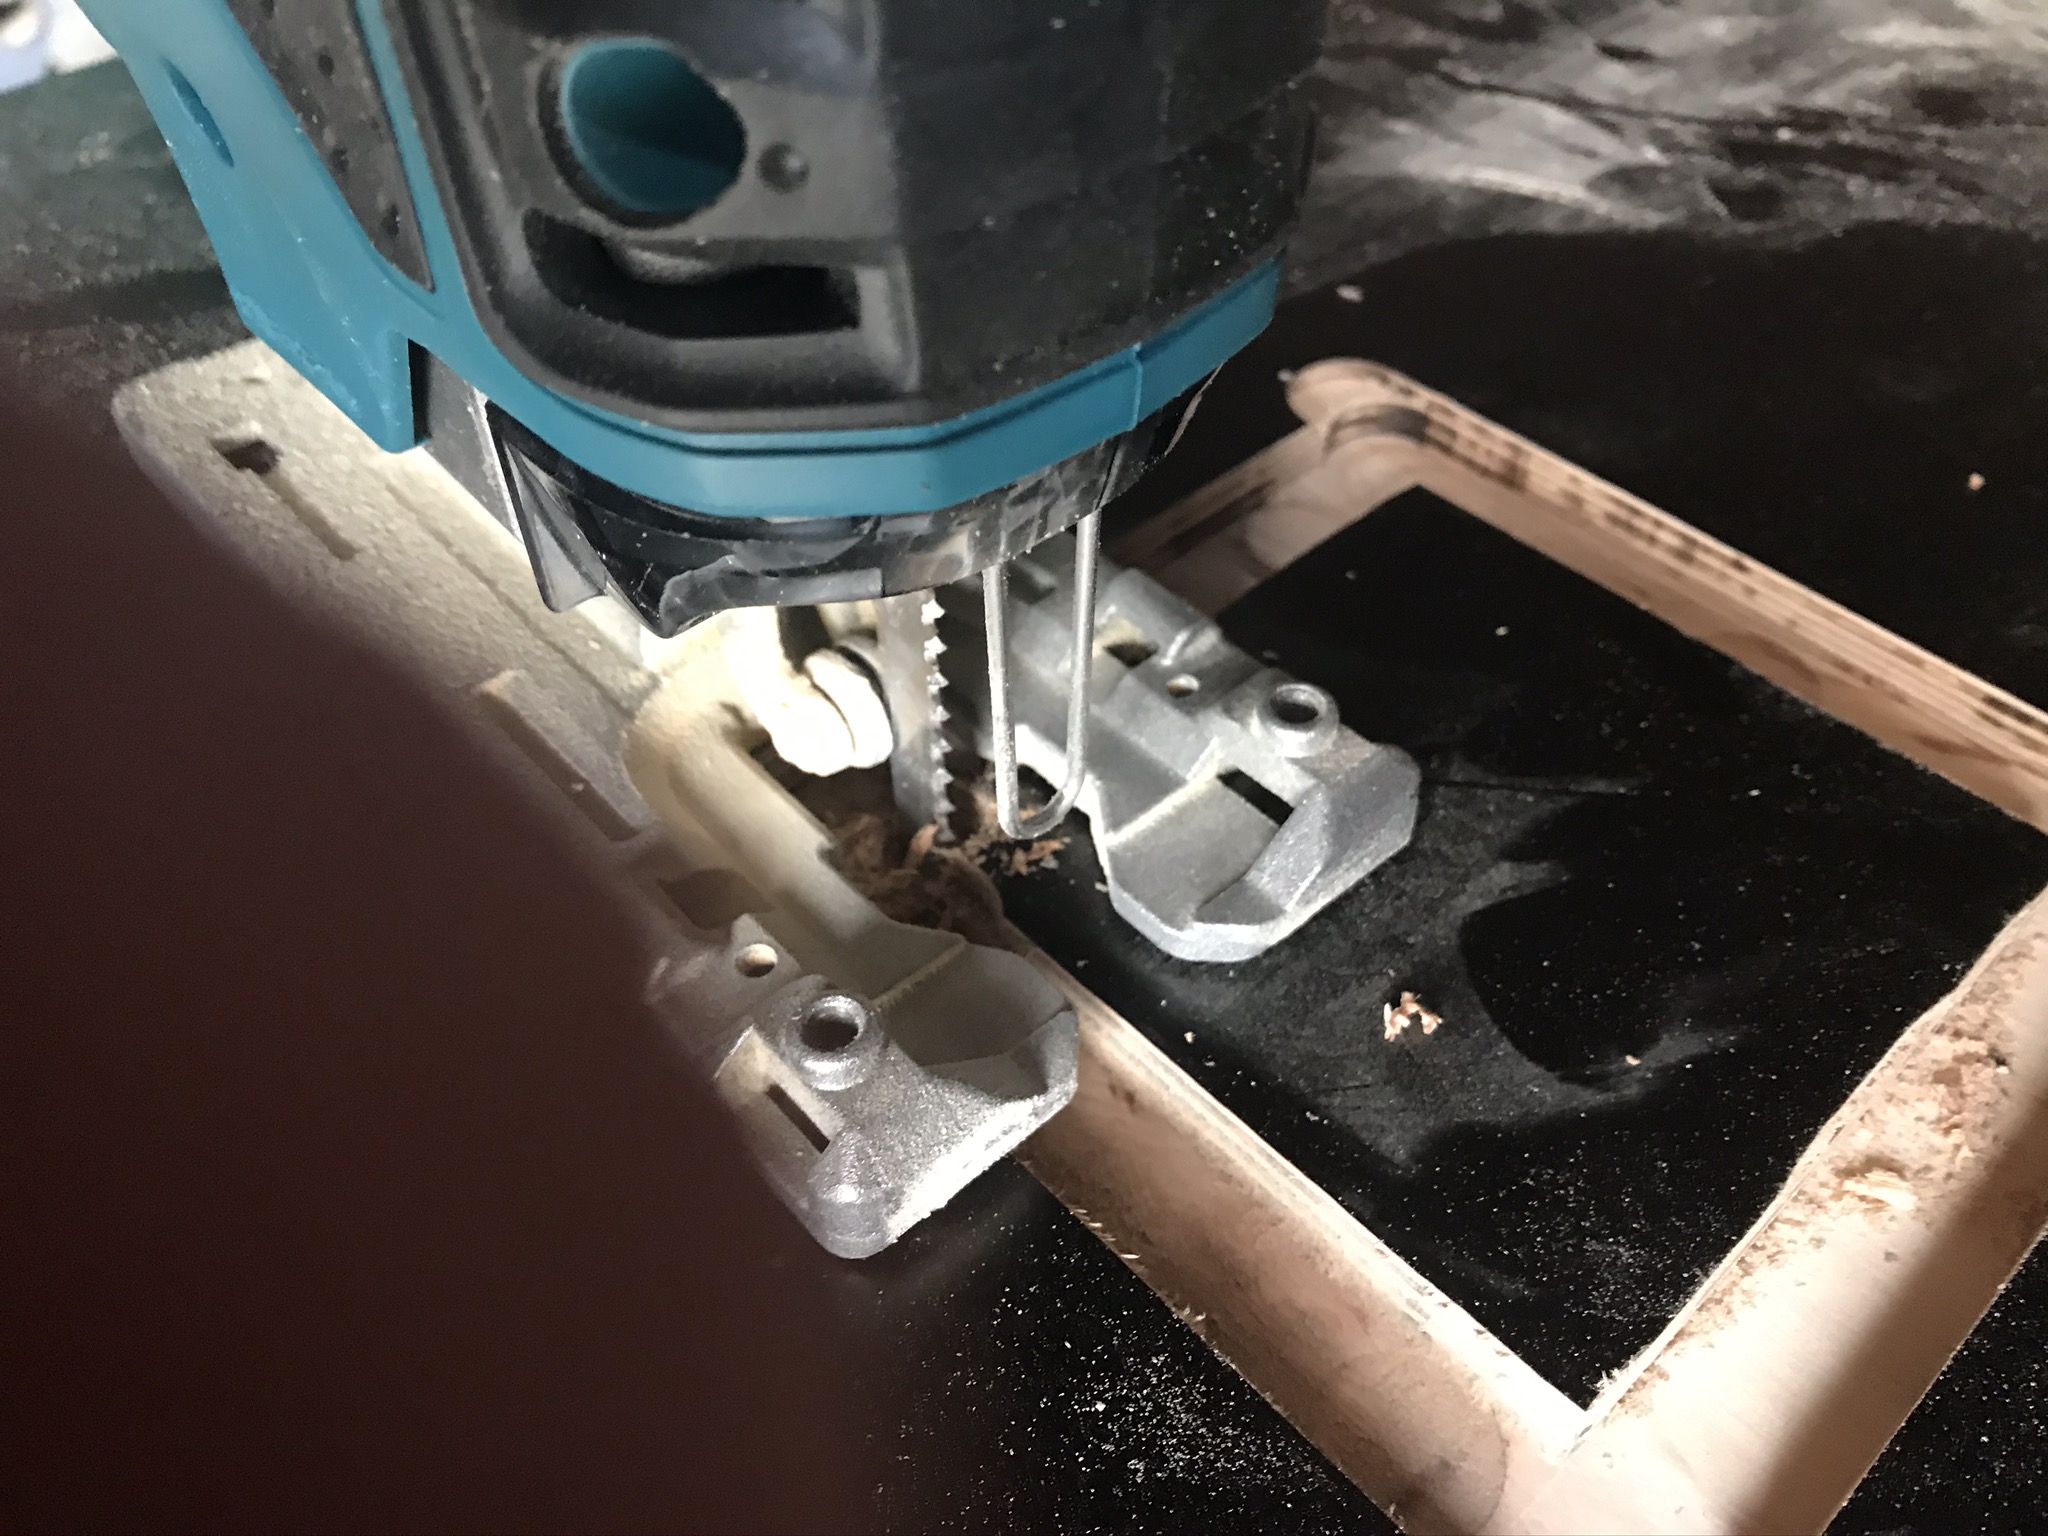
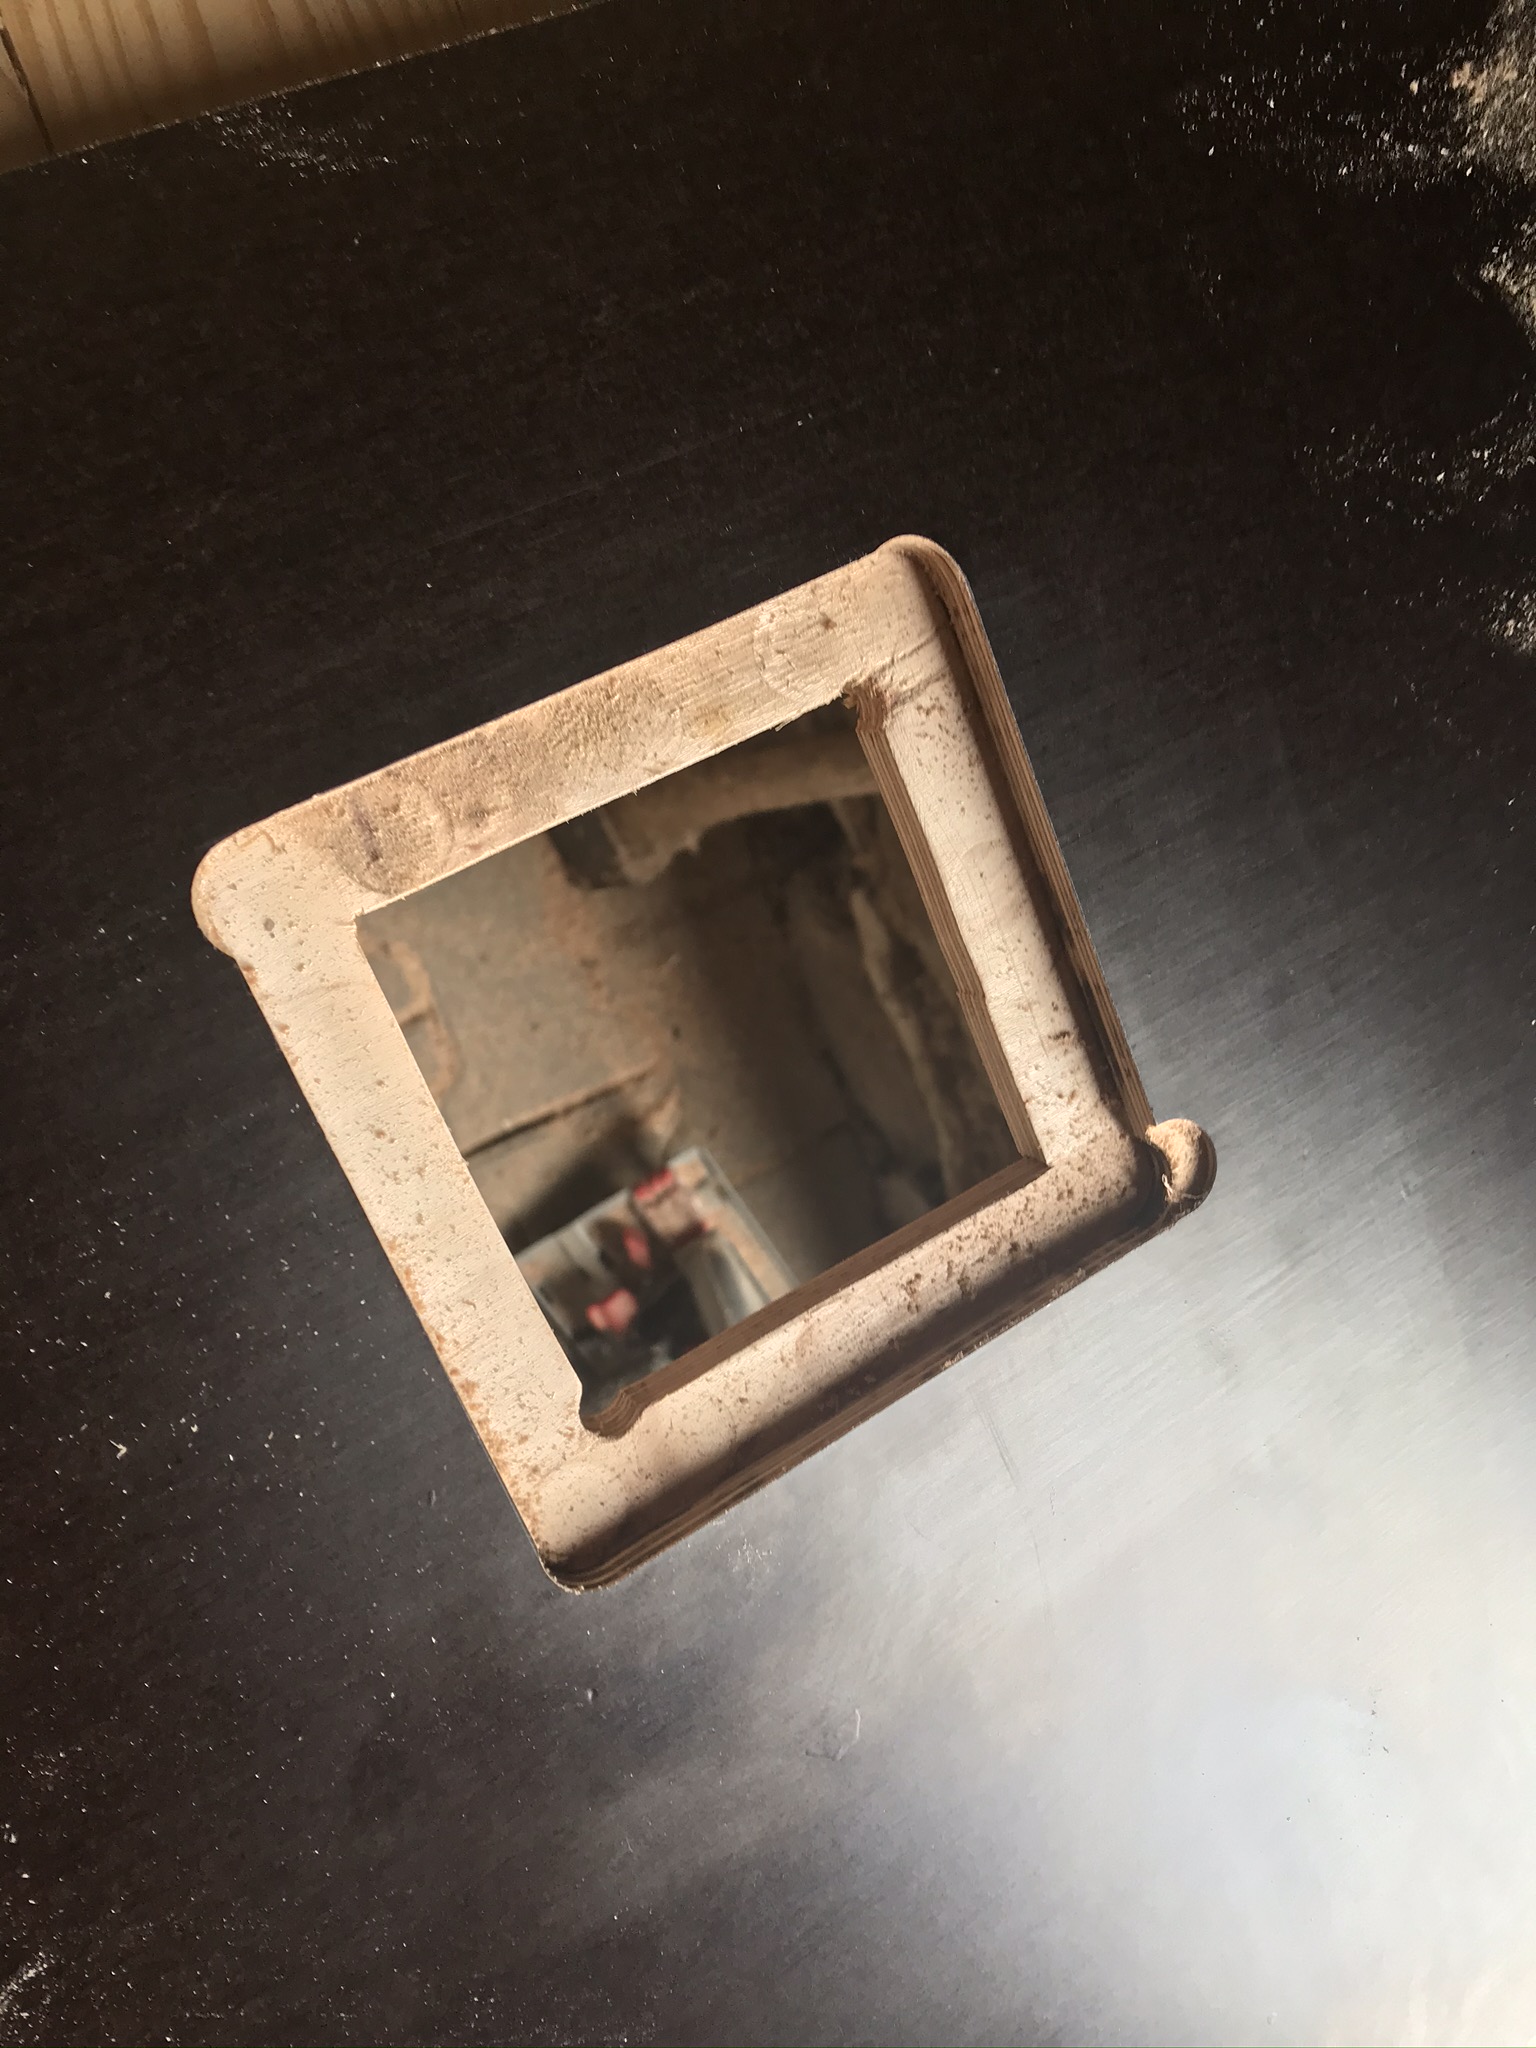
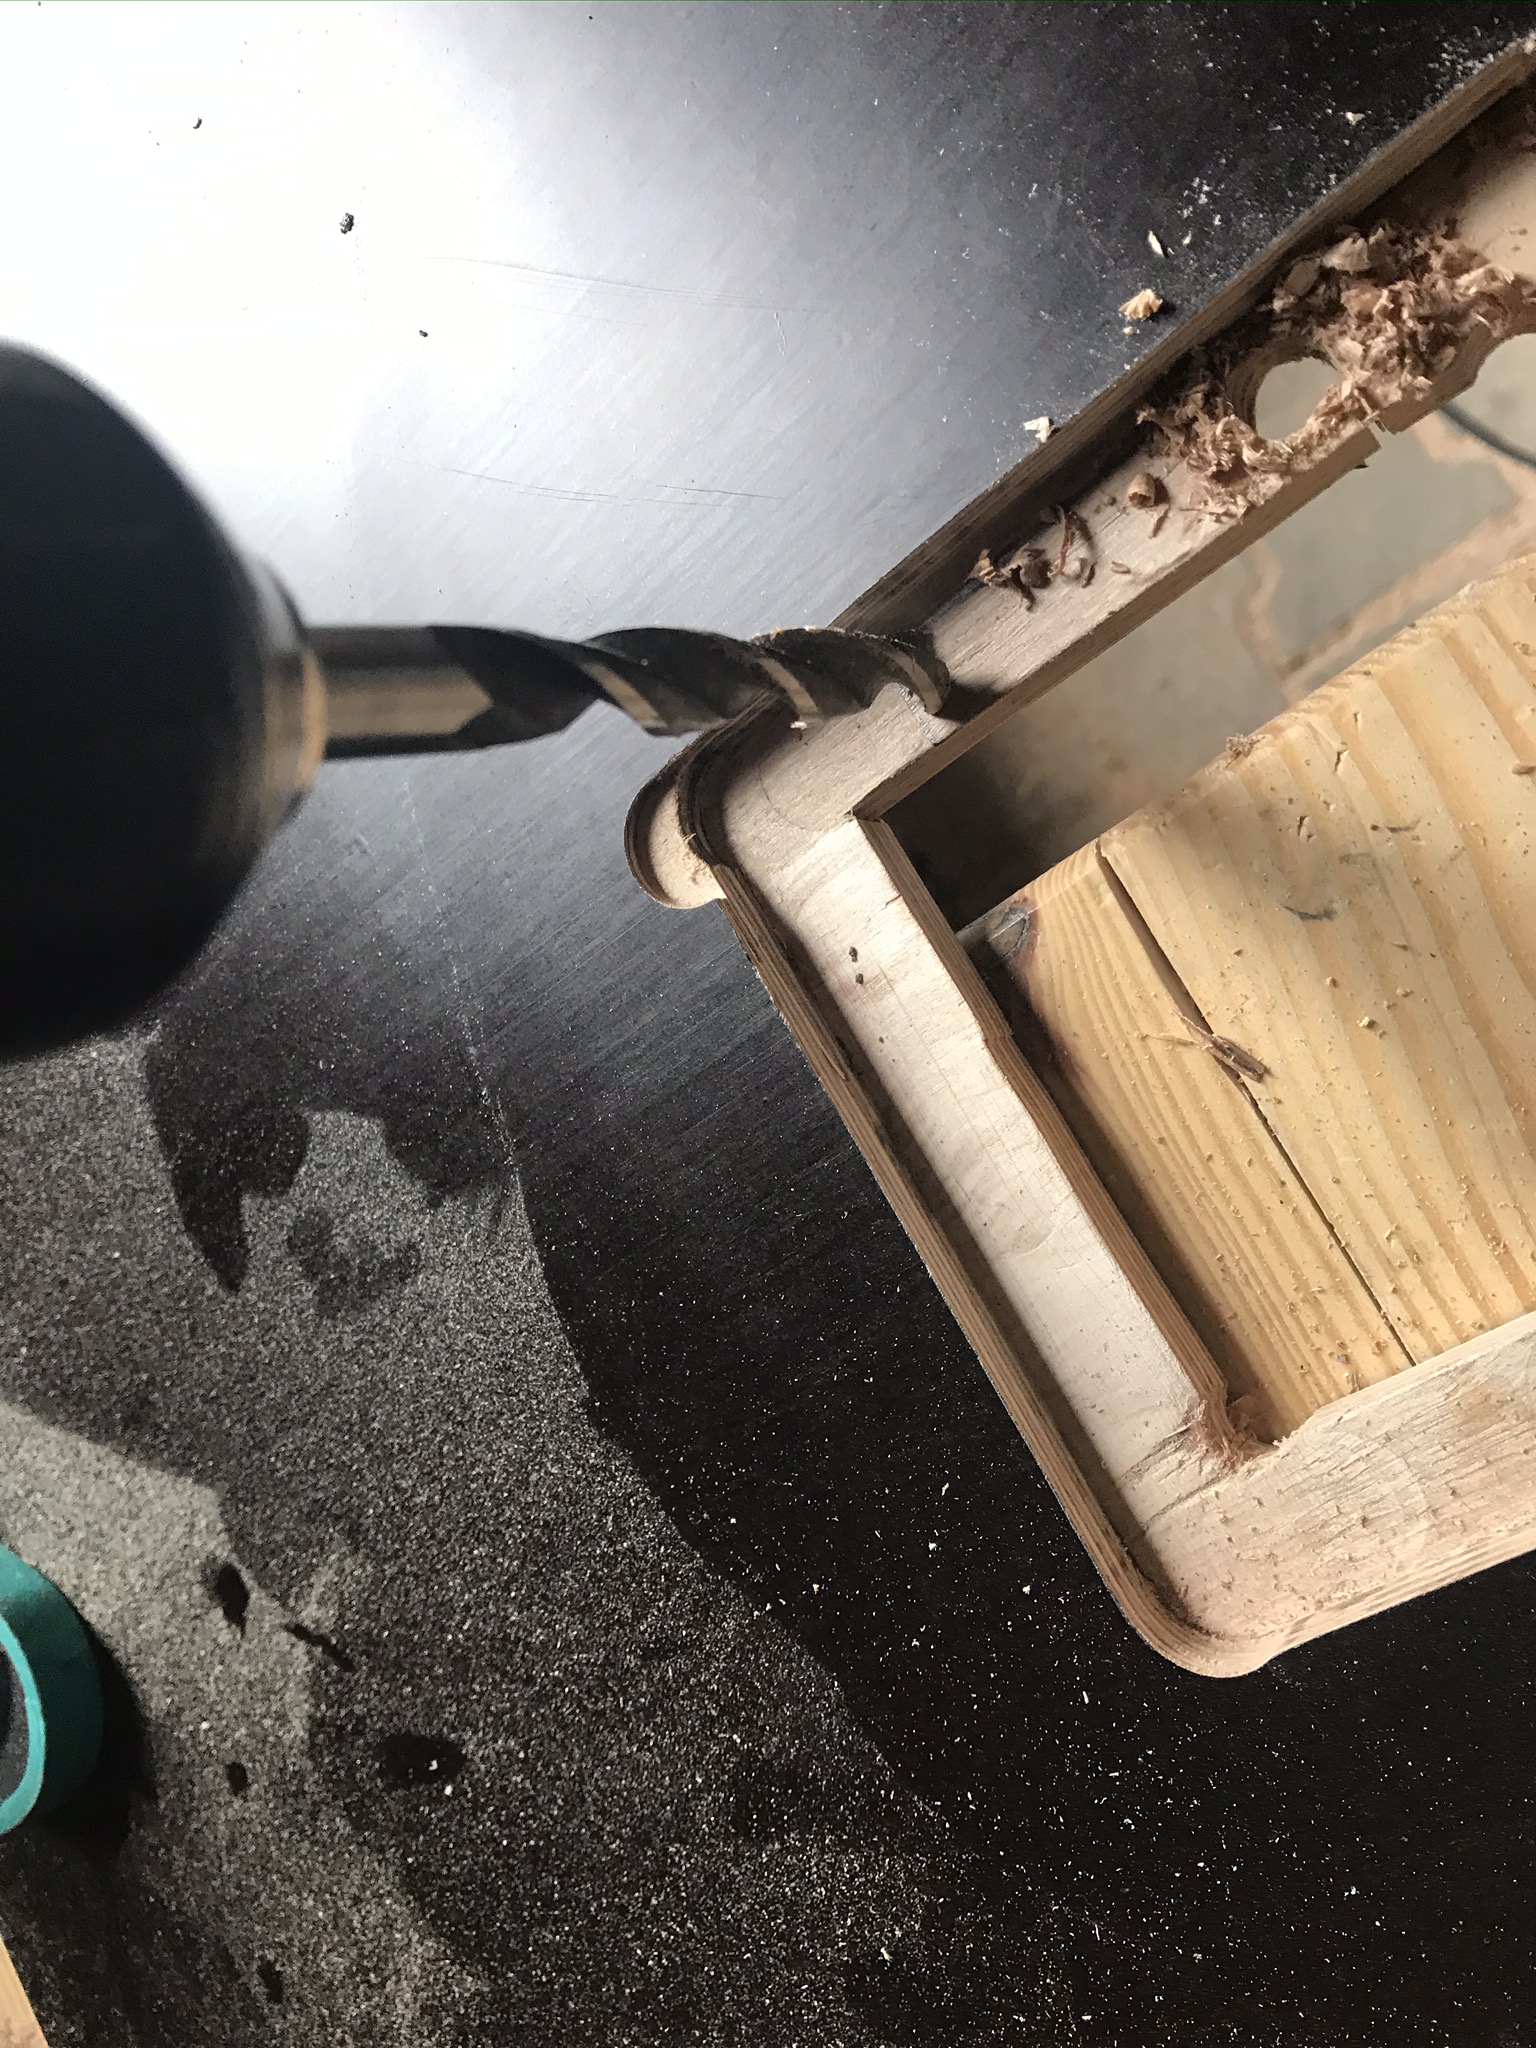
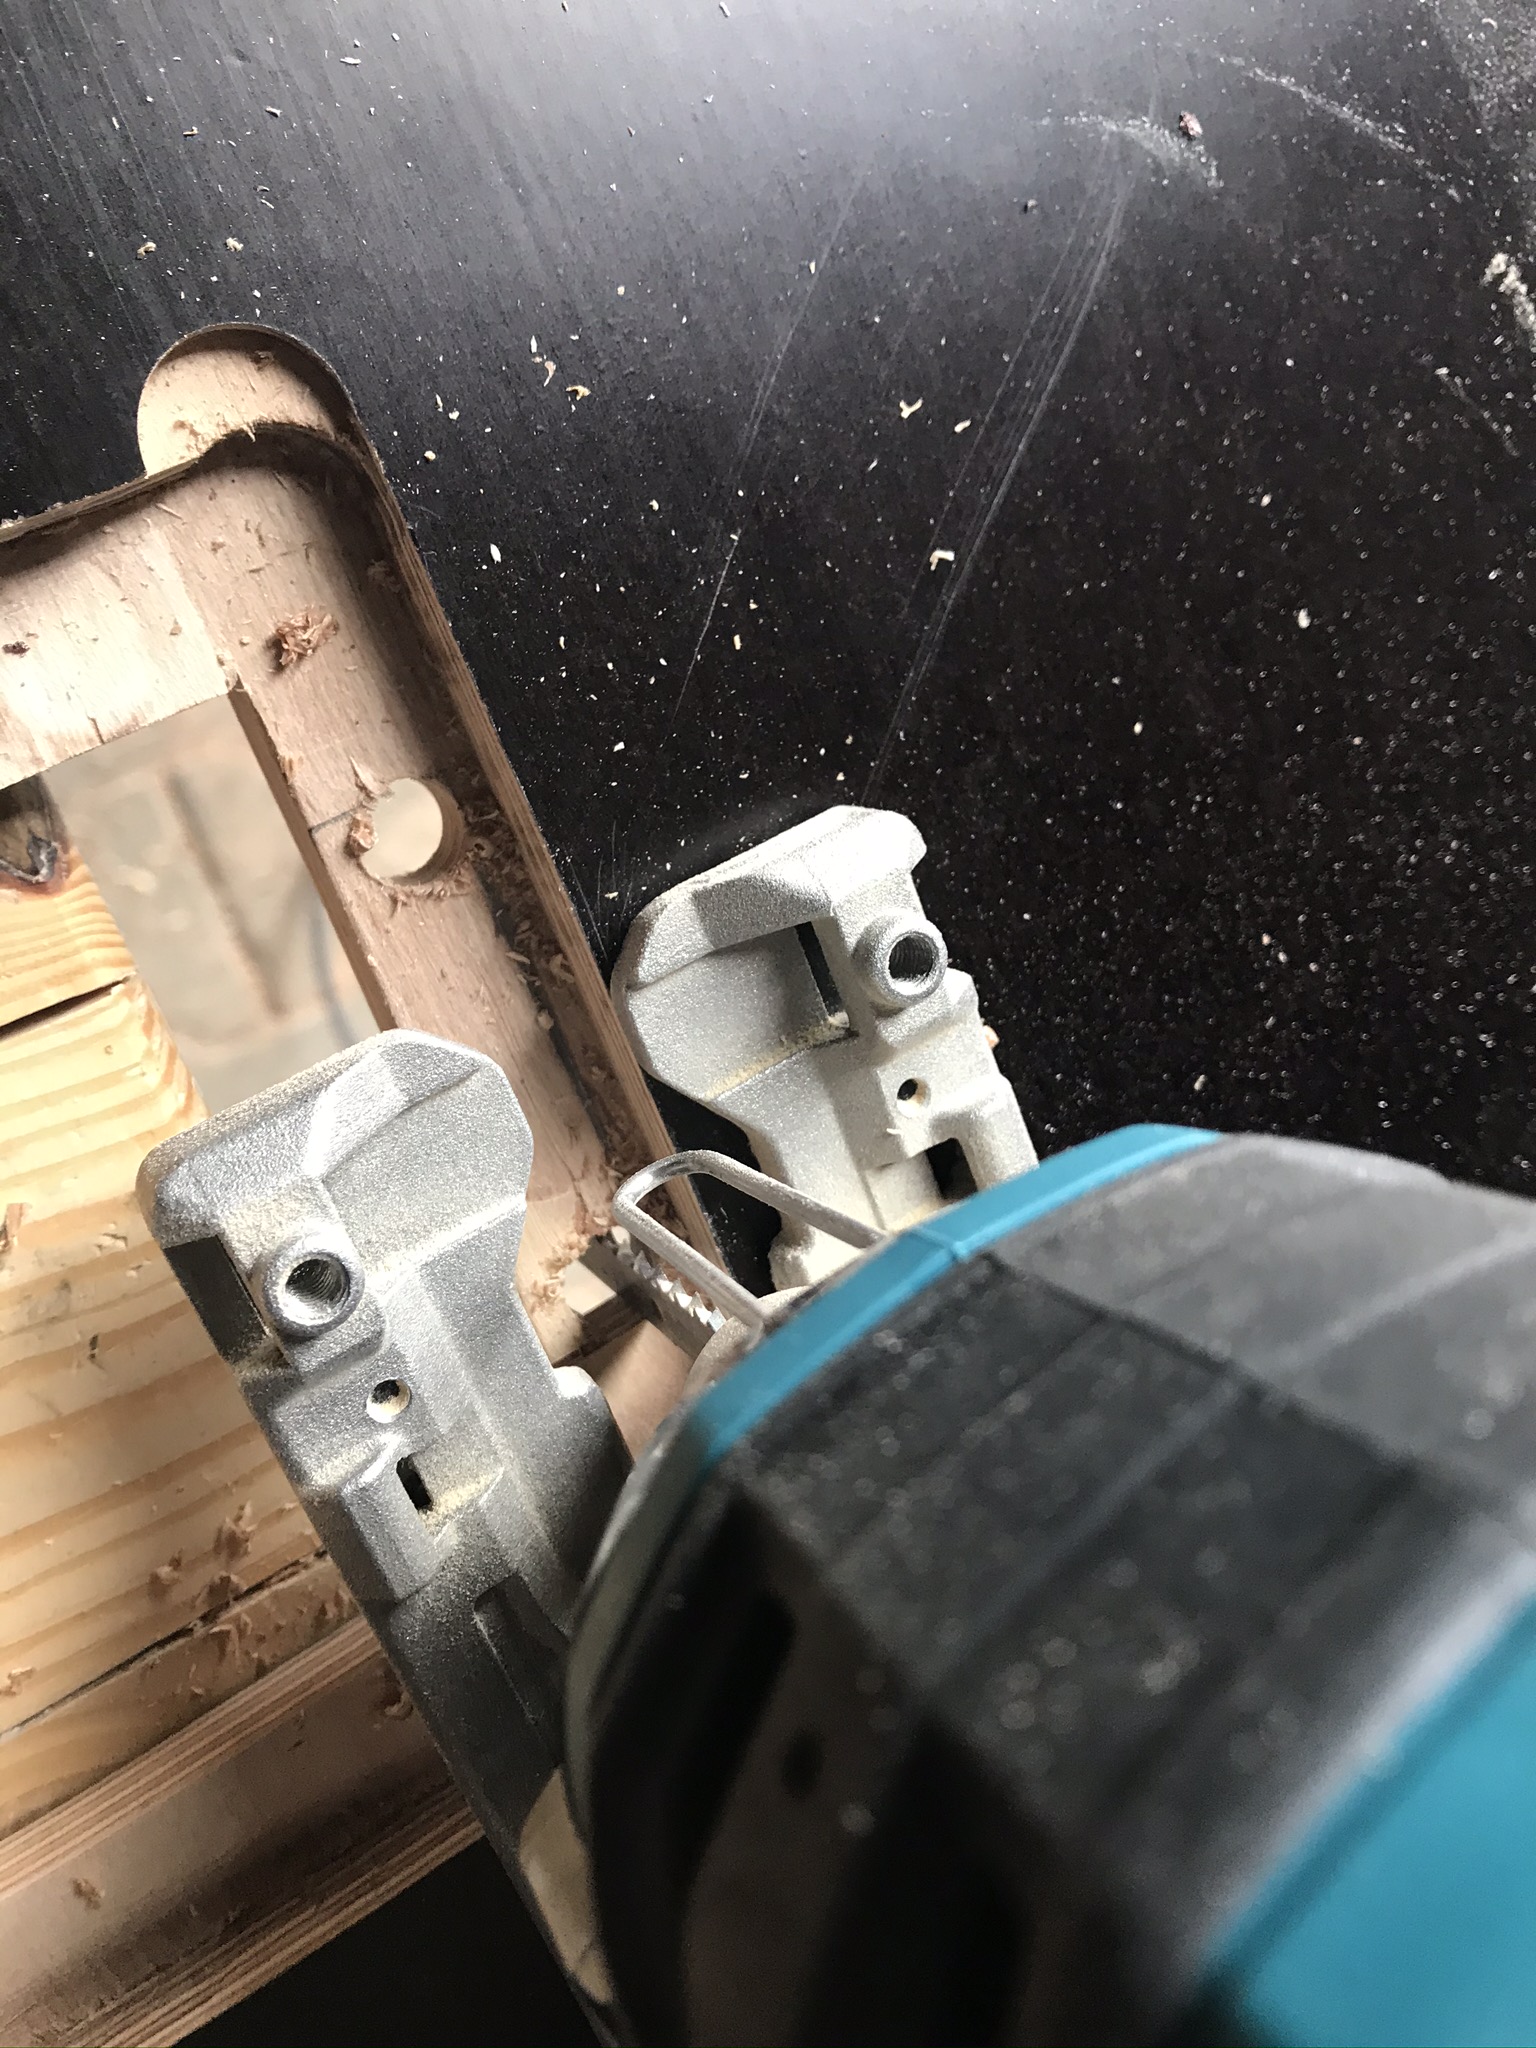
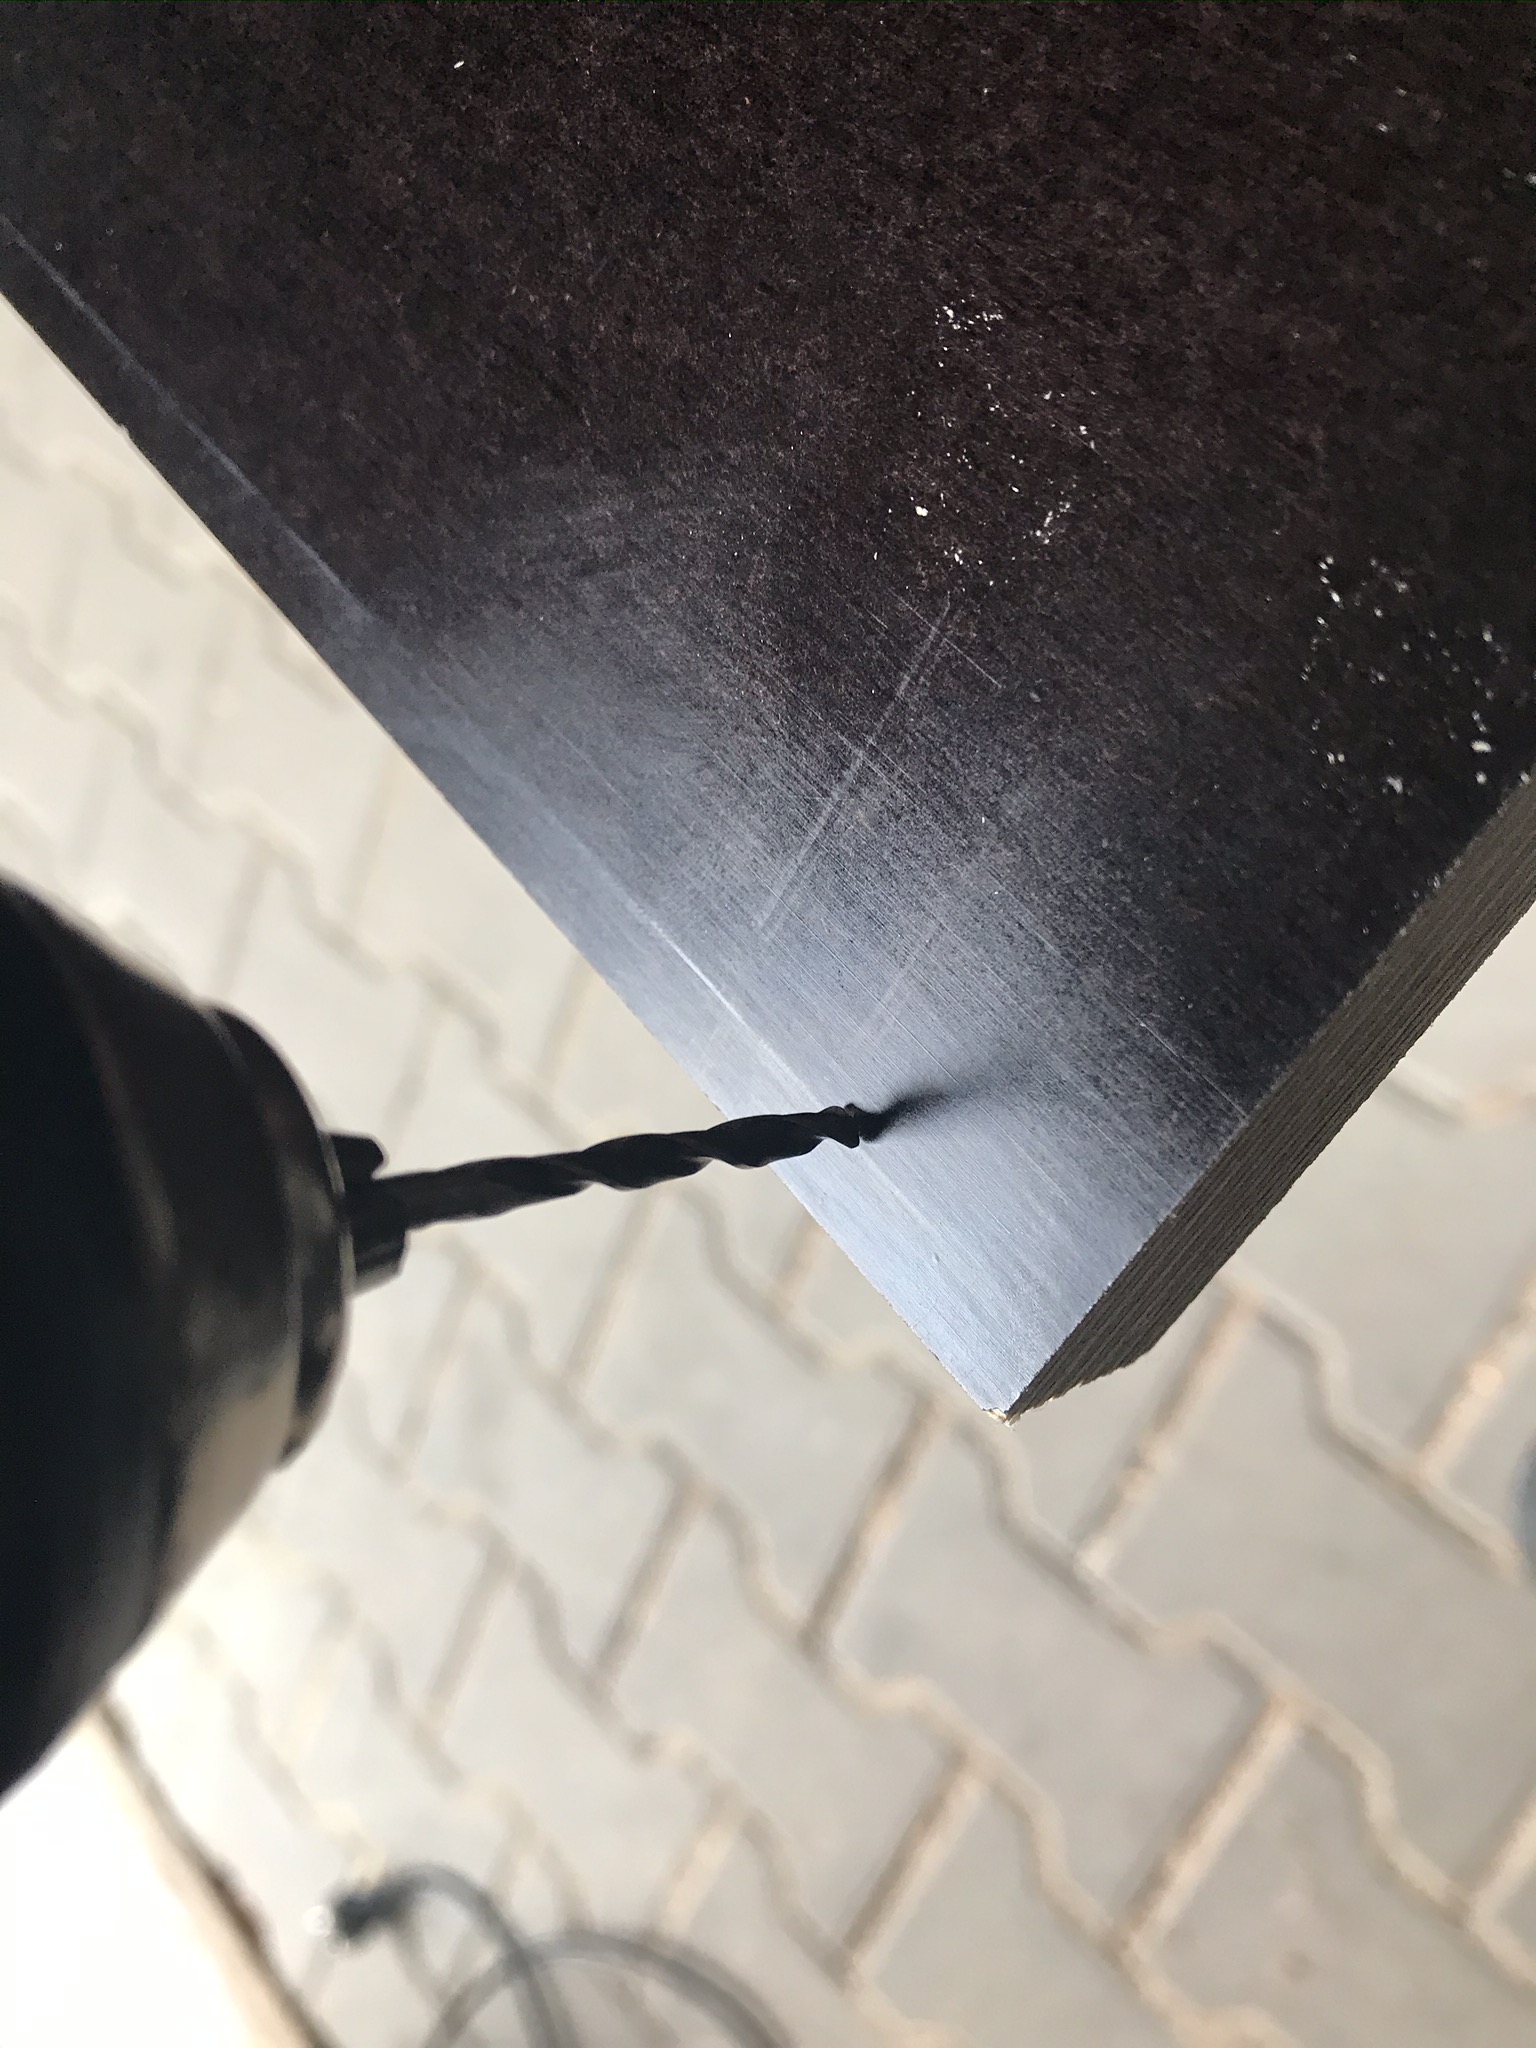
You can saw out the inner area of the cut-out, where there is still the full 18 mm of material thickness in the board, with a jigsaw*. To do this, simply drill a hole at any corner. Thats the point where you can start sawing with the jigsaw.
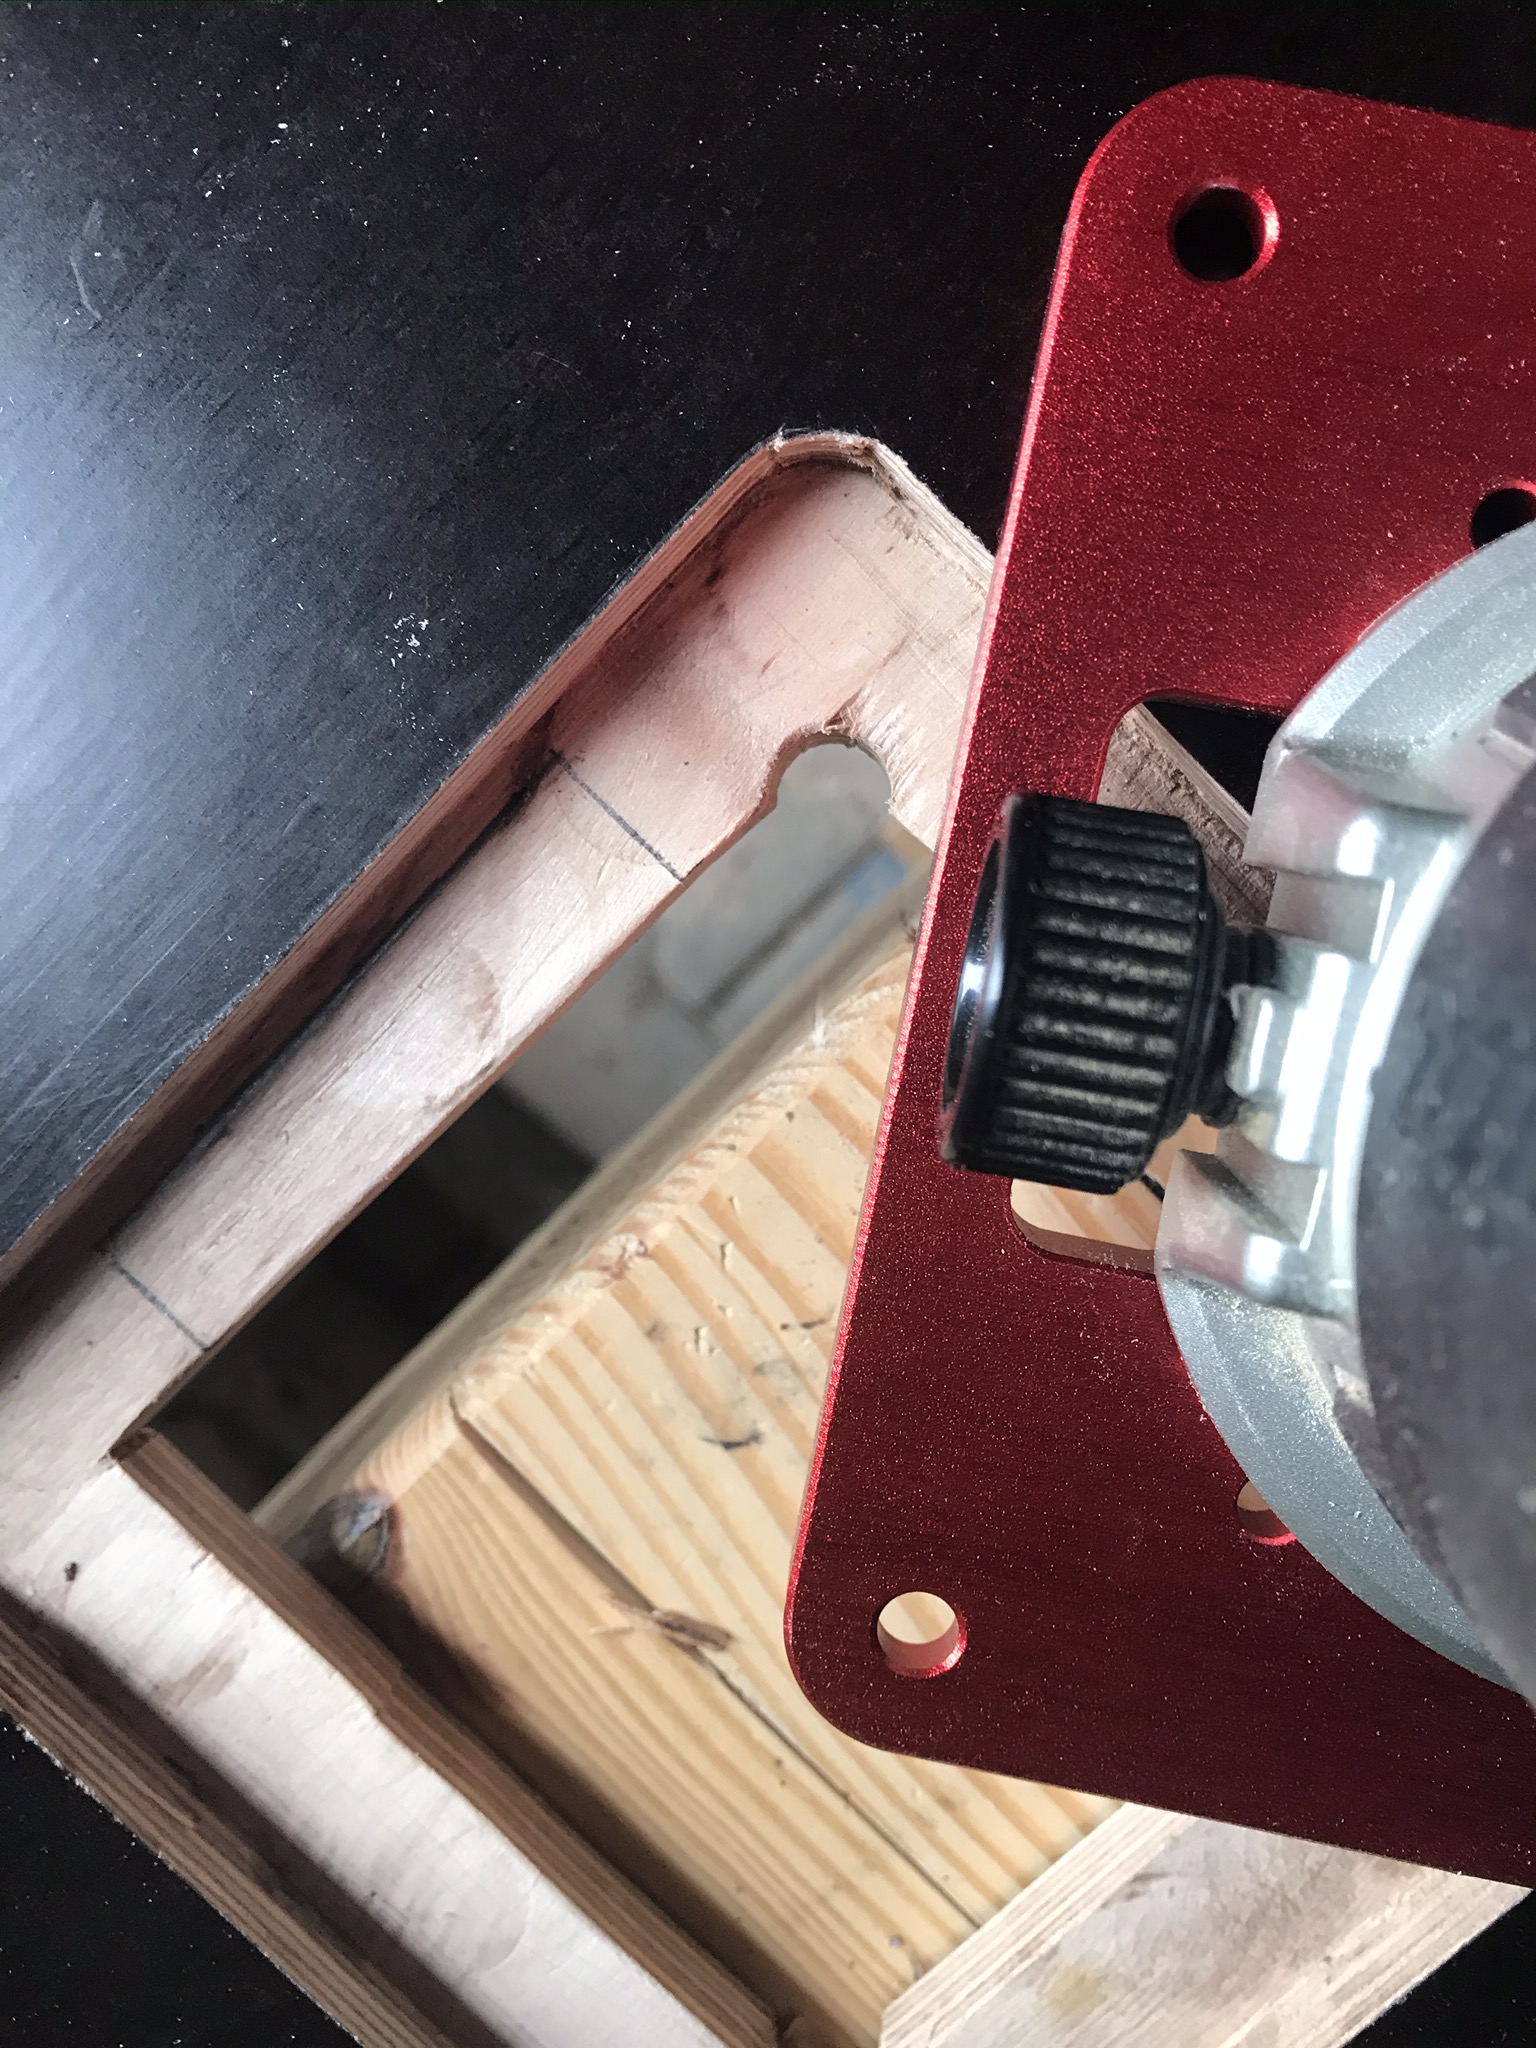
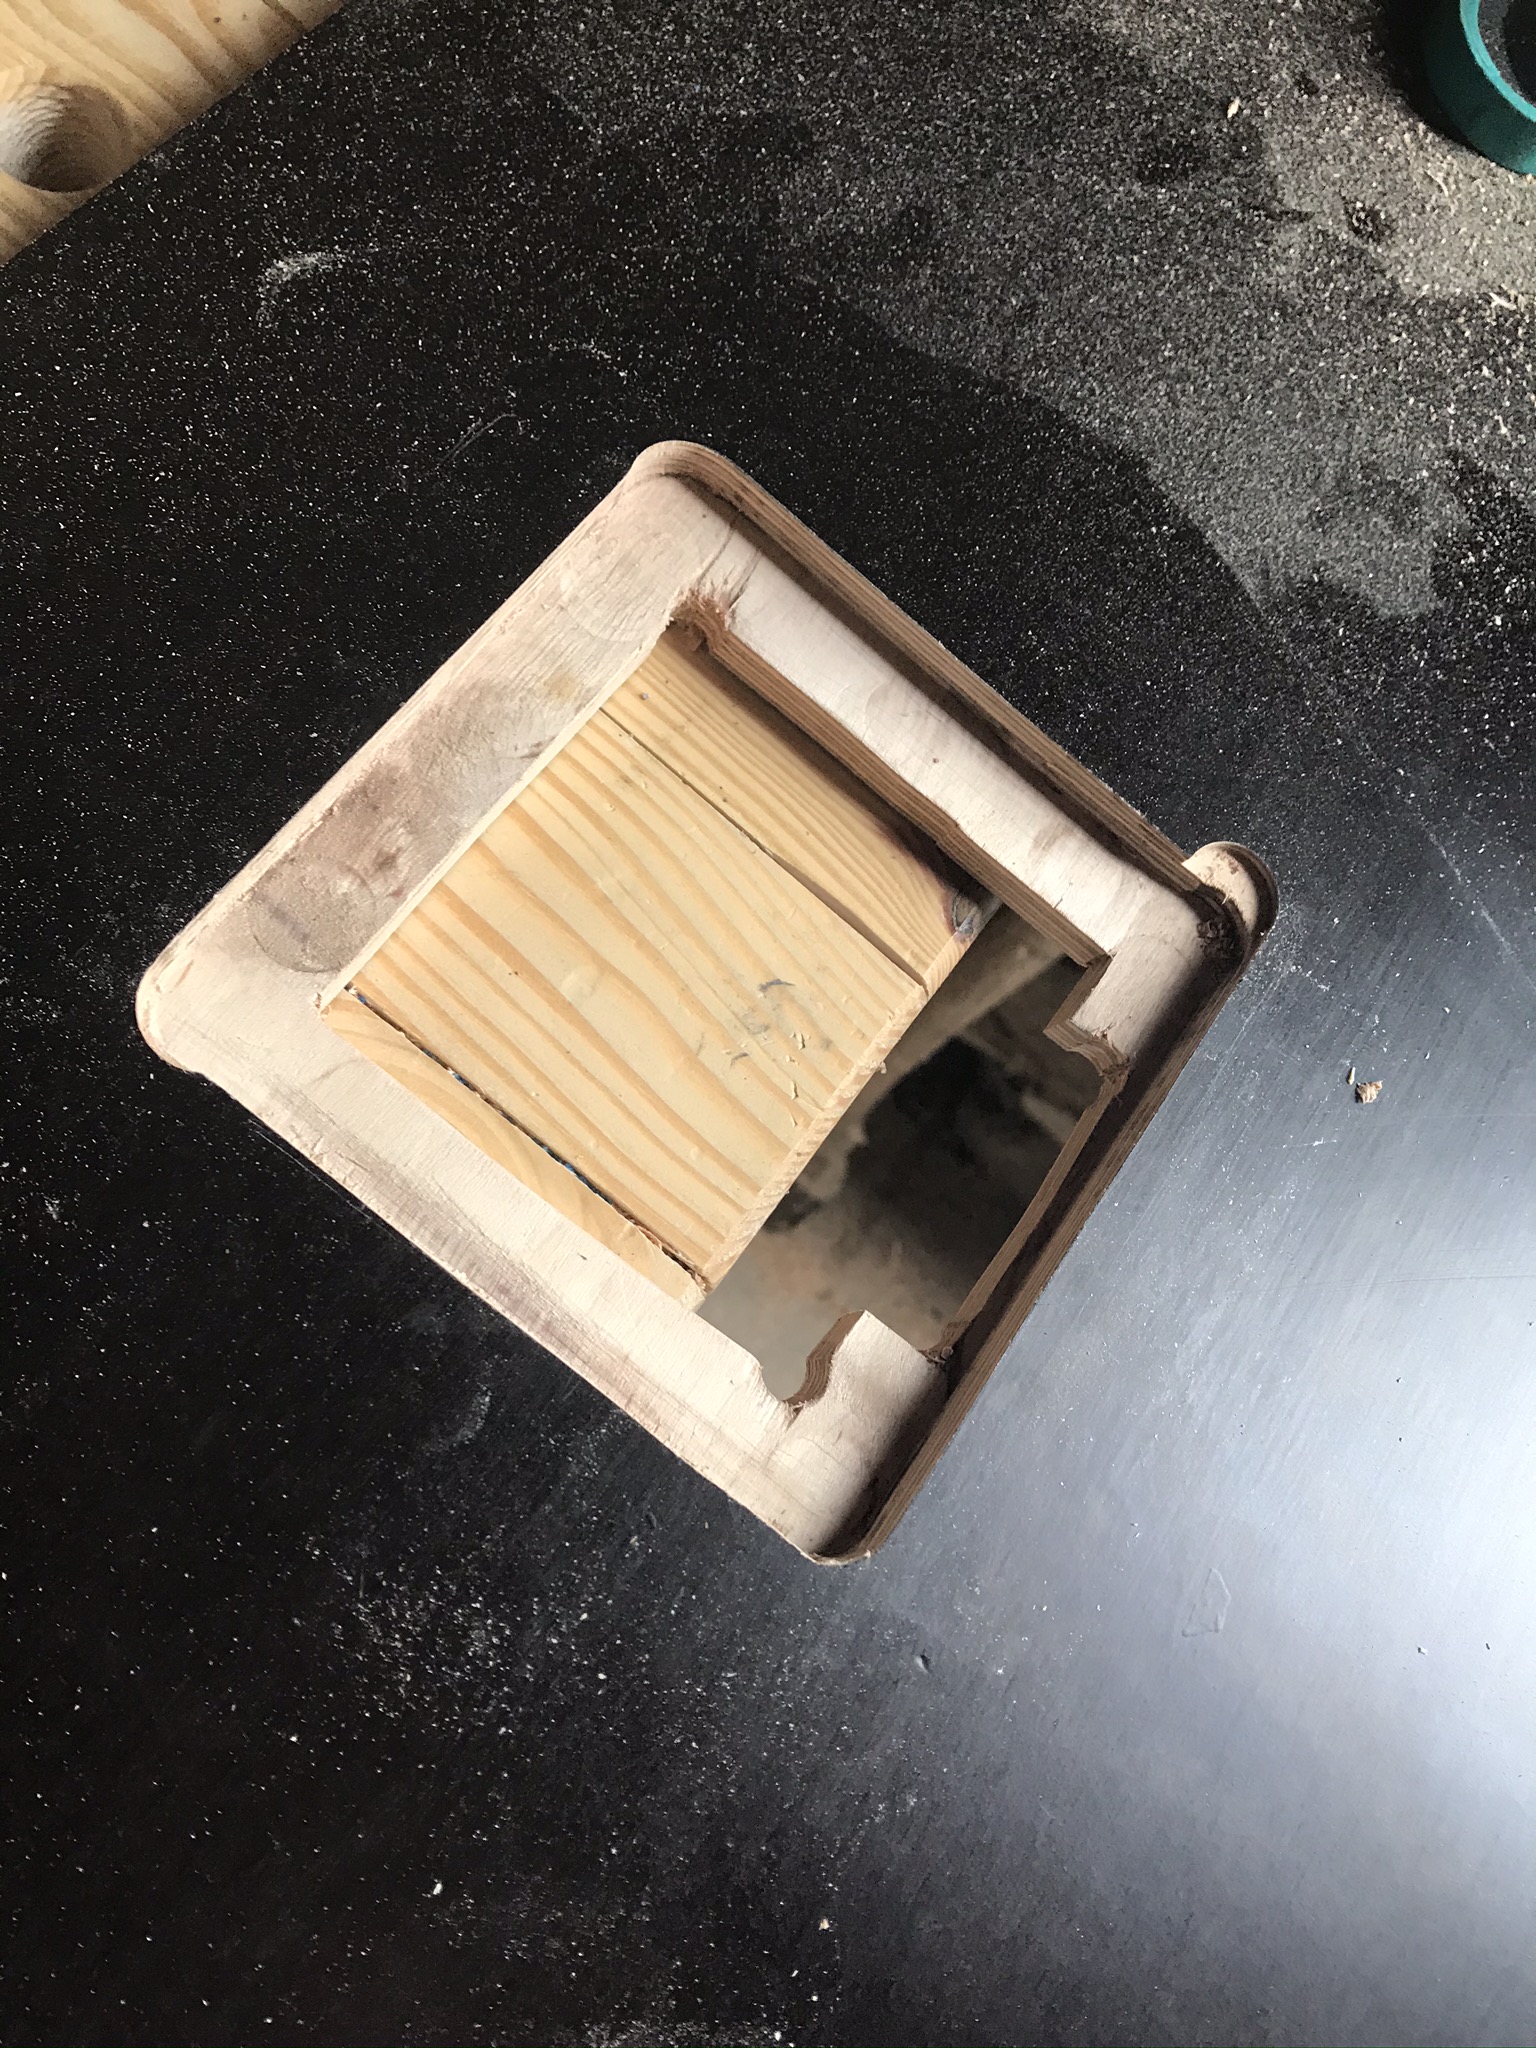
In case you use the same insert plate*, you should cut out a small recess on one side of the support surface. Otherwise the adjustment wheel on the milling cage will prevent the insertion of the insertion plate.

Assembling the parts of the router table
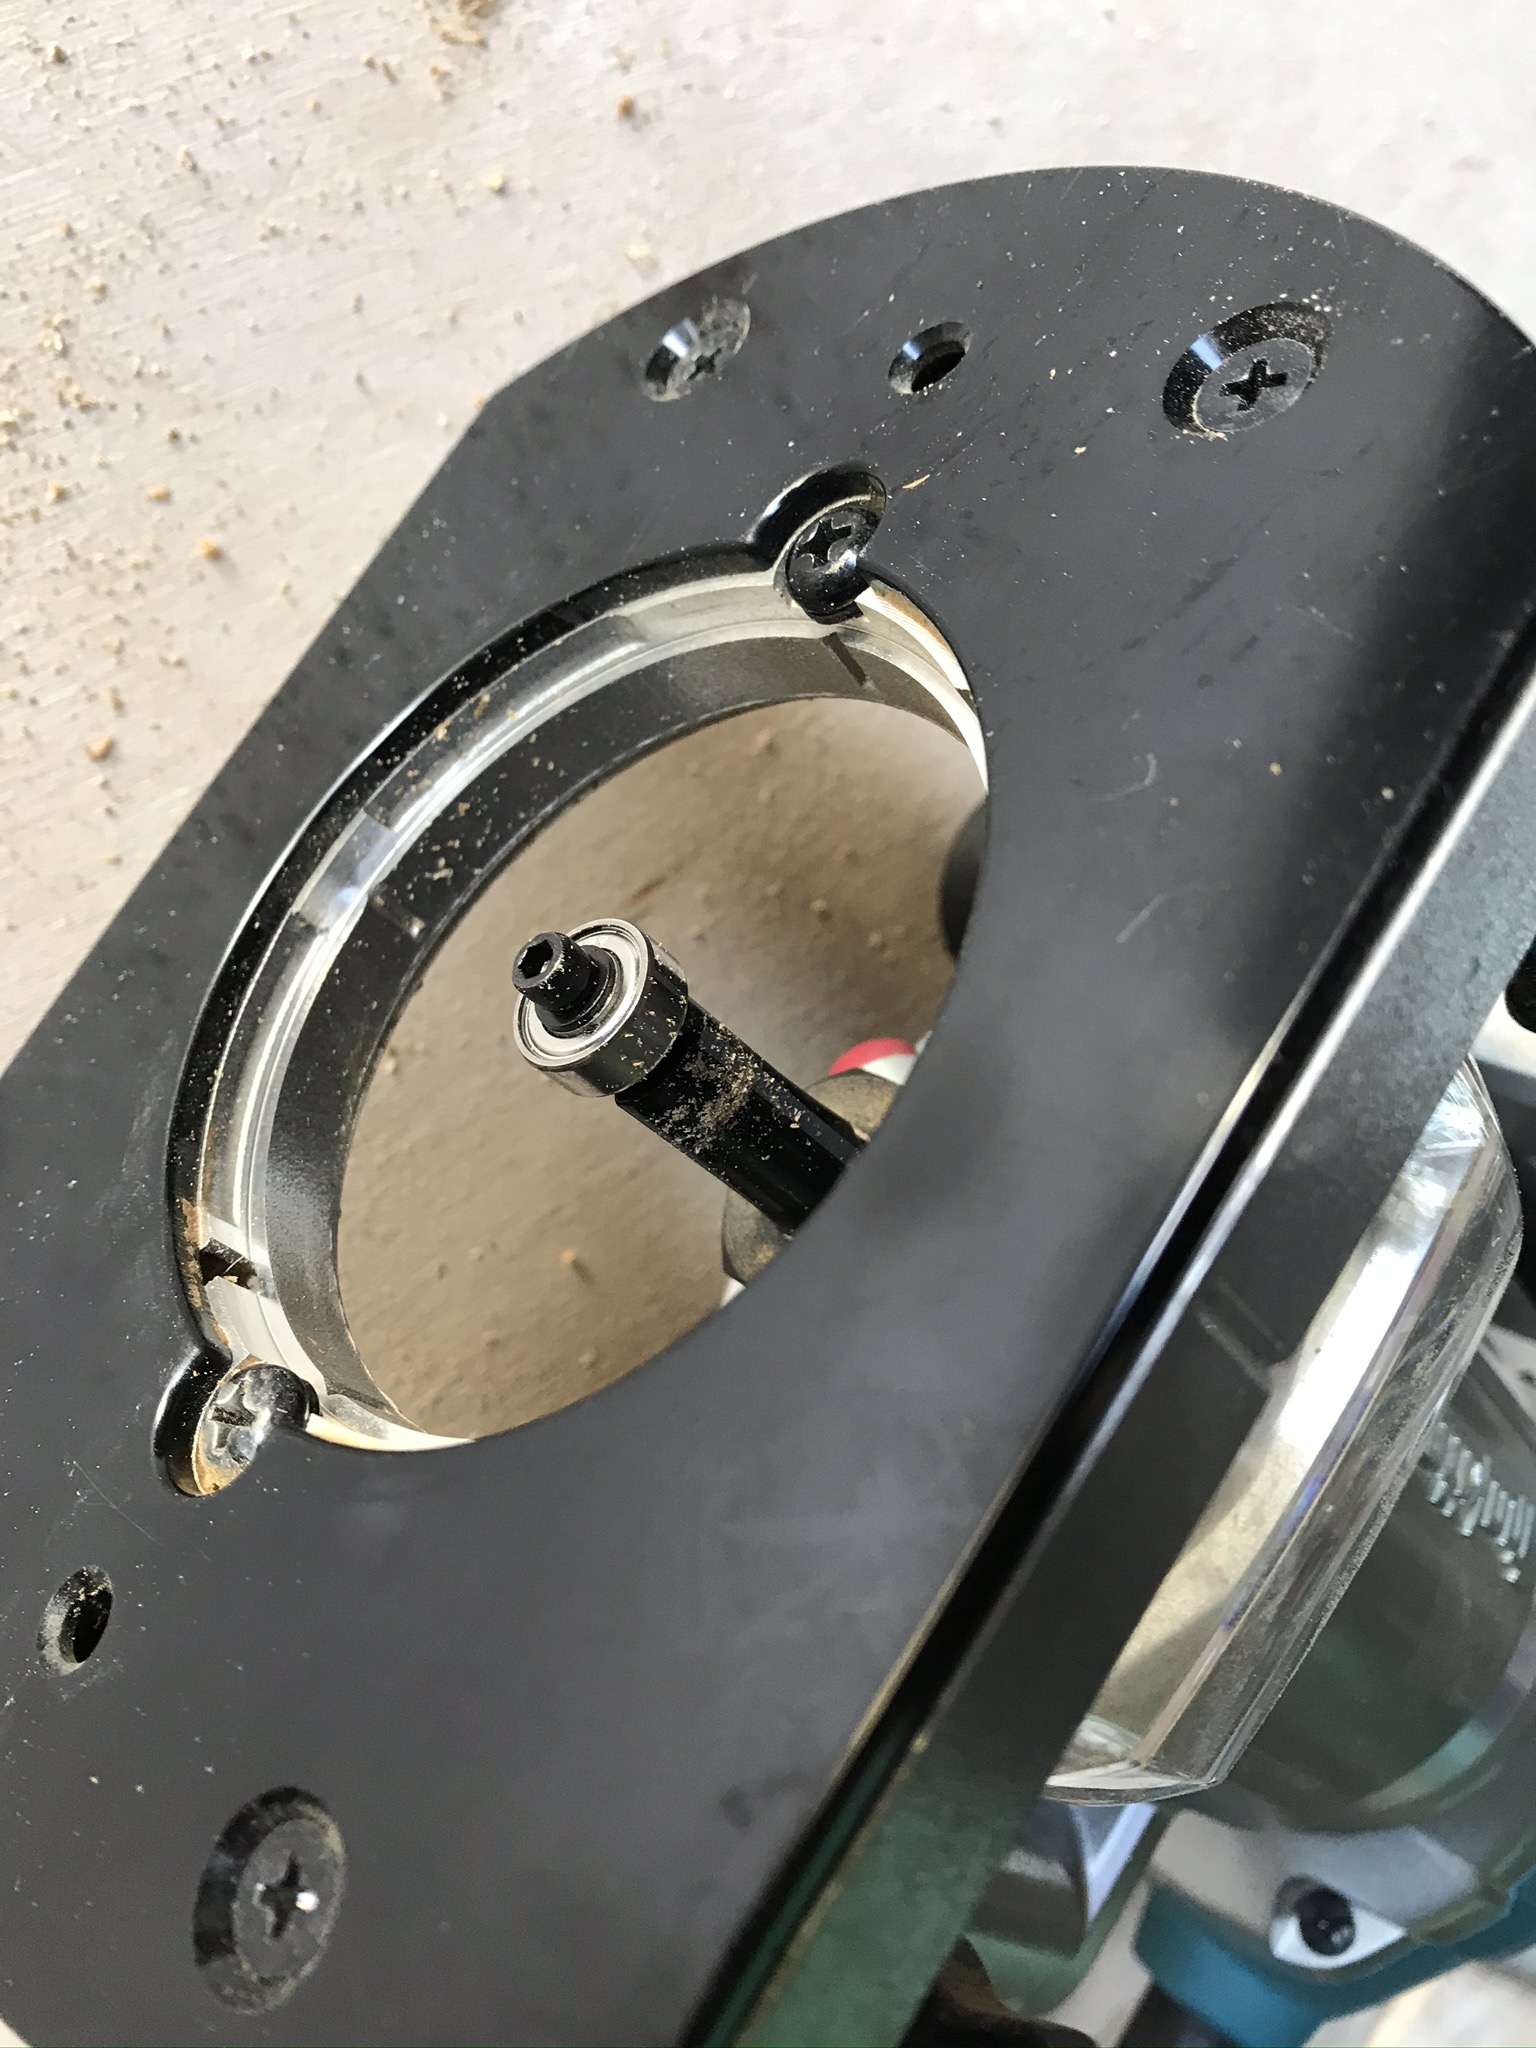
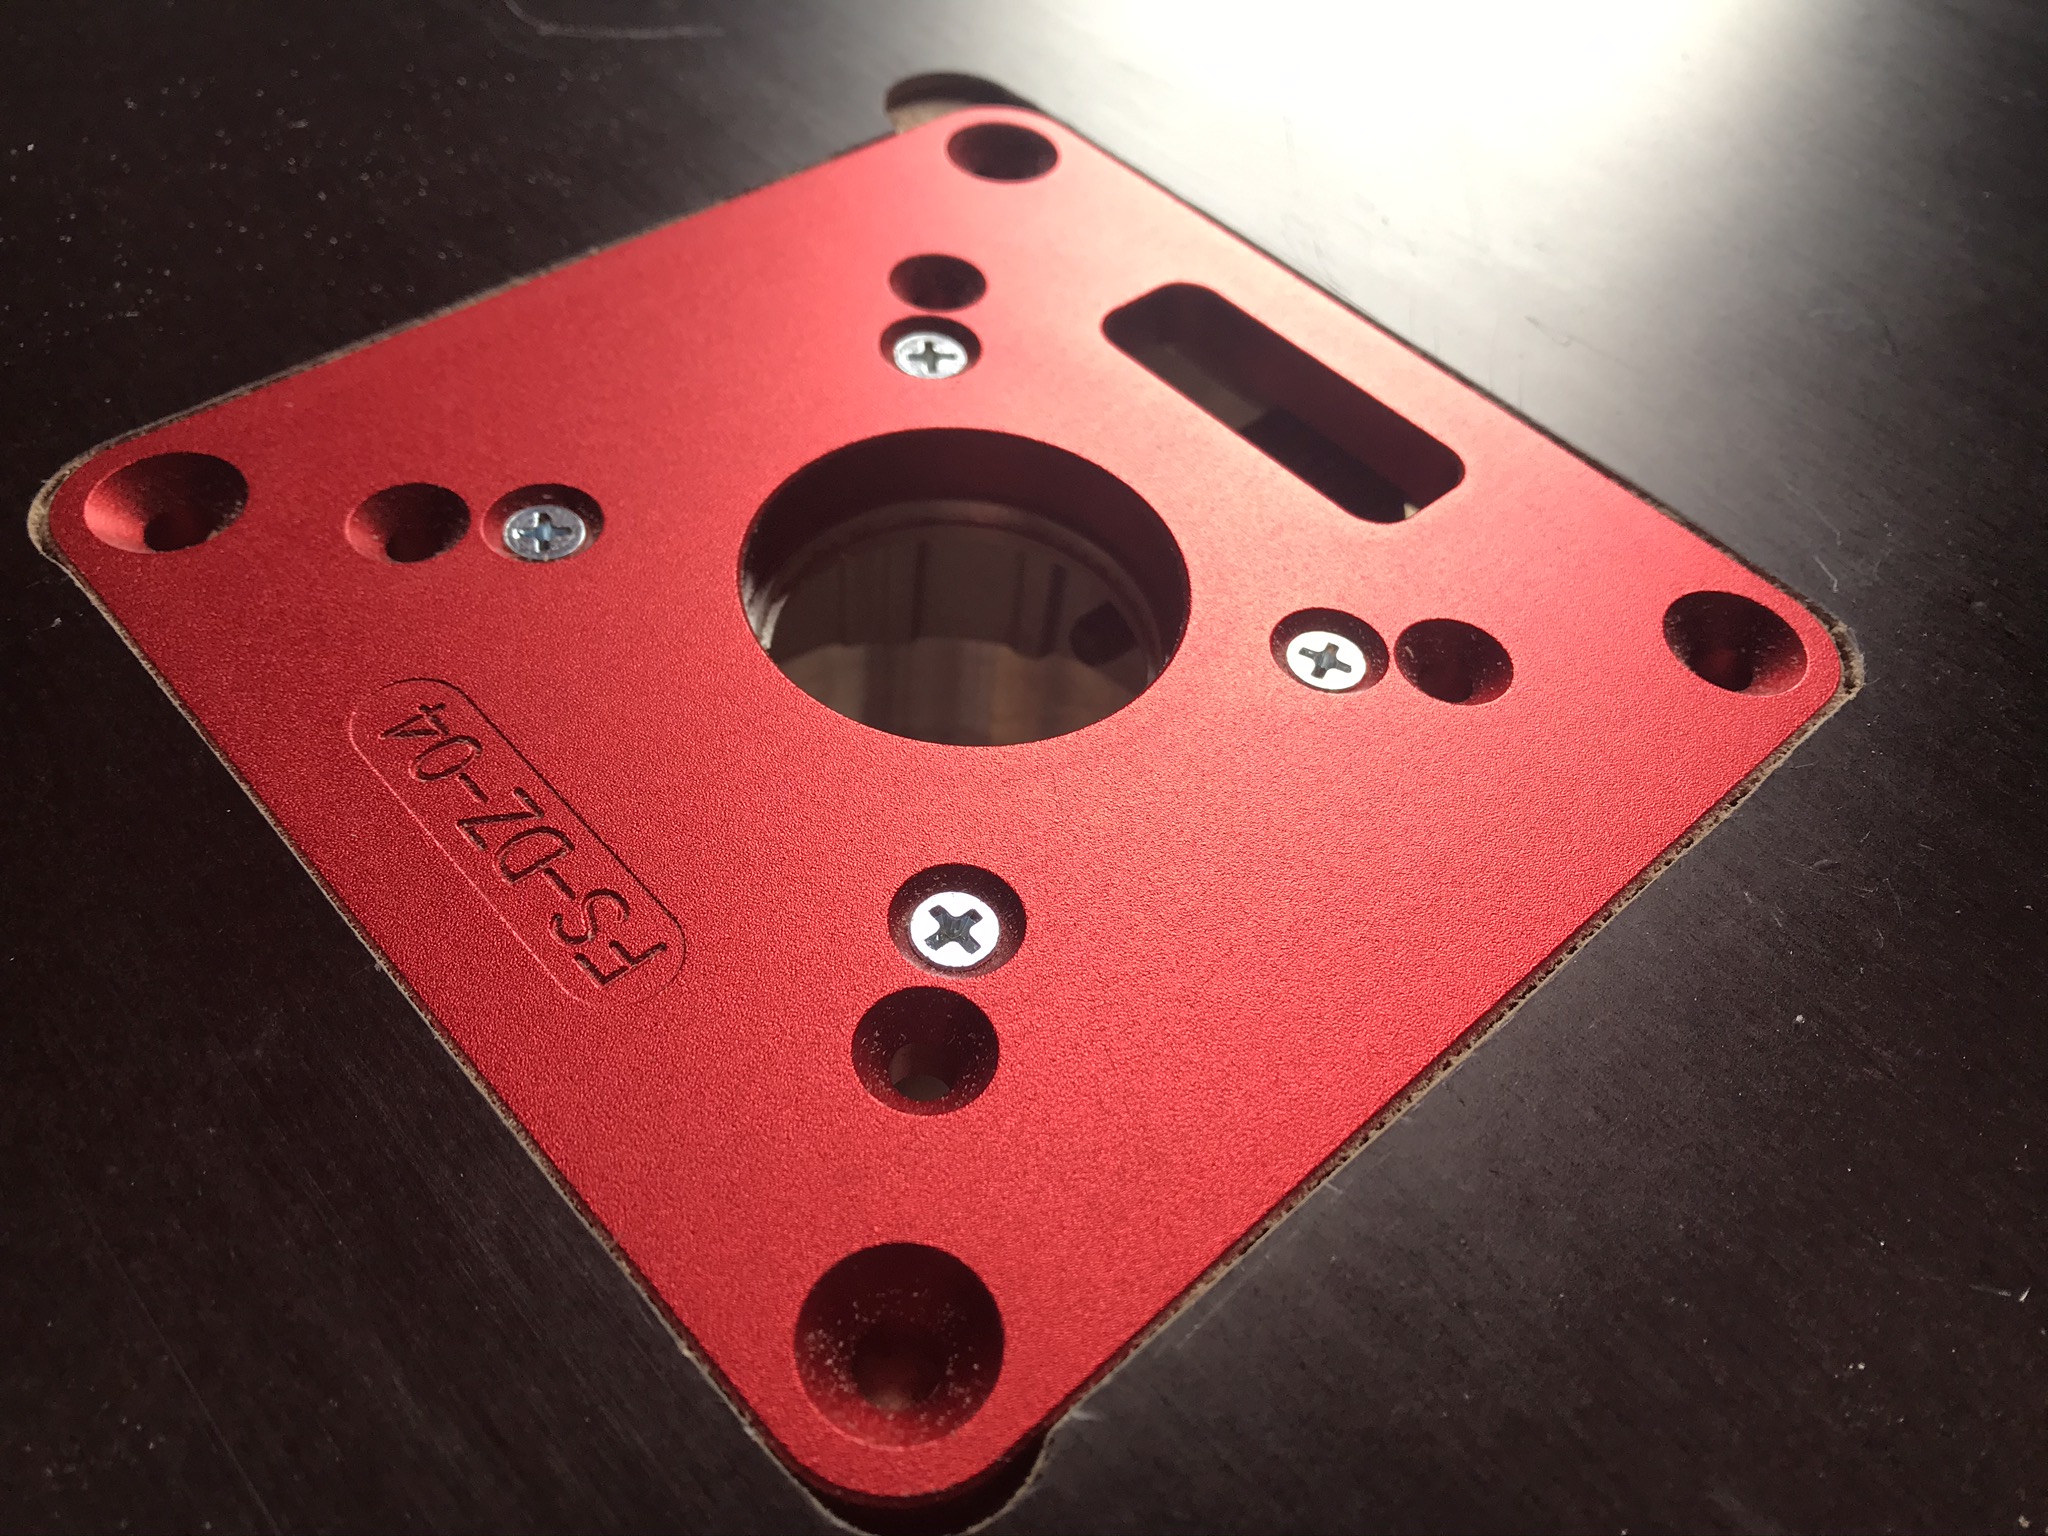
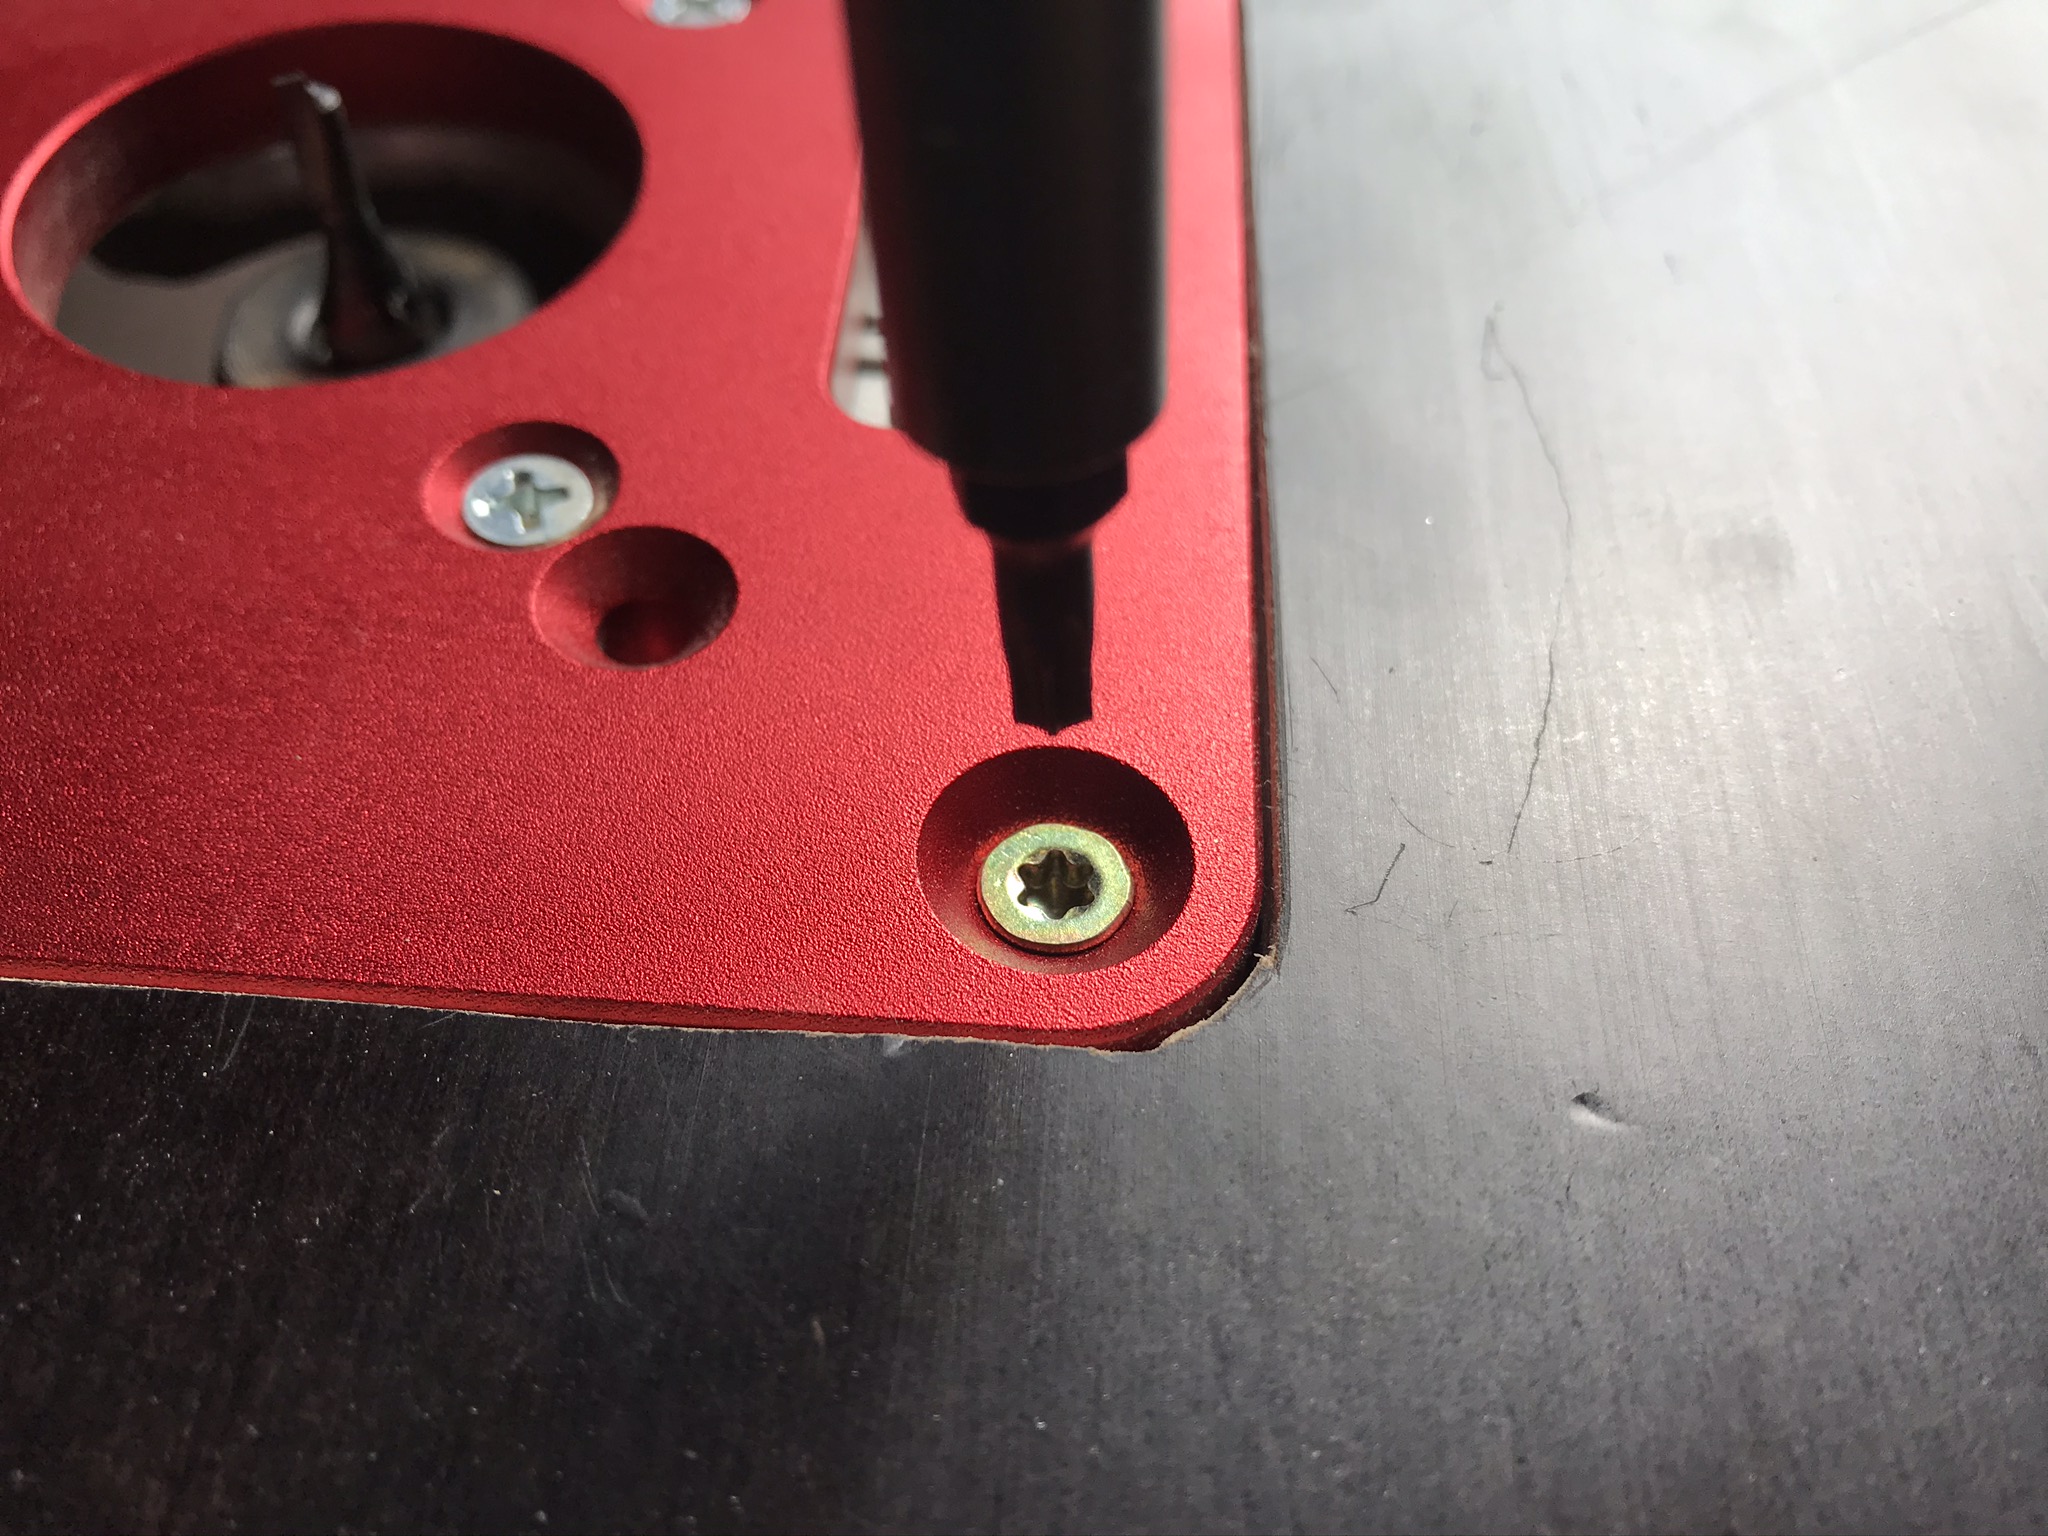
Then you can insert the insert plate* including the milling basket and screw it firmly into the film faced plywood plate at the outer holes of the milling plate.
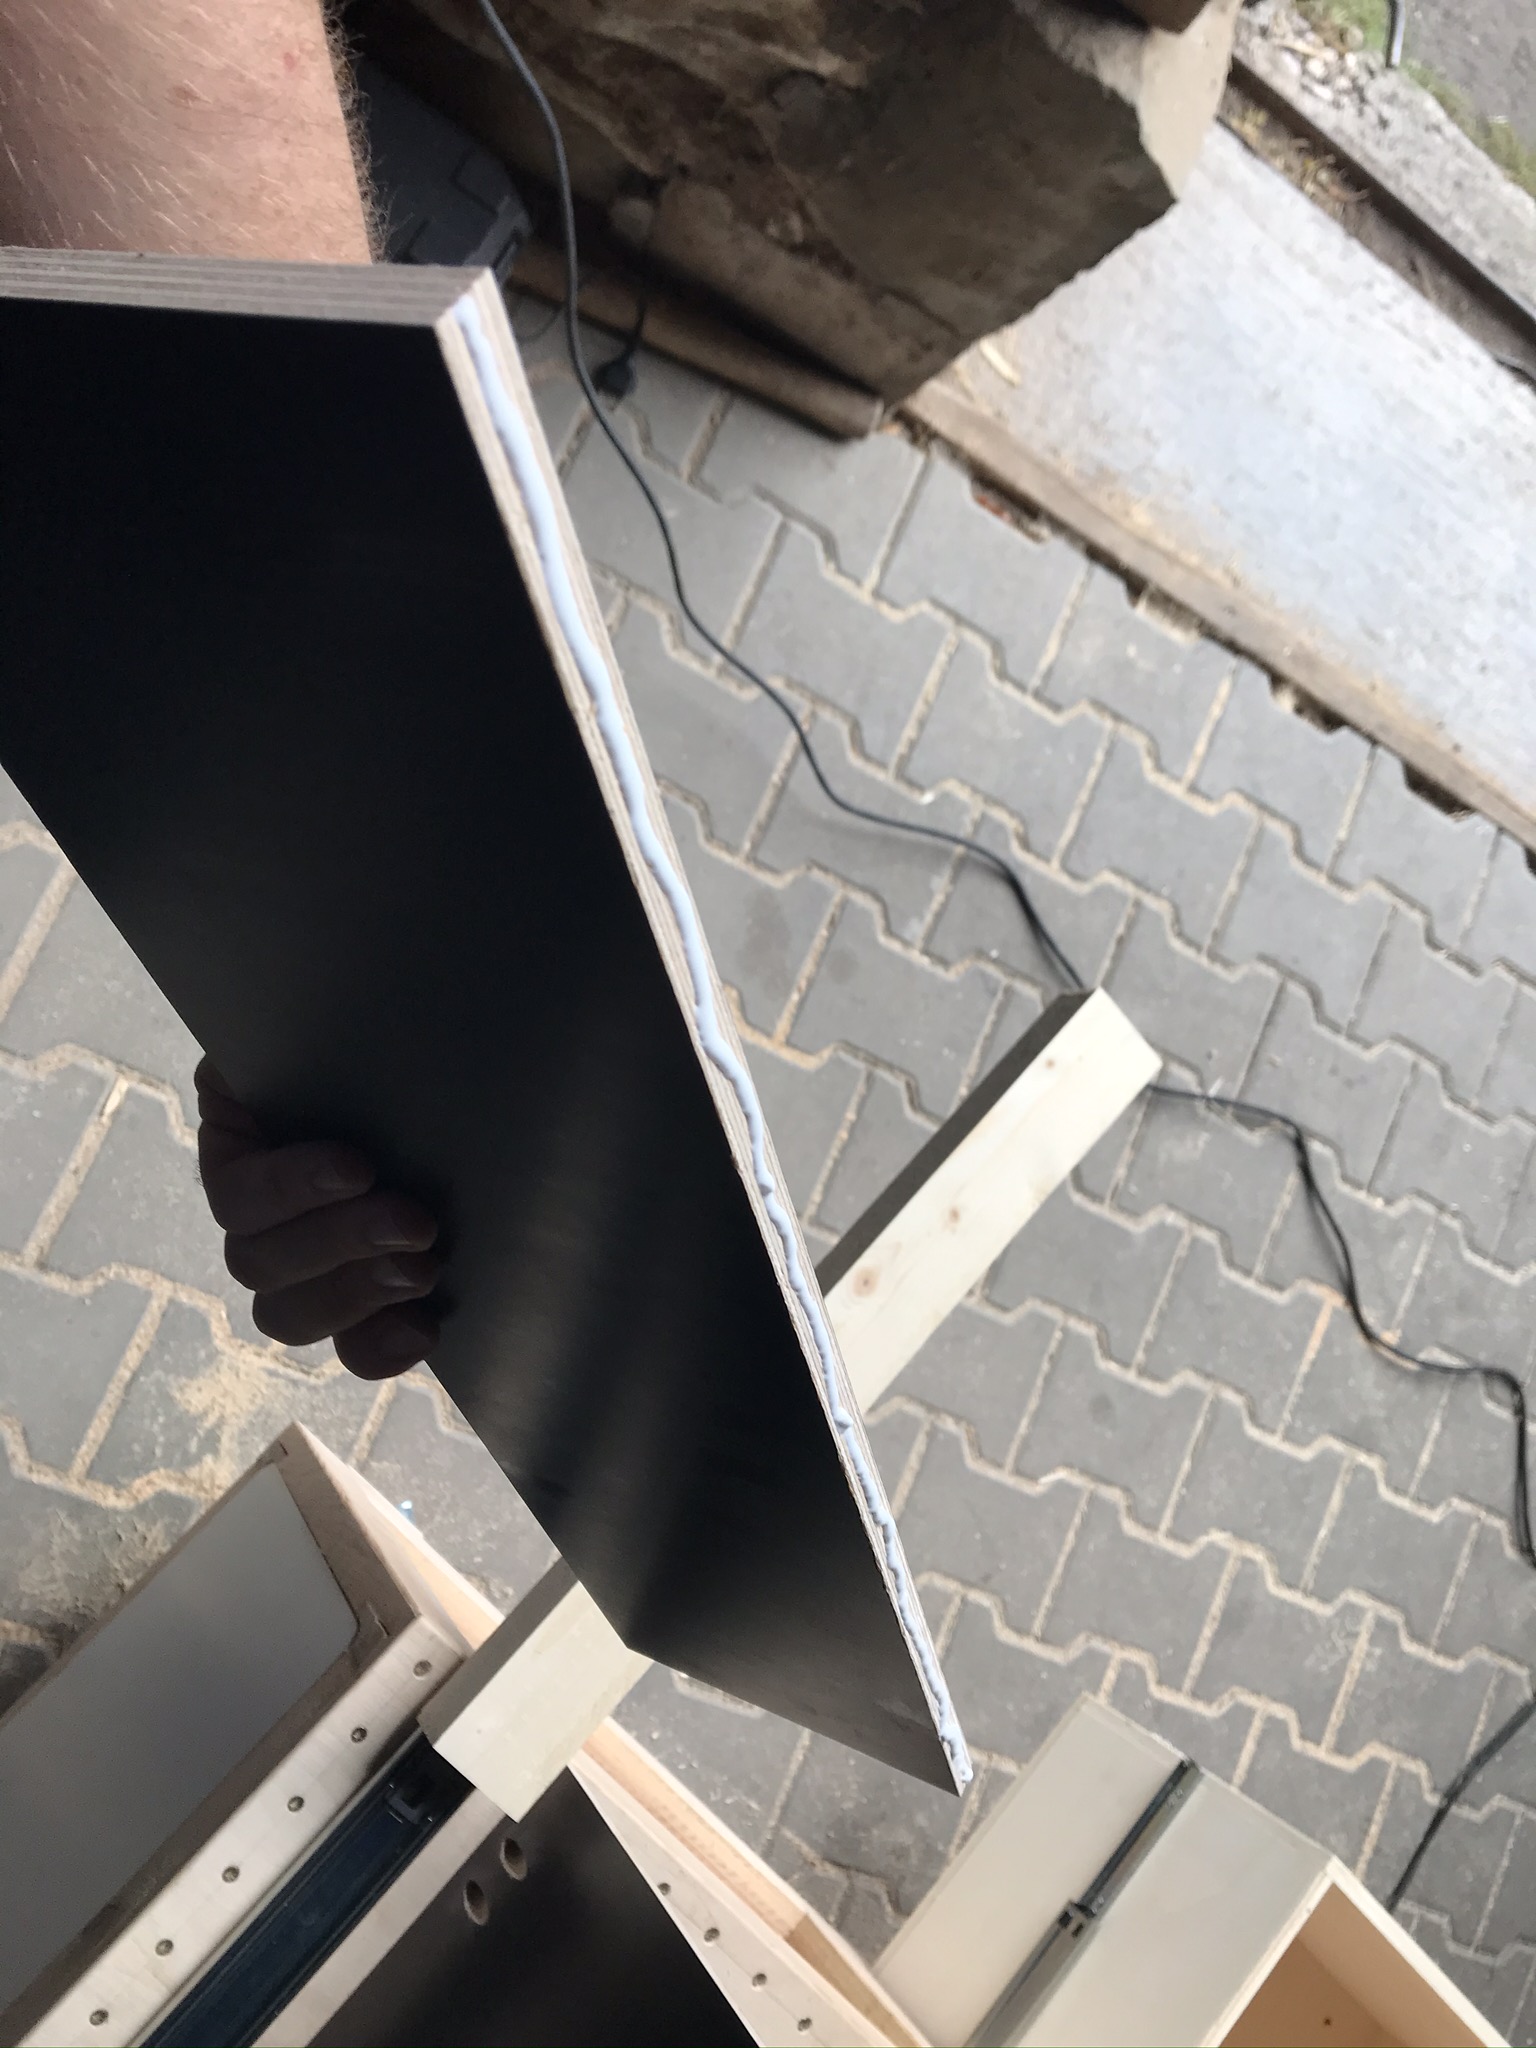
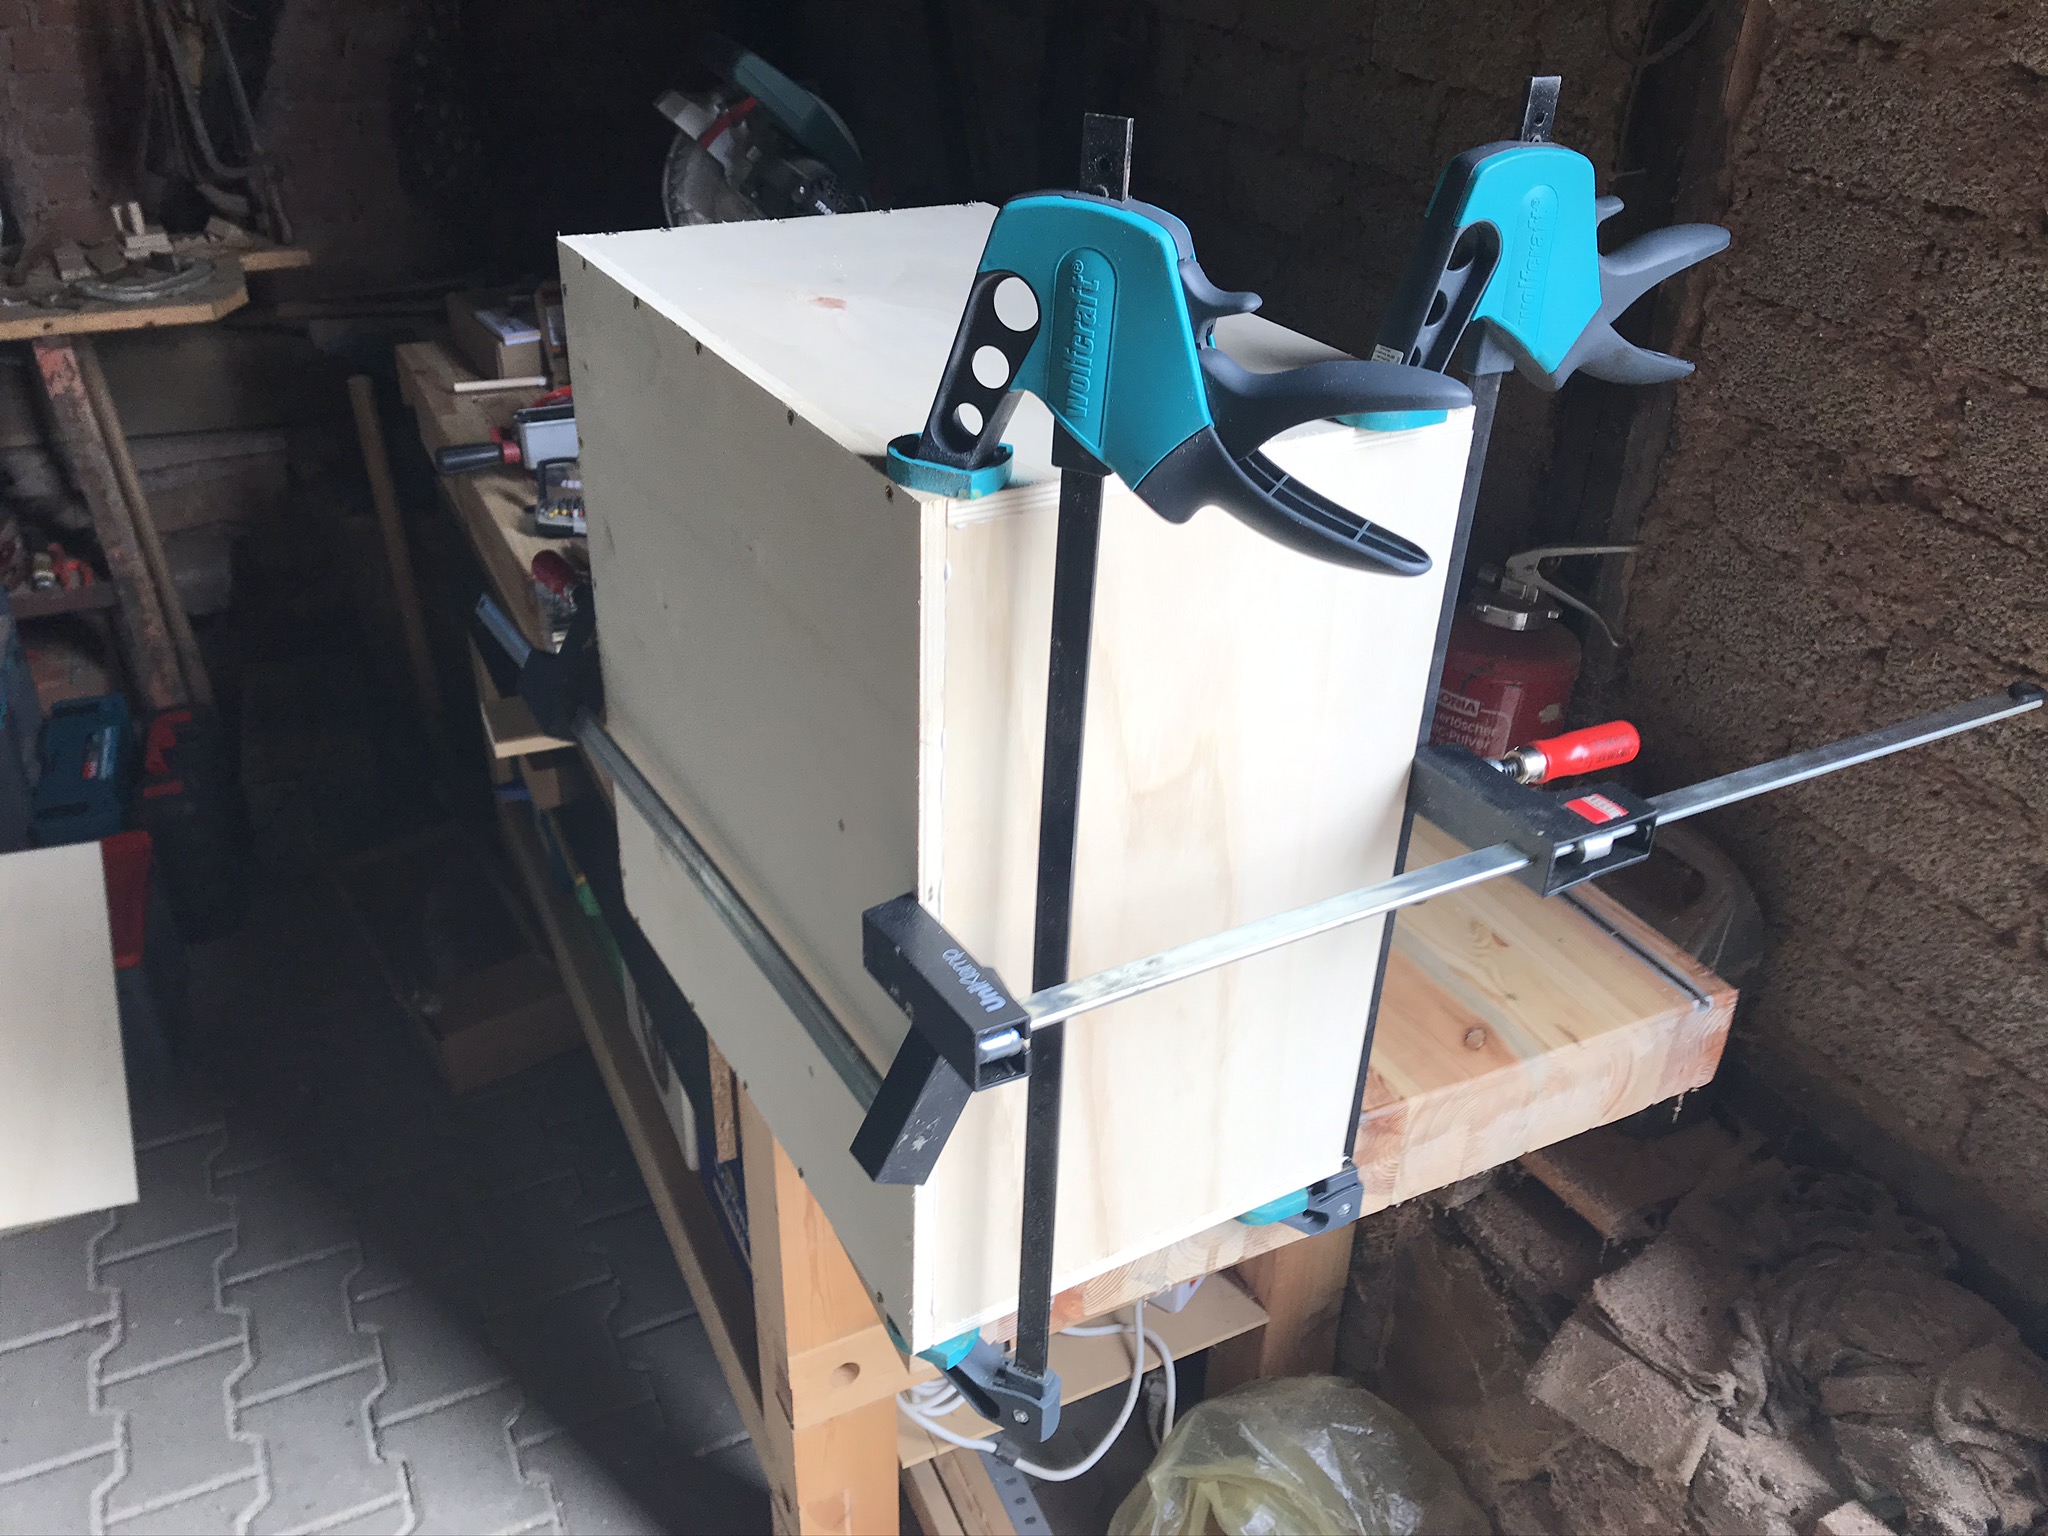
Now you can connect the upper 18mm thick film faced plywood (phenolic plywood) with the 12mm side walls of the router table. I screwed the top plate butt-jointed to the side walls.
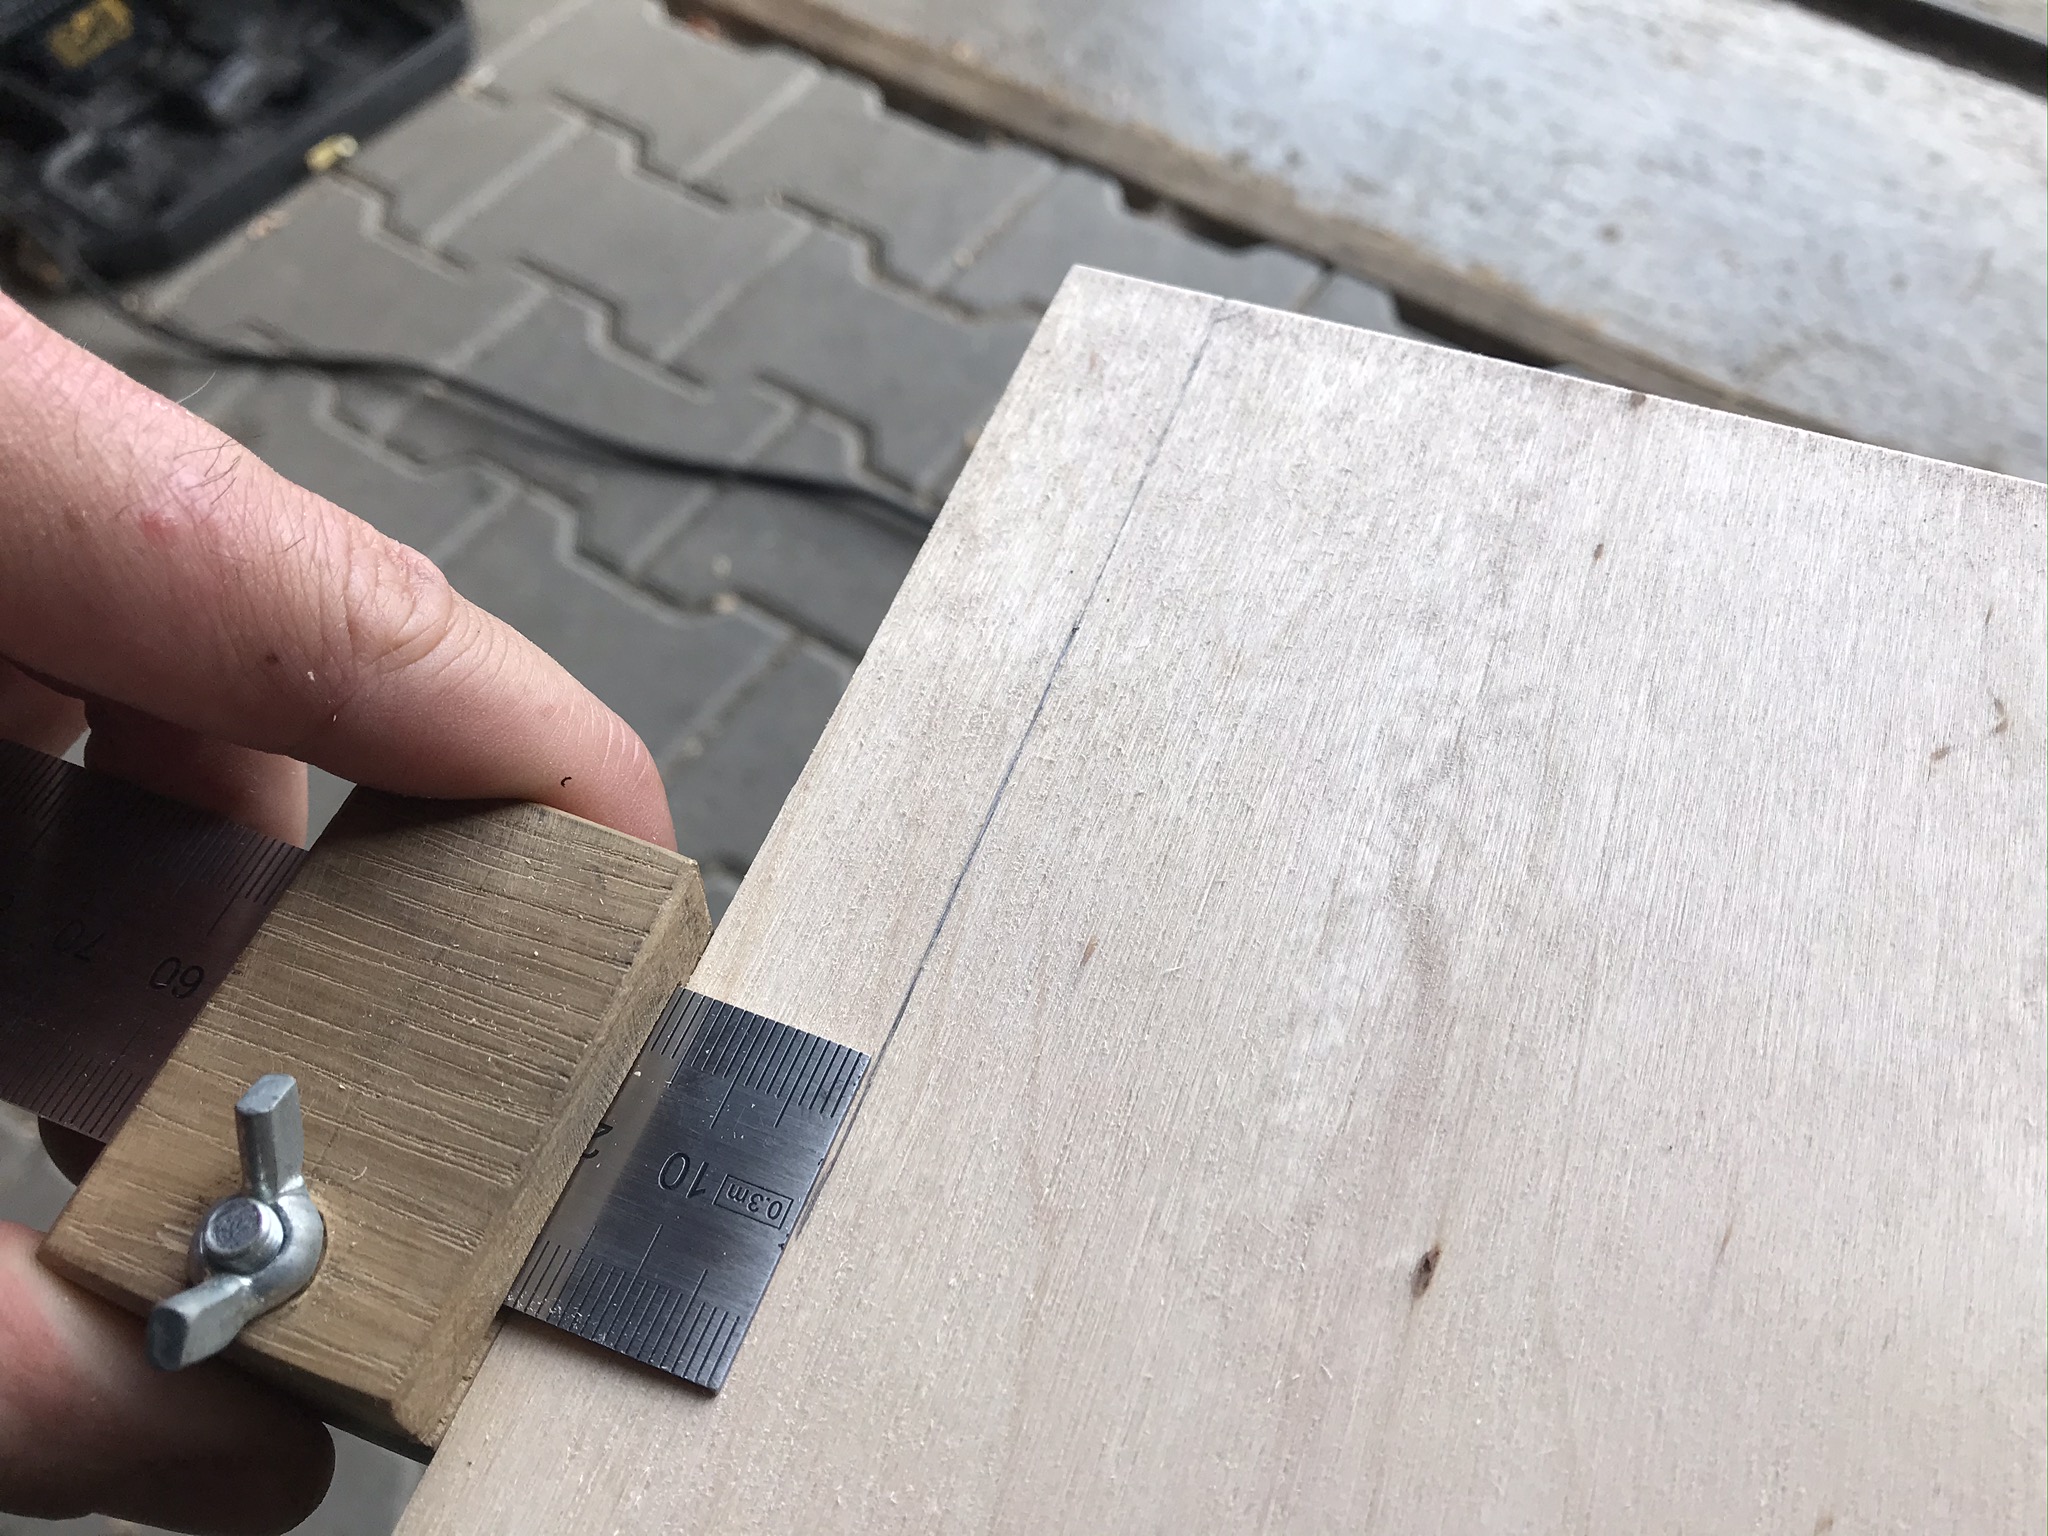
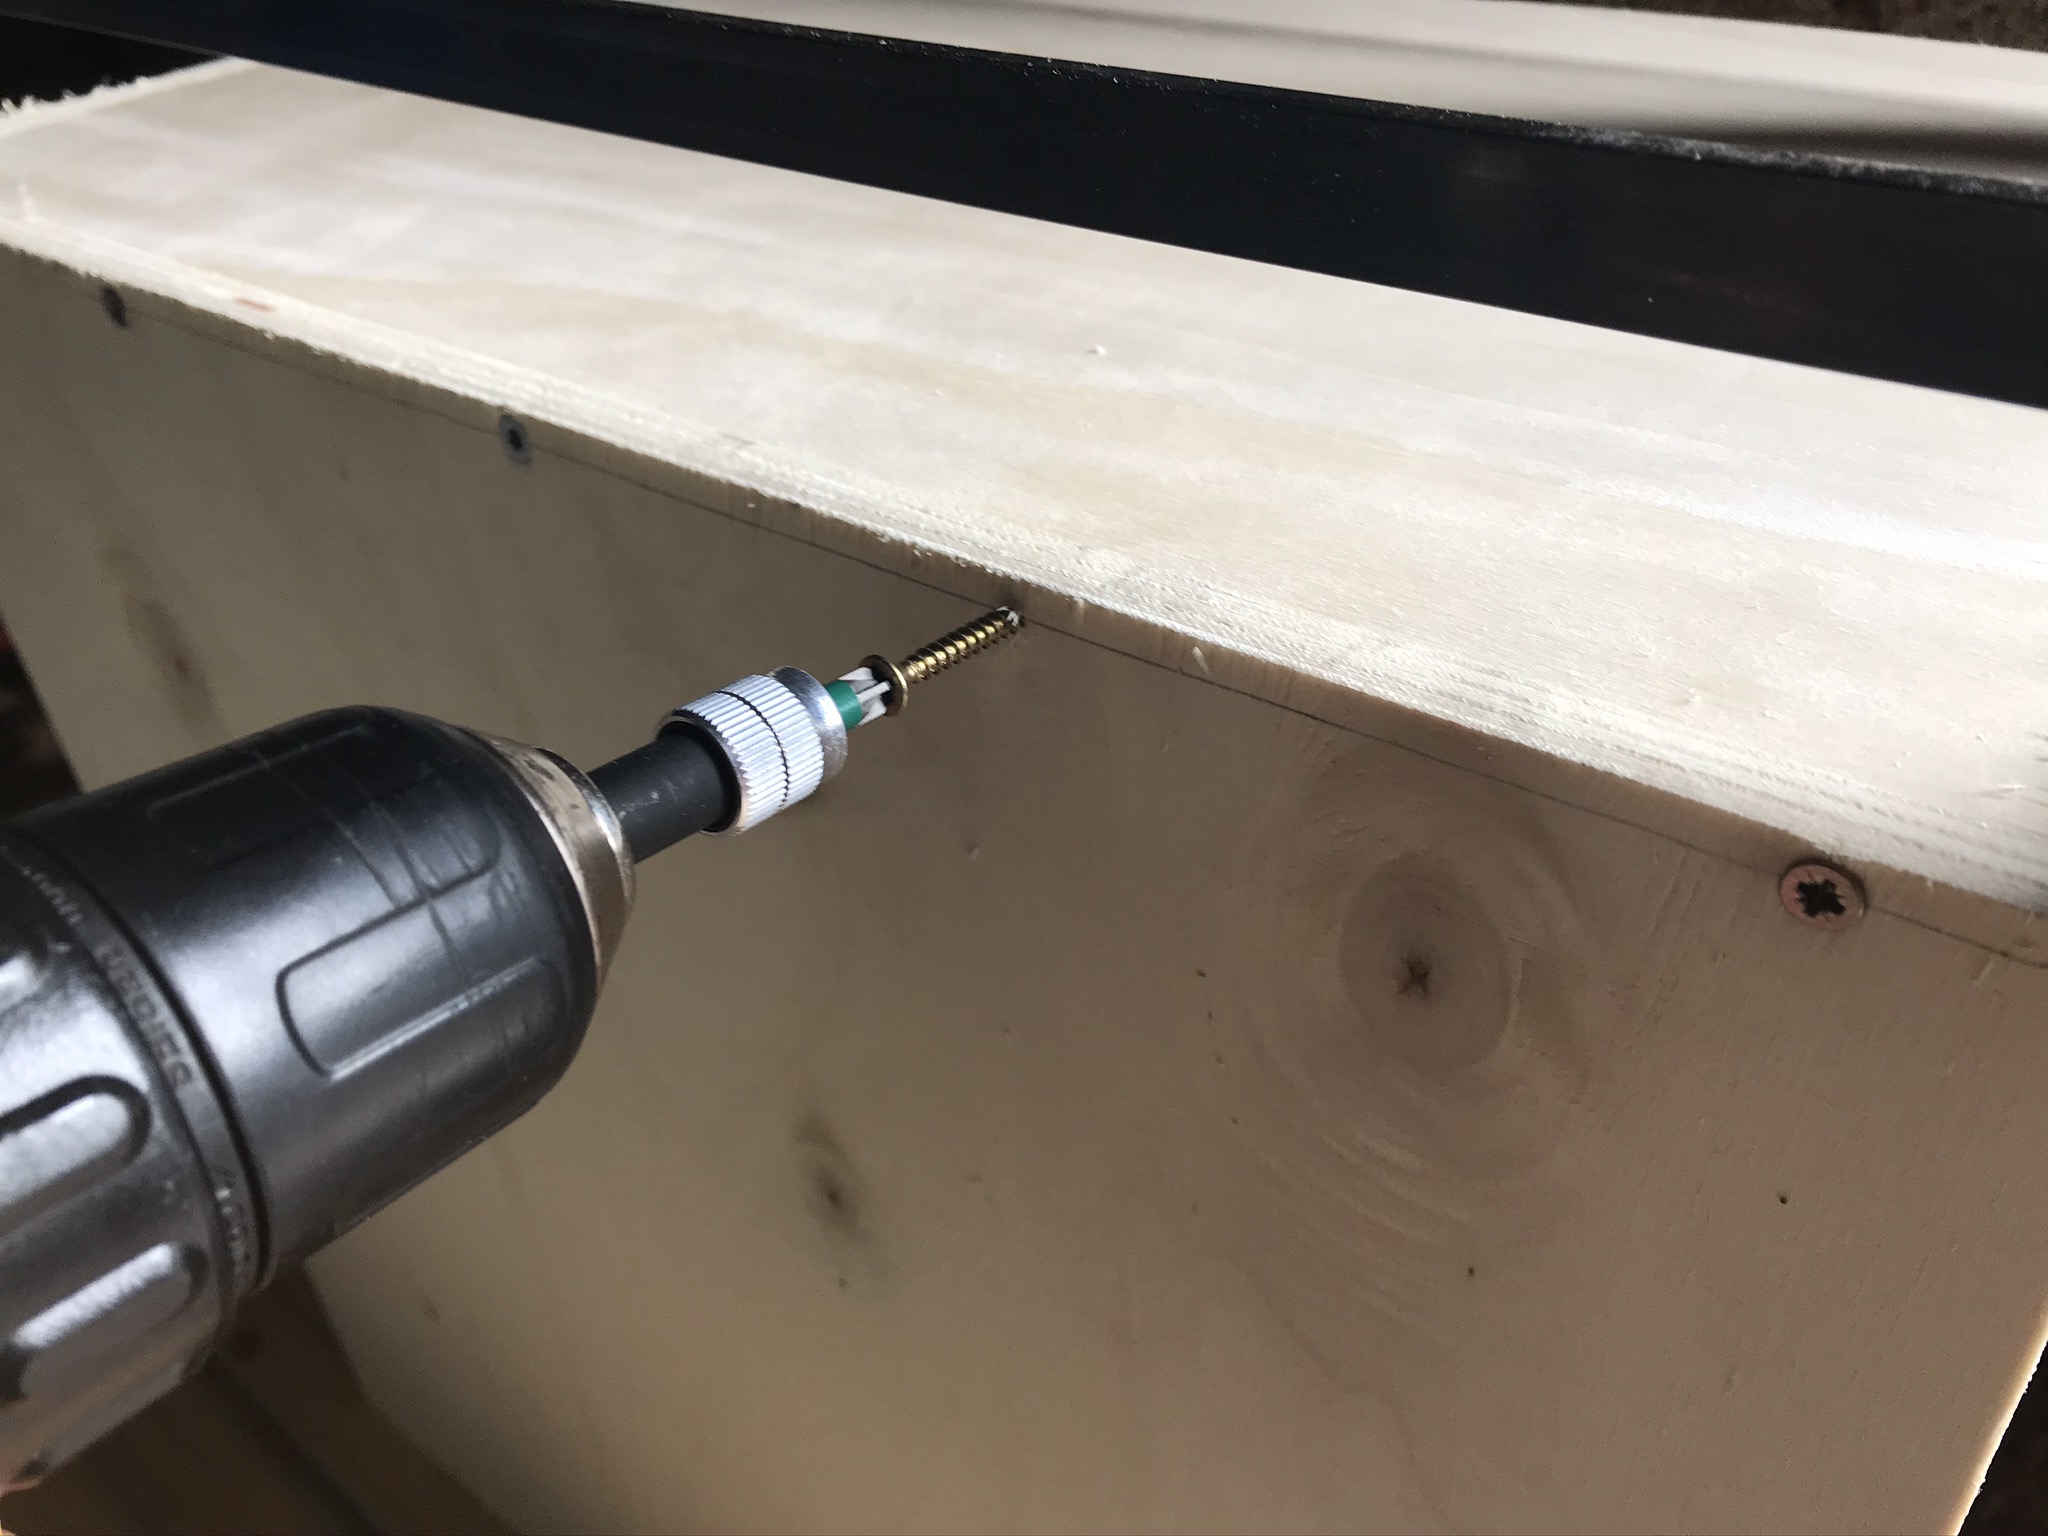
Draw a line 6mm from the outer edge of the top plate of the router table with a rule. This will mark the centre of the 12mm plate that will be butt-screwed to the outside. Again, be sure to pre-drill (3mm) and countersink the hole with a countersink drill bit* so that the screw heads do not protrude. I used 4x35mm wood screws* for the screws.
I used a total of 5 screws per side.
Attach the router table to the base unit
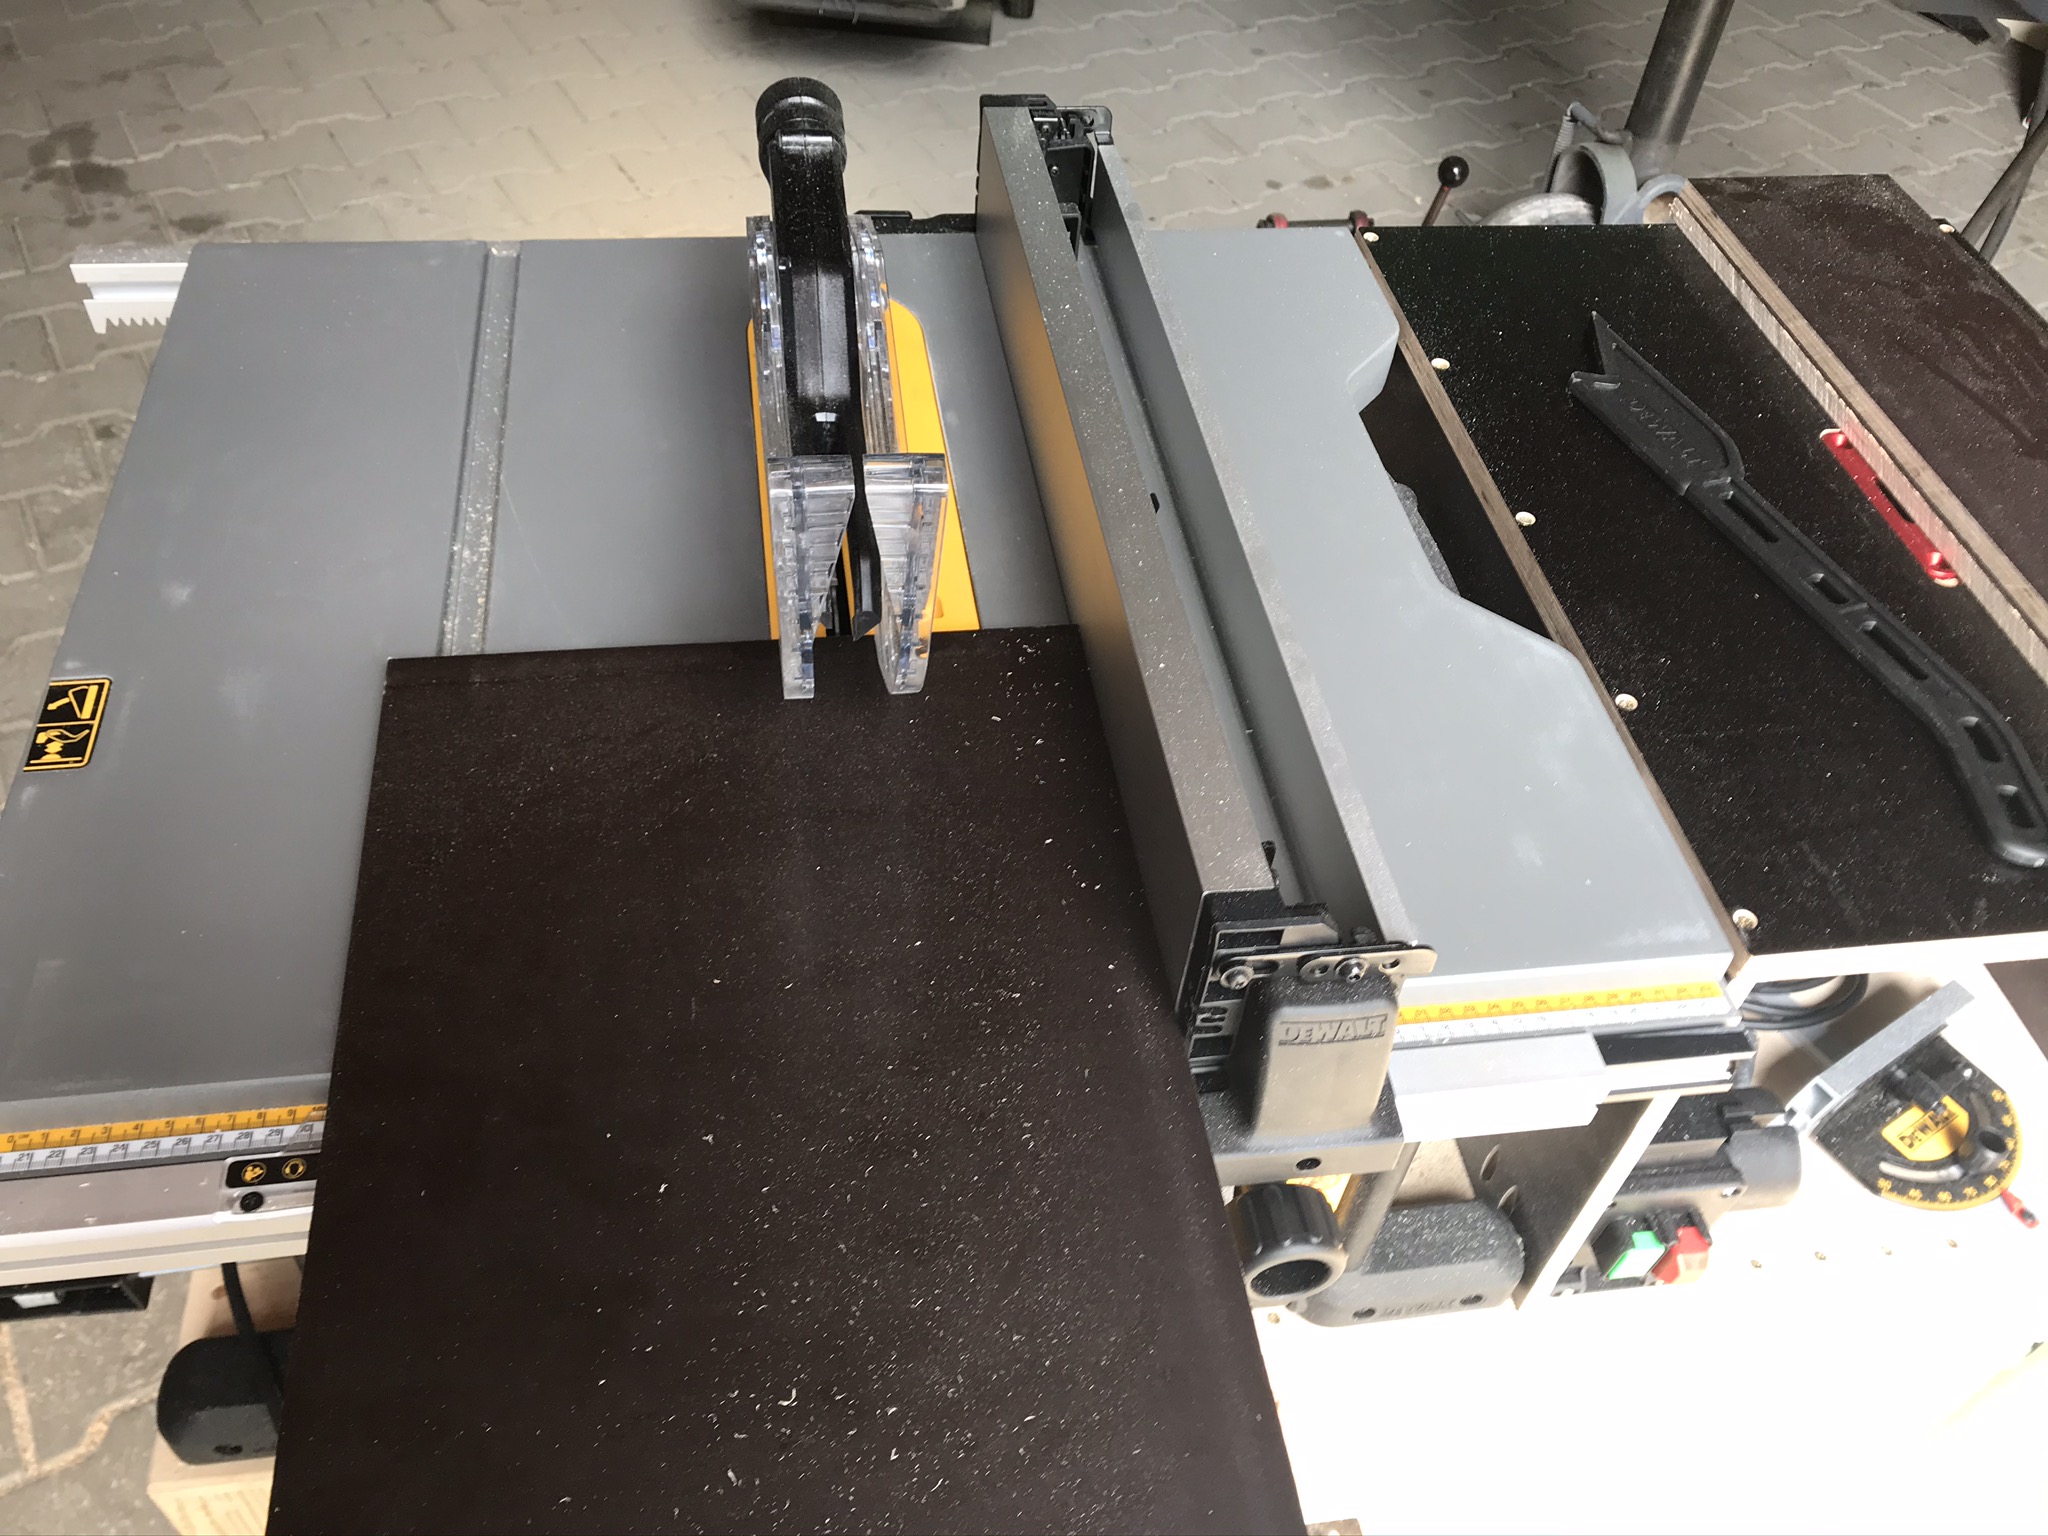
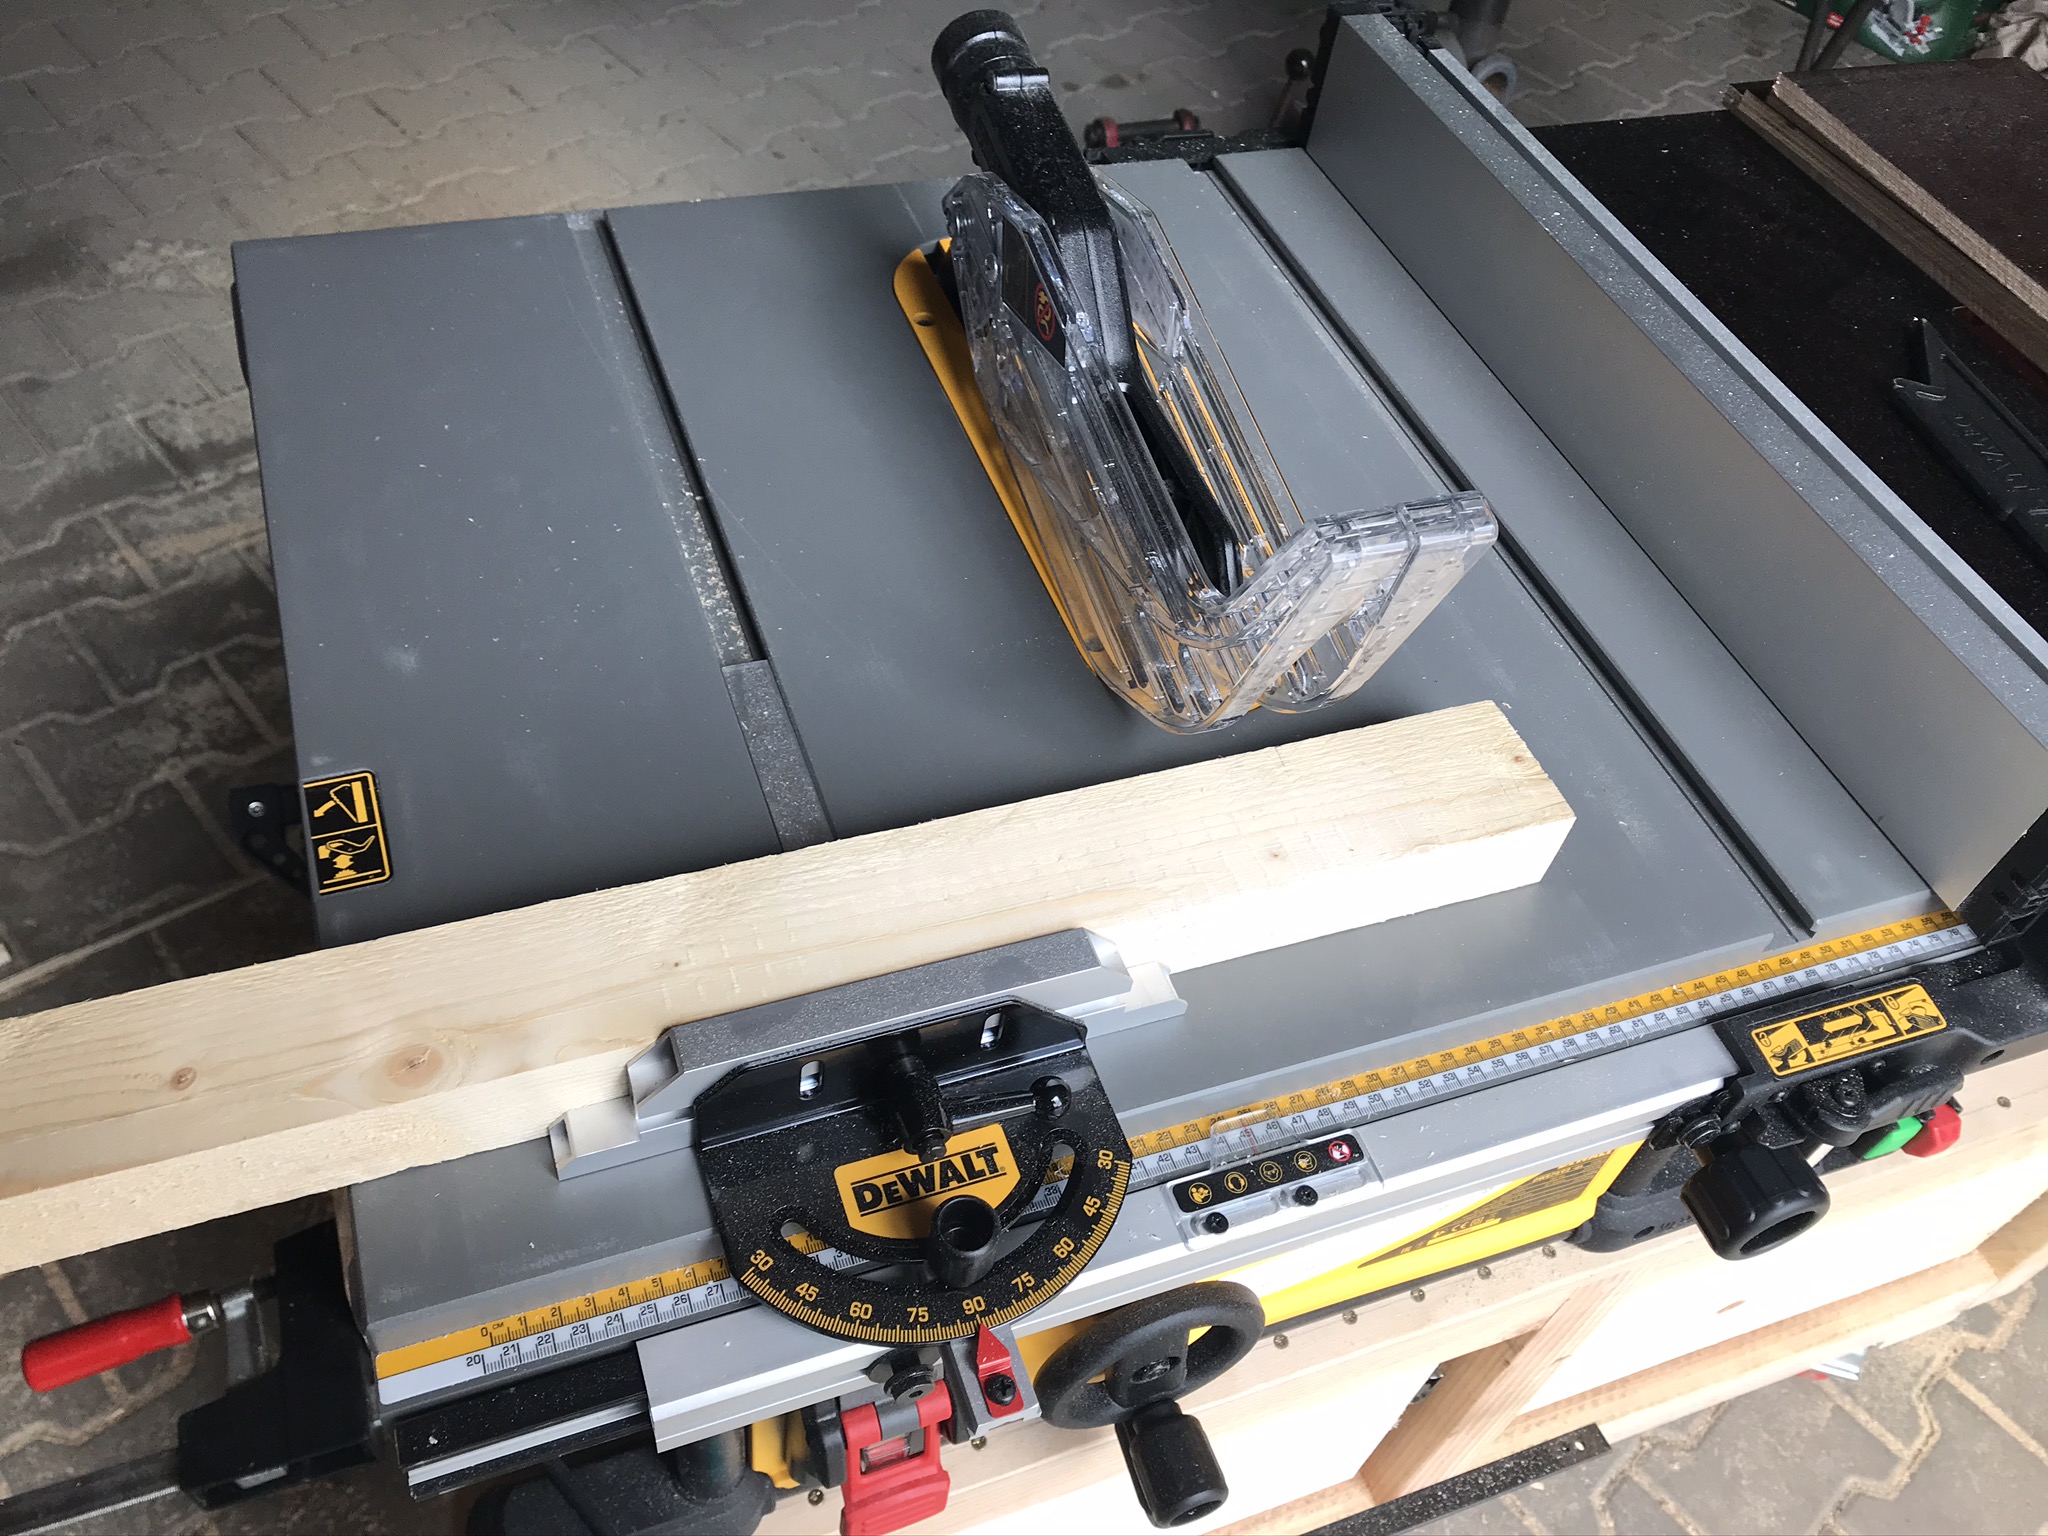
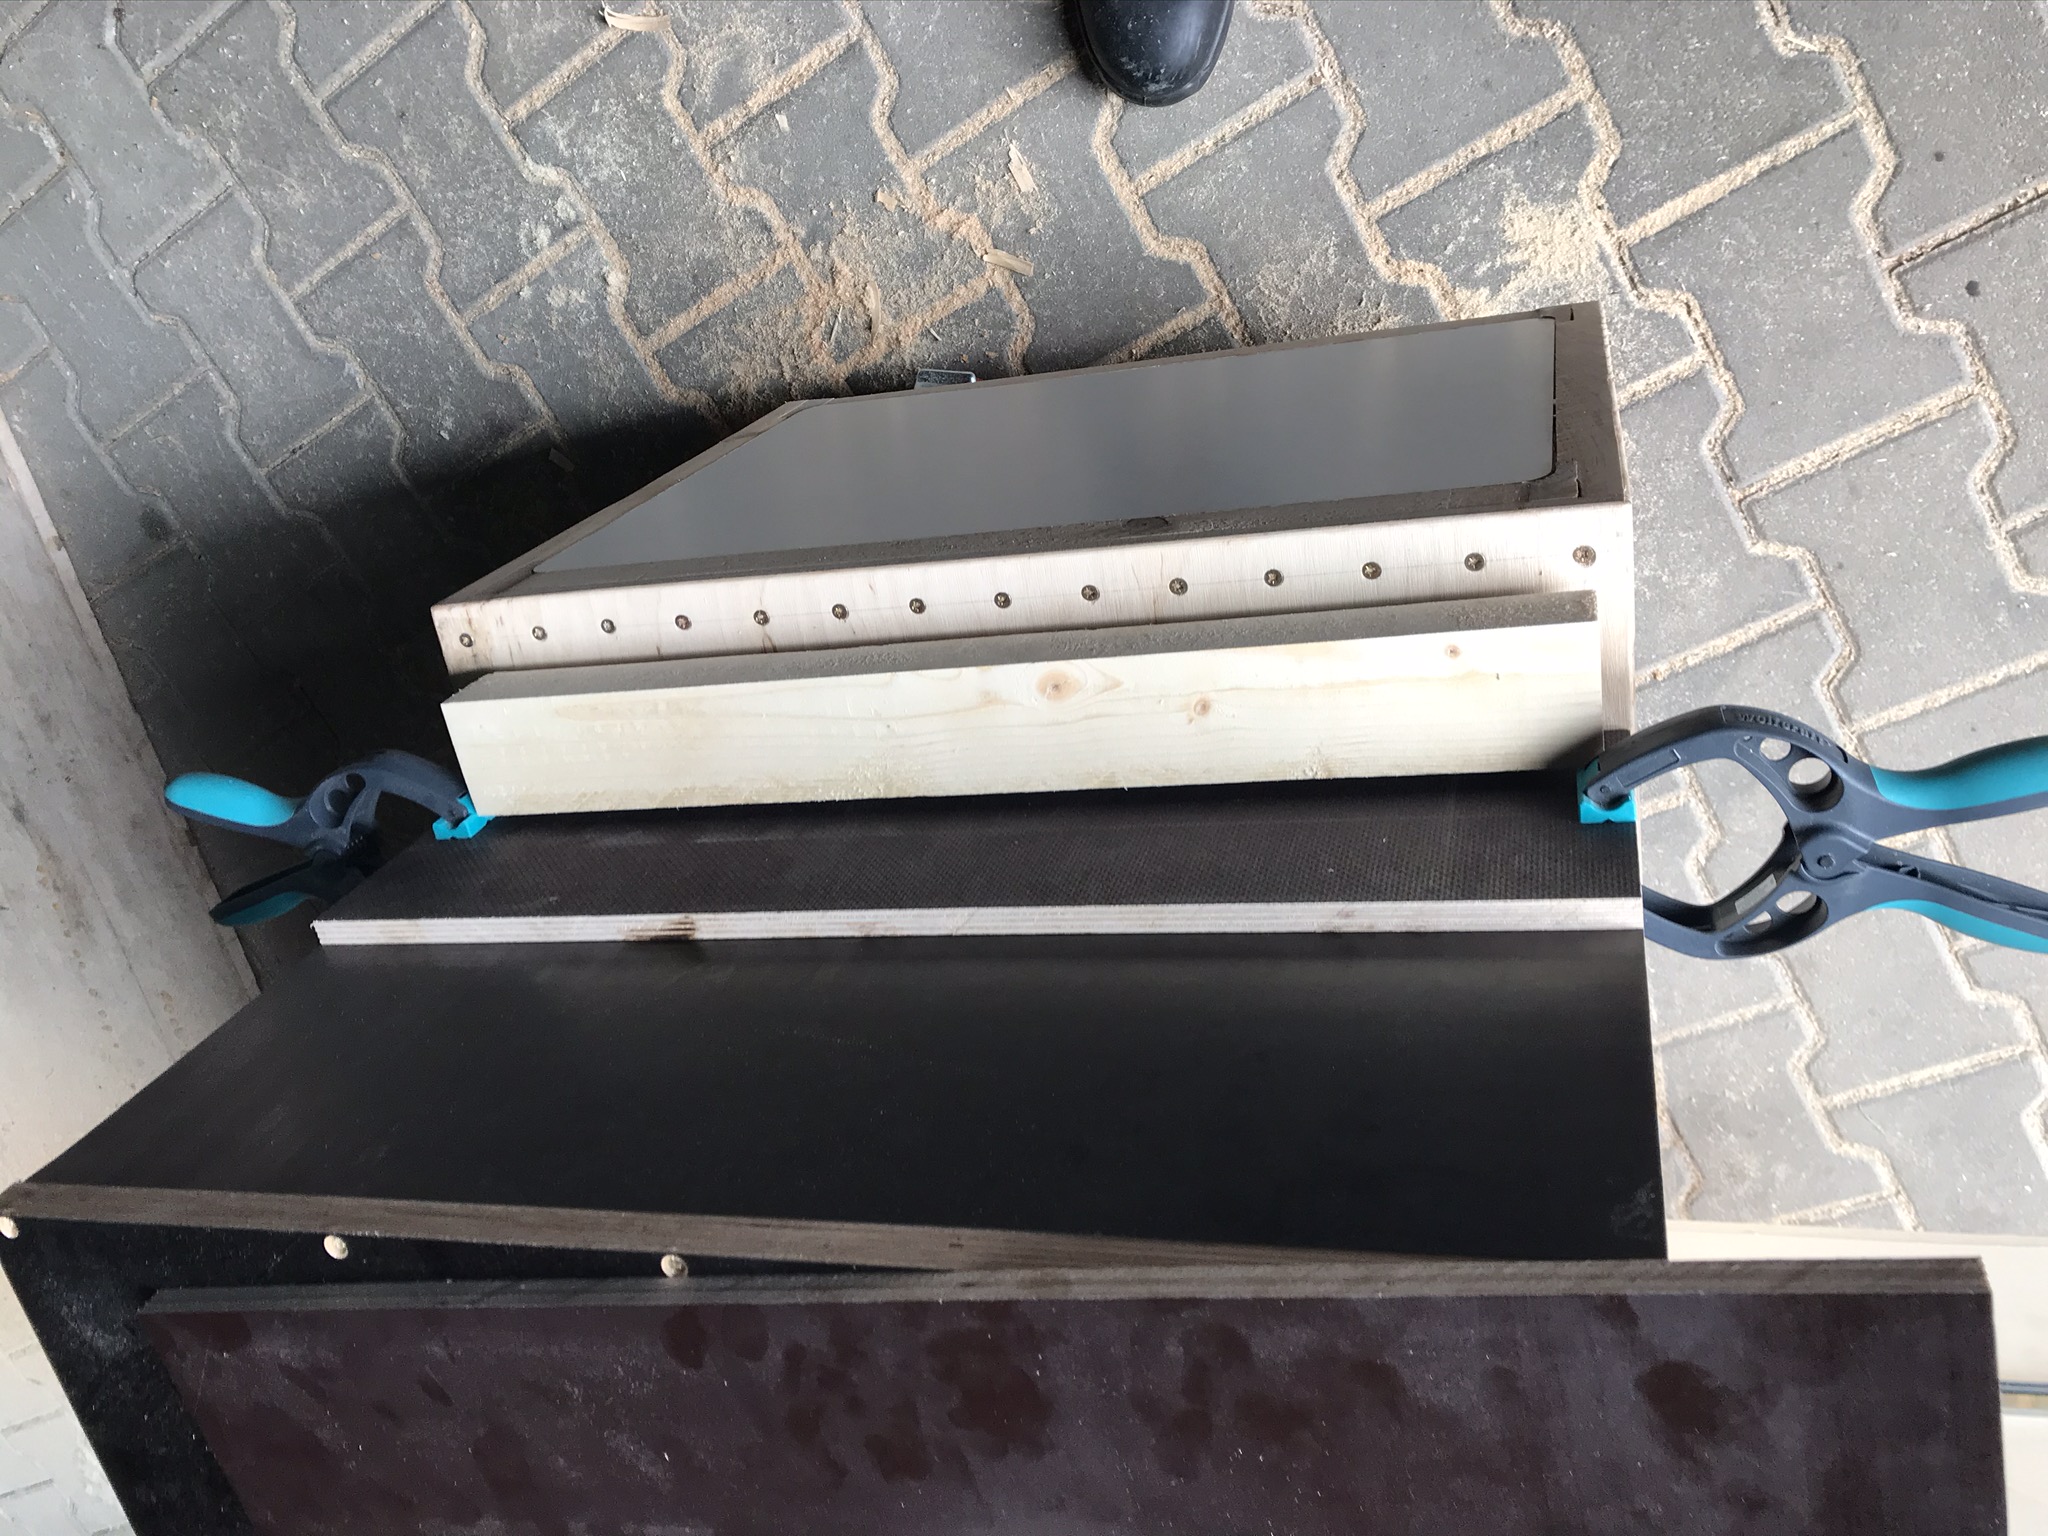
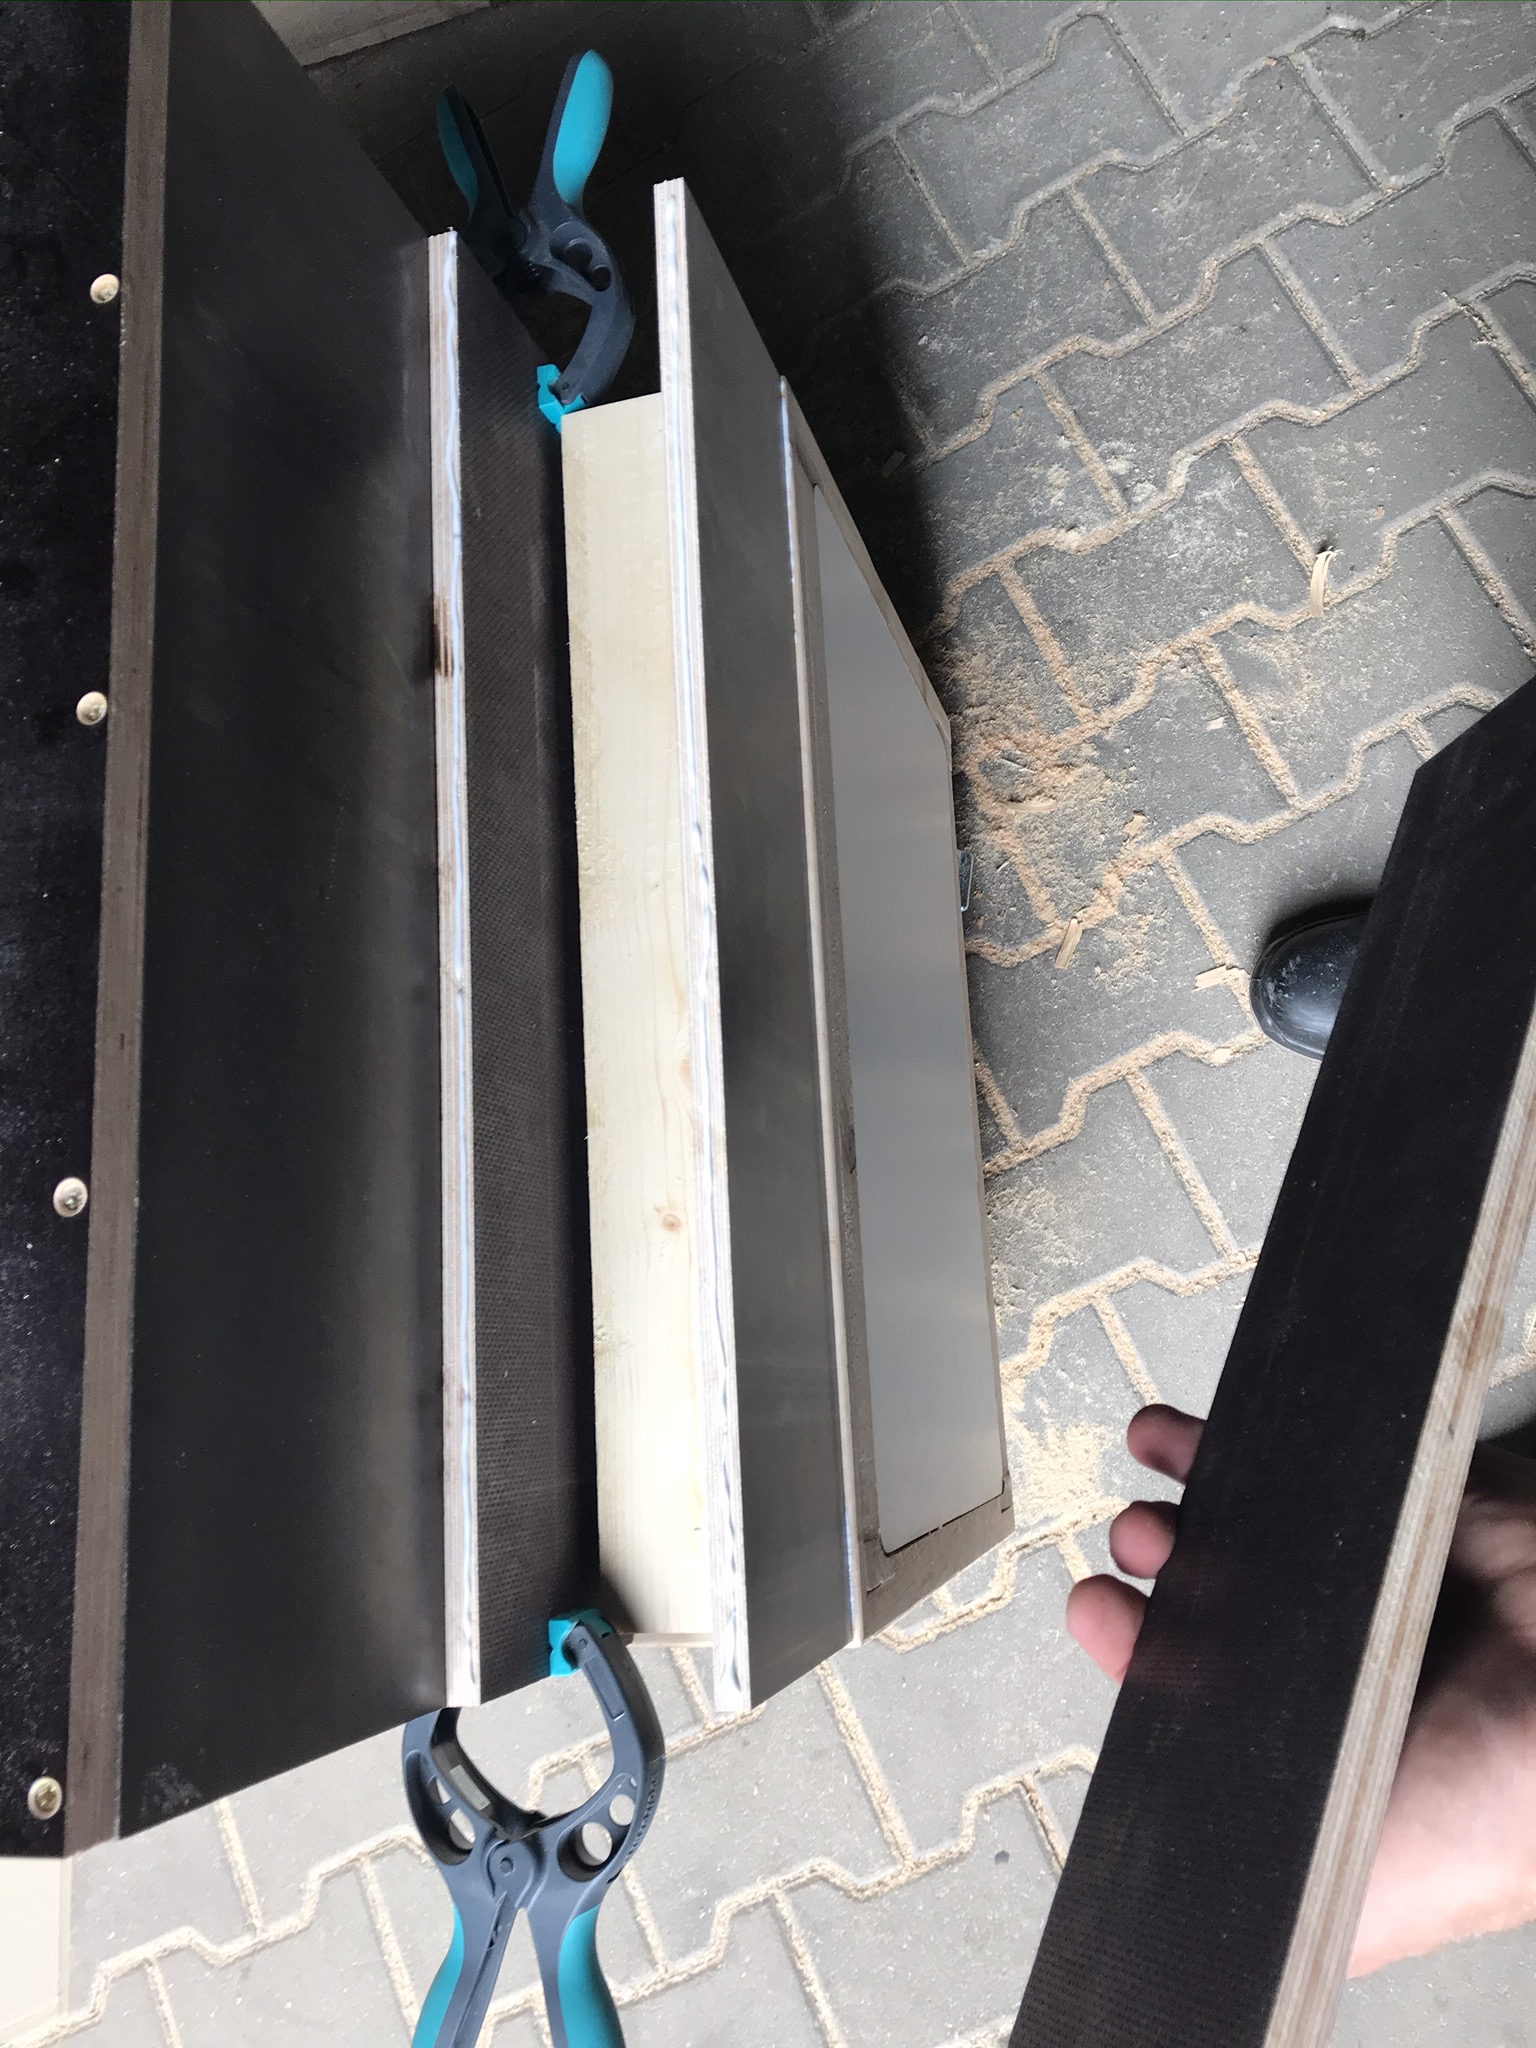
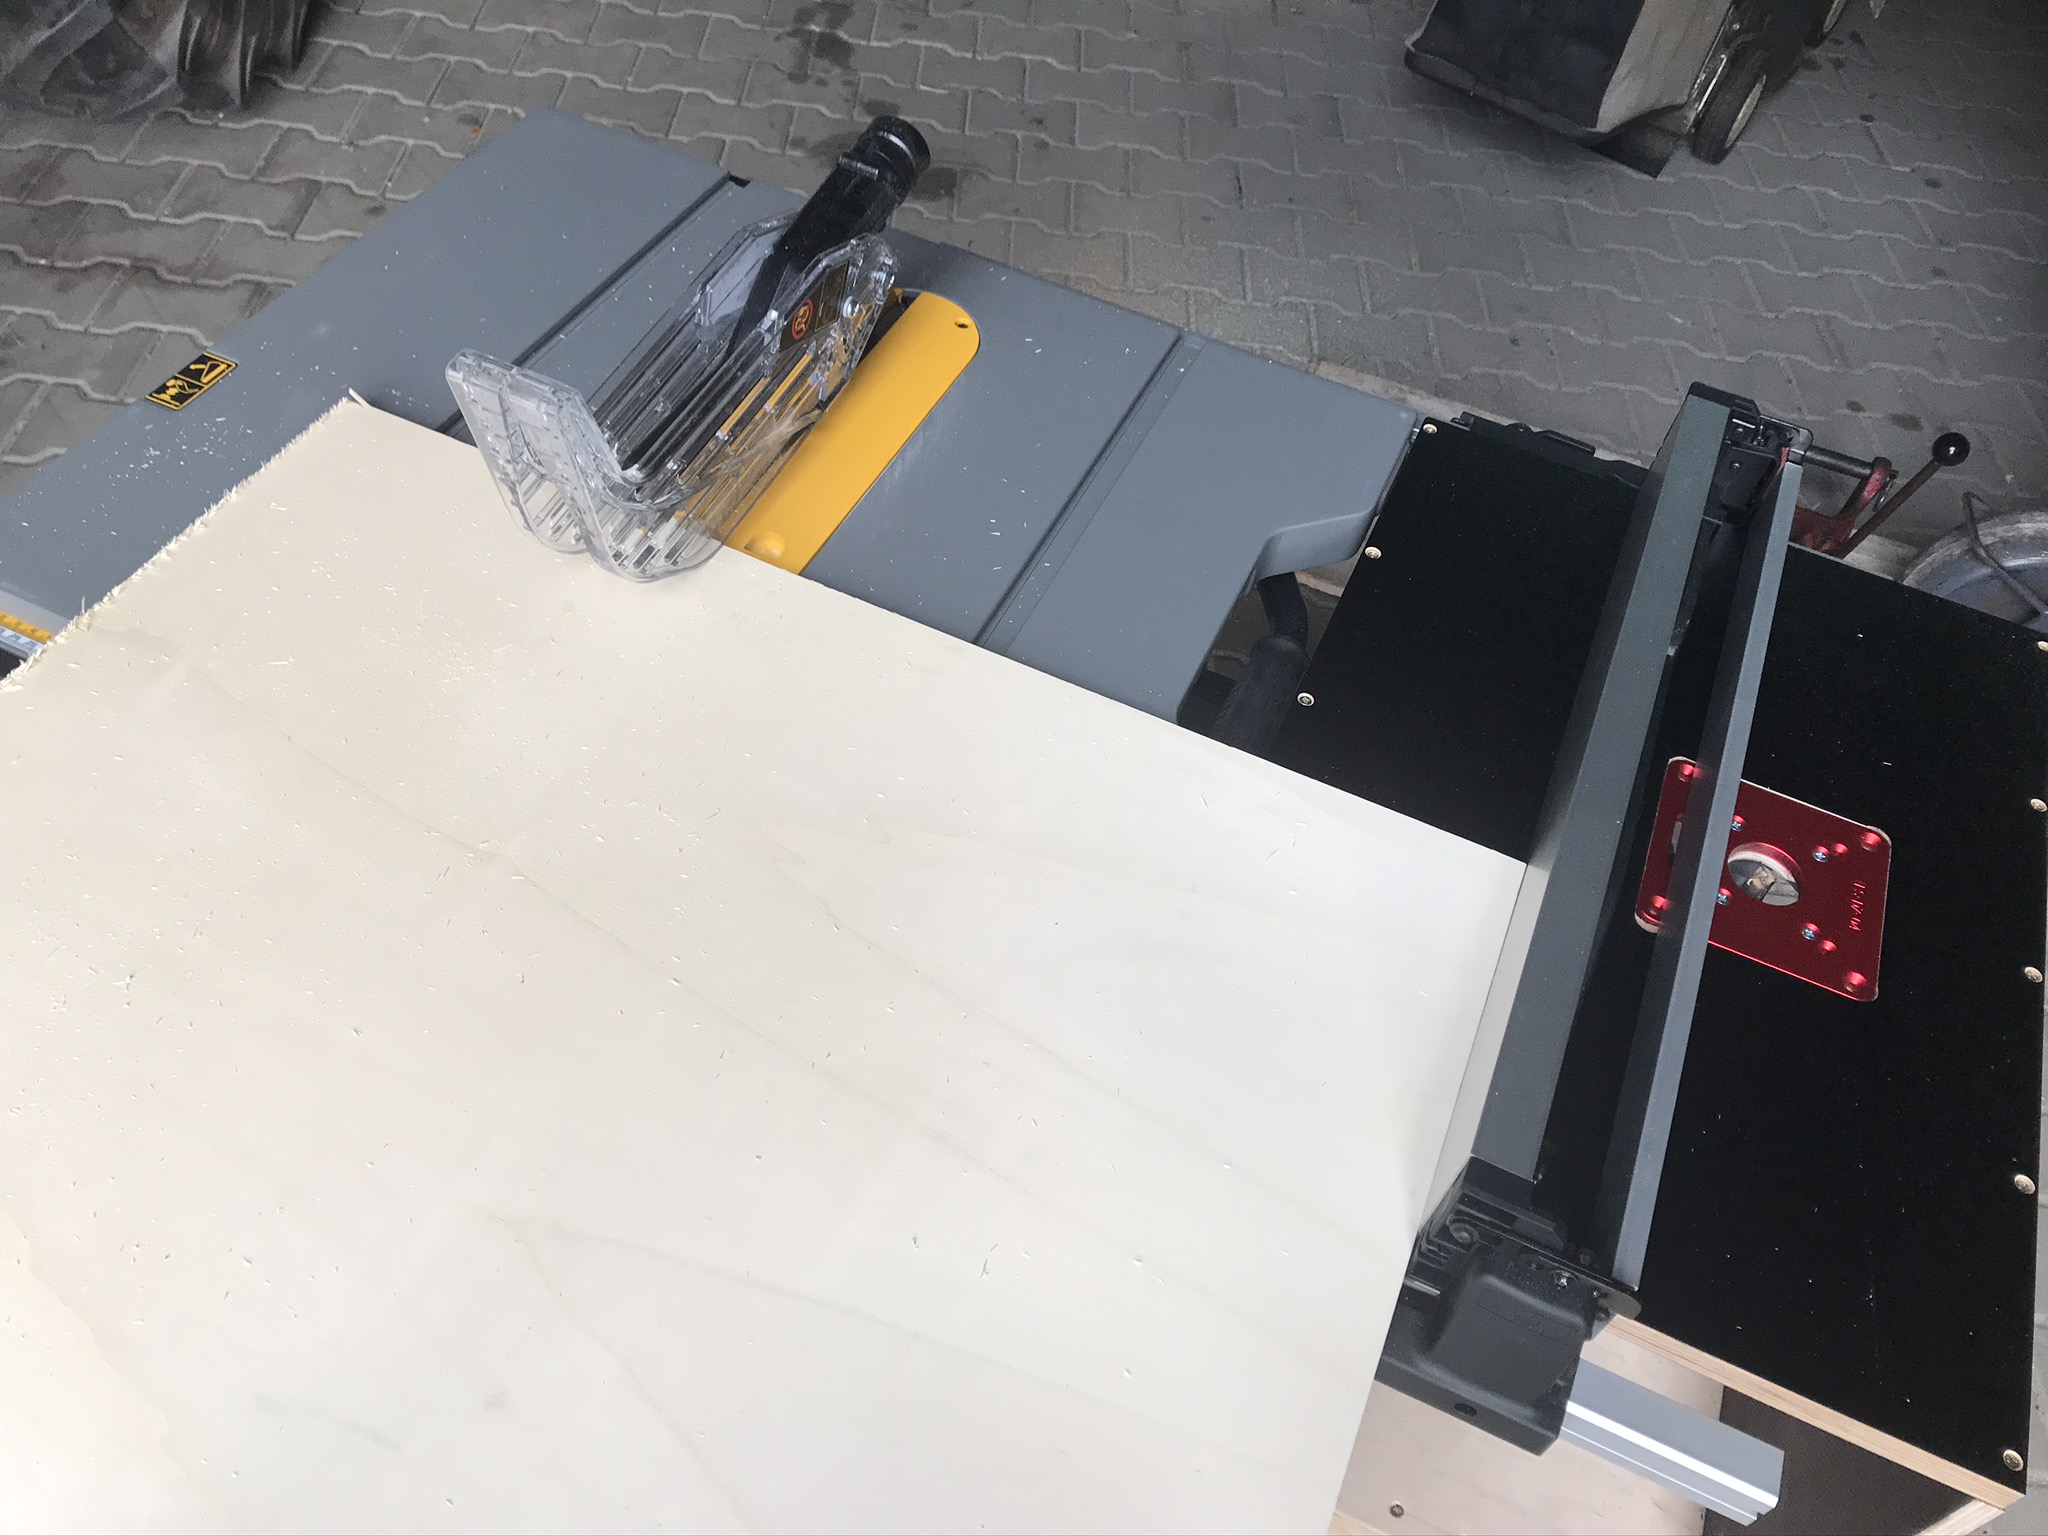
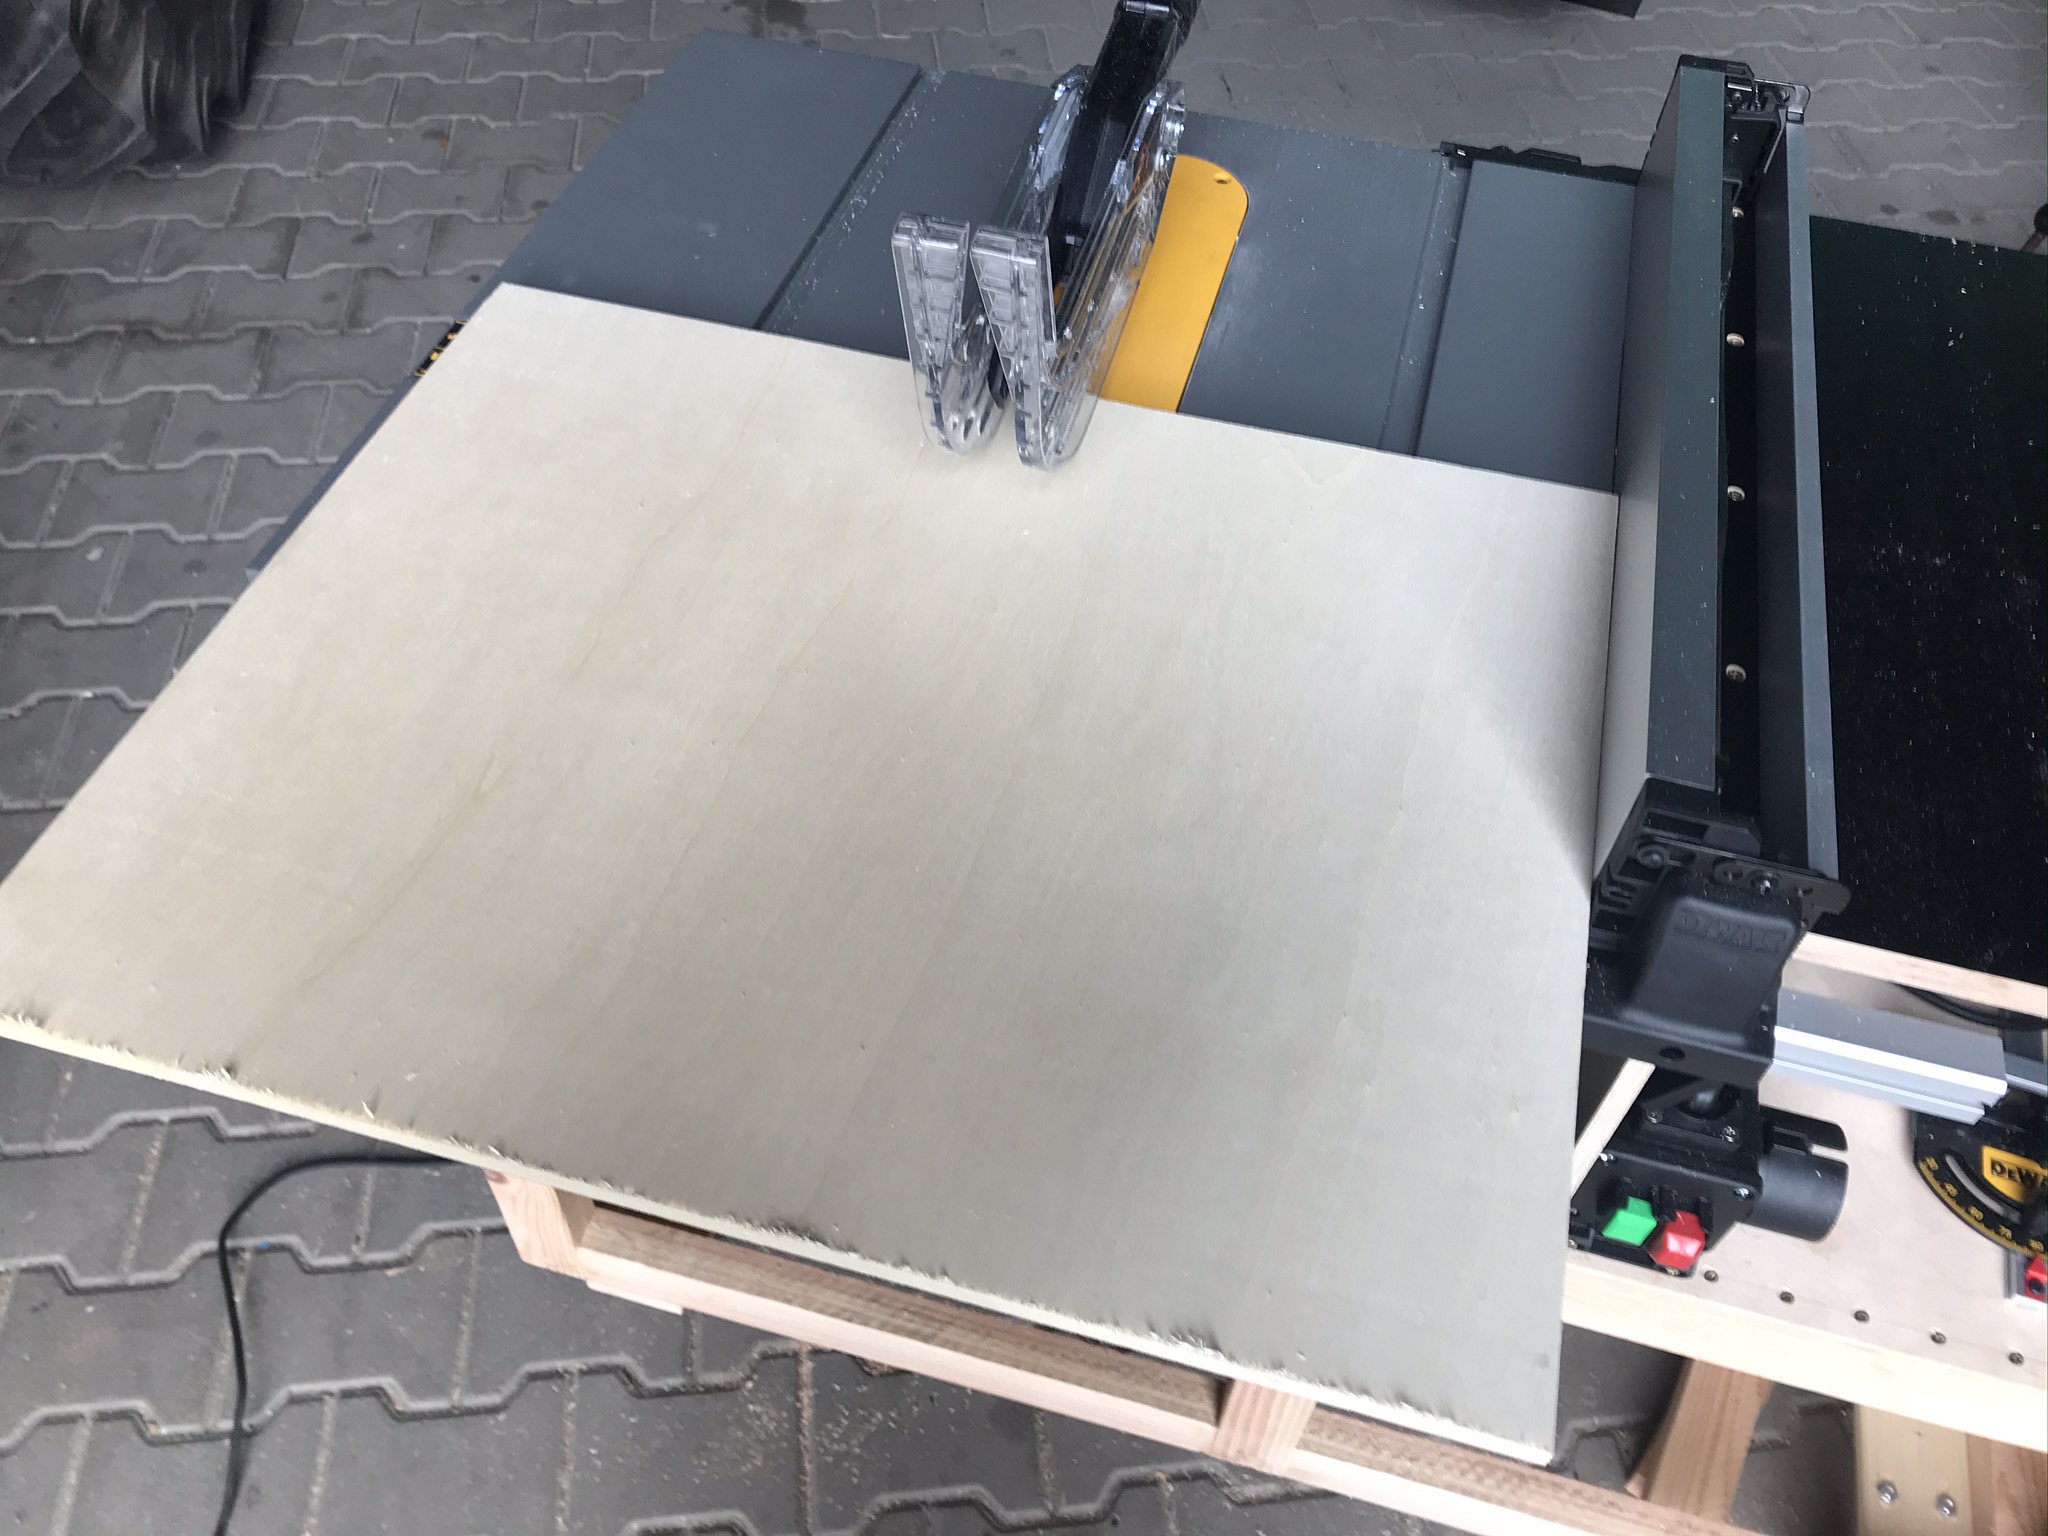
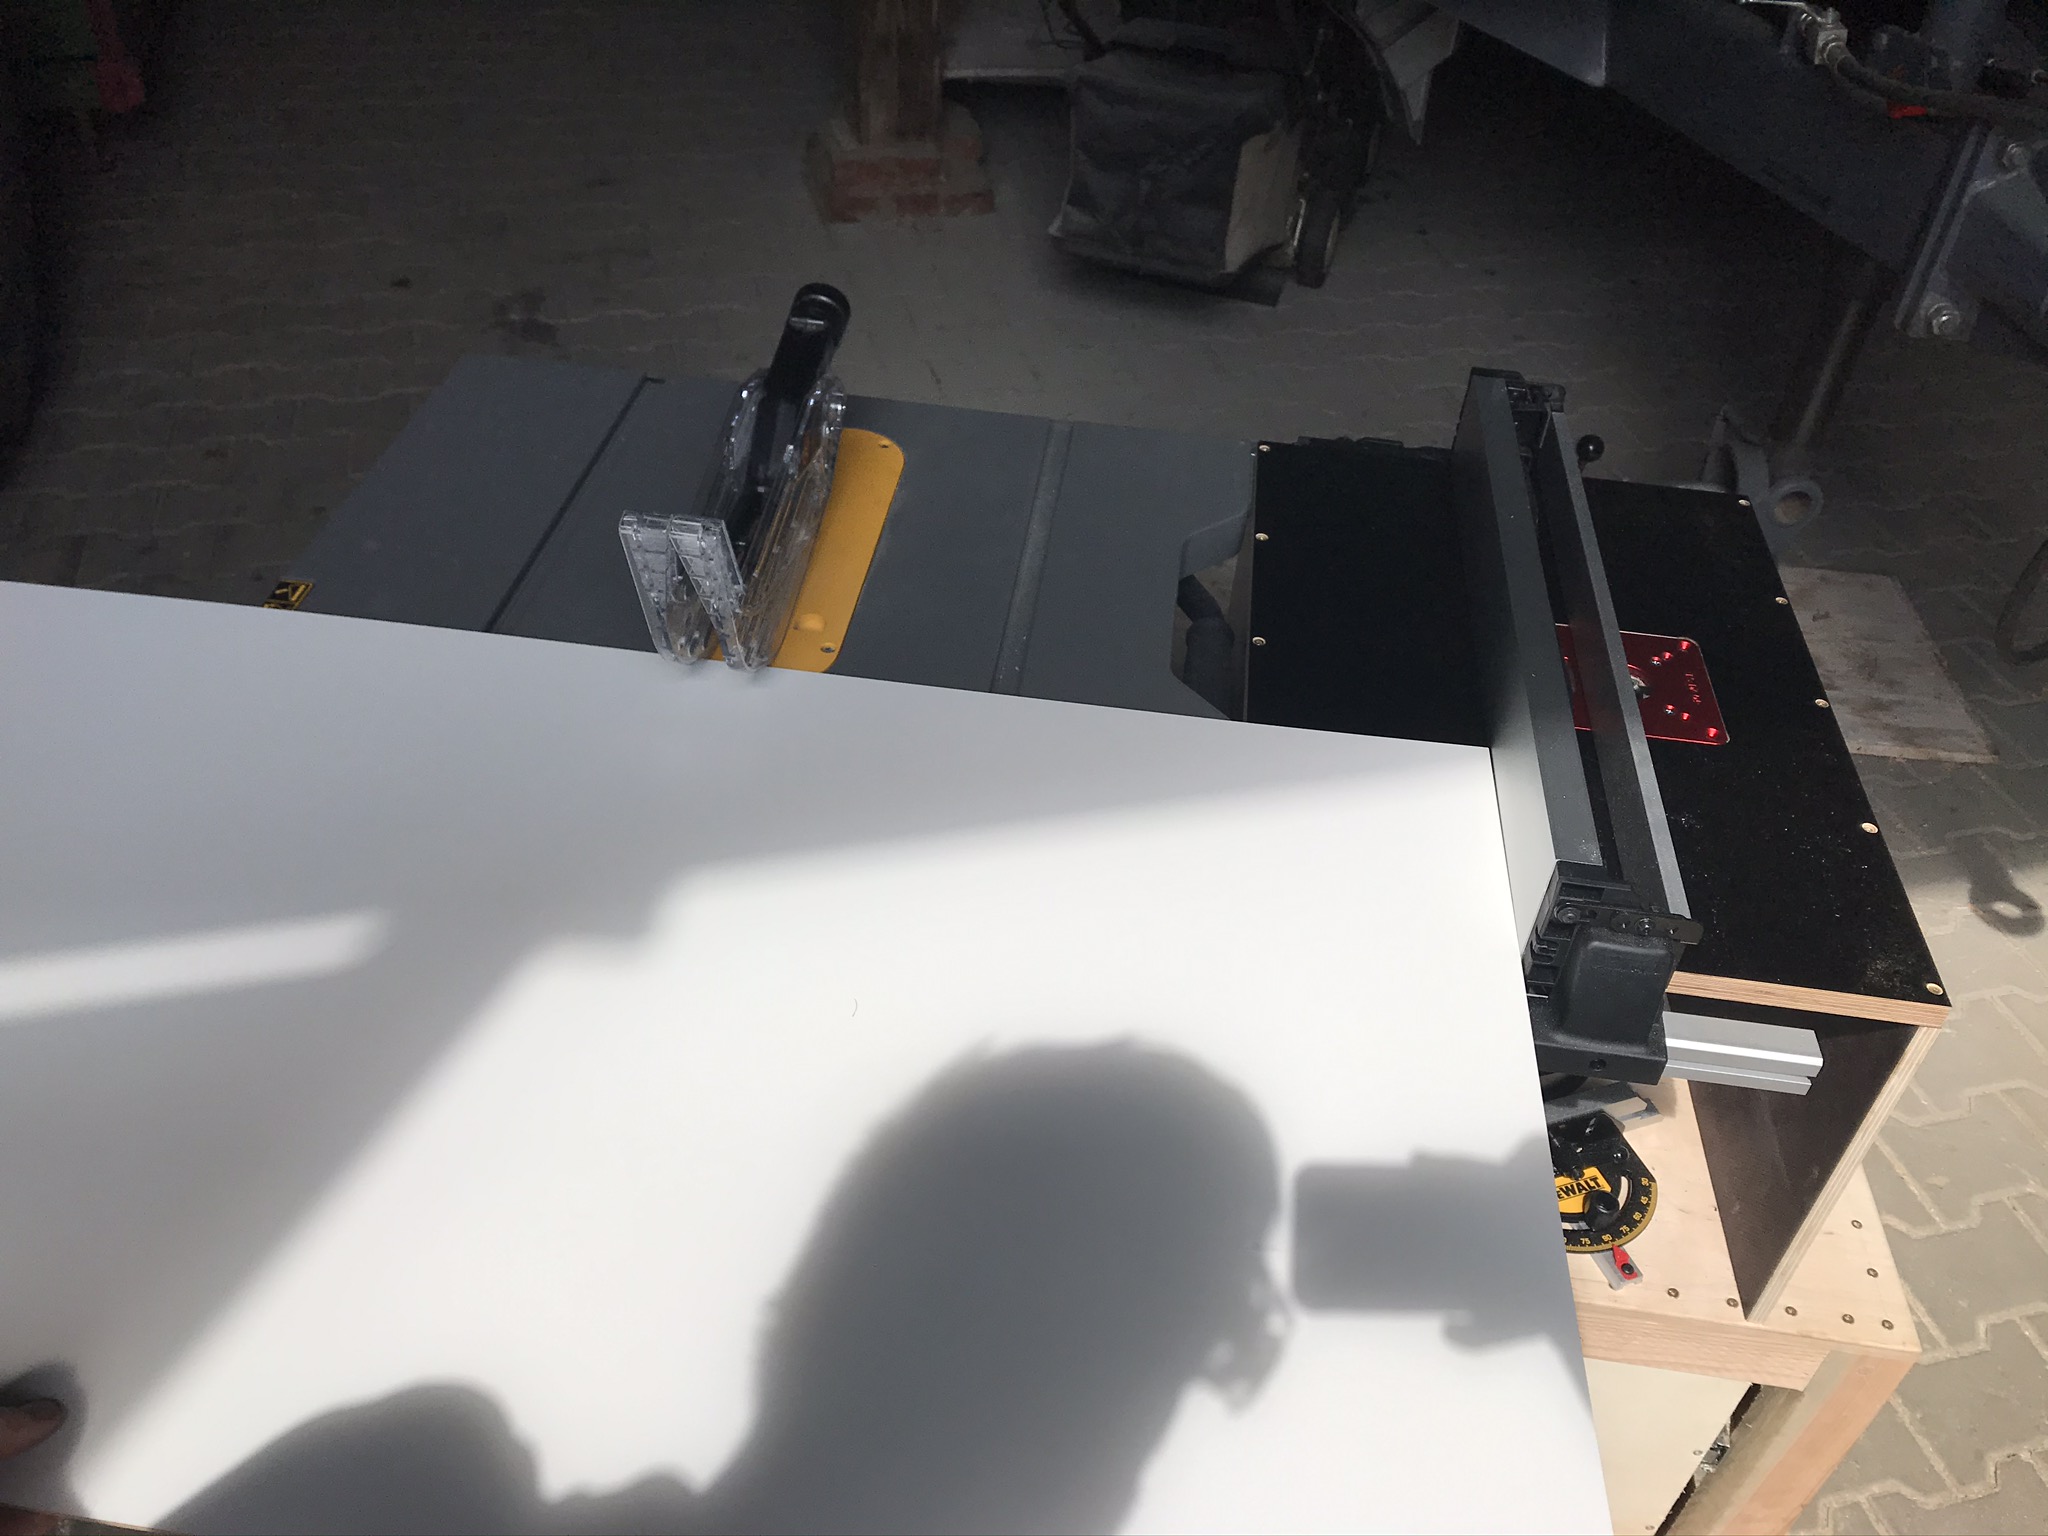
After screwing the construction together, you can test it by placing it on the frame and aligning the table saw next to it. At this point you should make sure that the rip fence slides cleanly over the router table and is exactly at the same height as the saw table. If necessary, you can remove a little material from the lower edges of the side walls with a plane.
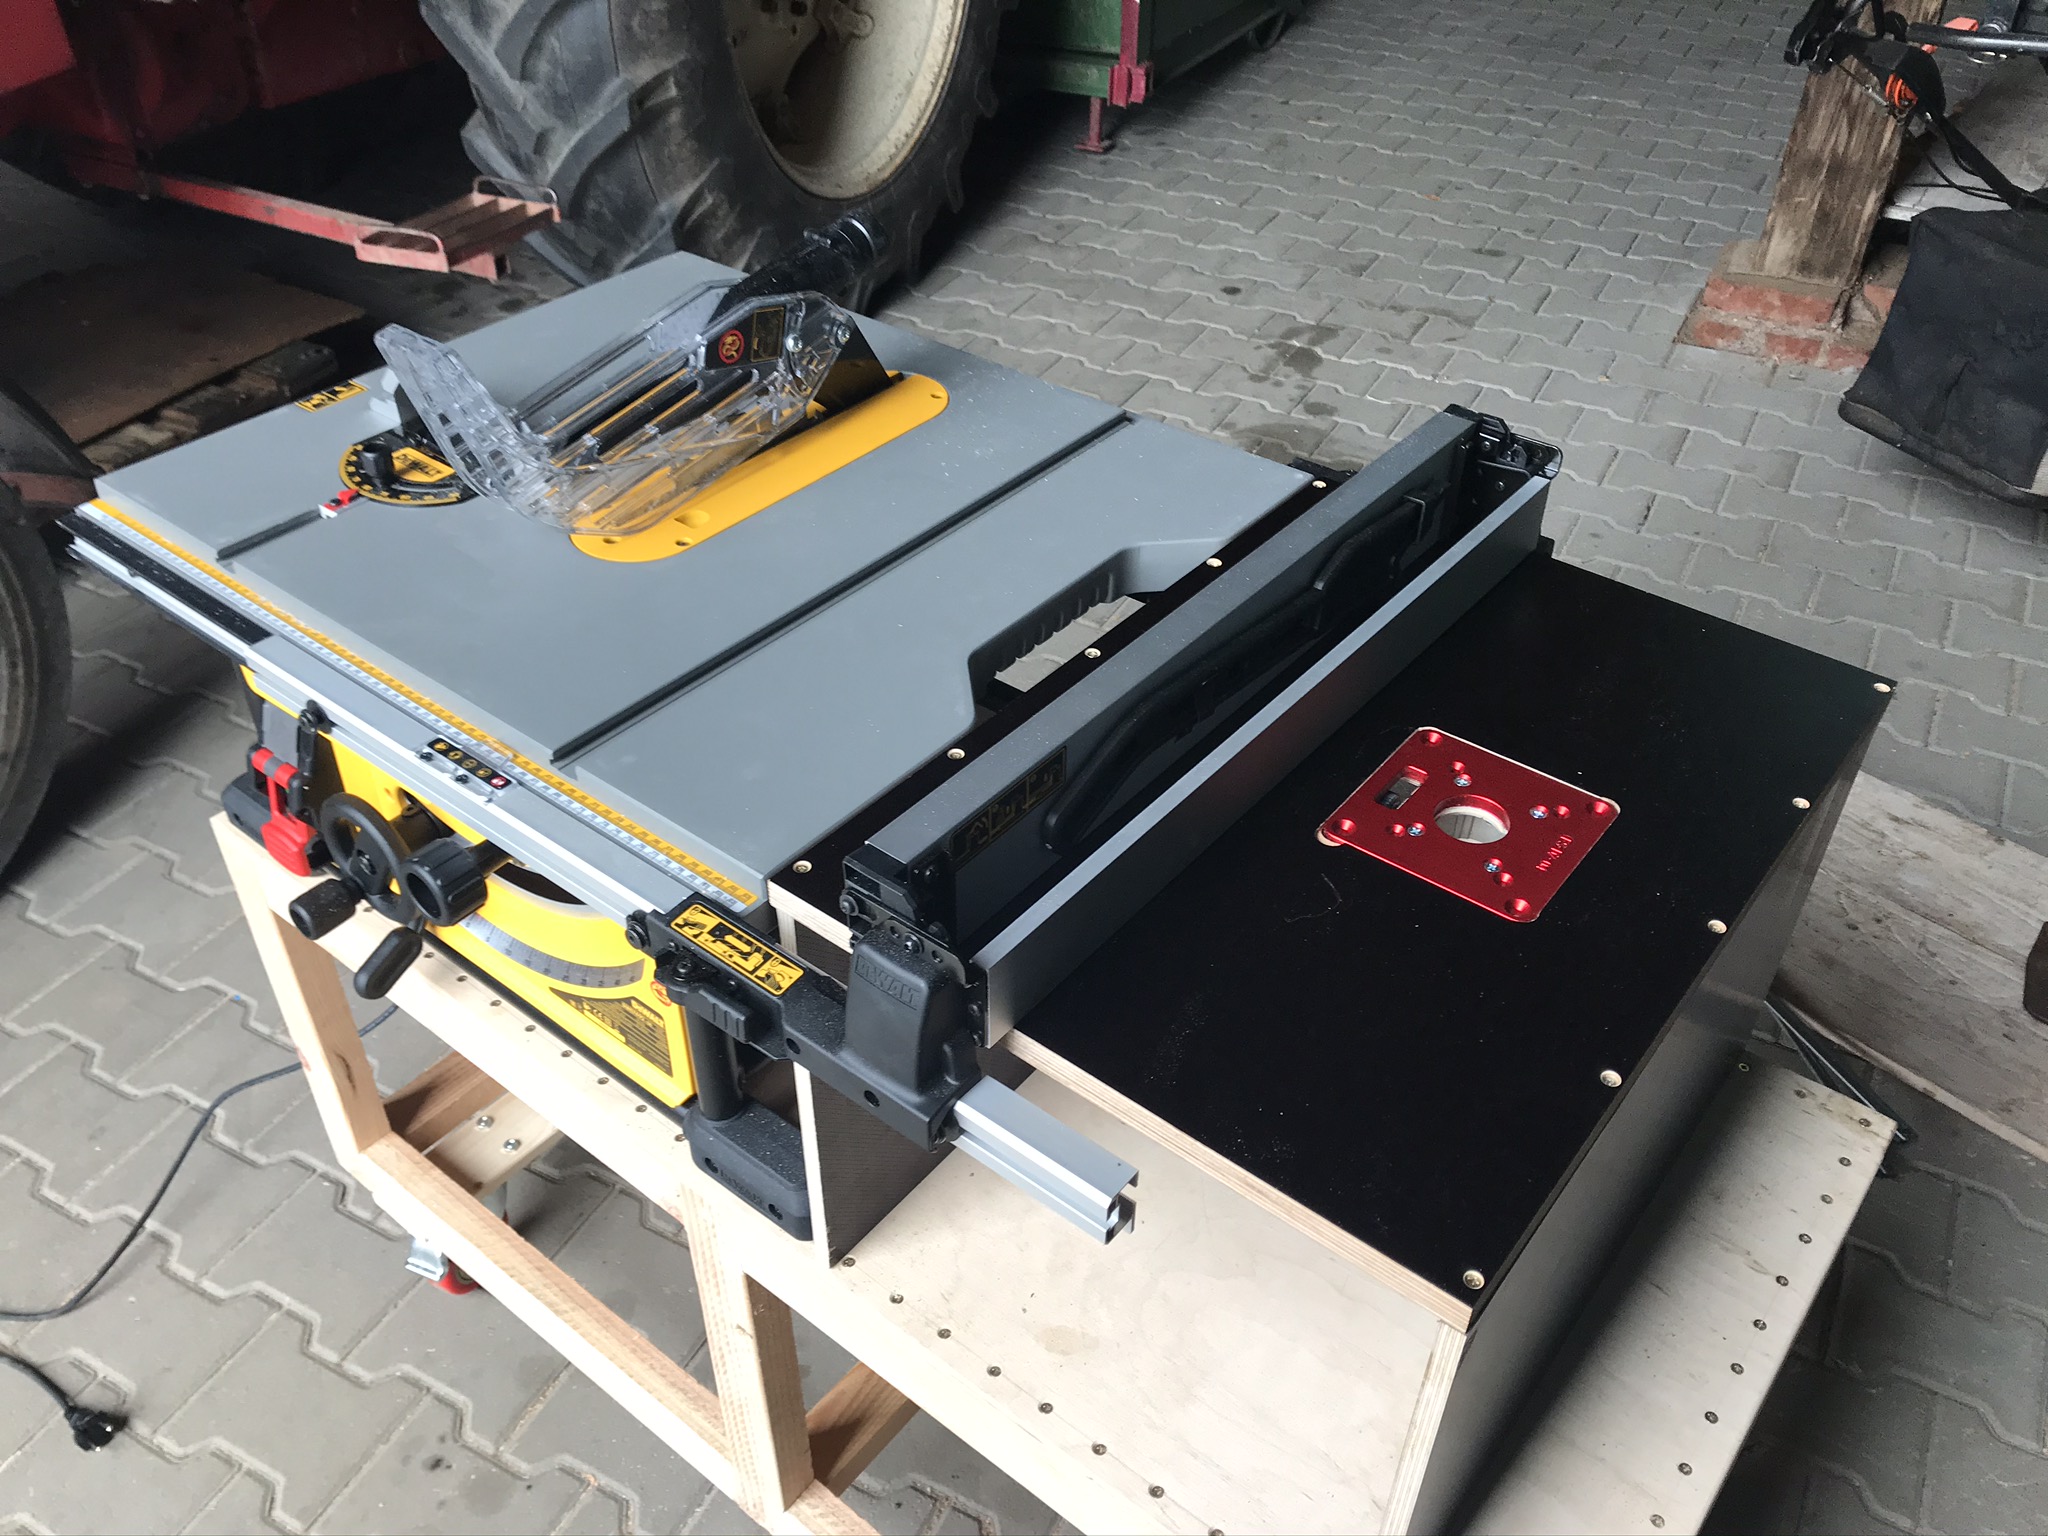
When everything fits, align the table saw and the router table perfectly. Now take the table saw off the frame and use the Undercover Jig* to screw the side walls of the router table into the table top of the base frame. In between, don’t forget to check for exact 90 degree angles with carpenters square*!


- With hydraulic damper
- Price refers to 1 pair; load capacity 30 kg per pair
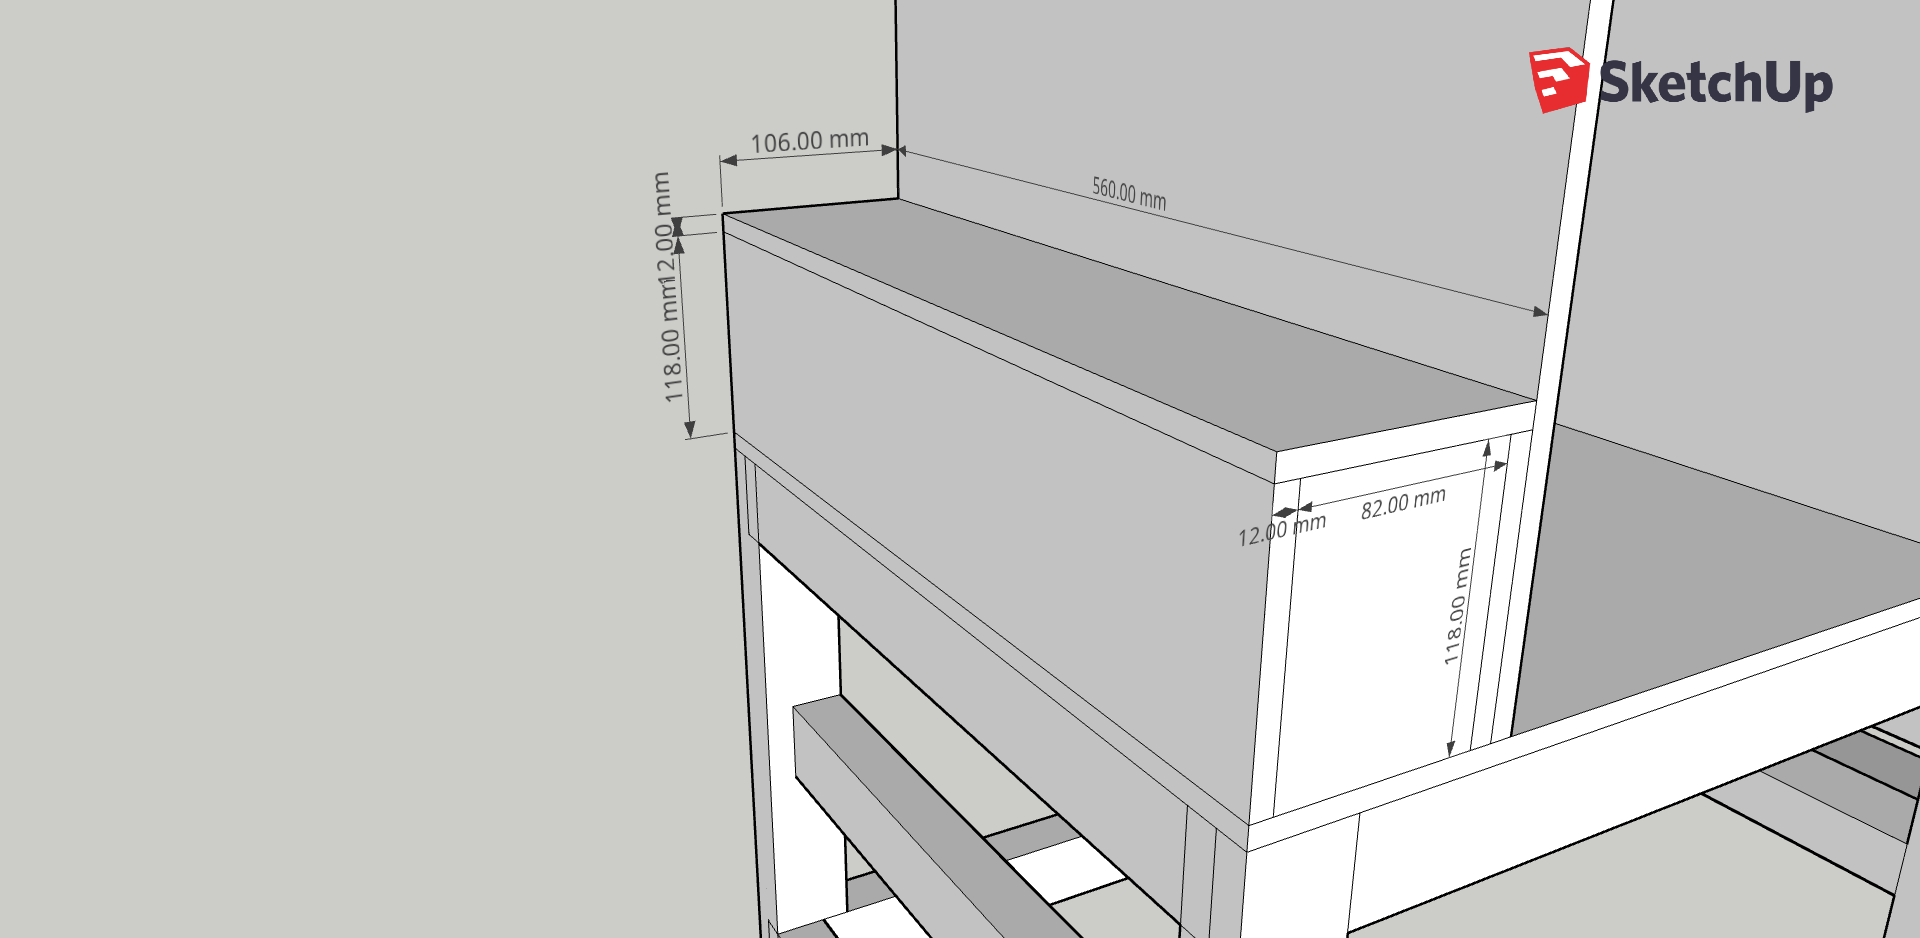
How to build a router bit storage
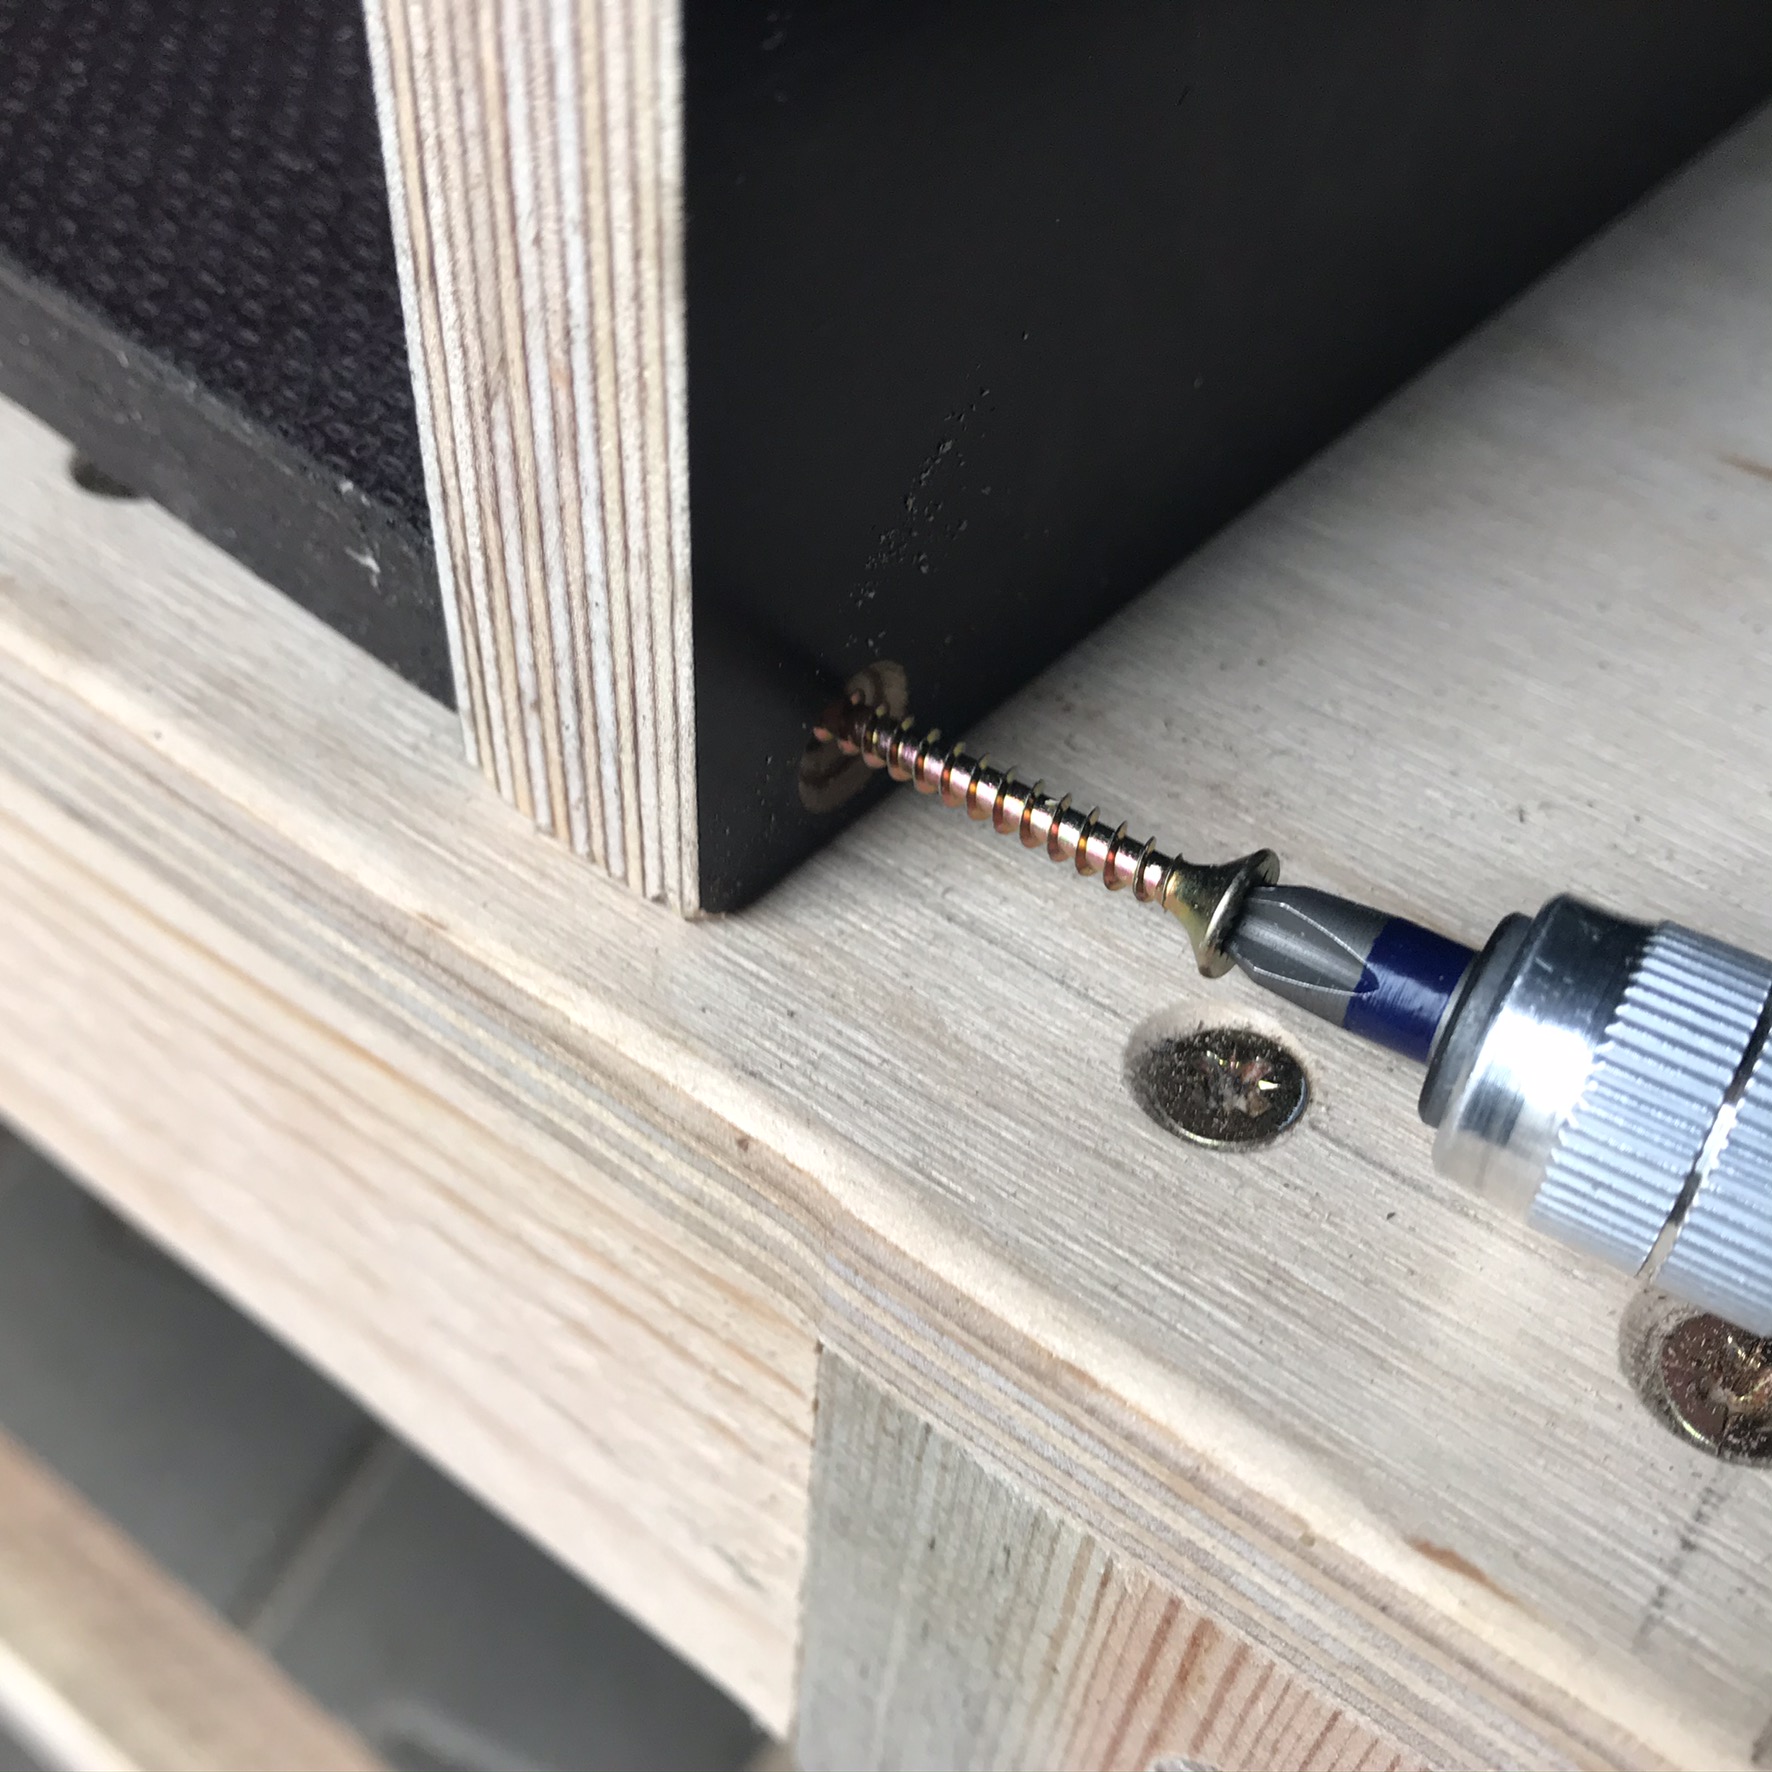
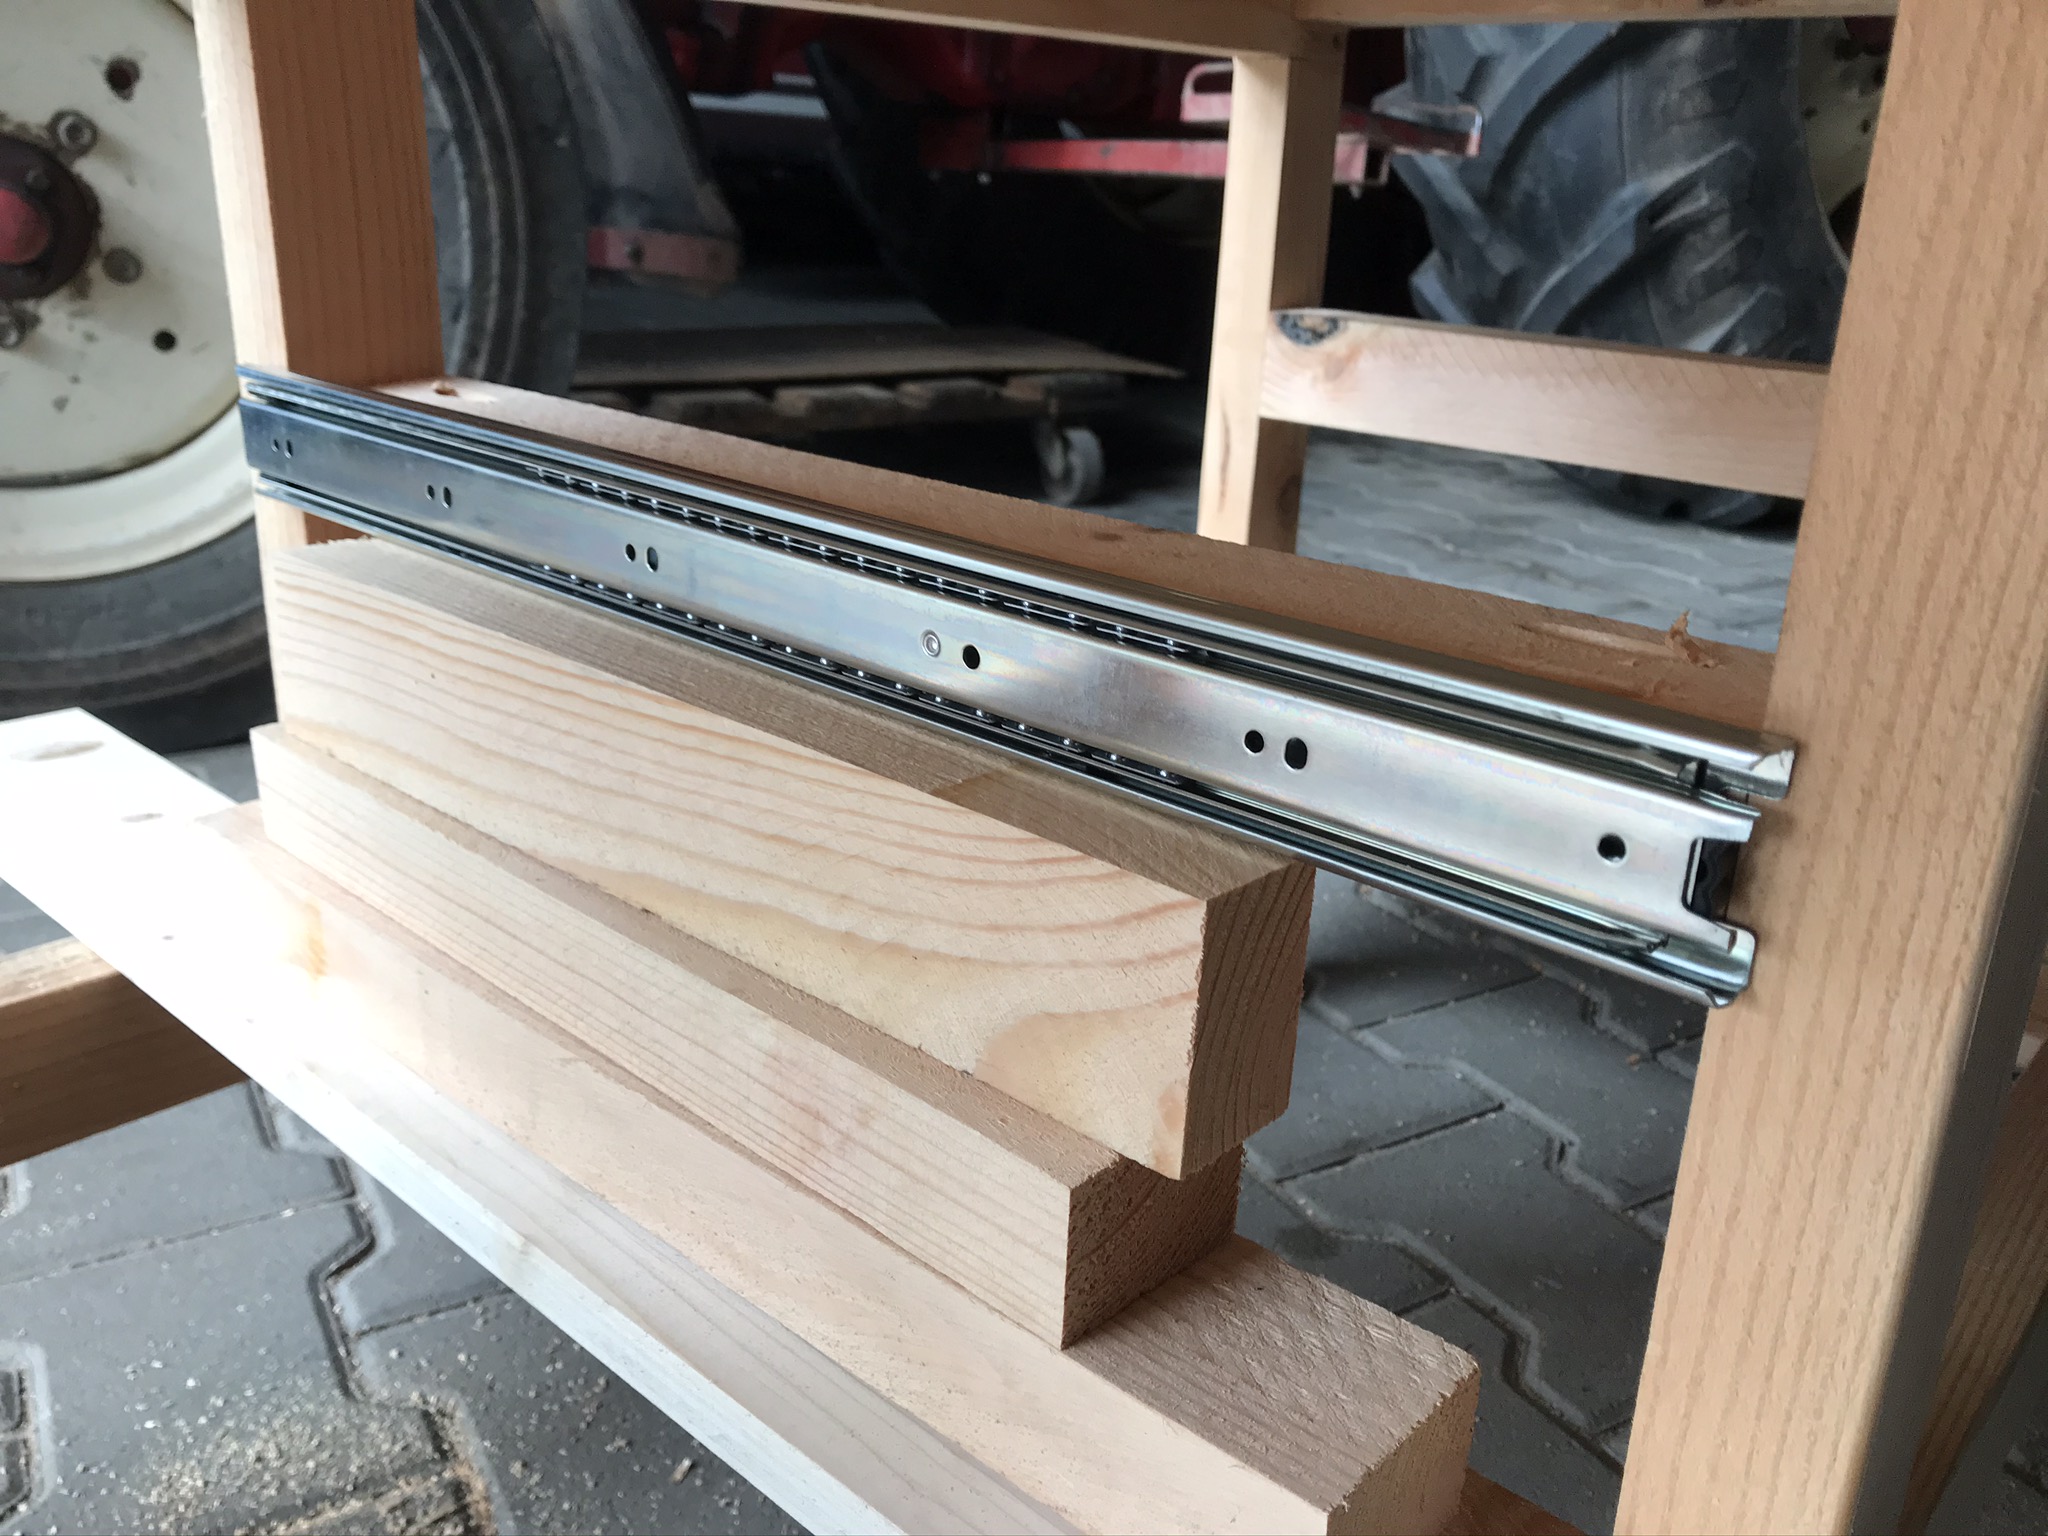
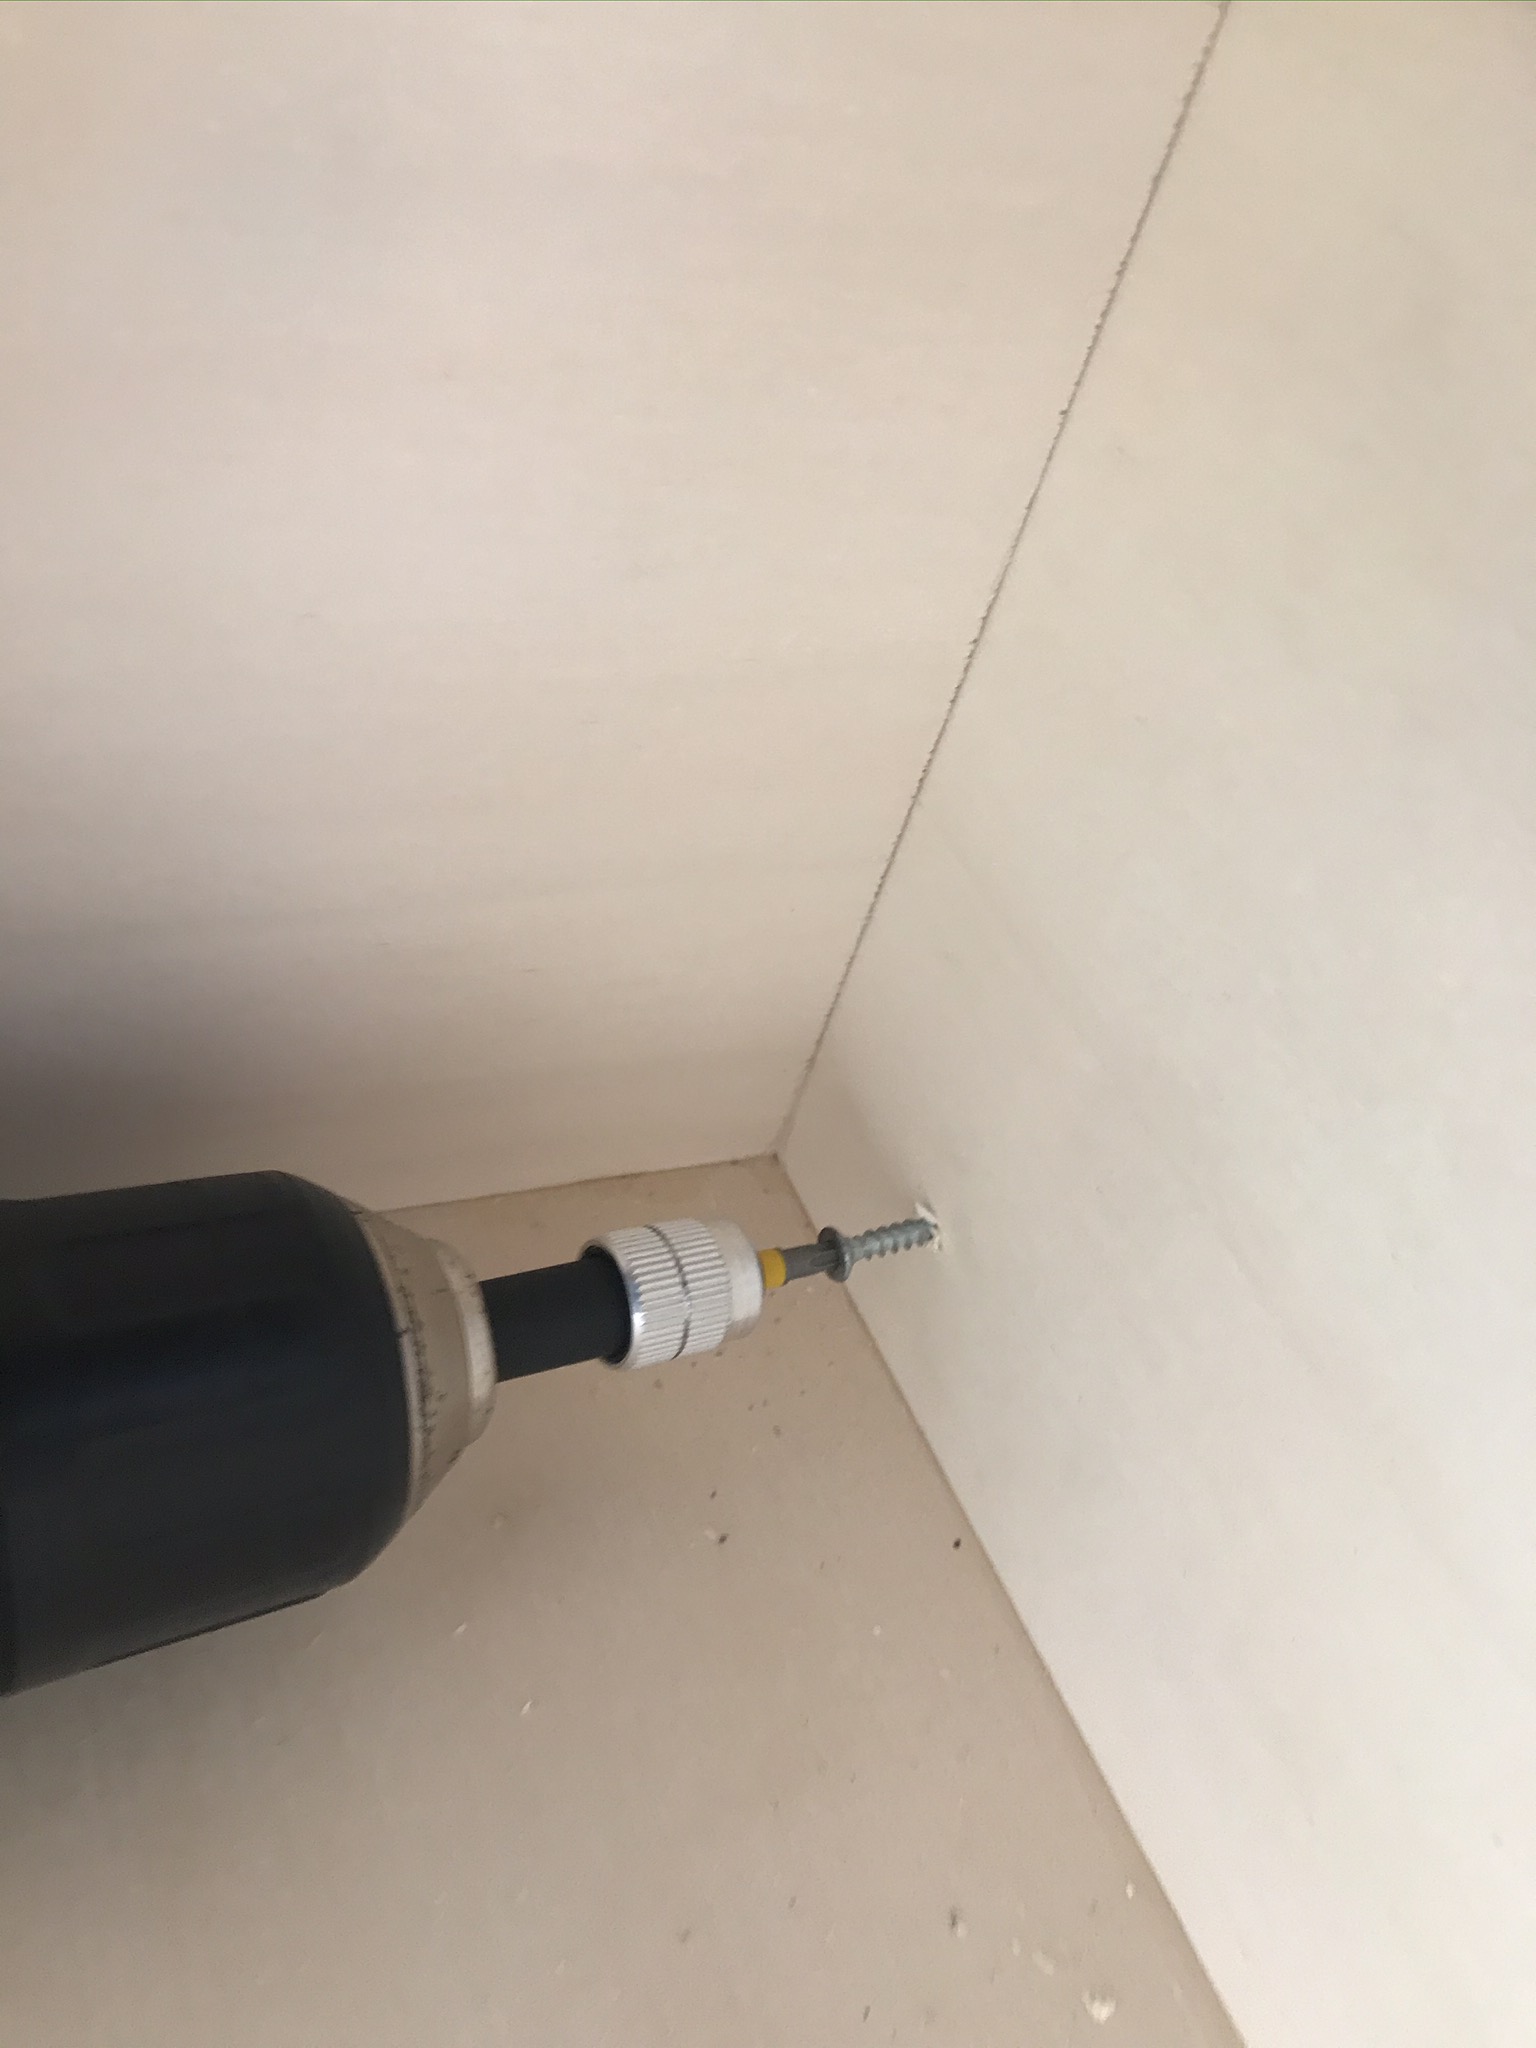
The last step for the router table is to build the router storage. First saw the 5 parts you need (see material list for router table). Place the full-extension runner on the tabletop and pre-drill the holes for fastening.
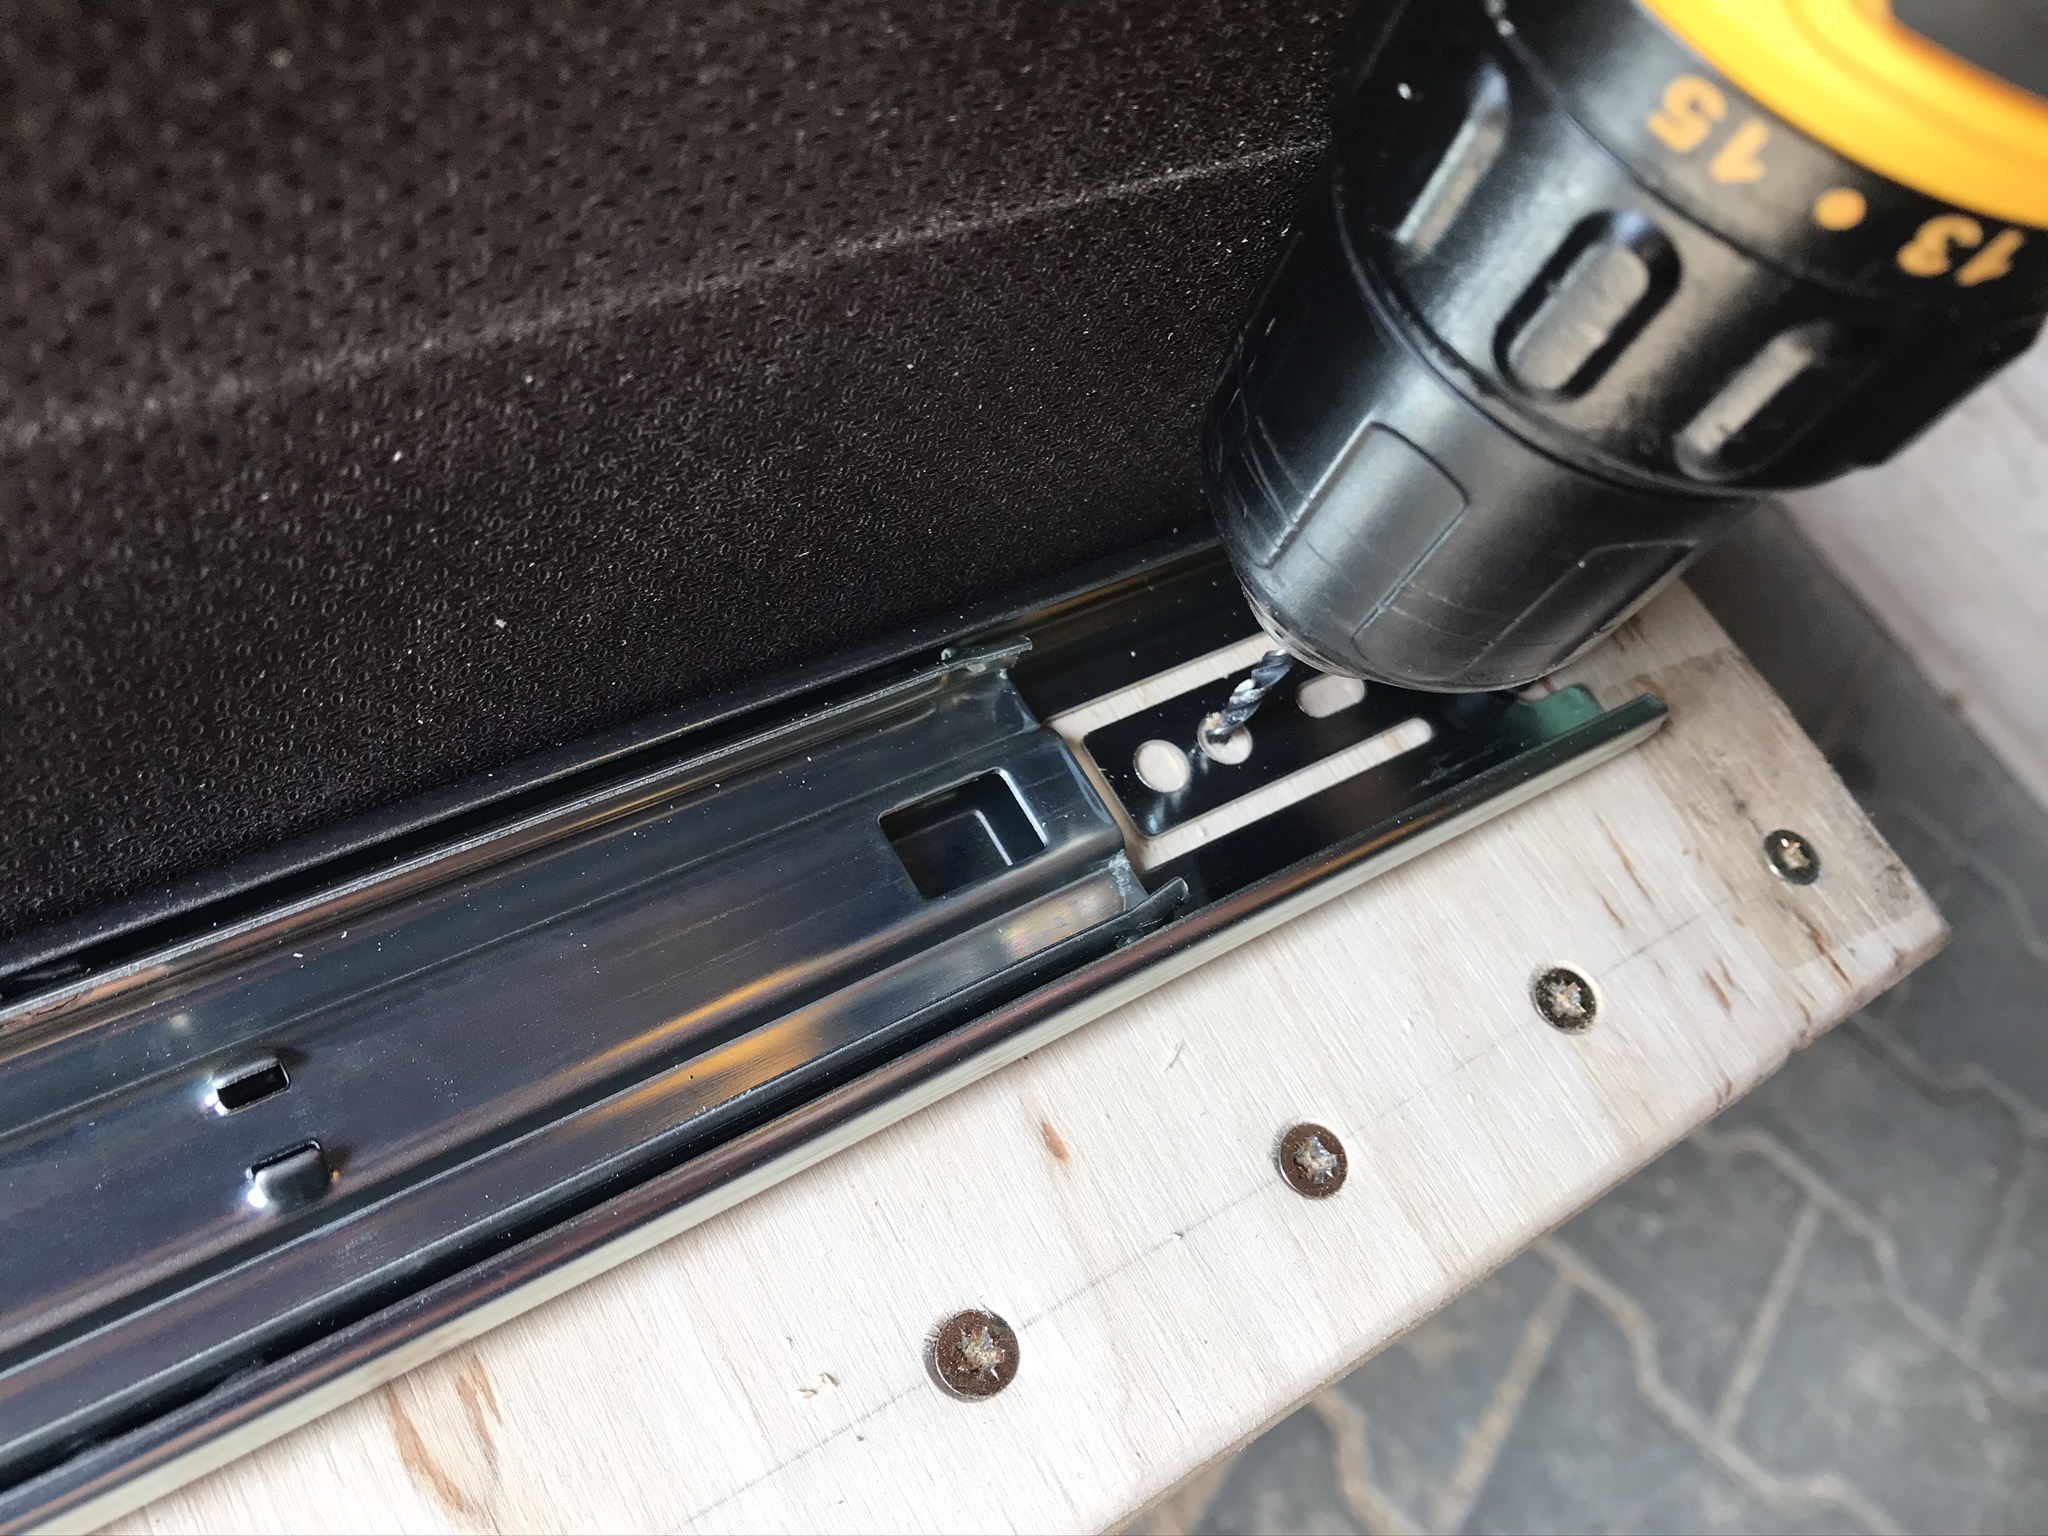
Before you screw the drawer runners* to the tabletop, you have to mount the squared timber, which is used for storing the router bits, on the extension. When determining the length of the squared timber and also when attaching it to the rail, make sure that the front end of the squared timber has a 12 mm film faced plywood plate attached to it, which should be flush with the body of the router storage.
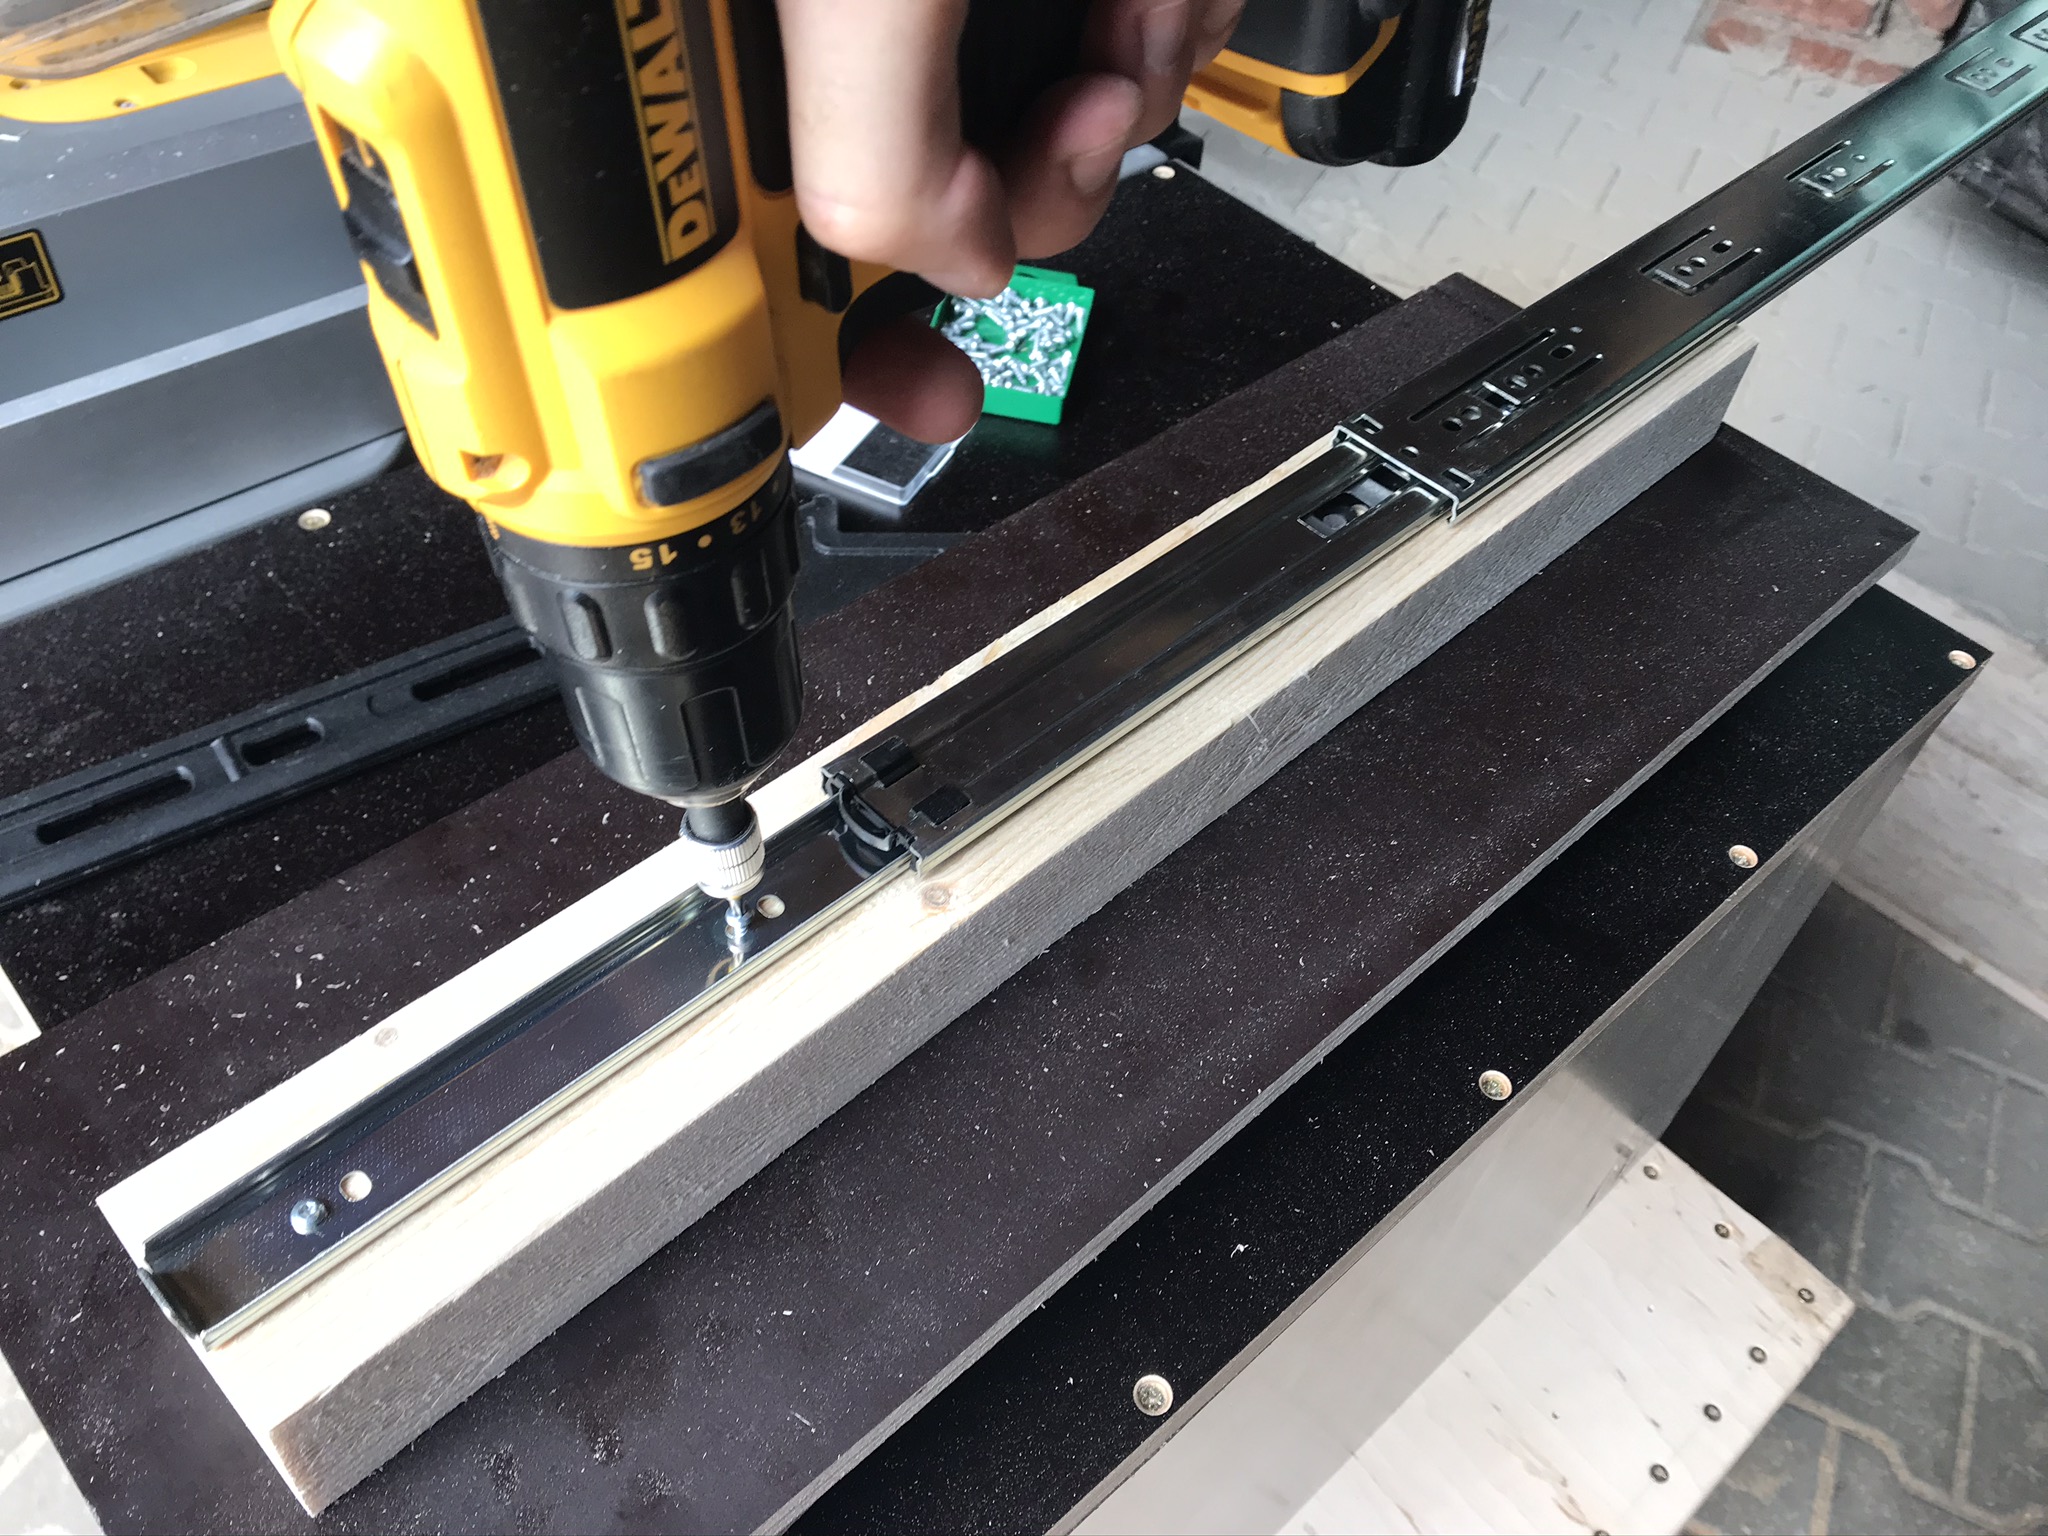
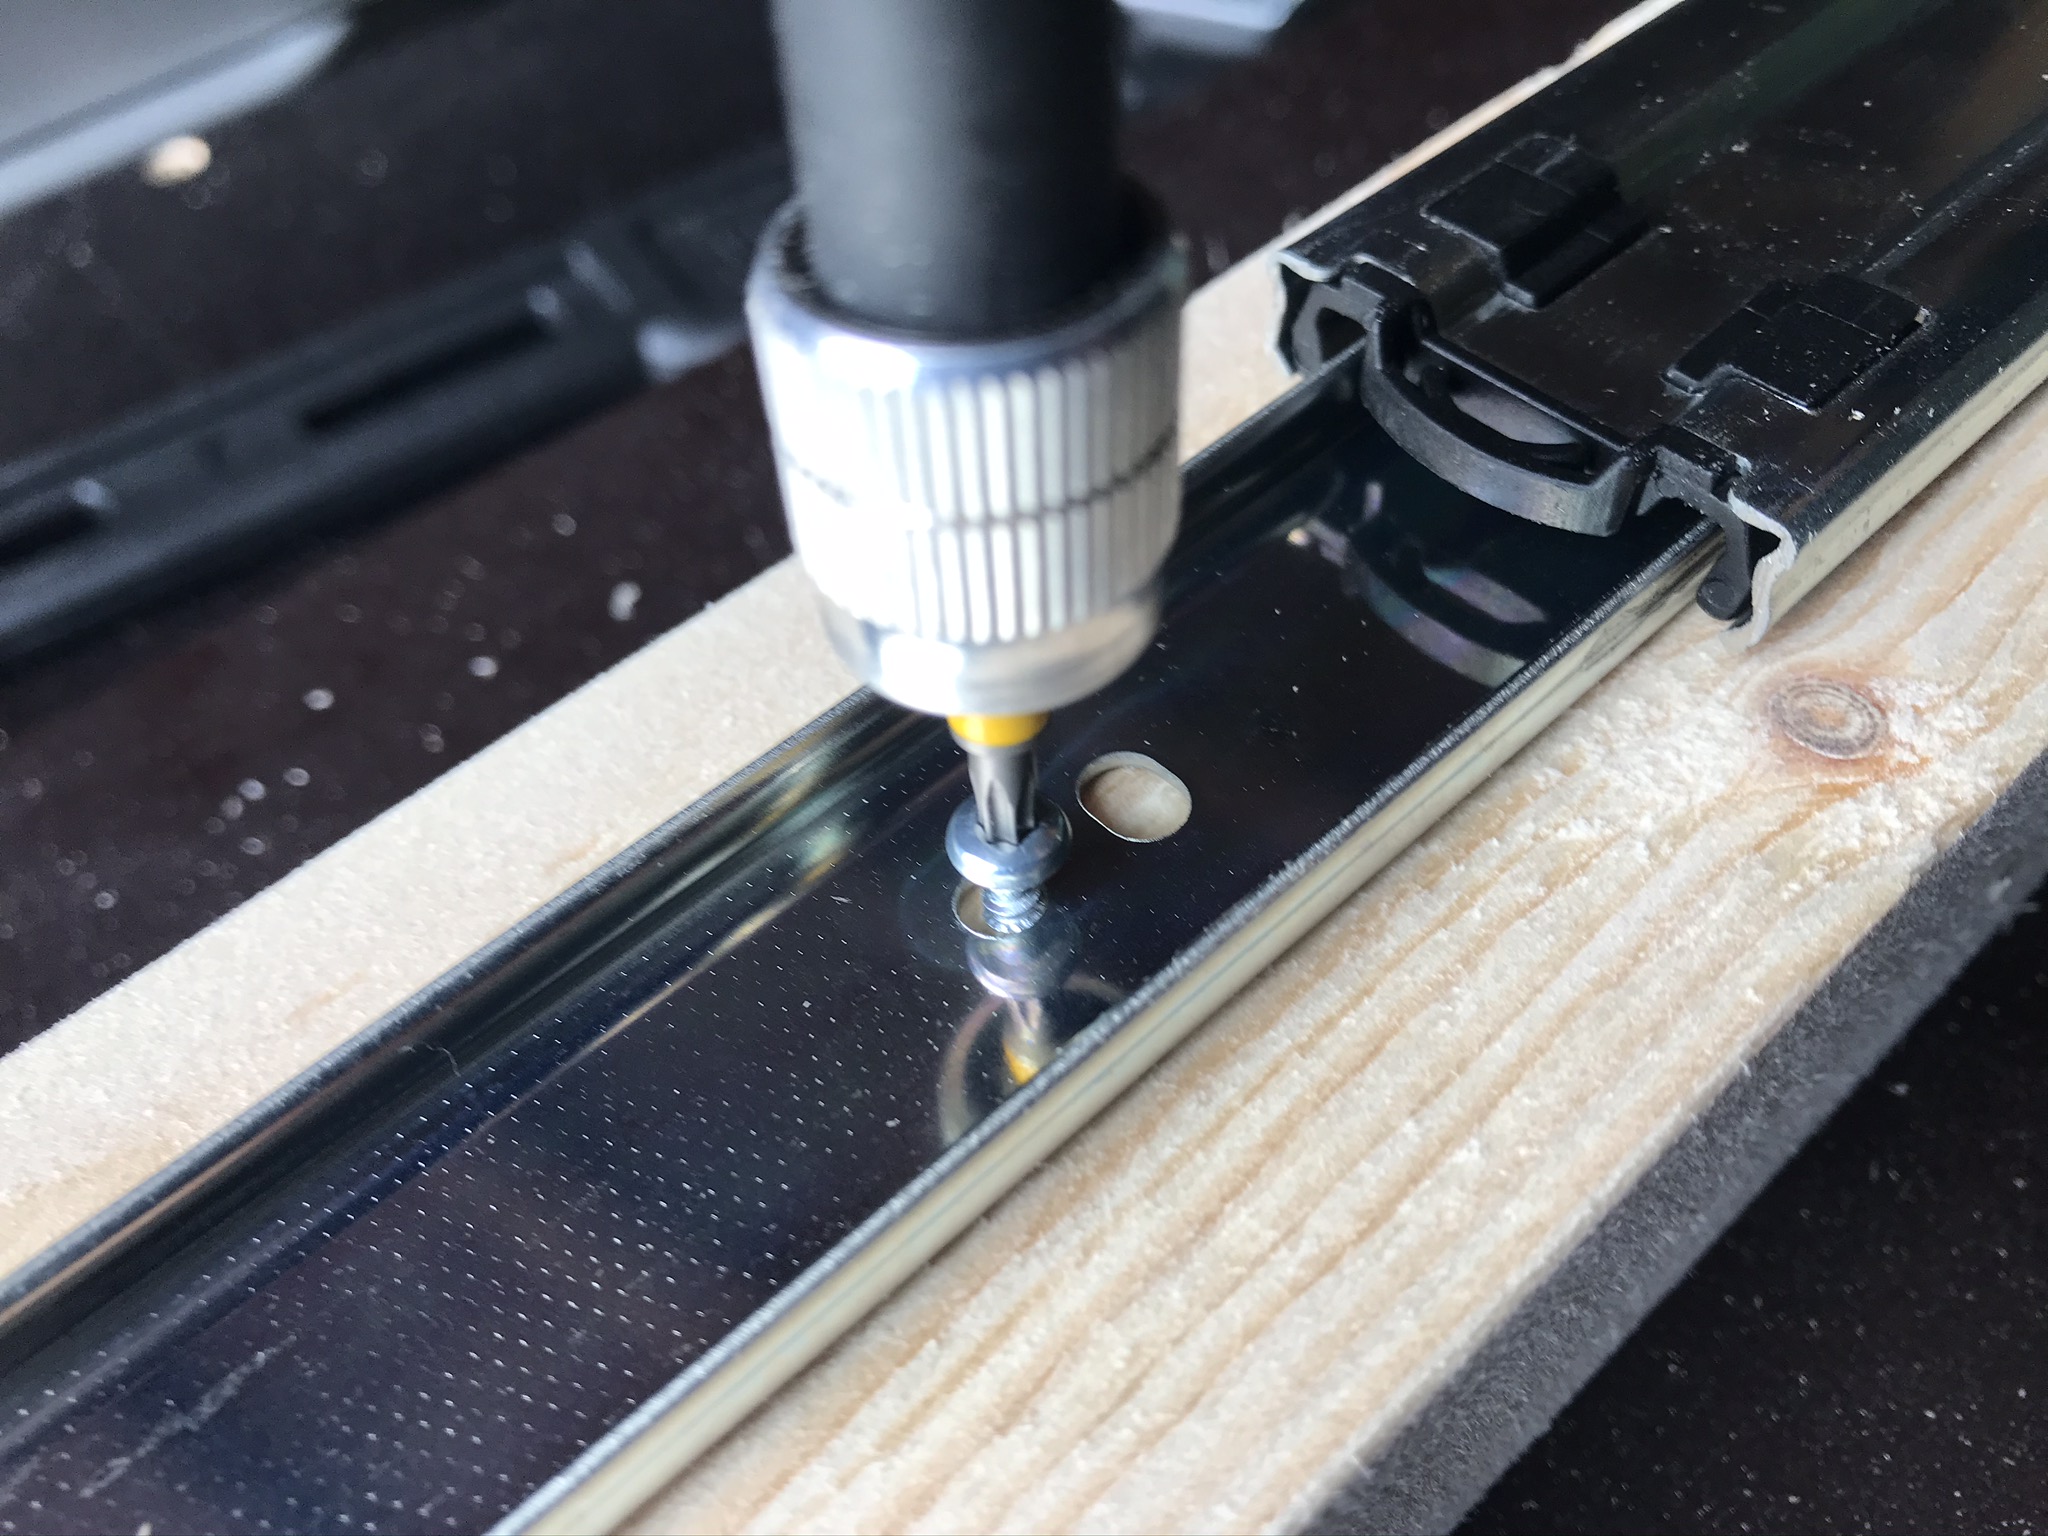
Now the full-extension runner can be screwed to the tabletop. Once this is done, you can simply glue the side parts of the router storage onto the TKS base frame. Do the same with the lid and the small back panel.

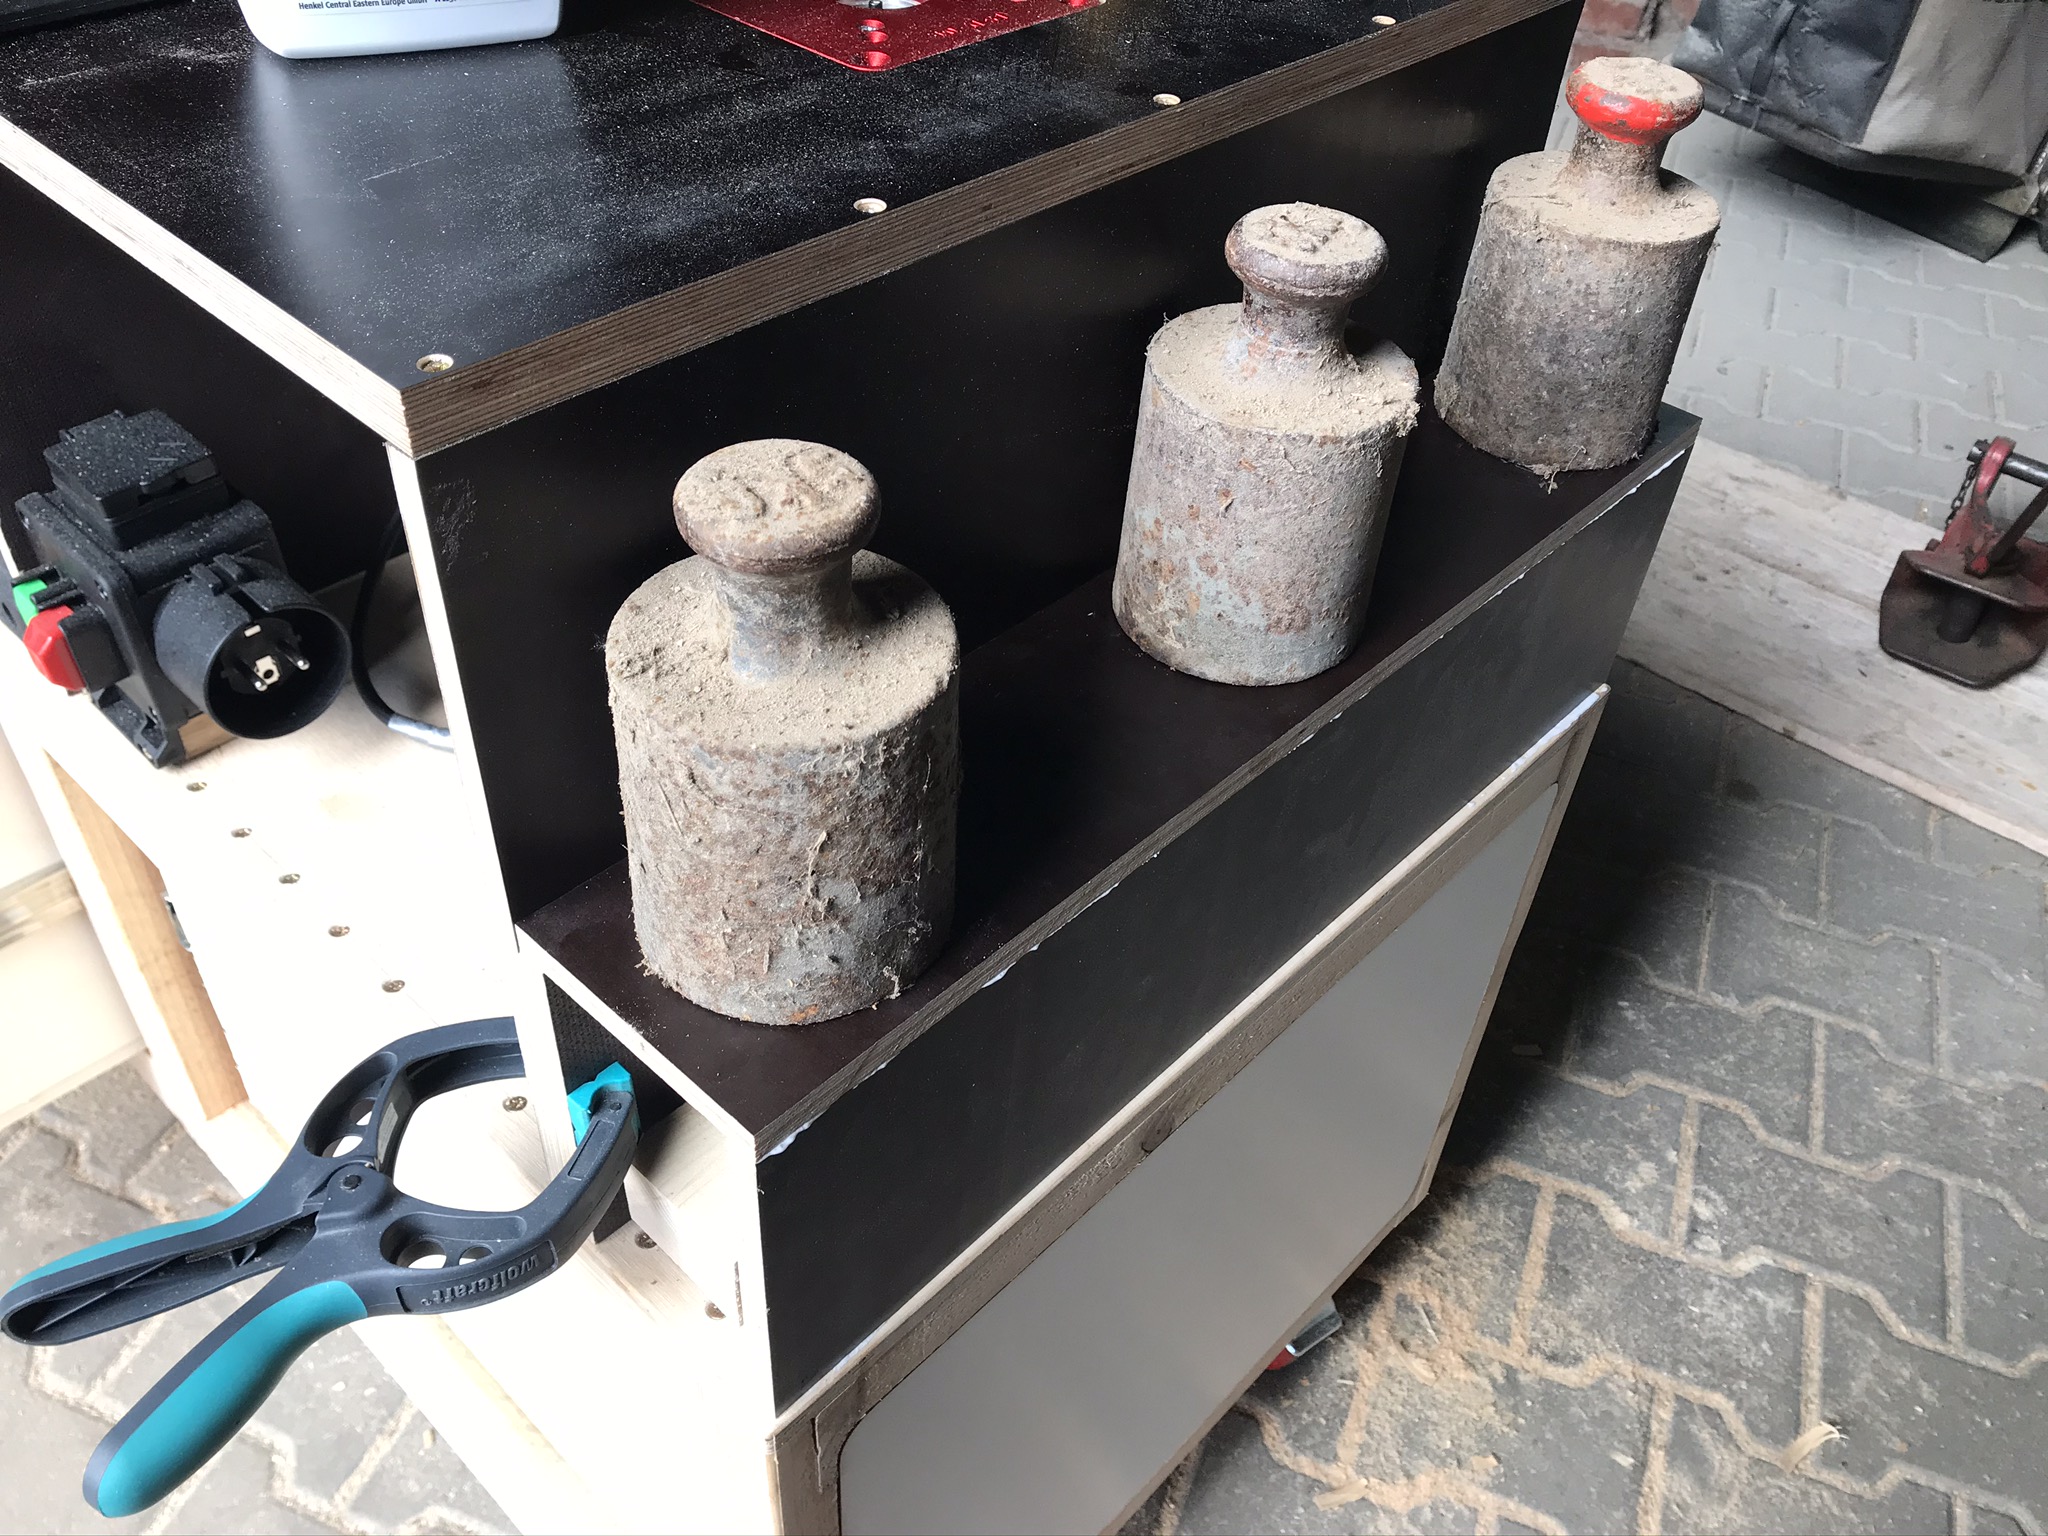
Finally, screw a handle* onto the panel. Glue the panel to the squared timber that is used to store the router. To ensure a uniform gap, you can place small spacers under the panel.
To store the router bits, drill as many 8 mm (or 10 mm, depending on the router bit) holes as you like in the squared timber and sort the cutters into them. From now on they are always ready to hand where they are needed. In the following pictures, only one hole has been drilled as an example.

This was one of the most time-consuming parts of building the DWE7492* saw station yourself! The roughest part is done at this point.
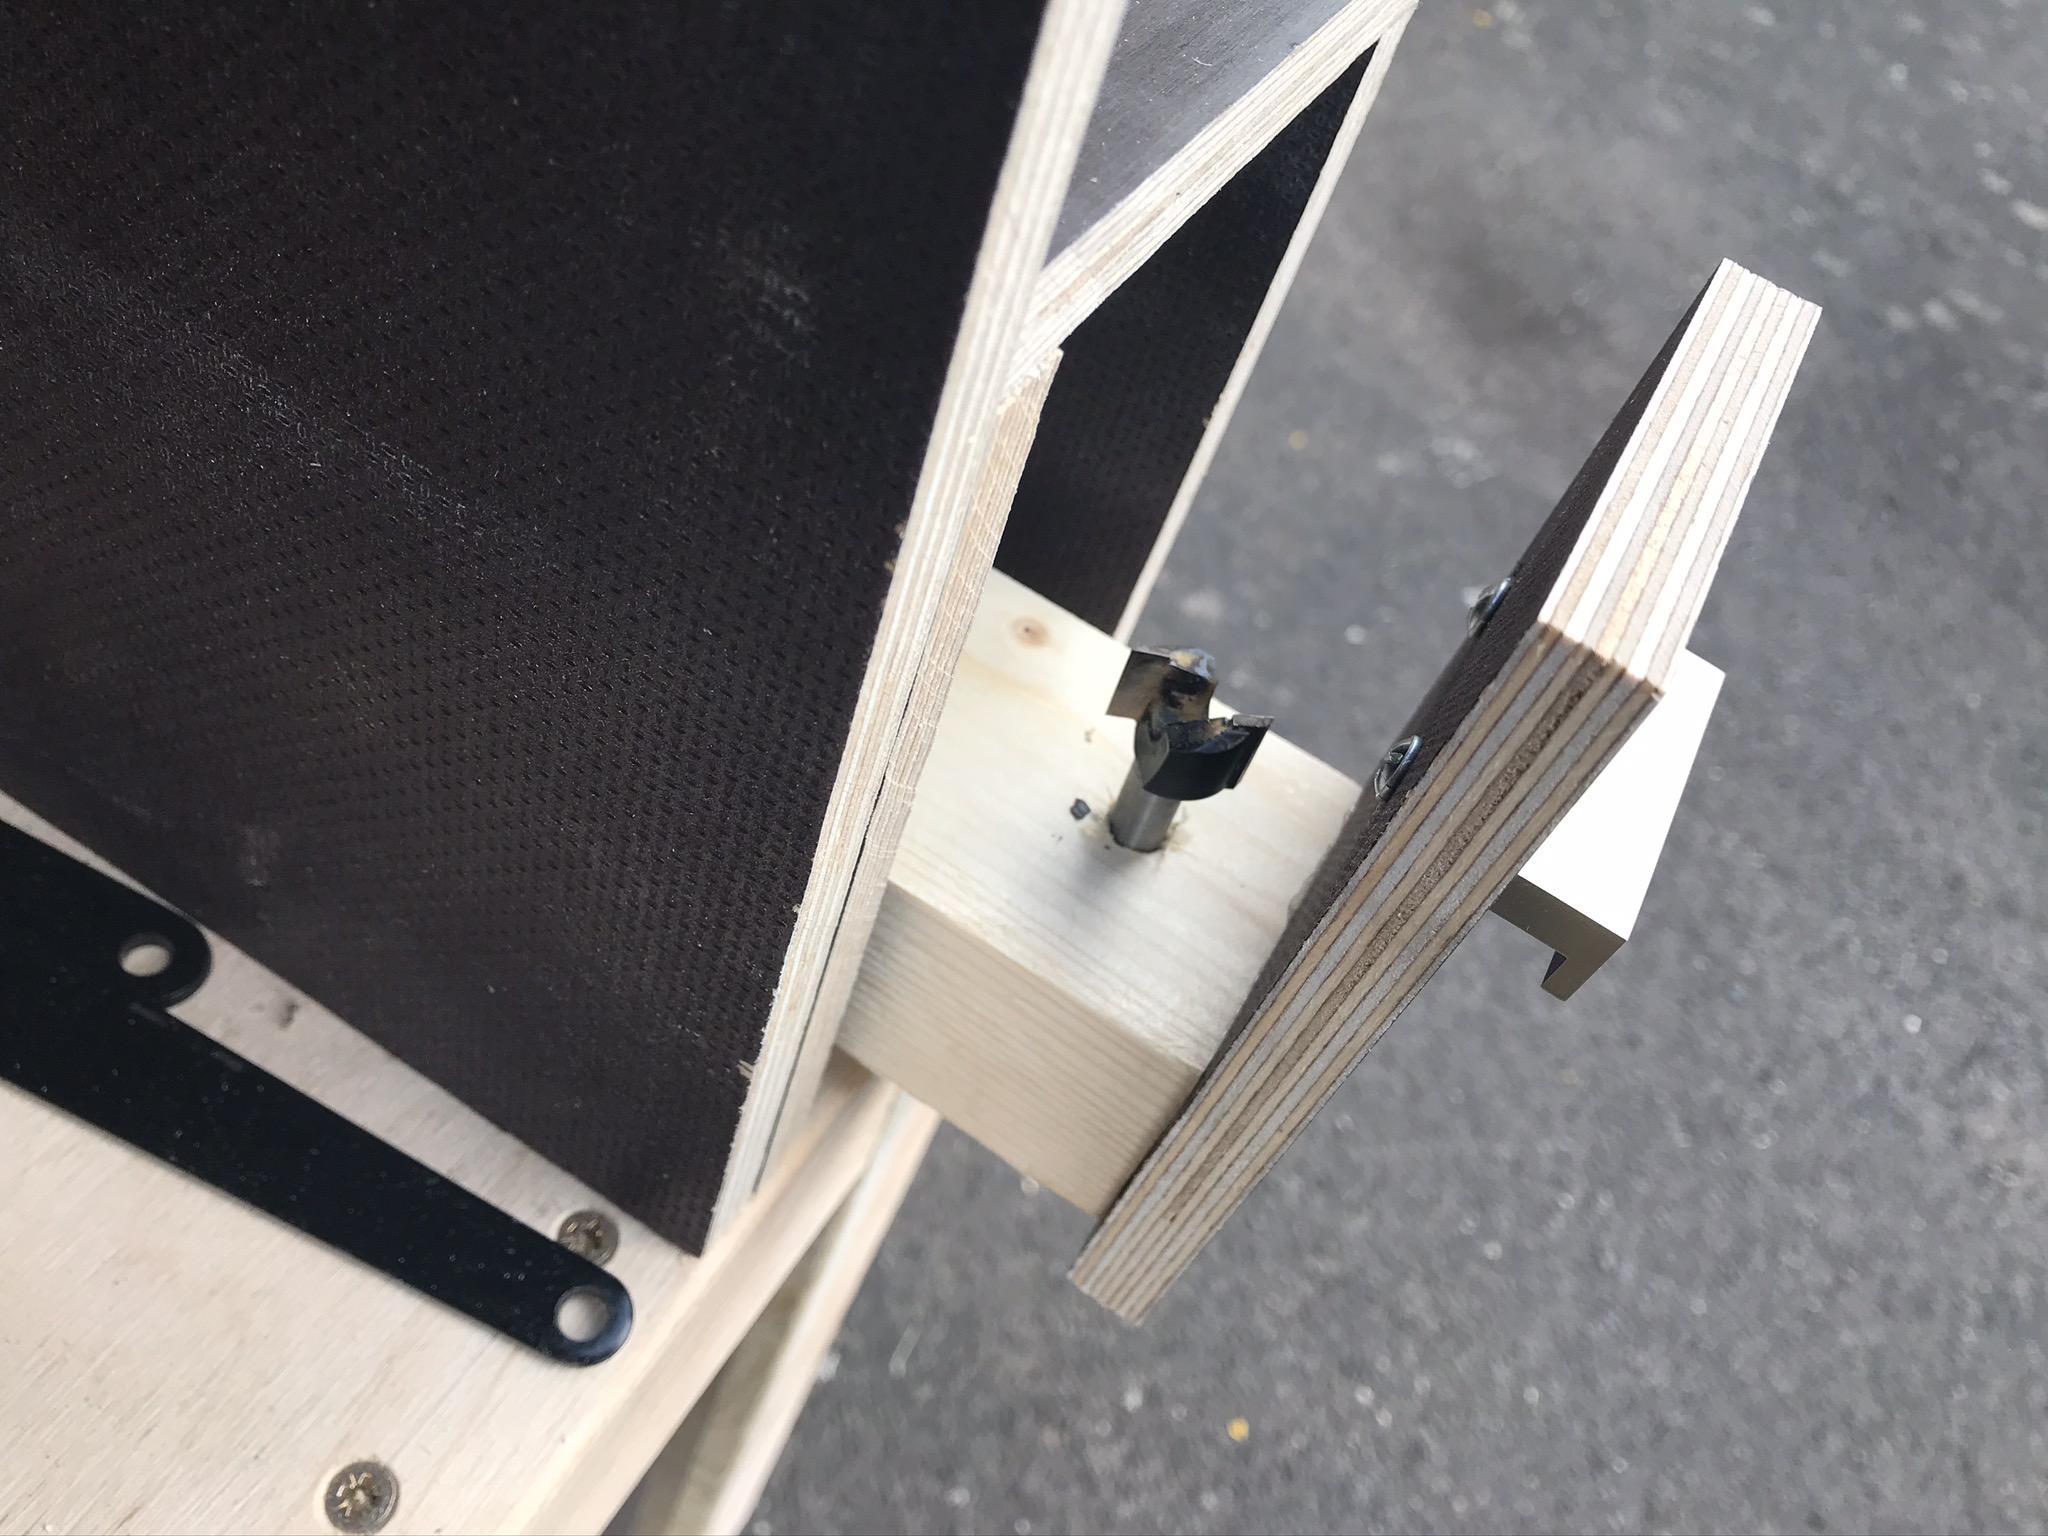
To strengthen the router table and make it more stable, you can screw the side wall of the router table to the side wall of the router storage. I used 6 screws for this.

- Removable, non-marring pads grip firmly and protect work
- One-handed quick-release trigger
DWE7492 router table – installation of a safety switch
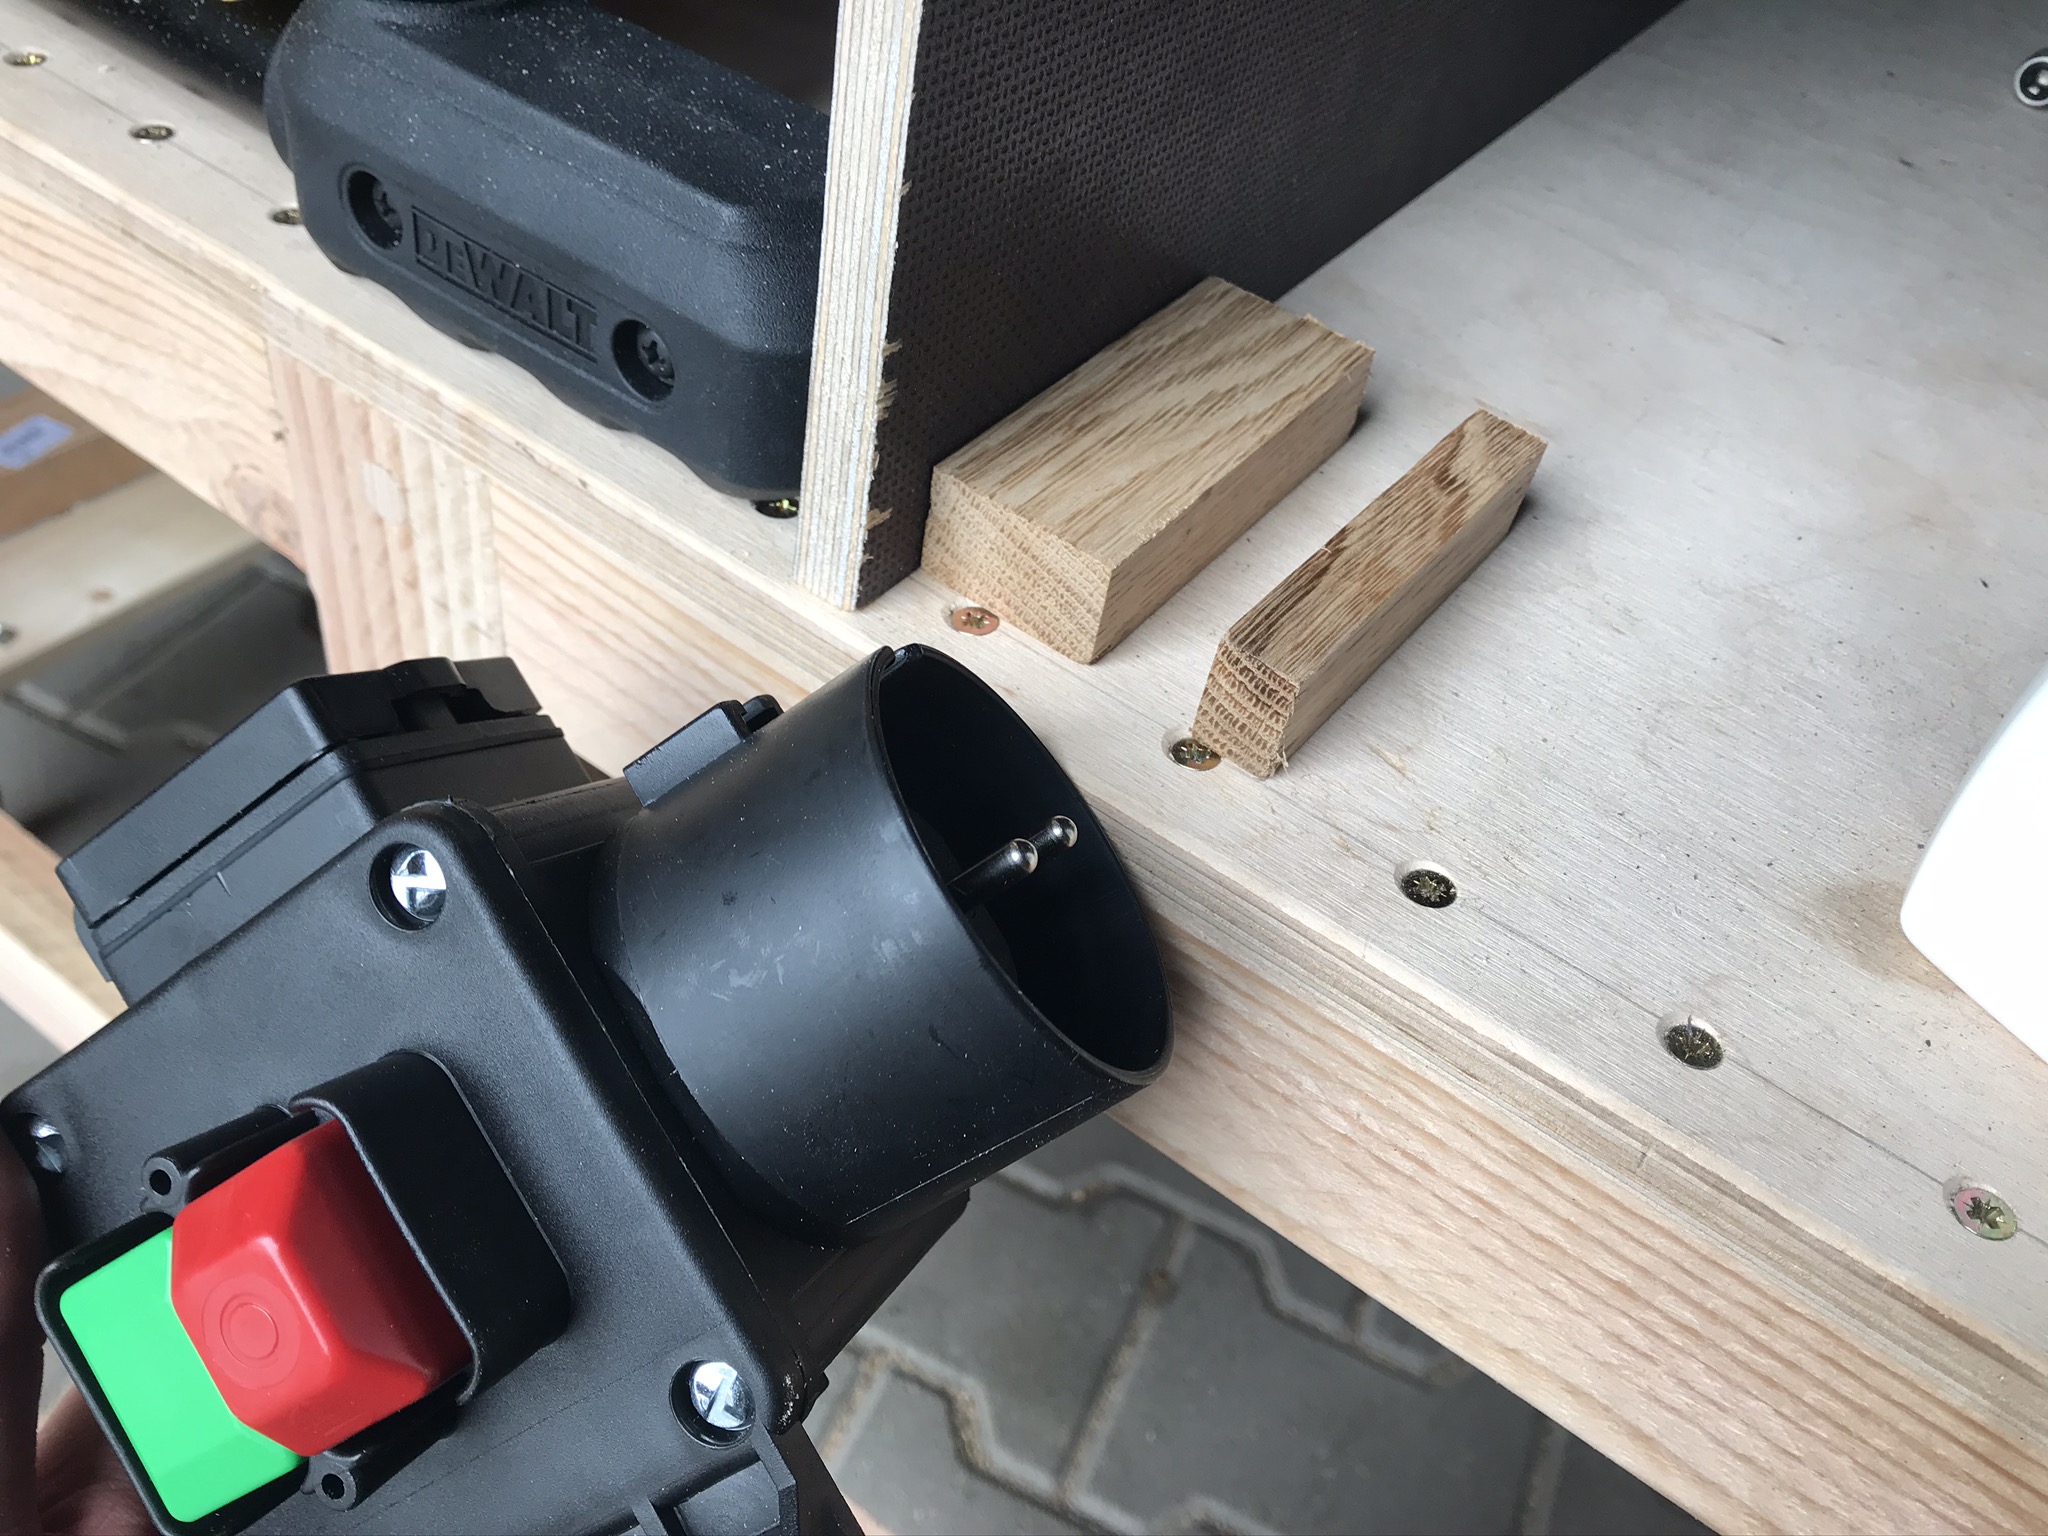
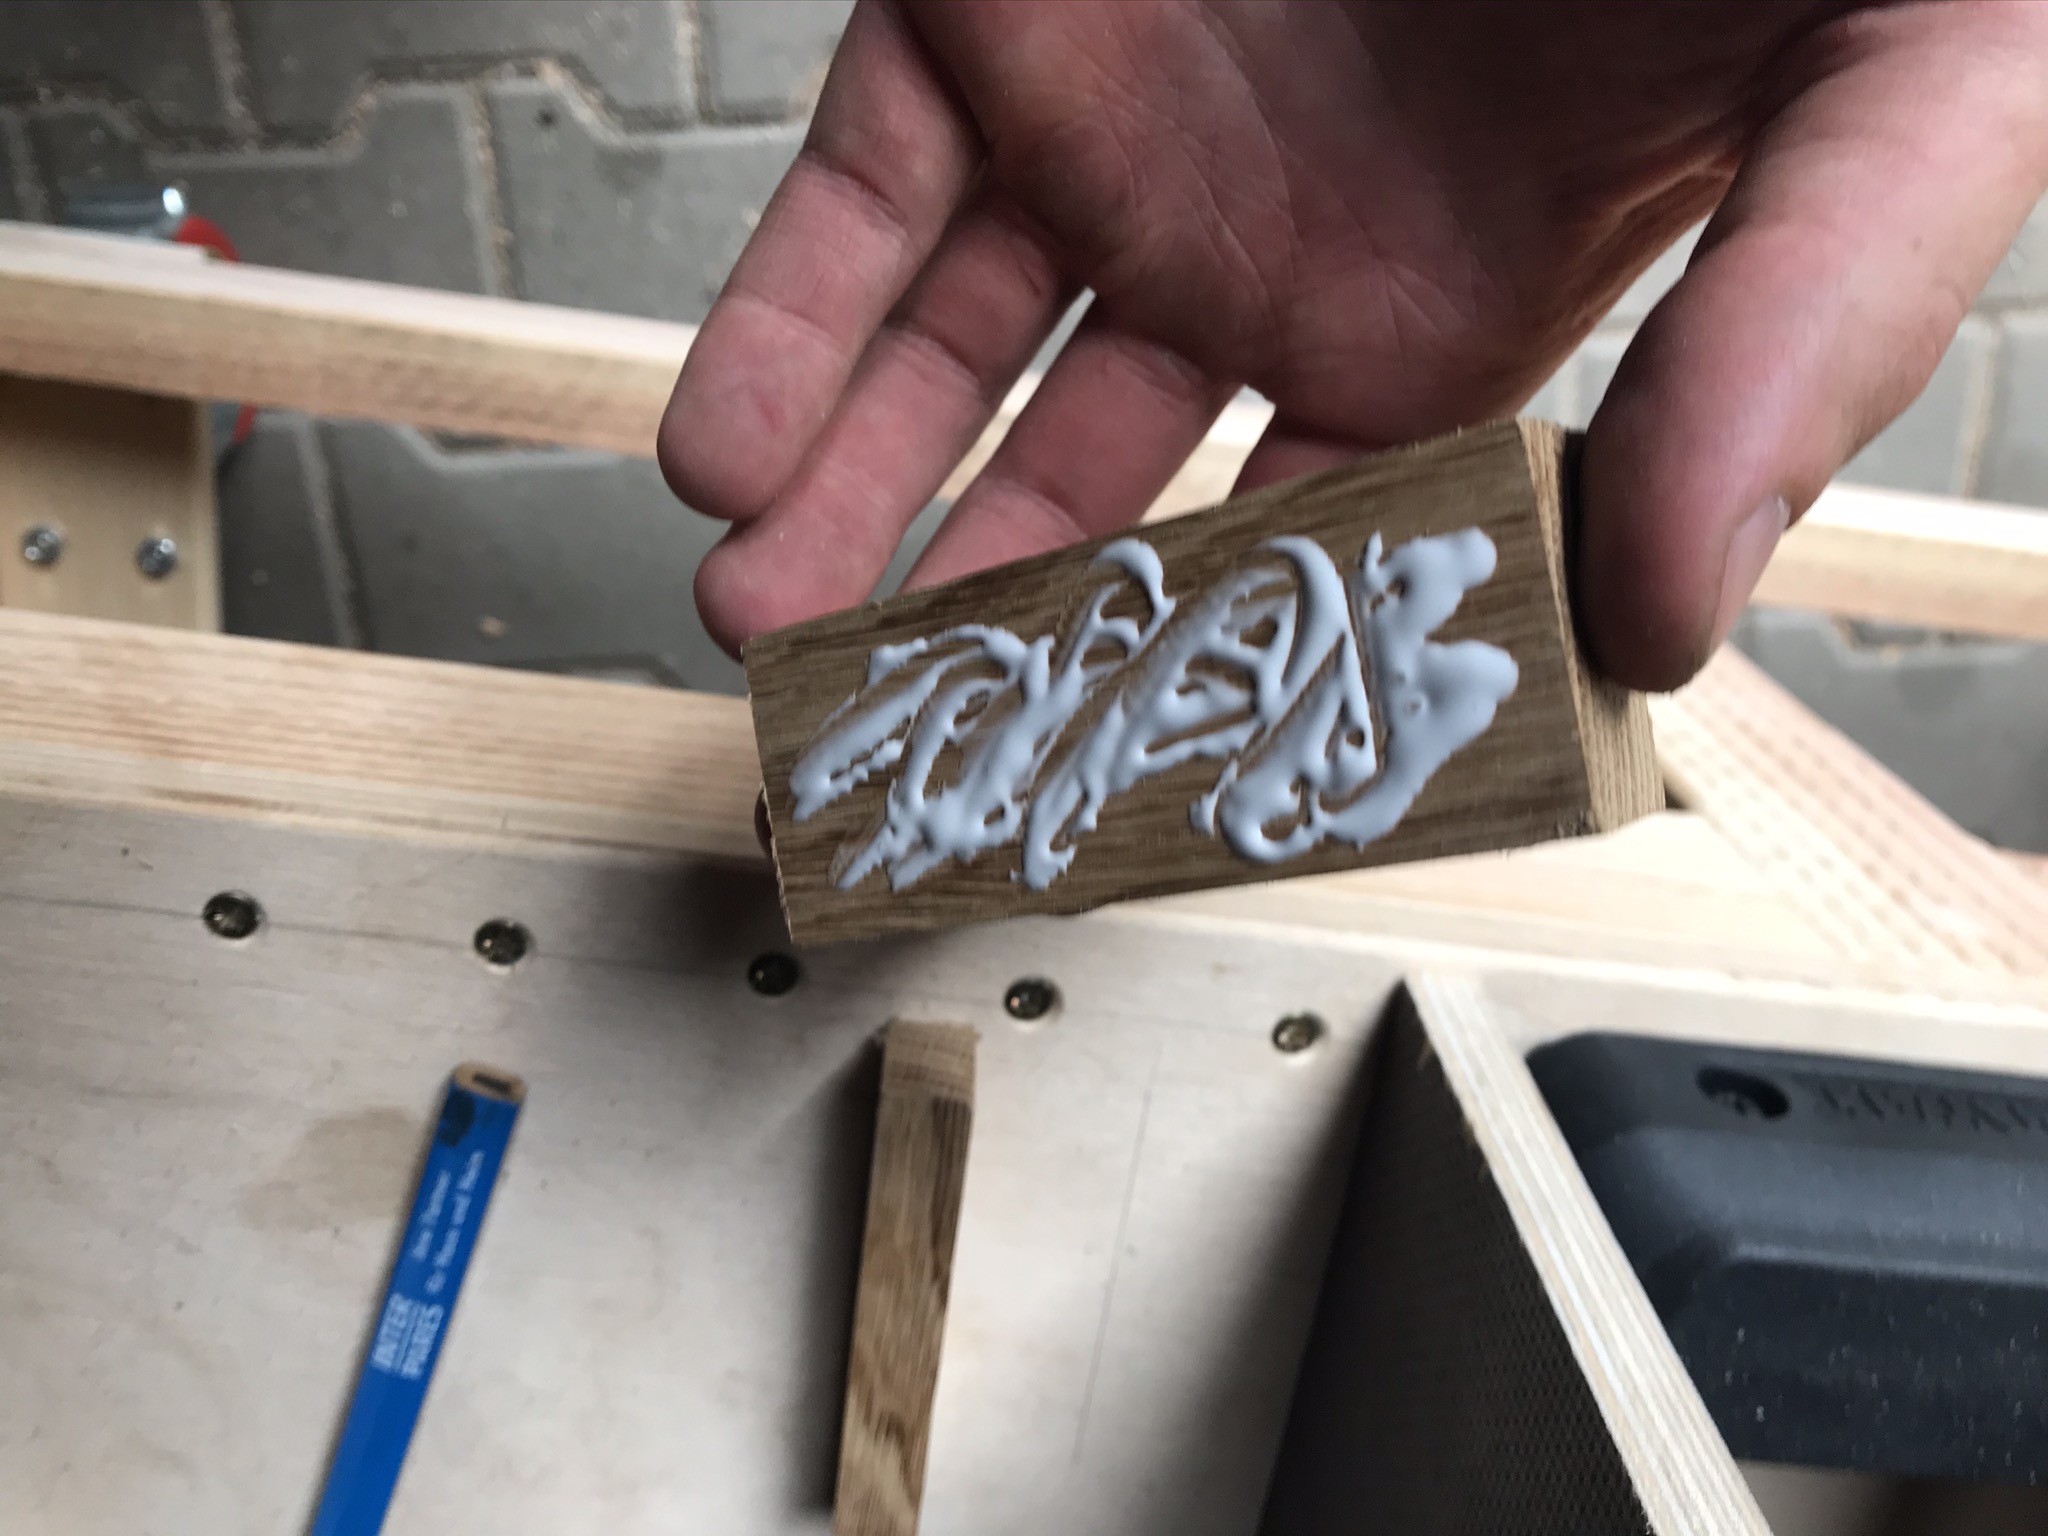
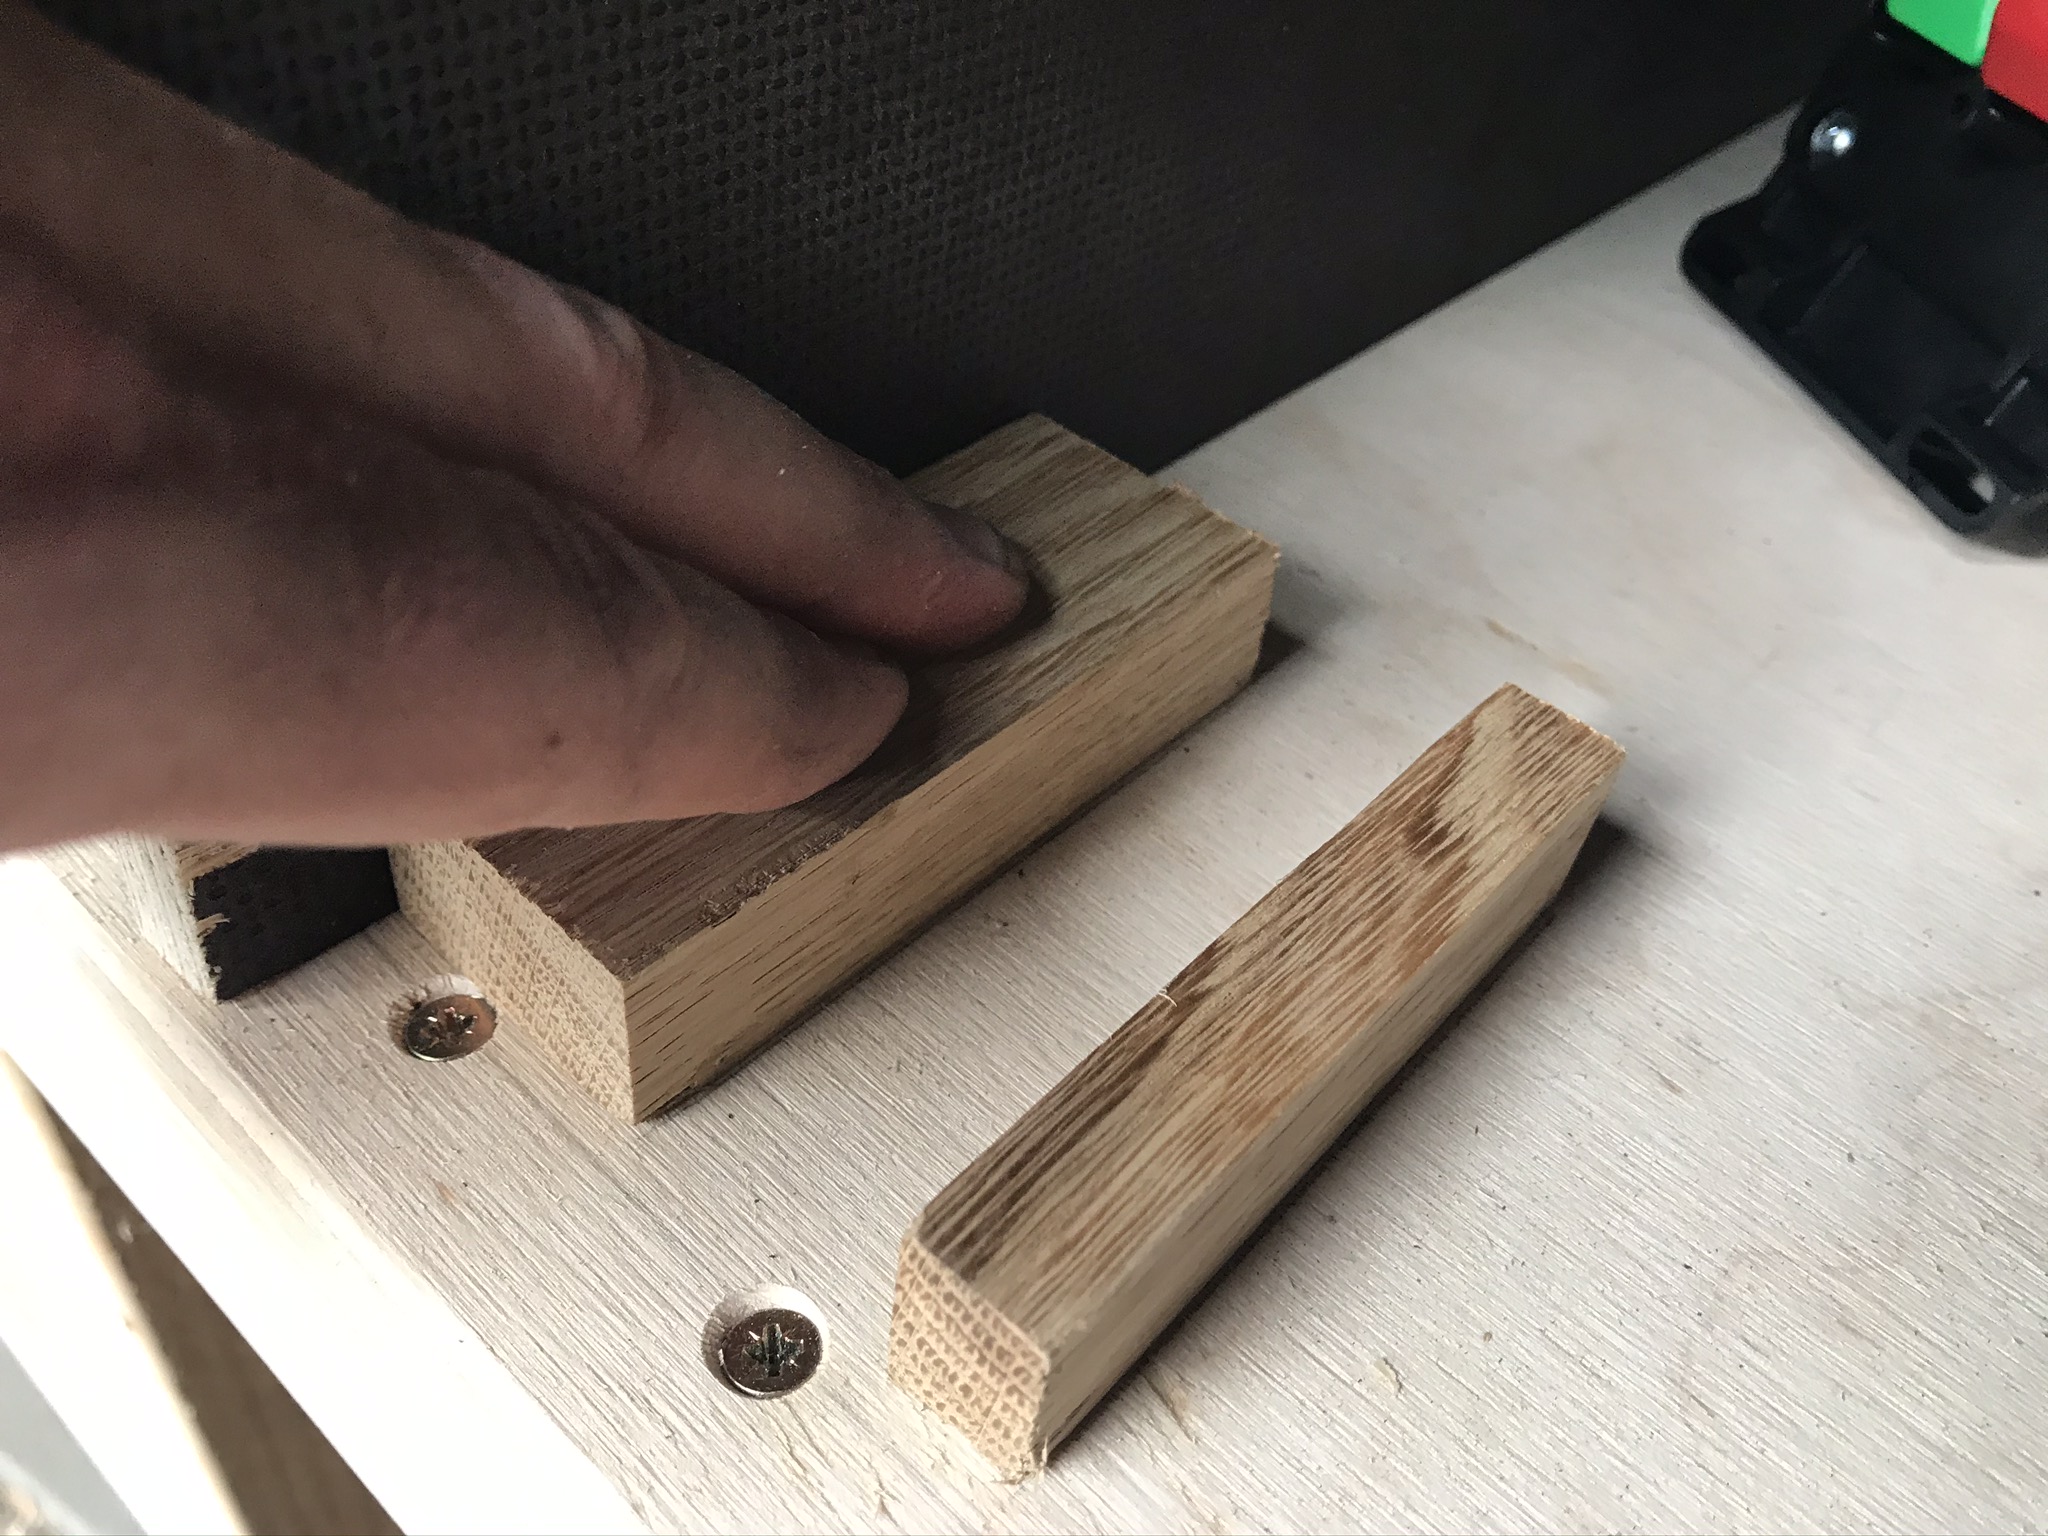
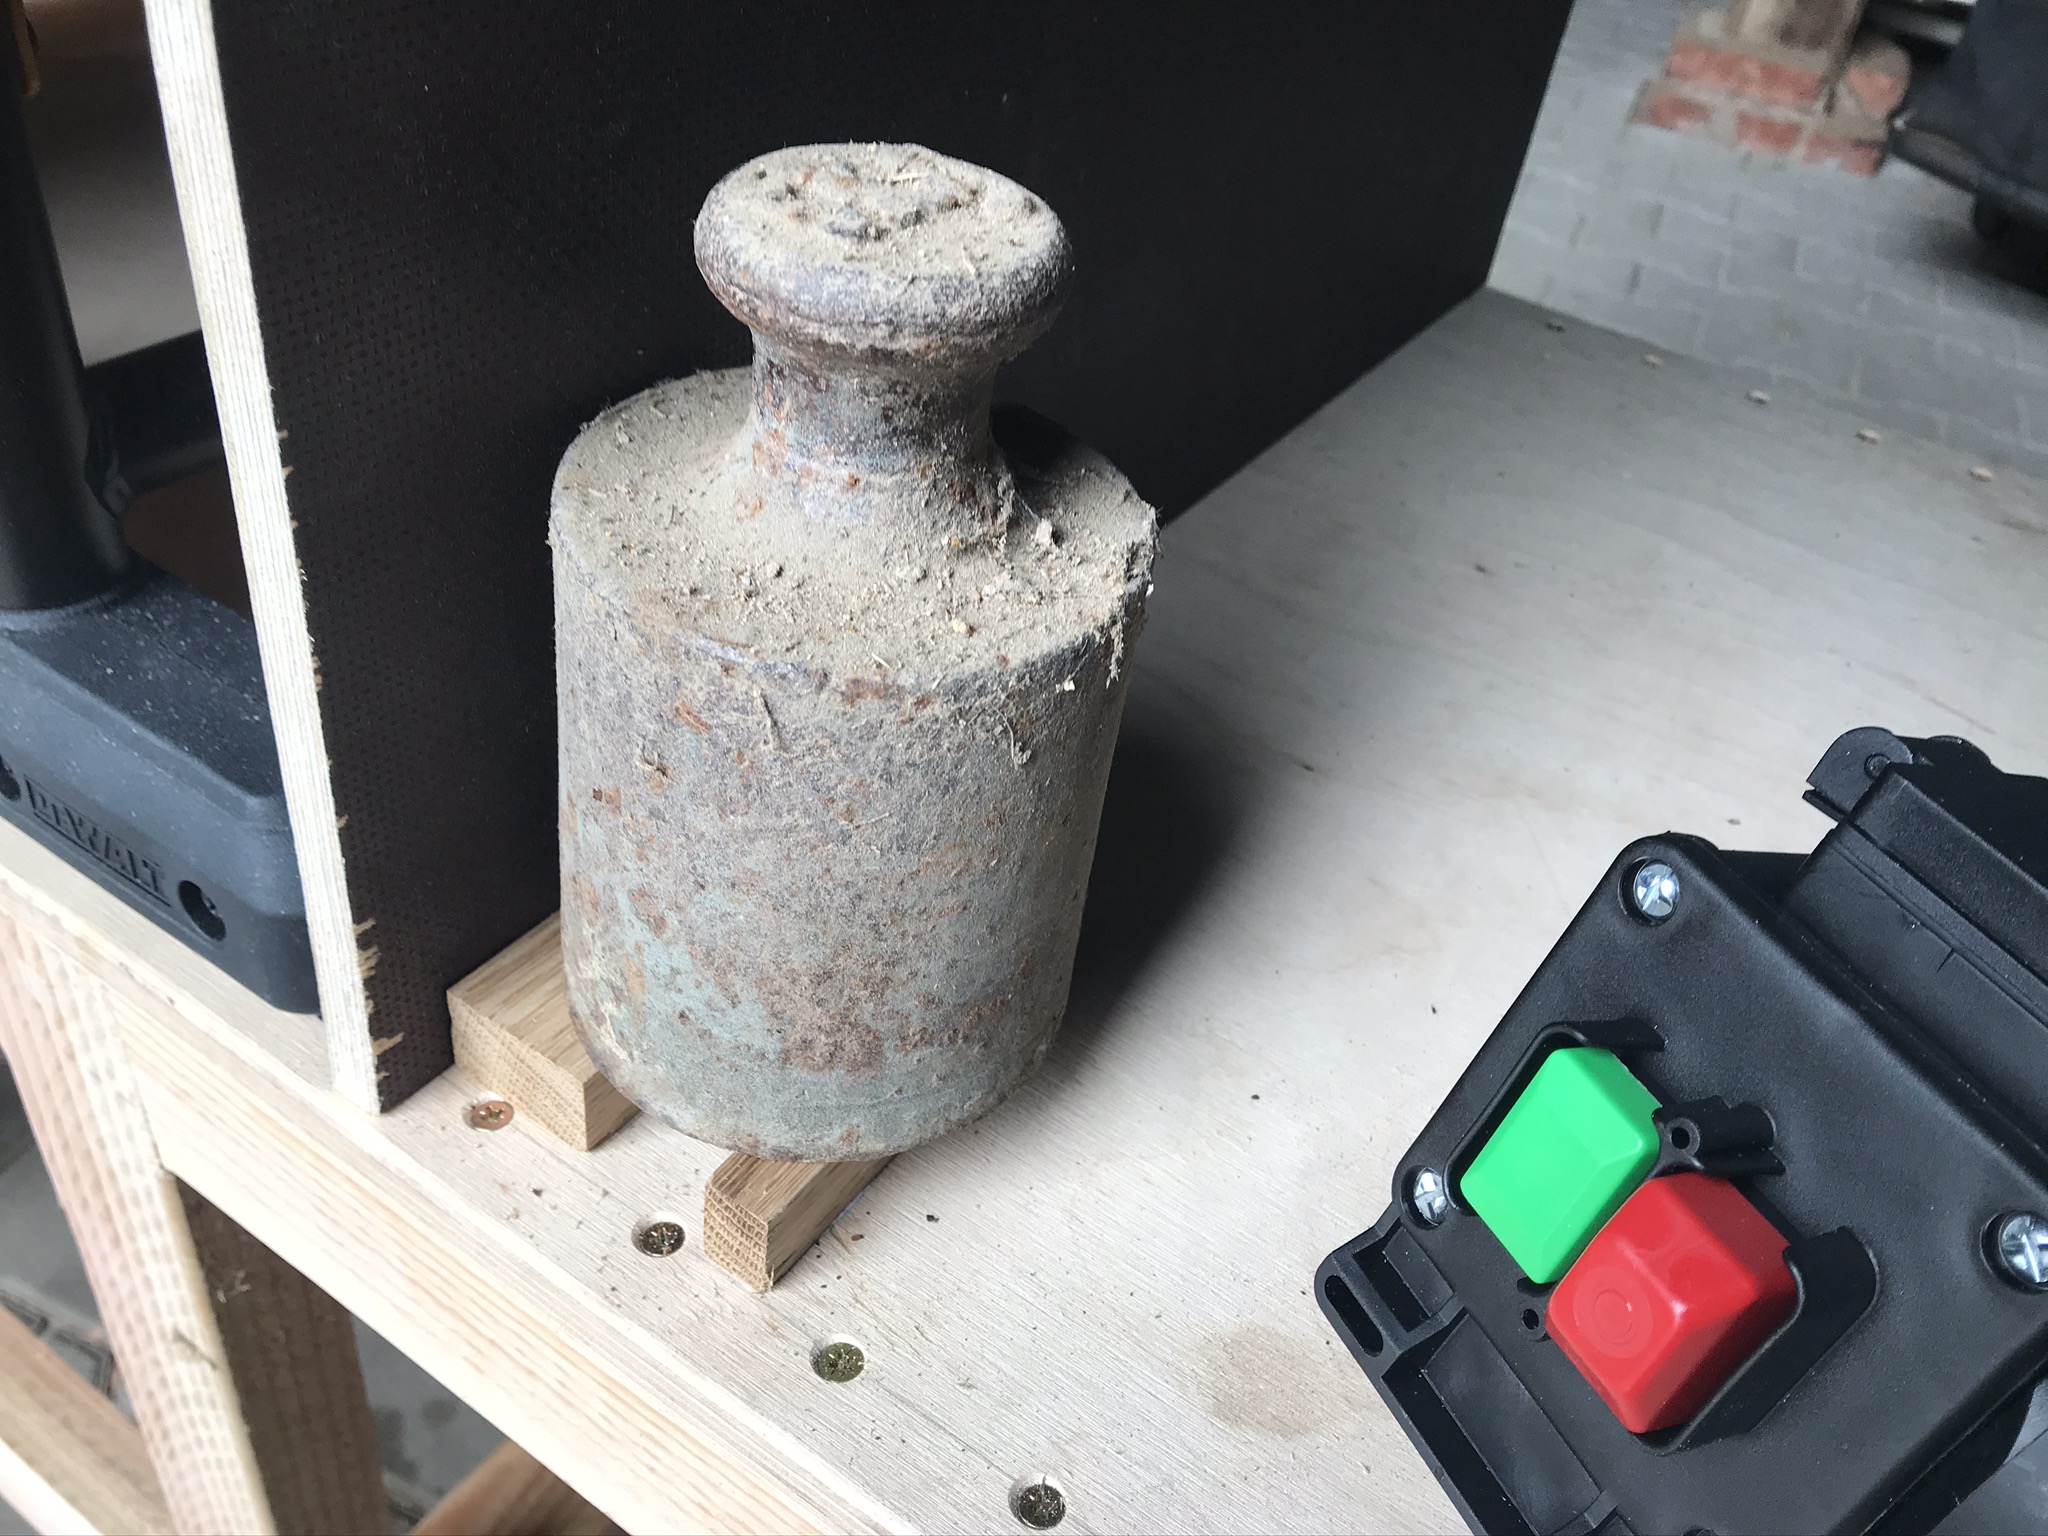
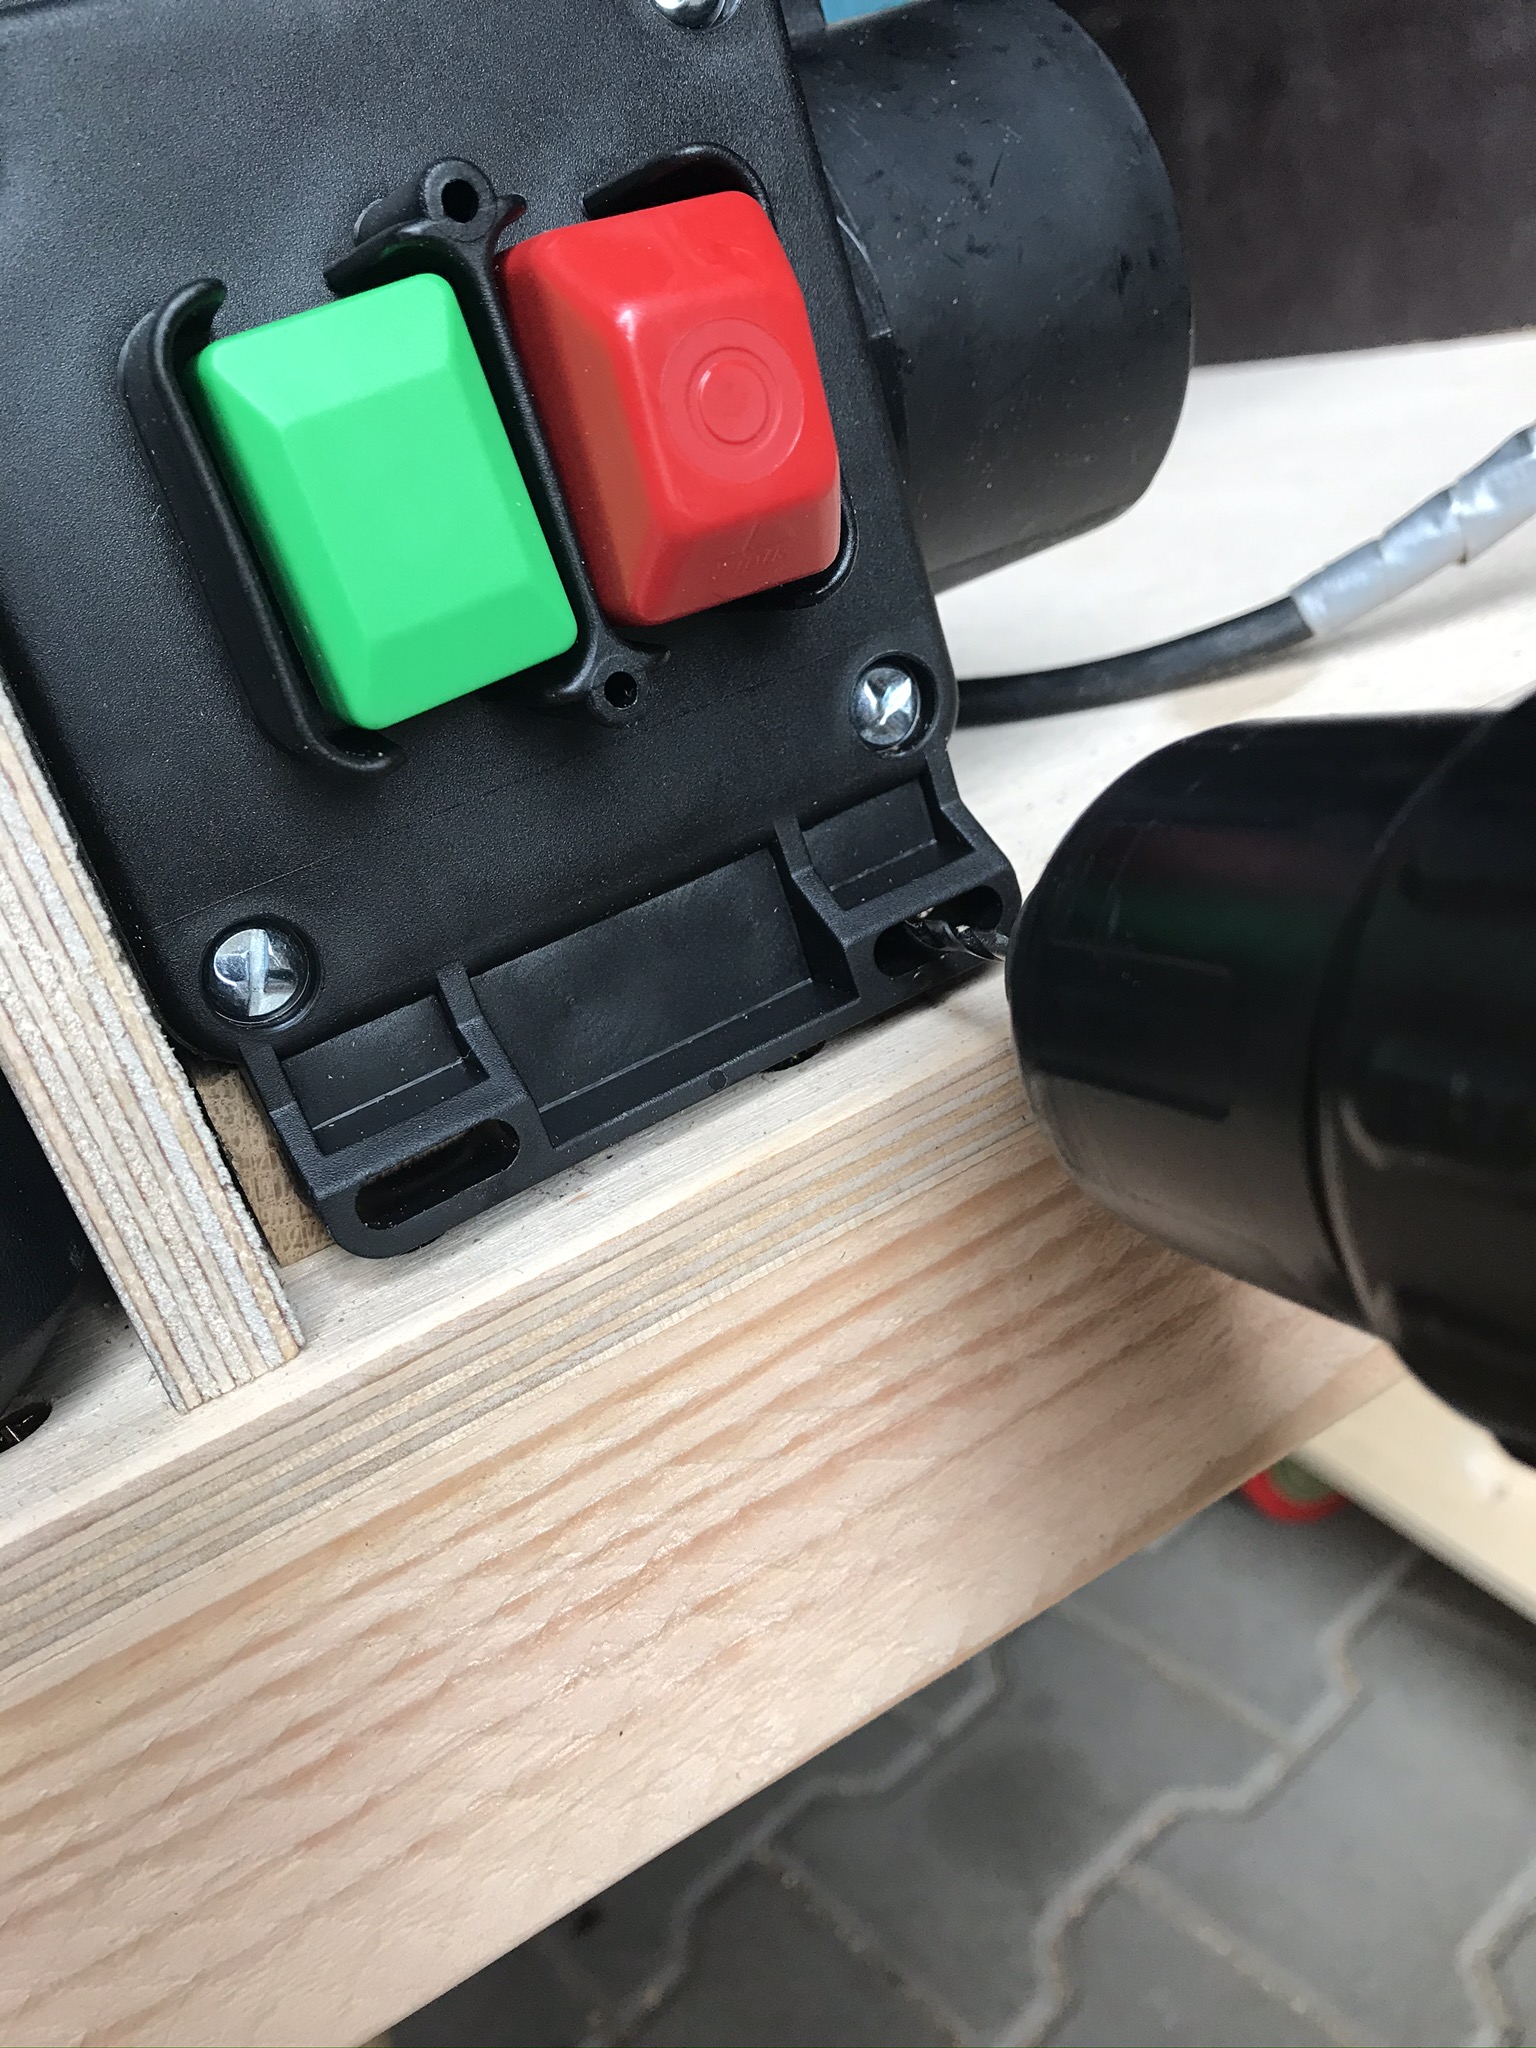
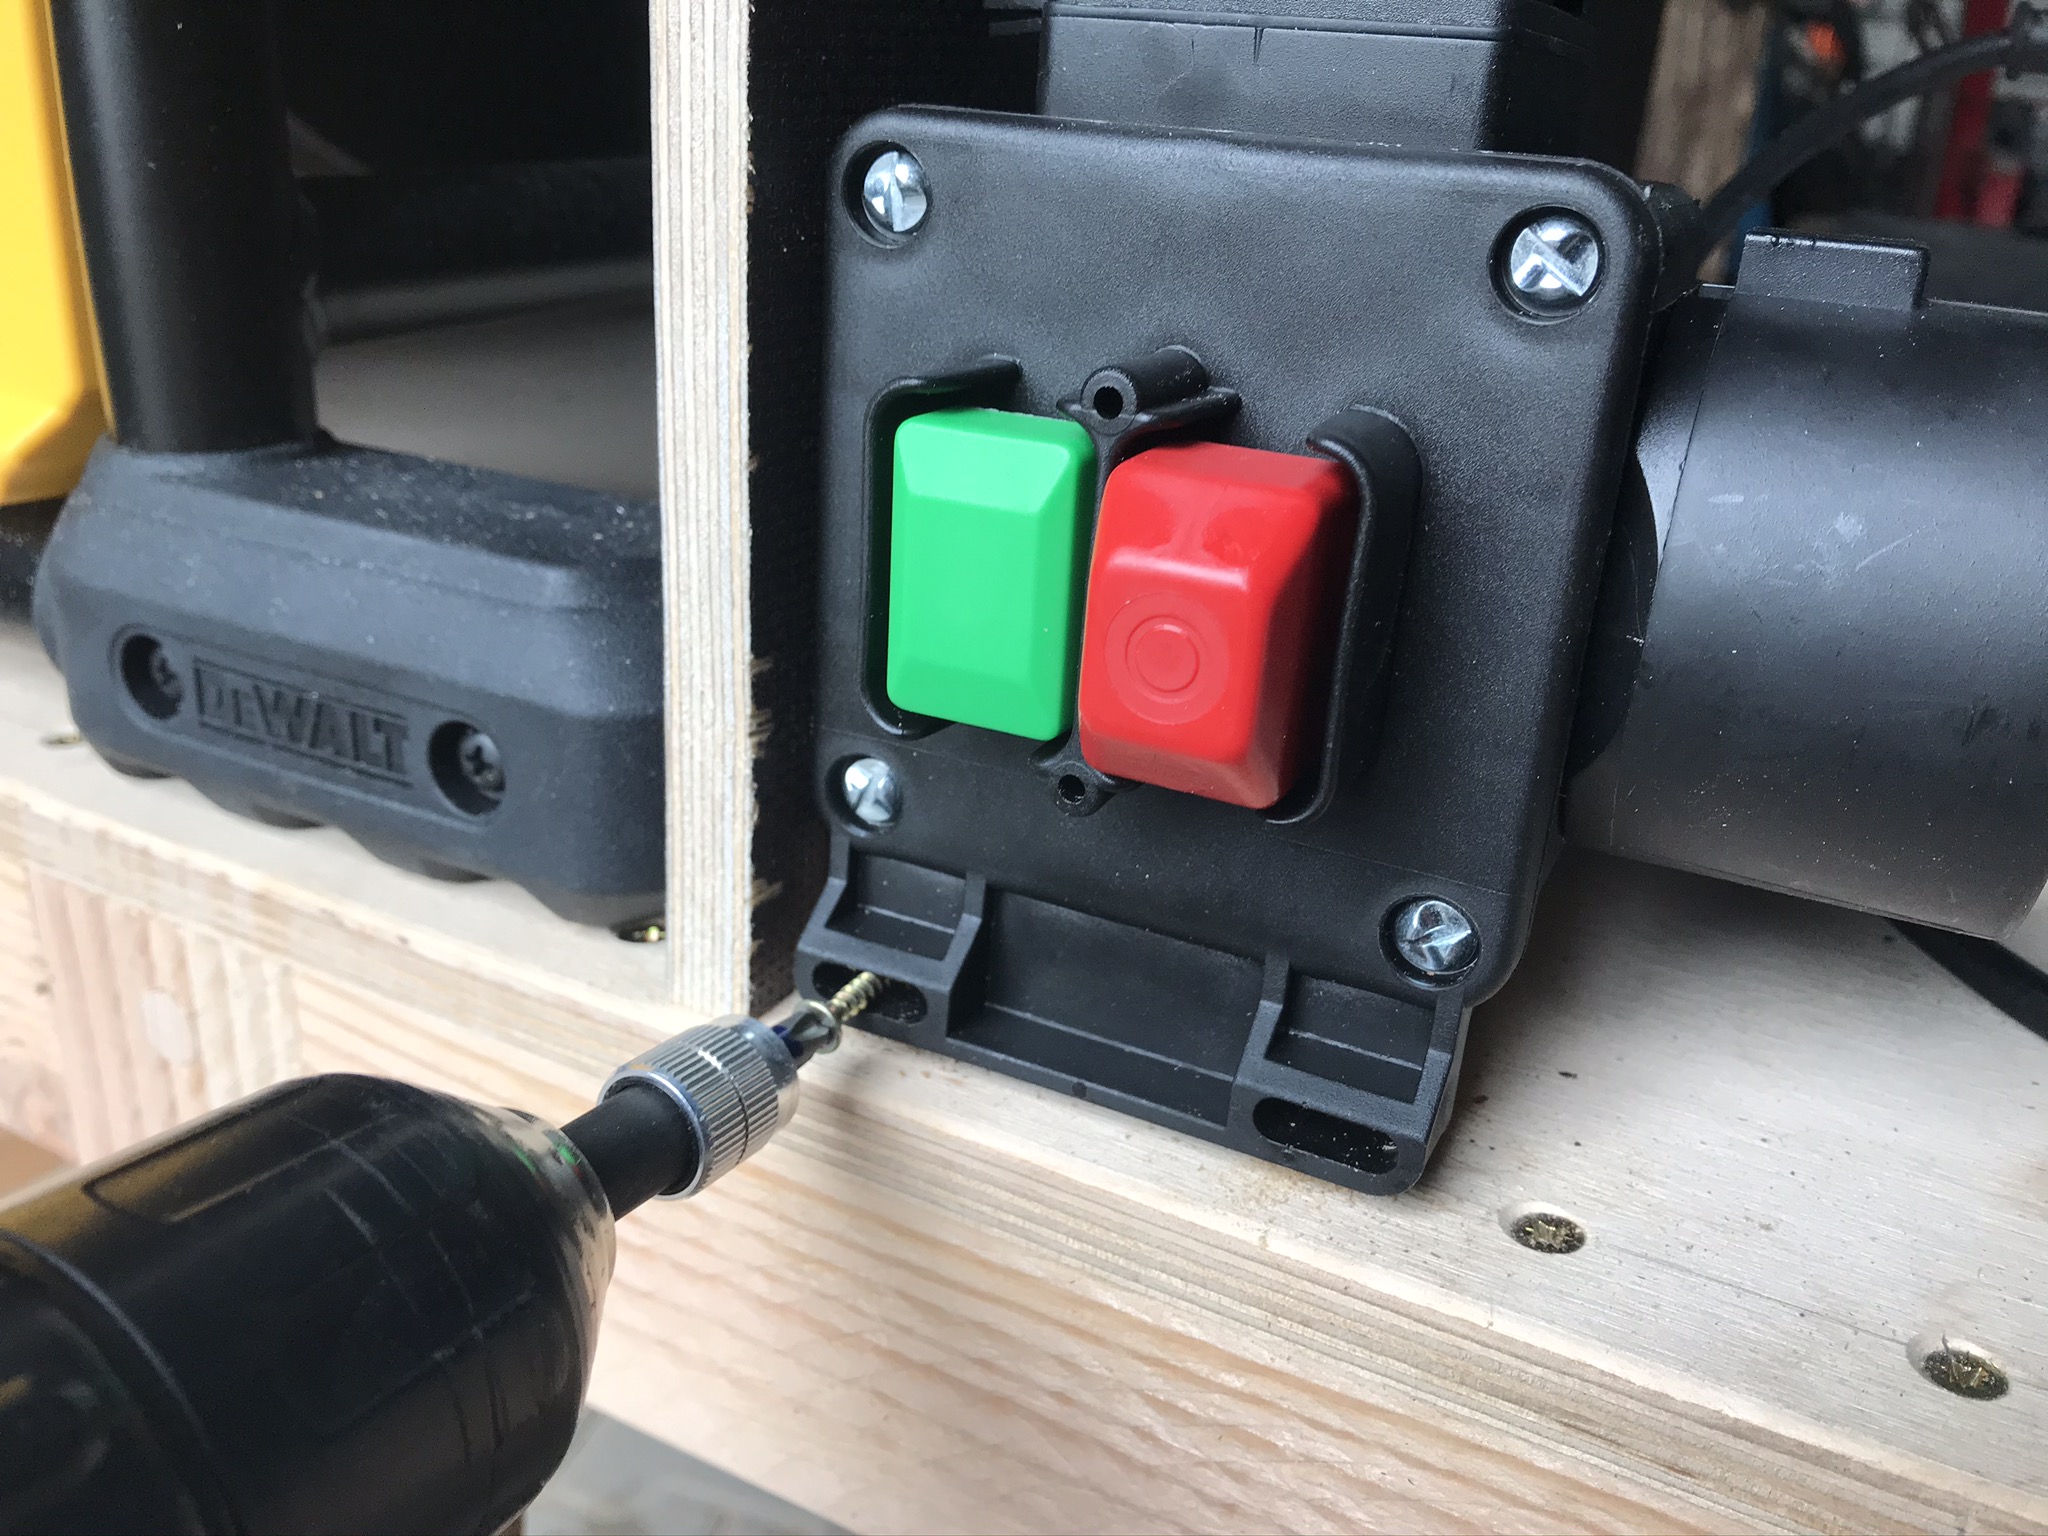
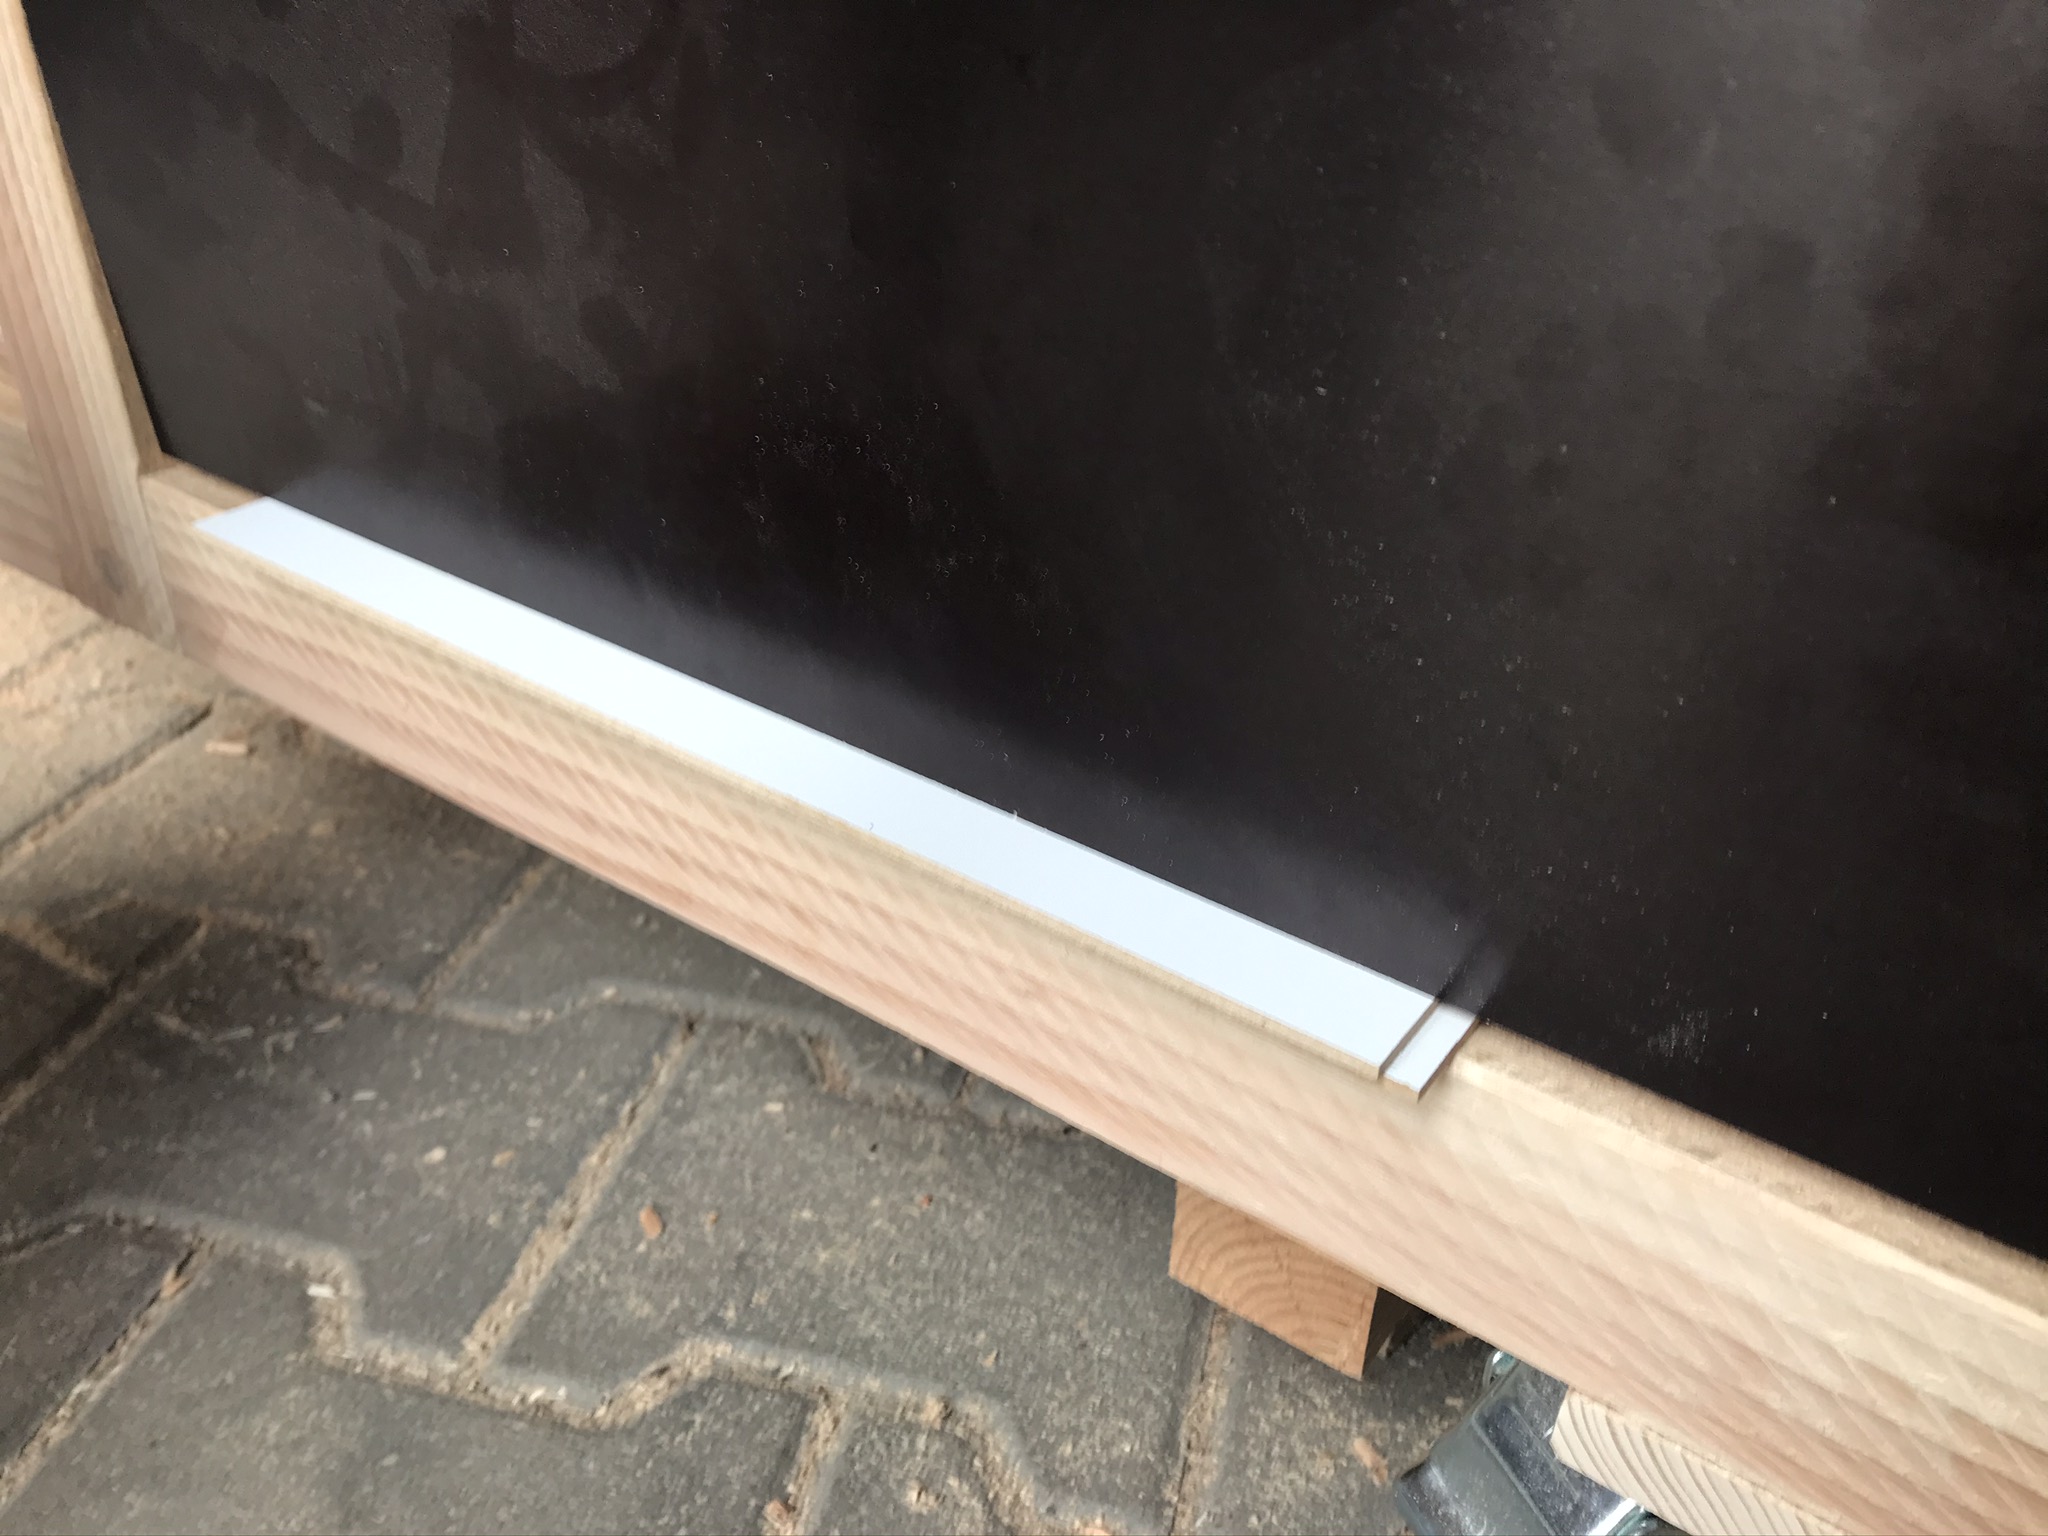
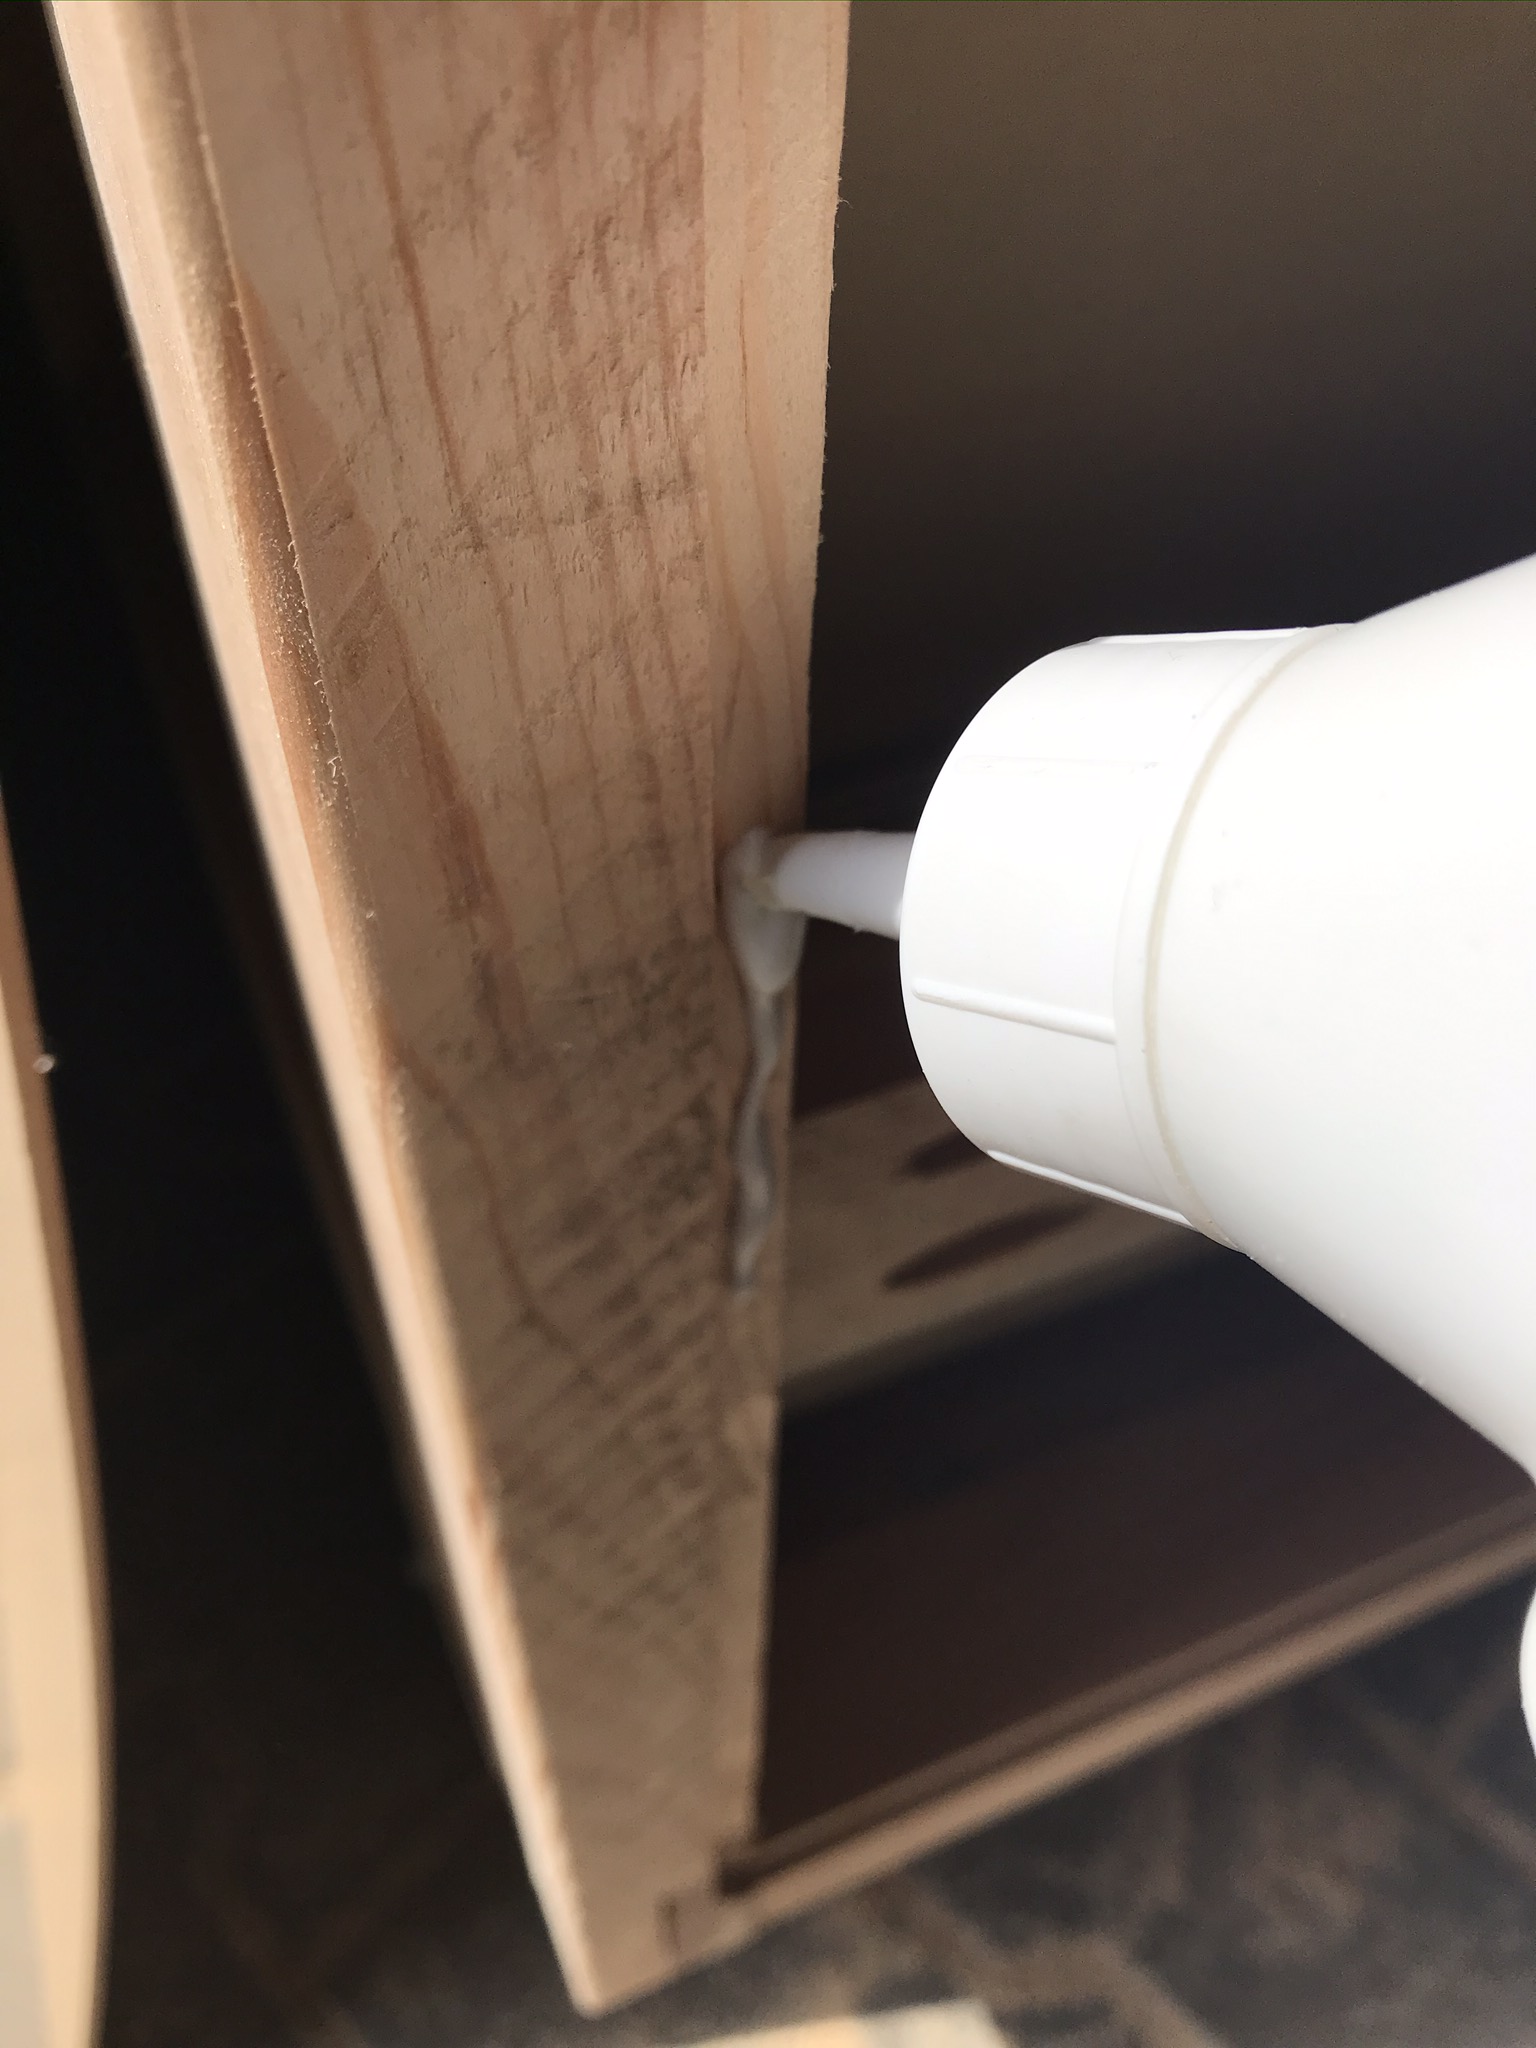
To ensure that the router table meets current standards and that the router can be switched off quickly at any time, I have installed a safety switch*. The switch only needs to be attached and is then ready for use. However, the safety switch* has a small nose on the underside, which makes it difficult to attach. I therefore glued two small wooden spacers with a gap for the plastic nose to the tabletop of the TKS frame. After that, the safety switch can be attached without any problems.
Attaching the table saw DWE7492 on the saw stand
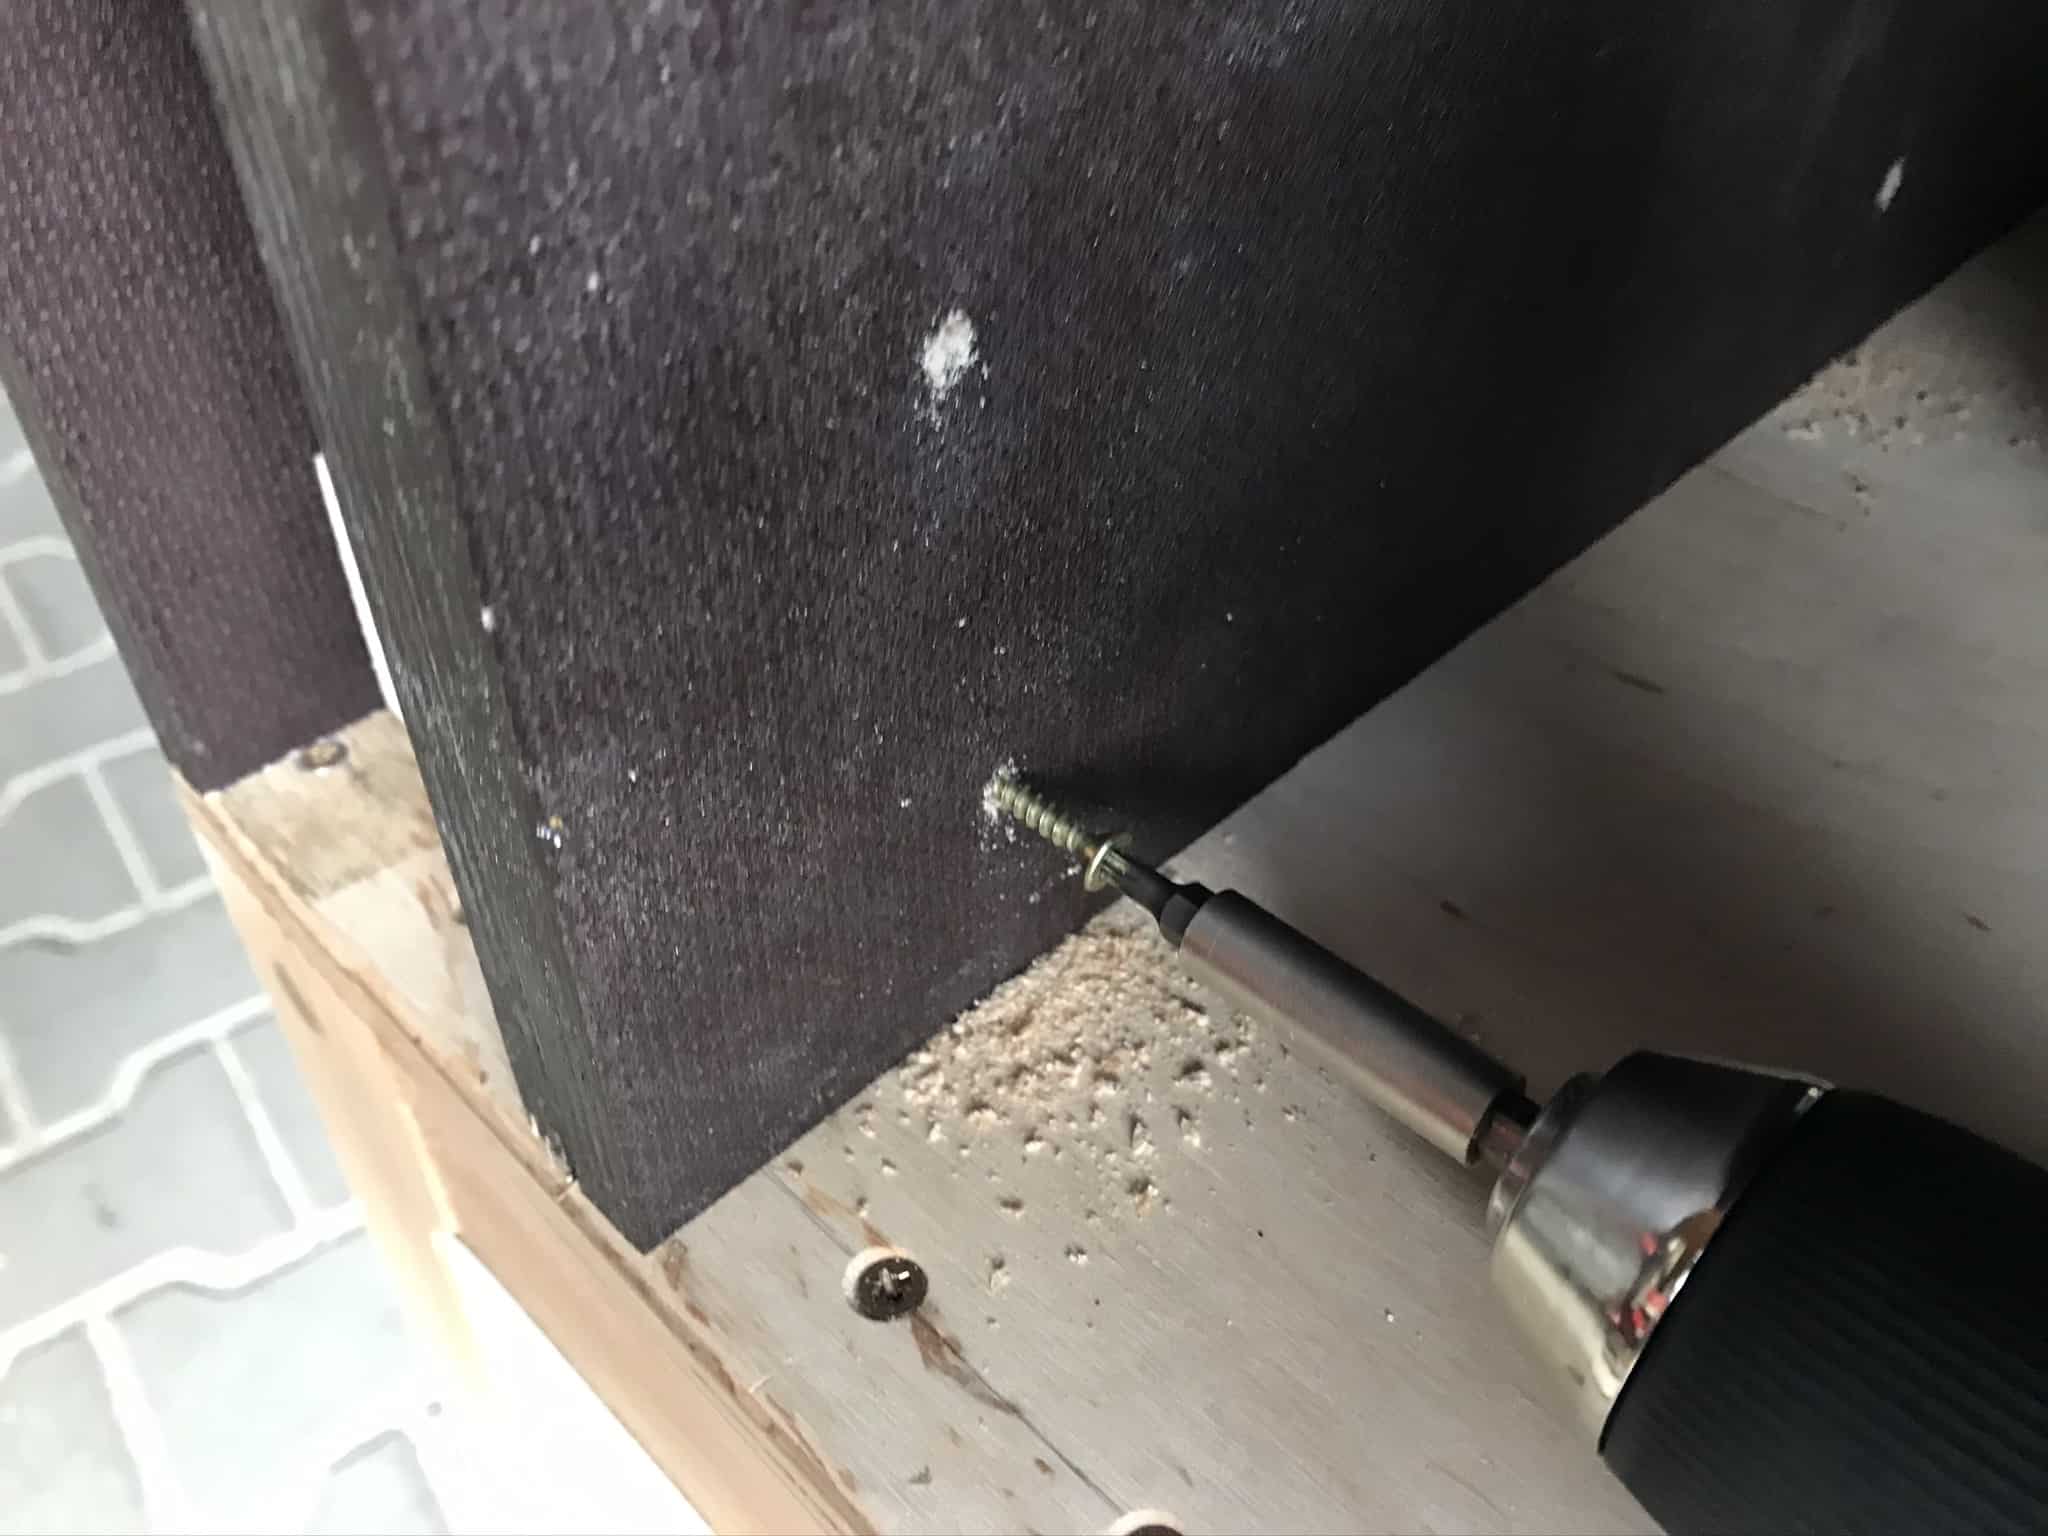
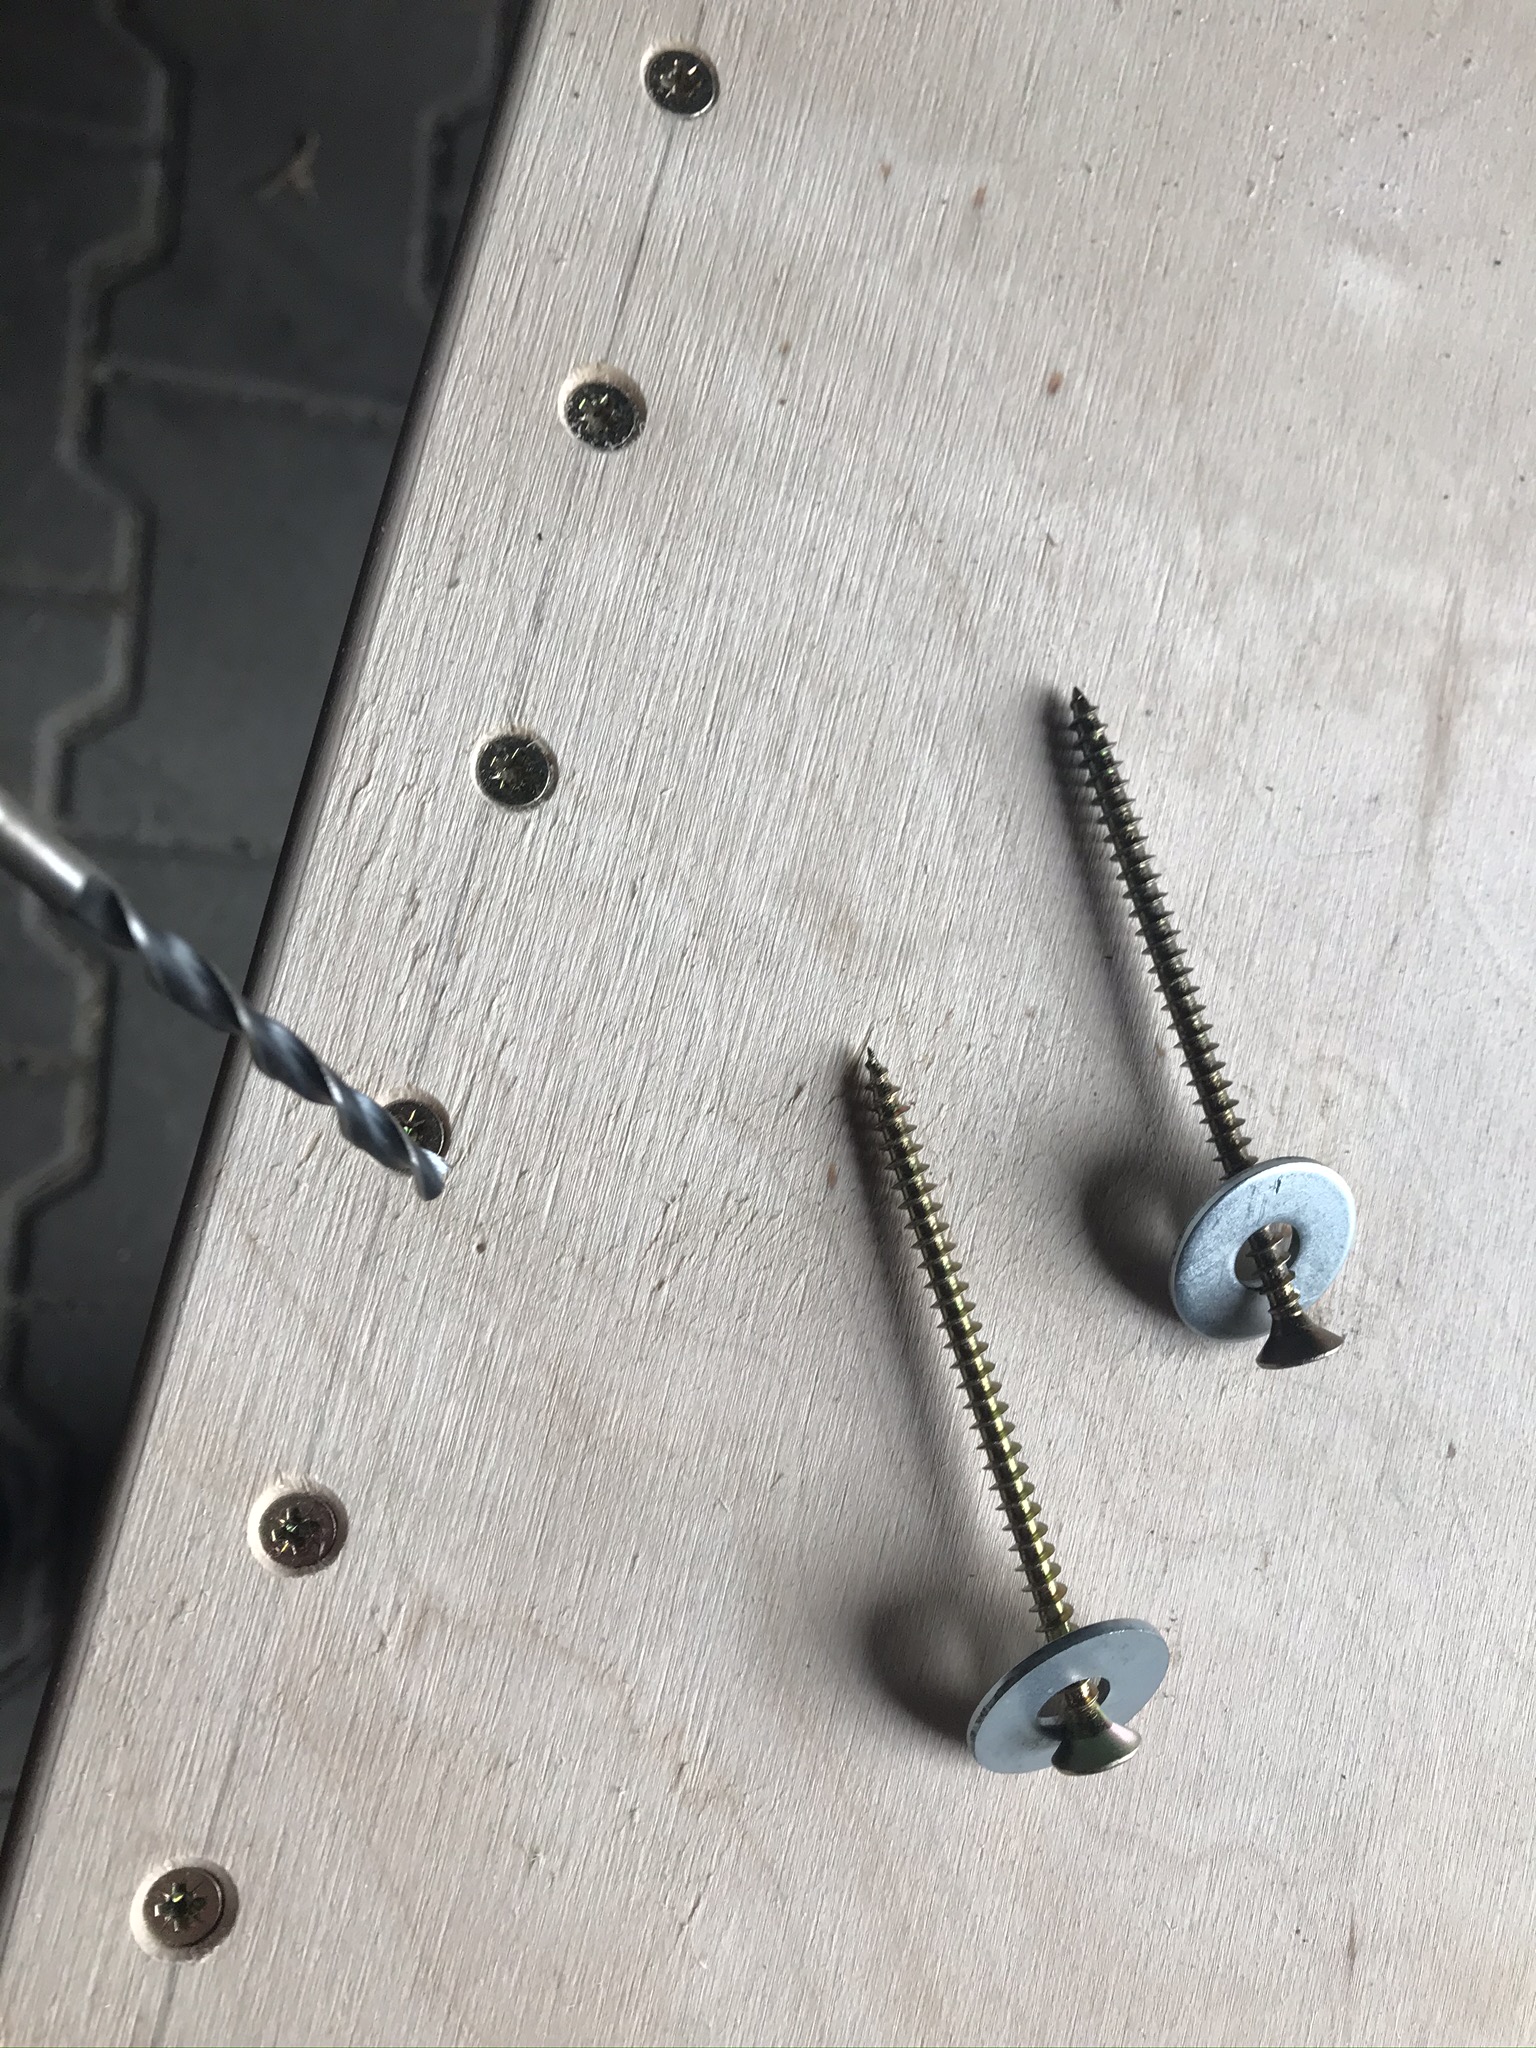
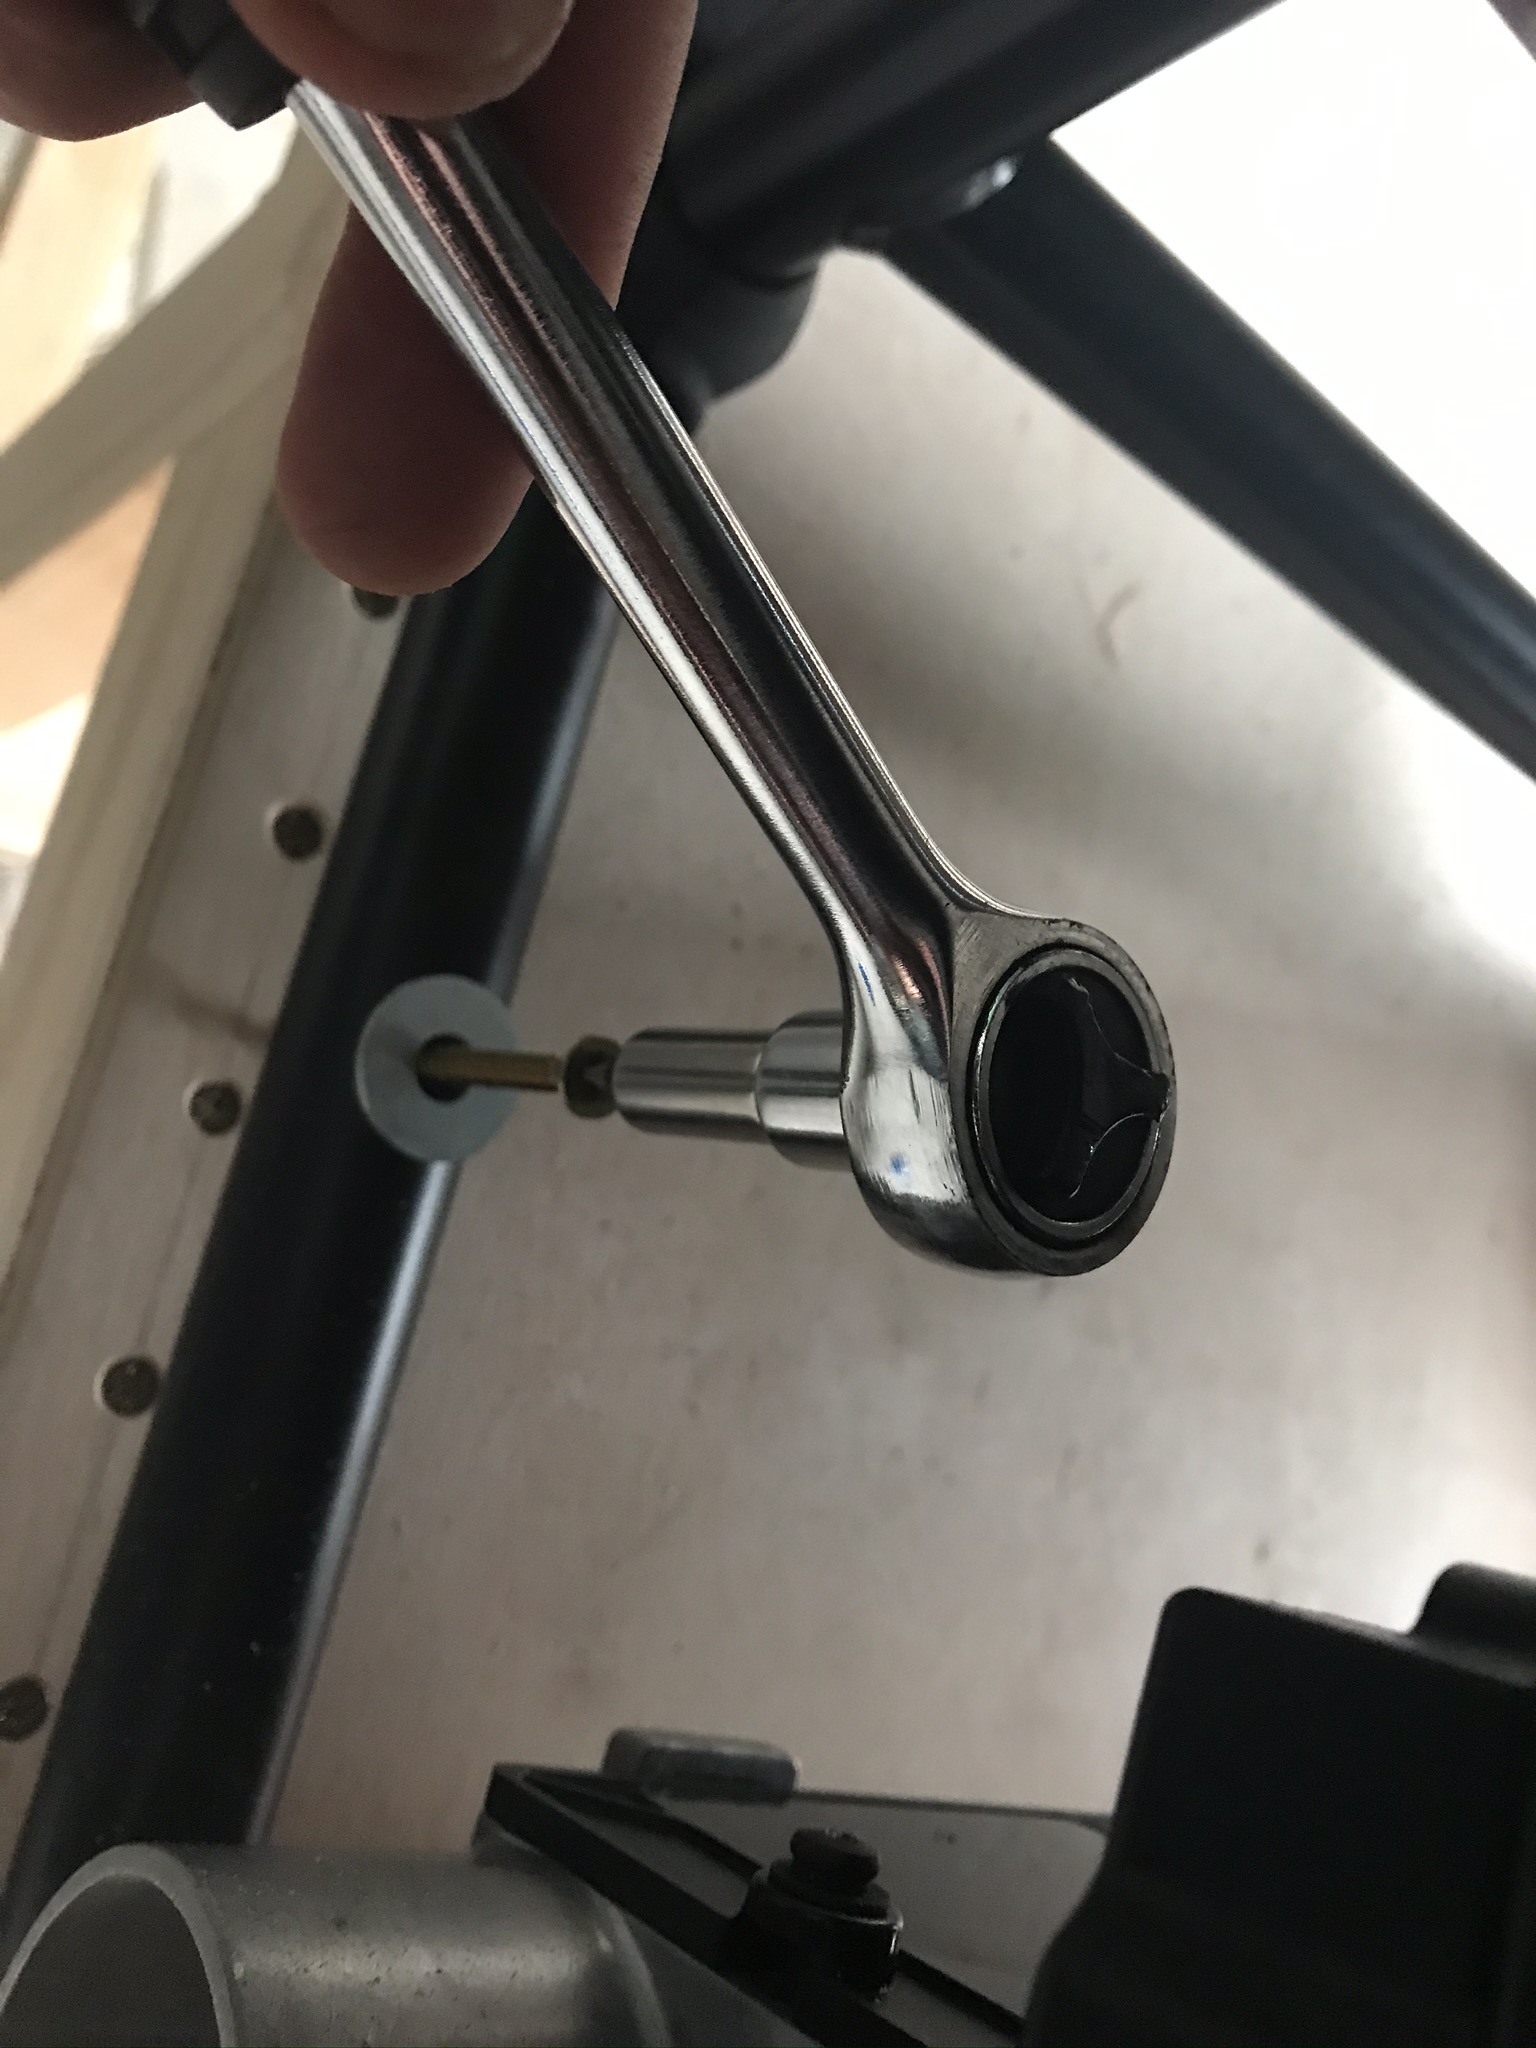
To ensure that the DeWALT DWE7492* stands securely on the stand, the saw must be anchored. Holes are provided in the frame of the saw for this purpose. According to the instruction manual, the saw should be anchored with machine screws, nuts and washers. Instead, I used long wood screws and washers, which are screwed into the square timbers of the frame and thus fasten the saw in the same way. Nevertheless, at this point I recommend following the instructions in the manual! You place the saw again on the frame directly next to the router table that you have just fixed and anchor the saw securely to the frame.
This is indispensable for working in a safe way with the table saw on a DIY saw stand!
After anchoring, the DeWALT DWE7492 underframe with router table is basically ready for use. Only the drawers are still missing.
How to build drawers
For the two drawers, you need the blanks for the drawer body made of 12 mm plywood and the panels made of 12 mm film faced plywood board. I recommend using at least 12mm plywood – 15mm would be even better.
The respective cuts can be made with the DeWALT DWE7492* out of standard sized plywood sheets (1200x600mm). You can also make the first cut with the hand-held circular saw to make the pieces easier to handle on the table saw. Later, when the table saw is placed next to or in front of the workbench, even large sheets in one piece are no problem because the workbench serves as a workpiece support at the same height. Or simply user a saw roller stand* as workpiece support.

After you have sawn all the individual parts for the two drawers, you can either glue or screw them together. Or you can use a mixture of both. I think everyone has their own approach. If you want to use screws and you have never built drawers before, you must drill the holes or the plywood will crack.
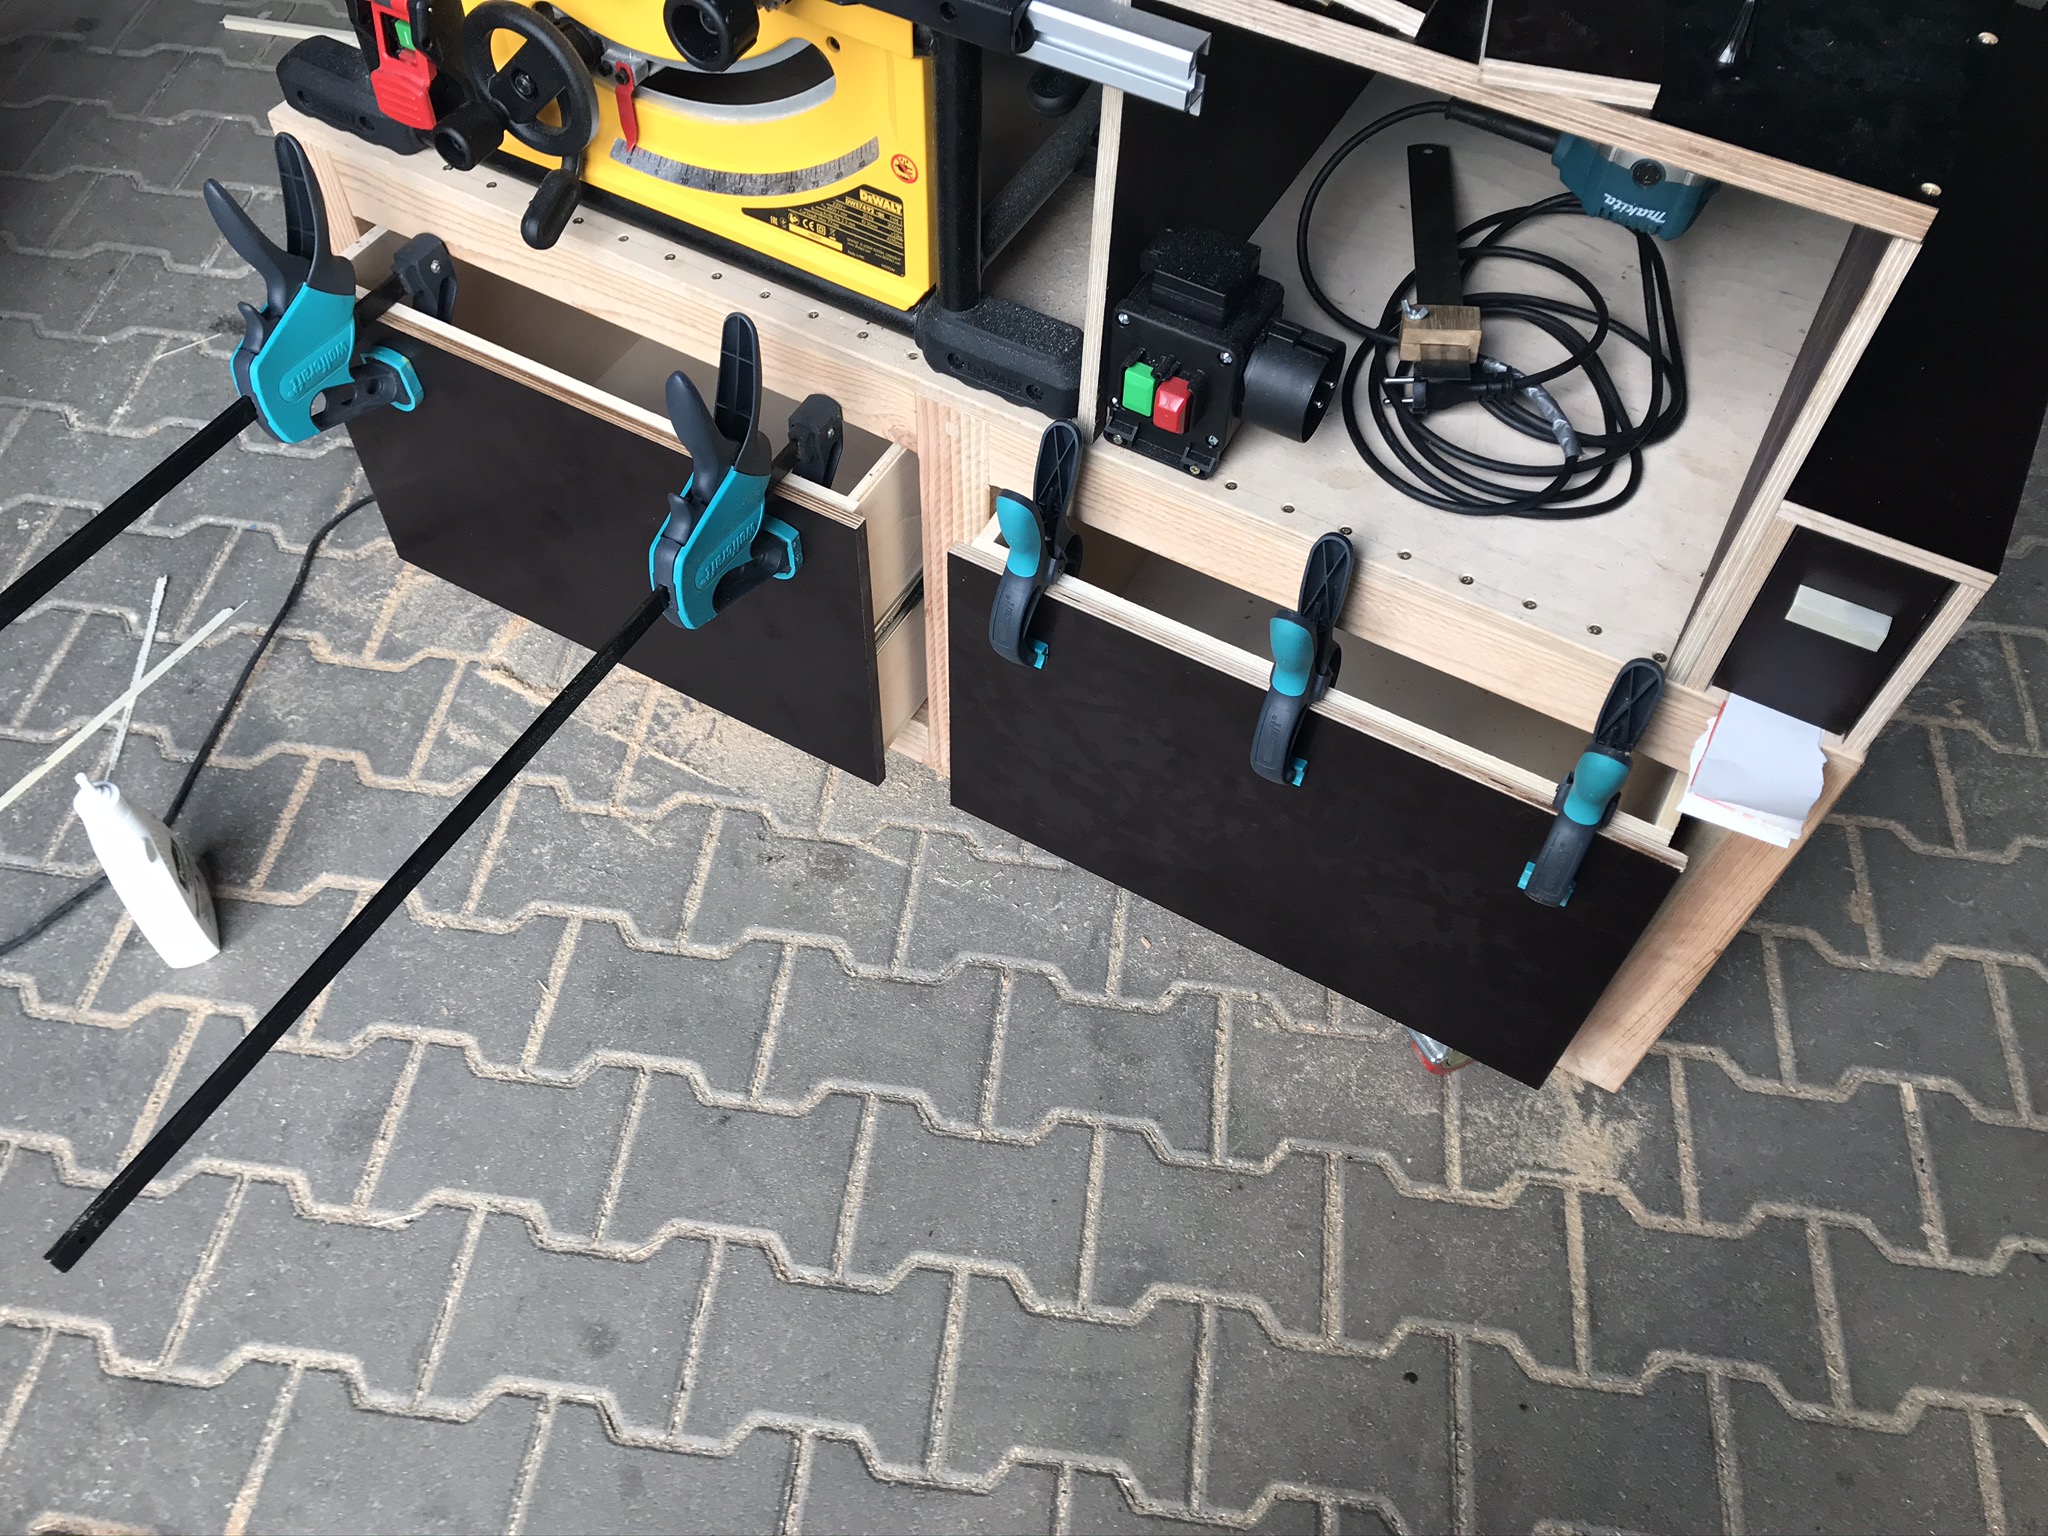
Mount drawers into the DWE7492 saw station
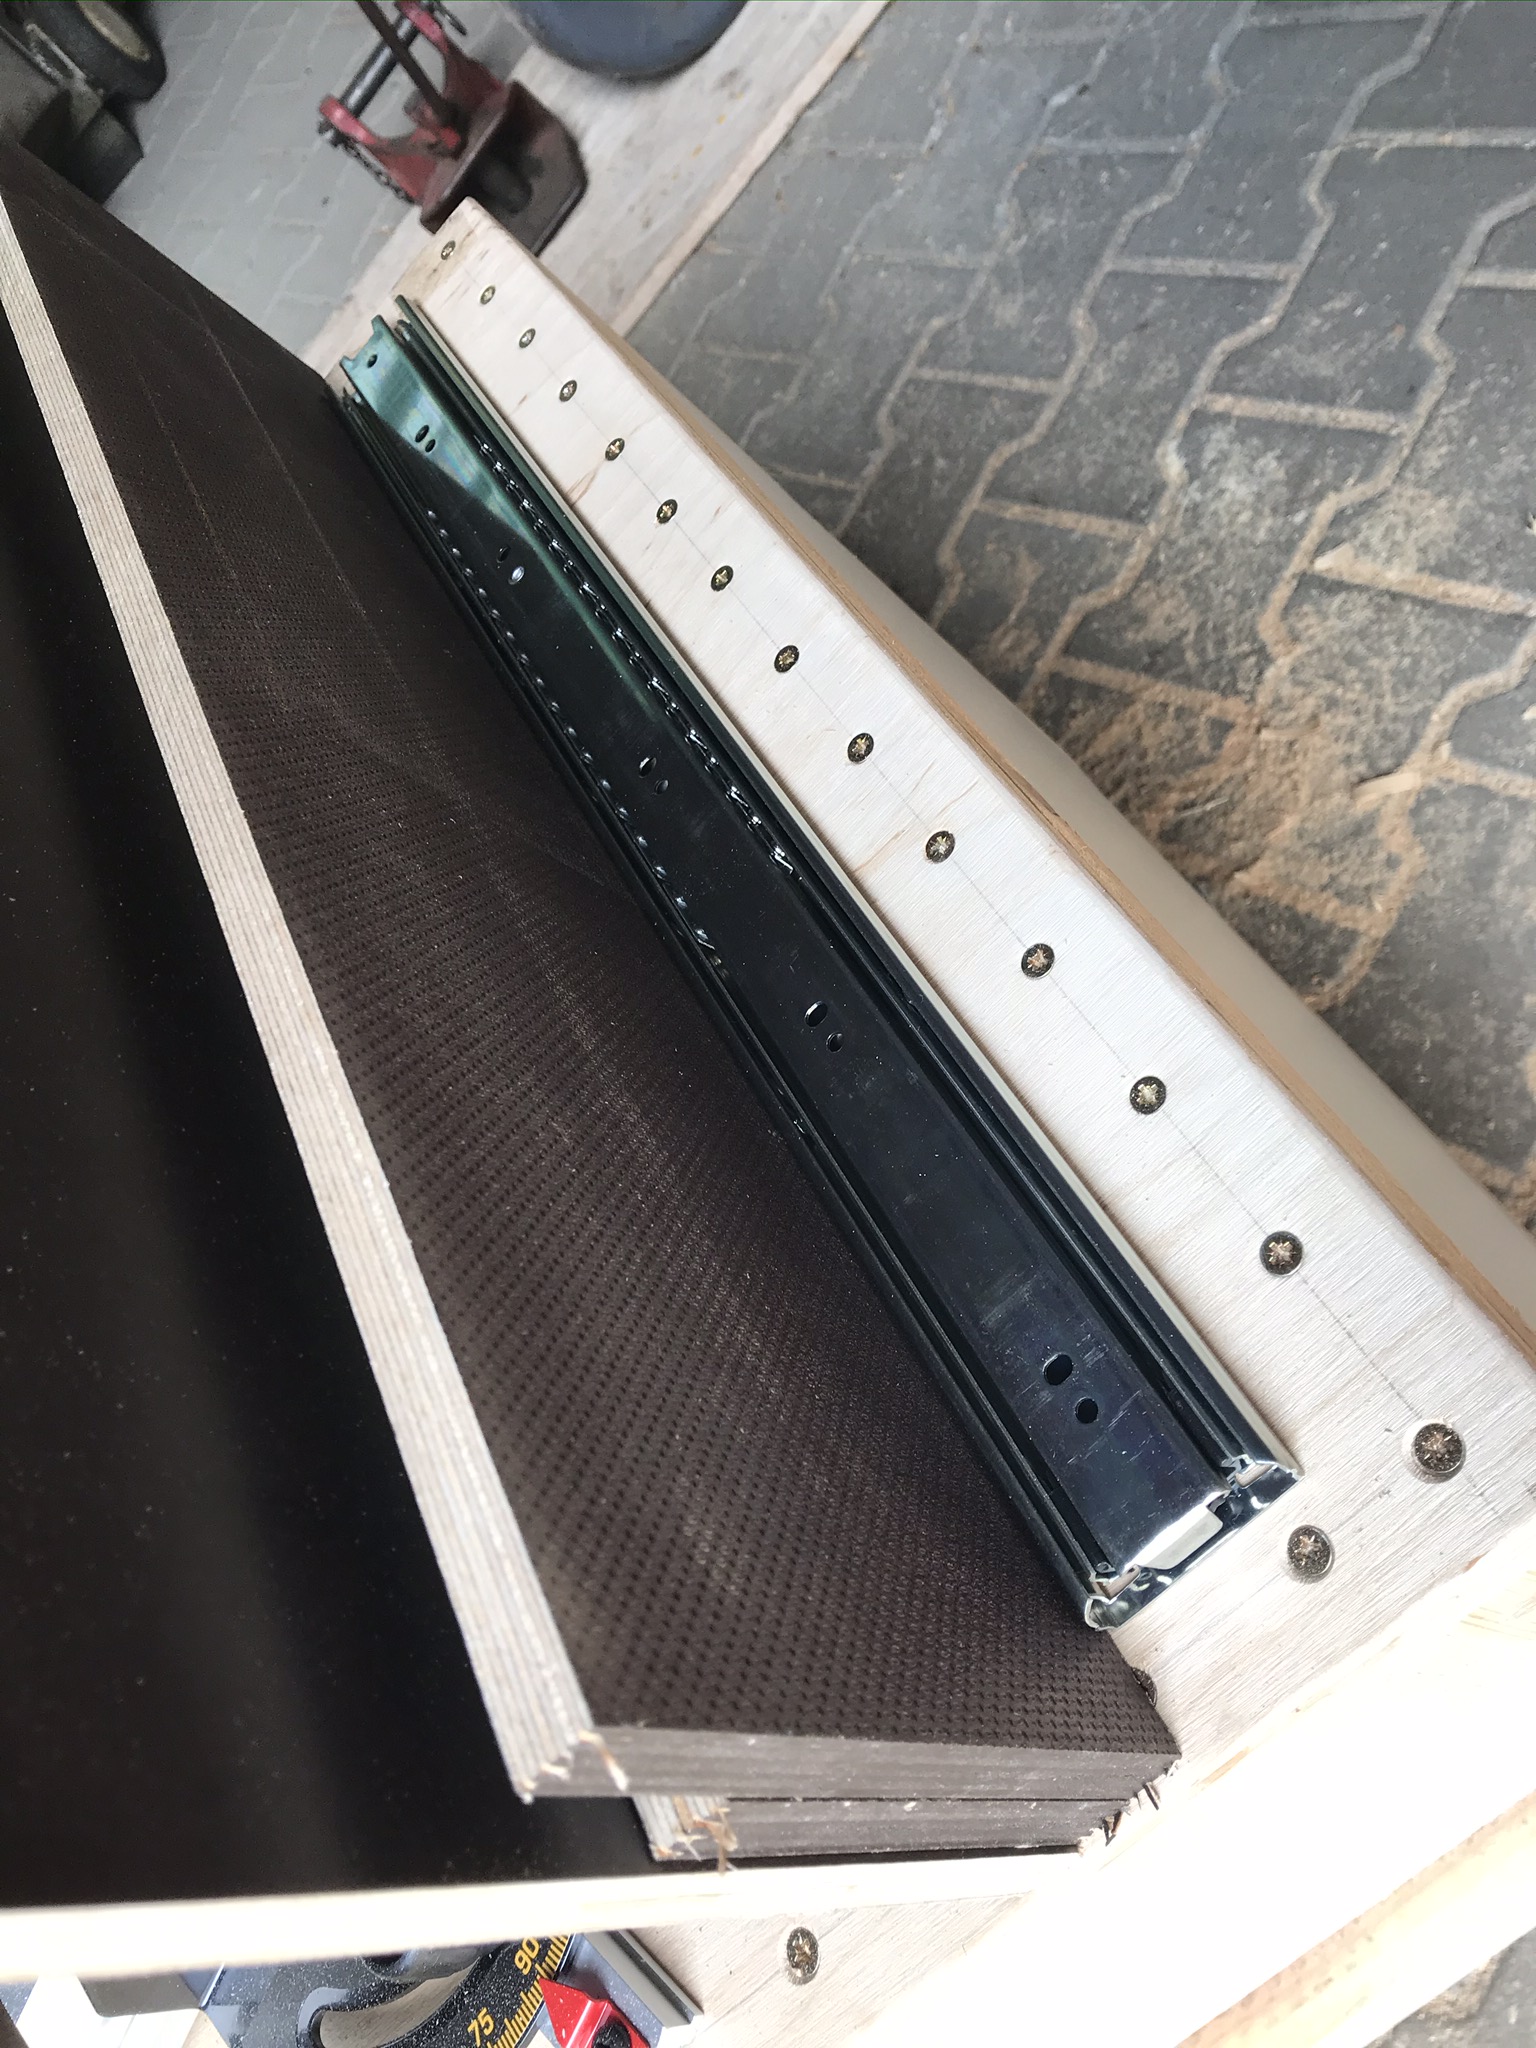
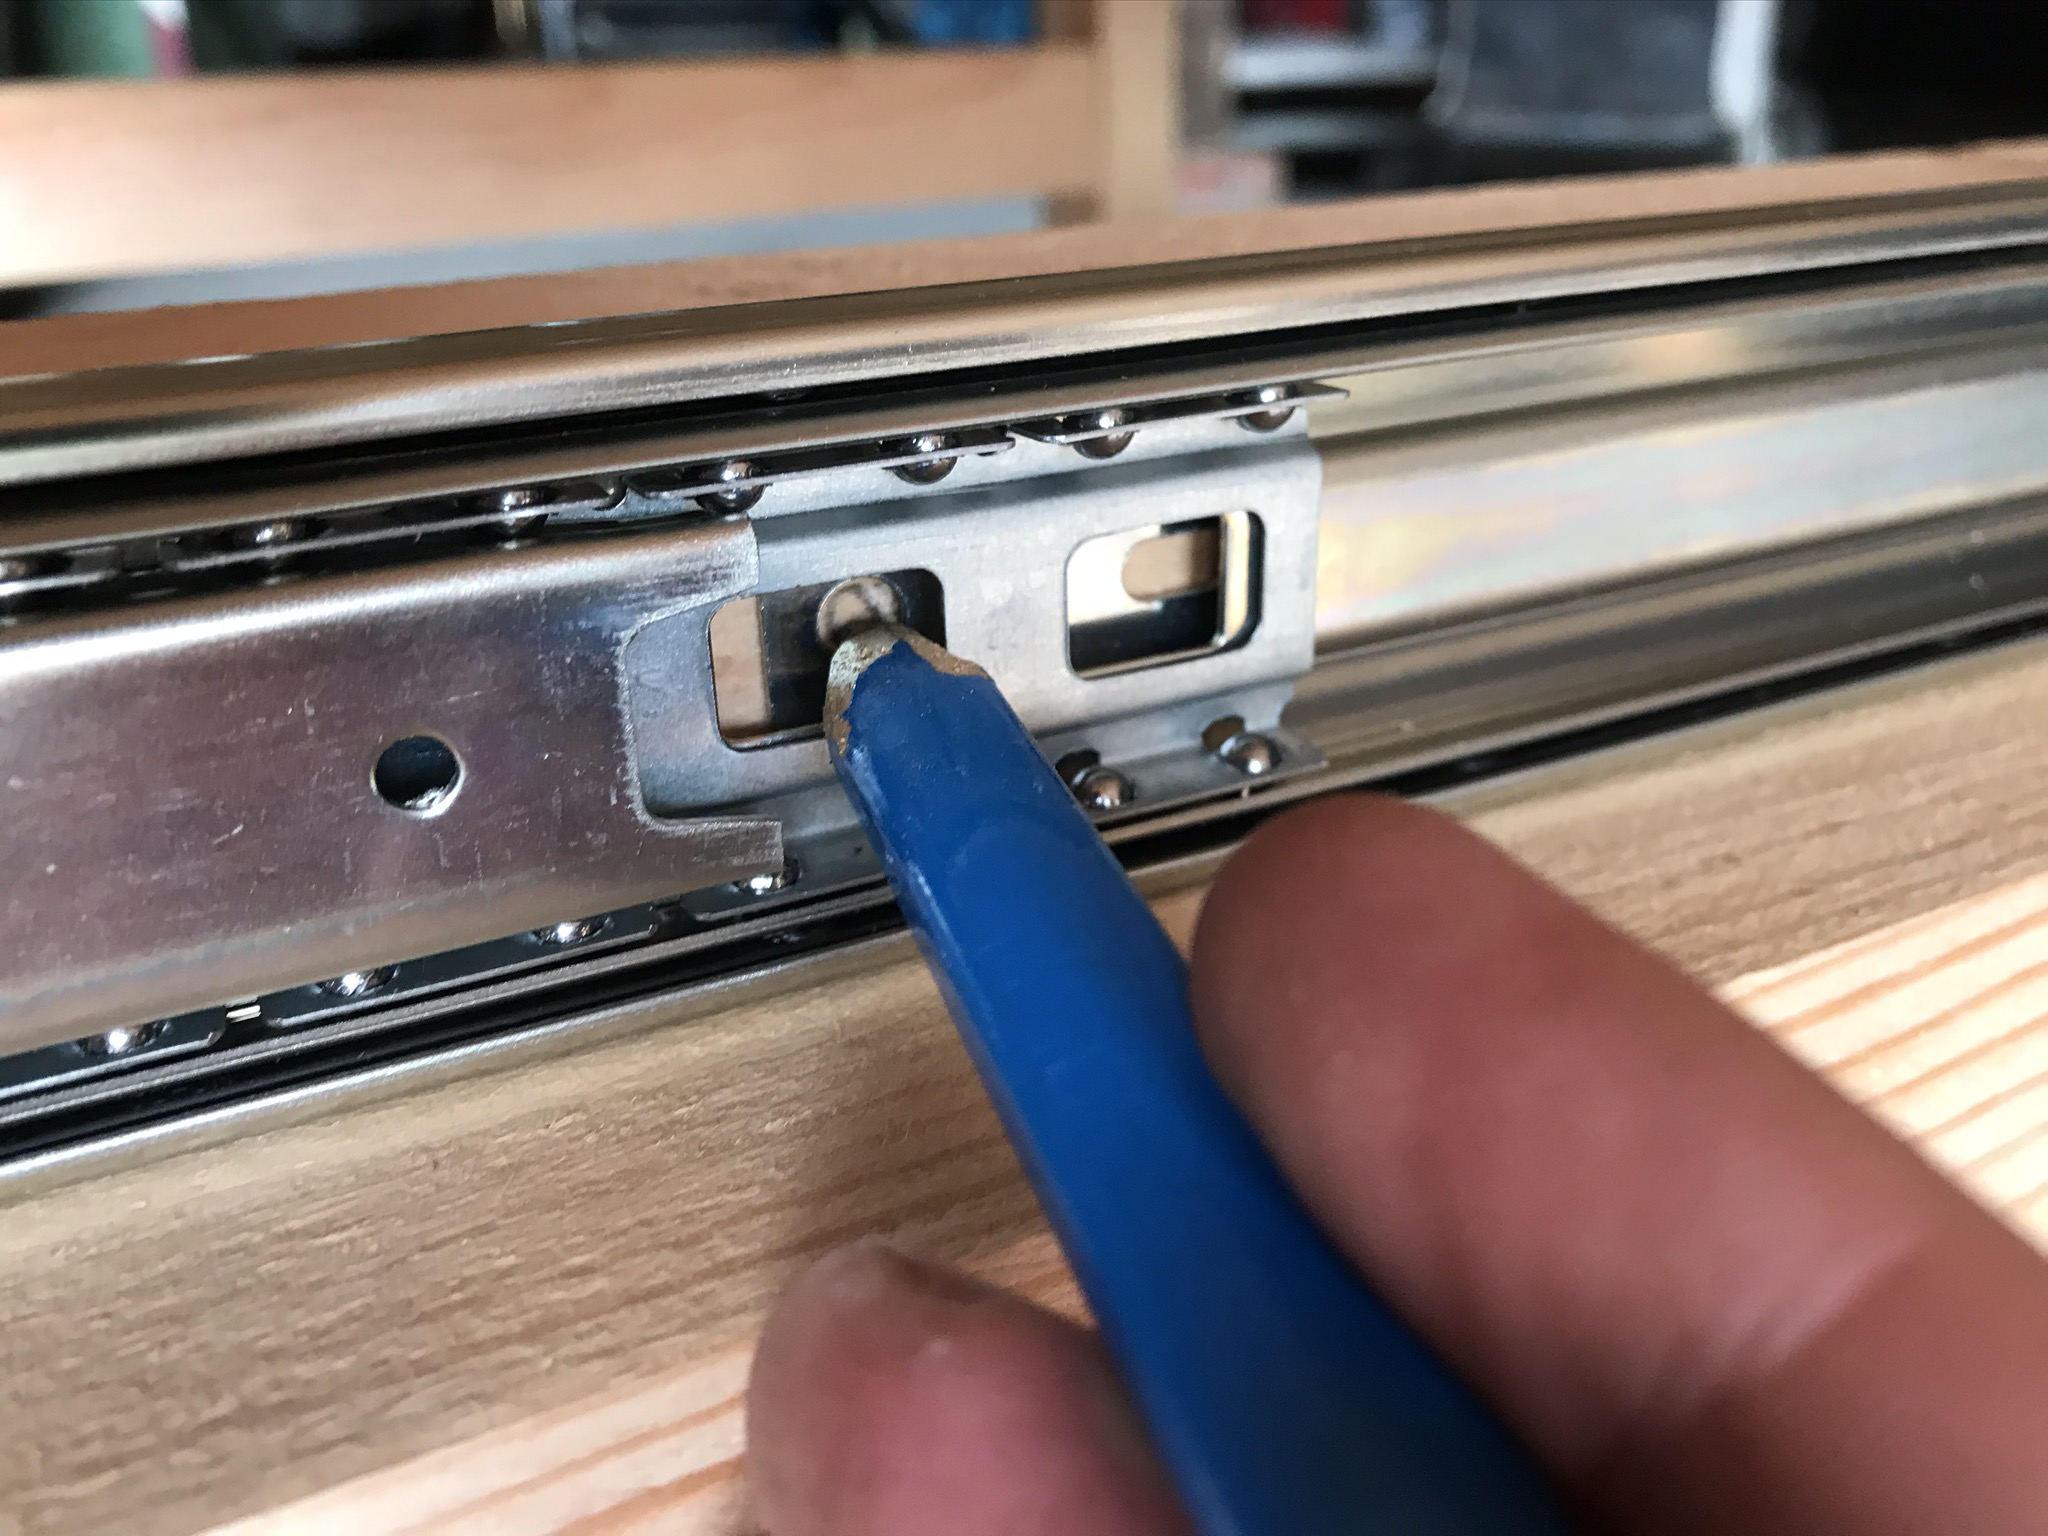
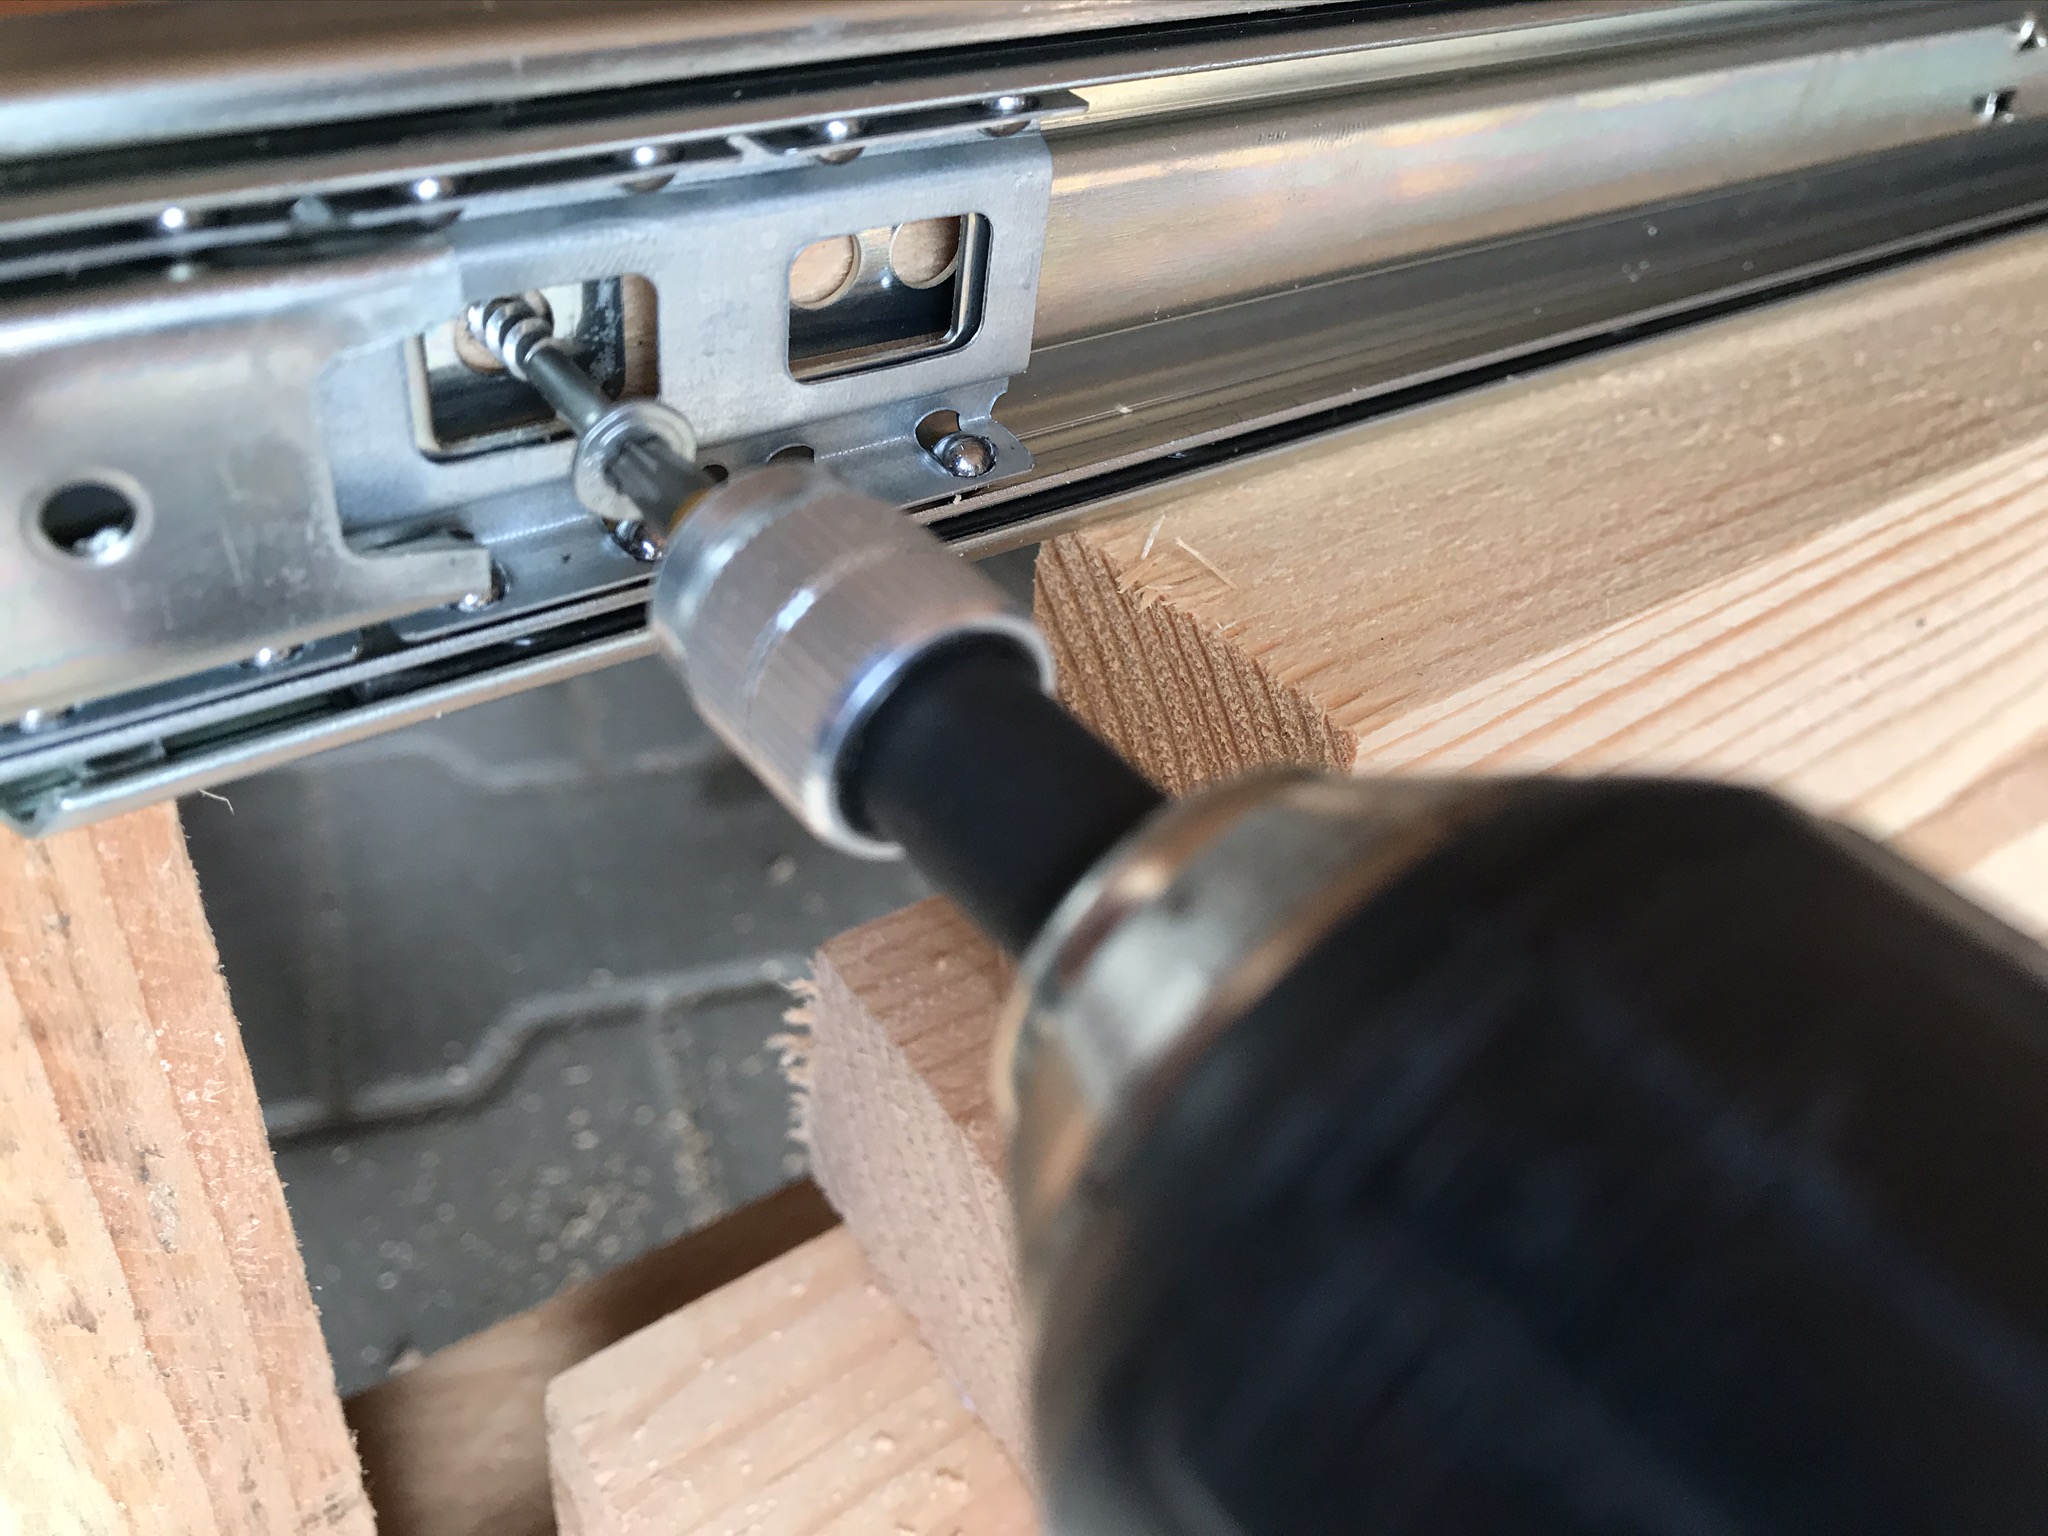
Once you have assembled the two drawers, you can screw the drawer runners into the base. To ensure that the pull-outs are all fixed parallel and at the same height, it is best to use spacers made of scrap wood that you stack on top of each other. You can then place the full-extension runner on these and then take your time to mark and pre-drill the holes before finally screwing the full-extension runner into the short struts.
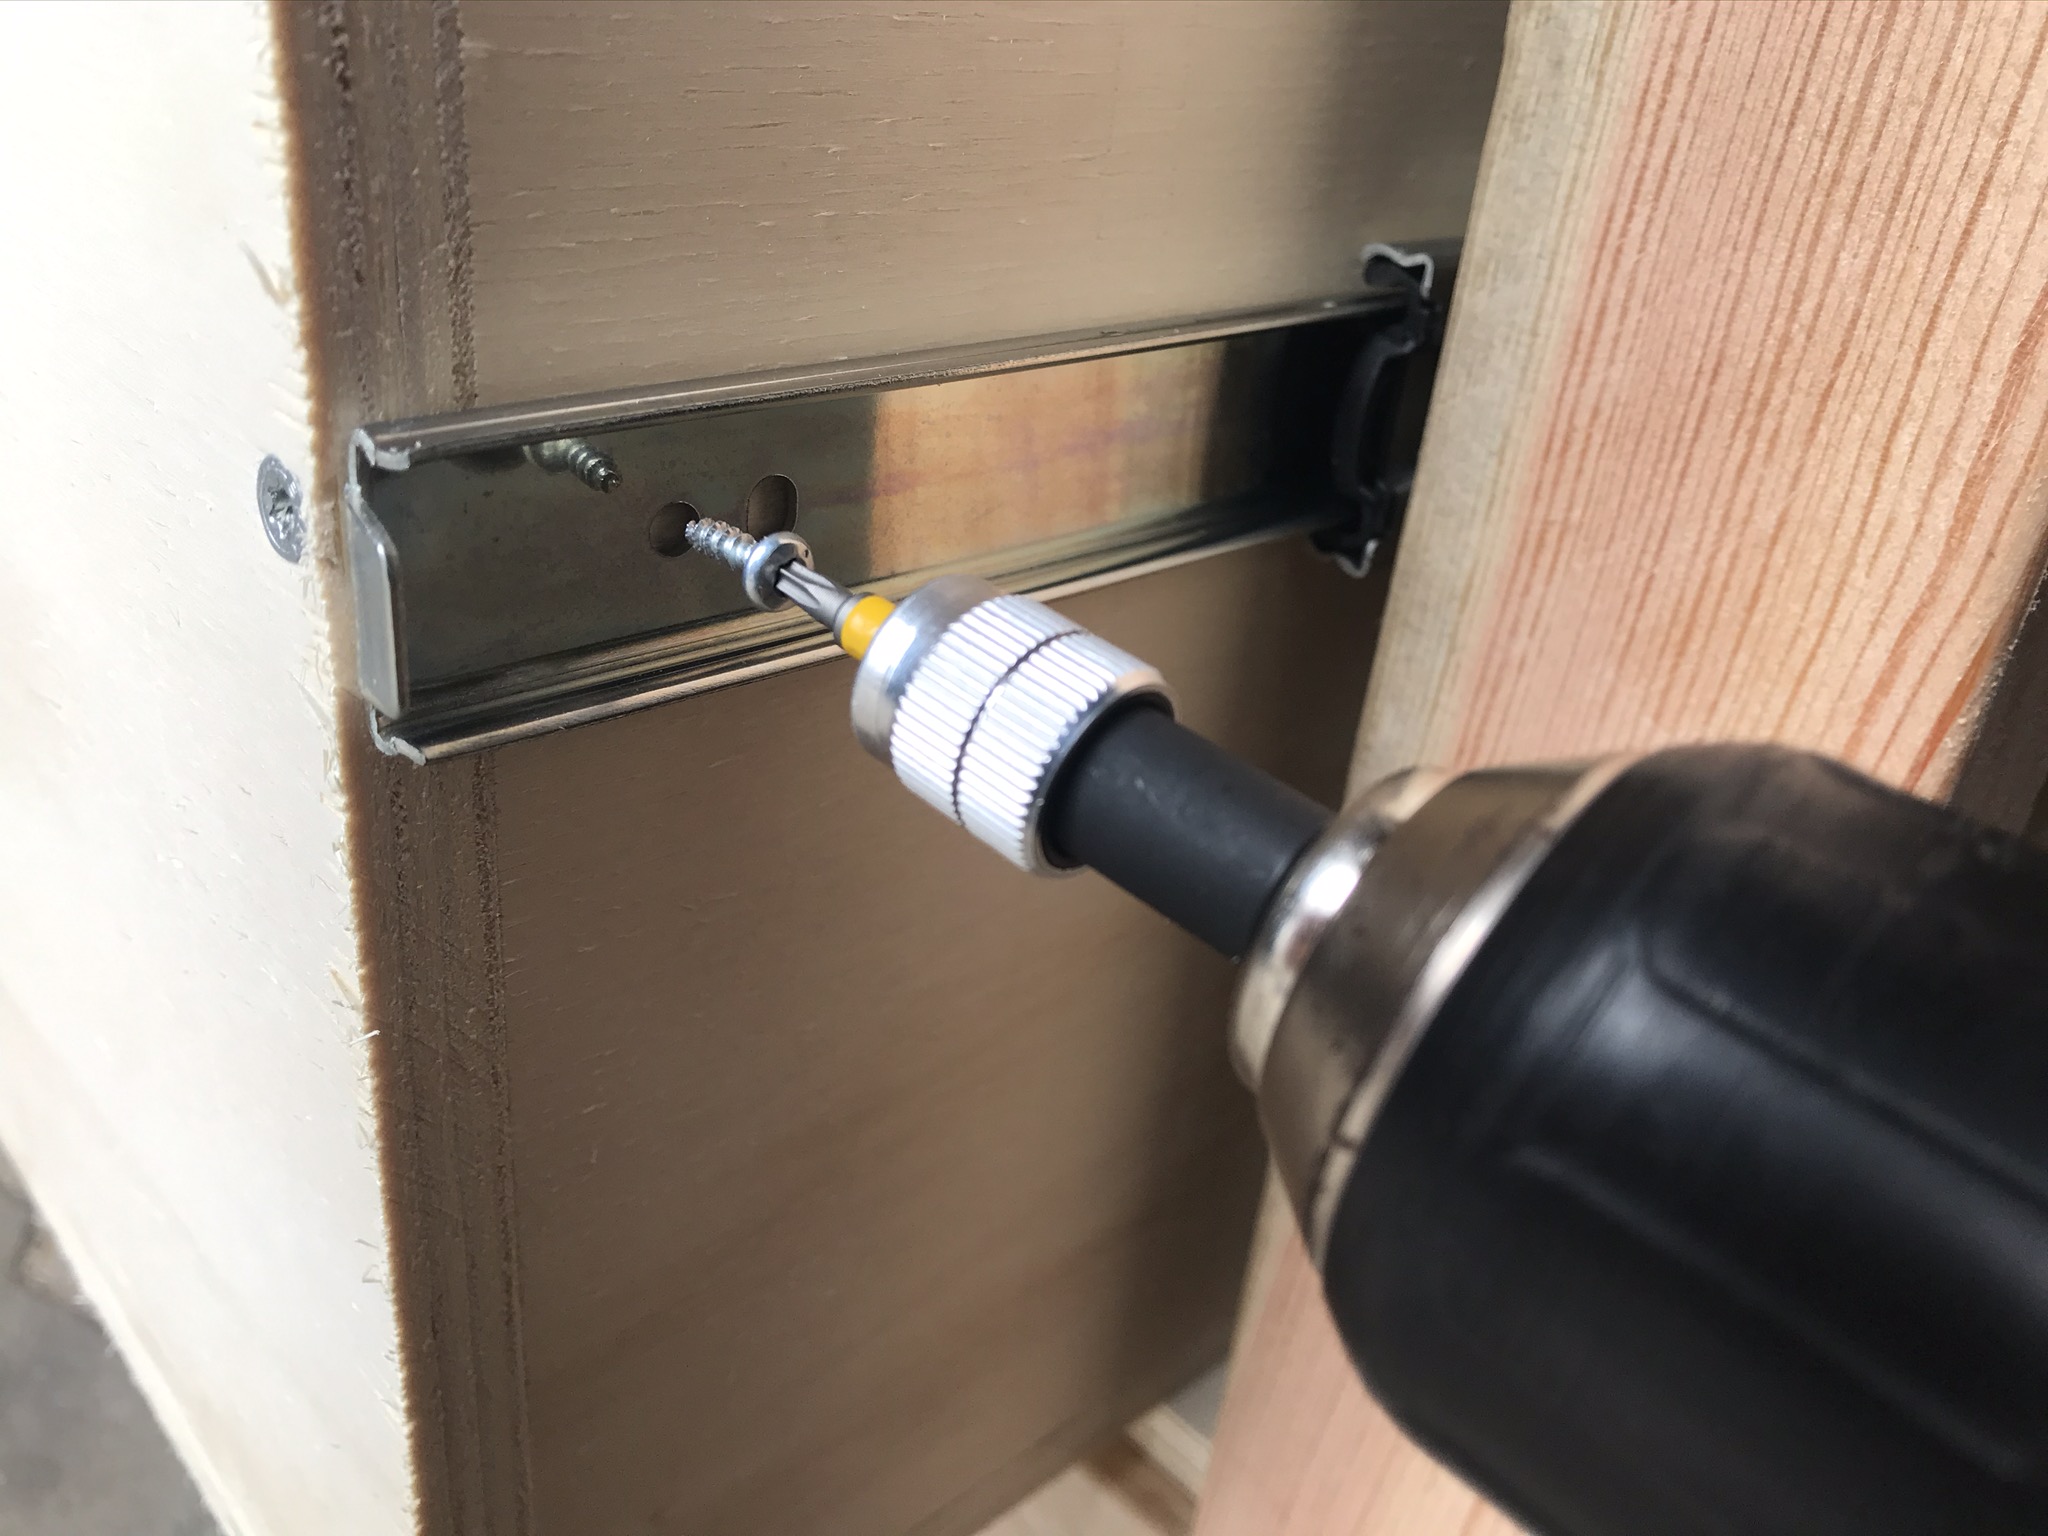
Now fix the drawers to the inner rails of the full-extension runner with 3x10mm wood screws*. To keep the drawers at the same height, I put a piece of 12 mm plywood on the lower struts of the frame – this serves as a spacer and can be removed after screwing them in place. When screwing the frame in place, don’t forget to take into account that a 12mm thick drawer front panel will be added to the front of the frame. This should not protrude from the frame of the circular saw stand.

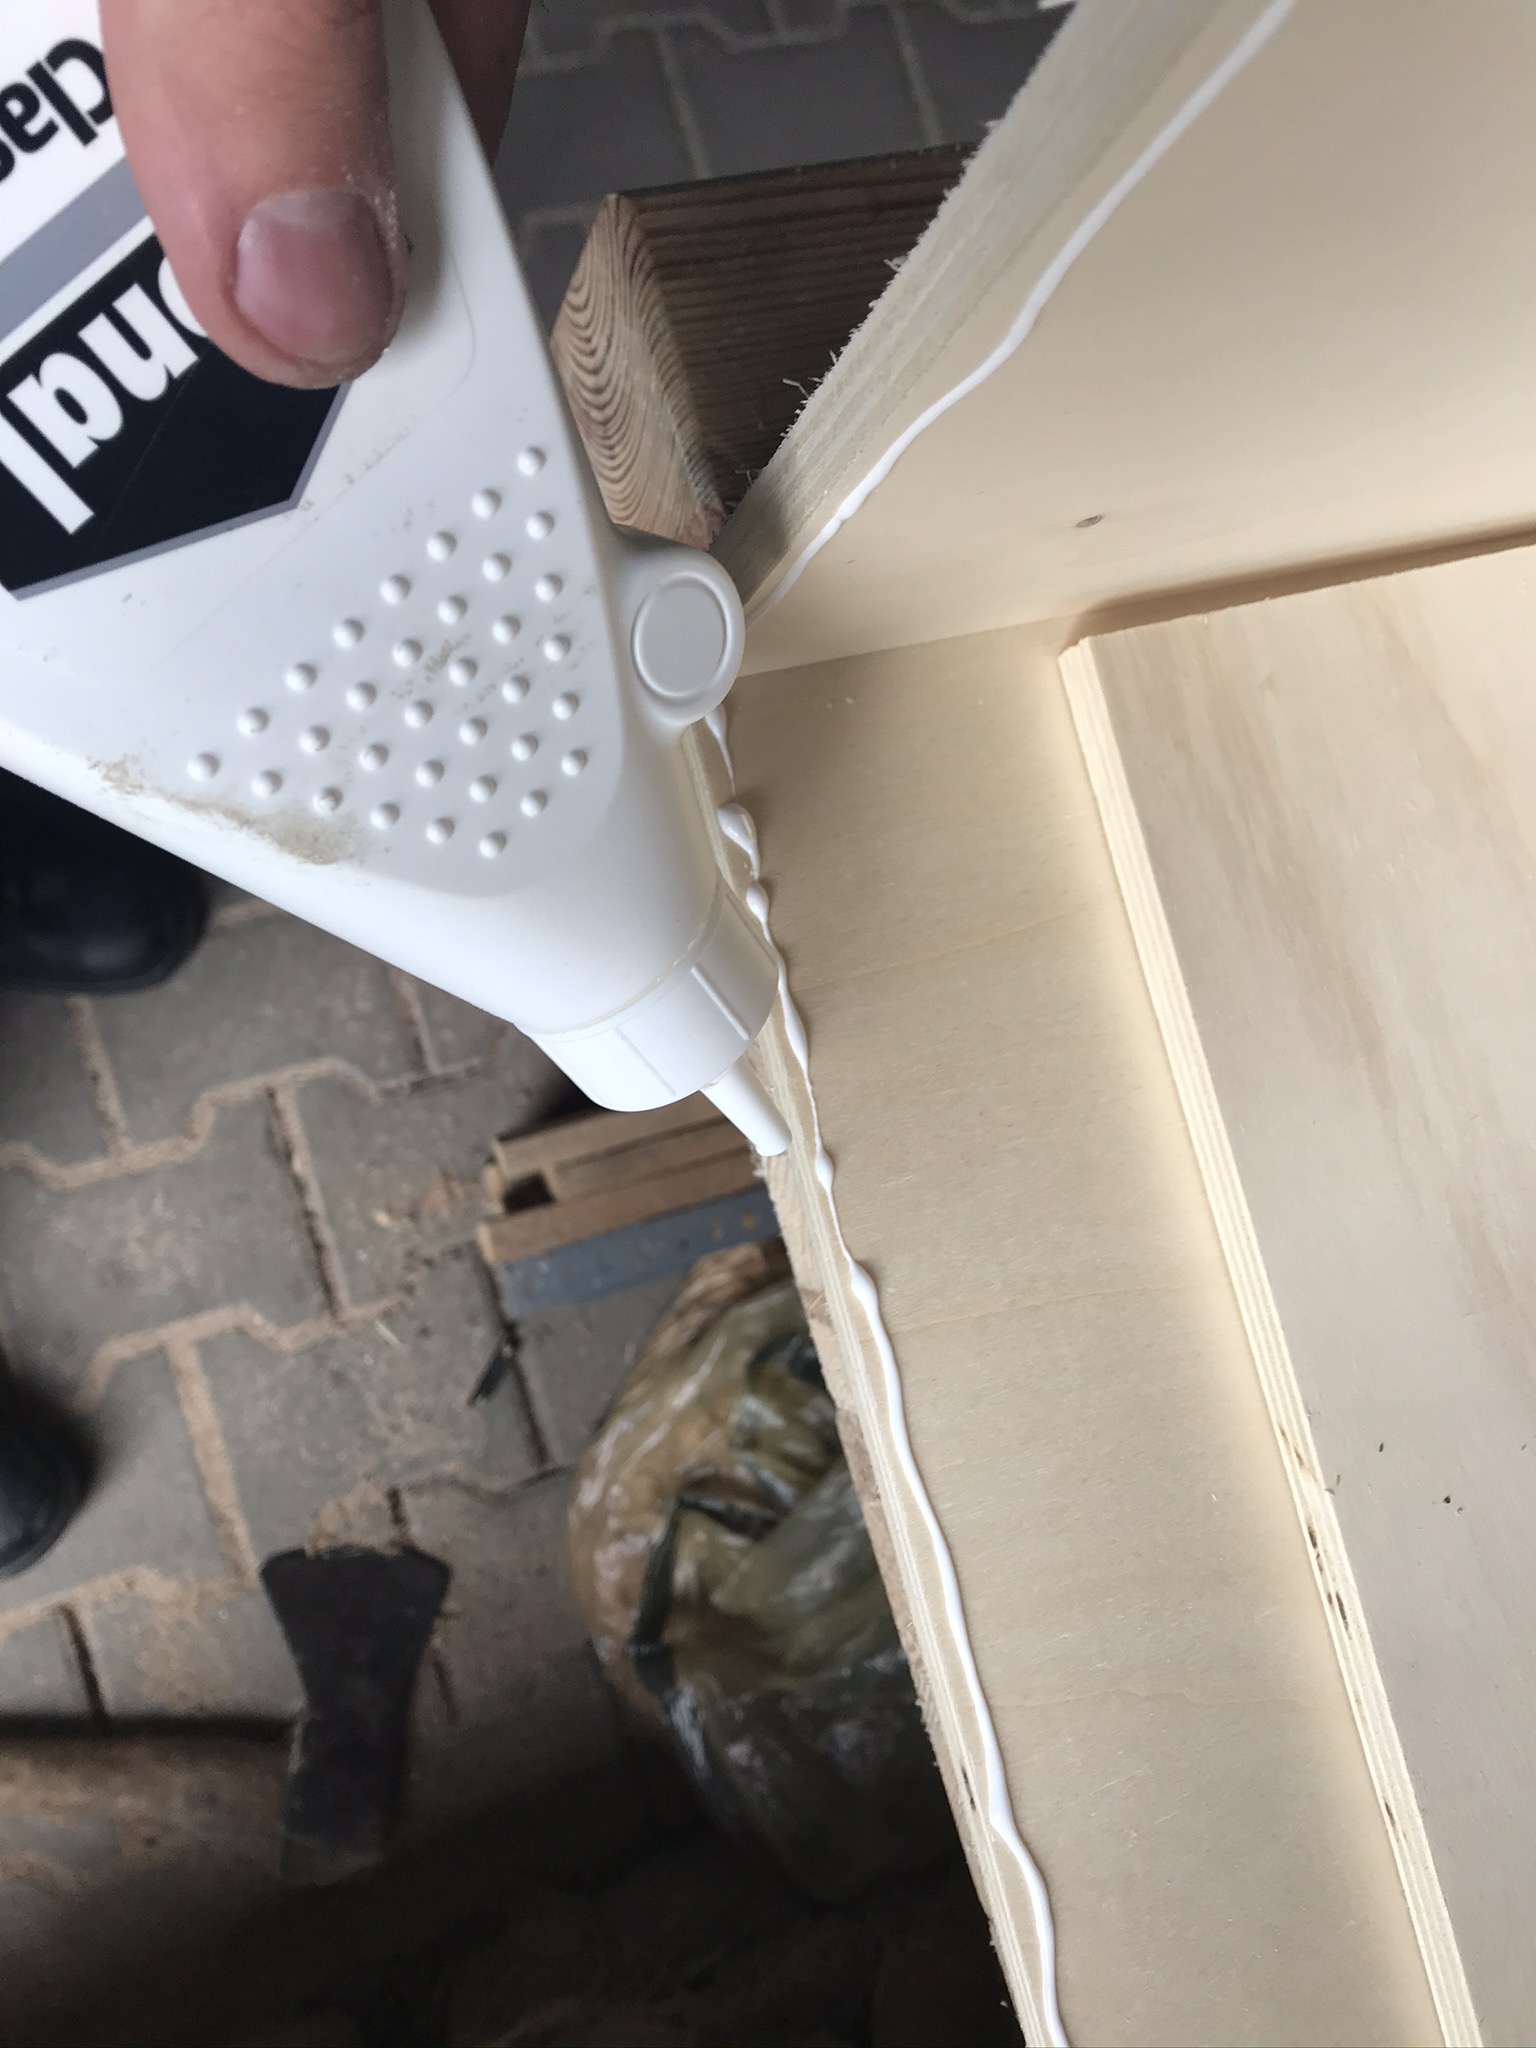
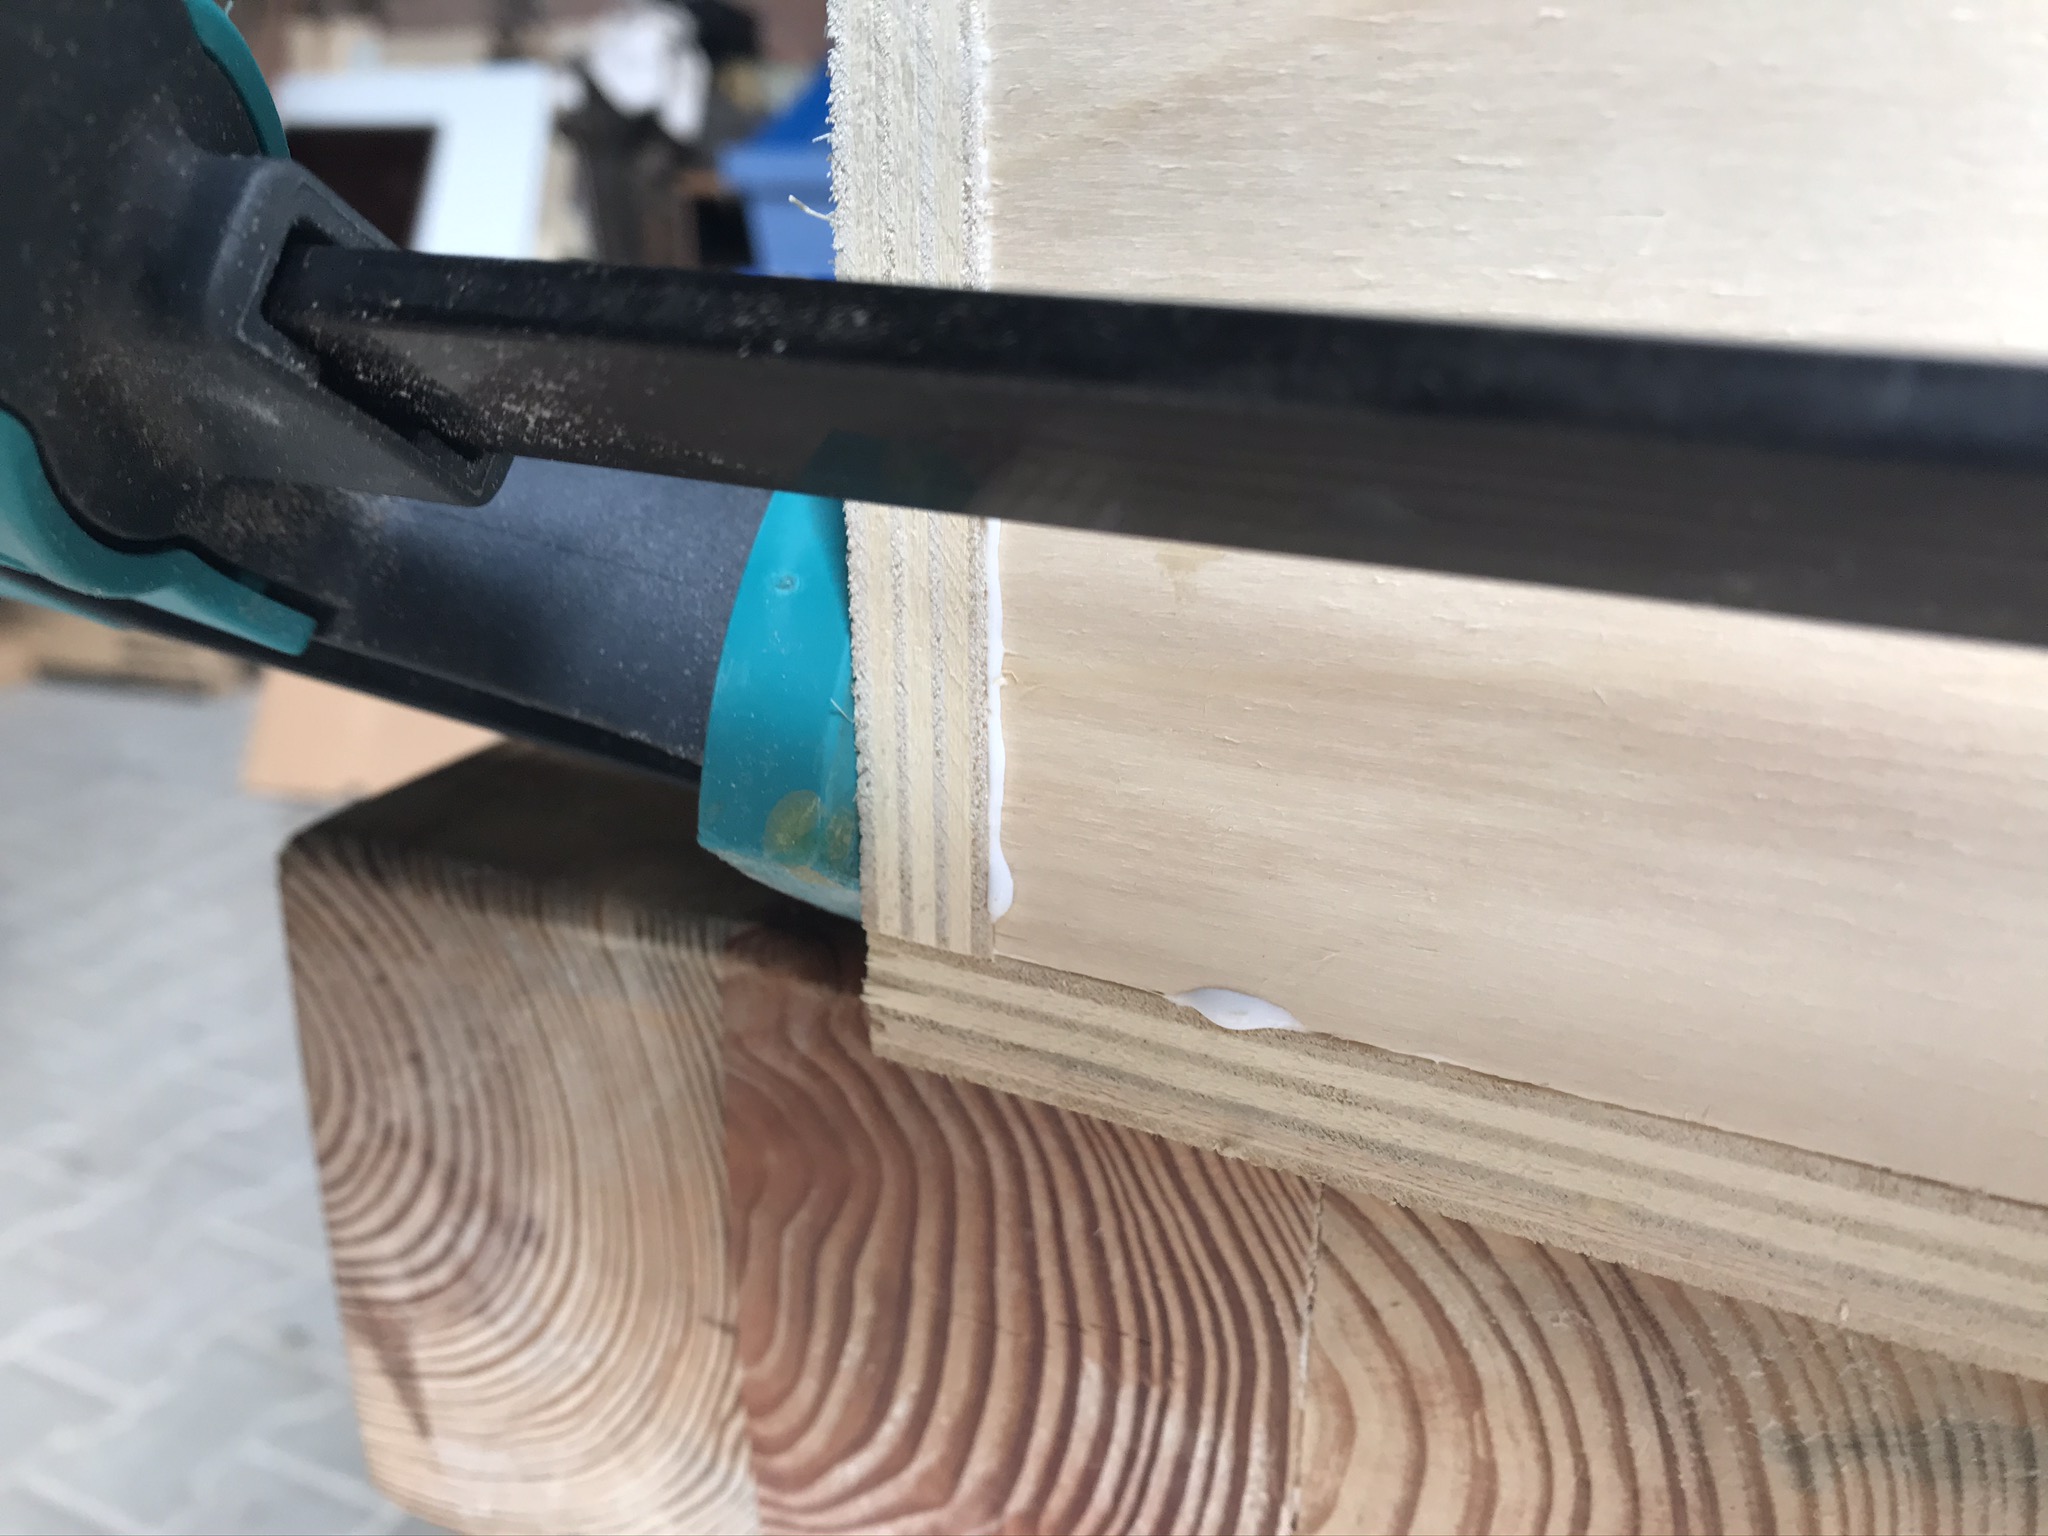
Now you can already attach the two drawer fronts made of 12 mm film faced plywood board. To ensure uniform gap dimensions, place a piece of scrap wood on the lower frame wood as a spacer. Apply some glue to the back of the panel and place the panel accurately on the front of the drawer. You can fix the panel in place with screw clamps* before sinking a few 4x20mm wood screws* from the inside of the drawer so that the panel pulls up to the drawer body.
Expert tip: don’t attach the drawer front with glue – simply use double sided tape*. It will make the process way easier and faster!

Finally, attach the handles to the drawers.
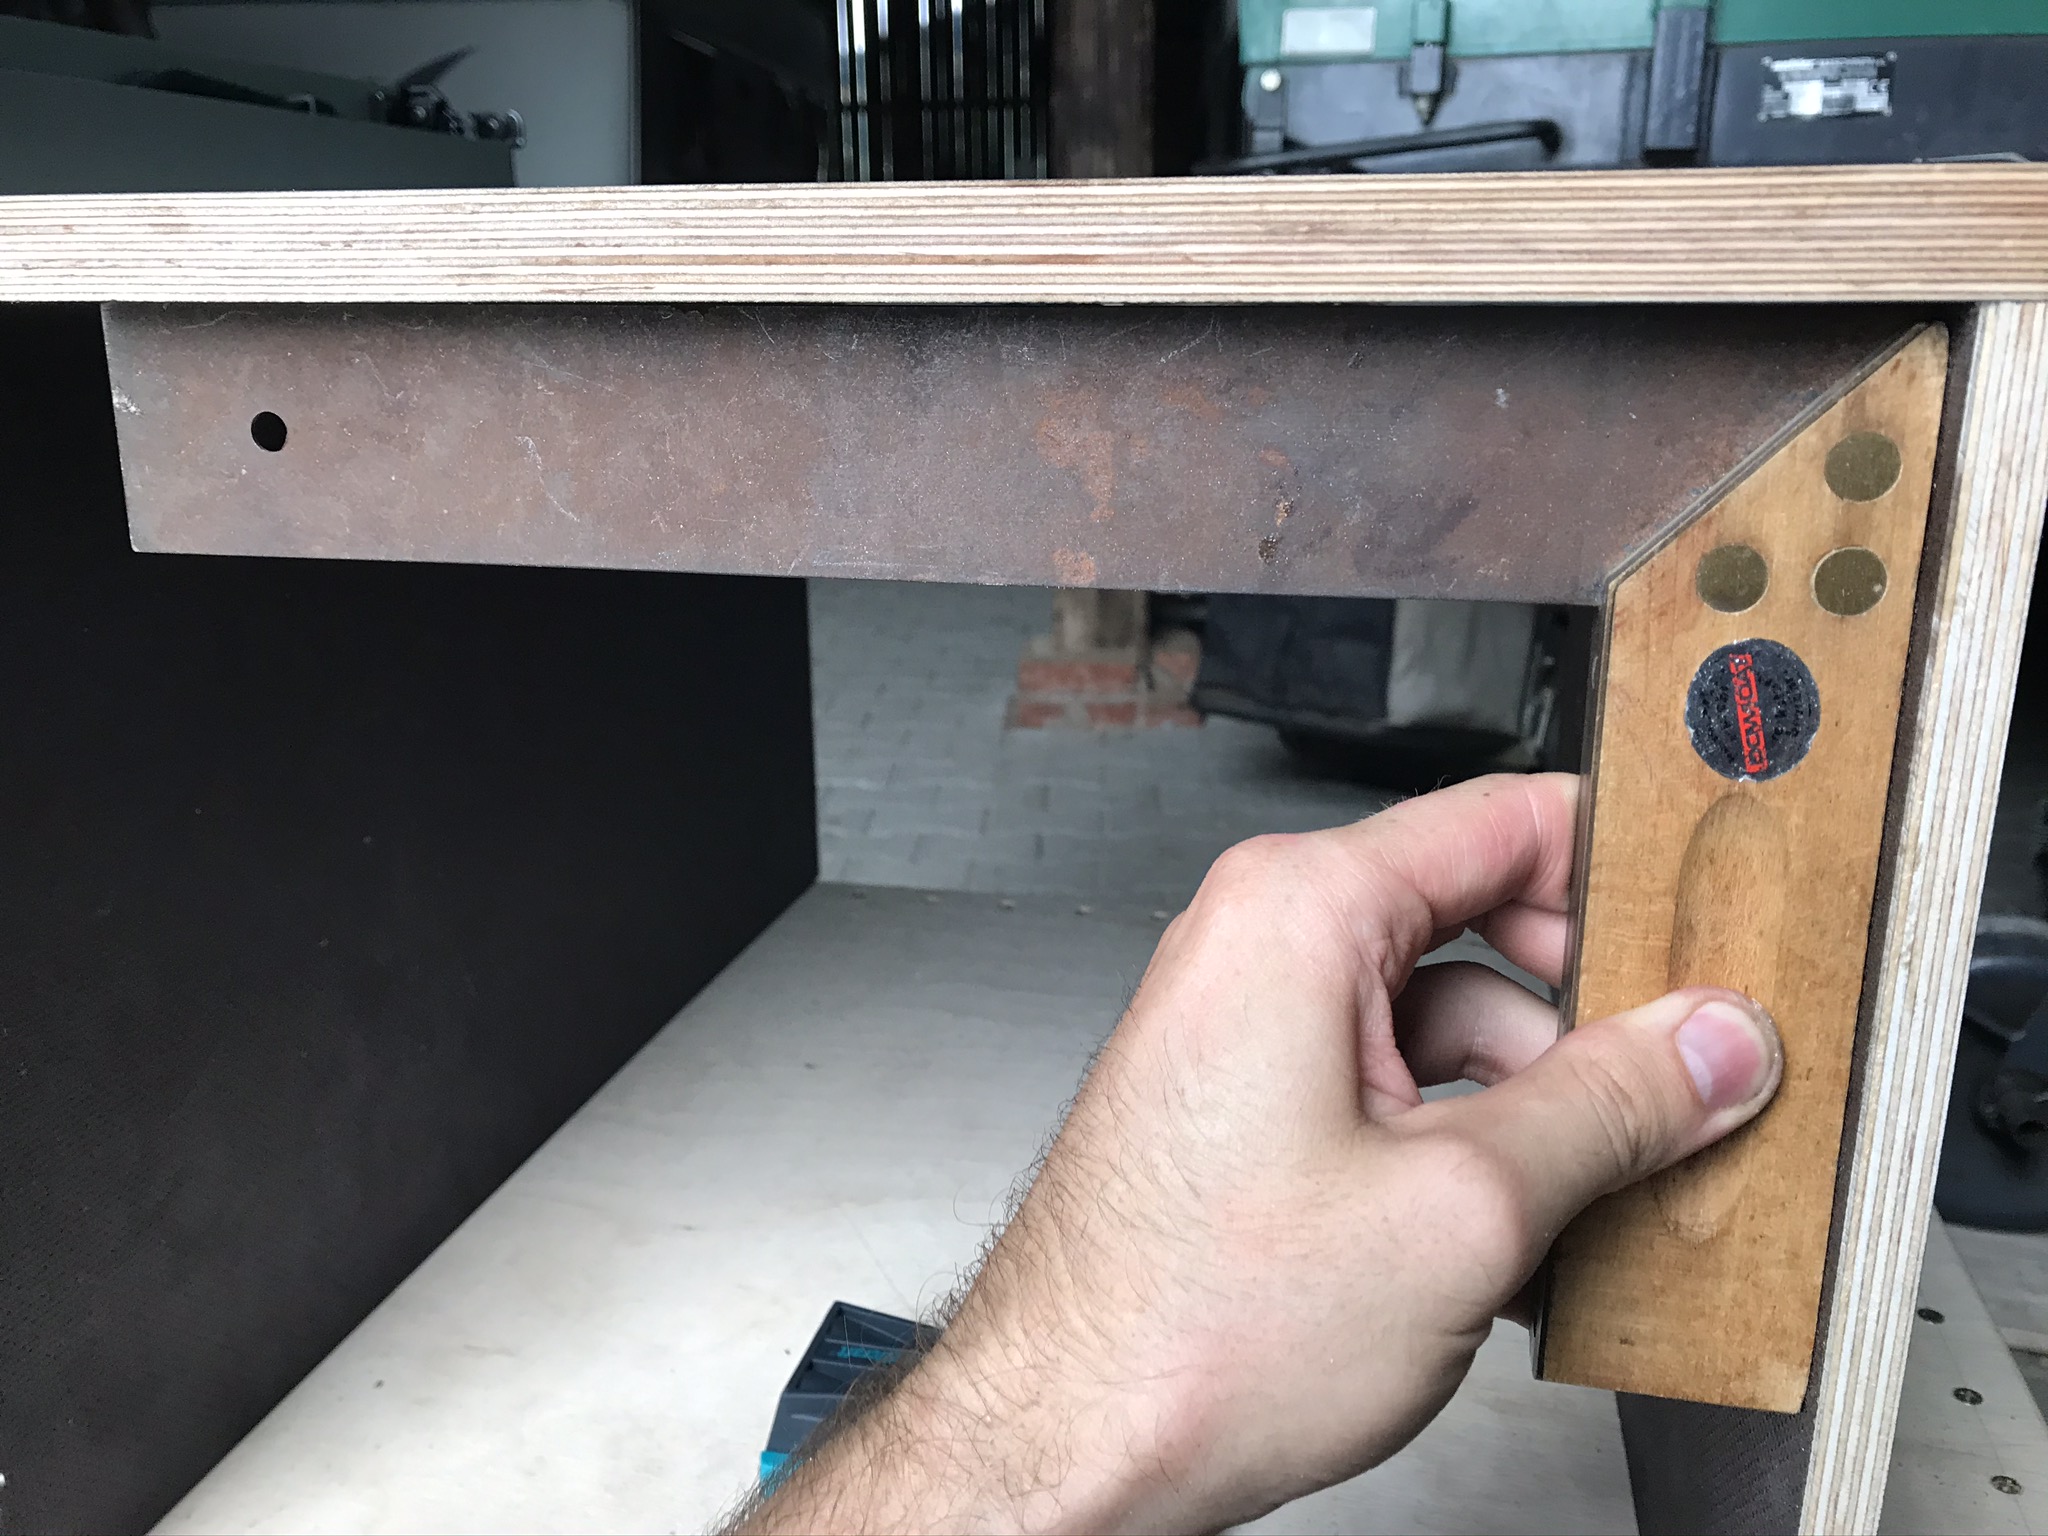
Fitting back- and side panele – DWE7492 – How to build a table saw stand with router table
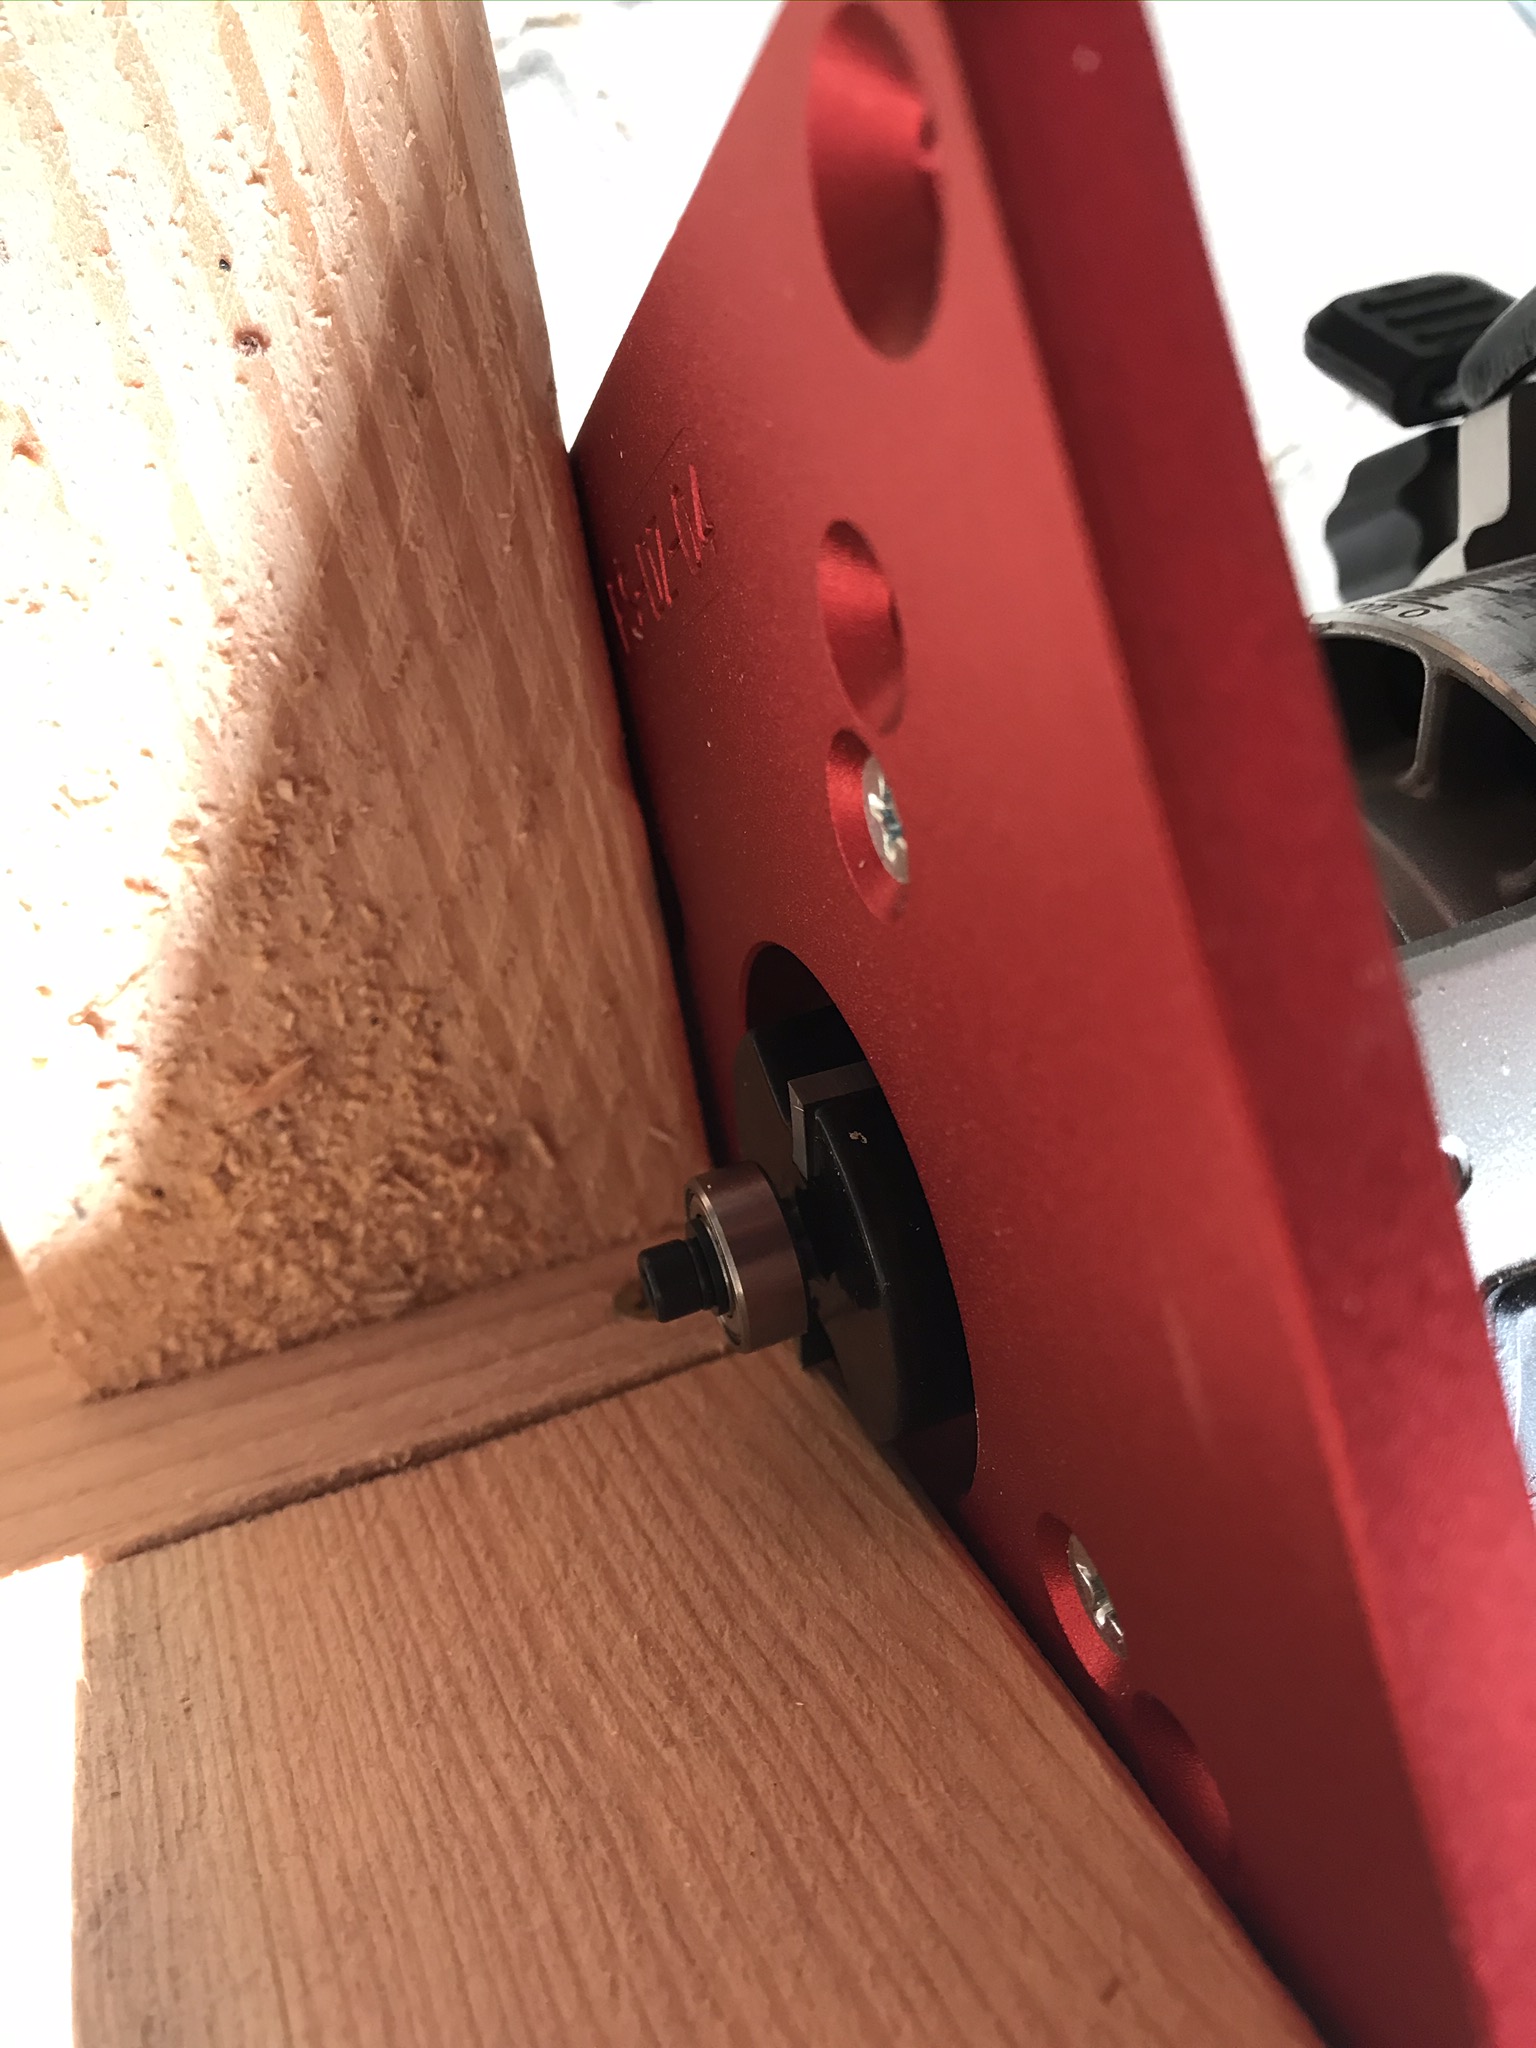
The last step in the DIY DeWALT DWE7492* base frame with router table is the side and rear panels. This is not absolutely necessary from a functional point of view. However, it is a visual highlight! To make sure that the panels made of white coated 3mm HDF are flush with the rest of the frame, I used a router and a guided rebate cutter router bit* to cut a rebate in the side and rear panel recesses of the frame. You should set the routing depth to 3mm.

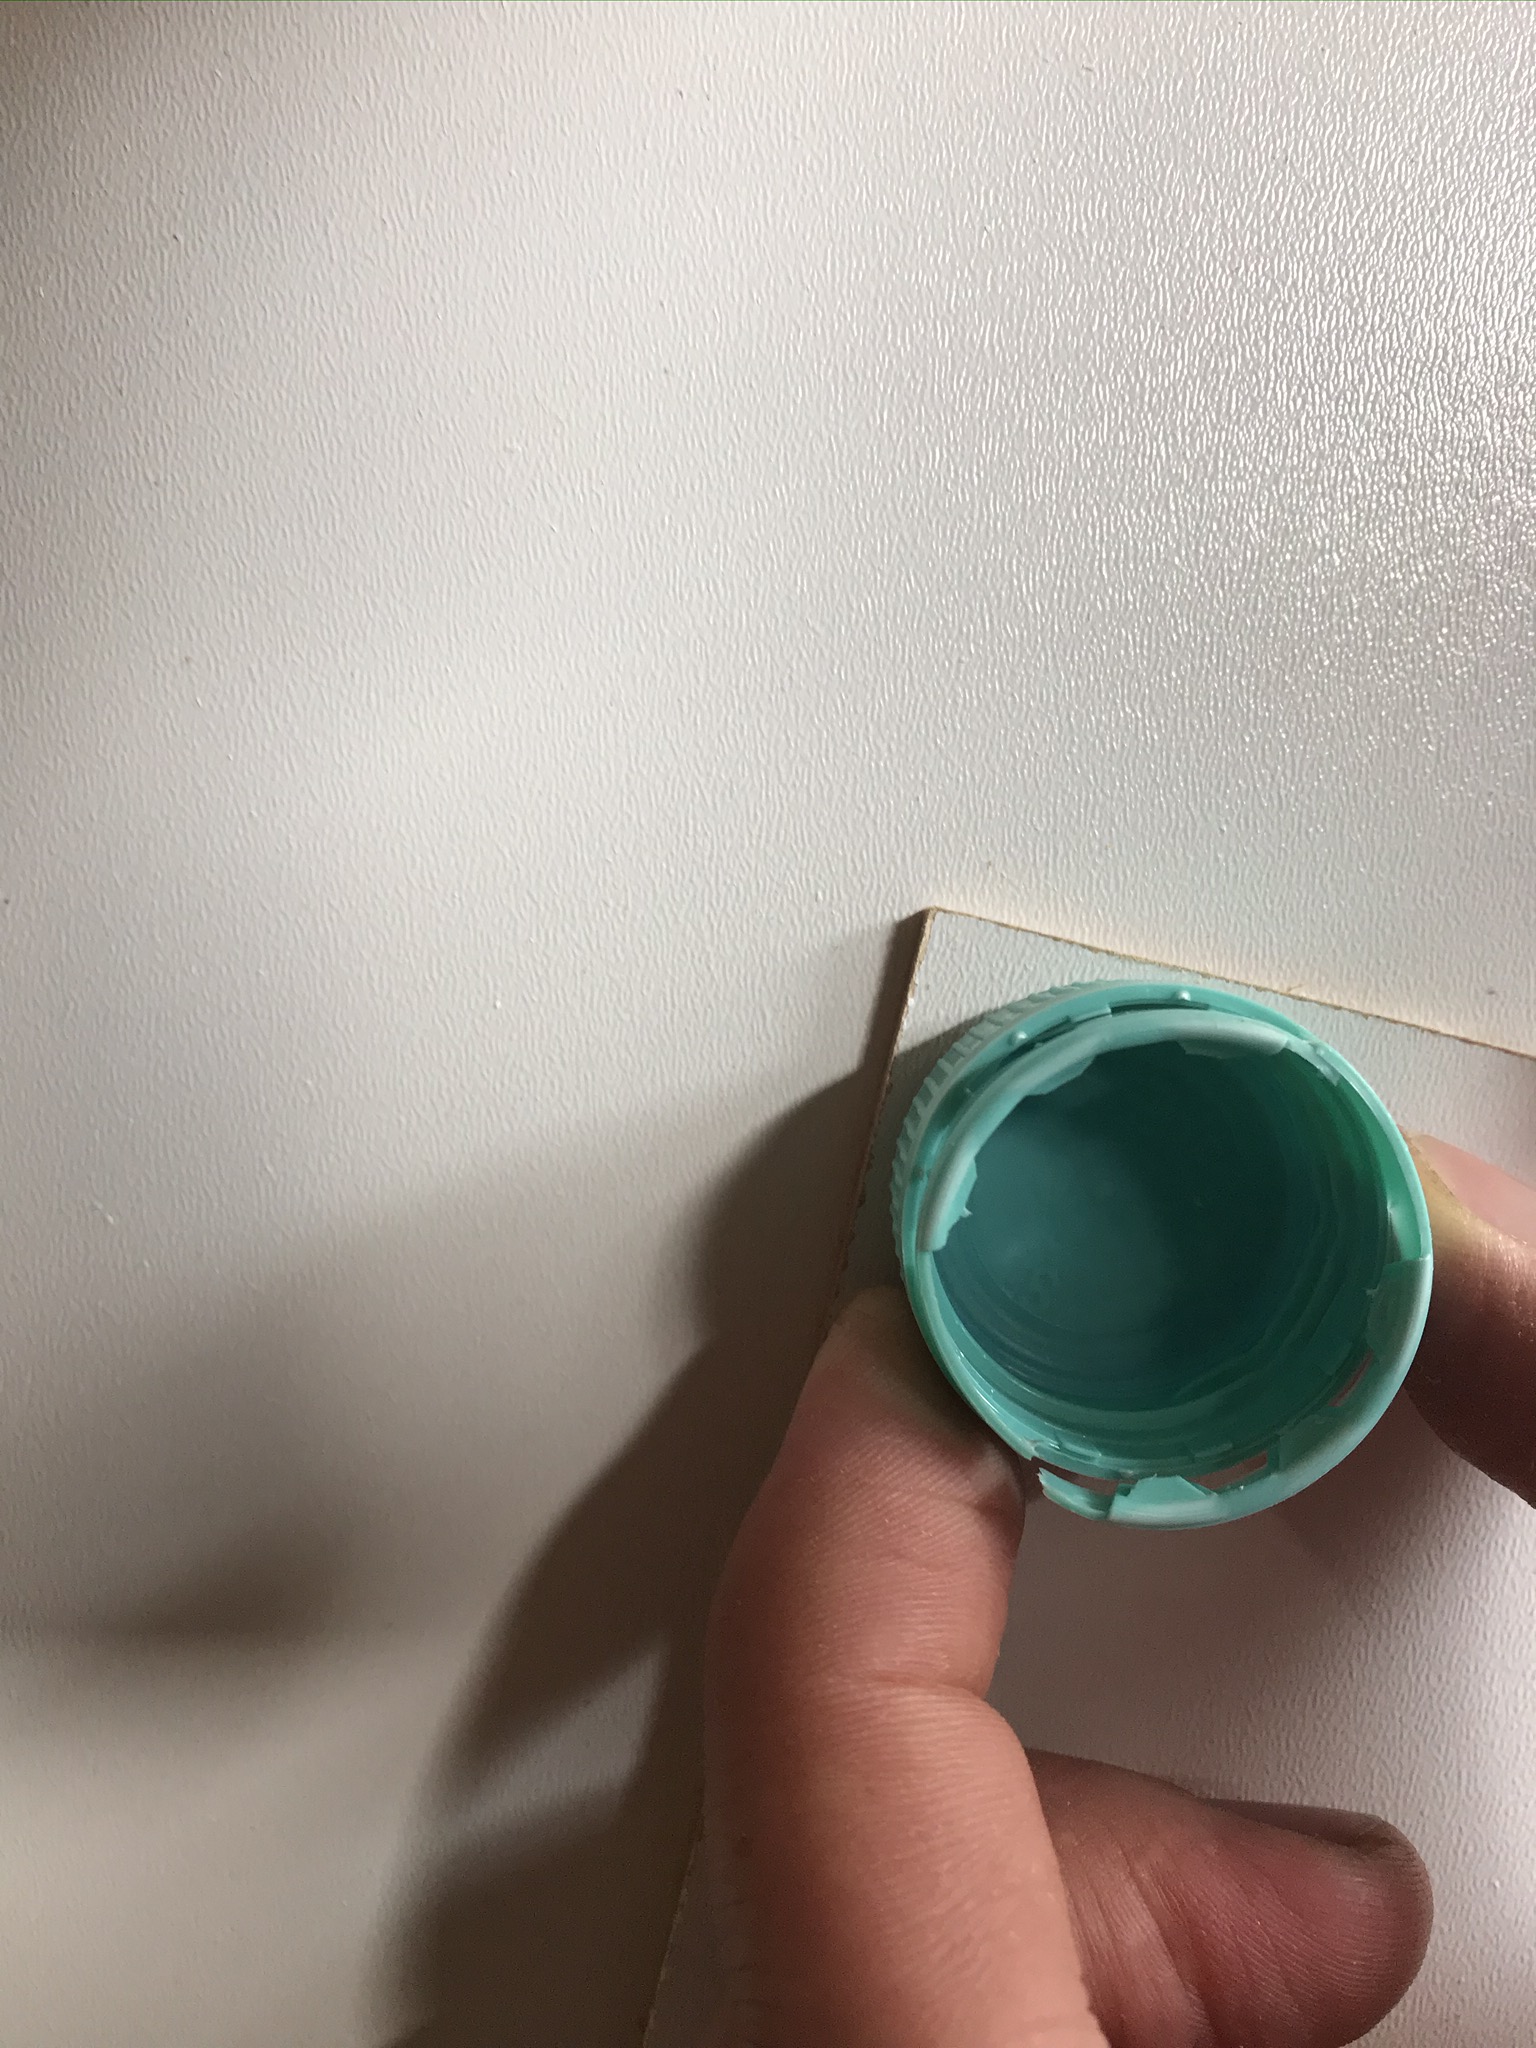
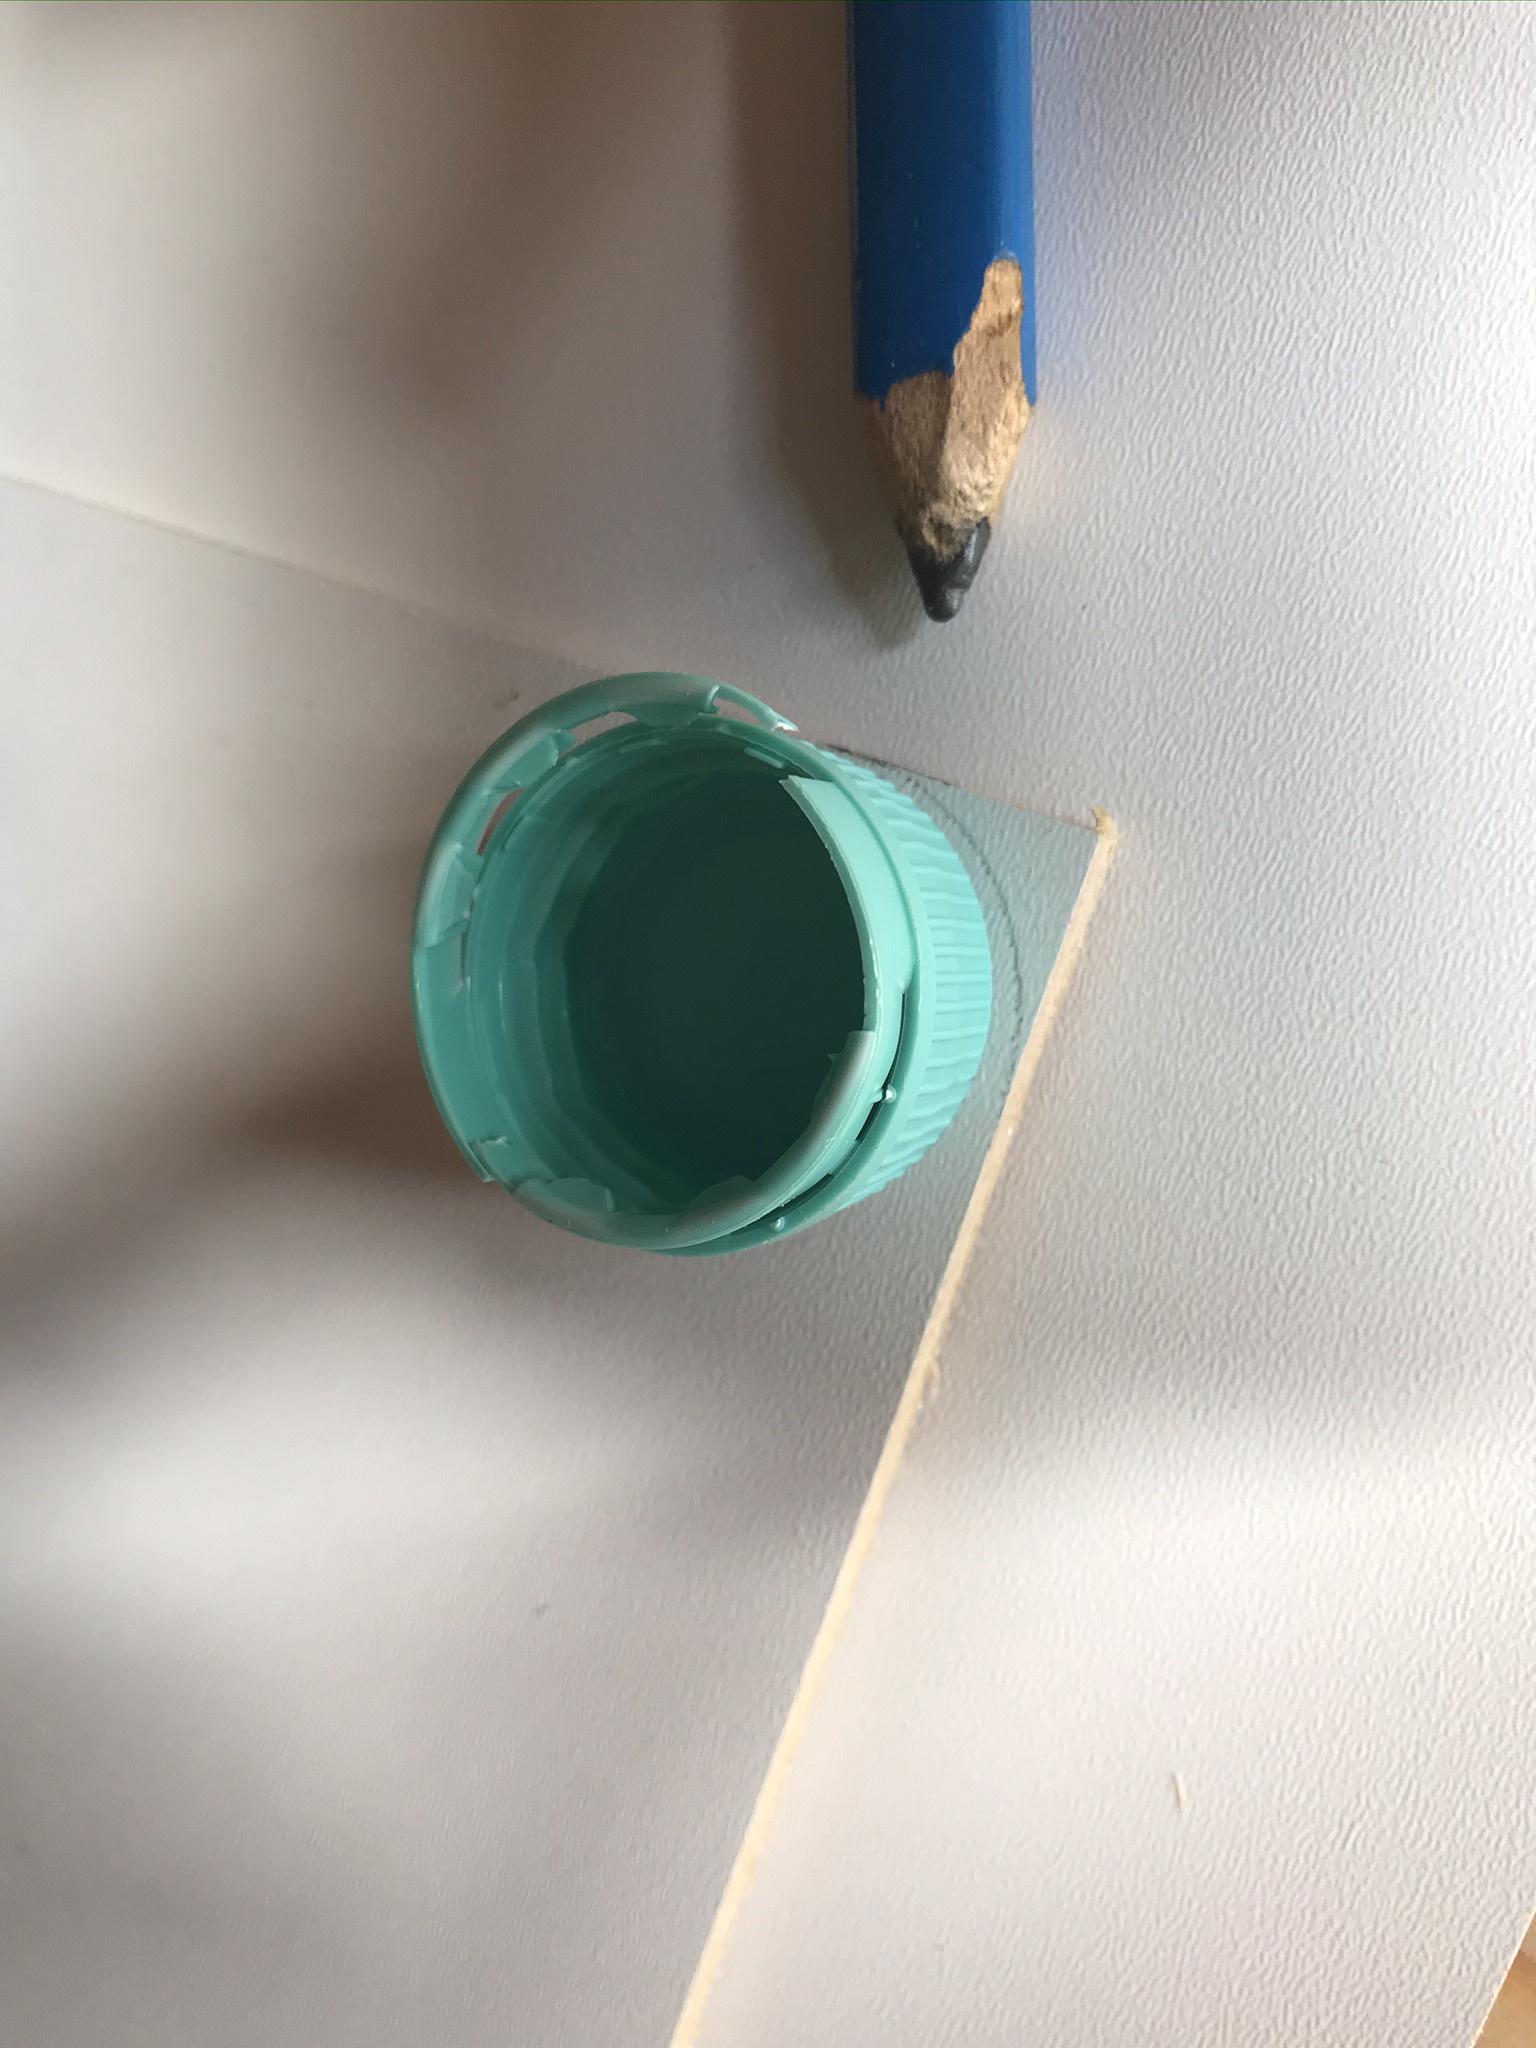
Now you can cut the 4 panelling pieces (2 pcs. 530x340mm and 2 pcs. 500x340mm) from the white coated 3mm HDF board on the table saw. To ensure that the angular panelling pieces fit perfectly into the round recess of the rebate, you still have to round off the corners. You can use the lid of a water bottle as a template if you don’t have a compass at hand.
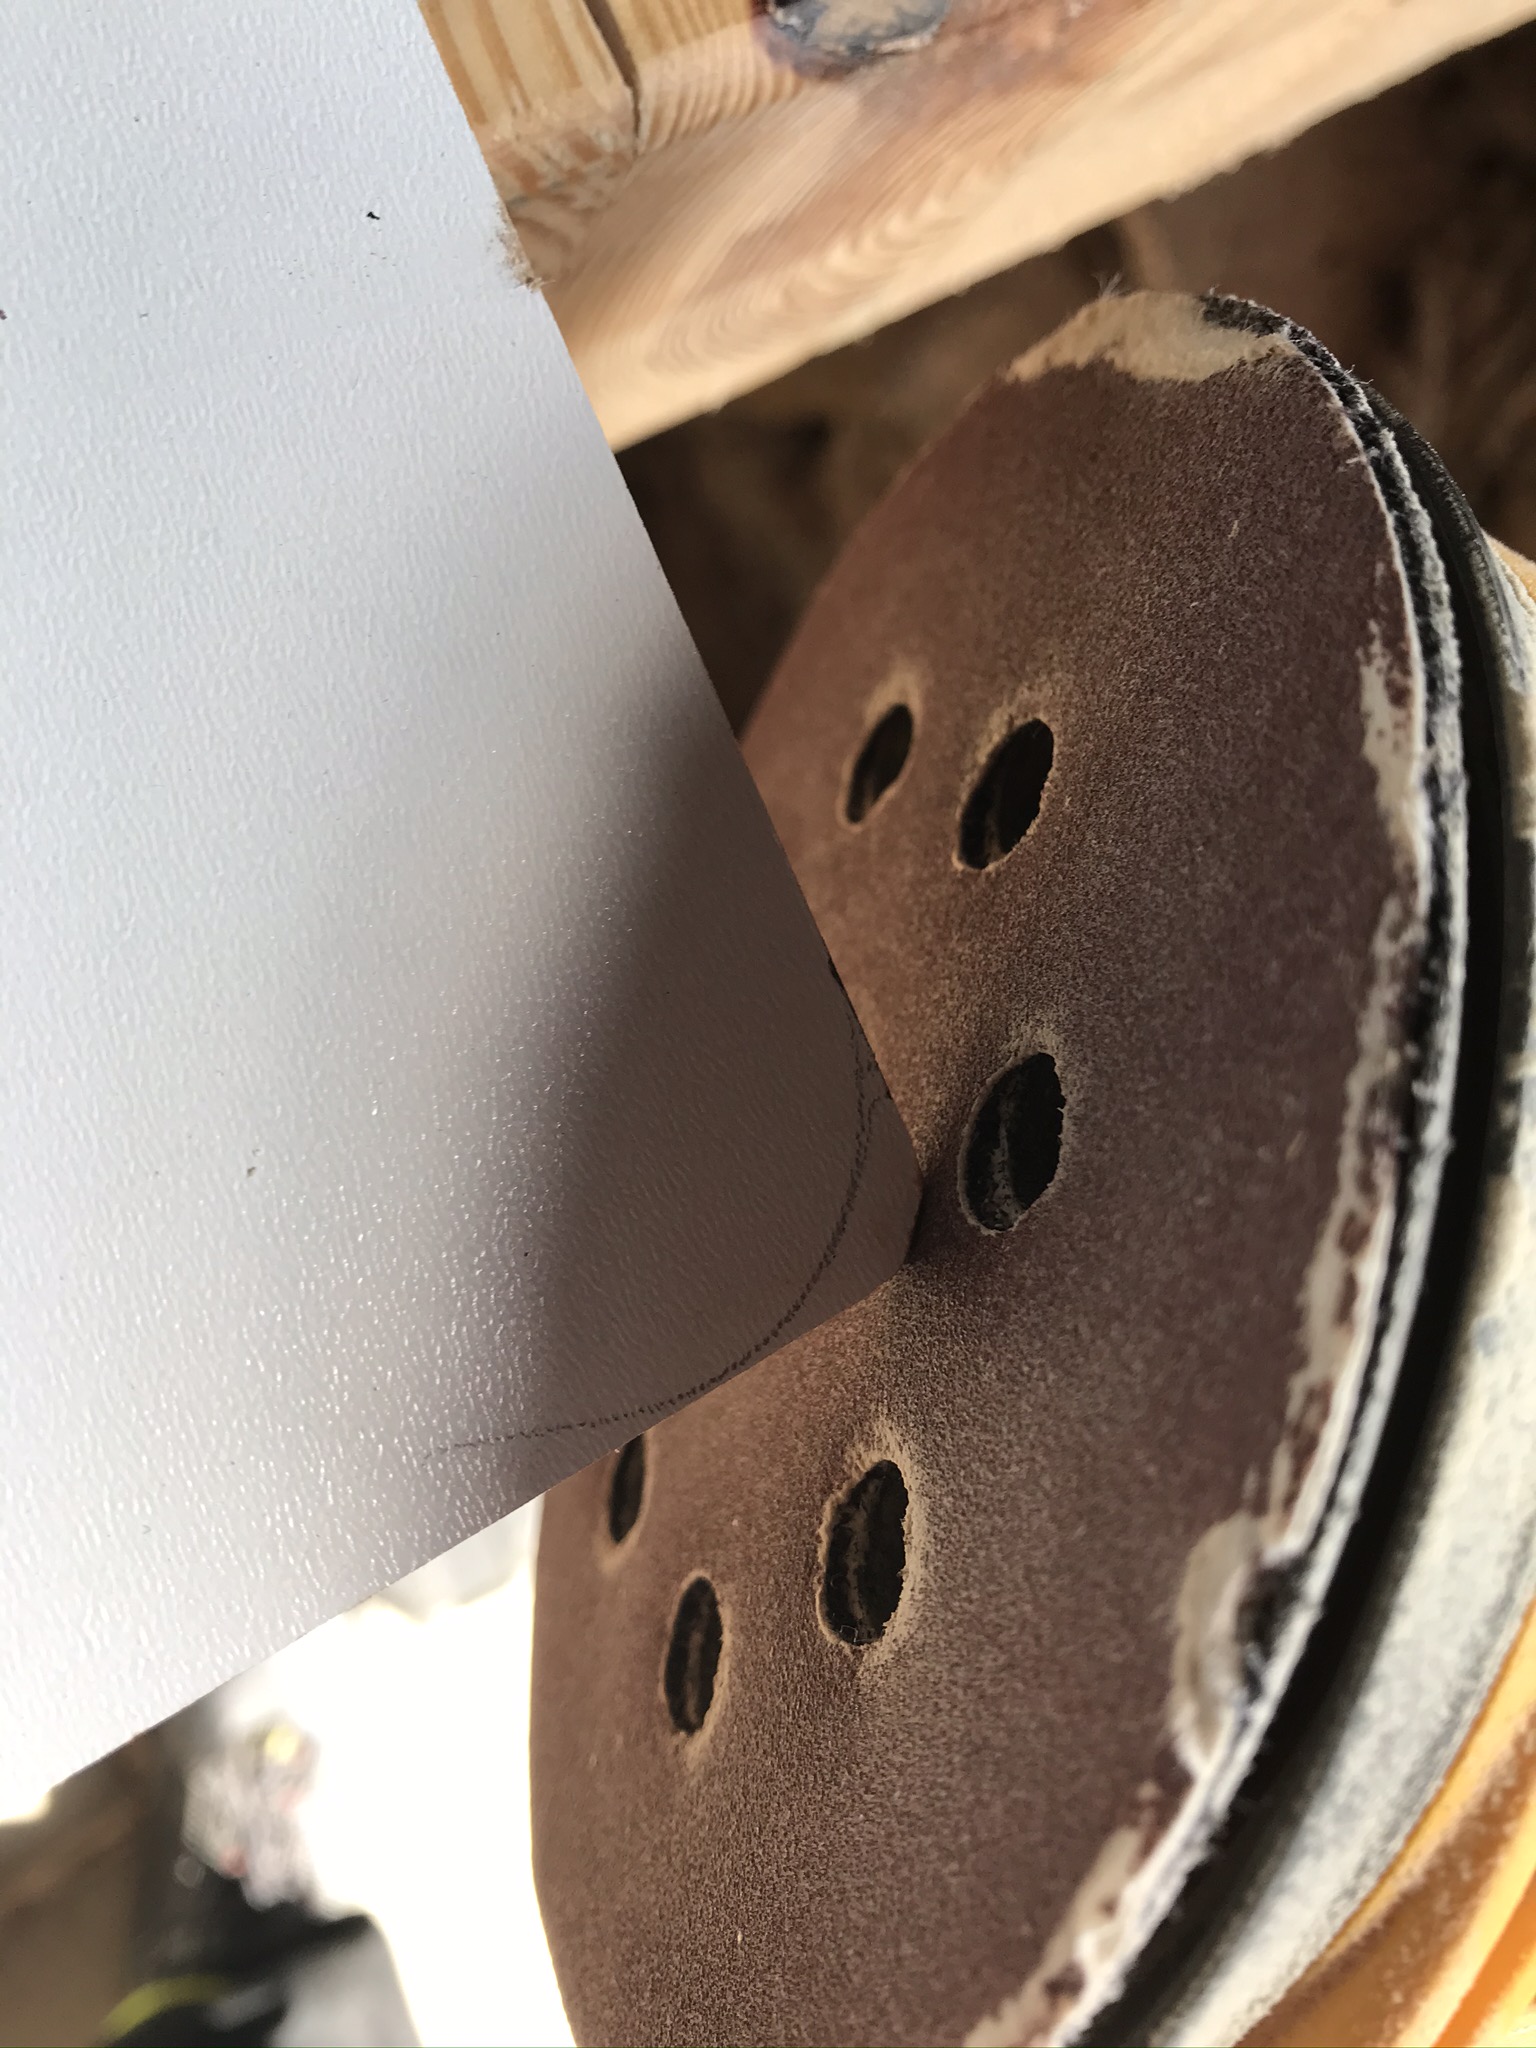
After marking out, you can adjust the 3mm thin material to the curve, for example, with a random orbital sander* or a jigsaw*.
Once you have sawn all 4 fairing parts to size and made the rounding, apply wood glue along the milled groove and insert the fairing parts. It is best to use some screw clamps to press the cladding parts firmly into the groove.

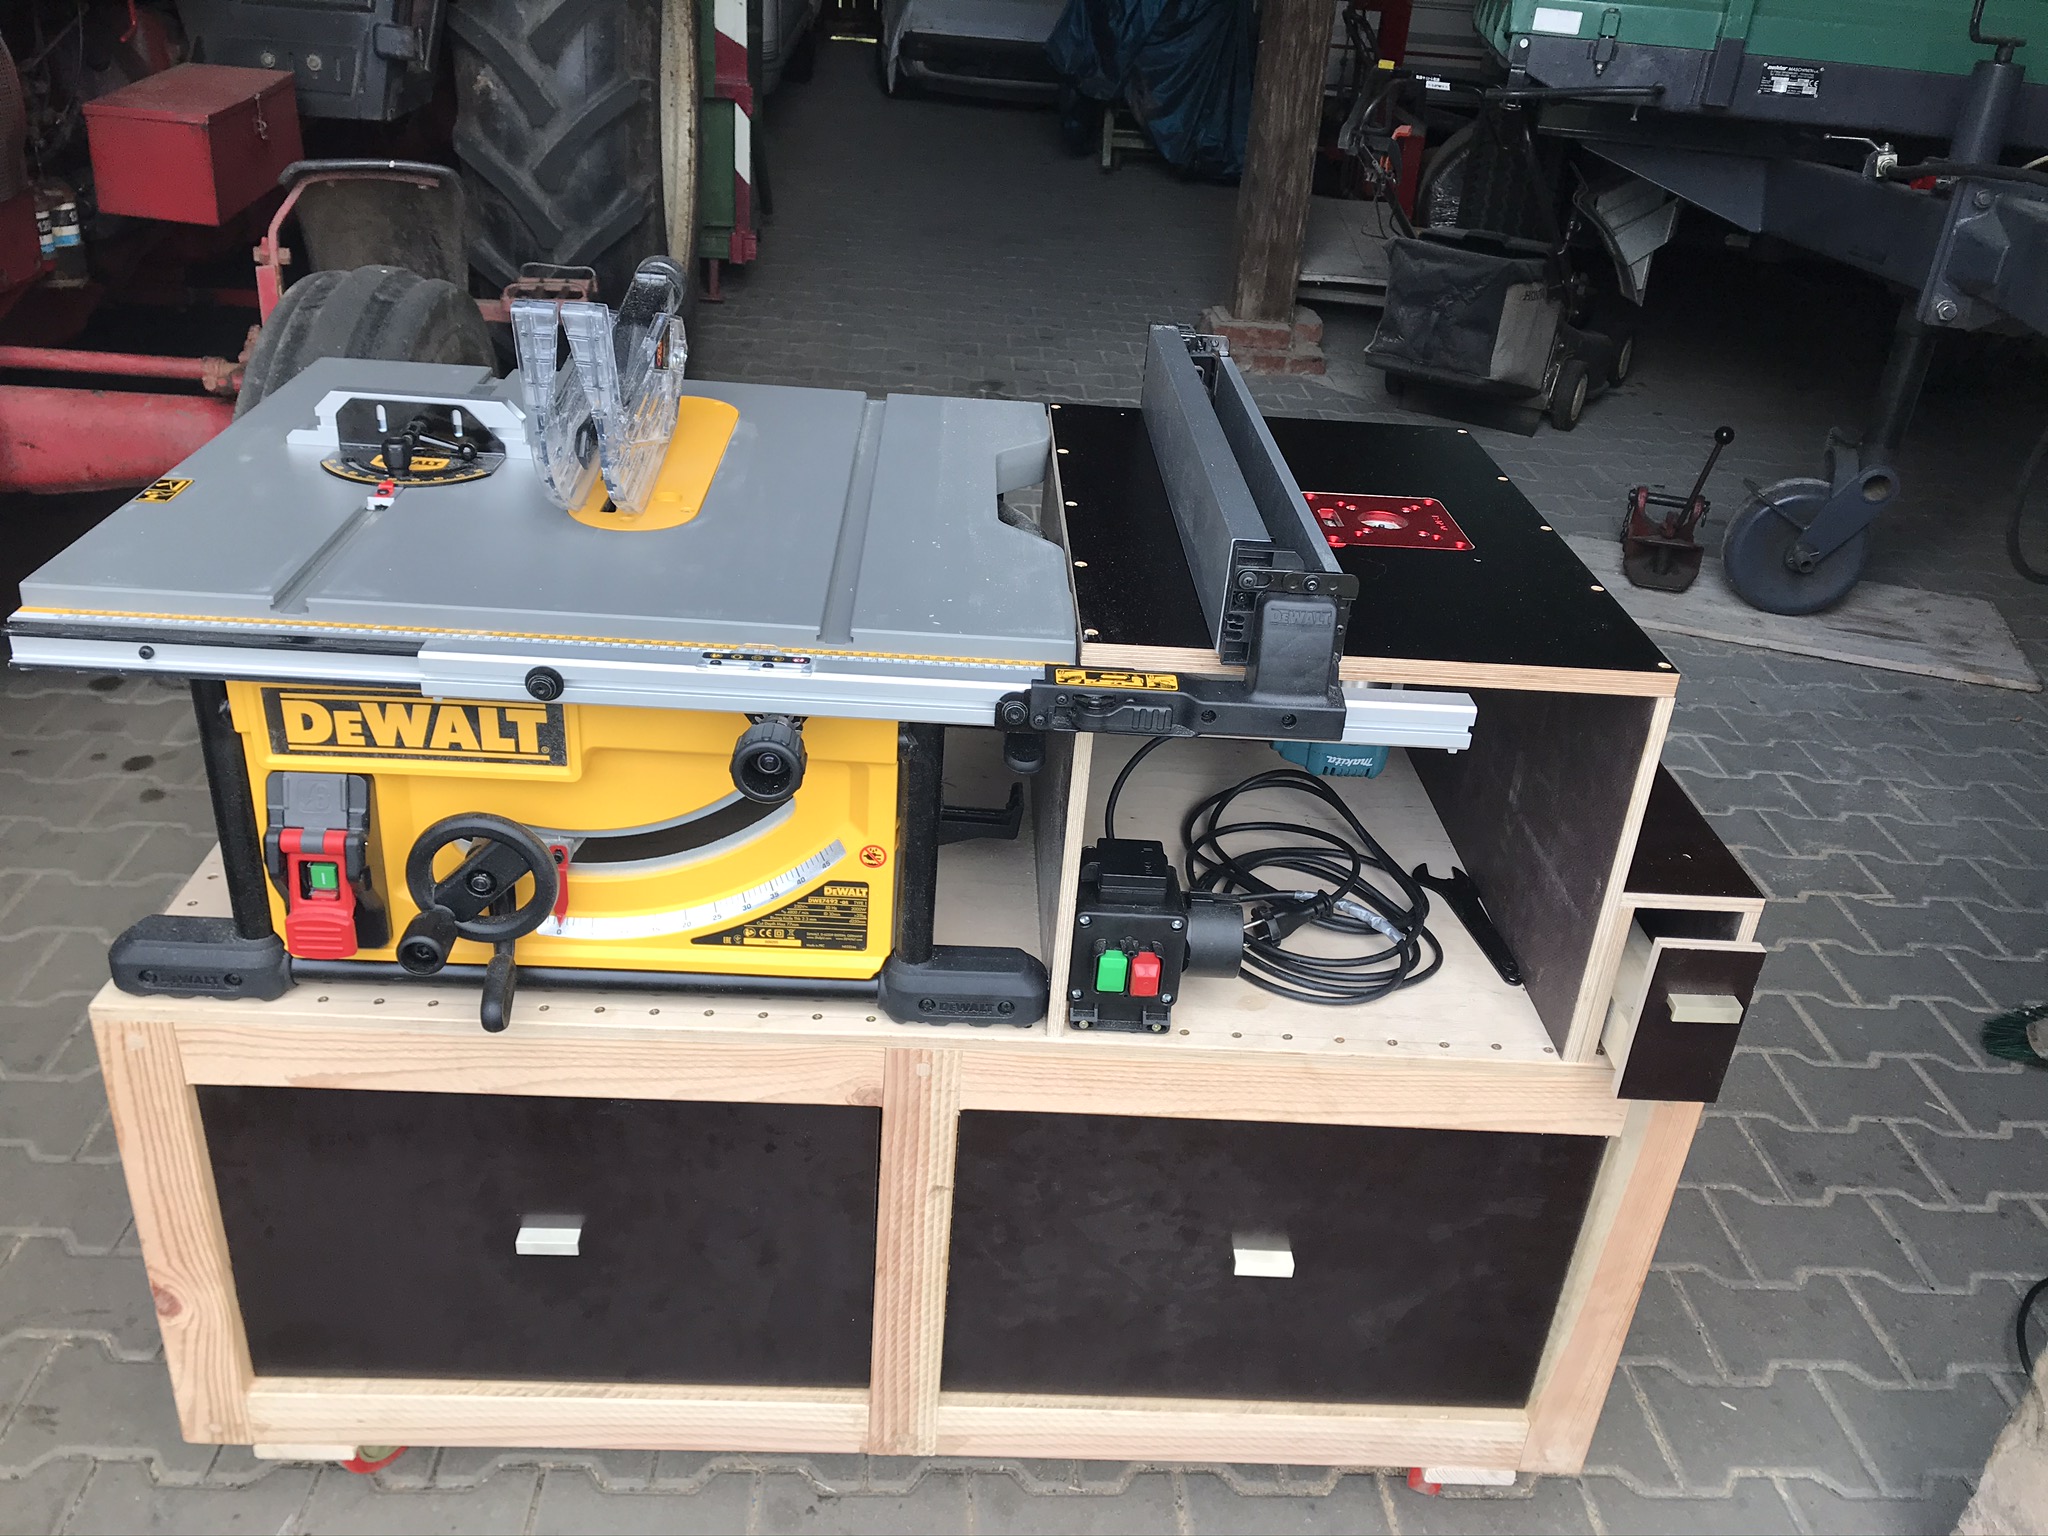
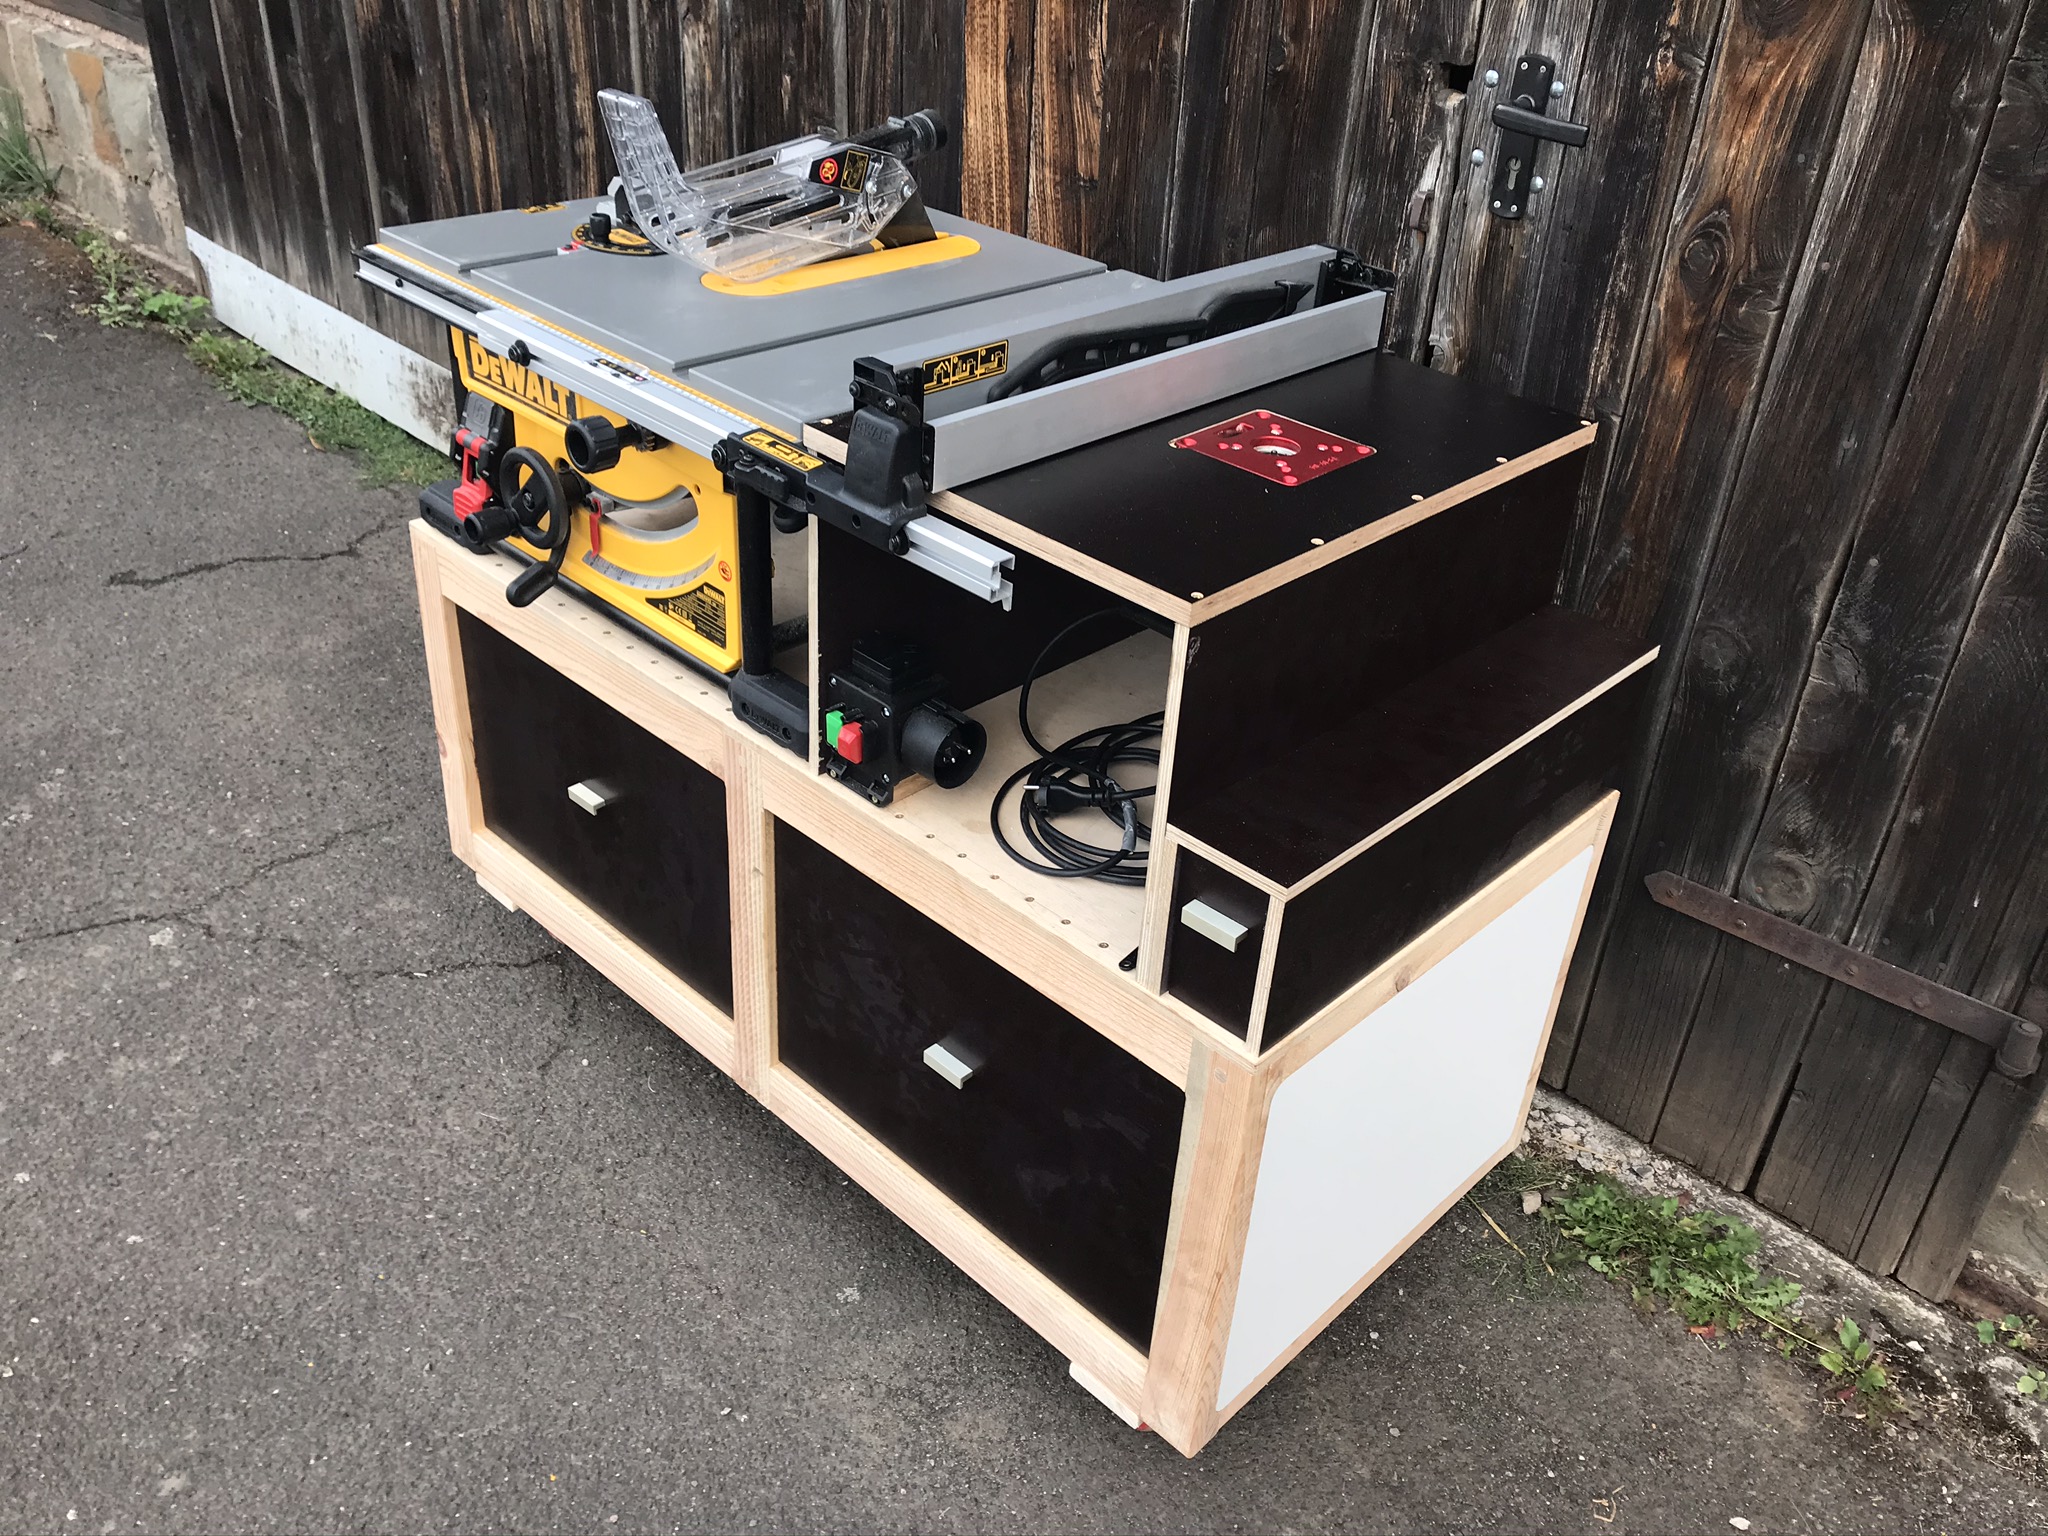
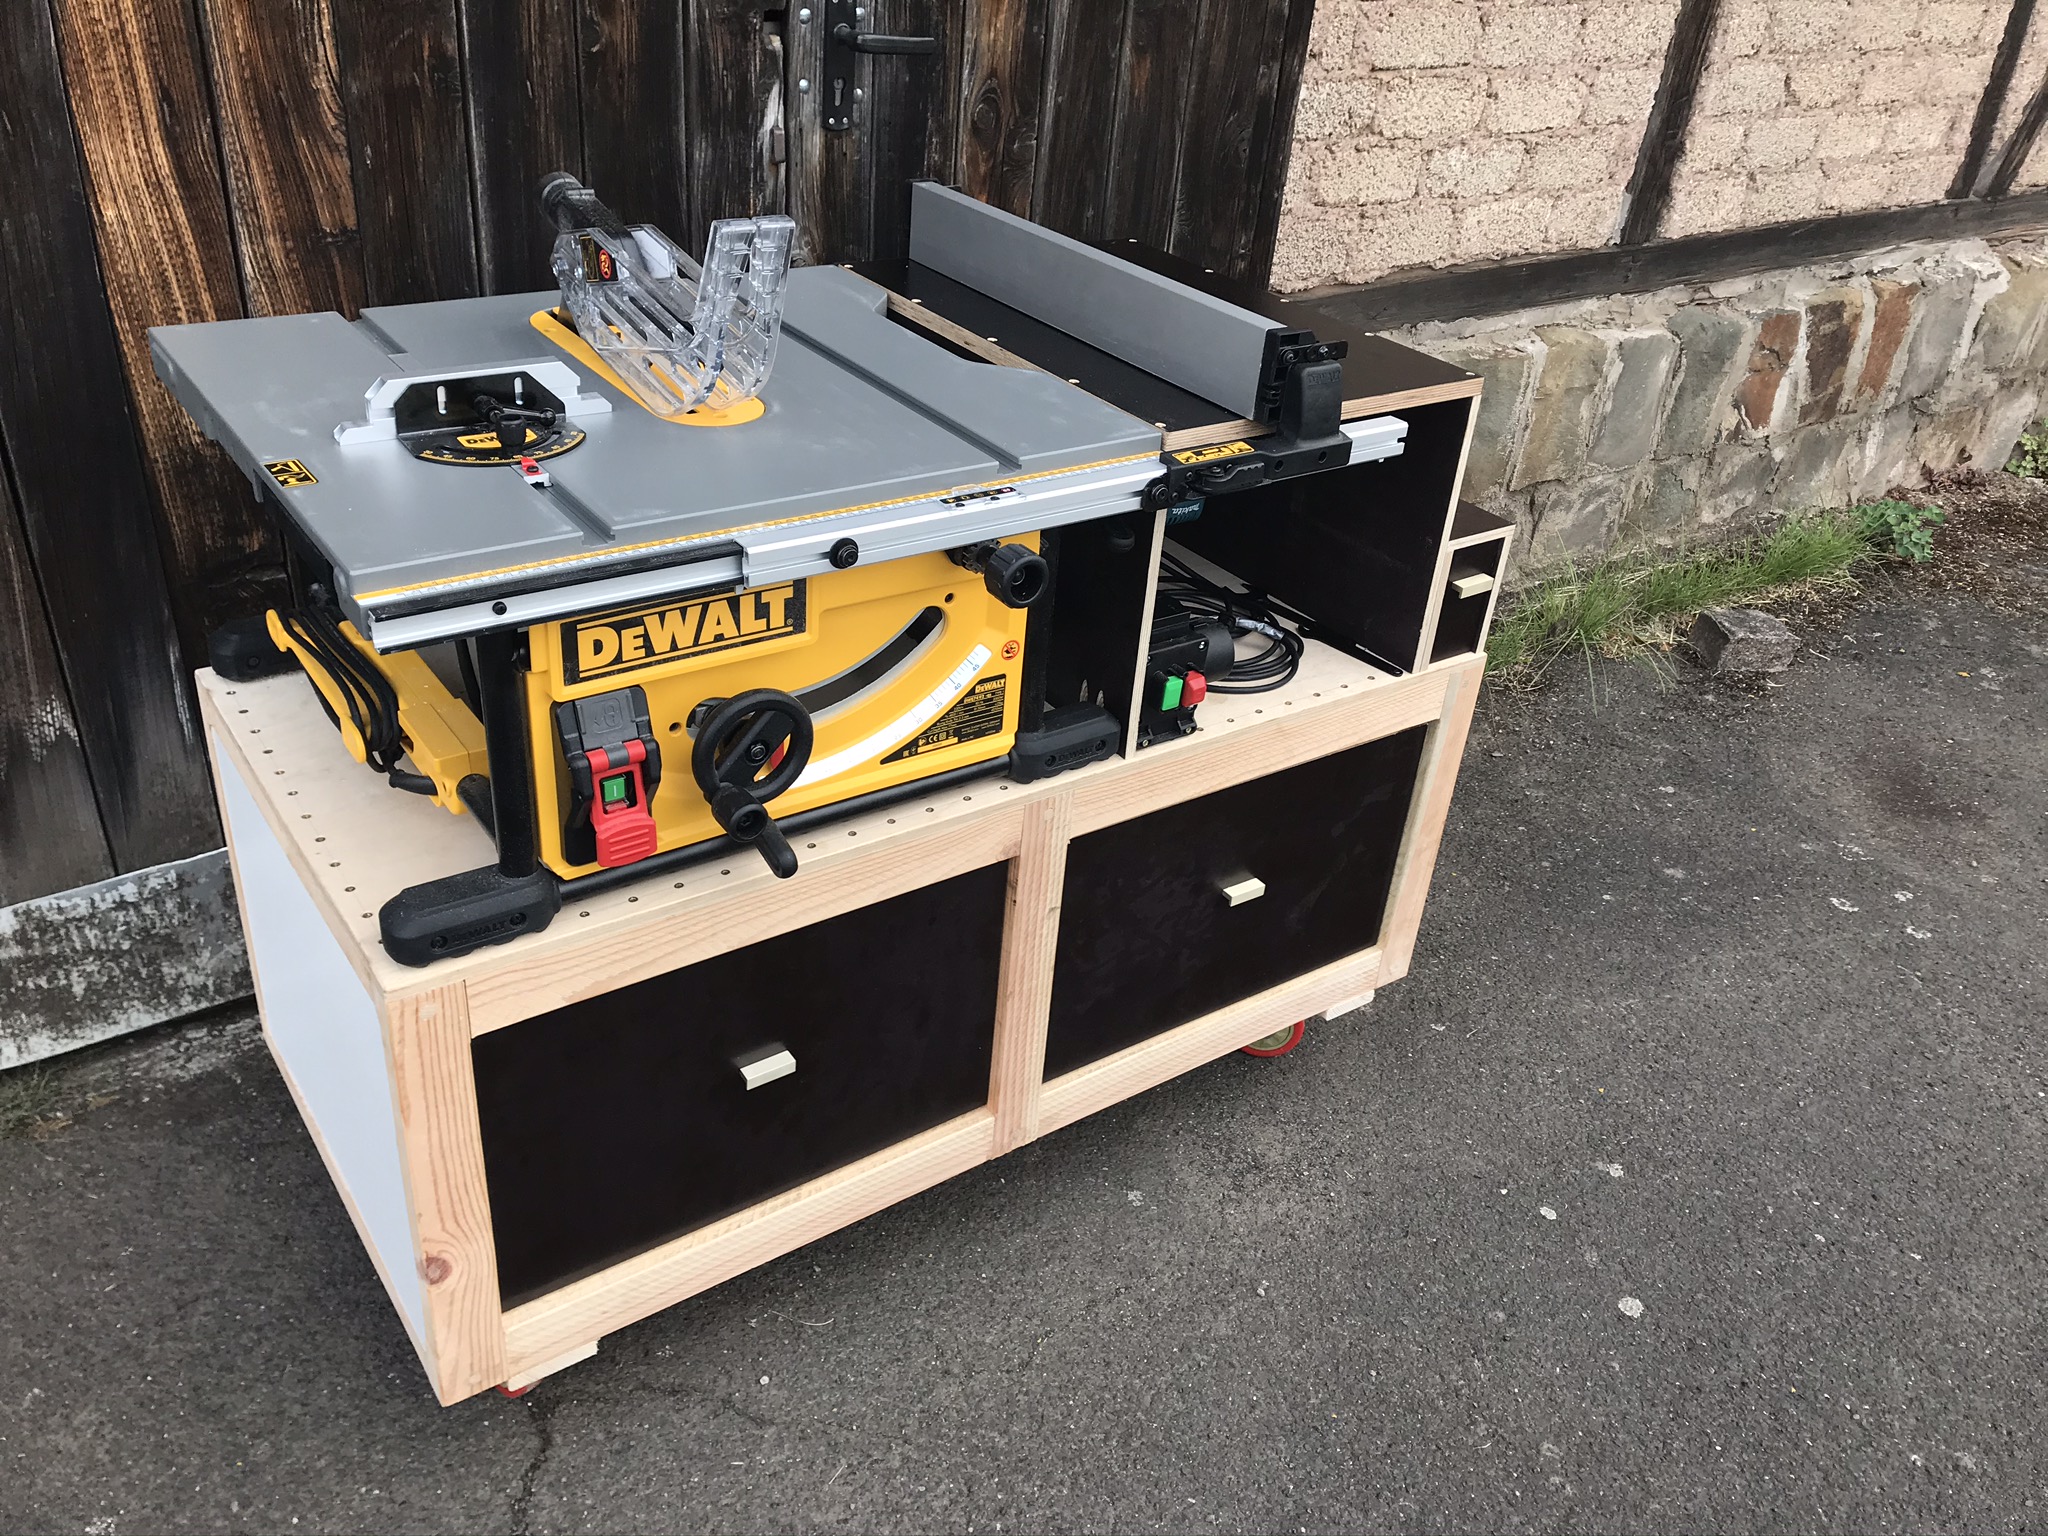
Repeat this for all 4 open recesses. The result is impressive and well worth the work. A fully functional base cabinet for the DeWALT DWE7492 with integrated router table! The router bits can be put into the router bit storage and are thus always where they are needed. If there is not enough space here at some point, an identically constructed solution can be placed on top. To ensure that the appropriate accessories and tools for the router and circular saw are always within reach, there is enough space for them in the two large drawers in the DWE7492 base cabinet.
How to build a table saw station – the final result
I hope I was able to help you with building the DWE7492 underframe yourself and give you some input. The integrated milling table for the DWE7492* is also easier to implement than I thought. If you have any questions, suggestions or ideas for improvement, please let me know in the comments!