

You’re wondering how to restore barn wood? Reclaimed wood can look great when it has been beautifully processed! Instead of spending a lot of money on ready-prepared barn wood, would you rather refurbish old beams yourself? Nothing could be easier! In the following article, I will describe how I have restored old barn wood so far and how you can also clean and restore old wood beams.
* = Affiliate Links /Advertising
As an amazon associate i earn from qualifying purchases.
Advertising

Necessary Tools
Necessary Material
- Brass Wire Brush*
- Small Brass Wire Brushes Set*
- Nylon Wire Cup Brush aggressive*
- Nylon Wire Cup Brush soft*
- Antique Wax*
Step by Step Guide – Refurbishing Old Beams and Scrap Wood
Basically, refurbishing reclaimed wood can be summarised in 4 steps, which I describe in detail below.
1) Preparation – removal of old nails, treatment of woodworms
2) Finish old wood surface with wire brushes and nylon brushes
3) Sand old wood while maintaining the natural structure
4) Surface finish
Preparation – Woodworm Treatment
First of all, you should be sure that the wood is worm-free. This is a very important step when it comes to the question “how to restore barn wood?”. The most common method, which is also carried out industrially on a large scale, is the thermal treatment of the wood with the help of heat. The wood is placed in a drying kiln and heated to a core temperature of approx. 55-60°C and kept at this temperature for a while. Woodworms consist mainly of protein, which is decomposed at this temperature. Thus, the woodworms die and the wood is worm-free.
Not everyone has a drying kiln in their backyard… Nevertheless, I can only recommend that you call the sawmills in your area and ask if you can put a piece of wood or two in their drying kiln. Usually this is possible at a reasonable price.
If you do not have the possibilities, there are the following alternatives to a drying kiln:
- Sauna – is well suited for woodworm control. You can also treat large pieces of wood in it.
- Old oven (or similar) – also works, the only problem is that the size of the workpiece is definitely limited.
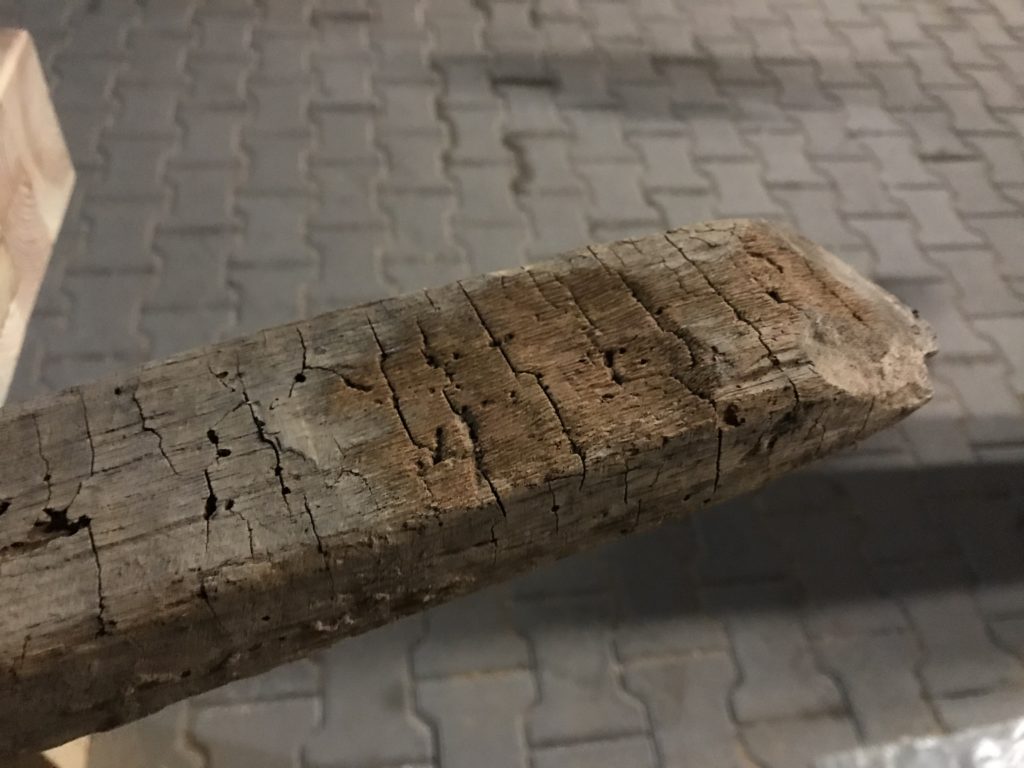
Preparation – The Reclaimed Wood is Full of Nails – What To Do?
Before you start with the surface treatment, search the old wood for old nails and remove them with a set of pliers*. Feel rather than force is more helpful here. The old rustic nails can break off quickly. If this happens to you and you absolutely have to remove the nail, the only thing that helps is a small chisel* to expose the nail. Alternatively, you could use an old wood drill to drill a hole right next to the nail, which you can use to try to remove the nail. The hole is quite tiny then.
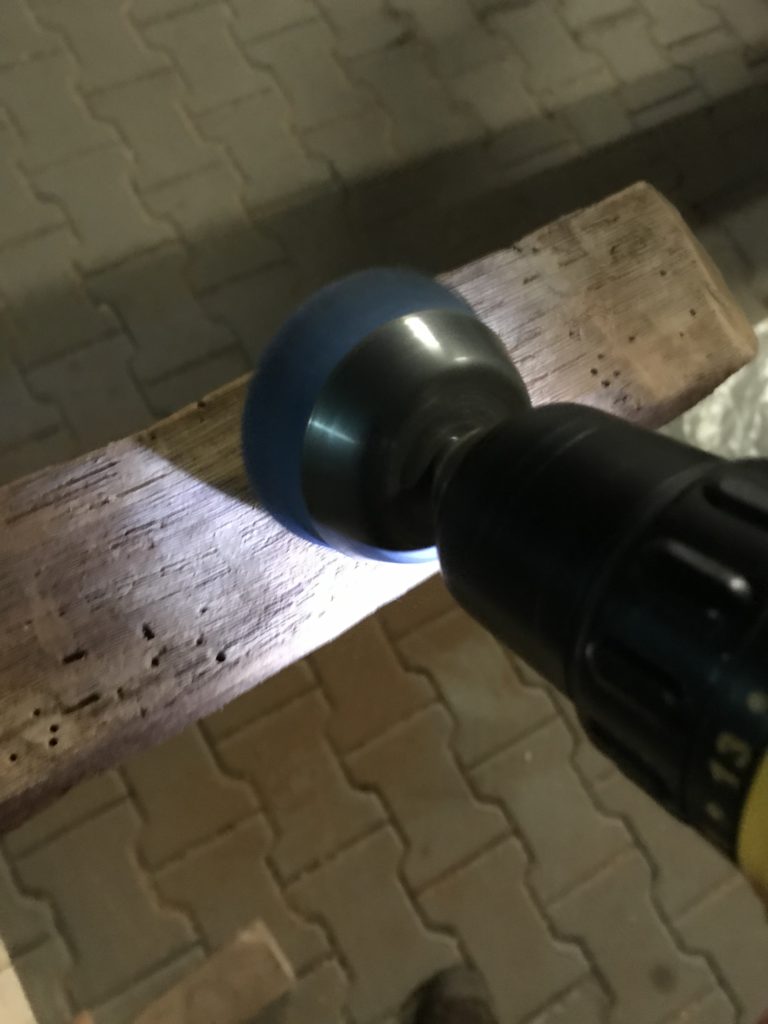
Surface Treatment – Brushing Barn Wood with Wire Brushes and Nylon Brushes!
I like to work with different wire brushes and nylon brushes for cordless drills. For larger workpieces, however, I recommend using a corded machine. Machining costs a lot of battery power. With these scrap wood brushes, you can process the scrap wood piece by piece.
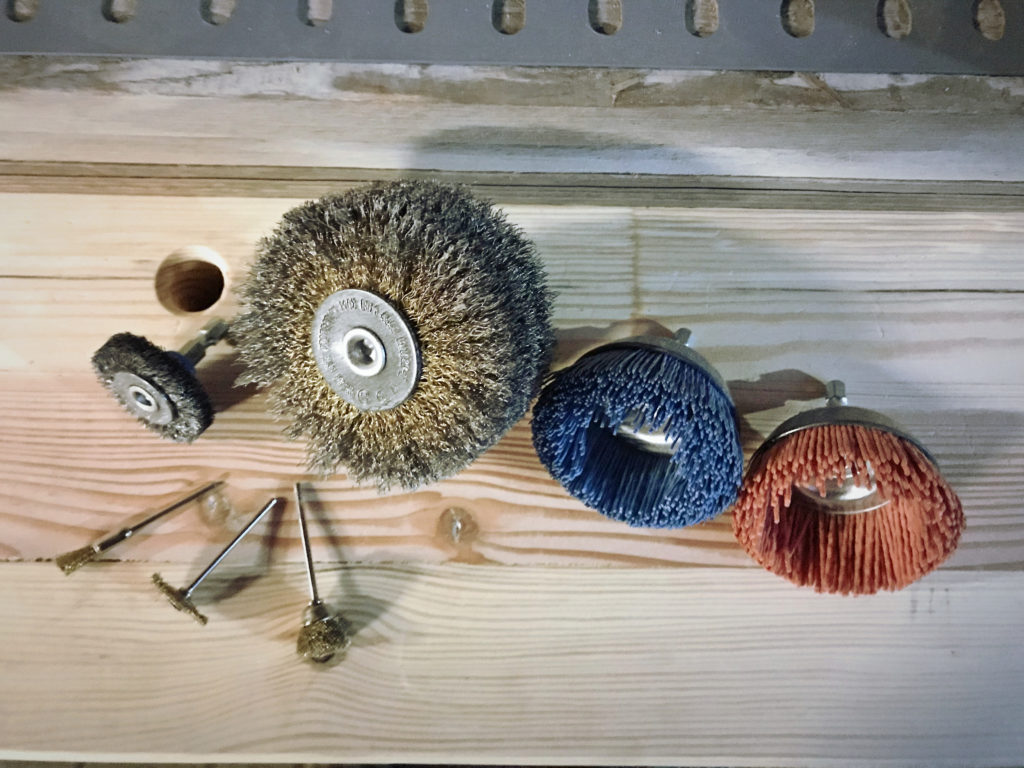
You start with a coarse wire brush drill bit and always work in the direction of the grain with your cordless drill. Be careful not to apply too much pressure to the workpiece, otherwise the wire brush will eat into the hardwood. You only want to achieve the following in this step:
Removal of softwood – the hardwood parts in the surface should remain.
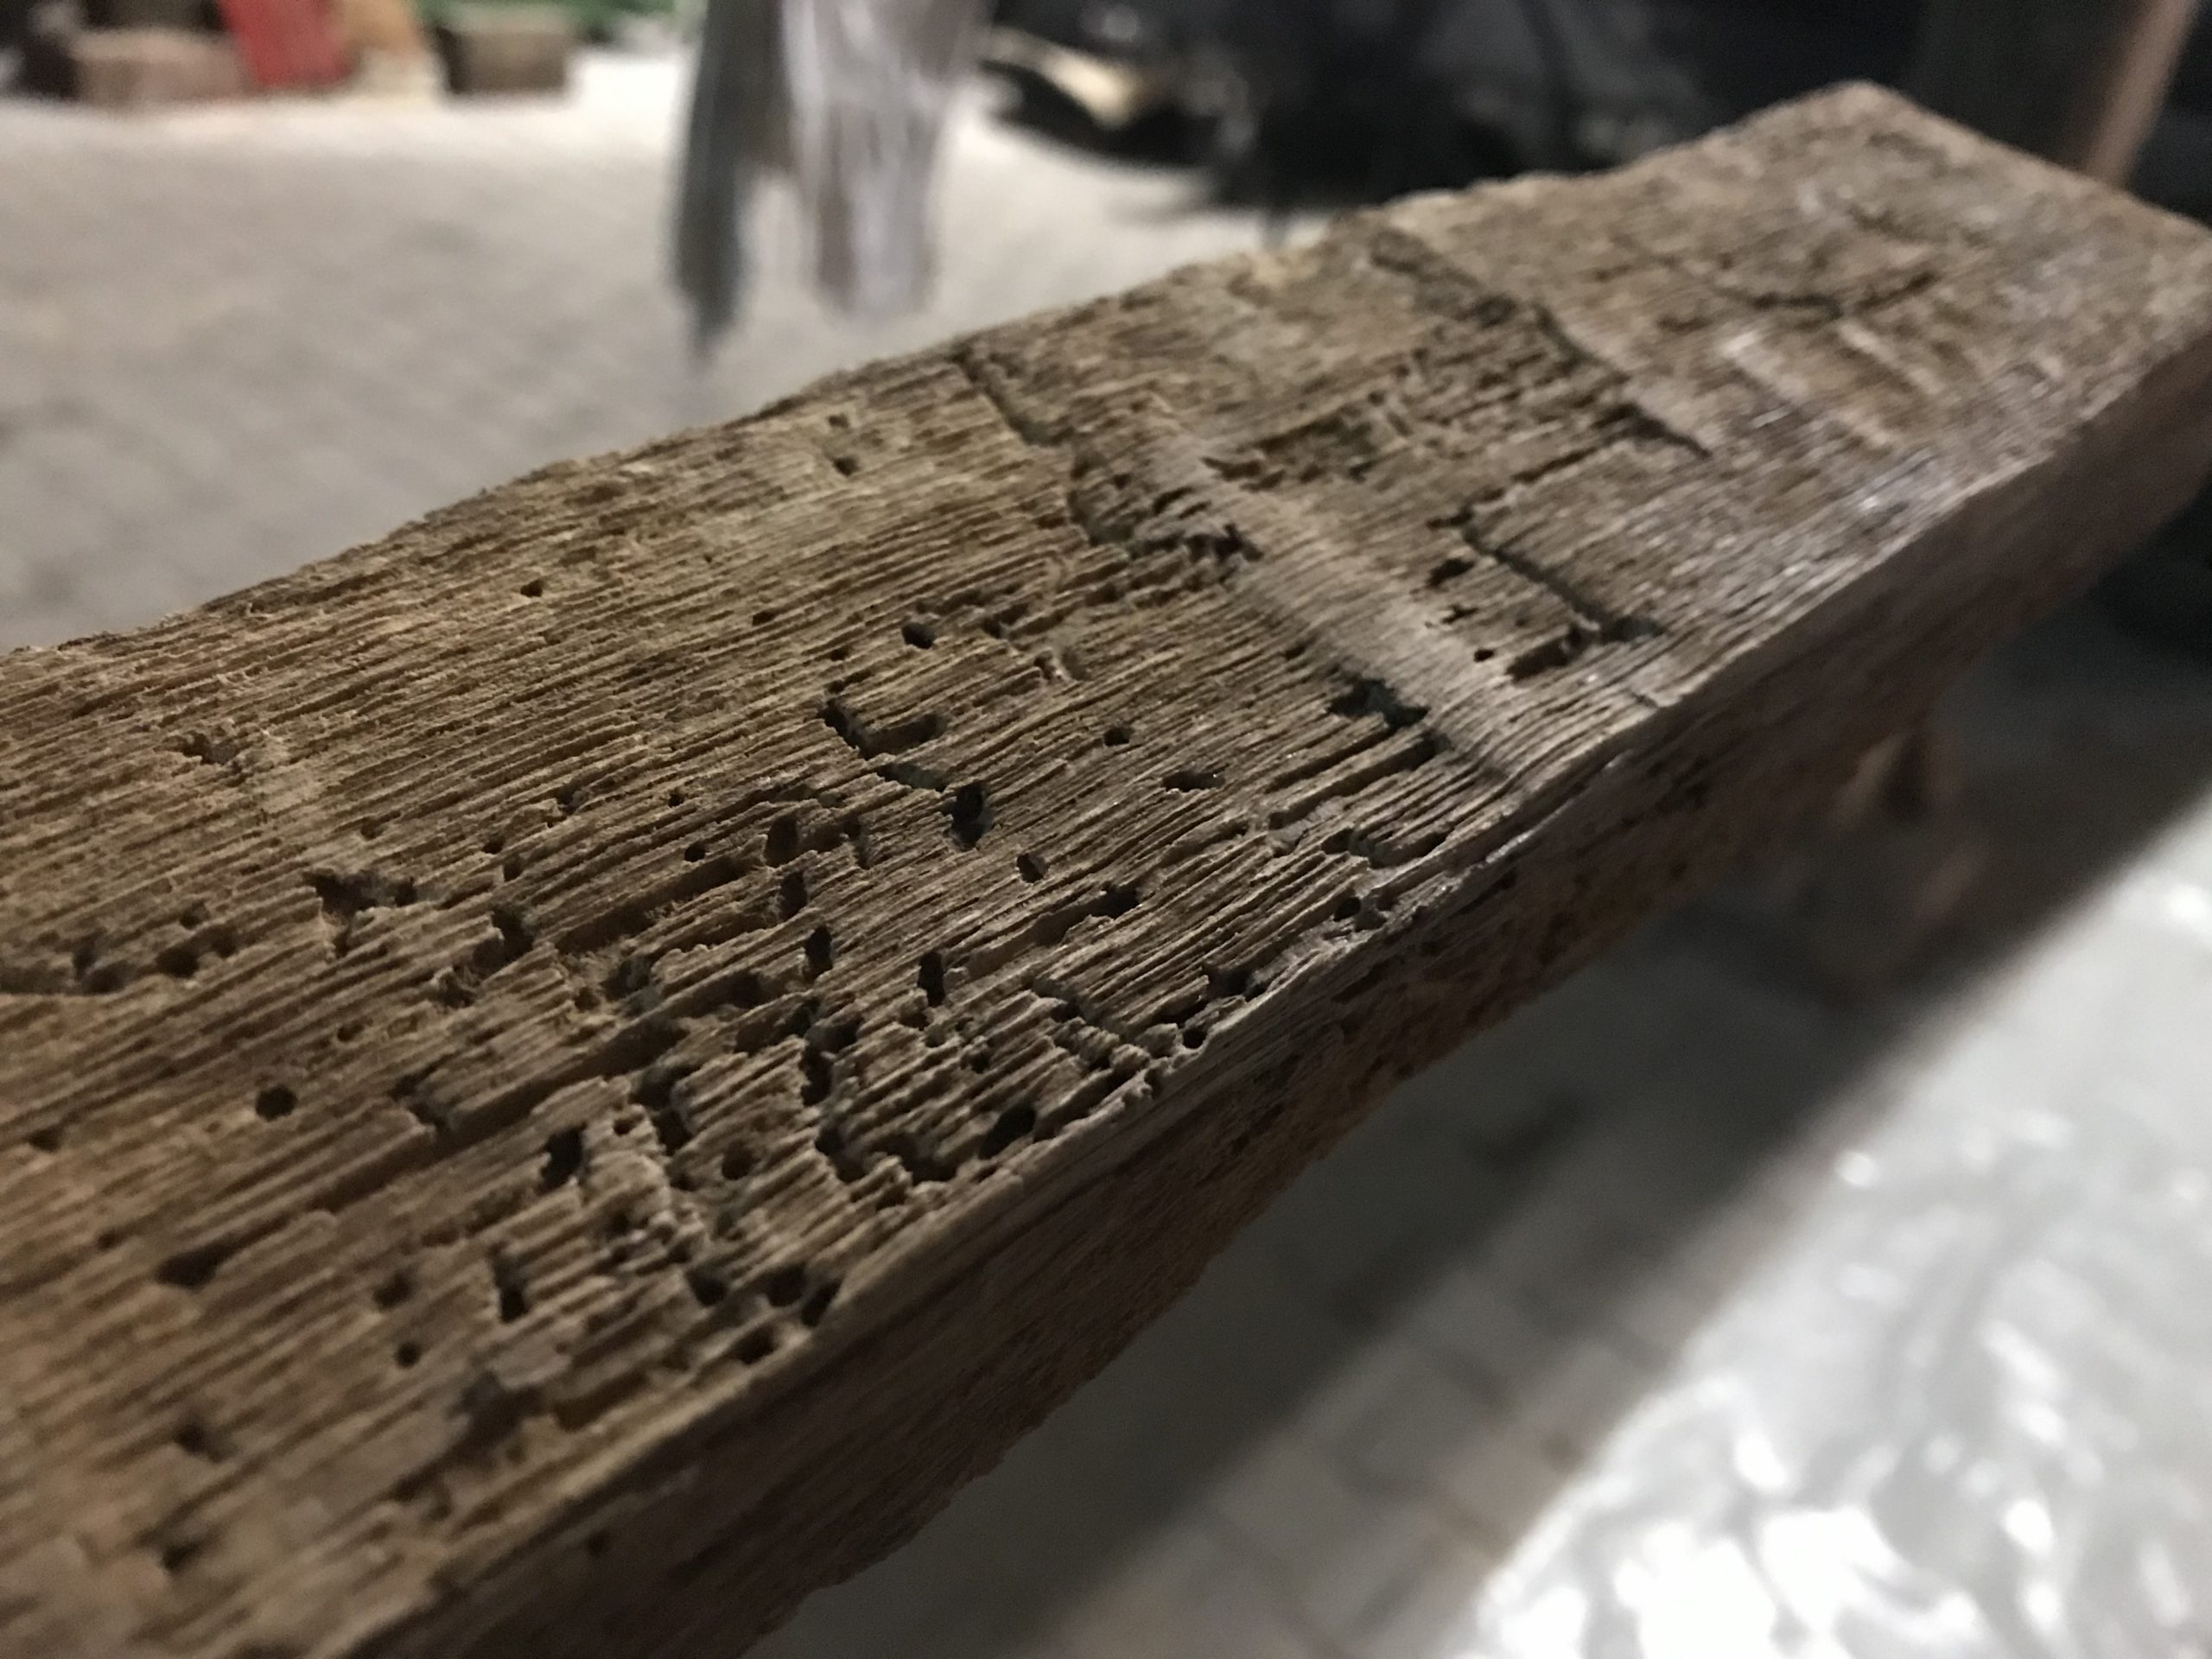
Removal of deadwood – the areas that are totally eaten away by woodworm are removed by wire brushing.
It is best to do this outdoors or in a well-ventilated garage, barn or similar. Working with the wire brush creates a lot of dust. Wearing a respirator mask* is highly recommended! And don’t forget to put on your safety glasses* – reclaimed wood tends to splinter.
In the following video you can see how I proceeded with the waste wood preparation.
In the photo below you can see the difference: On the left, the old wood has not yet been treated in any way. On the right, I have already gone over it with the wire brush attachment.
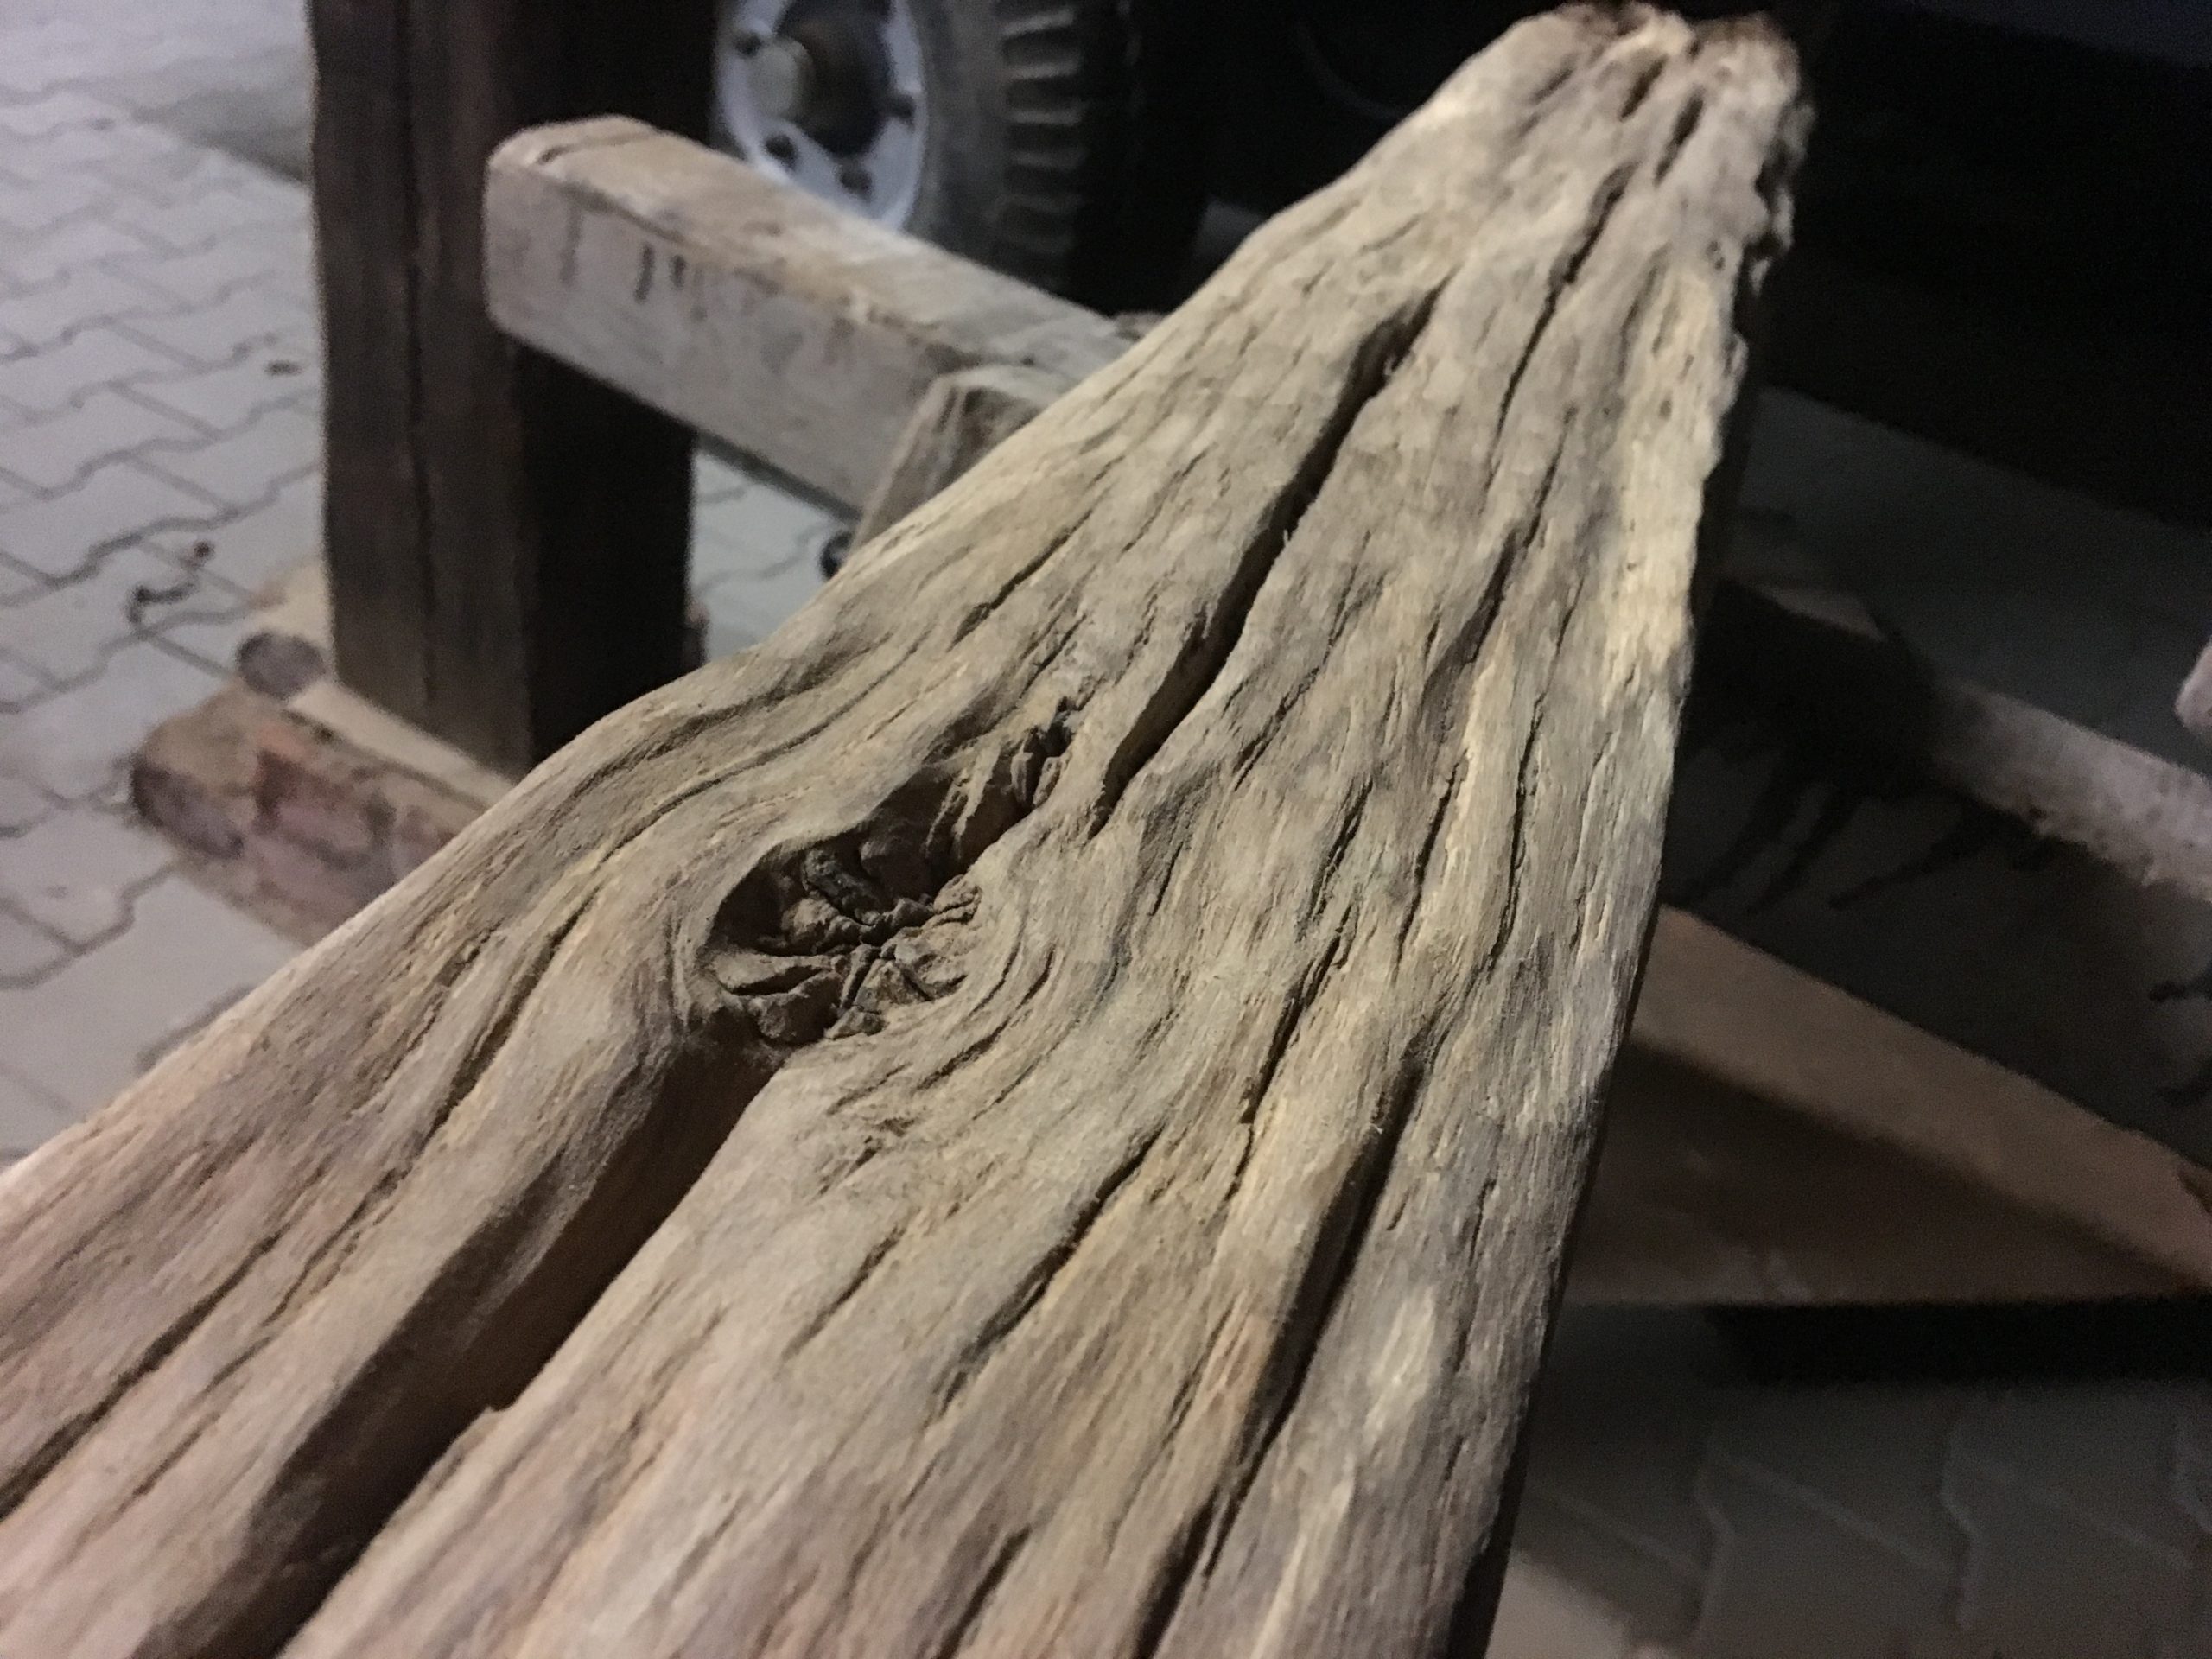
After you have worked the workpiece completely with the large wire brush, you can work on hard-to-reach places – for example, deeper cracks in the wood – with the narrow wire brush*. You can work on very fine and filigree places that are difficult to access with a fine wire brush set*. After working with the wire brushes, your wood will look something like this:
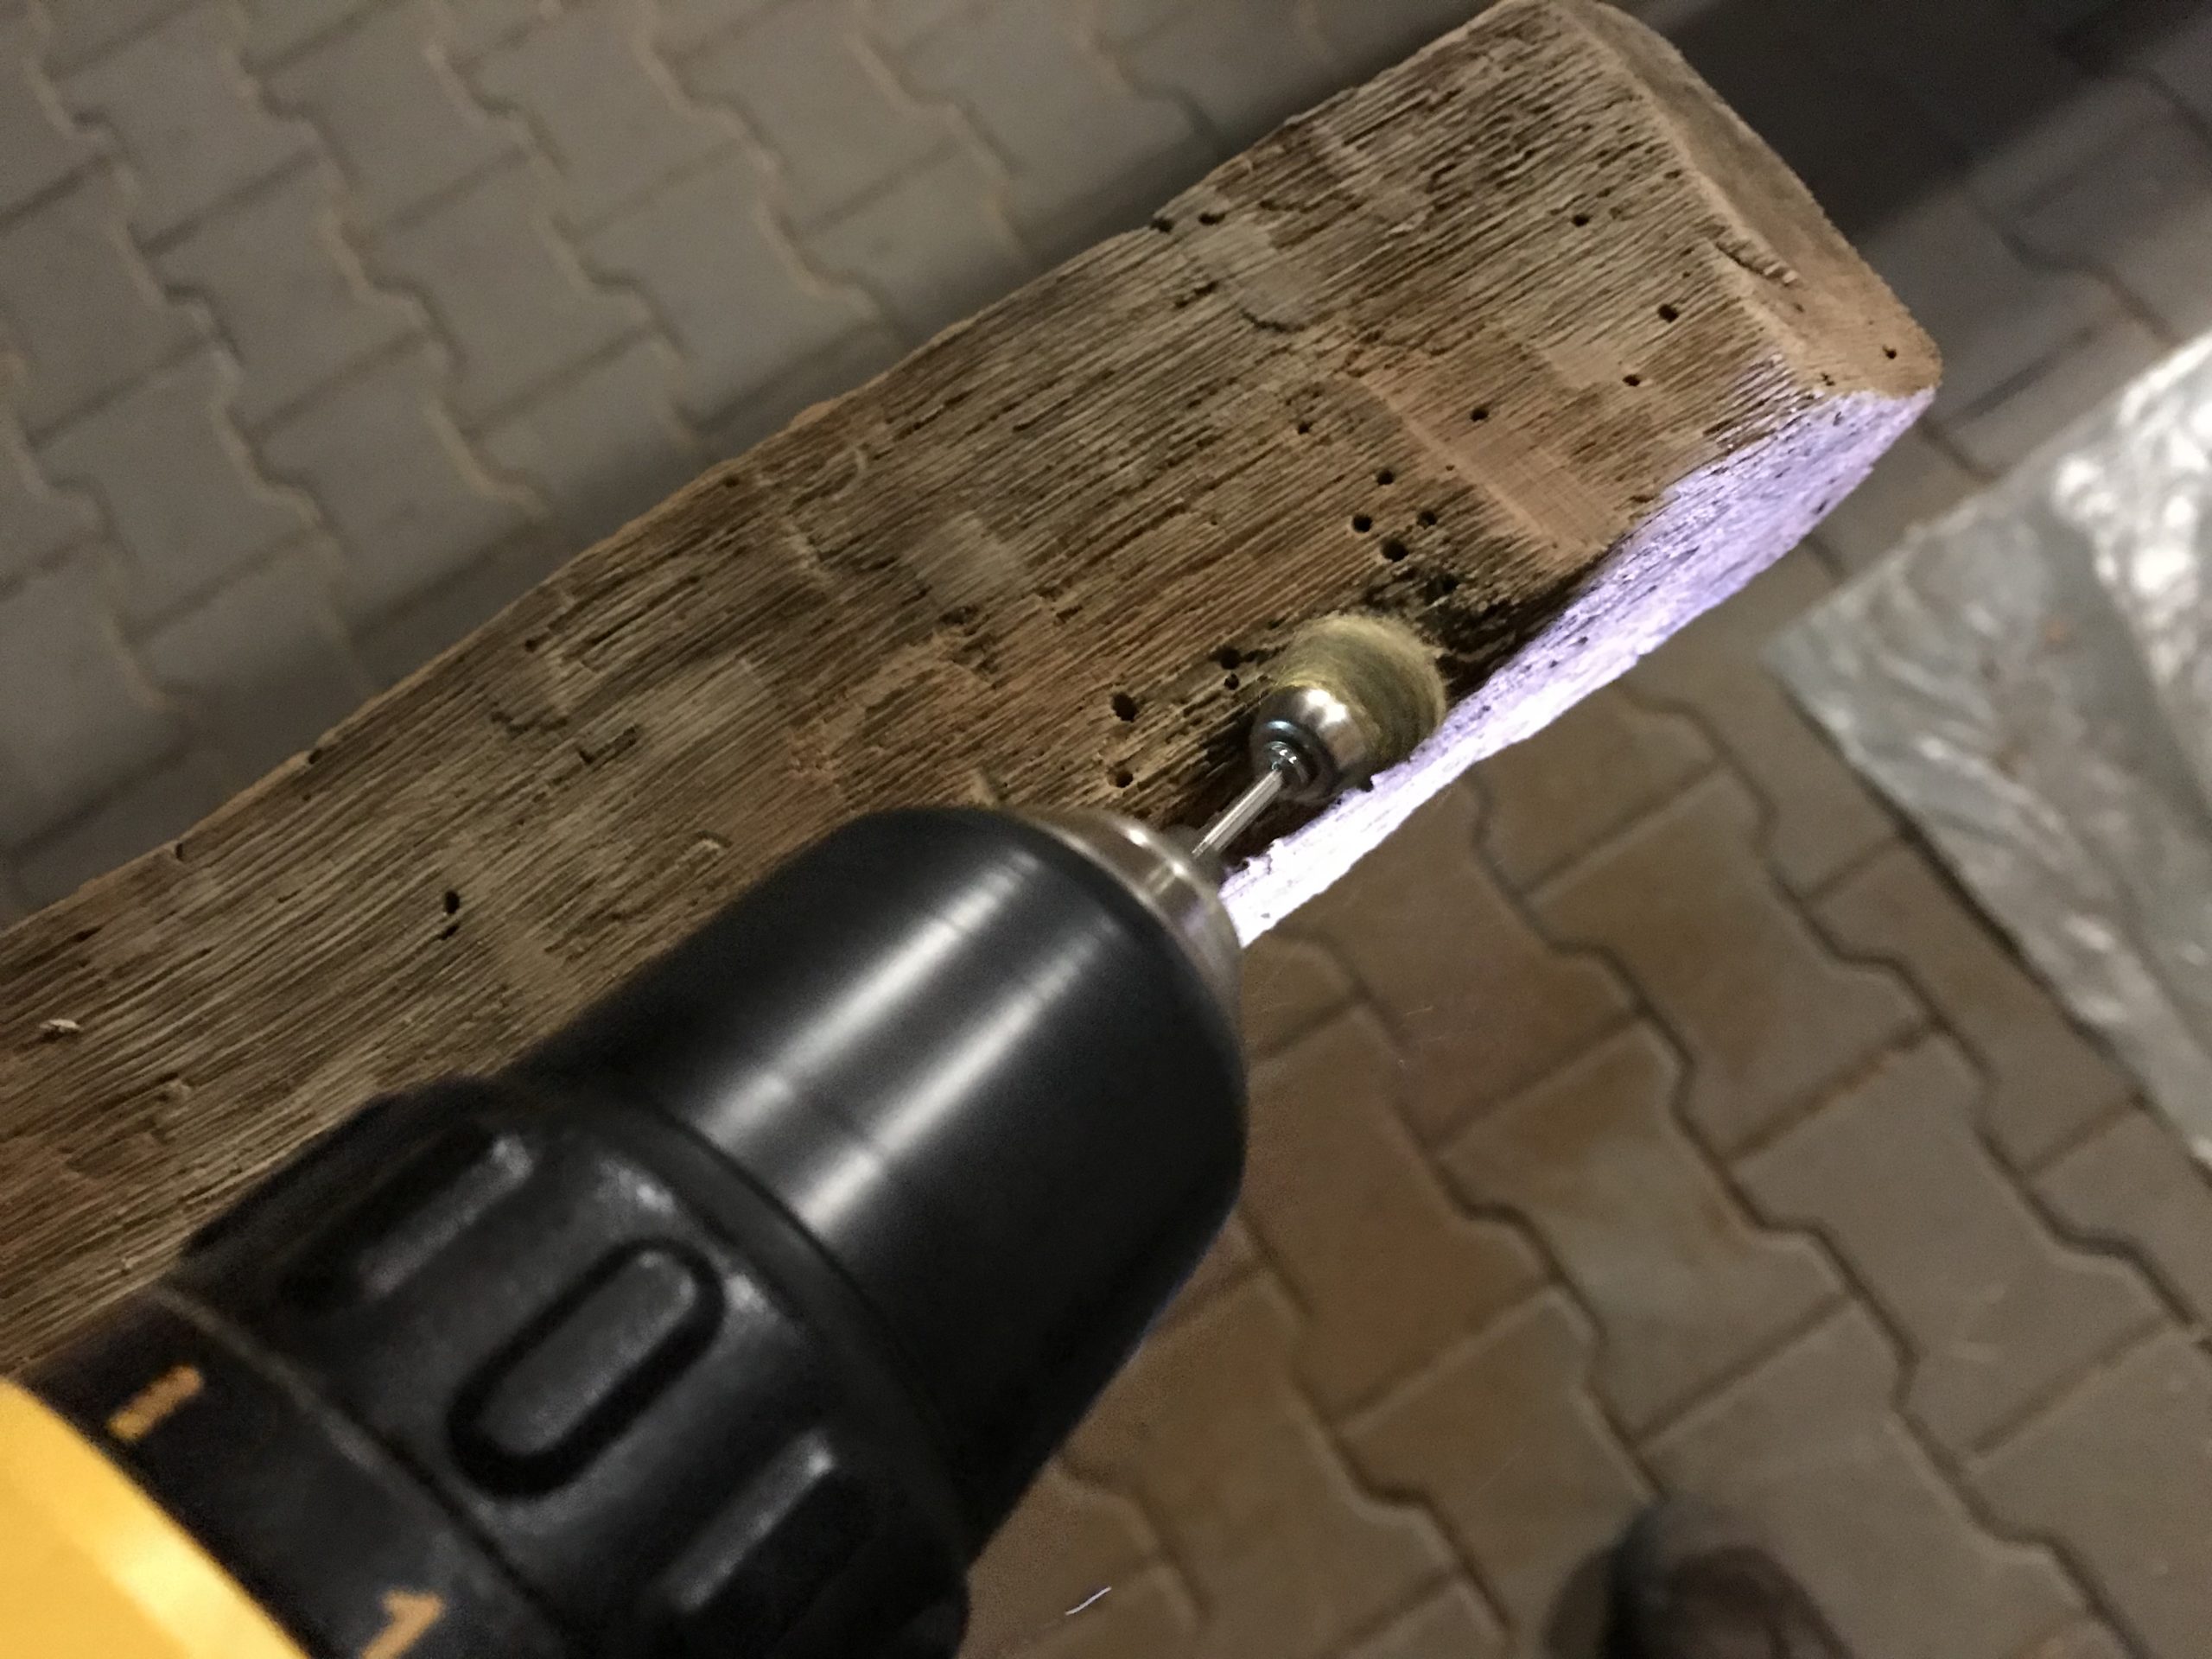
The next step is to work with the nylon brushes*. Here too, you briefly go over the entire workpiece.
If the procedure with the narrow attachments for the cordless drill is too effortful for you or if you want to protect your drill chuck (important!), a brush grinder or wheel sander* may be worthwhile for you. WHEN exactly it is worthwhile and WHY, I will show you now.
Surface Treatment – Why Should I Better Use a Wheel Sander?
The even better method for restoring barn wood or for cleaning reclaimed wood is to use a wheel sander*. Here’s why:
- The processing is much faster (especially large bars can be processed in a shorter time).
- The drill chuck of the drill or cordless screwdriver is protected. (you don’t want to ruin your drill chuck)
- The lateral load on the drill chuck is not good for the machine in the long run, because it is simply not designed for these loads.
- Sooner or later the drill chuck will have play.
- The motor and the drive of the cordless drill is going to be preserved.
- Again, cordless drills were not designed for this purpose and therefor early wear is inevitable.
- Some wheel sander models are actually affordable even in the hobby and DIY sector.
In my opinion the Fartools Rex 80* ist an awesome machine for this purpose. Moreover it’s affordable!
Sanding the surface – retain the structure as far as possible.
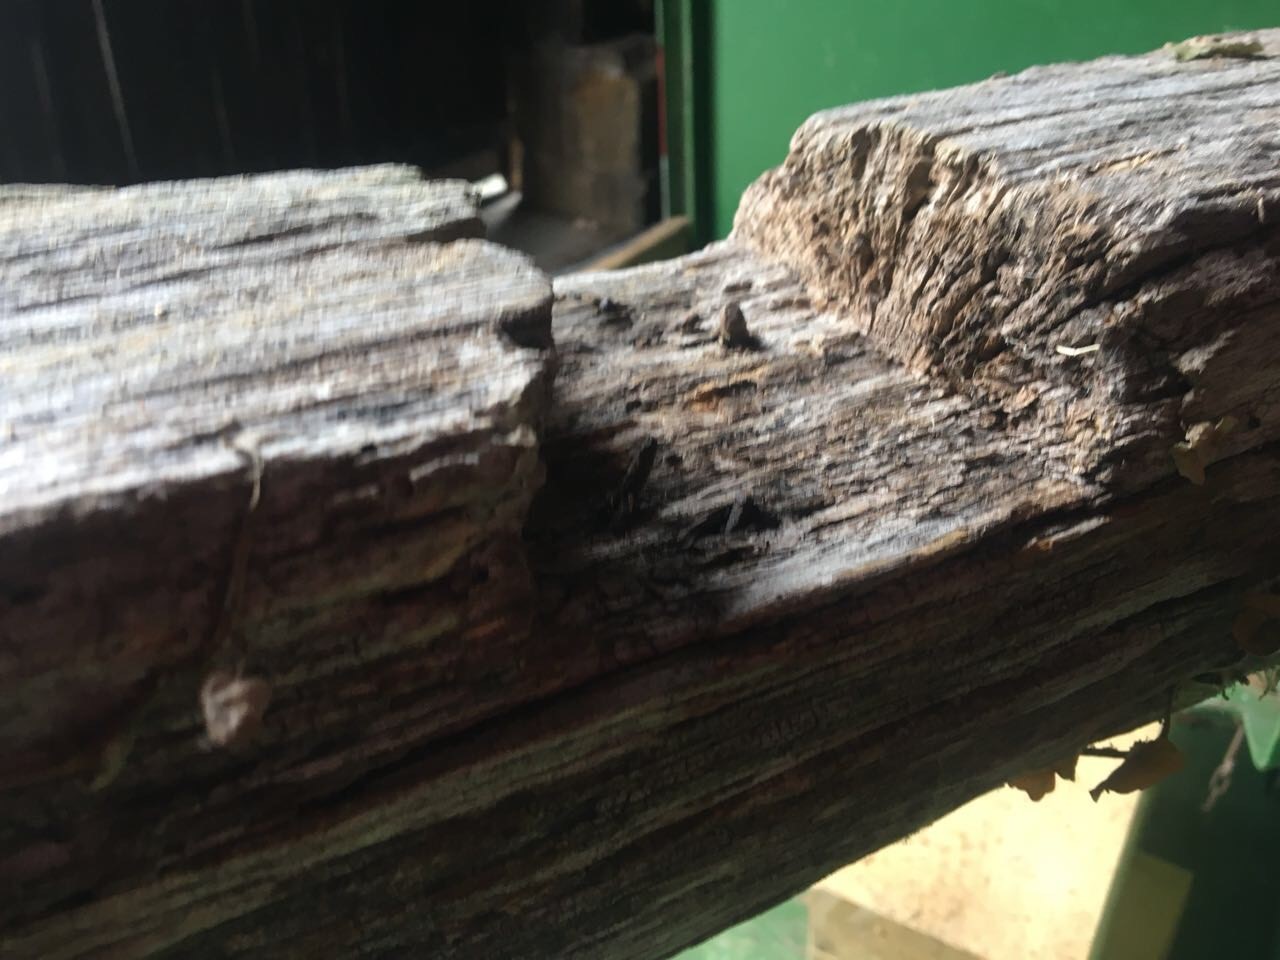
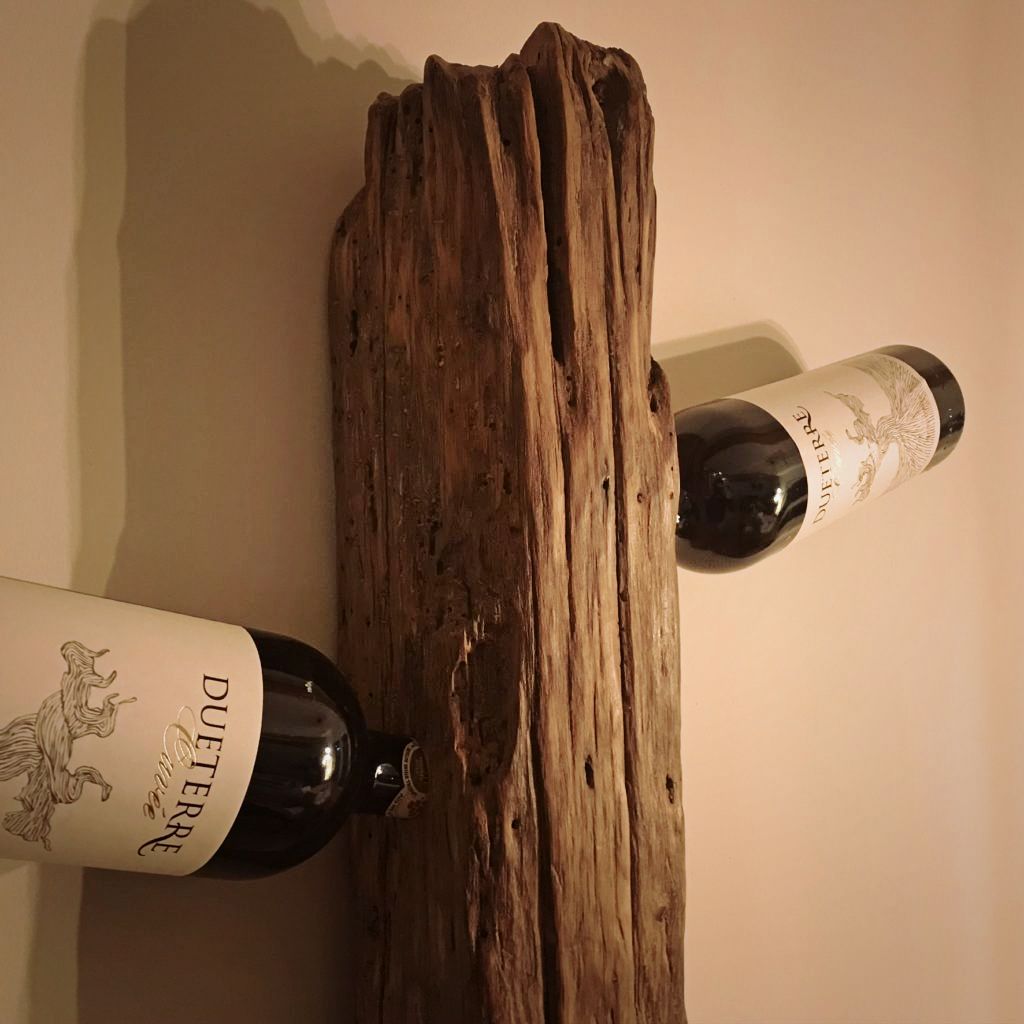
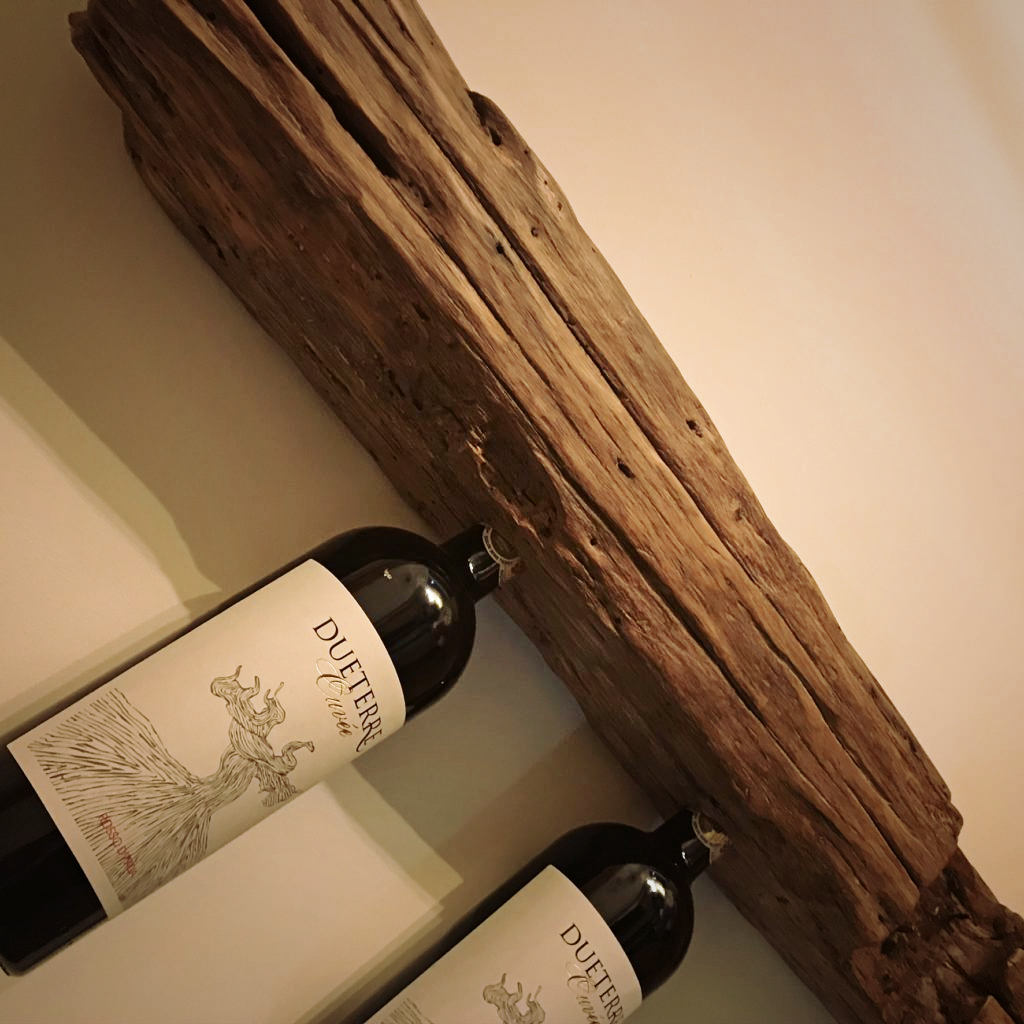
In order for the surface to feel pleasant and still retain as much character of the old barn wood as possible, it is important to sand the wood according to the existing contours. In the following picture, you can see a wine rack I built from an old oak beam. The beam had some cracks and knotholes. In my opinion, a belt sander or orbital sander is the wrong tool for sanding the old wood. With a multi-sander* you can sand all contours, including knotholes and cracks, relatively well, especially with the tip. HERE is an example of such a sander*. The whole thing can then look like this. Sanding everything flat with a belt sander would be the wrong way to go. This leads to a loss of the structure that you actually want to keep.

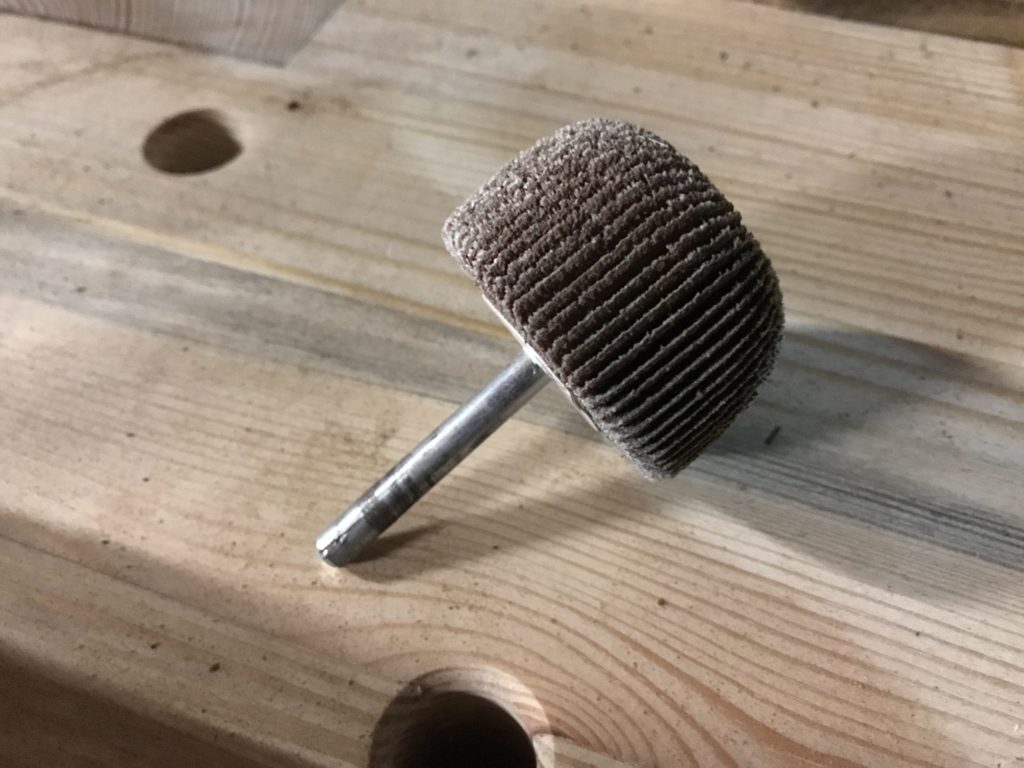
In addition to the multi-sander*, I also used various sandpaper attachments* for the cordless drill. These parts are available in various sizes and shapes. They are ideal for sanding cracks and knotholes even finer than with a multi-sander*.
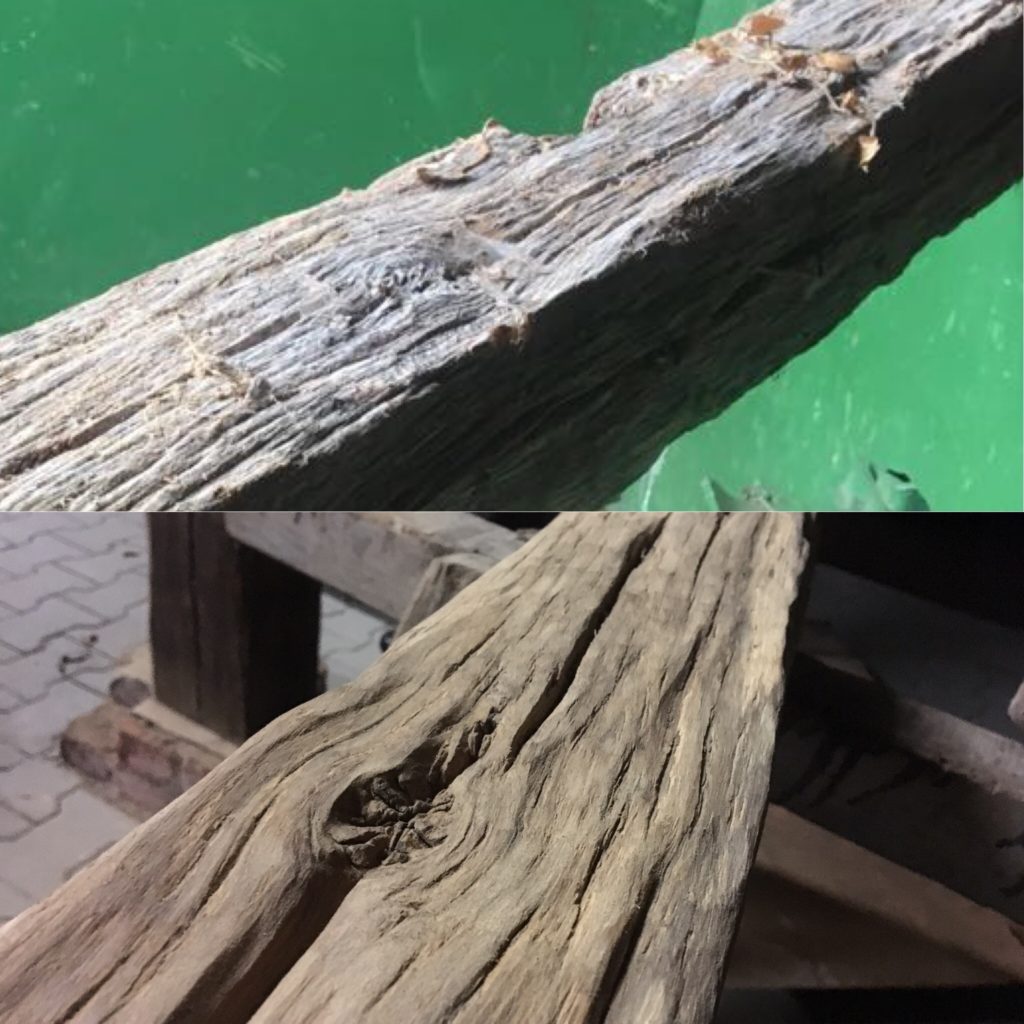
By the way, the reclaimed wood beam just shown originally looked like this.

The before-after-comparison is quite impressive:
How to Restore Barn Wood – What Else Can Be Done?
After you have processed the entire workpiece with the various brush attachments and are satisfied with the result, you can spray the wood again with the garden hose or the high-pressure cleaner (do not use an aggressive dirt blaster attachment!) and thus clean it of all the sawdust and dirt residues. Allow everything to dry thoroughly before moving on to the finish – the best part of restoring barn wood or reclaimed scrap wood. If you don’t have a water connection in your workshop, you can also use battery-powered pressure cleaners*.
Surface Finish – What to chose? Oil? Wax?
For my wine rack made from the beam shown, I first applied hard wax oil*. Then I applied another coat of antique wax*. The wax in particular makes the surface feel very pleasant, despite the unevenness. I was unsure at the beginning whether it was the right choice, but I didn’t regret it yet!

How to Restore Barn Wood – Conclusion
Restoring barn wood can be time-consuming. But I think it’s worth it! I would be very happy to exchange experiences on this topic! Please let me know in the comments how you have proceeded so far. How did you like my article about how to restore barn wood?