
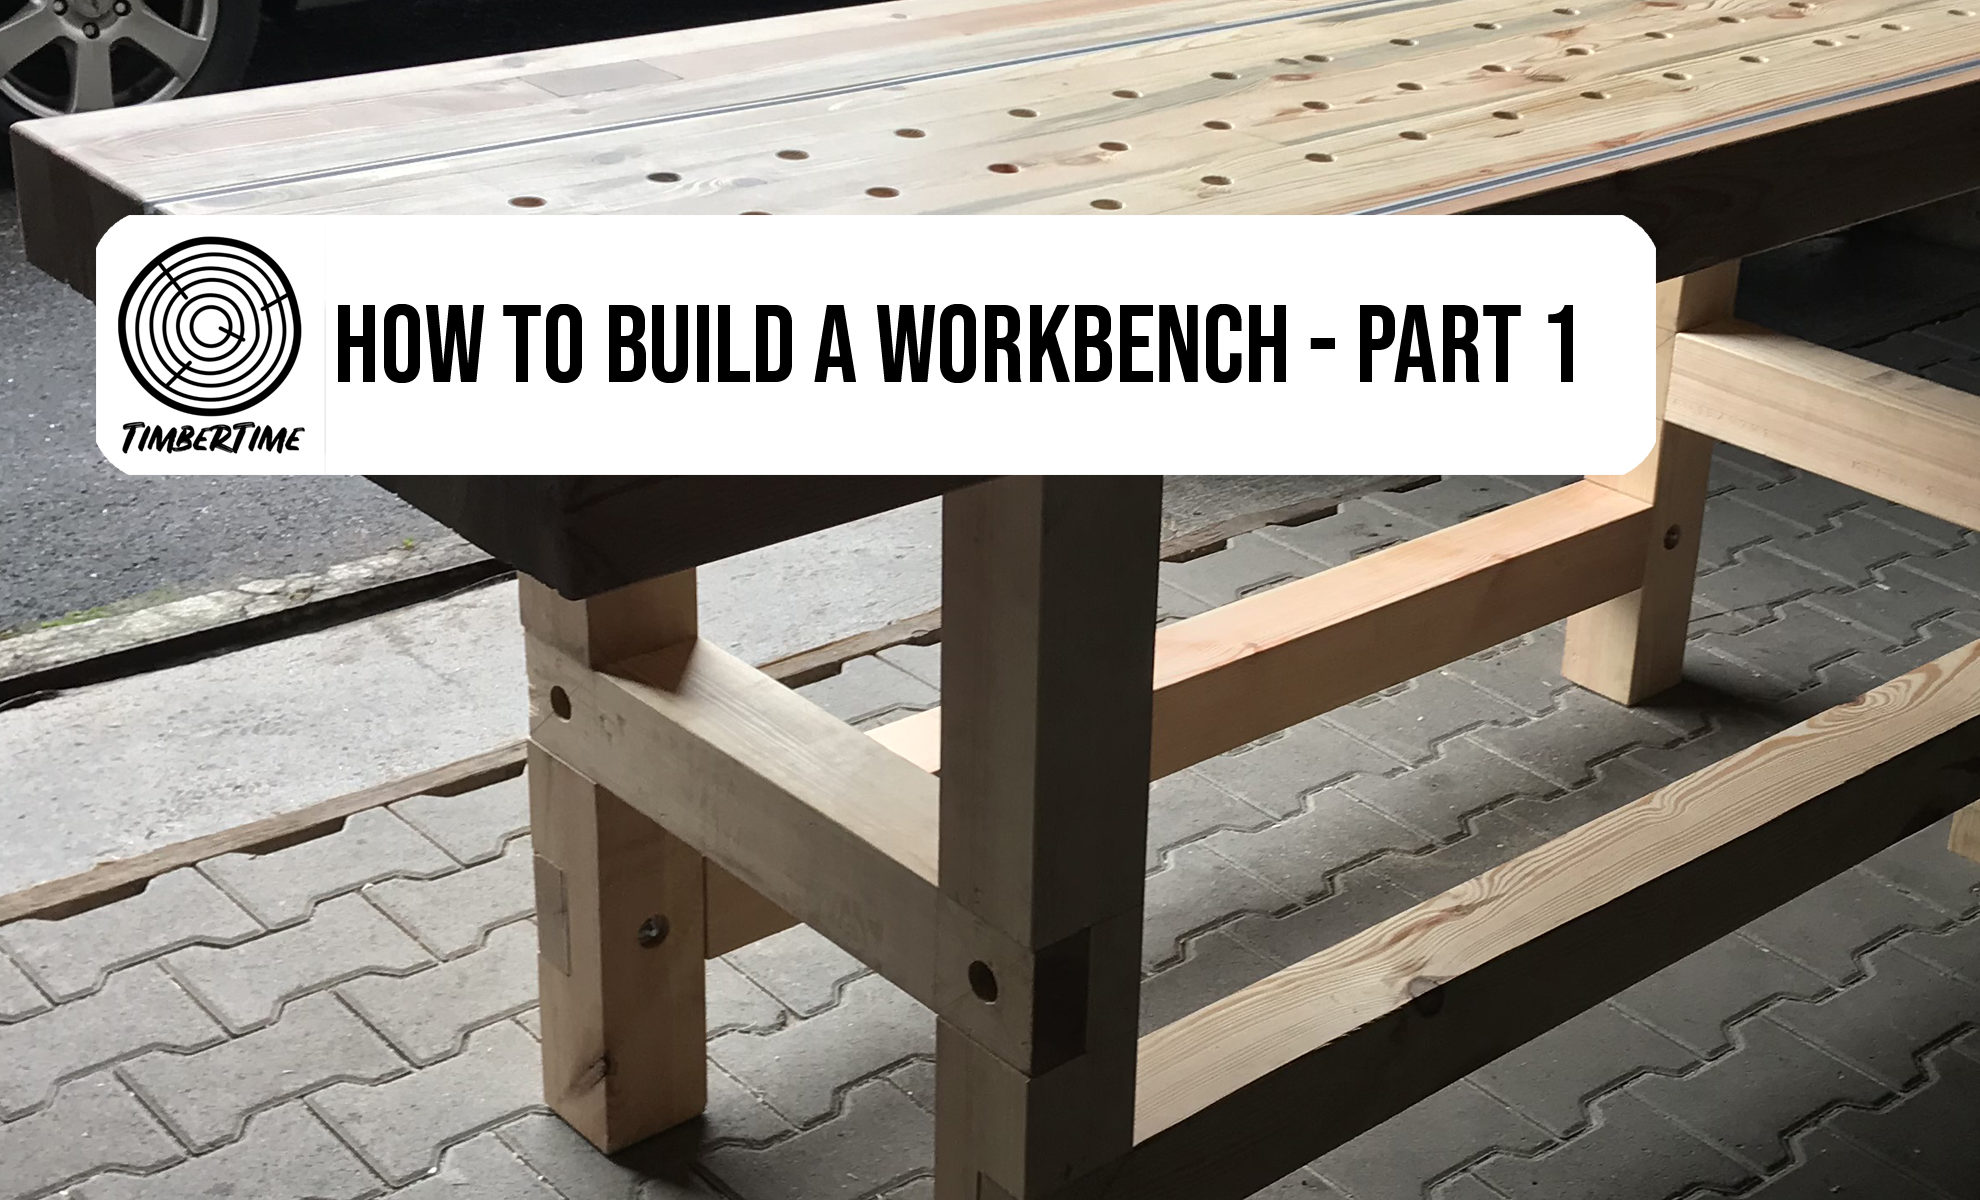
You want to know how to build a workbench yourself? With lots of clamping options? You don’t have a professional workshop and no professional machines at home? No problem! In the following series of posts you will find step-by-step instructions on how to build your own DIY workbench with simple tools! This DIY workbench tutorial refers to the metric system, not the imperial.
Below I have linked all the tools and materials you need to build the DIY workbench yourself.
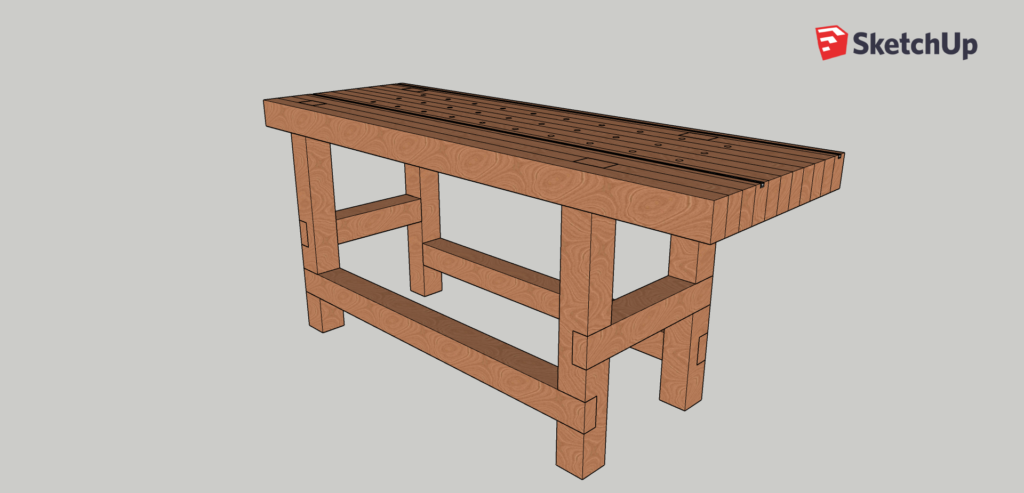
You can find metric workbench plans below.
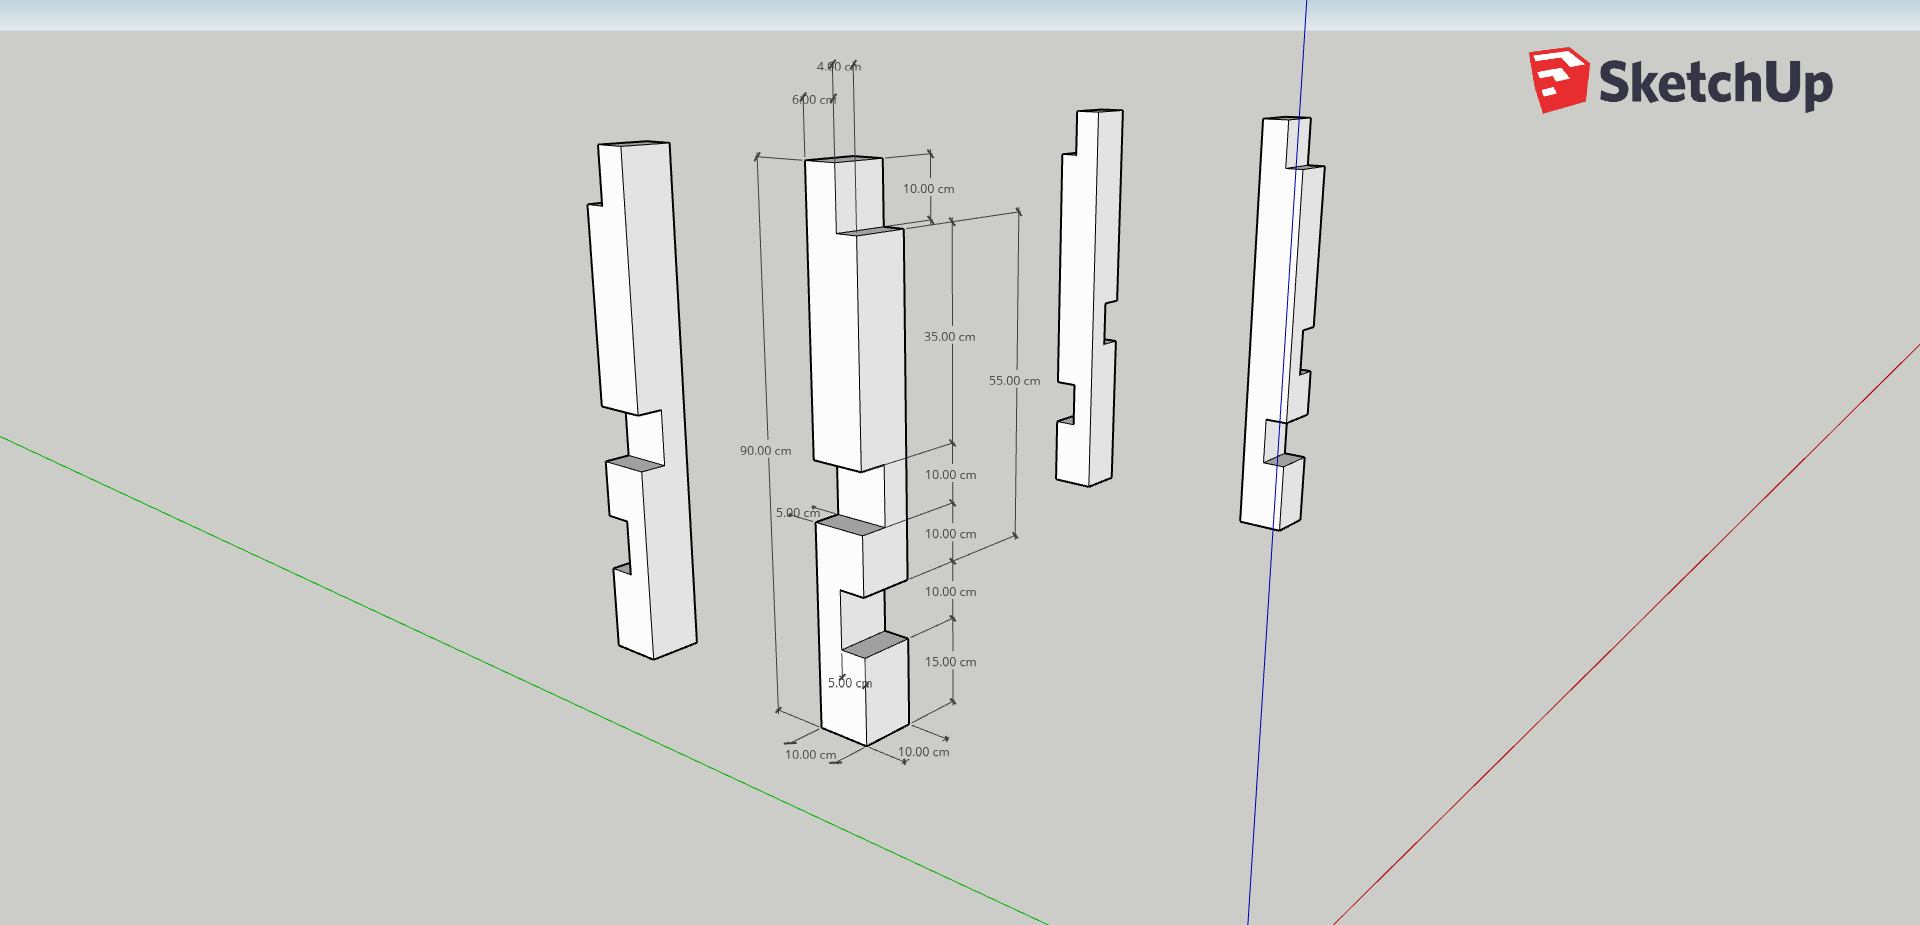
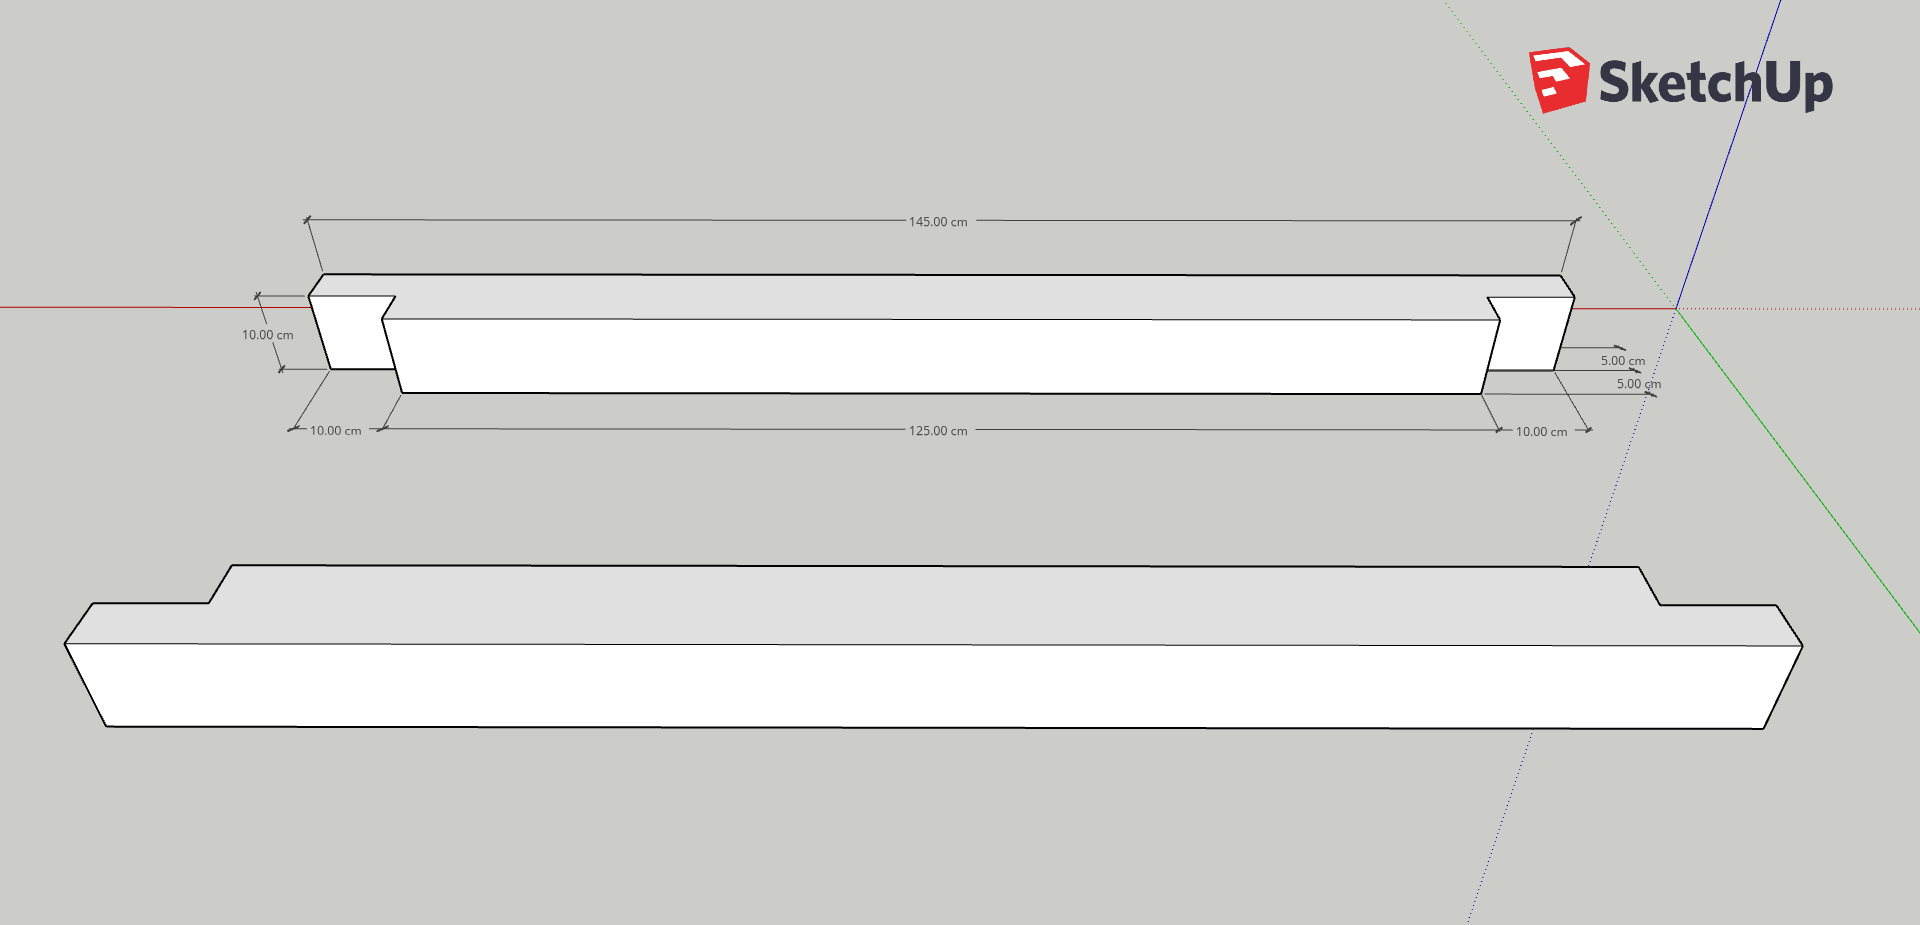
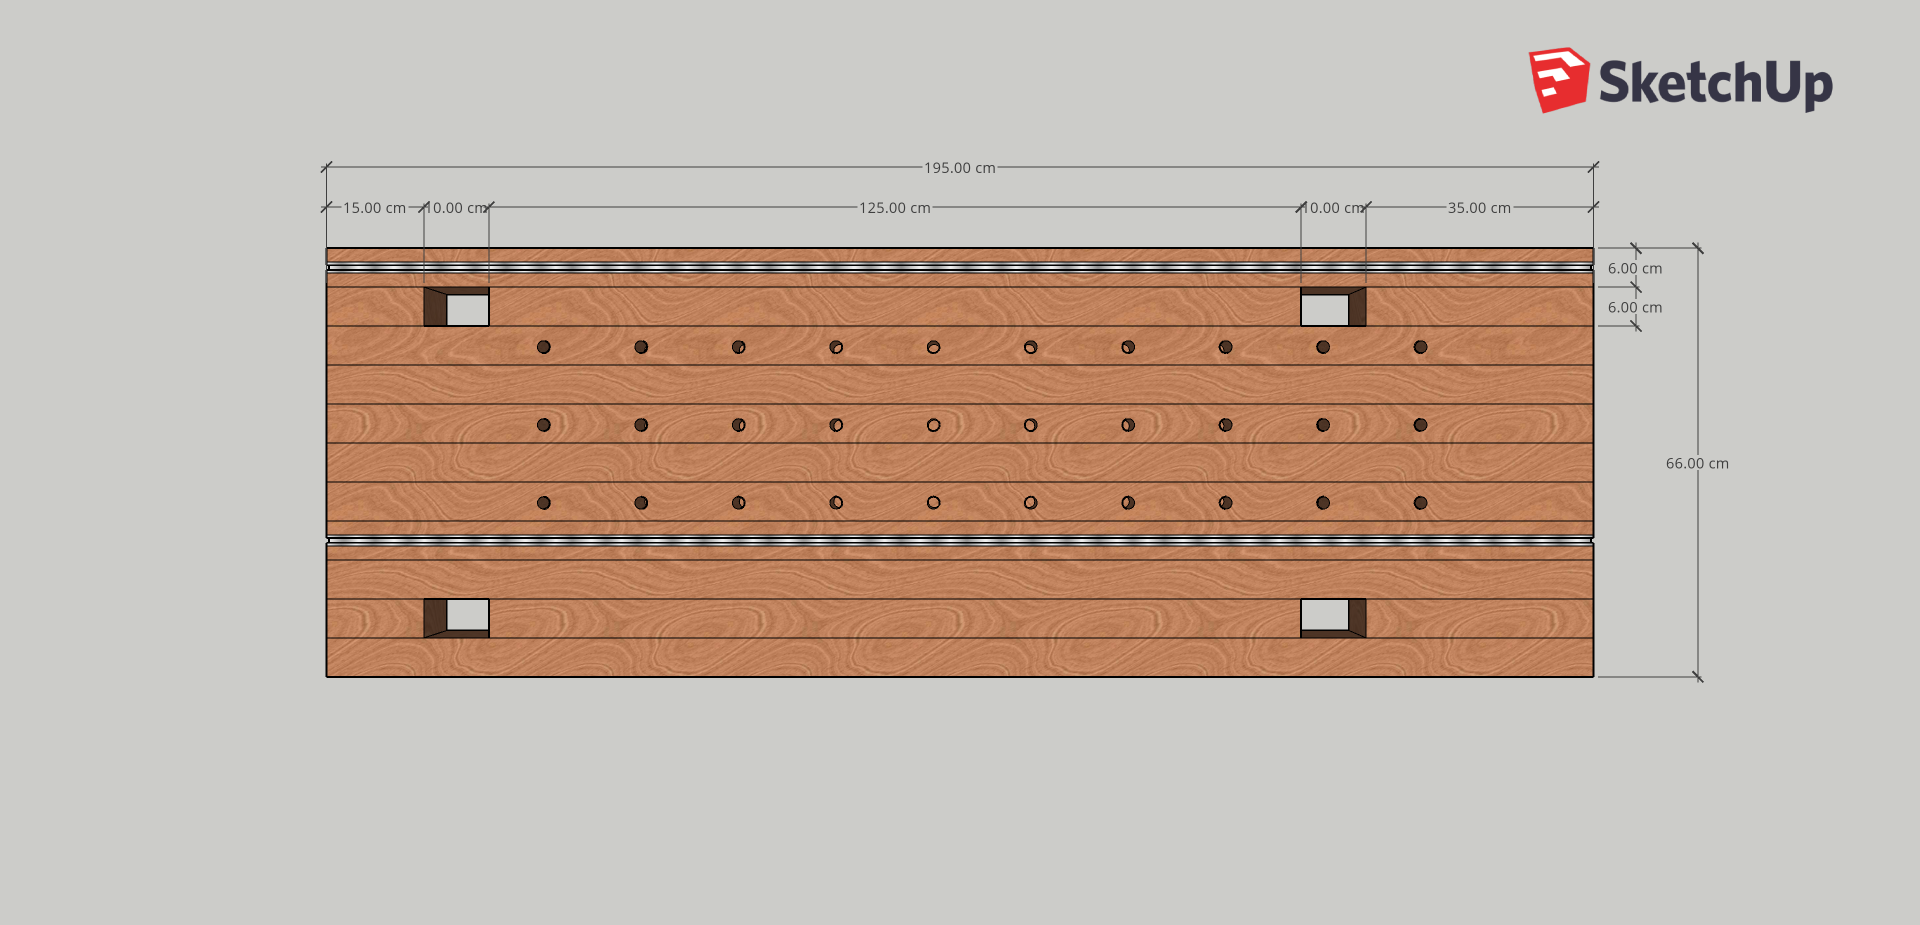
Construction drawings with detailed dimensions can be found below.
* = Affiliate Links /Advertising
As an amazon associate i earn from qualifying purchases.
How to build a workbench – easy, strong, multifunctional (metric)
Necessary Tools
- handheld circular saw* or table saw* or miter saw*
- router*
- cordless drill*
- chisel*
- sander*
- japanese saw*
- clamps*
Necessary Material
- [11 pcs.] [Worktop] 60x100x2000mm square timber
- [4 pcs.] [Workbench Base] 100x100x900mm inch square timber
- [2 pcs.] [Workbench Base] 100x100x620mm square timber
- [2 pcs.] [Workbench Base] 100x100x1450mm square timber
- Forstner drill bit 19mm*
- Router bit 19mm*
- [8 pcs.] Screws M8x80*
- [8 pcs.] Washers M8*
- [8 pcs.] Nuts M8*
- [4 pcs.] T-Track bar 500mm*
- Wood oil*
- Wood glue*
Material Costs: ca. 200 £
Part 2 and Part 3 of this project can be found here:
How to install a Workbench Vice:
How to build a workbench – CAD Drawings


DIY Workbench – The Workbench Base
In PART 1 I show you how to build the strong base for your DIY workbench yourself.
When buying the wood, make sure that you buy the straightest possible square timber – without any major twists. Once you have cut the wood to the desired lengths (square timber is usually available in 4m units at the hardware store – many hardware stores will also cut the wood down to the desired dimensions), you can begin to make cut-outs (lap joints) on the table legs and crossbars. This will make the workbench very stable later on! Have a look at my detailed construction drawings.
If you have a table saw or a large cross-cut saw with a depth stop at hand, you will manage this step very cleanly and quick. I built this DIY workbench only with a hand-held circular saw* – this can be done without any problems, but it takes a little longer. Make sure you work with some kind of a rip fence (e.g. a piece of wooden slats) and always measure very accurately. If the joints have too much play later, this will affect the stability of your DIY workbench.
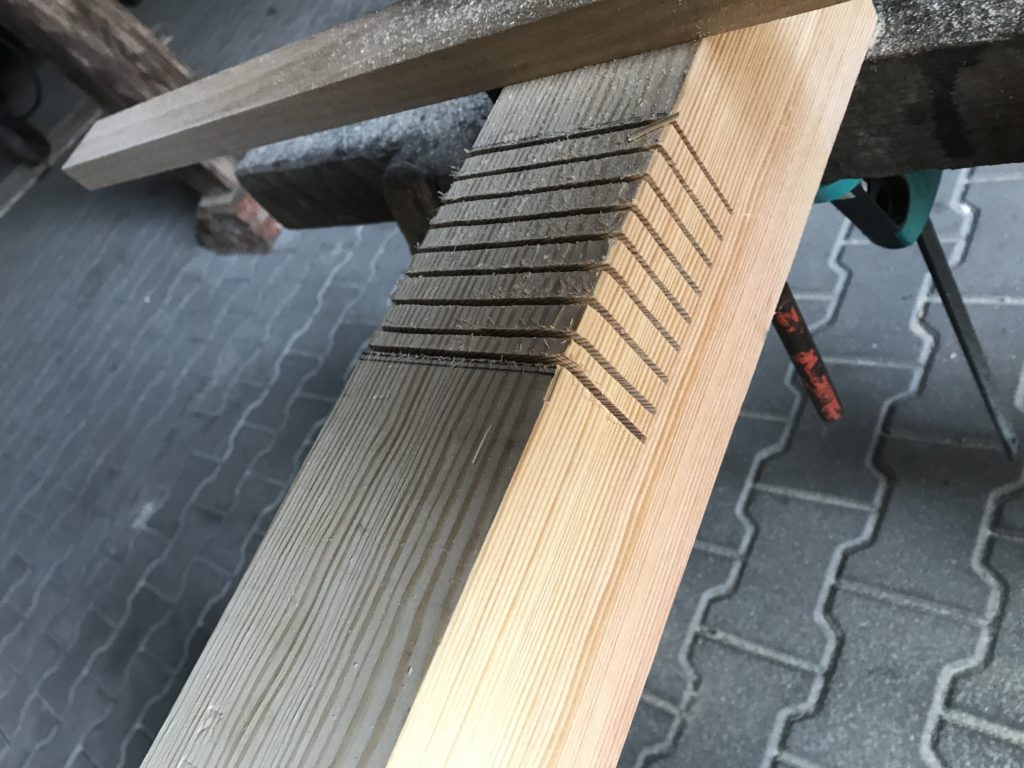
Make several cuts with a depth of 50mm (upper recess of the table legs with a depth of 40mm!) as shown in the picture and then break out the flat plates. You can easily remove the pins/remnants that remain with a sharp chisel*.
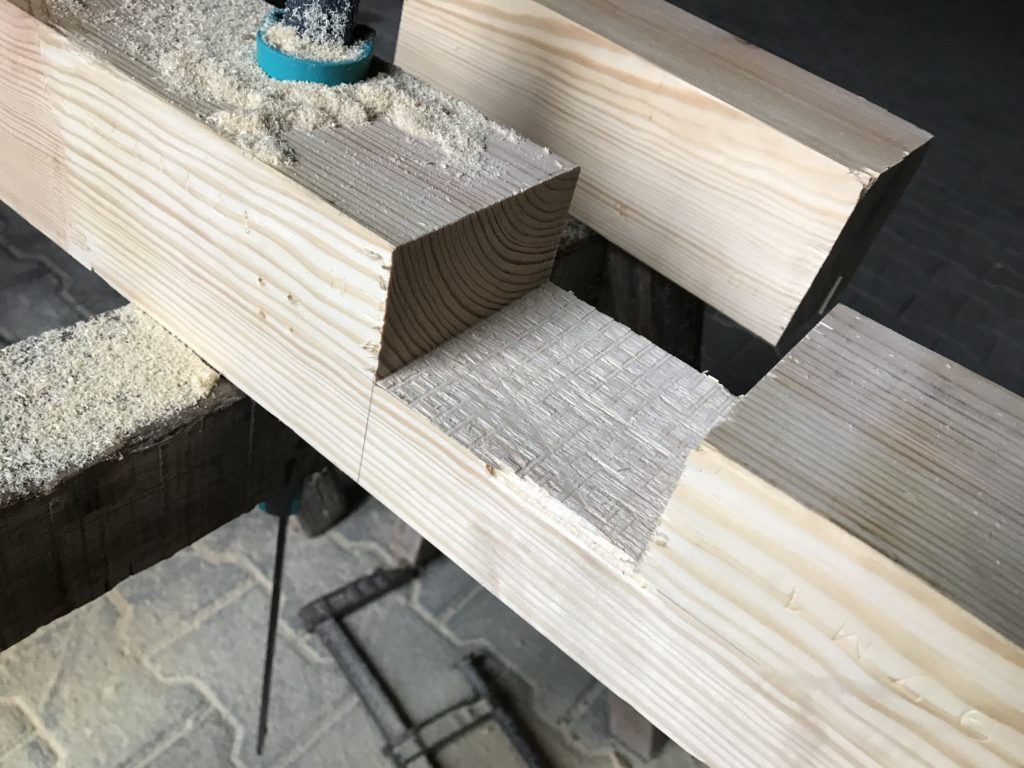
Follow this procedure to make all the overlays for the table legs and the braces. You can use the 3D CAD construction drawings above one to one.
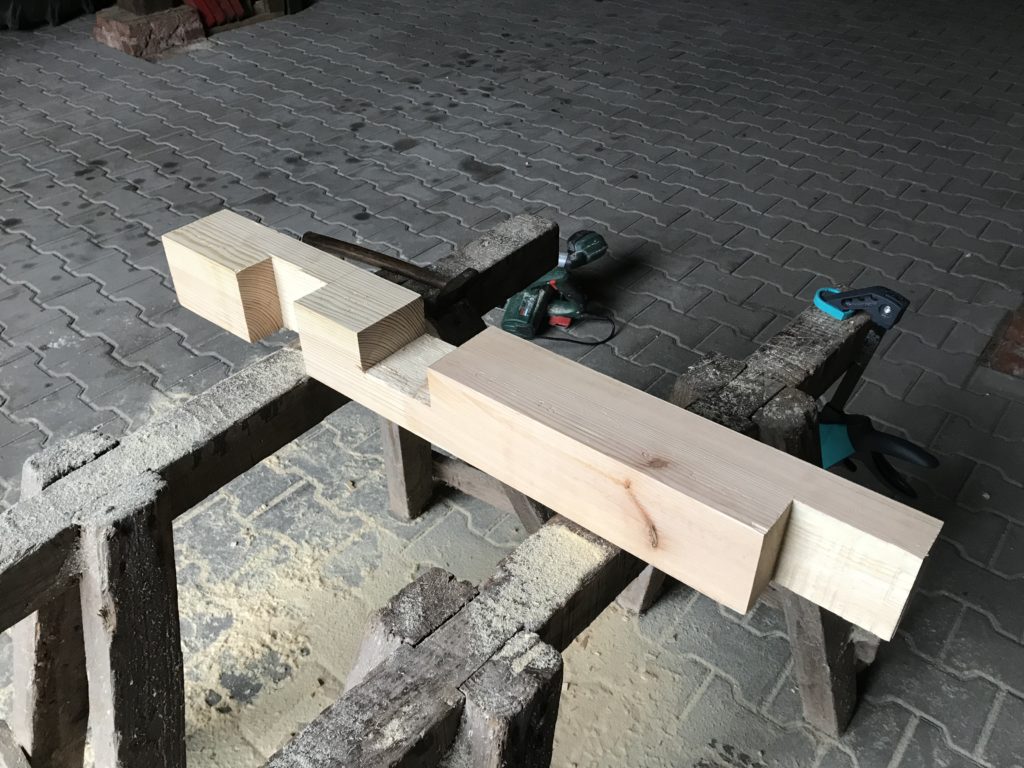
Once all the overlays on the table legs and struts have been made, you can check that everything fits together and test fit the individual parts together. Ideally, the connections should have little or no play.
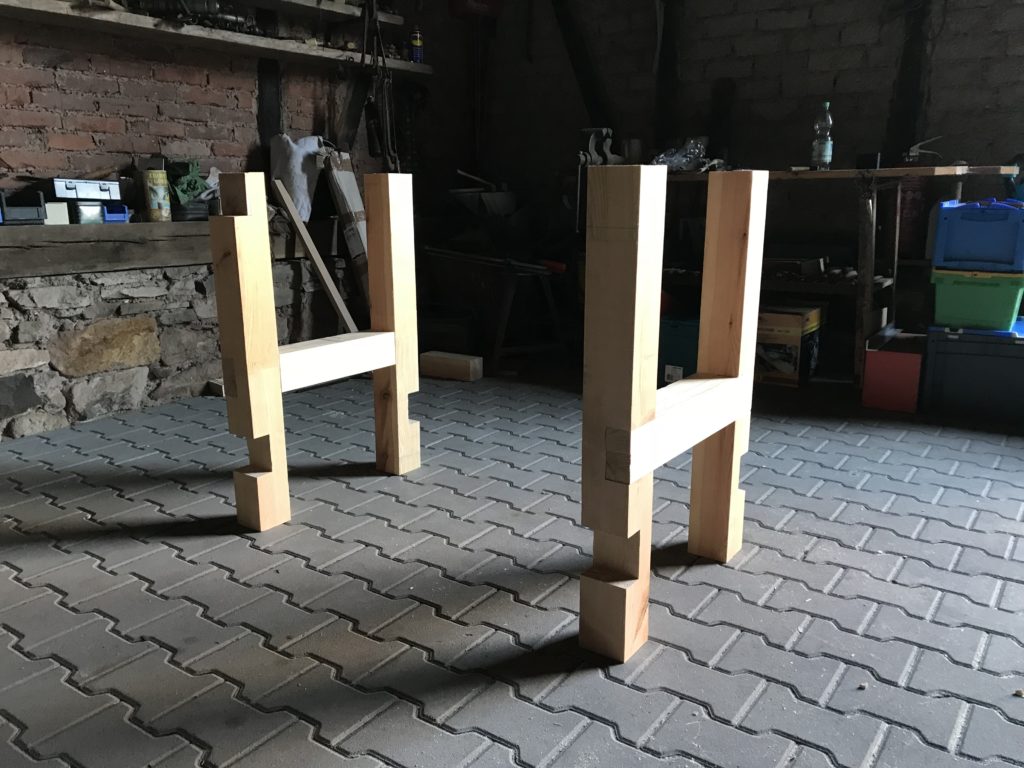
Any play in the overlaps is eliminated later by the screw connection.
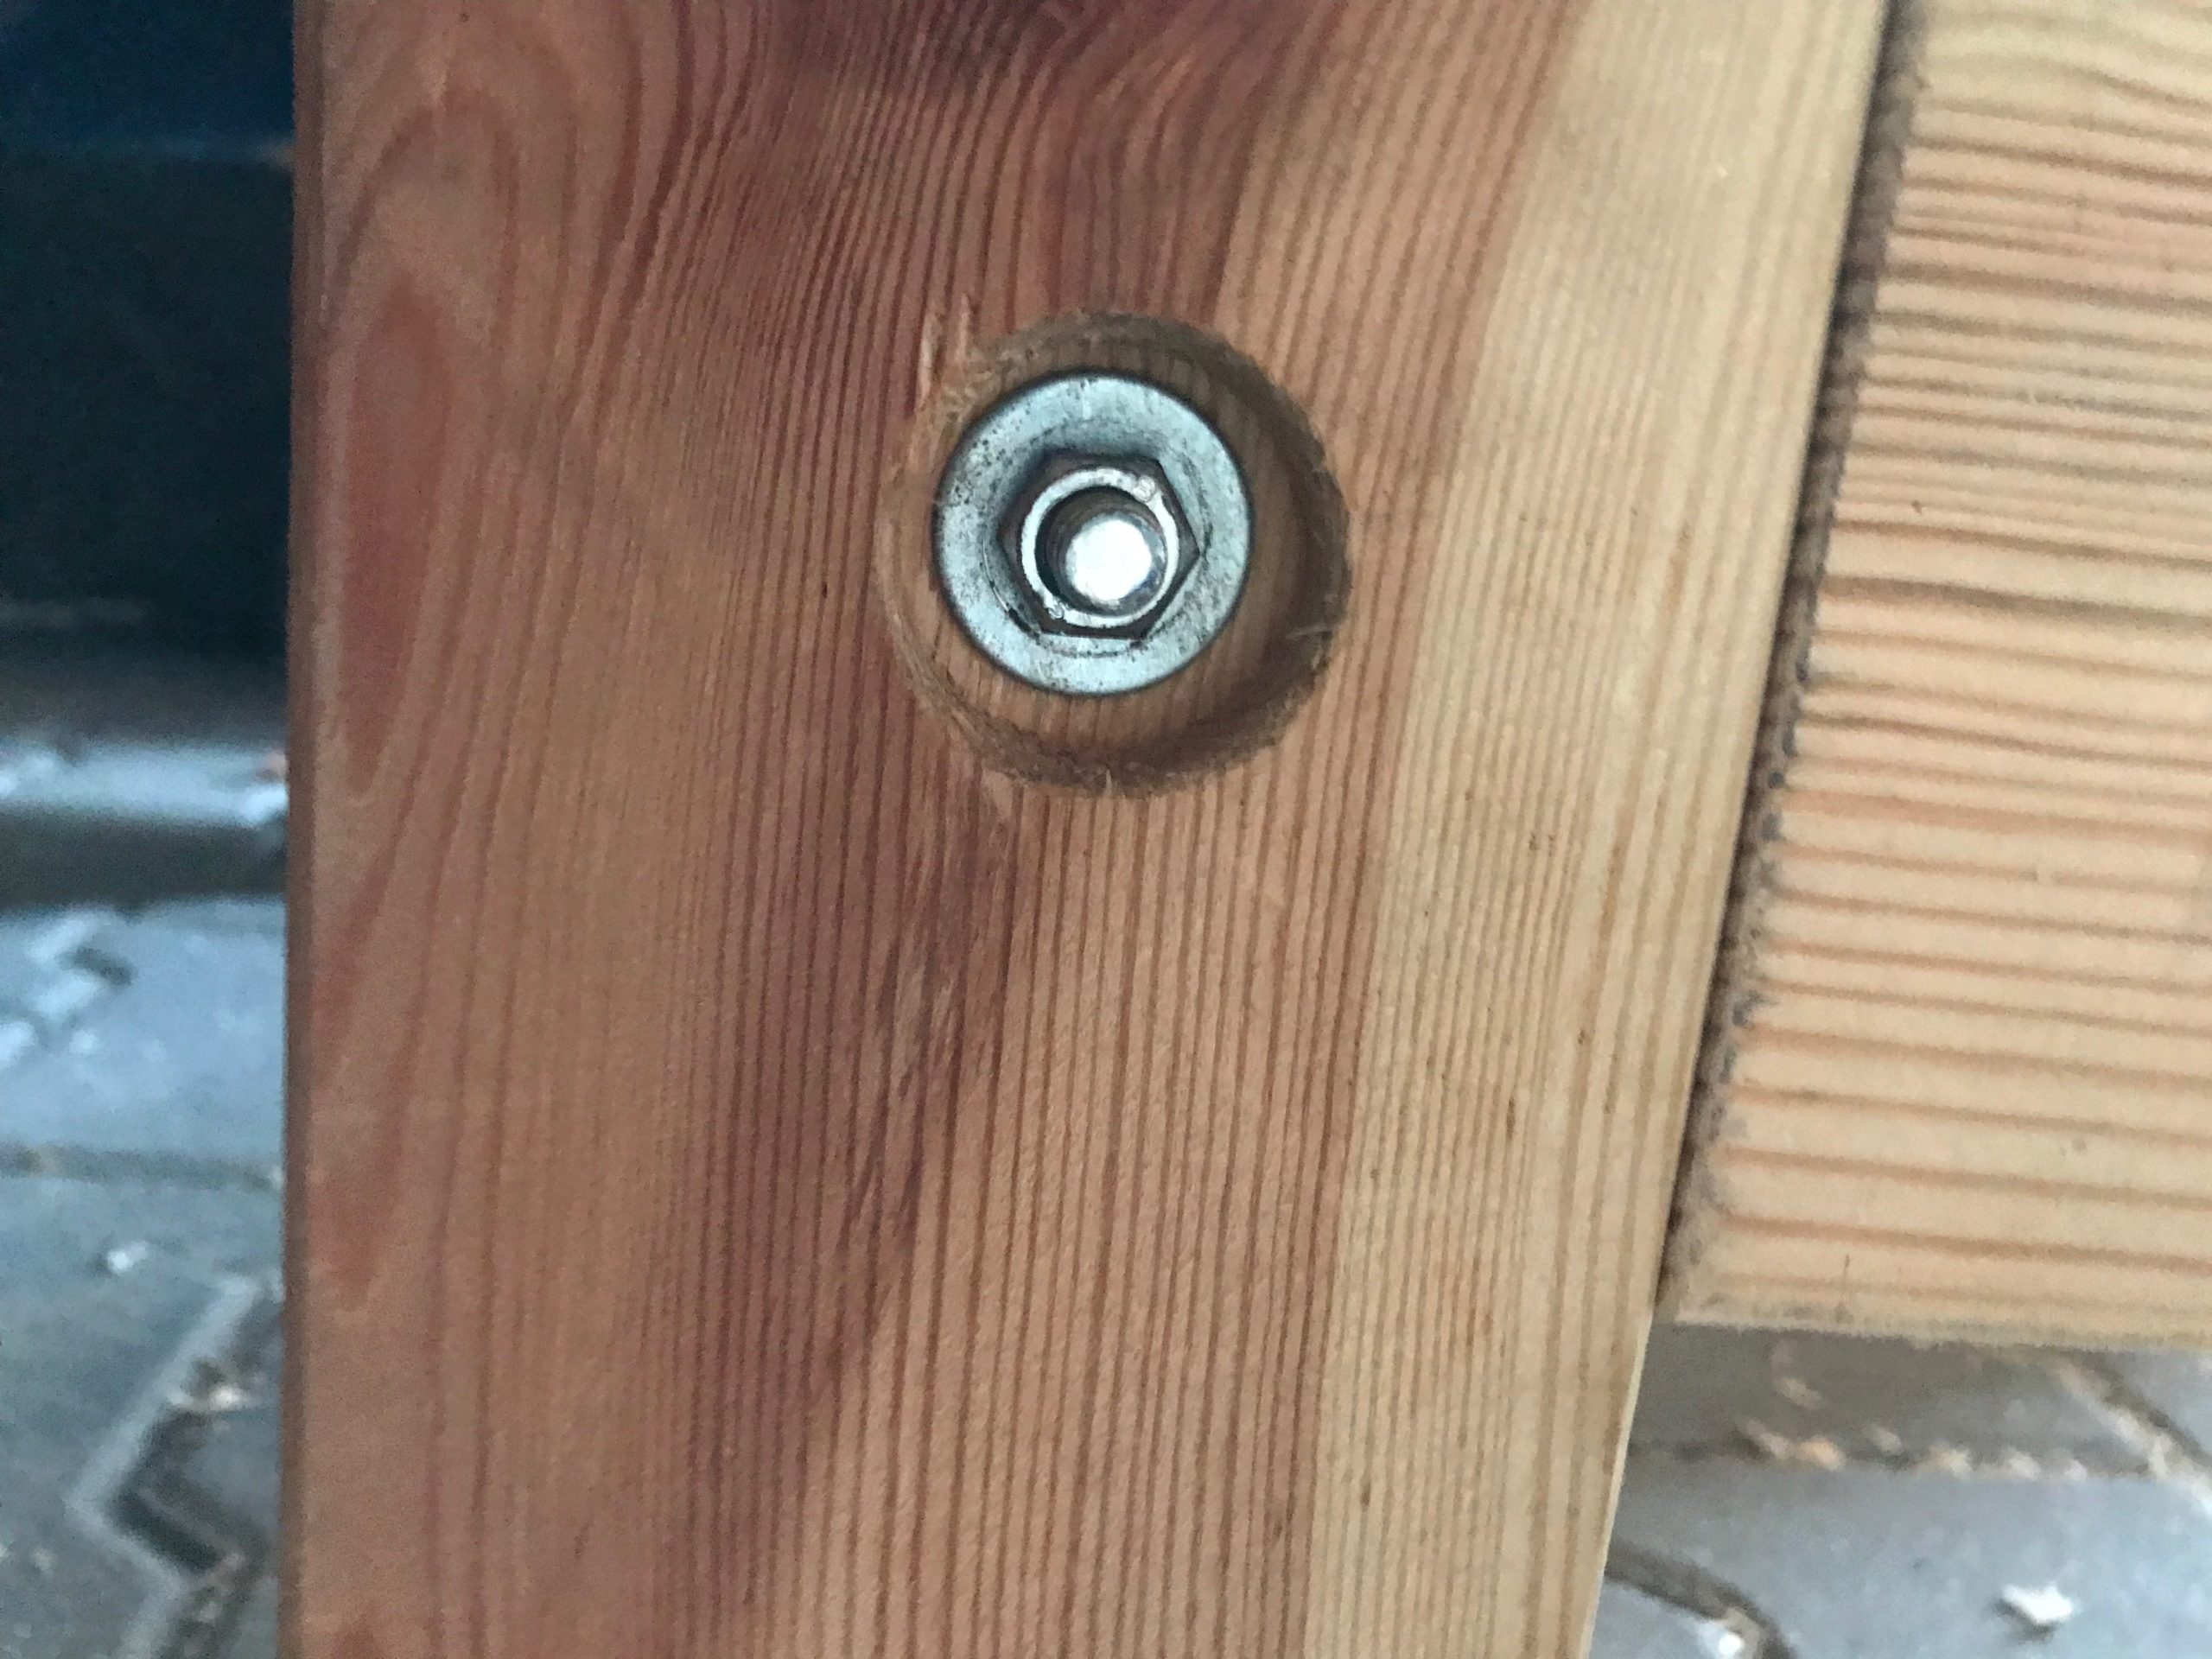
Screw or glue together?
If you want to transport the workbench at some point, you should not glue the construction together but screw it together. This way, the workbench remains mobile and you retain maximum flexibility. To do this, you can drill through the centre of the overlays with a 10 mm drill bit. If you want, you can use a 30 mm Forstner bit* and countersink the holes so that the screws do not protrude. Use 2 M8 washers* for the screw* and nut*. The whole thing can then look like this.

Screw the workbench together piece by piece. First put all the parts together loosely and see how it fits best. Then gradually tighten all the screws evenly. You will see – the construction is super strong!
If you are interested in installing a front clamp (workbench vice), take a look at the following comparison!
If you want to move the workbench regularly and therefore need a mobile workbench, you can attach workbench casters* onto the workbench legs. The square timber with a cross-section of 10×10 is more than adequately dimensioned for this purpose and the linked castors have a load capacity of 300 kg.

- 【EASY INSTALLATION】- The workbench casters include 4 workbench caster assemblies with assembly hardware, all the necessary mounting hardware, full instructions and an installation template for…
- 【DURABLE CONSTRUCTION WITH PREMIUM QUALITY】- The heavy duty wheel casters are 3″ constructed with durable thicker steel that can easily transform your stationary 880lbs workbench to a mobile…

- Precision machined grey cast iron body and front to ensure a smooth and parallel action
- Fitted with an adjustable front stop – or dog – that gives an additional clamping facility when used with a bench stop, to provide a normal vice and a tail vice in one tool