You want to know how to build a workbench yourself? With lots of clamping options? You don’t have a professional workshop and no professional machines at home? No problem! In the following series of posts you will find step-by-step instructions on how to build your own DIY workbench with simple tools! This DIY workbench tutorial refers to the metric system, not the imperial.
Below I have linked all the tools and materials you need to build the DIY workbench yourself.
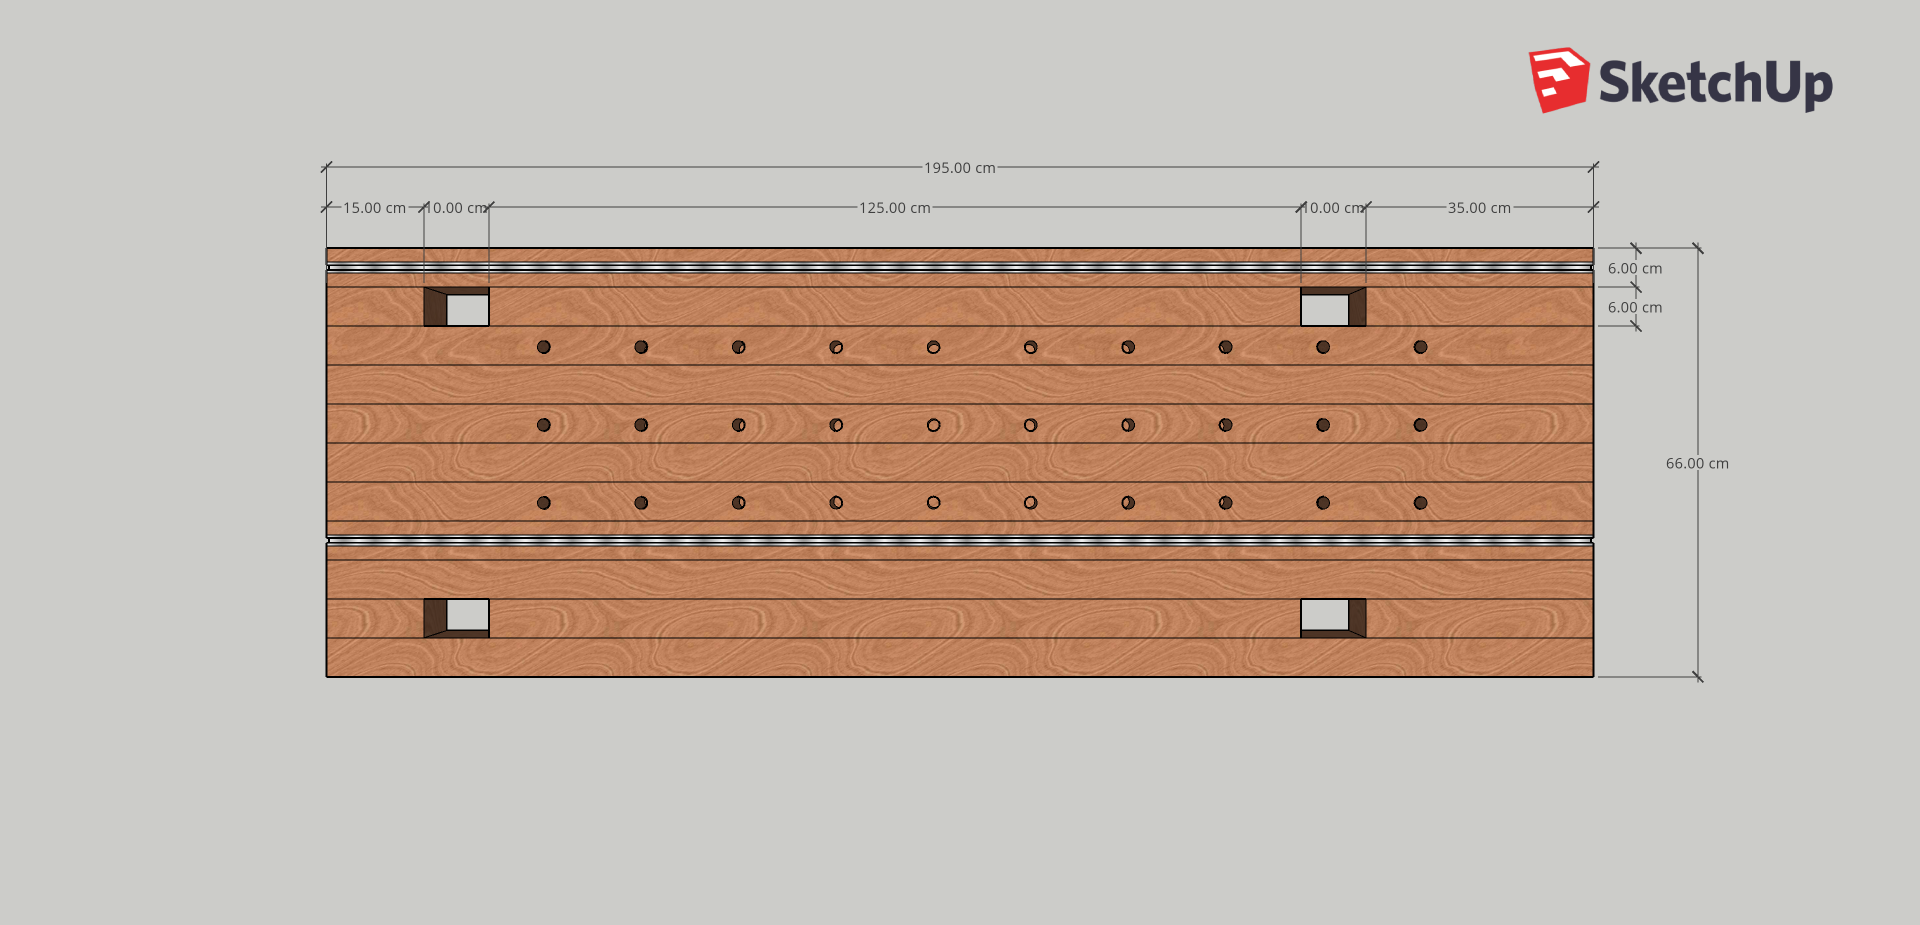
You can find metric workbench plans below.
Construction drawings with detailed dimensions can be found below.
* = Affiliate Links /Advertising
As an amazon associate i earn from qualifying purchases.
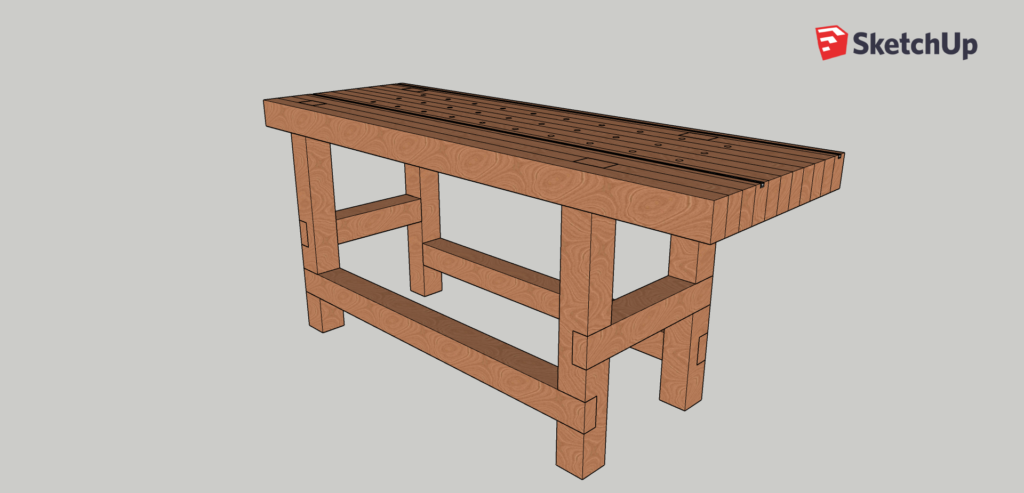
How to build a workbench – easy, strong, multifunctional (metric)
Necessary Tools
- handheld circular saw* or table saw* or miter saw*
- router*
- cordless drill*
- chisel*
- sander*
- japanese saw*
- clamps*
Necessary Material
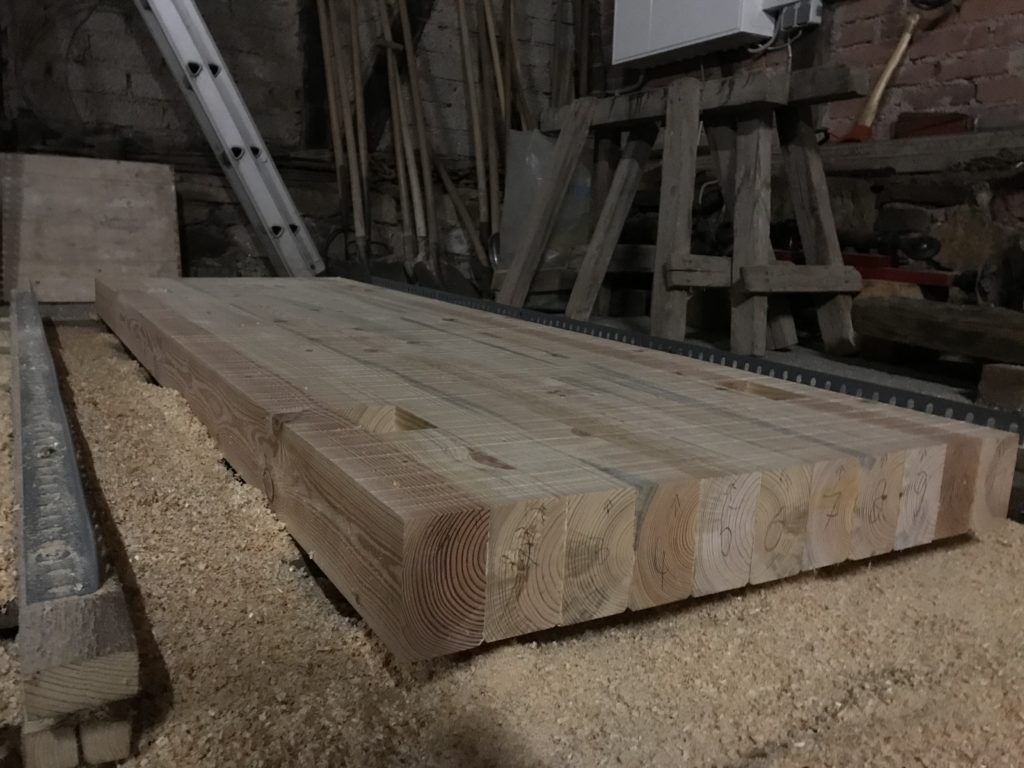
- [11 pcs.] [Worktop] 60x100x2000mm square timber
- [4 pcs.] [Workbench Base] 100x100x900mm inch square timber
- [2 pcs.] [Workbench Base] 100x100x620mm square timber
- [2 pcs.] [Workbench Base] 100x100x1450mm square timber
- Forstner drill bit 19mm*
- Router bit 19mm*
- Router bit 22mm*
- [8 pcs.] Screws M8x80*
- [8 pcs.] Washers M8*
- [8 pcs.] Nuts M8*
- [4 pcs.] T-Track bar 500mm*
- Wood oil*
- Wood glue*
Material Costs: ca. 200 £
Part 1 and Part 3 of this project can be found here:
How to install a Workbench Vice:
How to build a workbench – CAD Drawings
How to build a workbench – the worktop
In PART 2 I show you how to build the worktop for your workbench.
The squared timber sometimes is chamfered at the edges. This means that when you glue the beams together for the worktop, unsightly grooves will appear. If you have access to a jointer, you can save yourself a lot of time here and cleanly joint the beams before gluing them together so that the chamfer disappears. I will show you later how you can do this without a jointer. First you have to cut the squared timber for the worktop.
Note: Two of the eleven beams have to be cut further so that you get the recesses for the table legs. The worktop will later be self-supporting on the table legs – no further screwing or gluing is necessary here. With these dimensions, nothing will wobble. You can use my construction drawings again.
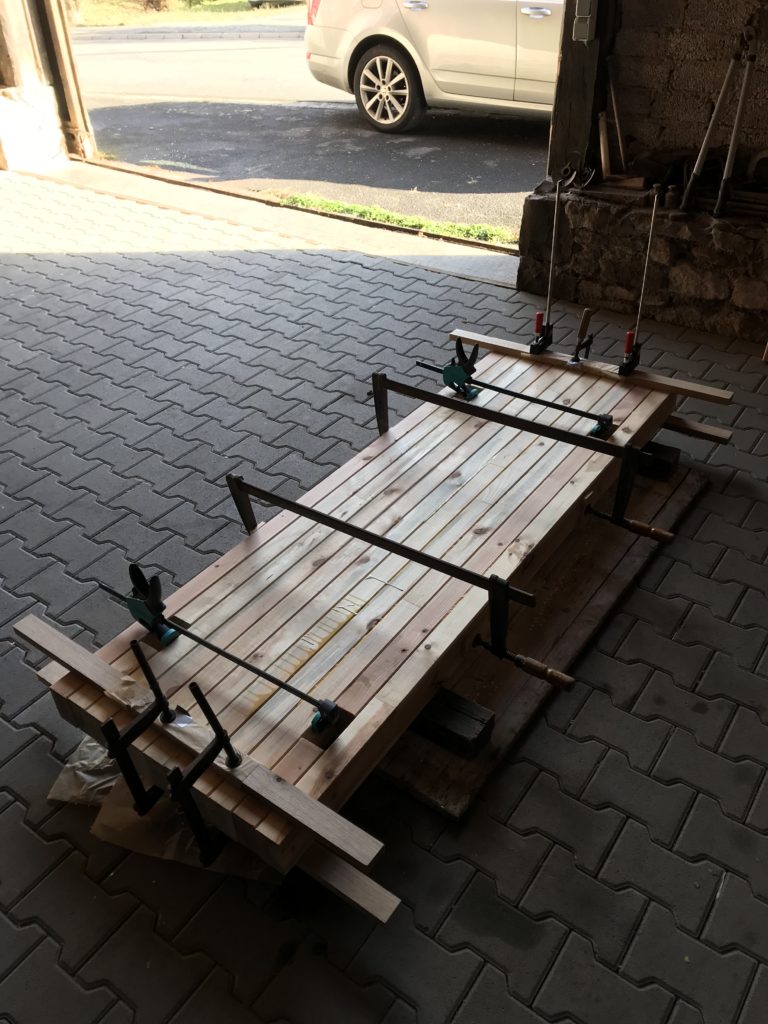
I glued the worktop in several steps because I don’t have clamps large enough. In the following picture you can see the two halves of the worktop. If you have larger clamps, you can also glue the worktop together completely in one step. I used the American Titebond wood glue*. Take whatever wood glue brand you like most!

What do I have to pay attention to when gluing?
When gluing yourself, make sure that you do not just apply lateral pressure to press the beams together. It is also very important that you align the beams as flat as possible. To achieve this, take two roof battens or similar and force them onto the ends of the beams, as in the next picture. I wrapped the battens with baking paper to prevent them from being accidentally glued to the worktop.
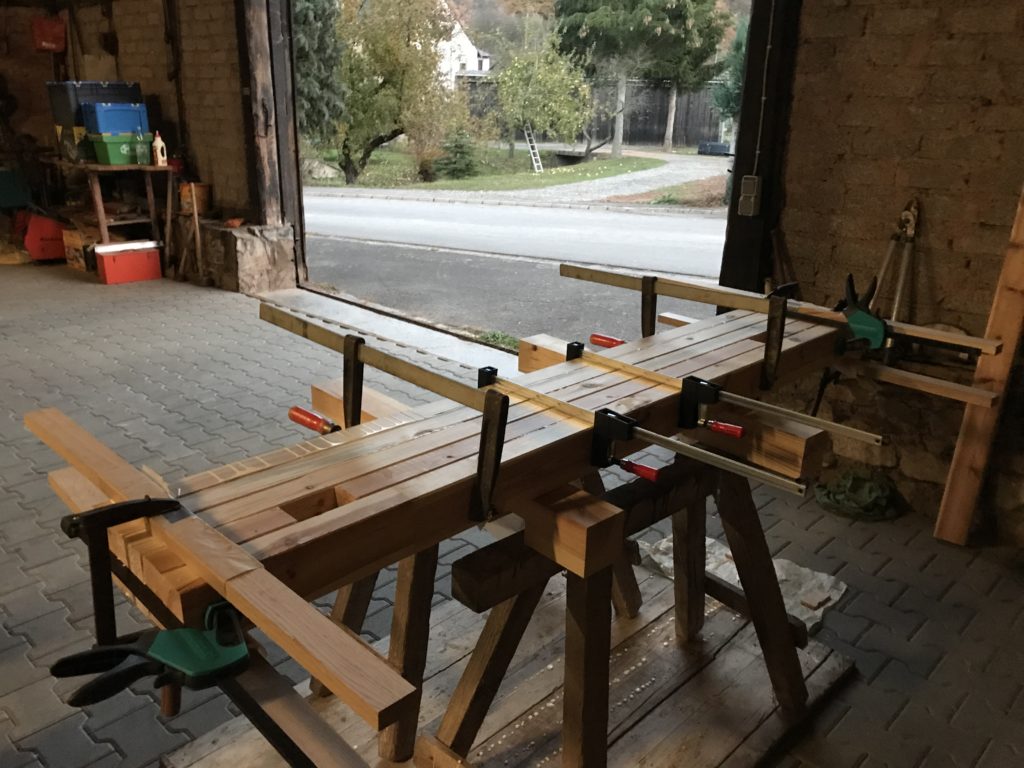
The two halves of the worktop can then be glued together using the same principle. Pressure from the sides and pressure from above and below.
How to plane the worktop without a planer?
In order for the surface of the worktop to be completely flat, you still have to flatten the worktop, i.e. remove material. Do this until the grooves between the beams have disappeared and a single flat surface has been created.
To do this, I built a provisional jig for my router based on the following jig: Link to Youtube Video
For the rails I bought cheap plug-in shelf posts. You can get them in any DIY store!
Later on you can integrate this jig into the workbench top and attached it to T-track rails installed in Part 3.
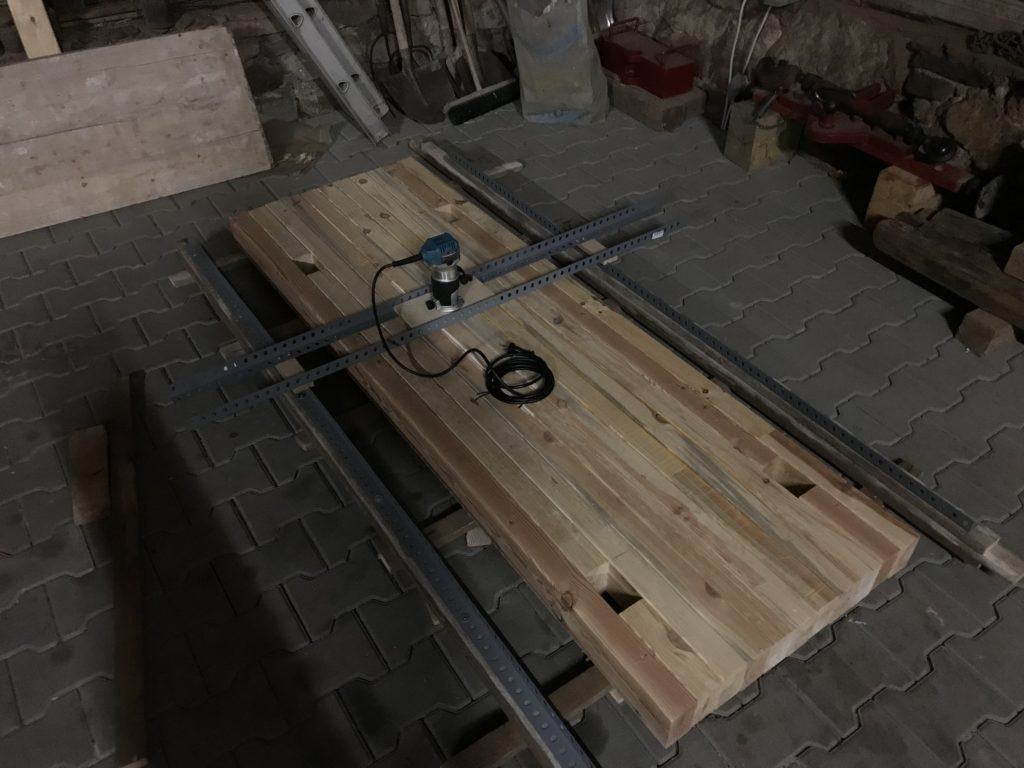
Shim the worktop with small pieces of wood as spacers and check several times that the distance from the worktop to the router* is identical at all ends. Otherwise, you will mill off the worktop at an angle and you will have to rework all over it again.
Now mill off the worktop piece by piece. A router bit with a large planing surfce is useful here. I used this one: 22mm router bit*

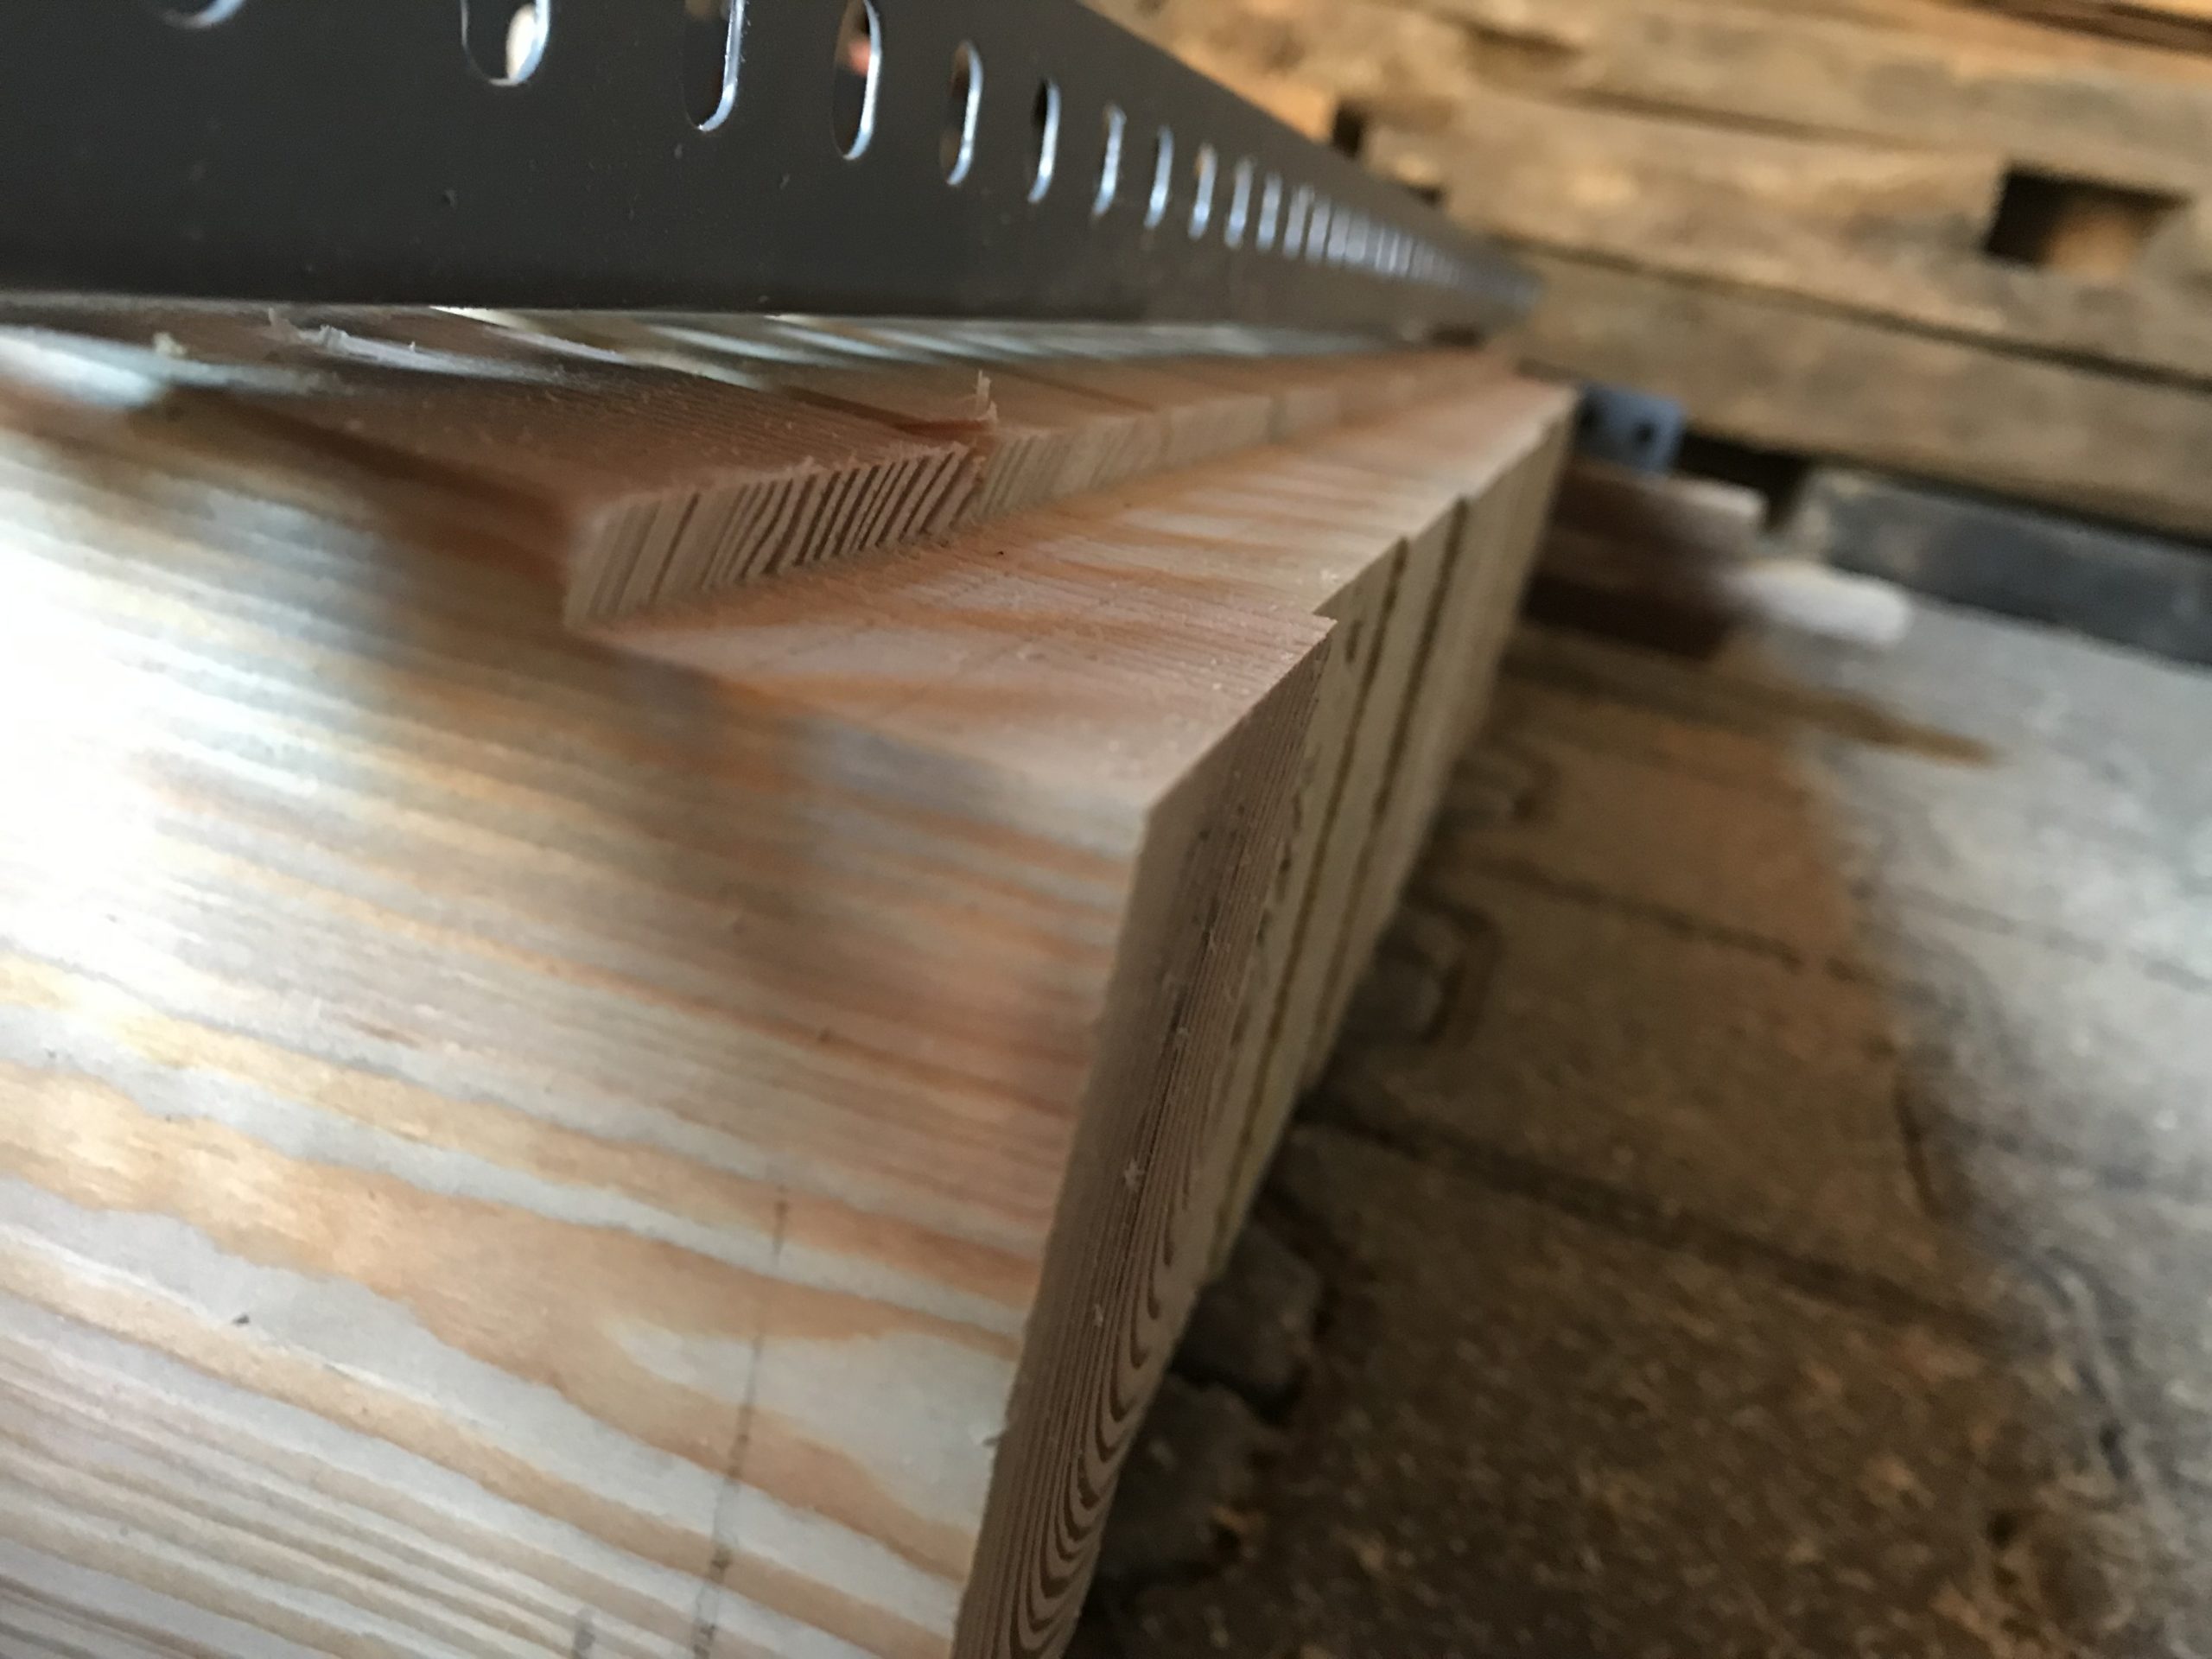
You will end up with a smooth surface with minimal grooves that can be easily sanded away with a sander*!